STEP BY STEP: How to rewire an electric iron.
Good day to you all here in the DIYhub community. It’s always a pleasure to be among people with a creative mindset. Every day would always be a day to learn something and gain additional knowledge to what one has learned before.
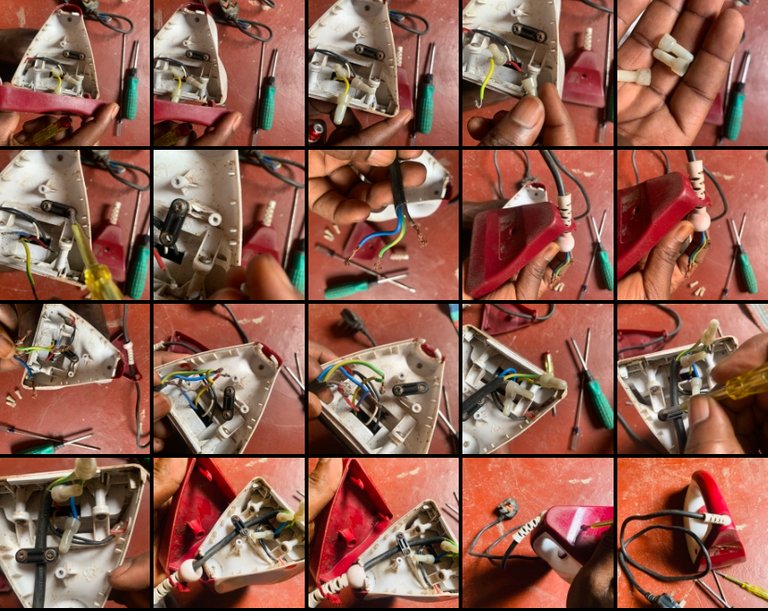
Group screenshot of my captures. All images are mine.
Today I would be sharing with the community how I REWIRED A DAMAGED ELECTRIC IRON.
This iron got damaged due to the high power of electricity. The wire attached to it from the company got burned, and the plug got damaged too. It has been abandoned for months now. I decided to rewire it so it could work perfectly again.
Follow me as we learn how rewiring works.
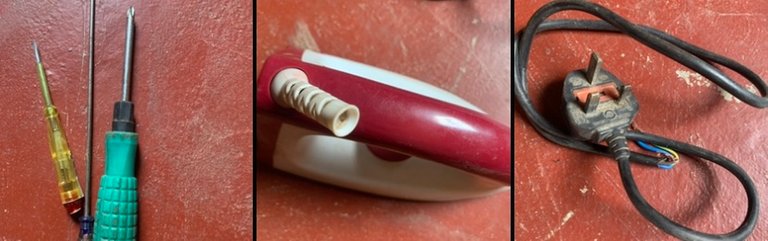
MATERIALS
- DAMAGED IRON
- WIRE AND PLUG
- SCREWDRIVERS
- HAND GLOVES (optional)
STEP-BY-STEP GUIDE
STEP 1: LOSING THE HEEL REST
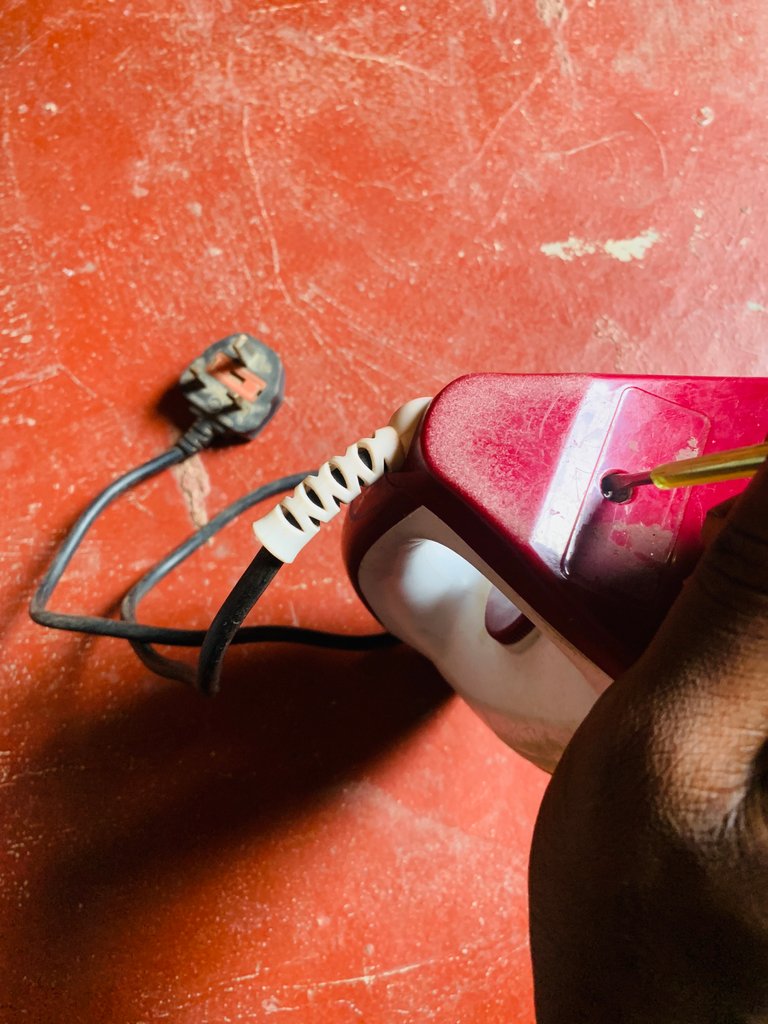
The first thing to be done is to loosen the heel rest where the connection is. There is a screw inside of it that makes the heel rest fixed with the other parts of the iron. Get your screwdriver and loosen the screw.

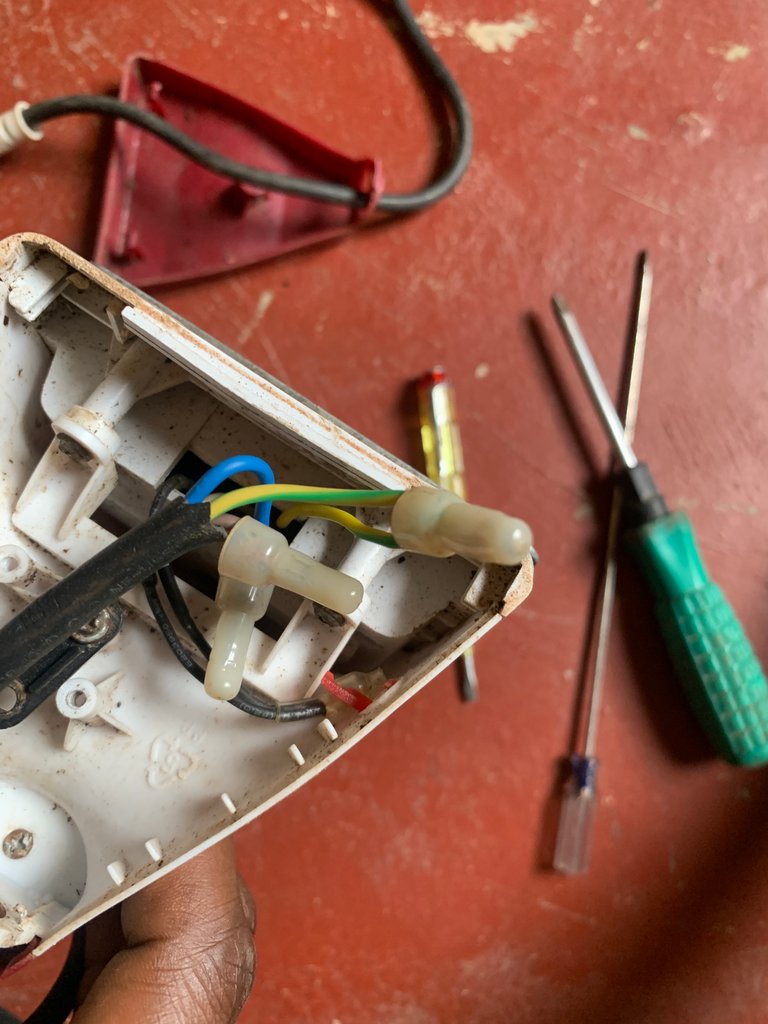
STEP 2: REMOVAL OF CAPS
After successfully losing the screws from the heel rest, the next thing is to see the wired connection and at this point, care has to be taken because if anything goes wrong then there might be an explosion 💥 after connection.
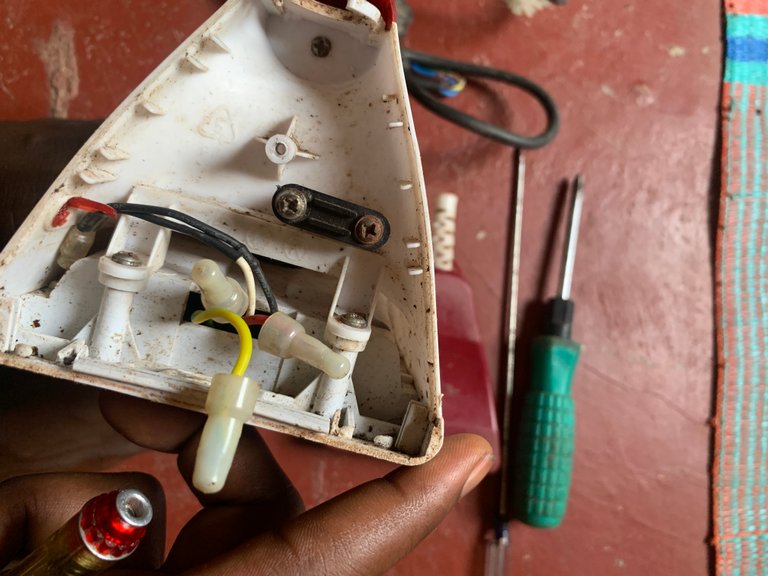
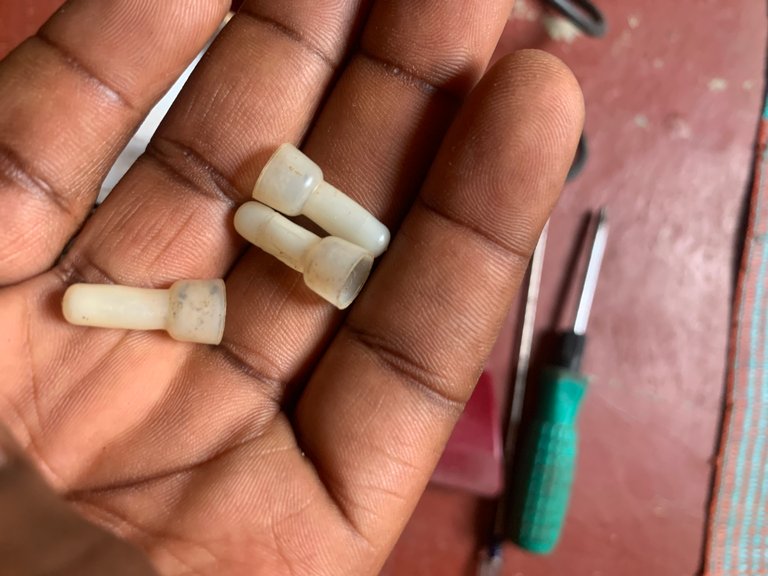
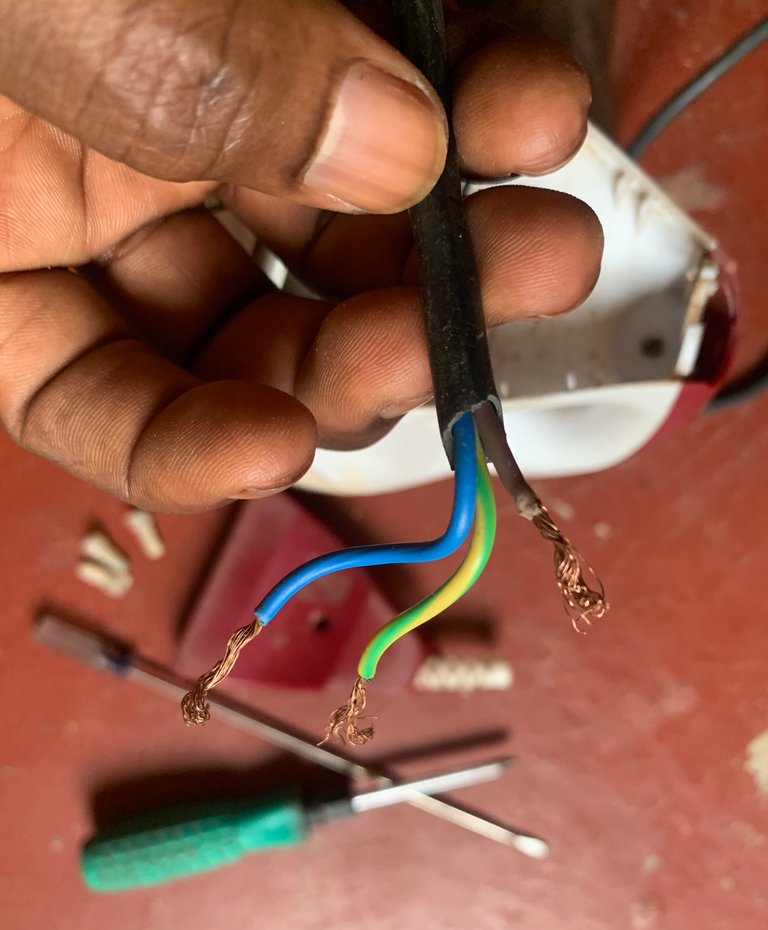
Gently remove the caps from the wire. There are five wires present in there. Two of which go straight to the signal lamp. And the other three are covered with caps.
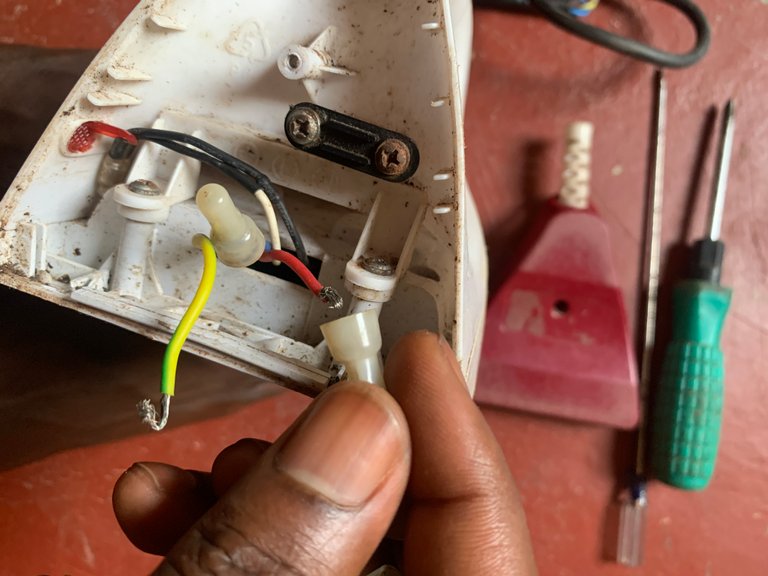
These caps shouldn’t be thrown away because they are useful in the connection. They are there to seal up the naked wired part of the connection to avoid a wire bridge that could lead to a spark ⚡️.
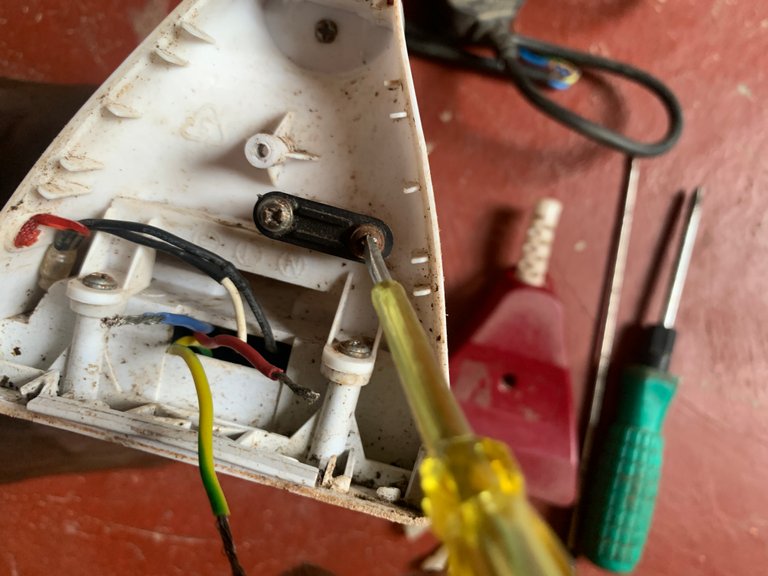
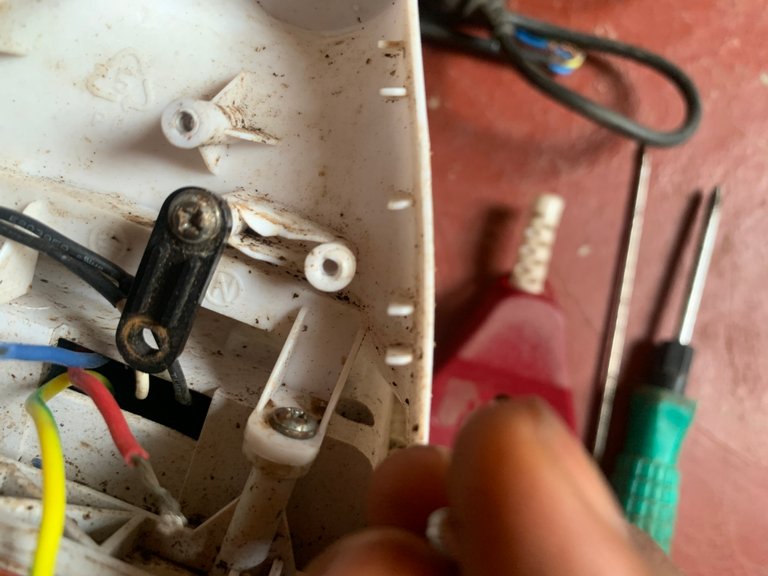
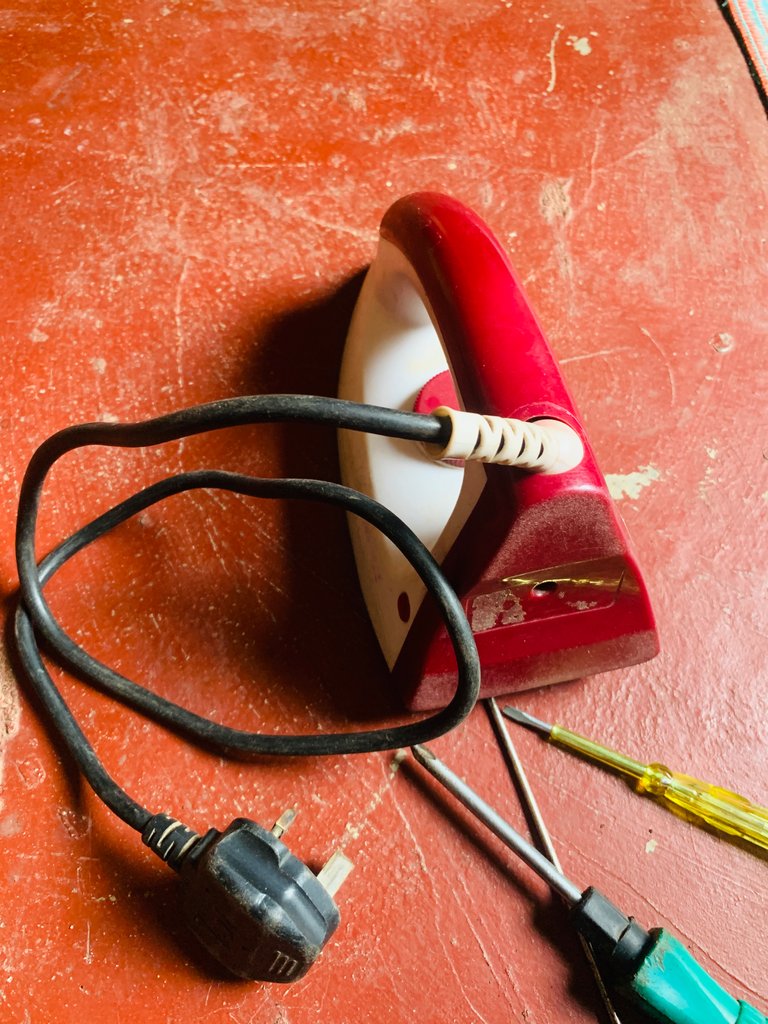
STEP 3: LOSE THE CORD GRIP
There is a grip in there that is made to hold the wire/cord firm to the iron to avoid it from disconnecting while plugged in.
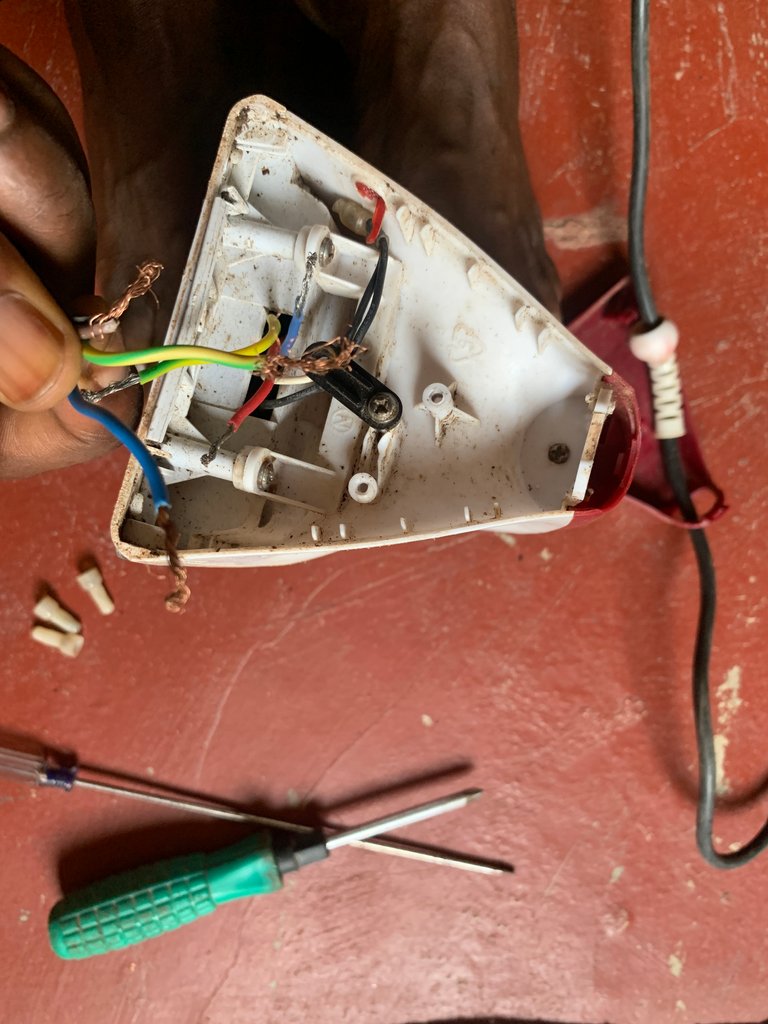
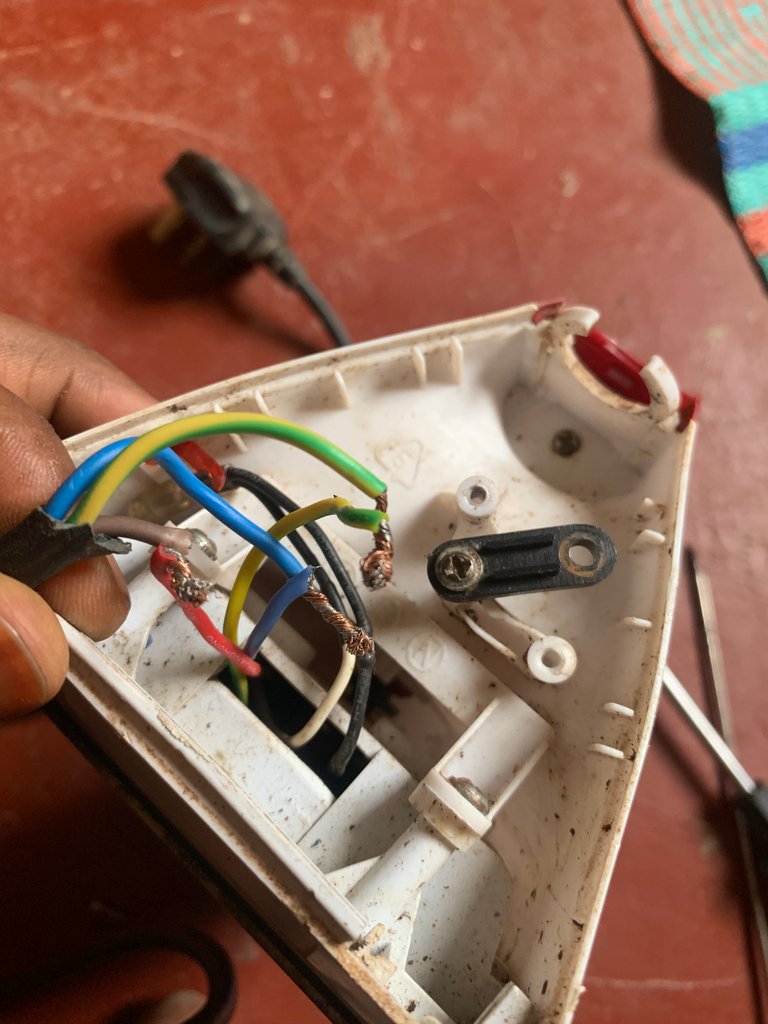
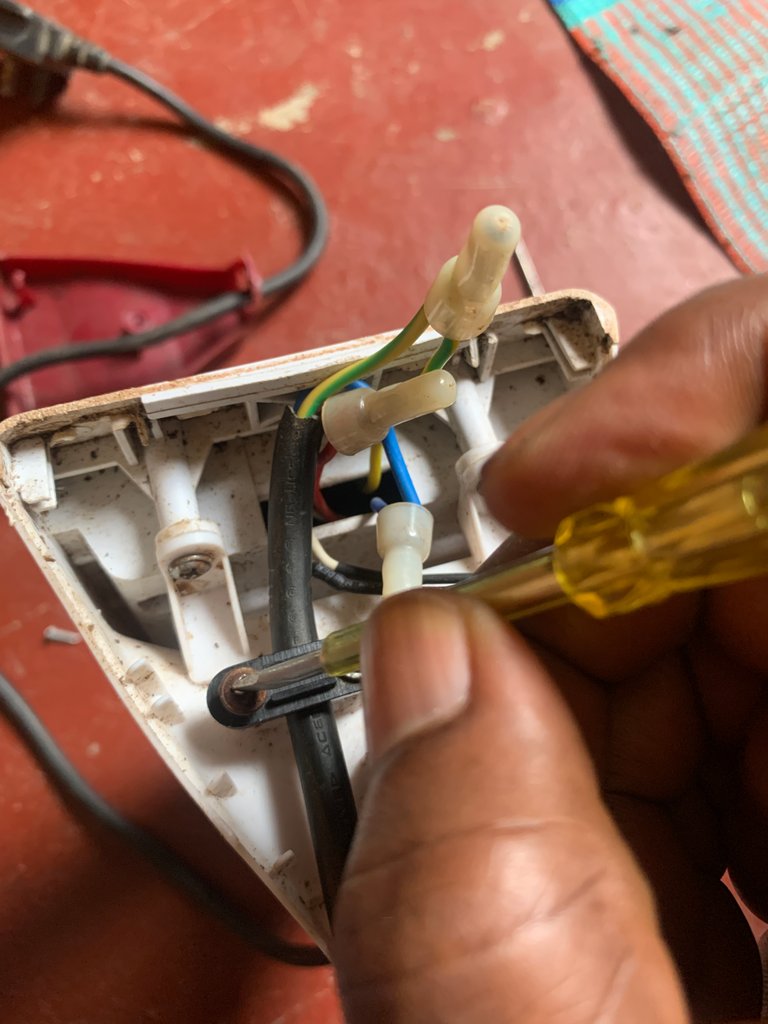
STEP 5: CORD AND WIRE CONNECTION
There are three wires from the iron itself and also there are three wires from the cord too. The blue colored, the yellow/green colored, and the brown colored. These three colors have different uses. The blue color serves as the LIFE WIRE, the red or brown serves as the NEUTRAL WIRE, and the green/yellow serves as the EARTH.
Don’t forget to insert the cord into the “vertical cord lift” before wiring because if you don’t then you would have to lose it all over again to refit it.
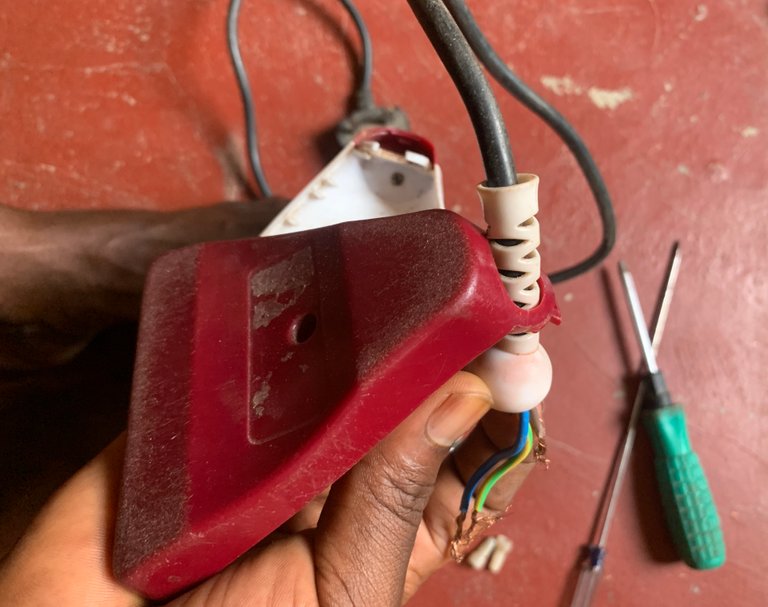
After successfully inserting the cord then the connection could be the next.

Make sure your wires are naked to be attached. The earth, the neutral, and the life wires. The earth wire is just there to prevent shock, it doesn’t have a direct effect on the wiring. The main connection is life and the neutral.
The life (blue-colored) wire from the cord is connected to the life wire from the iron. The neutral (red/brown colored) wire is connected to the neutral wire from the iron. And lastly, the earth (yellow/green colored) is connected to the earth from the iron.
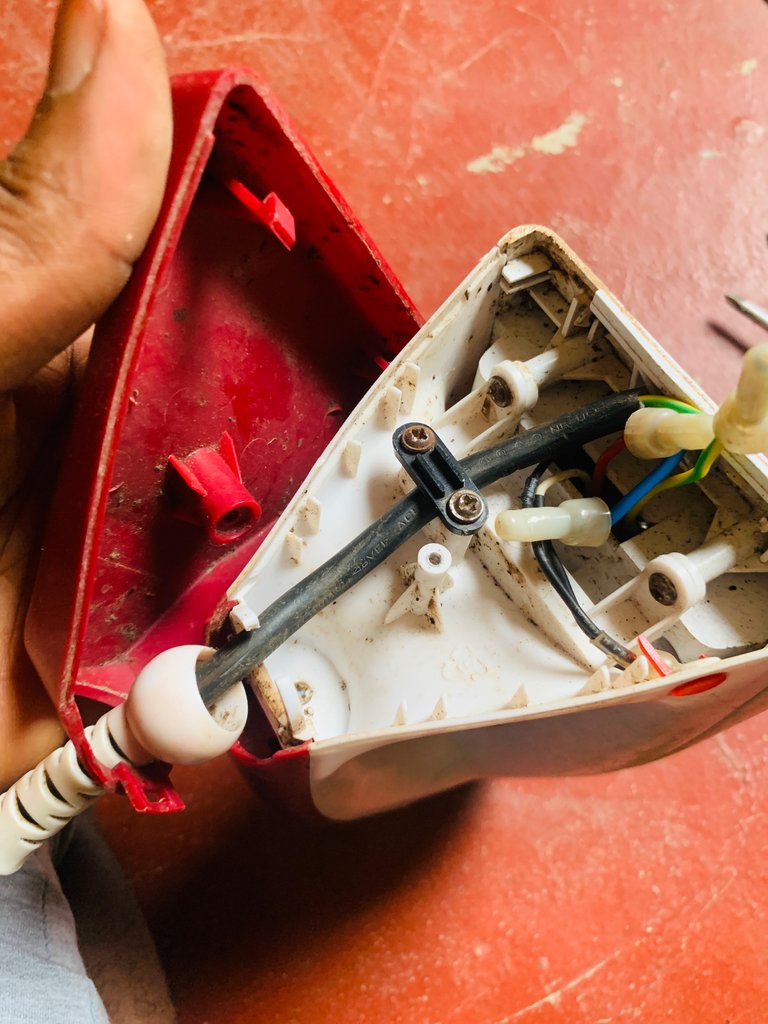
STEP 6: FITTING OF CAPS AND CORD GRIP
The next step to be taken after successfully connecting the wires from the cord to that of the iron is to make sure the caps are fixed. As I said above, it would prevent the wires from touching each other. The three caps were fitted in carefully.
Don’t forget the wire grip too. We already loosen it earlier. The next thing to be done is to fix the cord into the grip and tighten the screw with the screwdriver.

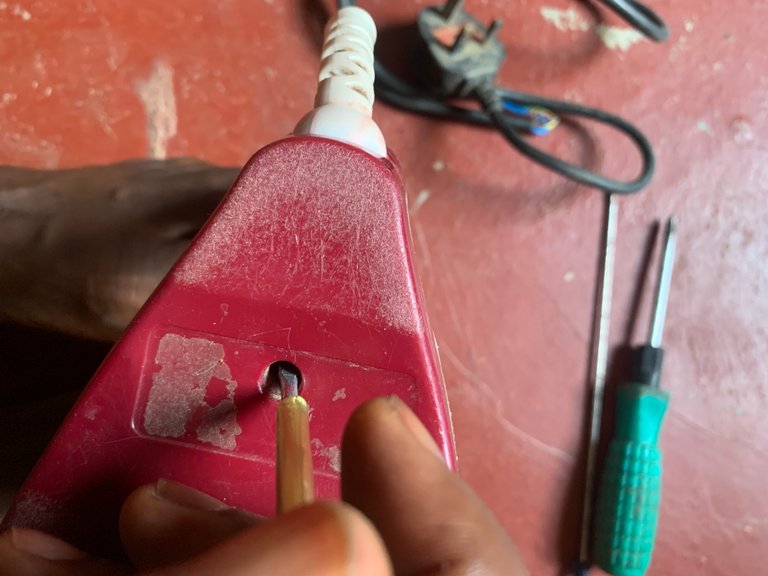
STEP 7: FIXING THE CORD LIFT AND HEEL REST
At this stage, we are almost done with the procedure. The little thing left is to fix the cord lift into its base and then fix back the heel rest to the other part of the iron.
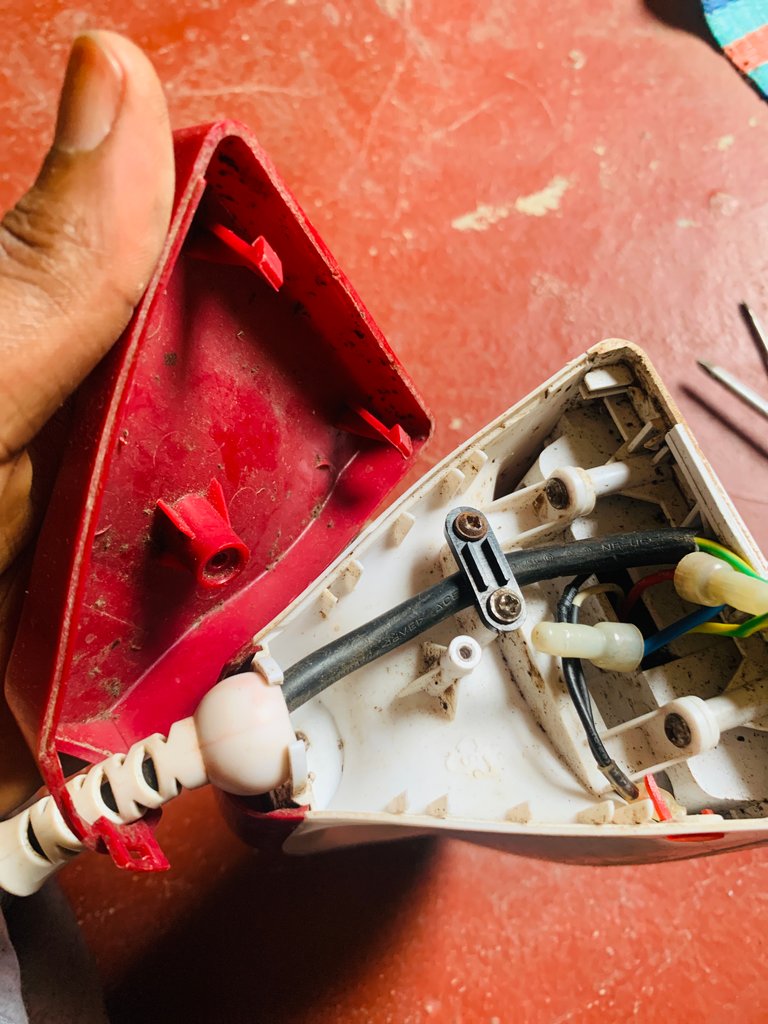
Get the screw and the screwdriver. Tighten the screw with the iron body. After that, the work is completed.
Finally! IT WAS A SUCCESS…
Thank you so much for journeying with me from the beginning to the end…

Thank you for sharing this post in the DIYHUB Community!
Your content got selected by our fellow curator semarekha & you just received a little thank you upvote from us for your great work! Your post will be featured in one of our recurring compilations which are aiming to offer you a stage to widen your audience within the DIY scene of Hive. Stay creative & HIVE ON!
Please vote for our hive witness <3
Thanks so much for this I really appreciate
You have actually done a good electrical job here. I love how you coated the wires after the repair to protect the electric bridge. At least you made a new iron from scrab.
https://twitter.com/1144390306596569089/status/1617228883421548547
The rewards earned on this comment will go directly to the people sharing the post on Twitter as long as they are registered with @poshtoken. Sign up at https://hiveposh.com.
Congratulations @abdul-qudus! You have completed the following achievement on the Hive blockchain And have been rewarded with New badge(s)
You can view your badges on your board and compare yourself to others in the Ranking
If you no longer want to receive notifications, reply to this comment with the word
STOPCheck out our last posts:
Support the HiveBuzz project. Vote for our proposal!
Great job, you did bring back the pressing iron to life. Among the things I haven't tried repairing is pressing iron but this article has given me an insight into what the connections are like.
Thanks. And I am glad you get to learn something.
Nice job. Thank you for mentioning the safety considerations and well done on showing how to properly fit the cable grip on the outer sheath.
I would further recommend some tape to hold the plastic caps on the wires to prevent that explosion you mentioned.
I really appreciate your contribution. Thanks so much
Nice work
Thank you