Blue skull
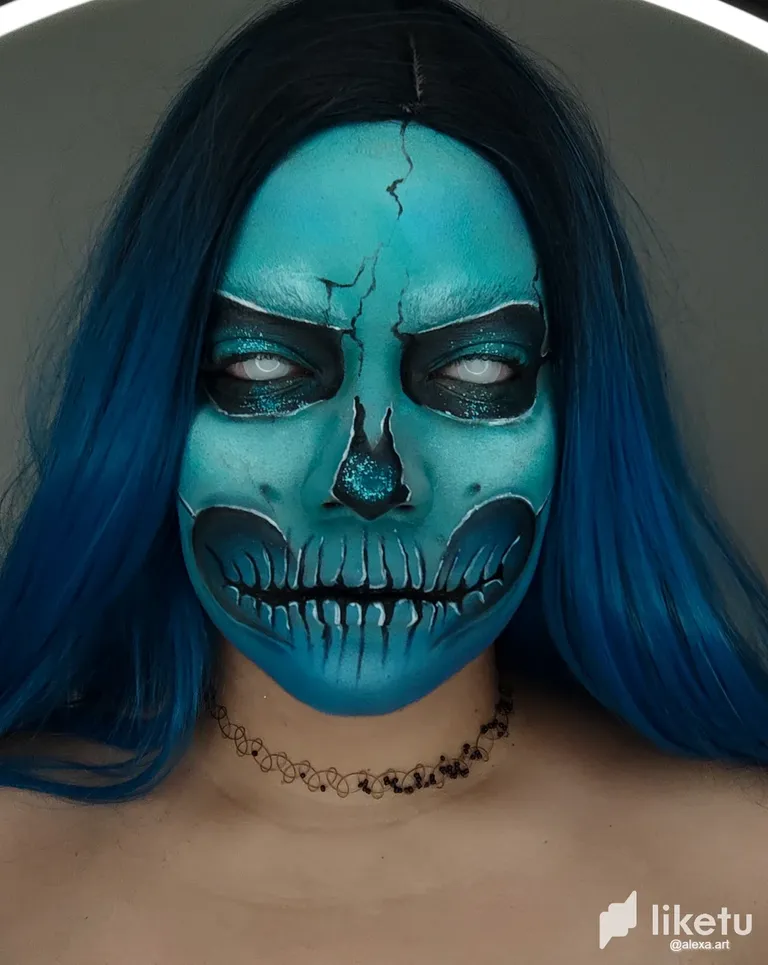
Hola amigos! Ayer quede con ganas de hacerme un maquillaje artístico, asi que hoy me llene de energía y comencé muy temprano, hace varios meses (creo) que no hacia un maquillaje con temática de calavera, estos maquillajes me gustan mucho, pero llevan un montón de trabajo, tenia ganar de practicar un poco haciendo una calavera con tonos fríos, pero realmente me frustre muchísimo porque mi cámara no captaba muy bien los colores que utilice, les cuento un poco.
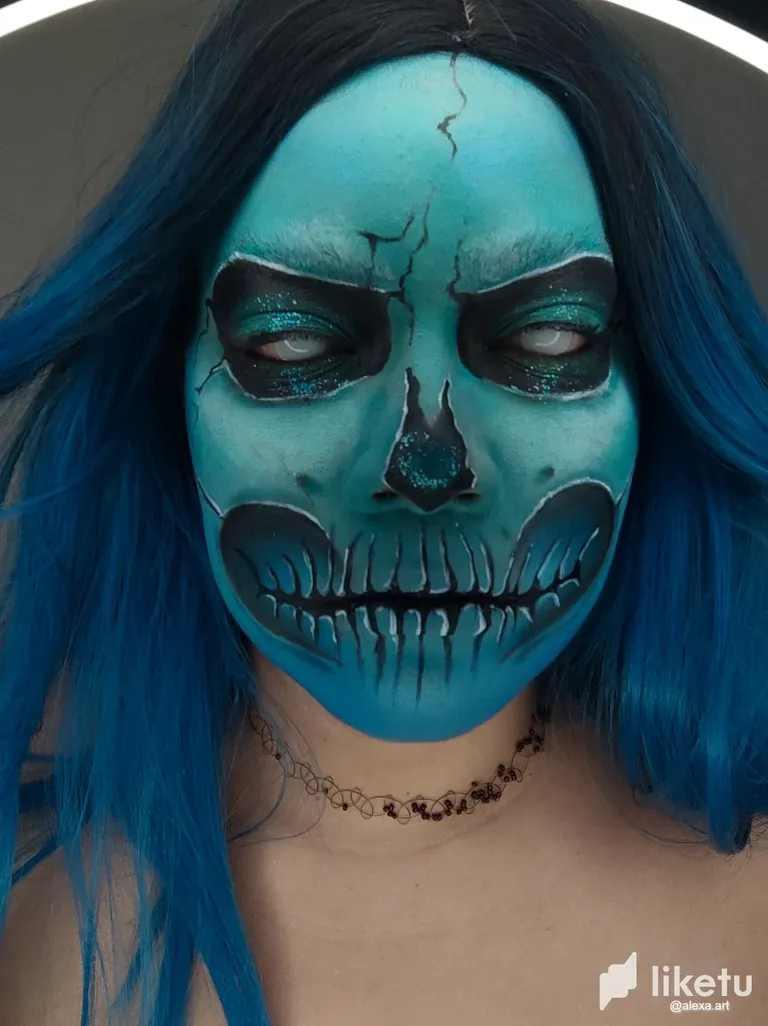
Quise hacer un degradado de color aqua marina en la parte superior del rostro y abajo un azul claro hasta llegar a un azul oscuro, pero en mi cámara se veía completamente todo azul, no entendía el porqué, literalmente el color que use arriba que es como un azul/verde aqua es super diferente al azul claro en persona, pero en fin, simplemente seguí sin desanimarme, me gusto mucho el resultado final aunque me costo tomarme las fotos porque con estos lentes blancos no se ve nada jaja, espero que les guste.
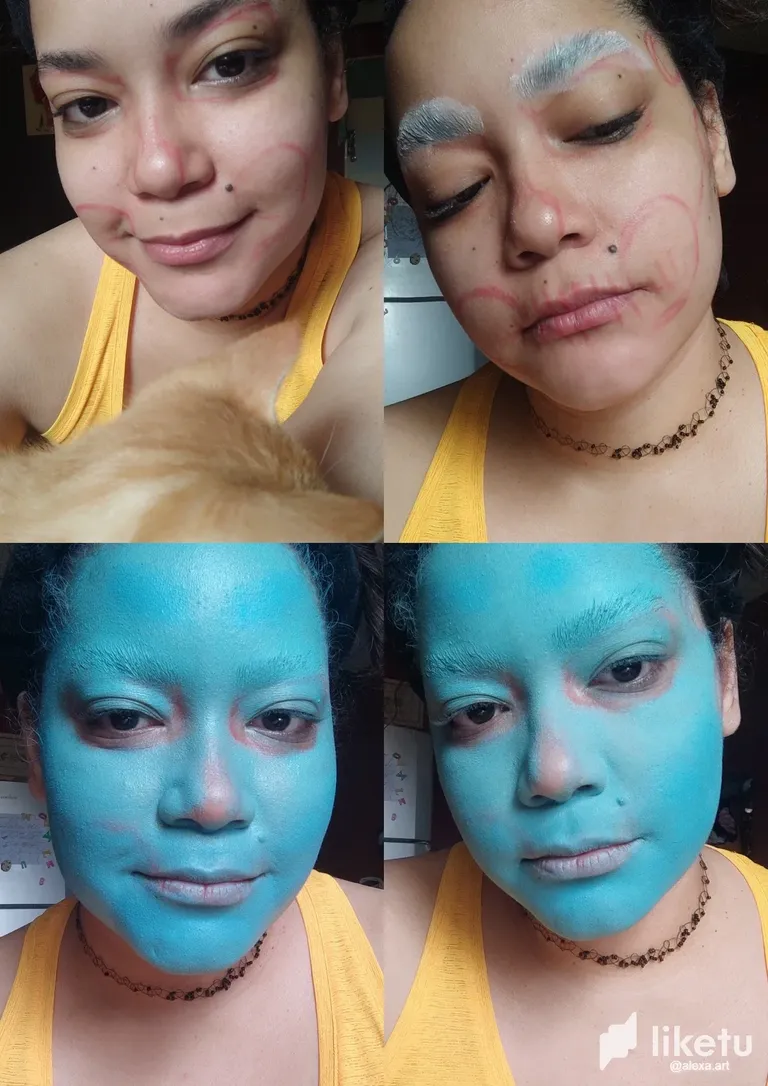
Comencé mi maquillaje limpiando mi rostro y haciendo el boceto con un lápiz rojo, hice hoy mi maquillaje acompañada de mi gatito que no le gusta estar solo y siempre me sigue a todos lados jajaja, luego comencé a sellar mis cejas con pegamento en barra y a estirarlas para poder pintar sobre ellas con mas facilidad, deje secar y luego selle con polvo traslucido, retire el exceso de polvo y a continuación empecé a añadir color al rostro, comencé aplicando el verde aqua por todo el rostro luego aplique el azul claro en la parte inferior del rostro, selle con polvo traslucido y para este punto ya estaba molesta porque no se veía bien el contraste de color que había puesto.
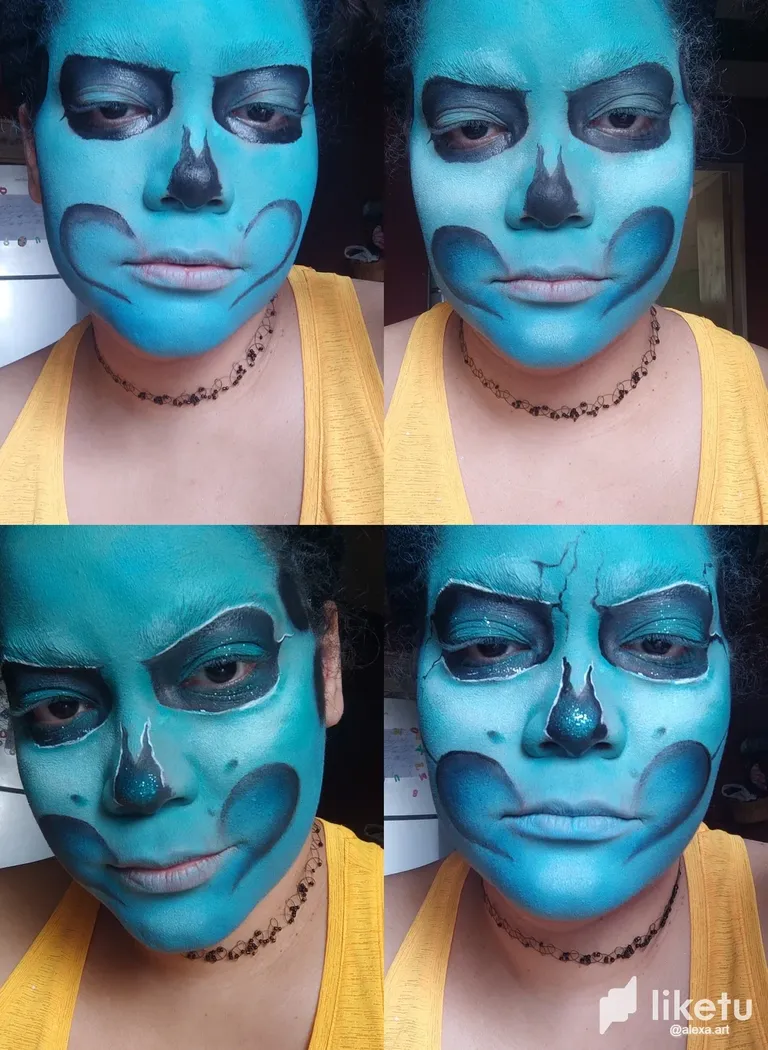
Luego utilice pintura negra para hacer la forma de la cuenca de los ojos, nariz y el resto d detalles, difumine con sombra de ojos negra y luego quise utilizar glitter para el centro del parpado asi como también en el centro de la nariz, con pintura blanca hice algunas líneas para dar volumen a los bordes del ojo y nariz, después hice algunas líneas que dan ese efecto de quebrado alrededor de los ojos.
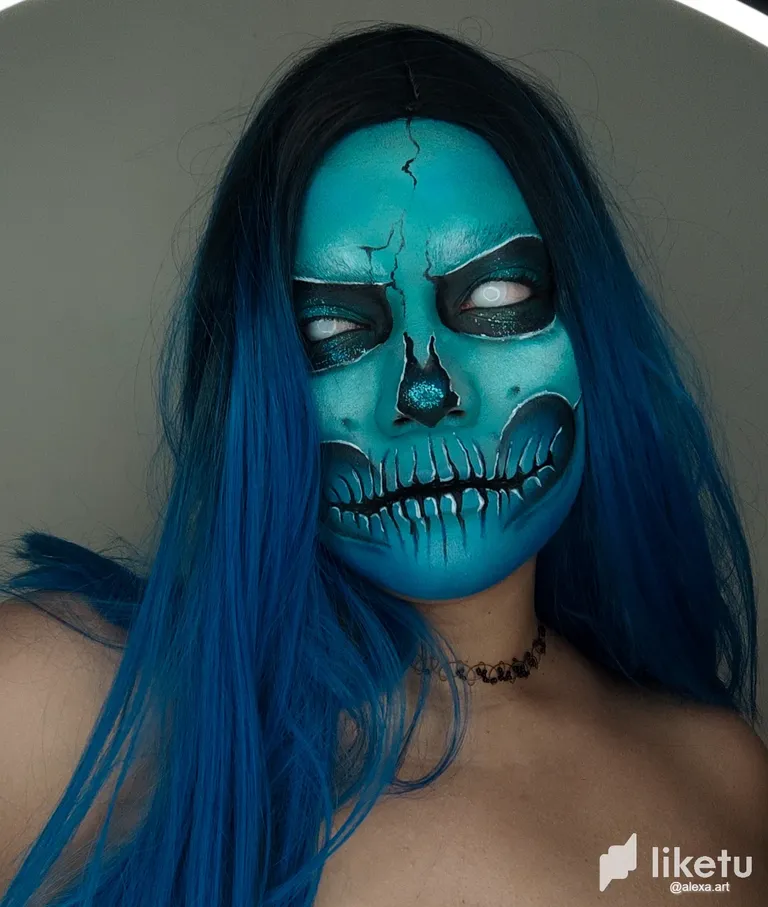
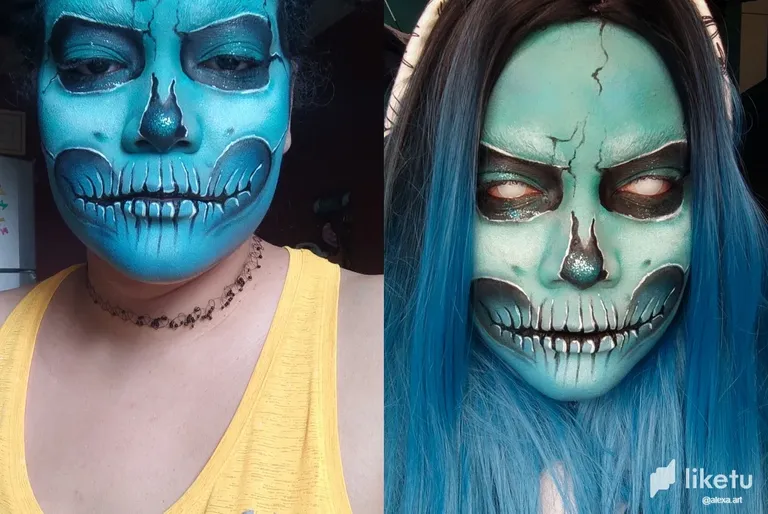
- Después añadí más sombras con azul oscuro y mas bordes con volumen usando pintura blanca, también pinte los dientes haciendo unas líneas negras y luego rellenándolas dándole forma y bordes con blanco, luego aplique mascara de pestañas y finalmente ya estaba todo listo, tuve que tomar una foto en la ventana para probar si aun se veía azul mi maquillaje y pues se veía verde jaja pero al menos se acercaba un poco mas a la realidad, tome mi aro de luz y probe distintas iluminaciones y bueno el resultado no se ve 100% original a como se veía realmente pero se veía mejor.

Hello friends! Yesterday I wanted to do an artistic makeup, so today I filled myself with energy and I started very early, it's been several months (I think) since I did a skull themed makeup, I really like these makeups, but they take a lot of work, I wanted to practice a little making a skull with cold tones, but I was really frustrated because my camera did not capture very well the colors I used, I tell you a little bit.
I wanted to make a gradient of aqua marine color in the upper part of the face and below a light blue until reaching a dark blue, but in my camera it looked completely blue, I didn't understand why, literally the color I used above which is like a blue/green aqua is super different to the light blue in person, but anyway, I just kept going without getting discouraged, I really liked the final result although it cost me to take the pictures because with these white lenses you can't see anything haha, I hope you like it.
I started my makeup by cleaning my face and making the sketch with a red pencil, I did my makeup today accompanied by my kitty who doesn't like to be alone and always follows me everywhere hahaha, then I started sealing my eyebrows with glue stick and stretching them to be able to paint on them more easily, I let it dry and then I sealed with translucent powder, I removed the excess powder and then I started to add color to the face, I started applying the aqua green all over the face then I applied the light blue on the lower part of the face, I sealed with translucent powder and by this point I was already annoyed because it didn't look good the color contrast I had put.
Then I used black paint to make the shape of the eye socket, nose and the rest of the details, I blended with black eyeshadow and then I wanted to use glitter for the center of the eyelid as well as in the center of the nose, with white paint I made some lines to give volume to the edges of the eye and nose, then I made some lines that give that broken effect around the eyes.
- Then I added more shadows with dark blue and more edges with volume using white paint, I also painted the teeth making some black lines and then filling them giving shape and edges with white, then I applied mascara and finally everything was ready, I had to take a picture in the window to test if my makeup still looked blue and it looked green haha but at least it was a little closer to reality, I took my light ring and tried different illuminations and well the result doesn't look 100% original to how it really looked but it looked better.
For the best experience view this post on Liketu
Muy rica makes, me Gusta, si puderes conecer mi trabajos https://ecency.com/hive-158694/@moxa/jacket-painting?referral=moxa
Te quedó súper increíble 😱😱
¡Gracias!
Realmente impresionante 😍. Me encantaría poder maquillarme así❣️ Un abrazo.
Muchisimas gracias @eleanagutierrez 🤗