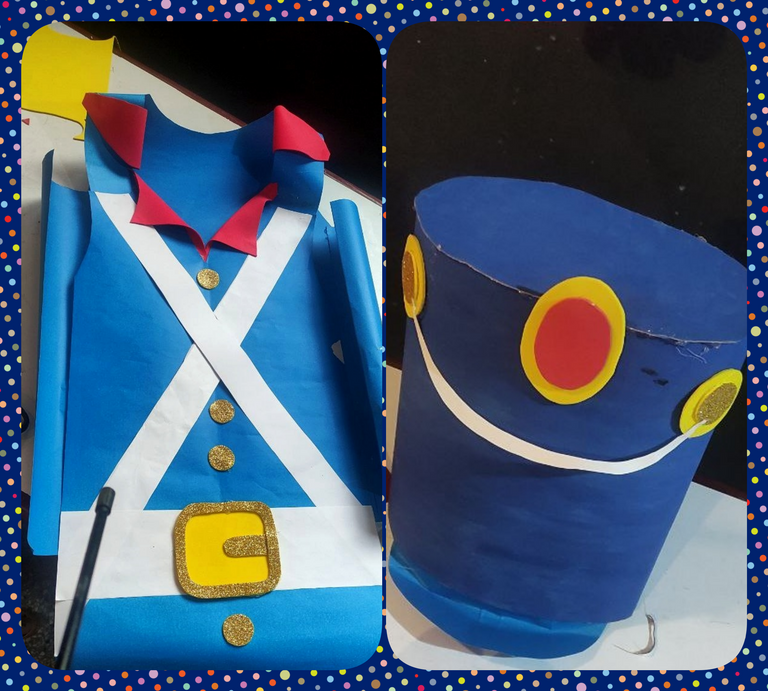
Soldier costume for school
Hello friends, once again I want to share with you a new challenge and something that I always do makes me feel proud because crafts is something that I am developing at this age, little by little, I think it is something that I am learning practically by obligation because of my son's school, but at the same time it has been very helpful to make better things and thid distract my mind, I really like it a lot.
This week my son will have a theater play at school and the teacher told me that he must wear a costume of "Spanish soldier of the colonial era" so I started looking for reference images on Google because I really did not know how was the design of those uniforms for that time, I was surprised to see all the colors they wore and I was overwhelmed because in this country it is difficult to buy a costume, so I had to work with what I could, today I bought some cardboard and foamy and I got down to work.

- Tijeras
- Lapiz
- Regla
- Foami Amarillo, rojo y amarillo con escarcha
- 2 Pliegues de cartulina azul
- Silicon caliente
- Pega en barra
- Cartulina blanca
- Carton
- Pintura al frio azul
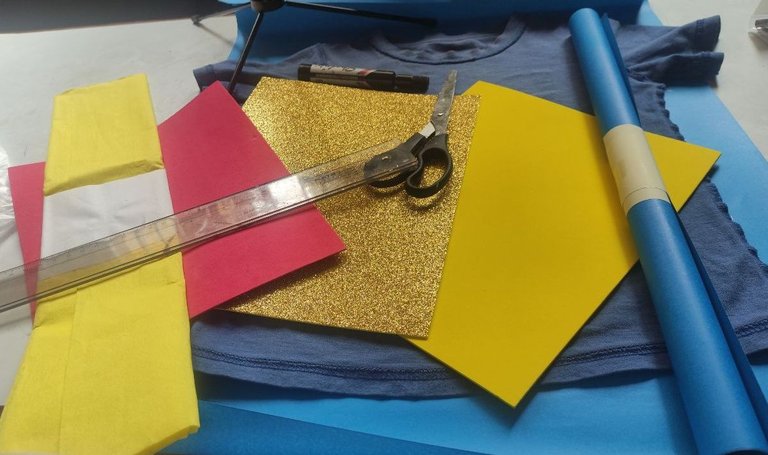
- Scissors
- Pencil
- Ruler
- Yellow, red and yellow Foami with frosting
- 2 folds of blue cardboard
- Hot silicon
- Glue stick
- White cardboard
- Cardboard
- Blue cold paint
Well to start, I was quite lost, I came up with an idea that may not have been the best but in the end it worked, I took a shirt of my son and put it on the blue cardboard to trace the shape and thus have a reference of the size to be cut out, I used the pencil to make the shape and once ready I began to cut, until I had the shape I wanted for the front.
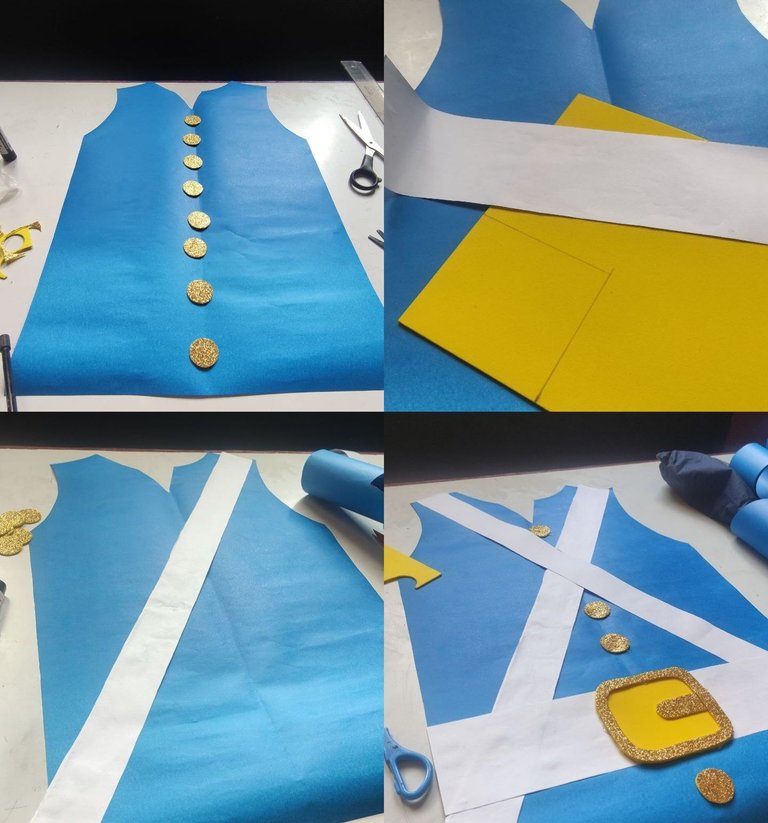
At this point I began to make the details of the shirt that I would put later, in this case I started making the buttons, for which I chose yellow frosted foamy, I made small circles on the back of the foamy where it has no frost, and then cut them out.
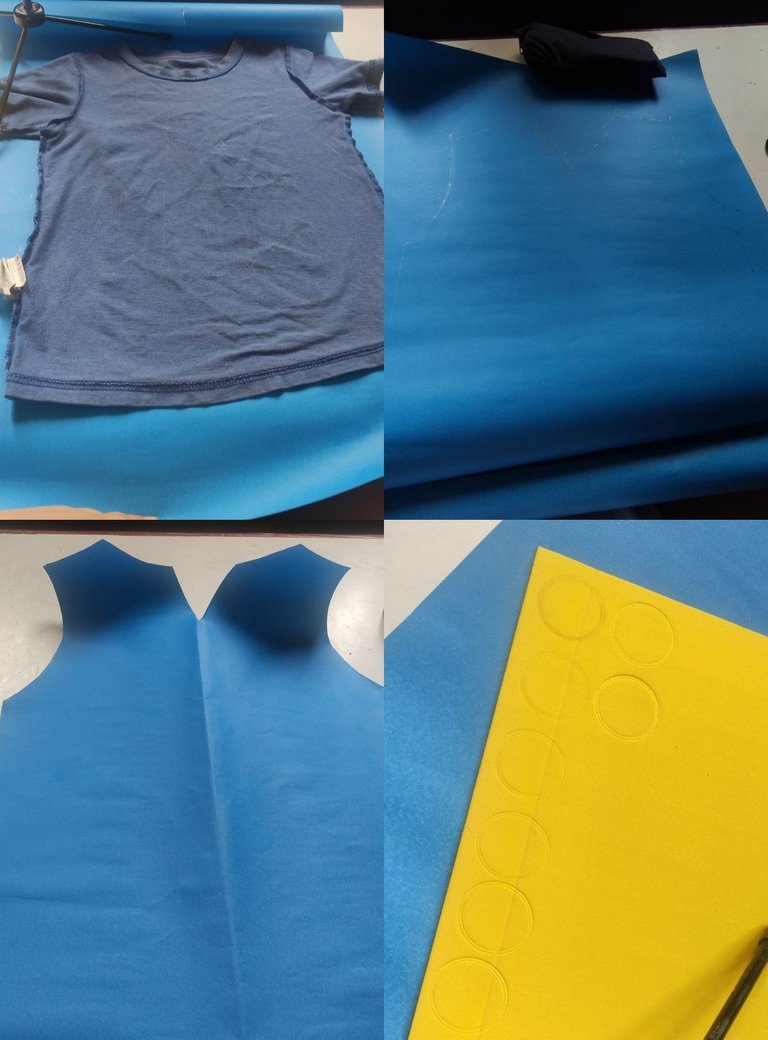
After cutting out the buttons, I tried them on the shirt and it looked great, but I realized that I cut out too many circles, I really didn't need that many haha.
Now I took white cardboard and cut a thick and long ribbon to make the strap, for the buckle of the strap I cut yellow foamy, then I cut two ribbons thinner than the width of the strap to make these ribbons that go covering from one end to the other forming a kind of X, with glue stick I started to glue each piece on the shirt, and to finish giving a nice touch to the buckle of the strap, I decided to make a frame with the frosted foamy.
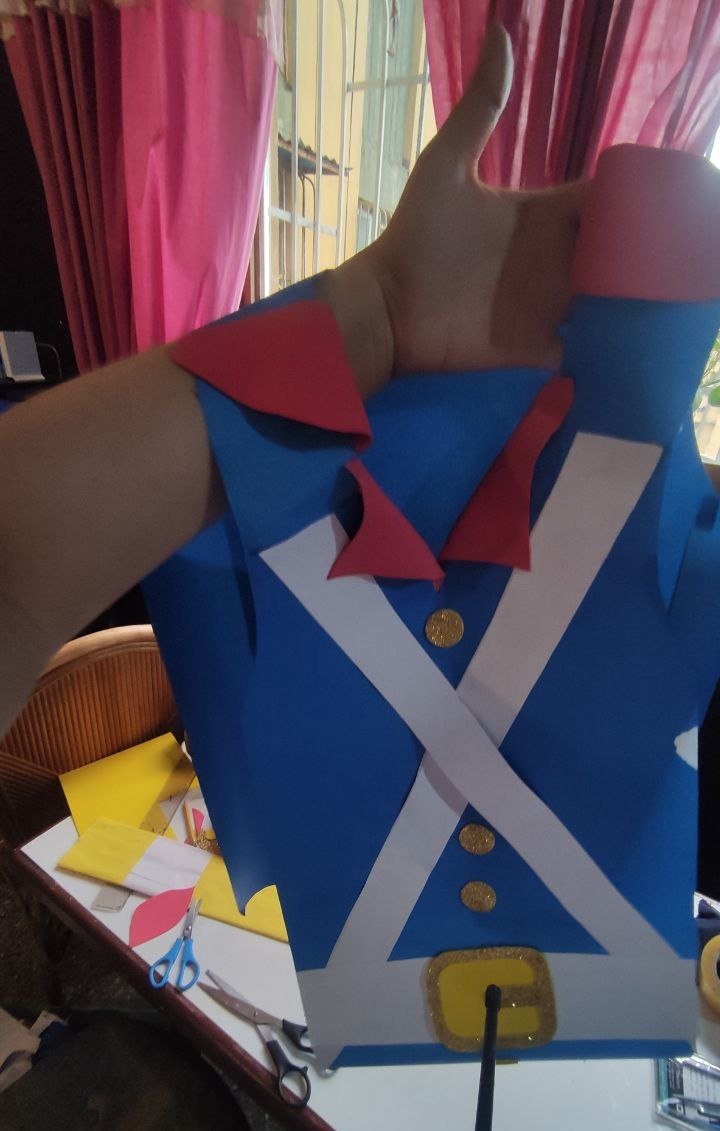
My idea for this suit is that it is easy to put on and take off and also easy to make for me since I did not have so many materials, so I decided to apply some ribbons in the part of the shoulders that would connect the front with the back, then with the same mold of the shirt I made another similar one to cover the back, I used the red foamy to make a kind of collar for the shirt, and I also glued it with silicone, this is how the shirt turned out, you can't see it very well in the picture but it looks nice, I really liked it.
It got dark and I had to make the hat, this was more difficult because I had no blue cardboard left, so I had to improvise with a thin cardboard that I had here which I folded to create a thick tube, I glued it with silicone and I had to paint it with blue cold paint.
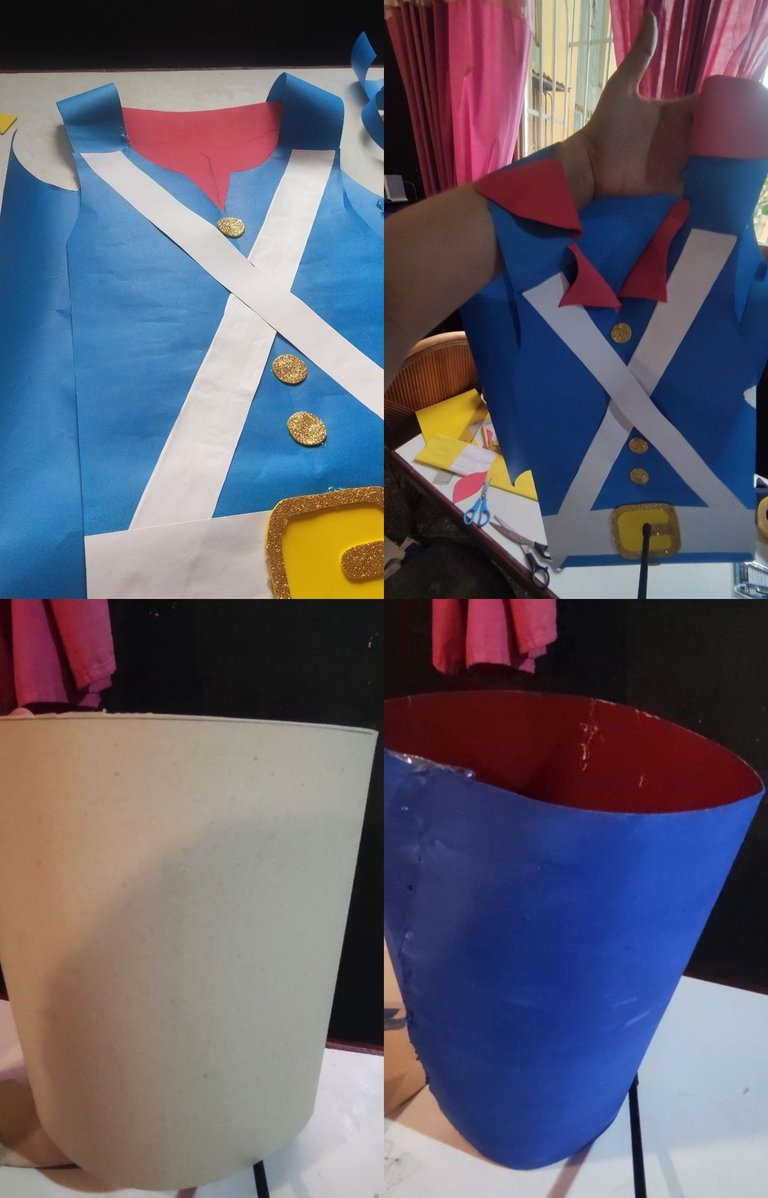
With yellow foamy I made some buttons to the hat, with white cardboard a very thin ribbon that goes from one button to another and with more cardboard painted blue, I filled the hole on top creating the hat's lid, I also added a decoration with a yellow oval and inside a red oval, and that was the whole process of the hat, although it sounds fast it was not, I suffered a lot with this.

The costume itself is wide, but the day of the play, I'm going to stick some adhesive tape on the sides to make it look much better, I already did the test and it looks excellent, sometimes with few materials we can do a lot, today I was very nervous that something would go wrong, but luckily I got a better result than I had in mind, I hope you liked it.

Sigue, contacta y se parte del proyecto en:
Muchas gracias por el apoyo!
Si quieres formar parte de nuestro trail de curación, ingresa a HIVEVOTE, haciendo clic en la imagen del capybara aristocratico. Capybaraexchange tu casa de cambio, rapida, confiable y segura
Gracias por el apoyo 😀
Excelente trabajo. Que mejor que hacerlo con nuestras propias manos y con material que tenemos disponibles y otros de fácil adquisición.Te felicito @alexa.art ✨
!DIY
Te lo agradezco, de verdad que hacer las cosas por uno mismo da una satisfaccion tremenda! 😁
Excellent work, very good that you decided to do it yourself. You got a great result ✨
Thank you so much!
Que bueno verte por esta comunidad saliendo de tu zona de confort, tienes mucha creatividad y eso es suficiente para comenzar a crear, te envío un saludo.
Muchas gracias!!
Me trajiste tantos recuerdos de cuando era más chico y actuaba en los actos del colegio, que nostalgia, antes estos disfraces eran baratos de comprar pero ahora tristemente ya no sumado a que no son de calidad pero este jajaja este tiene un trabajo detrás muy bueno