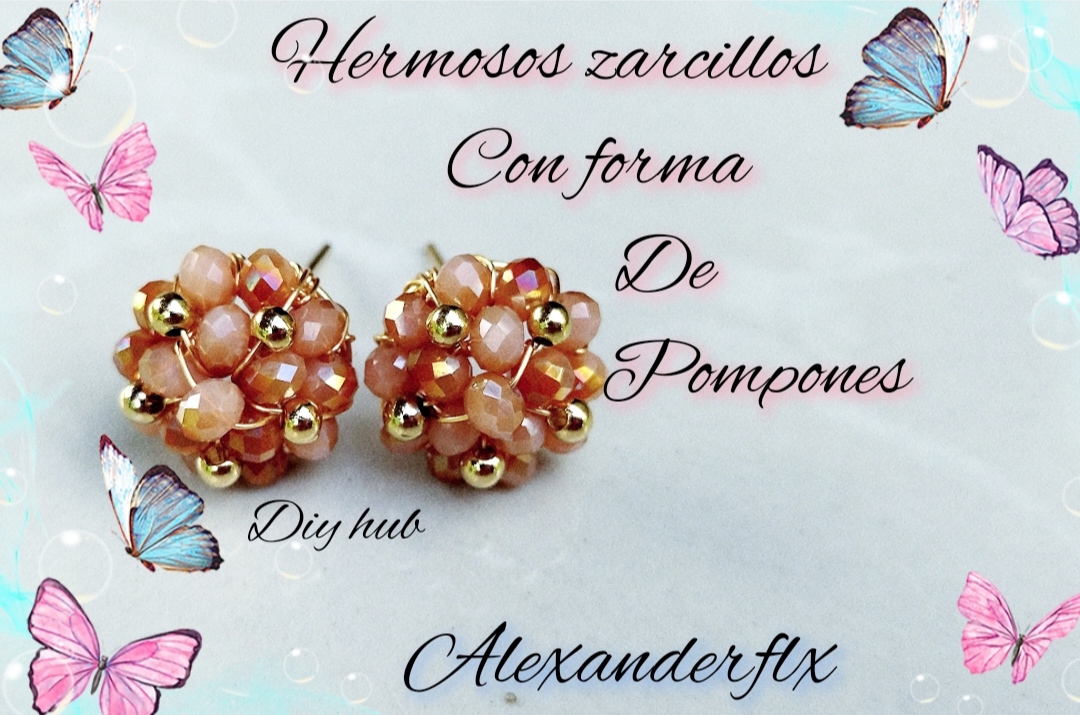
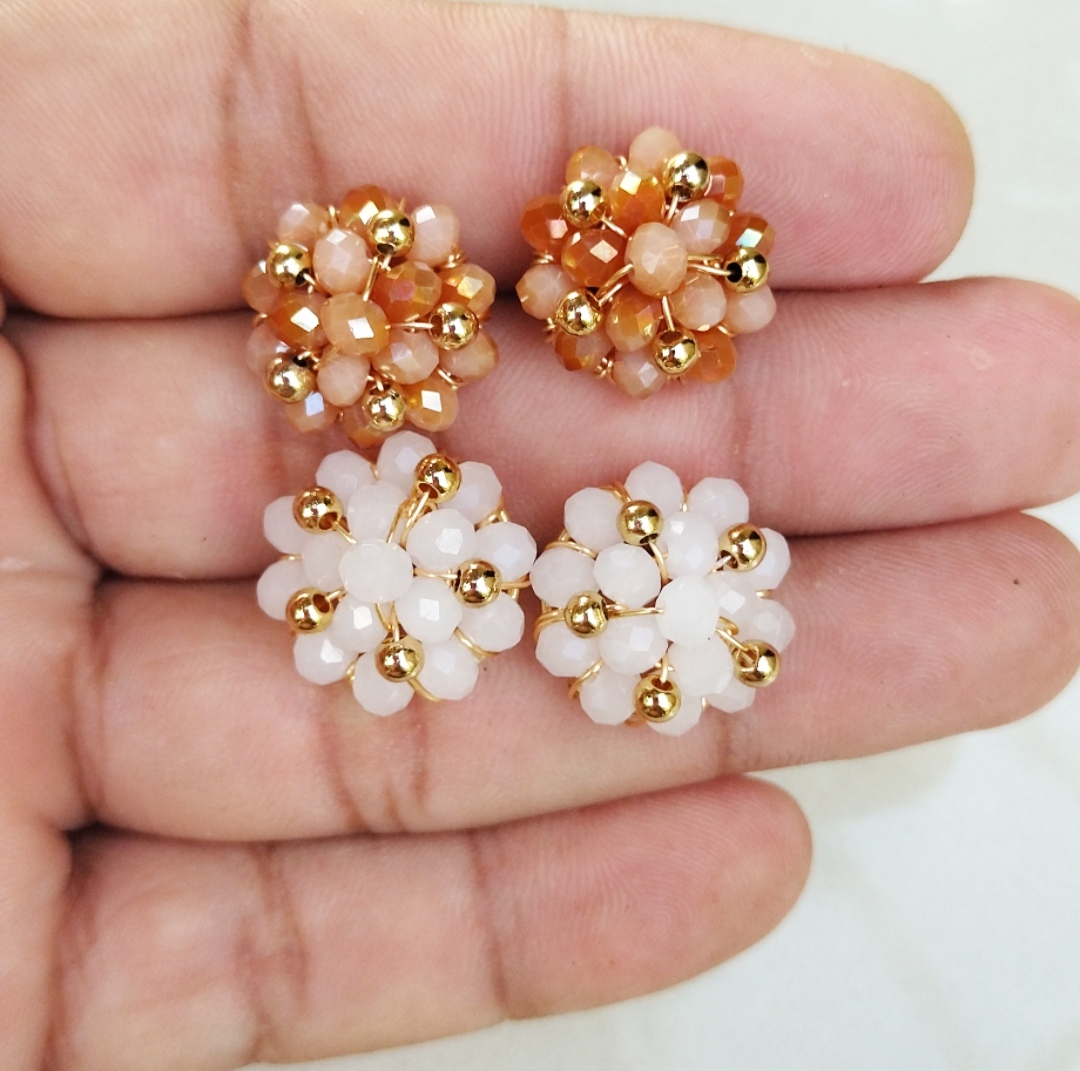
[ENG- ESP] ️ Beautiful pom-pom earrings ☺️😉🌹🍓👍❤️💖️ / Hermosos pendientes con forma de pompones ☺️😉🌹🍓👍❤️💖️ /@alexanderflx
Hello, happy night everyone, I hope you are having a good time, I was a bit missing because I had a little problem with the internet, but I fixed it, thank God, on this beautiful night I want to share with you some beautiful earrings, I call them pom-poms because of their round shape. friend they call it flower but hey everyone gives it a name, these earrings are made with crystals and wire that cannot be missing I hope you like them they are very cute and we can do it in all colors they are super easy to do but they are a very elegant piece I hope the girls like it, well, without further ado, we will go step by step.
Hola feliz noche para todos espero la estén pasando bien estaba un poco desaparecido porque tenía un problemita con el internet pero ya lo arregle gracias a Dios, en esta hermosa noche quiero compartir con ustedes unos hermosos pendientes yo los llamo pompones por su forma redondo algunos amigo le dicen flor pero bueno cada quien le pone un nombre, estos pendientes están echo con cristales y alambre que no puede faltar espero les gusto son muy lindo y lo podemos hacer en todos los colores son super fáciles de hacer pero son una pieza muy elegantes espero a las chicas les guste bueno sin más que decir pasaremos al paso a paso.
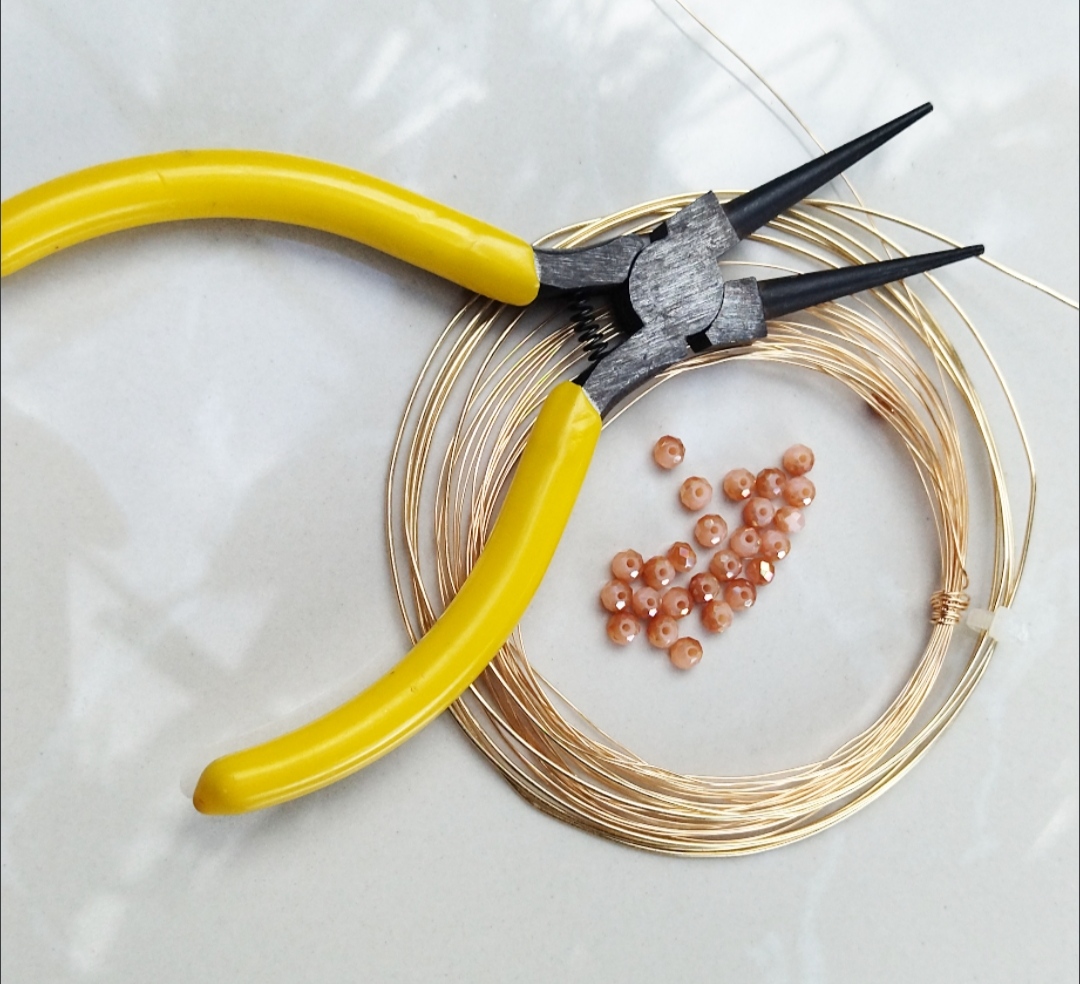
- 26 and 20 gauge wire
- Crystals
- Tweezers
Que necesitamos .
Alambre calibre 26 y 20
Cristales
Pinzas
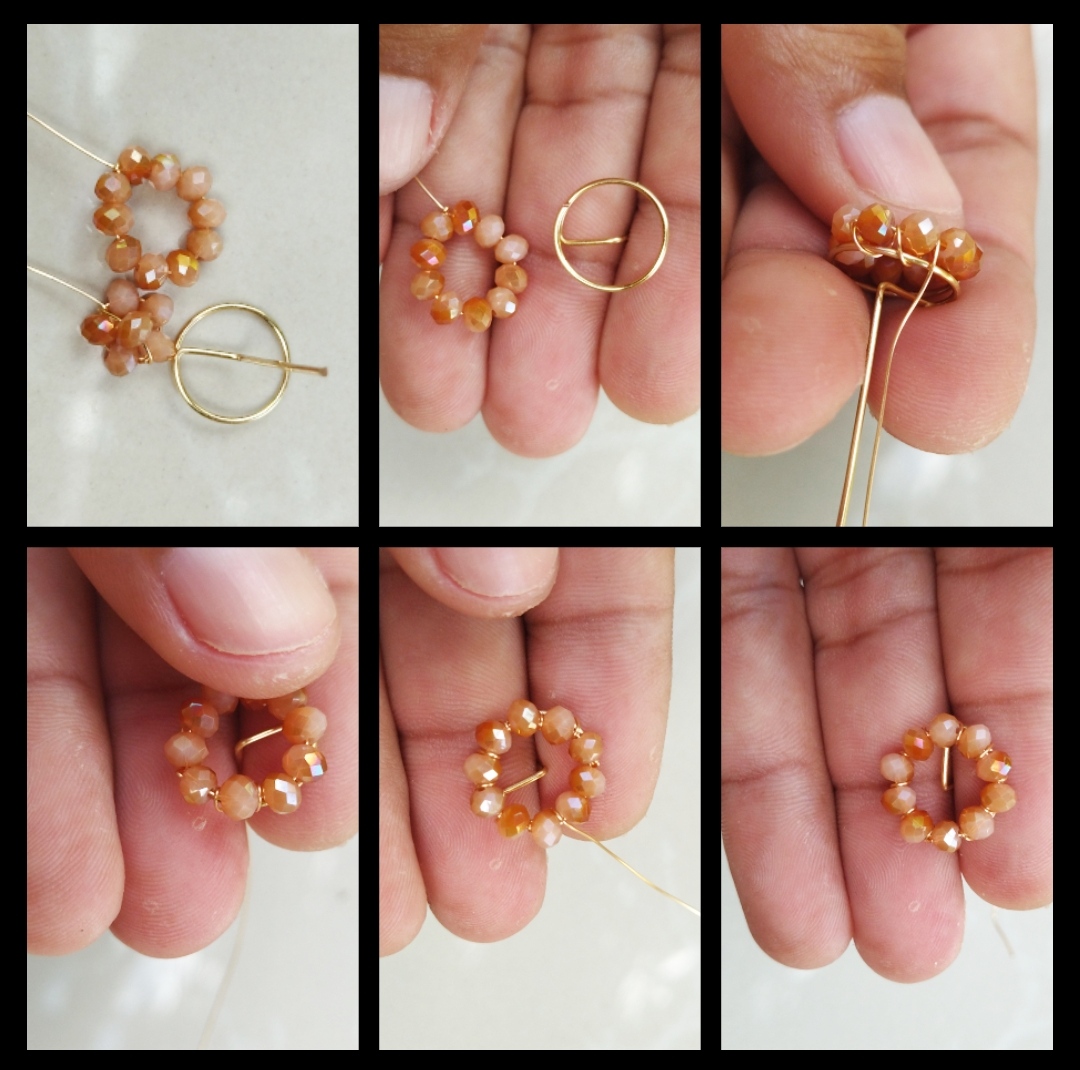
Step 1: For our first step we will make the base of our earrings we will use 20 gauge wire we cut a piece of wire about 10 centimeters then we will make a small round if you do not have a clamp we can use a round object that will help us make the round the best possible after making the round, you can see that we have a piece of wire left, we will bend it trying to make it fit in the middle of the round, then we bend that same piece of wire backwards so that the base is ready.
Paso 1: Para nuestro primer paso aremos la base de nuestros pendientes utilizaremos alambre calibre 20 cortamos un trozo de alambre de unos 10 centímetros luego aremos un pequeño redondo si no tienen una pinza podemos utilizar algun objeto redondo que nos ayude hacer el redondo lo mejor posible luego de hacer el redondo pueden ver qué nos queda un trozo de alambre doblaremos tratando de que nos quede en medio del redondo luego ese mismo trozo de alambre lo volvemos a doblar hacia atrás para que así nos quede lista la base.

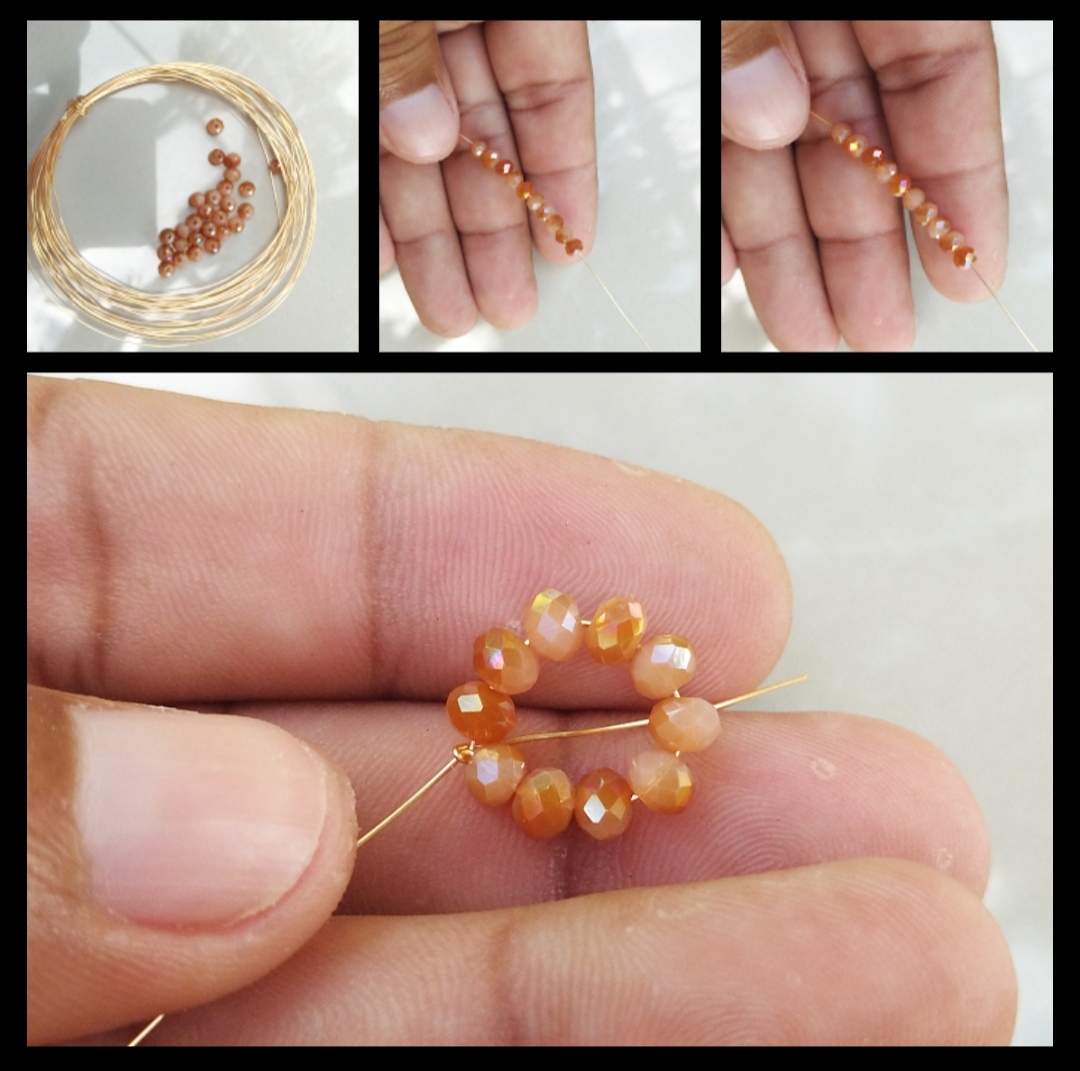
Step 2: In this step we will make two very important pieces since these two pieces will practically be the tendril to make these two pieces we will use twenty-six gauge wire, we will put ten stones in the wire. These stones are iridescent and from white to brown as you can see from one side of the stone is lighter than the other side these are very beautiful stones due to their effect, after having the ten stones we cross the wire, secure it by turning it and leave a long piece of wire, the other piece is almost the same, only that In seeing ten there will be five stones and one in the middle of those five and that's it, we already have the two pieces ready, super easy.
Paso 2: En este paso aremos dos piezas muy importante ya que estas dos piezas serán prácticamente el zarcillo para hacer estas dos pieza utilizaremos alambre calibre veintiséis, meteremos en el alambre dies piedras estás piedras son tornasol y de blanco a marrón como pueden ver de un lado de la piedra es más claro que el otro lado estas son piedras muy lindas por su efecto, luego de tener las diez piedra cruzamos los alambre aseguramos dándole una vuelta y dejamos un trozo de alambre largo, la otra pieza es casi igual solo que en ver de diez serán sinco piedra y una en medio de esas sinco y listo ya tenemos las dos piezas listas super fácil.
Step 3: For this step, as you can see, we already have the three pieces, but we will only use two pieces, which are the base and the round stones, to begin with, I want to tell you that you try to make the round ones the same size or if you can, the round of the base is smaller ok now we will put the round with stones on the base and with the wire that we left we will secure the stones of the base we only have to pass the wire through the middle of each stone after securing all the round we cut the excess and ready.
Paso 3: Para este paso como puede ver ya tenemos las tres piezas pero solo utilizaremos dos piezas que es la base y el redondo de piedras, para empezar les quiero decir que traten de que el los redondo sean delismo tamaño o si pueden que el redondo de la base sea más pequeño ok ahora pondremos el redondo con piedras sobre la base y con el alambre que dejamos aseguraremos las piedras de la base solo debemos de pasar el alambre por el medio de cada piedra luego de asegurar todo el redondo cortamos el exceso y listo.
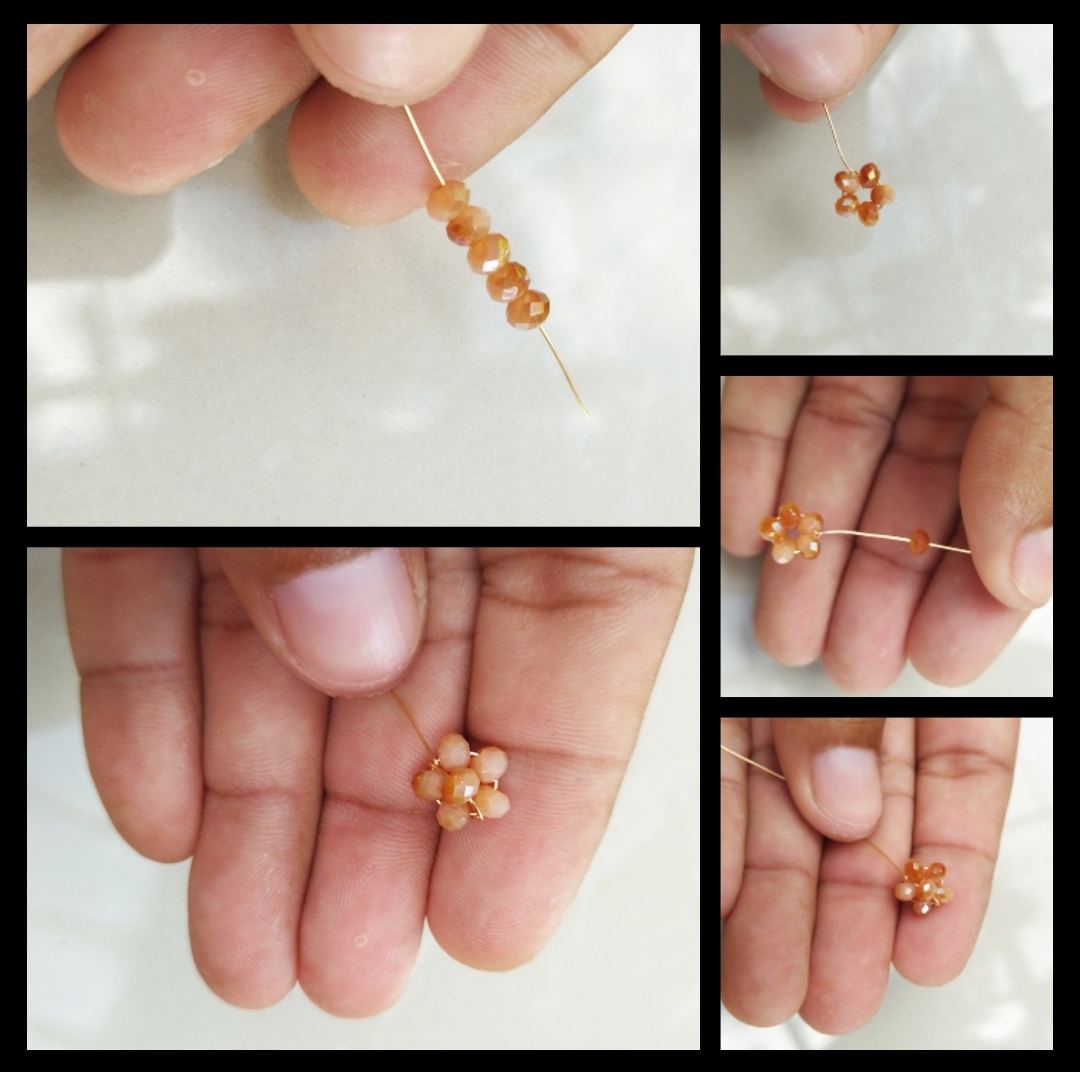
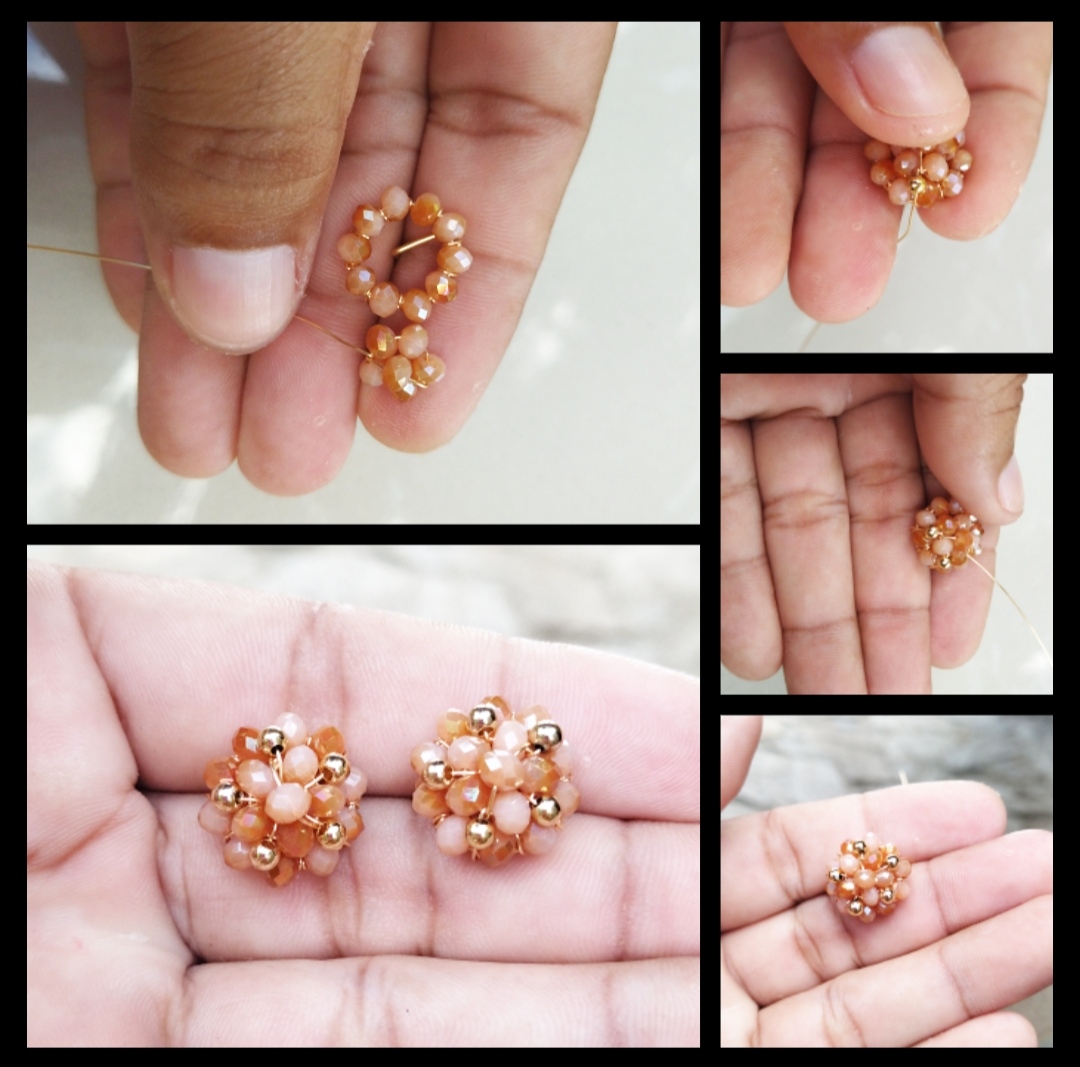
Step 4:Last step for this last step we will glue the other small piece as you can see it is a small flower and as you can see the flower has five spaces in those five spaces we will put a golden stone these are pellets, now we begin to assemble we put the flower In the middle of the round we try to accommodate it very carefully as you can see I also left a piece of wire for the flower, after putting the flower we put a golden stone and we will put it in the space that the flower gives us we put the wire underneath holding the base and we will put it in a hole that leaves the stones, we will rotate the wire so that it is again in the middle of the stones and we pass the wire underneath again, touching it again to the other space that the flower gives us and so until we have the no stones and ready we already have the earrings ready I hope you like it ☺️🌹🌹🌹😉 .
Paso 4: Último paso para este último paso pegaremos la otra pieza pequeña como pueden ver es una pequeña flor y como pueden ver la.flor tiene sinco espacio en esos sinco espacio pondremos un piedra dorada estos son balines, ahora empezamos armar ponemos la flor en medio del redondo tratemos de acomodarla con mucho cuidado como pueden ver también dejé un trozo de alambre a la flor, luego de poner la flor metemos una piedra dorada y la pondremos en los espacio que nos da la flor metemos el atambre por debajo sujetando la base y la meteremos pon un agujero que nos deja las piedras rotaremos el alambre para que así nos vuelva a quedar en medio de las piedras y volvemos a pasar el alambre por debajo totandolo nuevamente al otro espacio que nos da la flor y así asta tener las sinco piedras y listo ya tenemos los pendientes listo espero les guste ☺️🌹🌹🌹😉🥰.
<. beautiful tendrils
<Hermosos zarcillos
Todas las Fotos son de mi autoría y fueron tomadas con mi Celular Redmi 9T
Thank you for sharing this post in the DIYHUB Community!
Your content got selected by our fellow curator semarekha & you just received a little thank you upvote from us for your great work! Your post will be featured in one of our recurring compilations which are aiming to offer you a stage to widen your audience within the DIY scene of Hive. Stay creative & HIVE ON!
Please vote for our hive witness <3
This is good for business. ☺️
It's different if you have the skills because it's easy for you to earn for a living or as a sideline. ☺️
Hola si la verdad es un buen negocio yo apenas estoy empezando mi capital prácticamente no es nada 😁 pero ya empecé que es lo importante , gracias por tu visita a sido un placer❤️🌹🌹🌹🌹
Wow!Thank you for sharing this article. Making these cute earrings seems interesting!I only wear these kinds of earrings but I'm glad I get to learn how to make this one.
Hola, te invito a mi blog, siempre a sido un gusto compartir con ustedes, en mi blog encontrarás muchos modelos, meda mucho gusto saber que te enseñe hacer estos zarcillos, muchísimas gracias por tu visita a sido un placer para mi🌹🌹🌹🌹🌹🌹🌹❤️❤️❤️❤️❤️❤️😊😊😊😊
Congratulations @alexanderflx! You have completed the following achievement on the Hive blockchain And have been rewarded with New badge(s)
Your next target is to reach 15000 upvotes.
You can view your badges on your board and compare yourself to others in the Ranking
If you no longer want to receive notifications, reply to this comment with the word
STOPCheck out our last posts:
Support the HiveBuzz project. Vote for our proposal!
Quedaron hermosos!
Gracias ☺️❤️❤️👍🌹