ESP-ENG] / Llamativos pendientes utilizando la técnica de alambrismo🍓🌹🌹🌷🌷/ Striking earrings using the wire technique🍓🌹🌹🌷🌷/@alexanderflx
It's time to make our girls fall in love, beautiful earrings
Hola muy buenas noches para todos espero se encuentren bien un fuerte abrazo a todas aquellas personas que me apoyan siempre quiero agradecerle con todo el corazón, bueno lo prometido es deuda creo que a una de las chicas le dije que no se fuera muy lejos porque traería unos nuevos pendientes de seguro estos pendientes les van a gustar a muchos bueno eso espero esta echo con mucha humildad y mucho amor, estos pendientes están echo con piedras y un poco de alambre son muy llamativos muy coloridos y están echos para complacer a todas las chicas que conforman esta hermosa comunidad espero les guste, sin más que decir pasaremos al paso a paso .
Hello, good night to all, I hope you are well, a big hug to all those people who support me, I always want to thank you with all my heart, well, what was promised is a debt, I think I told one of the girls not to go too far. away because I would bring some new earrings for sure many will like these earrings well I hope it is made with great humility and love, these earrings are made with stones and a bit of wire they are very striking very colorful and are made to please all the girls that make up this beautiful community I hope you like it, without further ado we will go step by step.
What do we need.
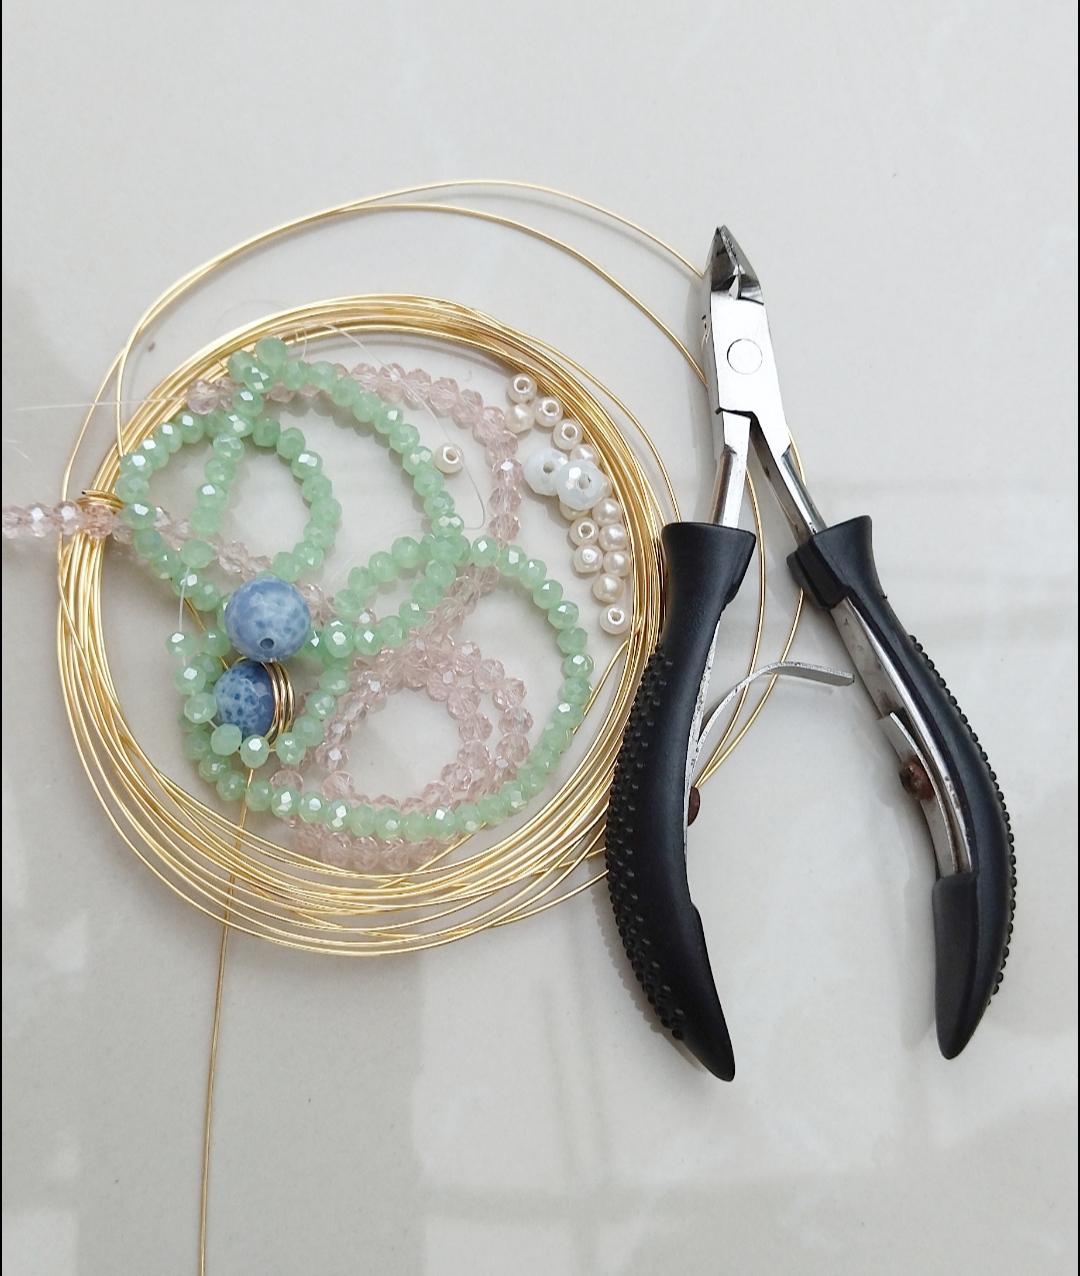
- piedras de bisutería
- alambre para bisutería calibre 22
- pinzas
jewelry stones
22 gauge jewelry wire
tweezers
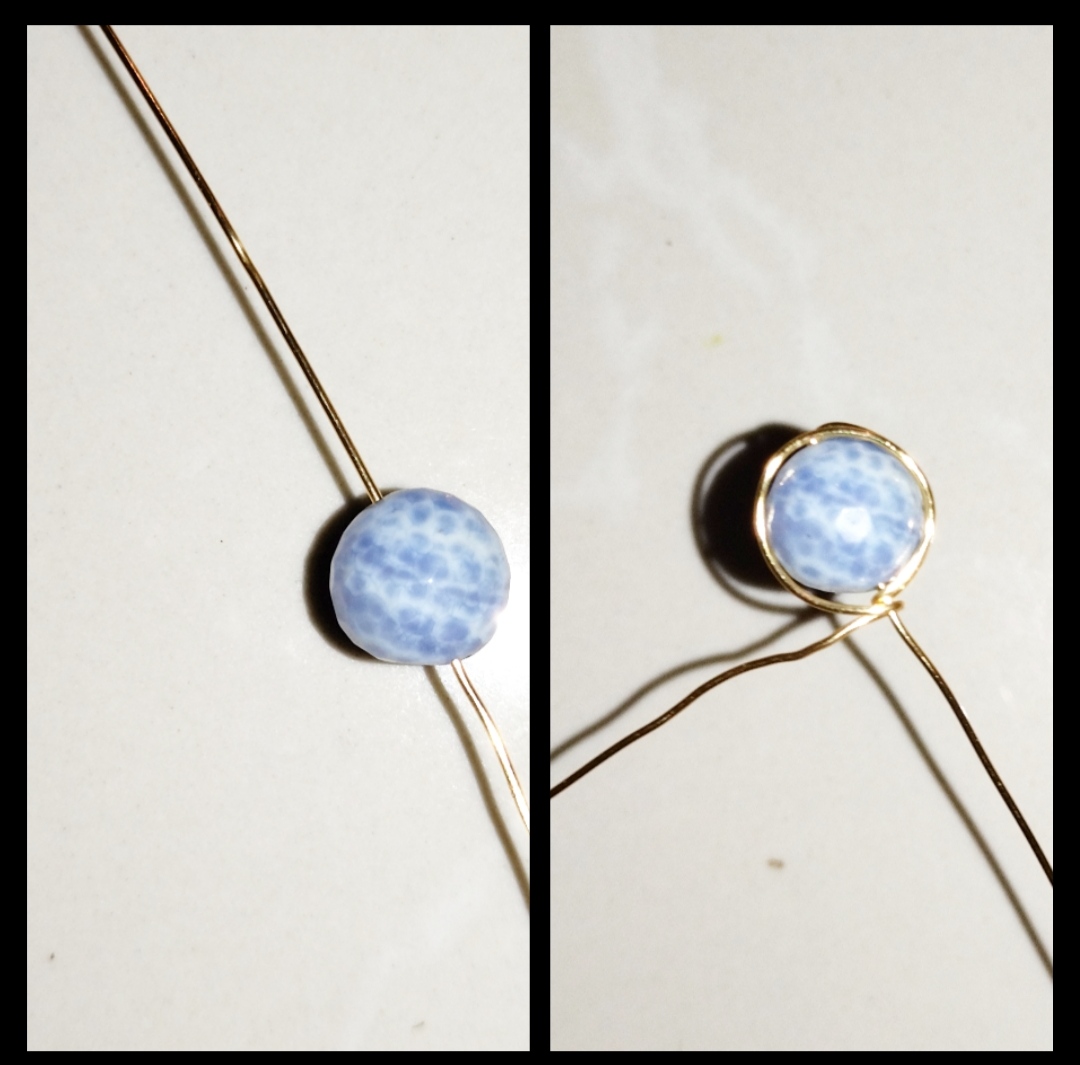
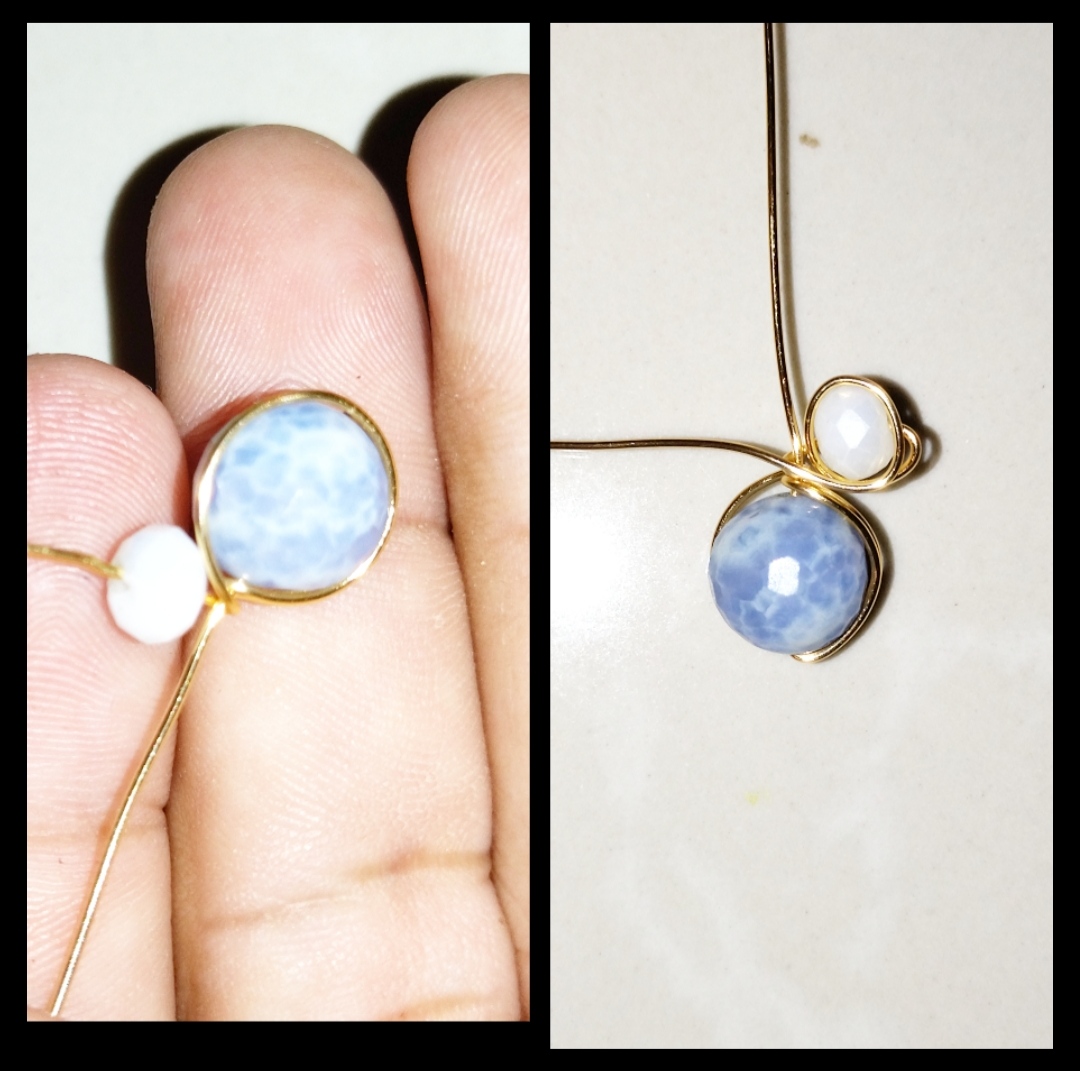
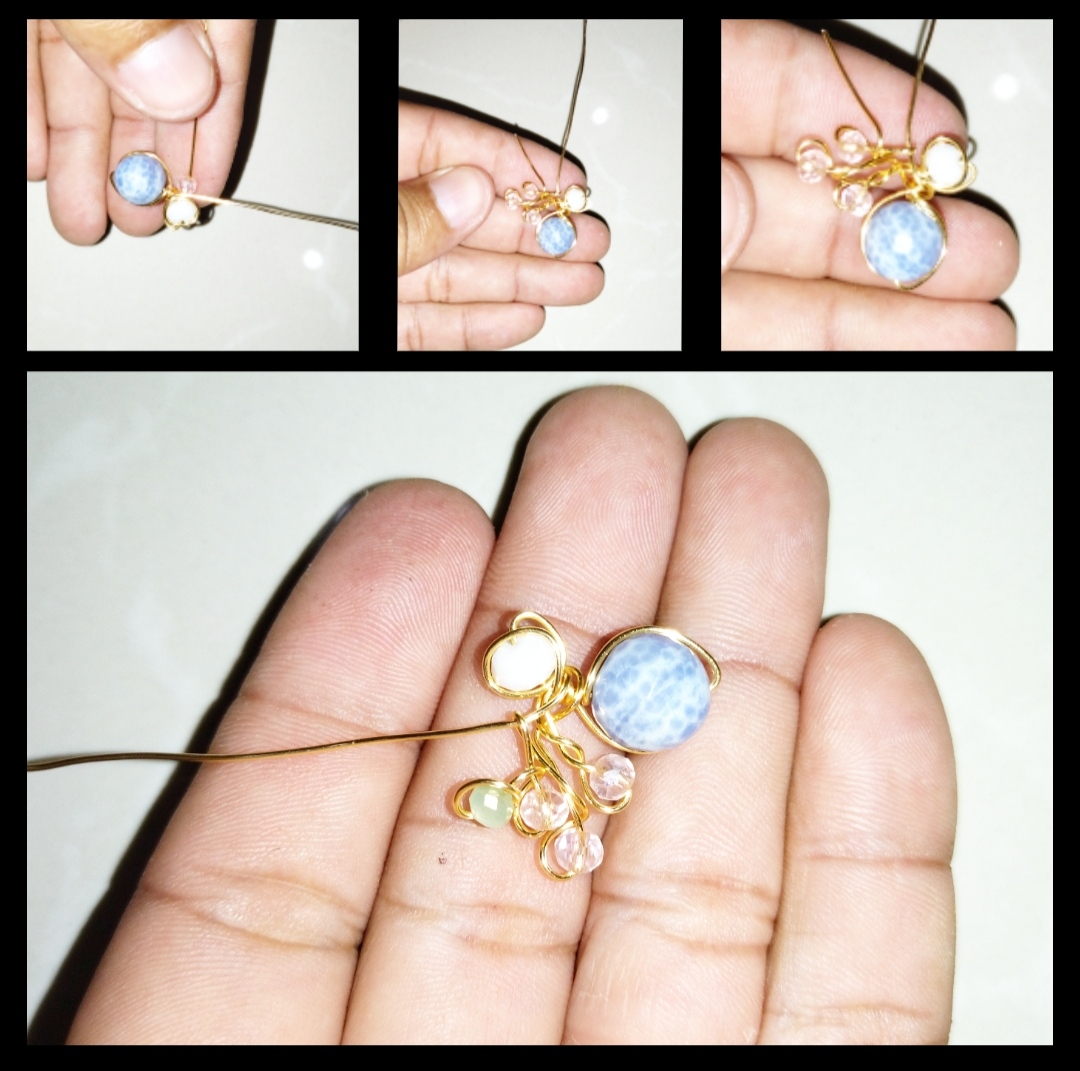
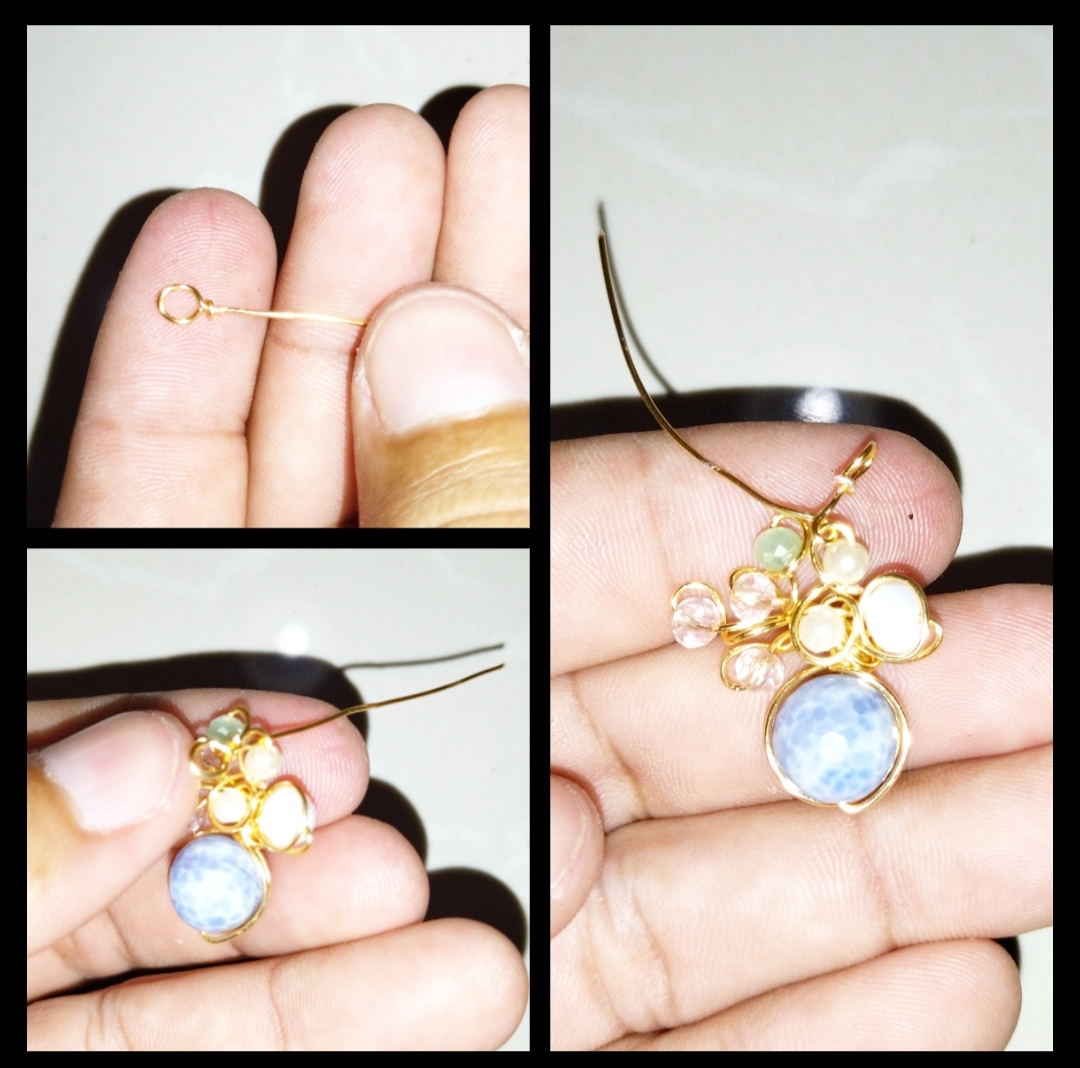
Paso 1:Empezaremos cortando un trozo de alambre de unos treinta sentimetro luego tomaremos una de las dos piedras tratemos de que las piedras no sean muy grande para no hacerlo muy grandes luego de tener el alambre y la piedra meteremos la piedra en el alambre la pondremos la piedra un poco más a bajo de la mitad del alambre luego el lado que nos quedó más corto lo doblaremos hacia arriba hacia donde está el otro lado del alqmbre luego le daremos una vuelta al rededor del alambre luego nos regresaremosy le daremos una vuelta al rededor del alambre llegaremos a el alamvre nuevamente y le daremos una vuelta al rededor del mismo nuevamente luego tomaremos una de las dos piedras blanca y la meteremos en el alambre y le daremos una vuelta al rededor de la piedra .
Step 1: We will start by cutting a piece of wire about thirty centimeters, then we will take one of the two stones. We will try not to make the stones too big so as not to make it too big. wire we will put the stone a little lower than the middle of the wire then the side that was shorter we will bend it up to where the other side of the wire is then we will turn it around the wire then we will go back and give it a looping around the wire we'll get to the wire again and loop around it again then take one of the two white stones and stick it in the wire and loop around the stone .
Paso 2: Para este paso tomaremos tres piedras rosadas y una verde luego de tener las piedras tomaremos el otro alambre que aviamos dejado el lado más largo y lo doblaremos hacia un lado luego tomaremos una de las piedra rosada y la meteremos en el alambre dejaremos el alambre un poco largo no mucho luego doblamos hacia abajo y entorchamos un poco después aseguraremos dándole la vuelta a el alambre que dejamos al principio, luego aremos lo mismo con la otra solo que la dejaremos un poco más larga y la otra dos piedras serán un poco más corta al poner la piedra verde hay terminará el alambre la entorcharemos al rededor de la piedra y la punta la dejaremos por detrás de la misma .
Step 2: For this step we will take three pink stones and one green one after having the stones we will take the other wire that we left the longest side and bend it to one side then we will take one of the pink stones and we will put it in the wire we will leave the wire a little long not much then we bend down and twist a little later we will secure by turning the wire that we left at the beginning, then we will do the same with the other one only we will leave it a little longer and the other two stones they will be a little shorter when we put the green stone there will end the wire we will wrap it around the stone and we will leave the tip behind it.
Paso 3: Que debemos de hacer para asegurar un poco los pendientes o para que no quede todo suelto como pueden ver nos quedó un trozo de alambre este es el mismo que utilizamos al principio este alambre nos quedó en medio del otro alambre así que apretamos con nuestras manos y le daremos una vuelta al redor de todo el pendiente así que este alambre pasará por detrás del arete y regresará a la parte de adelante luego de hacer esto tomaremos dos perlitas meteremos una primero y le daremos vuelta a el alambre poniéndolo al rededor de la perla luego meteremos la otra perlita y le daremos vuelta a el alambre hacia el otro lado y listo muy fácil.
Step 3: What should we do to secure the earrings a little or so that all luck is not left as you can see we have a piece of wire left this is the same one that we used at the beginning this wire was left in the middle of the other wire like this that we squeeze with our hands and we will go around the entire earring so that this wire will pass behind the earring and will return to the front after doing this we will take two pearls we will put one first and we will turn the wire putting it around the pearl then we will put the other pearl and we will turn the wire to the other side and ready very easy.
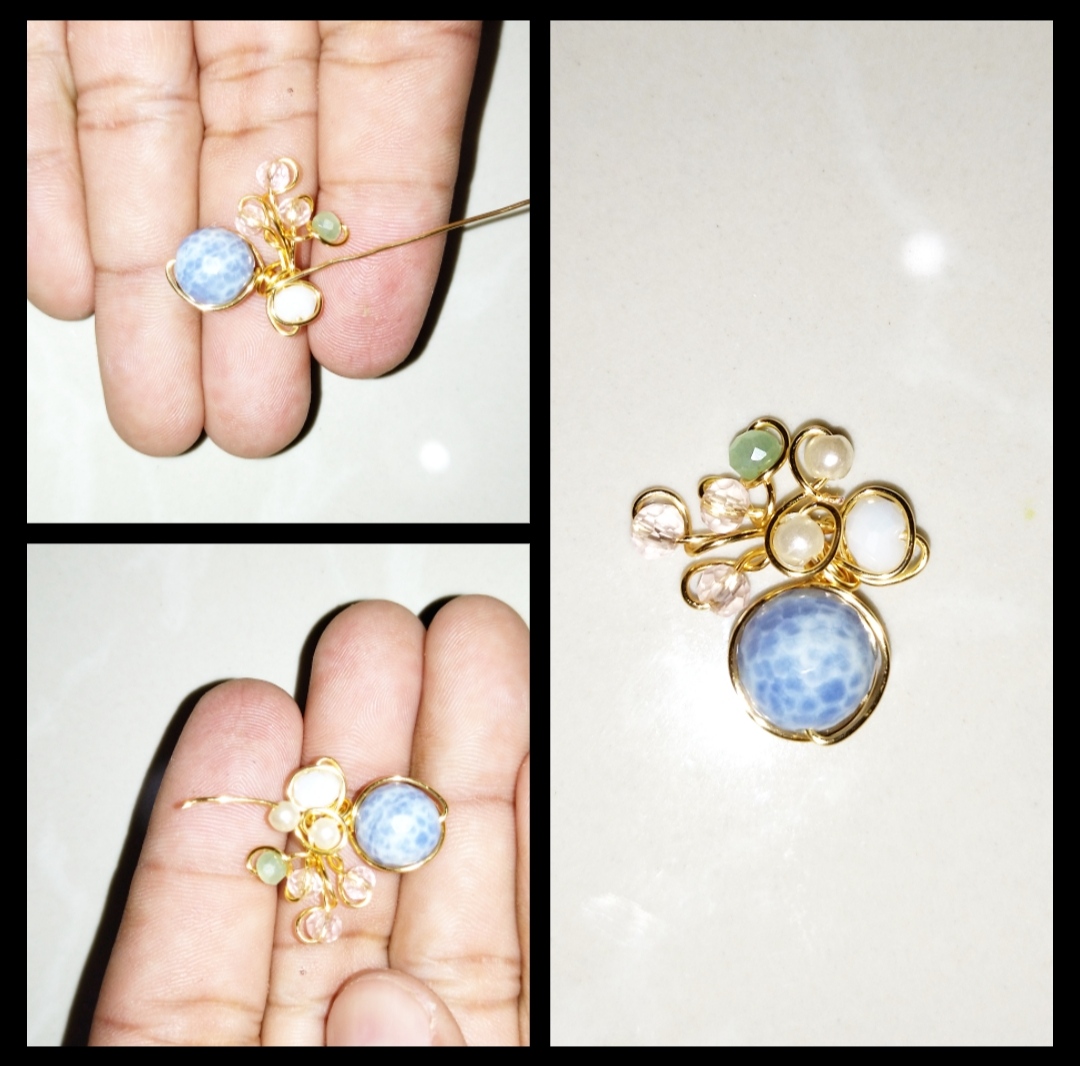
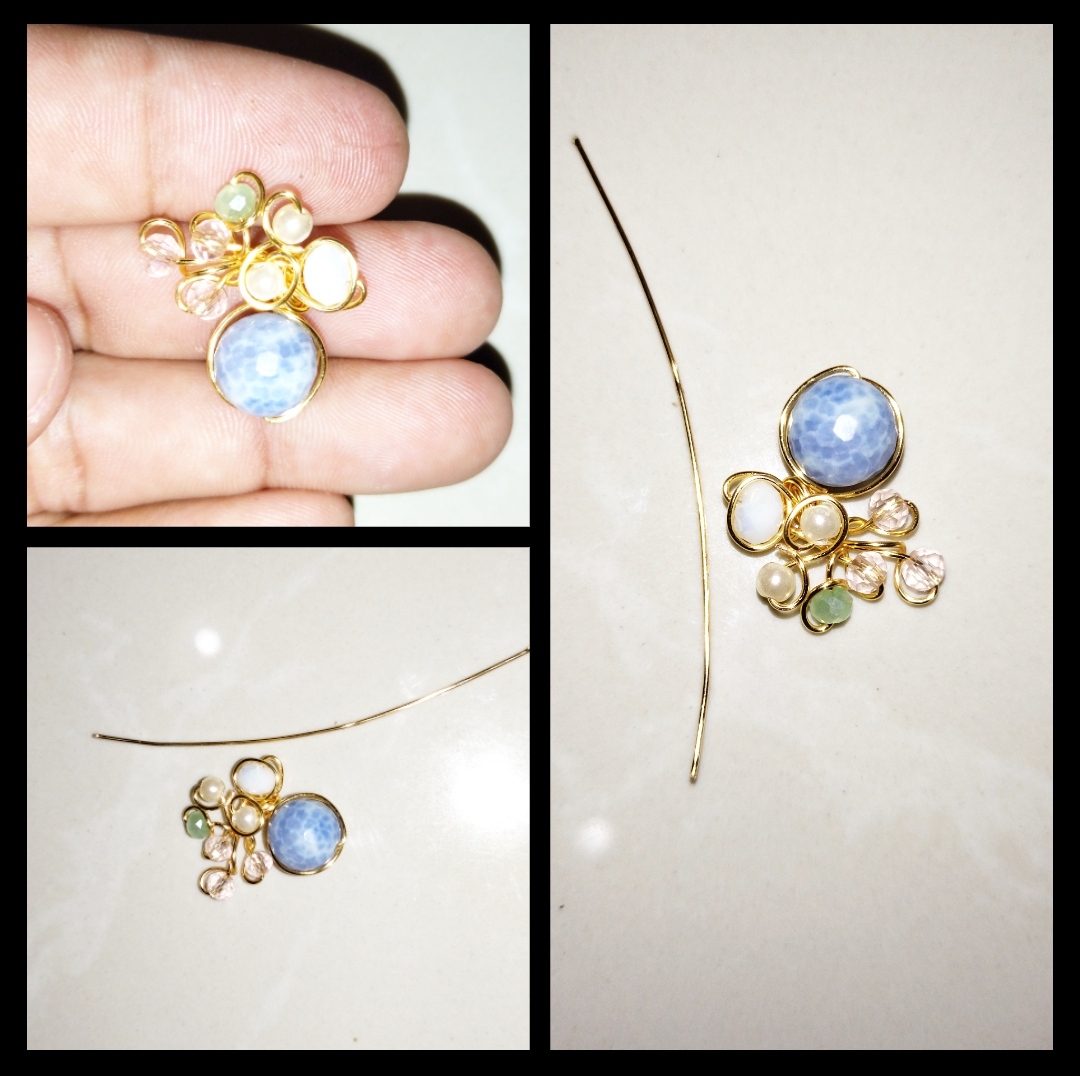
Paso 4:Bueno como pueden ver es super fácil hacer el pendiente ya terminamos con lo más difícil pero lo más fácil para este último paso cortaremos un trozo de alambre no muy largo a ese trozo de alambre le aremos un redondo en un extremo y entorcharemos la punta en el mismo, luego pasaremos la punta del alambre por uno de las agujeros del pendiente dejando el redondo en la parte del frente del pendiente para así doblar en mismo hacia atrás los alambre se cruzarán dejando una argolla muy pequeña luego tomaremos el trozo de albre largo y aremos una especie de ovalo no muy grande la punta del alambre la meteremos en redondo que realizamos y listo espero les guste fue un gusto compartir con ustedes.
Step 4:Well as you can see it is super easy to make the earring we are done with the most difficult part but the easiest for this last step we will cut a short piece of wire to that piece of wire we will make a round one at one end and we will twist the tip in it, then we will pass the tip of the wire through one of the holes of the earring leaving the round in the front part of the earring to fold it backwards the wires will cross leaving a very small ring then we will take the piece of long wire and we will make a kind of oval not very big the tip of the wire we will put it in the round that we made and that's it I hope you like it it was a pleasure to share with you.
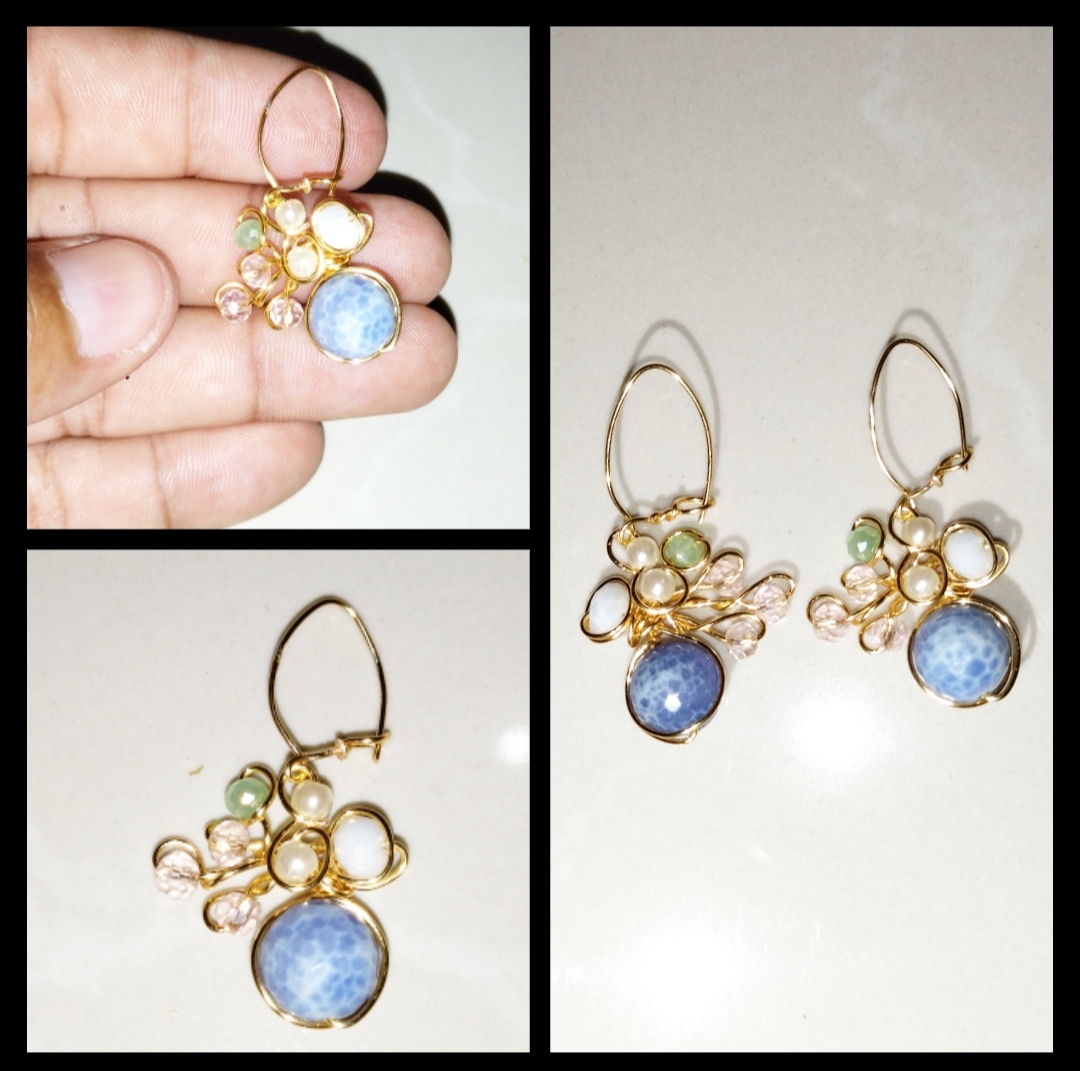
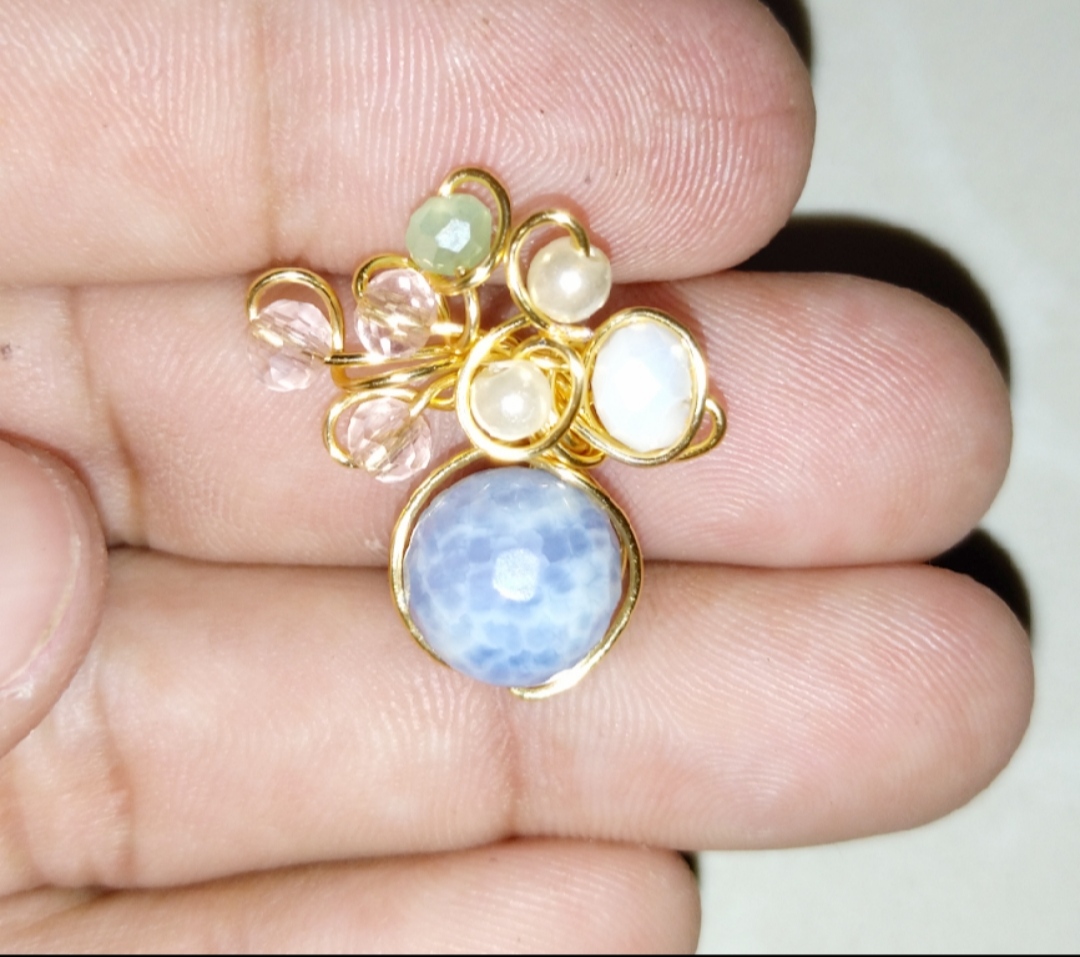
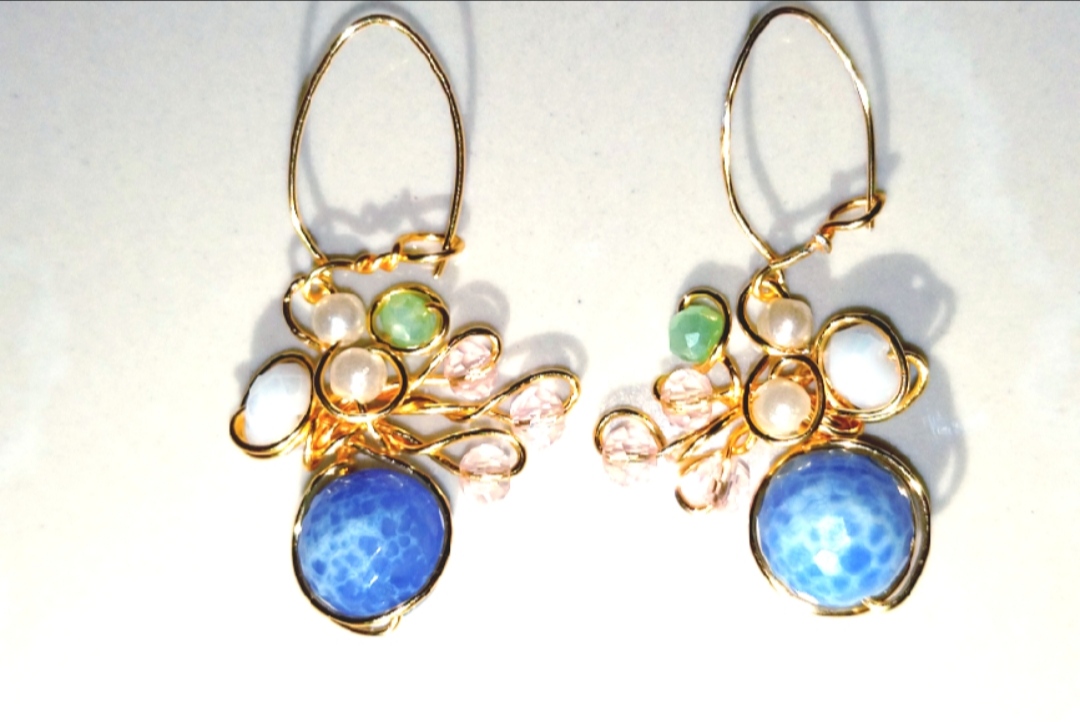
listo nuestros hermosos pendientes , espero que a las damas les guste, fue un gusto compartir con ustedes .
ready our beautiful earrings, I hope the ladies like it, it was a pleasure to share with you.
Todas las Fotos son de mi autoría y fueron tomadas con mi Celular Redmi 9T
All Photos are my authorship and were taken with my Redmi 9T Cellphone
Excelente post, bien detallado
!discovery 30
This post was shared and voted inside the discord by the curators team of discovery-it
Join our community! hive-193212
Discovery-it is also a Witness, vote for us here
Delegate to us for passive income. Check our 80% fee-back Program
Muy lindos amigo @alexanderflx. Siempre admirando tus bonitos trabajos. Felicidades y éxitos...✨
Hola, espero estés bien, si ya me fijé que siempre me as comentado muchas gracias es un gusto tener siempre un comentario de uno chica muchas gracias de verdad👍👍👍👍, muchísimo éxito también para ti
Congratulations @alexanderflx! You have completed the following achievement on the Hive blockchain and have been rewarded with new badge(s):
Your next target is to reach 4250 upvotes.
You can view your badges on your board and compare yourself to others in the Ranking
If you no longer want to receive notifications, reply to this comment with the word
STOPCheck out the last post from @hivebuzz:
Support the HiveBuzz project. Vote for our proposal!
Este trabajo es muy hermoso amigo, que elgante y fino que se ve. Me encanta la combinación de piedras y alambre ❣️.
Para publicaciones como esta te recomiendo la comunidad Jewelry (https://peakd.com/c/hive-189504). Ahí vas a encontrar más usuarios que practiquen este arte.
¡Saludos!
Hola, feliz día, que bueno que le gustó, muchas gracias por su recomendación la tomaré en cuenta 👍👍👍👍👍👍👍👍👍🌹
Que hermoso trabajo. ✨😊
Es realmente delicado y elegante. Me gustó mucho tú post, muy bien explicado el paso a paso y muy bonitas fotografías.
Muchas gracias por compartir tan bonito trabajo, Saludo.✨
Hola, feliz día muchas gracias por visitarme, el gusto es completamente mio ya que sin ustedes las mujeres no sabría si están bien los pendiente, siempre trato de hacer los paso a paso muy fáciles.
Muchas gracias es un gusto compartir con ustedes espero seguir viendo y leyendo su comentario, feliz día
Hola Alexander, tus sarcillos están espectaculares, super artesanales, es una buena idea para emprender y su forma es muy original.
Hola, espero estás bien, que gusto volver a ver un comentario suyo en mi publicación estoy muy contento, ante trabajaba con la misma técnica pero solo hacia cosas grande como carruajes y otro tipo de cosas pero el materia está un poco caro pos eso decidí hacer prendas son más pequeñas y logré ver qué podía ganar algo de dinero espero me valla bien, estos pendientes son muy lindo y muy artesanales como usted dice y claro originales ya que son para compartir con ustedes, que bueno que le gustó espero seguir haciendo un buen trabajo 🌹🌹🌹❤️😊👍🌹
Es muy elegante, para usarlos en una fiesta con un vestido quedarían muy bien. Hermosa creación, son unos aretes muy bonitos.
Hola, sin son muy elegantes, pero no solo para una fiesta mi idea es que ustedes las chicas lo puedan usar en cualquier momento estos porque son para guindar por eso se ven más elegantes, pero tengo unos parecidos que son pegados a la oreja o como decimos aquí de tapitas también son muy lindos y muy llamativos,muchas gracias por tu visita feliz tarde.
Holaaa, que lindos pendientes! Un trabajo delicado y con un resultado hermoso.. 💜
Hola, gracias que bueno que te gustaron.
Excelente trabajo, muy bien hecho, felicidades.
Hola, muchas gracias.