Foami & aníme fusión. 🌸Alfiletero📌🌸 (Esp/Eng)
¡Hola queridos amigos! Estoy emocionada de participar en este concurso dónde debemos fusionar dos materiales ANIME Y FOAMI. Para lo cual quise hacer una manualidad que no solo fuera decorativa, sino también, funcional! 👌😉
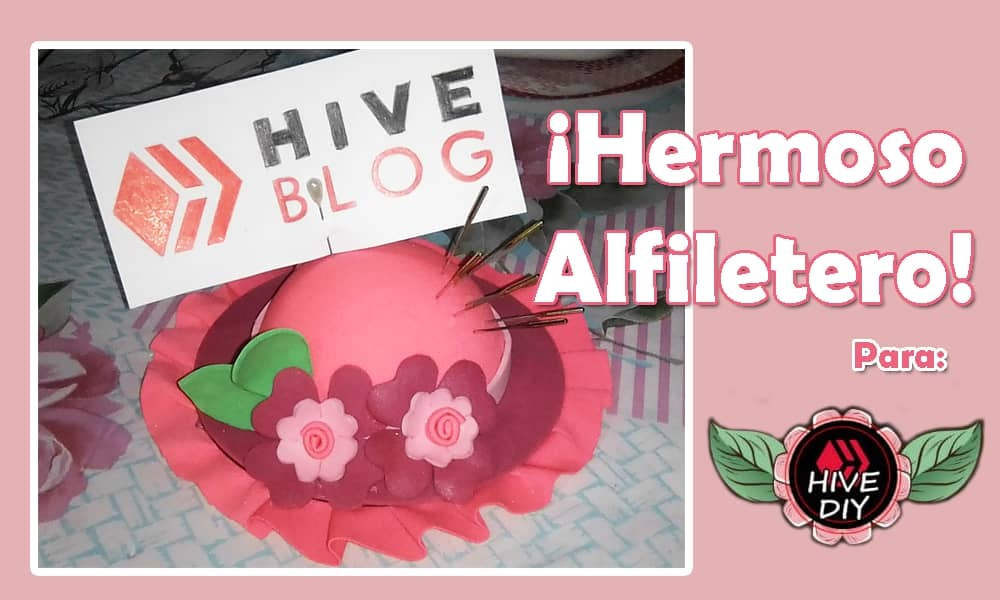
Como pudieron ver en la imagen de portada queda muy bonito! De hecho varias amigas quedaron encantadas con el resultado y me pidieron que les hiciera unos. 😄😄
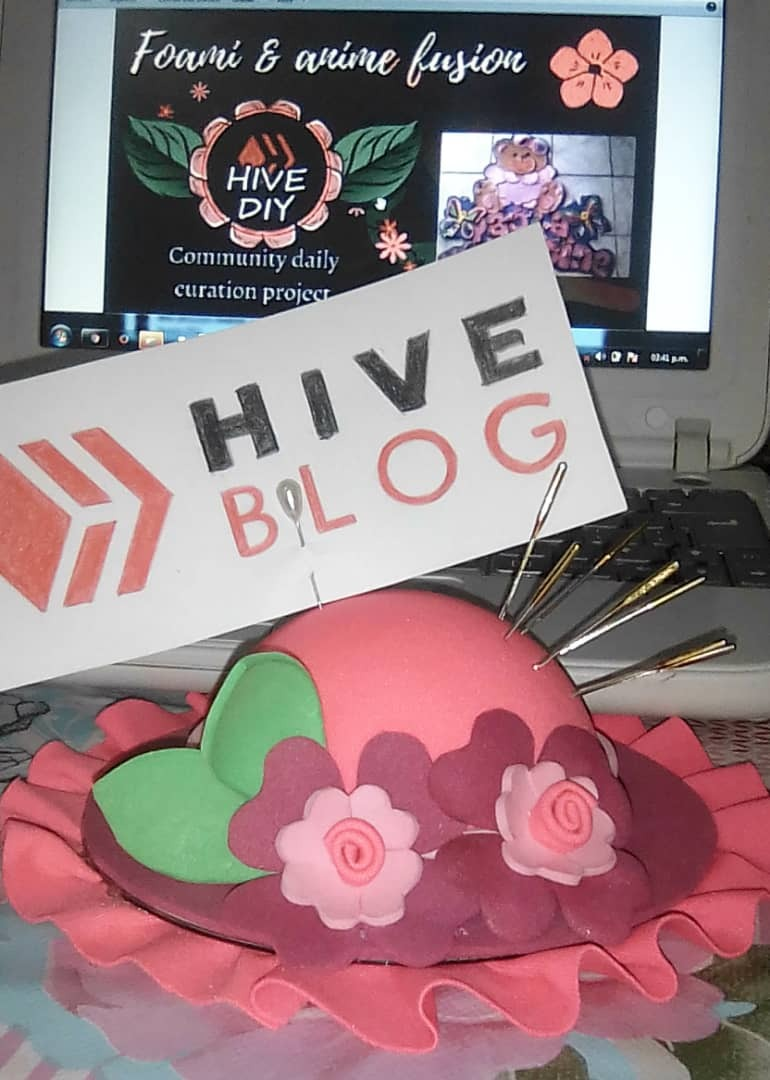
Gracias a estas iniciativas en esta maravillosa plataforma y comunidades fabulosas cómo lo es Hive Diy podemos mostrarles como hacer ustedes mismas, paso a paso, este tipo de manualidad. 😃
¡Empecemos! 😁😁
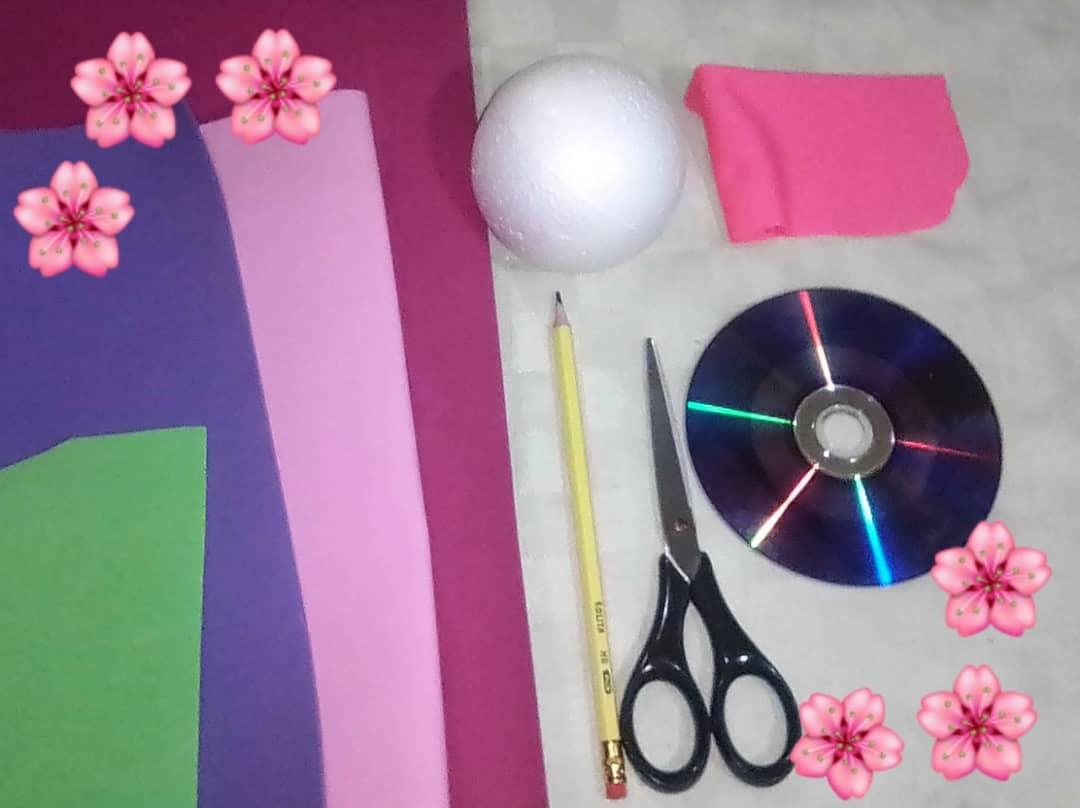
Los materiales a utilizar principalmente son:
✨Una esfera de anime #10.
✨Foami del color de su preferencia.
✨Un CD que ya no use
✨ Tijeras
✨ Lápiz
✨Recortes de tela
✨Pistola de silicón
✨Barra de silicón
✨Un cúter
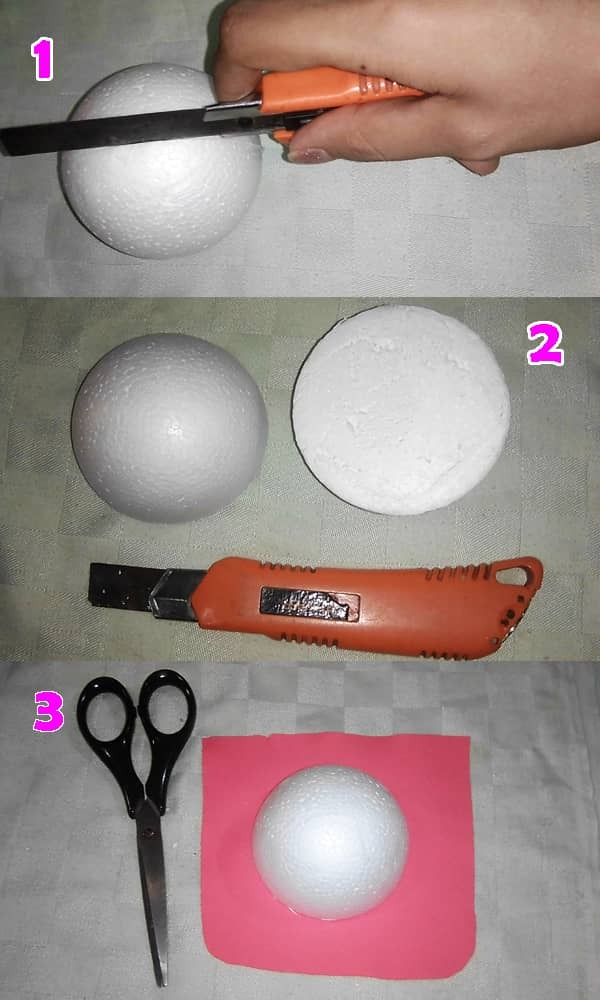
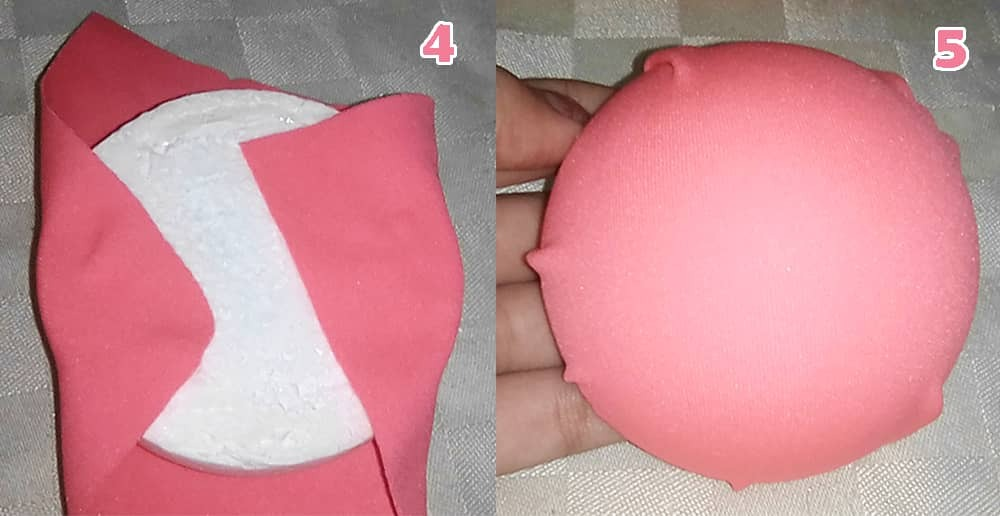
Lo primero que hice fue cortar la esfera por la mitad, poco a poco fui introduciendo la hojilla y dándole vueltas hasta cortarla en su totalidad. Luego conseguí un retazo de tela que fuera un poco más grande de la esfera para luego forrarla.
Como se muestra en los pasos 1 al 5.

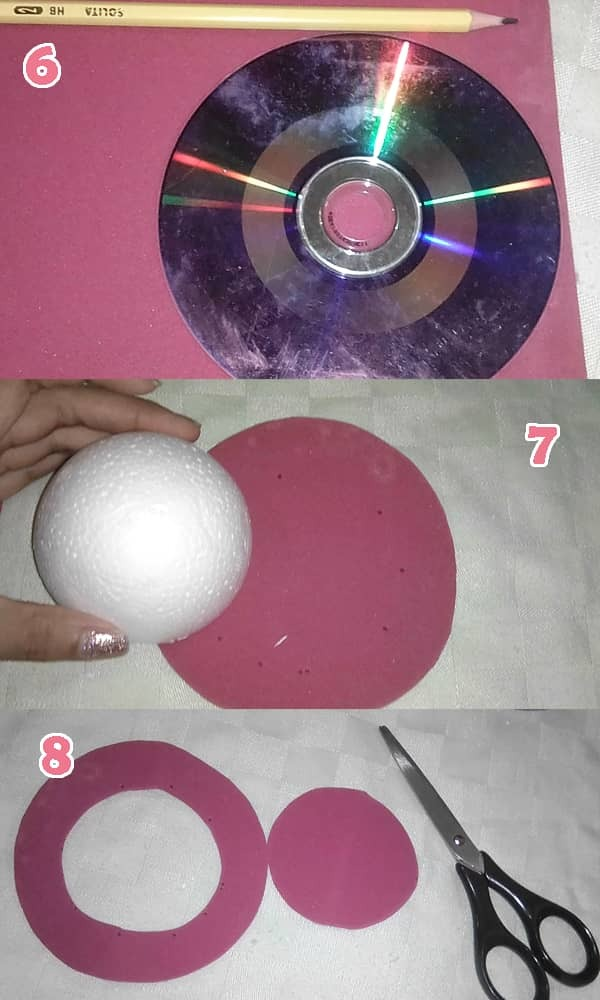
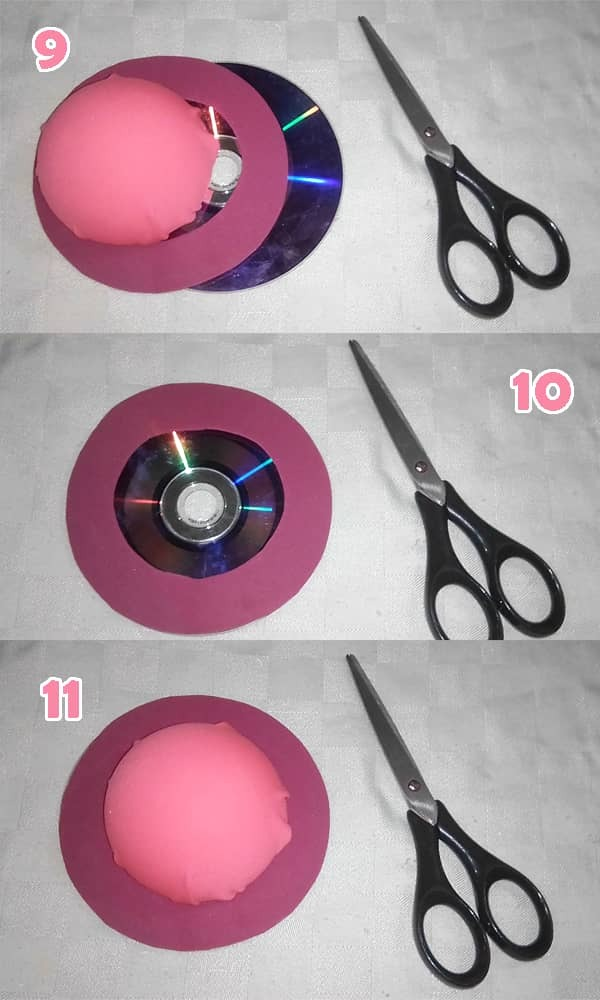
Bien, luego marqué el CD con unos puntitos sobre el foami para cortarlo del mismo tamaño, después, la otra mitad de la esfera la marqué en el centro para posteriormente retirar la parte central del foami. Esta la utilice para hacer una flor, ya verán 😁
En los pasos 6 a 11 se muestra el proceso.
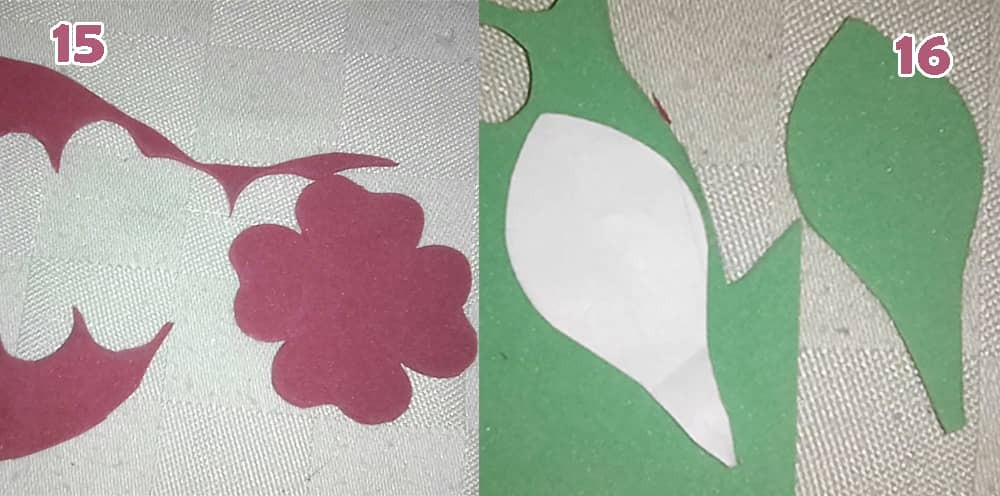
Para hacer las flores más grandes doble un papel en cuatro y en una de las esquinas marqué un corazón, para luego cortar. Al abrir el papel pueden ver la flor que luego se transfiere al foami y cortar también.
Lo ideal es hacer el patrón primero en una hoja para utilizarlo en el foami y quedé lindo y bello😁
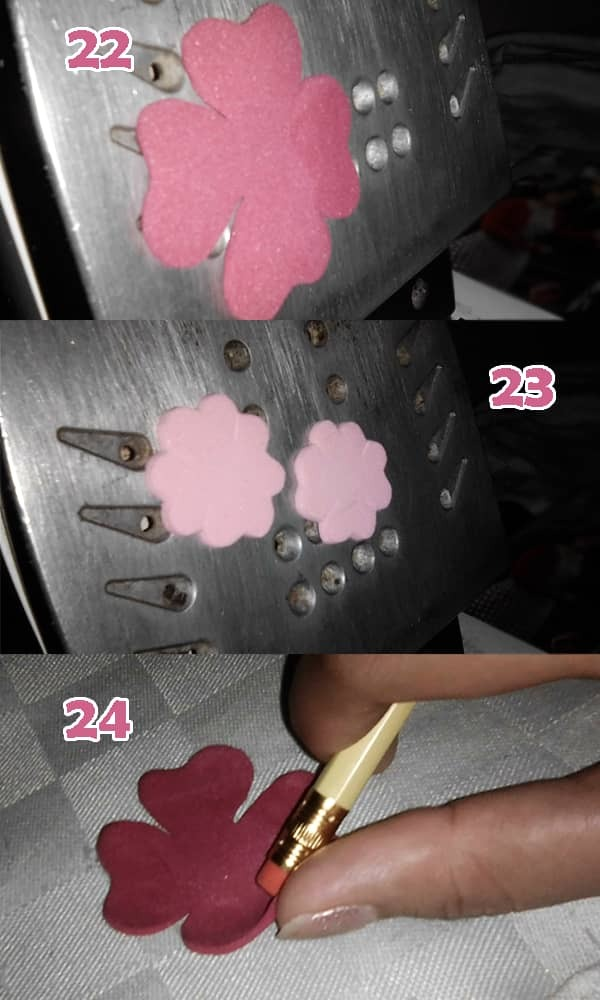
También pueden marcar otro estilo de flor y hojas como hice en las imágenes 12 a 16

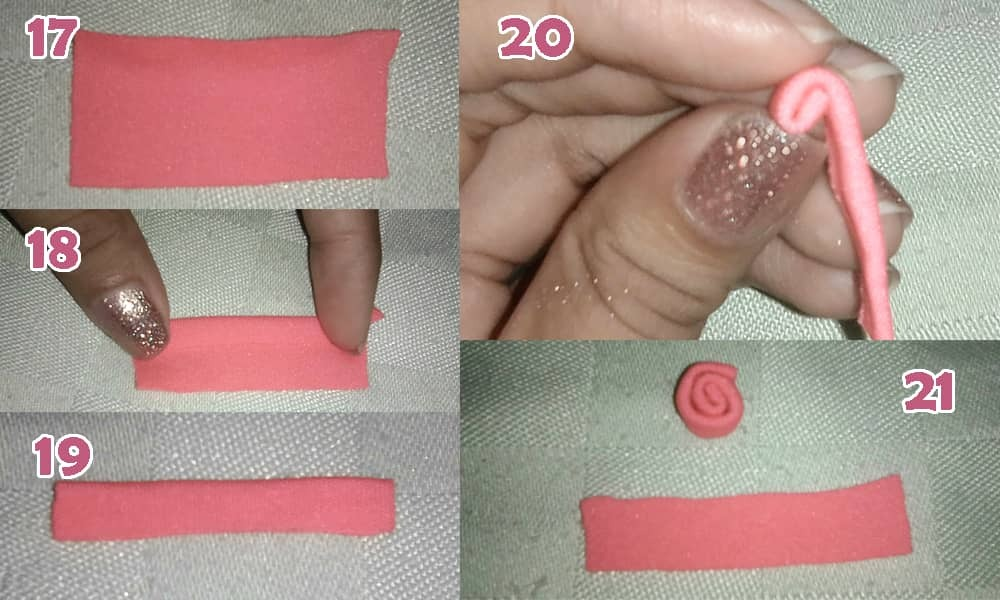
El centro de la flor lo hice con un rectángulo pequeño de tela, que doble para hacer un caracol.
Para que las flores no me quedarán planes las coloque un momentico en la plancha para que tomara una forma onda y luego con la ayuda del borra del lápiz hundí un poco más el borde de los pétalos.
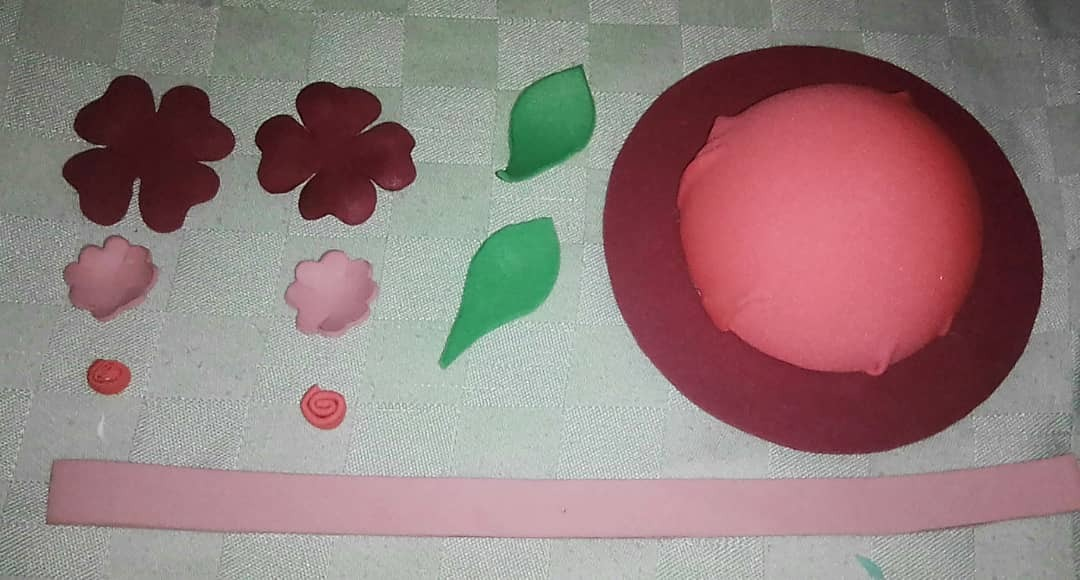
Quise hacerle una cinta con foami en la unión de la esfera con la parte plana del Alfiletero. Acá la pueden ver todas las piezas. Esto ya está casi listo 😄👉
¡A colocar las piezas!
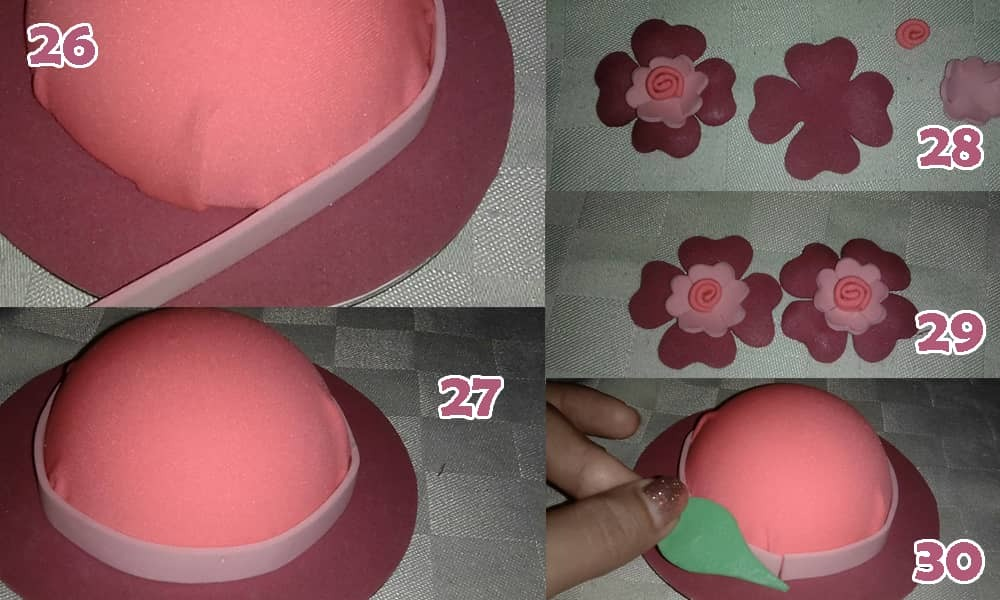
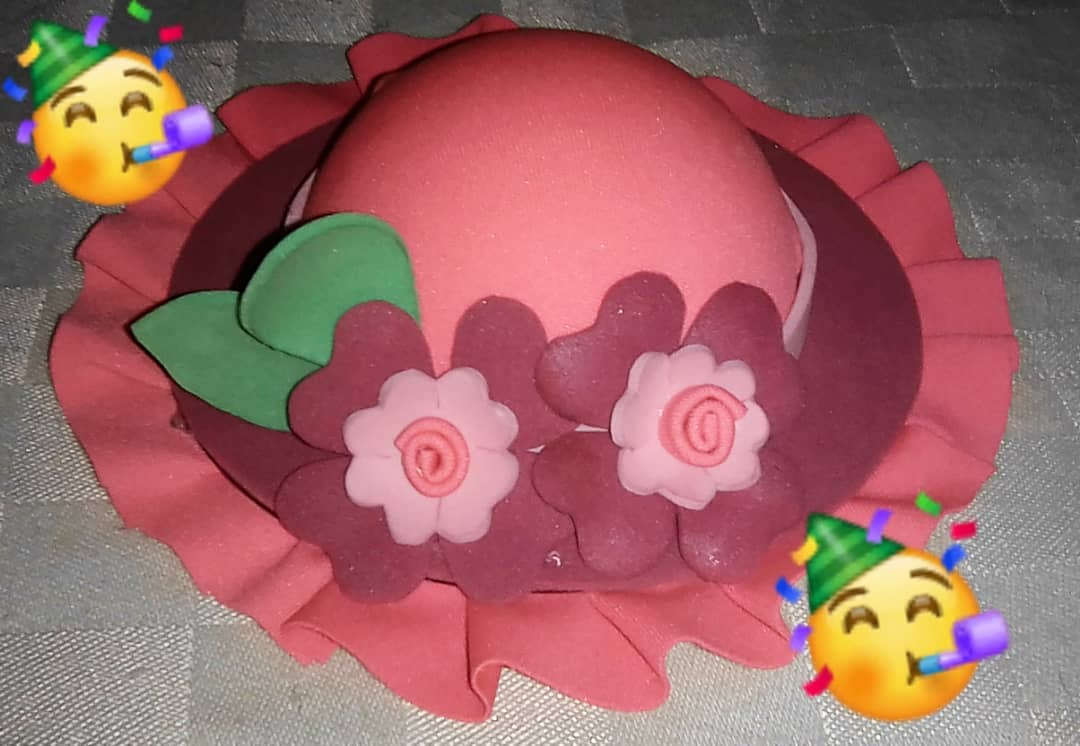
Cuando ya casi lo tenía listo me fijé que le faltaba algo de gracia,🧐 así que le puse un borde plisado con unas tiras de tela en la parte de atrás del CD miren👉

Y ya está listo amig@s
Esperen un momento🤚. Aún falta algo
Me encantó hacer esta manualidad 🤩. Espero puedan hacerla ustedes también en casita y decorarla a su propio estilo 😉.
Gracias, gracias , gracias.!!!
¡Hasta la próxima! 😃
Versión en inglés
Foami & anime fusion. 🌸Pillowcase📌🌸.
Have your pins and needles strewn about? Make a beautiful Pincushion, easy and beautiful, follow these steps 😃👉.
Hello dear friends!!! I am excited to participate in this contest where we have to merge two materials ANIME AND FOAMI.
For which I wanted to make a craft that was not only decorative, but also, functional! 👌😉
As you can see in the cover image it looks very nice! In fact several friends were delighted with the result and asked me to make them some. 😄😄
Thanks to these initiatives on this wonderful platform and fabulous communities how is Hive Diy we can show you how to make yourselves, step by step, this kind of craft. 😃
Let's get started! 😁😁
The materials to use mainly are:
✨An anime sphere #10.
✨Foami in the color of your choice.
✨A CD that you no longer use.
✨ Scissors
✨ Pencil
✨Cloth clippings.
✨Silicone gun
✨Silicone stick
✨A box cutter
The first thing I did was to cut the sphere in half, little by little I introduced the blade and turned it around until it was cut in its entirety. Then I got a piece of fabric that was a little bigger than the sphere and then lined it.
As shown in steps 1 to 5.
Well, then I marked the CD with some dots on the foami to cut it to the same size, then I marked the other half of the sphere in the center to later remove the central part of the foami. I used this one to make a flower, you will see 😁.
Steps 6 to 11 show the process.
To make the flowers bigger I folded a piece of paper in four and in one of the corners I marked a heart and then cut it out. When you open the paper you can see the flower that is then transferred to the foami and cut too.
The ideal is to make the pattern first on a sheet to use it on the foami and it looked nice and beautiful😁.
You can also mark another style of flower and leaves as I did in images 12 to 16.
I made the center of the flower with a small rectangle of fabric, which I folded to make a snail.
So that the flowers would not be too flat, I placed them for a moment on the iron to make a wave shape and then with the help of the pencil eraser I sank a little more the edge of the petals.
I wanted to make a ribbon with foami at the junction of the sphere with the flat part of the pincushion. Here you can see all the pieces. This is almost ready 😄👉.
Let's put the pieces!
When I almost had it ready I noticed that it lacked some grace,🧐 so I put a pleated edge with some strips of fabric on the back of the CD miren👉.
And that's it friends
Wait a moment🤚. There is still something missing
I loved making this craft 🤩. I hope you can make it at home too and decorate it in your own style 😉.
Thank you, thank you, thank you!!!!!
See you next time! 😃
Esto quedó muy bonito. Mucho éxito en el concurso!
Es una super cuchitura tu proyecto. Muchas gracias por participar, mucha suerte en el concurso.
Espectacular quedo tu alfiletero, tengo que hacerle uno a mi mamá que siempre vive botando los alfileres, me encanto como te quedo, muy ingenioso y creativo, suerte en el concurso.
Vaya, que bue trabajo.
Tanto práctico como útil.
Hermoso trabajo, se ve muy bien, te sigo, saludos.
Muchas gracias @equipodelta me encantó participar ! :D Gracias @gaboamc2393 @dayna199019 @ismaelrd04 @comandoyeya, éxitos para ustedes también! :)
Muchas gracias, firme y adelante, saludos.