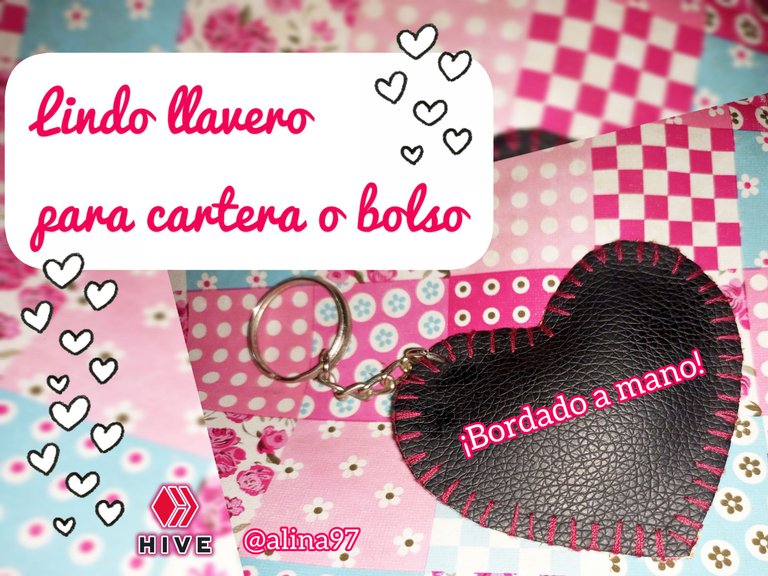
Lindo llavero para cartera o bolso 🤎🖤👜 (Esp / Eng)
¡Hola amigos!, un gusto saludarles nuevamente☺️
En esta ocasión les quiero mostrar cómo hice este lindo llavero de semi-cuero bordado a mano, es súper fácil y además resulta muy económico hacerlo porque utilice retazos de tela. 😃
Este llavero es ideal para llevarlo en nuestras carteras o bolsos, da un estilo súper lindo, jovial y elegante. 👜😉 Asi que les ánimo a que sigan los pasos y vean como pueden hacer su propio llavero decorativo para bolso.😃
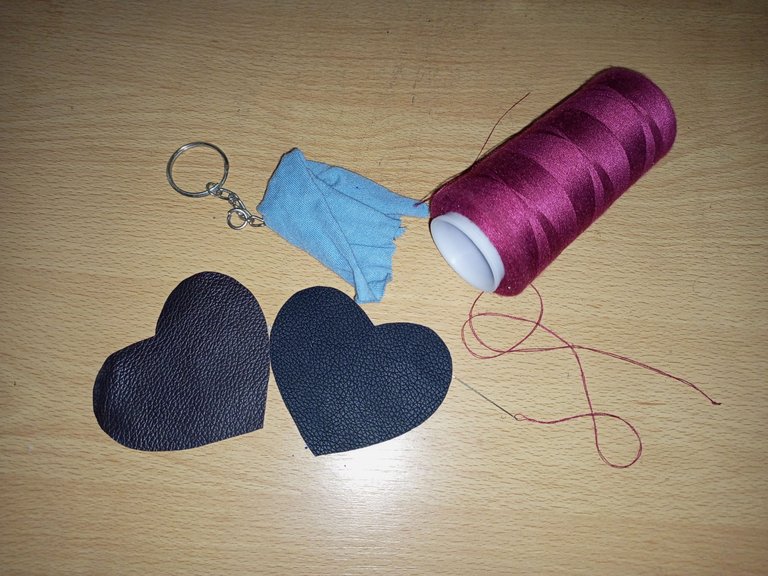
El proceso de elaboración es súper sencillo, pero antes, los materiales que utilicé son los siguientes: 😉
Materiales:
- Retazos de tela de semicuero
- Hilo de coser
- Aguja
- Tijera
- Retazo de tela de algodón
- Argolla y cadena para llavero.
- Pinza
Hello friends! It's a pleasure to greet you again☺️
This time I want to show you how I made this cute hand-embroidered semi-leather keychain, it's super easy and it's also very cheap to do it because I use fabric scraps. 😃
This keychain is ideal to carry in our wallets or bags, it gives a super cute, jovial and elegant style. 👜😉 So I encourage you to follow the steps and see how you can make your own decorative bag keychain.😃
The elaboration process is super simple, but first, the materials that I used are the following: 😉
Materials:
- Scraps of semi-leather fabric
- sewing thread
- Needle
*Scissors- Cotton fabric scrap
- Ring and chain for keychain.
- Tweezers
Para empezar, trace la forma de un corazón en el lado posterior de la tela con una tiza.
To start, trace a heart shape on the back of the fabric with a piece of chalk.

Doble el retazo a la mitad, y luego marque la mitad de un corazón.
Al hacer un solo corte con la tela doblada en dos el resultado es un corazón simétrico, es decir con la misma forma de ambos lados.
Este corazón lo utilice como guía para hacer el otro en la tela marrón.
Sujeté ambas telas para hacer un trazo y corte preciso.
Fold the patch in half, and then score half a heart.
By making a single cut with the fabric folded in two, the result is a symmetrical heart, that is, with the same shape on both sides.
Use this heart as a guide to make the other one on the brown fabric.
I clamped both fabrics to make a precise trace and cut.
Bordado a mano
Este bordado lo pueden realizar con hilo de coser normal, pero si desean utilizar otro hilo más resistente, cómo el nailon por ejemplo, también puede servir.
Hand embroidery
This embroidery can be done with normal sewing thread, but if you want to use another more resistant thread, such as nylon, it can also be used.
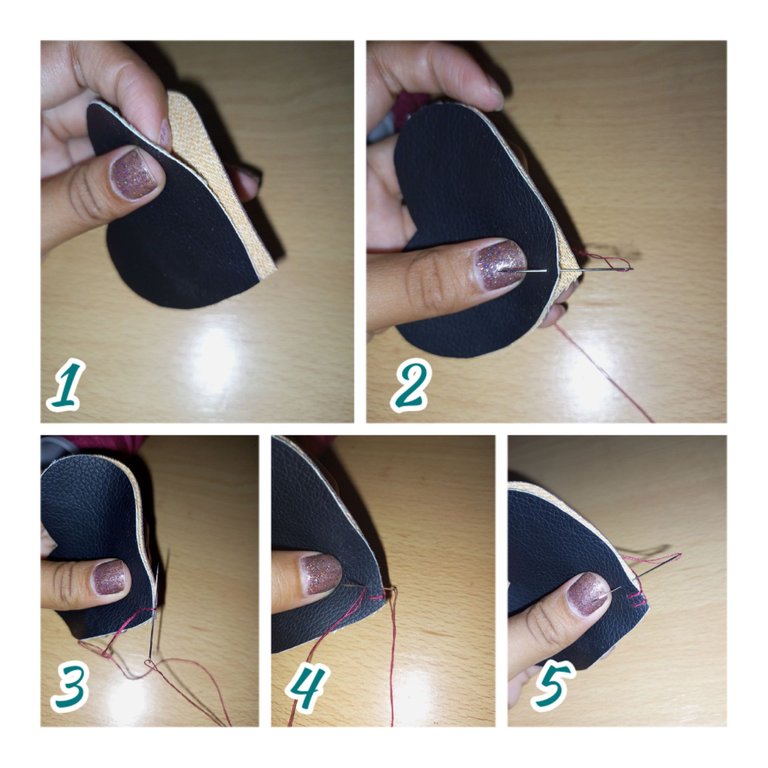
Enfrenté los dos corazones por su lado tracero, dejando el semi-cuero a la vista por los dos lados.
La primera puntada la hice en la punta del corazón, metiendo la aguja entre los dos retazos, para que el nudo quede adentro y no se vea.
Luego de sacar la aguja, doy la vuelta y la introduzco de atrás hacia alante dejando ver la primera puntada, luego bordeó esa puntada con la aguja entre los dos corazones de derecha a izquierda.
Vuelvo a introducir la aguja por dentro, hacia afuera para hacer la siguiente puntada.
Al sacar la aguja, la paso por detrás y meto la aguja en el mismo punto que ya hice, luego vuelvo a hacer lo mismo que en el punto número 3.
I faced the two hearts on their rear side, leaving the semi-leather visible on both sides.
I made the first stitch at the end of the heart, inserting the needle between the two pieces, so that the knot remains inside and cannot be seen.
After removing the needle, I turn and insert it from back to front, revealing the first stitch, then skirted that stitch with the needle between the two hearts from right to left.
I reinsert the needle in, out to make the next stitch.
When removing the needle, I pass it behind and insert the needle in the same stitch that I already did, then I do the same as in stitch number 3.
Antes de cerrar el bordado.
Bien, antes de culminar nuestra costura a mano, procedemos a darle volumen a nuestro corazón para que se vea más coqueto y no quede plano, no es necesario utilizar algodón, si no tenemos, no hay problema, yo utilice una tira de tela.
Before closing the embroidery.
Well, before completing our hand sewing, we proceed to give volume to our heart so that it looks more flirtatious and does not remain flat, it is not necessary to use cotton, if we don't have it, no problem, I used a strip of fabric.
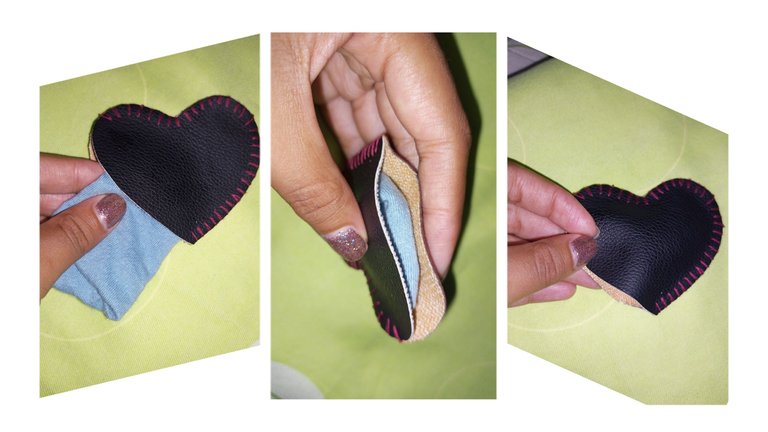
Después que acomodamos bien el relleno, ya podemos continuar el bordado hasta cerrar por completo la costura.
After we accommodate the filling well, we can continue the embroidery until the seam is completely closed.
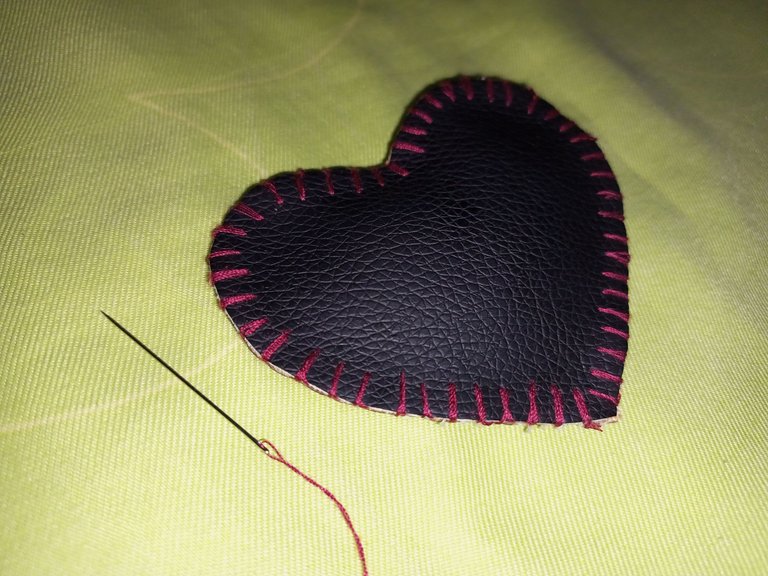
¡Ya está listo nuestro corazón! 😃🖤🤎
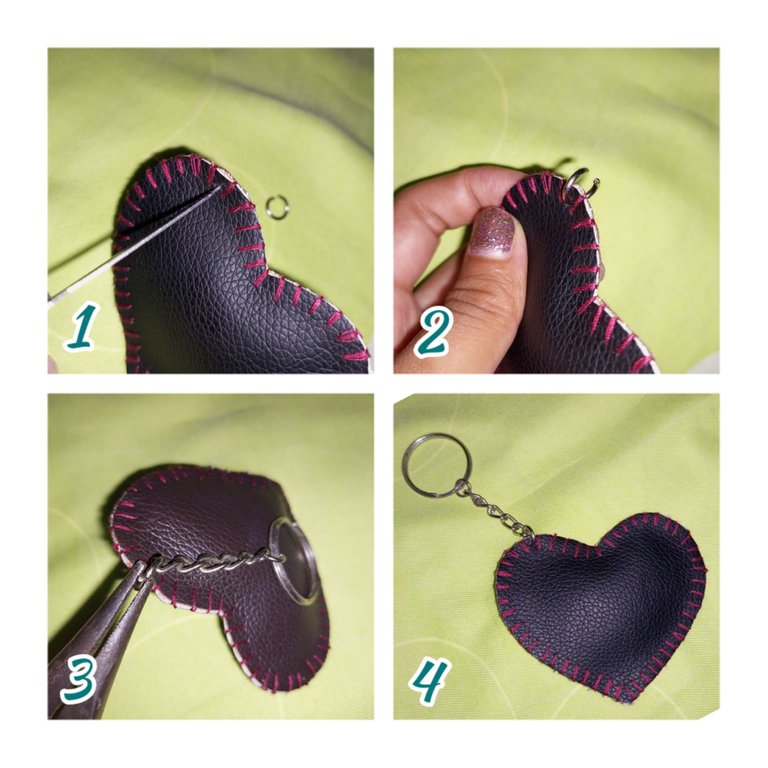
Ahora solo falta colocarle la cadera y la argolla para colgarlo de la carte y bolso. Para colocarla lo hice muy sencillo. Con la duda de una herramienta punzante, (yo utilice un cortaúñas 🤭) abrí un pequeño agujero en el borde del corazón, allí coloque el aro más grandecito de la cadena, coloque el resto de la cadena y cerré con la ayuda de una pinza. ⛓️
Our heart is ready! 😃🖤
Now all that remains is to place the hip and the ring to hang it from the cart and bag. To place it I made it very simple. With the doubt of a sharp tool, (I used a nail clipper 🤭) I opened a small hole on the edge of the heart, there I placed the largest ring of the chain, placed the rest of the chain and closed with the help of a pliers. ⛓️
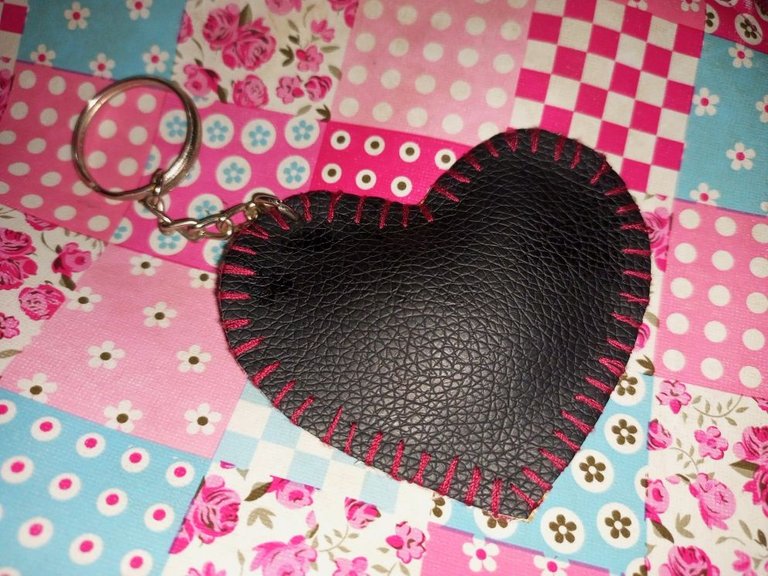
¡Ahora sí, está listo nuestro llavero para bolso o cartera! 👜🖤🤎
Now yes, our bag or wallet key ring is ready! 👜🖤
Esto fue todo por hoy amigos y amigas, espero puedan hacer su propio llavero con diferentes formas y colores. ☺️💚❤️💜💛 ¡Gracias llegar hasta acá! 🤗🤗
This was all for today friends, I hope you can make your own keychain with different shapes and colors. ☺️💚❤️💜💛 Thank you for getting here! 🤗🤗
¡Hasta la próxima! Gracias por visitar mi blog. Todas las imágenes son de mi propiedad.
Thank you for sharing this post on HIVE!
Your content got selected by our fellow curator rezoanulvibes & you just received a little thank you upvote from us for your great work! Your post will be featured in one of our recurring compilations which are aiming to offer you a stage to widen your audience within the DIY scene of Hive. Next time make sure to post / cross-post your creation within the DIYHub community on HIVE and you will receive a higher upvote ;) Stay creative & HIVE ON!
Please vote for our hive witness <3
Amiga que lindo trabajo, me gustó mucho y de manera sencilla.. te felicito 😊
Hola Alina. Que lindo detalle para adornar nuestras pertenencias, siempre es lindo llevar con nosotros algo hecho a mano. El hilo contrastando fue una gran elección.
Te felicito! Saludos ❣️
Un llavero siempre será una creación muy útil, este que muestras es fácil de hacer, pero muy lindo gracias por compartir.