Today I'm going out and I thought, why not share my step by step makeup that I love and use all the time? So it is! Let's go?
_____________________
Hoy salgo y pensé, ¿por qué no compartir mi maquillaje paso a paso que amo y uso siempre? ¡Así es! ¿Vamonos?
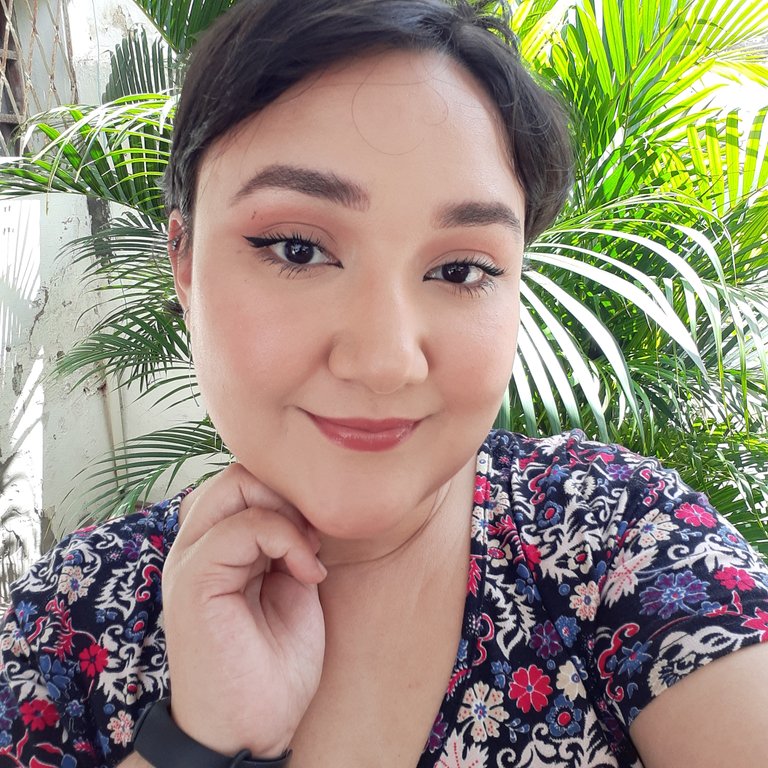
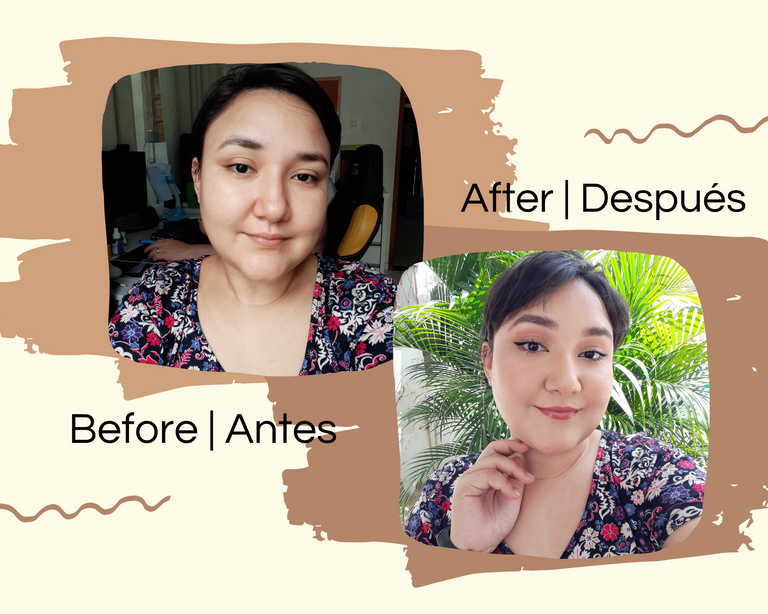
This makeup is very beautiful in my perception! It's simple, easy and quick to do. What's more, I use it on many occasions, whether it's going out to lunch or even meeting friends at night. It's not a party makeup but you can adapt well if you want.
I love pink/rosé tones because I think they give an air of health and “I woke up like this”.
For me, less is more and in makeup it couldn't be different! I believe that when we use a large amount of product we can often cover up our own unique characteristics and I prefer a look that doesn't lose its naturalness without giving up covering some imperfections.
_____________________
¡Este maquillaje es muy hermoso en mi percepción! Es simple, fácil y rápido de hacer. Es más, lo uso en muchas ocasiones, ya sea para salir a comer o incluso quedar con amigos por la noche. No es un maquillaje de fiesta pero puedes adaptarte bien si quieres.
Me encantan los tonos rosas/rosados porque creo que dan un aire de salud y “me desperté así”.
Para mí, menos es más y en maquillaje no podría ser diferente! Creo que cuando usamos una gran cantidad de producto muchas veces podemos tapar nuestras propias características únicas y prefiero un look que no pierda su naturalidad sin renunciar a tapar algunas imperfecciones.
Without further ado, let's show you this makeup step by step.
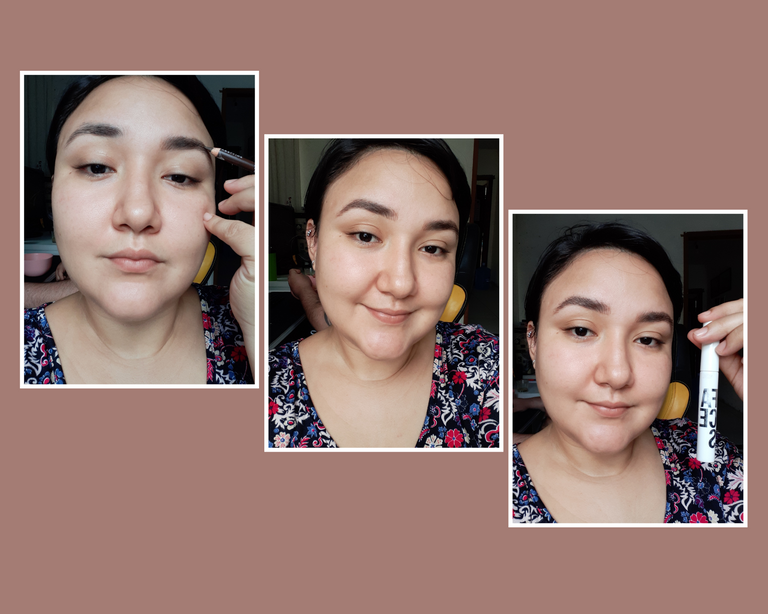
The materials needed are very simple and I believe they all have them if they want to reproduce. These are:
- Eyebrow pencil;
- Colorless mask;
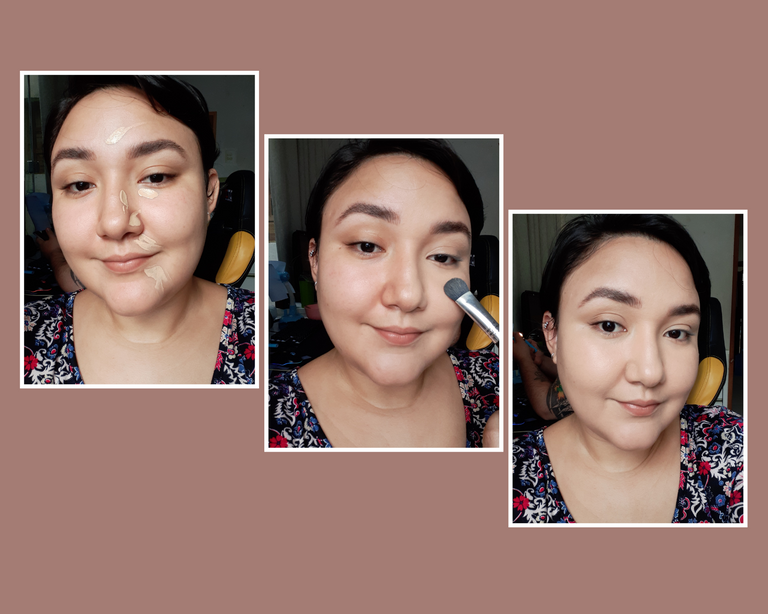
- Foundation or concealer for your skin tone;
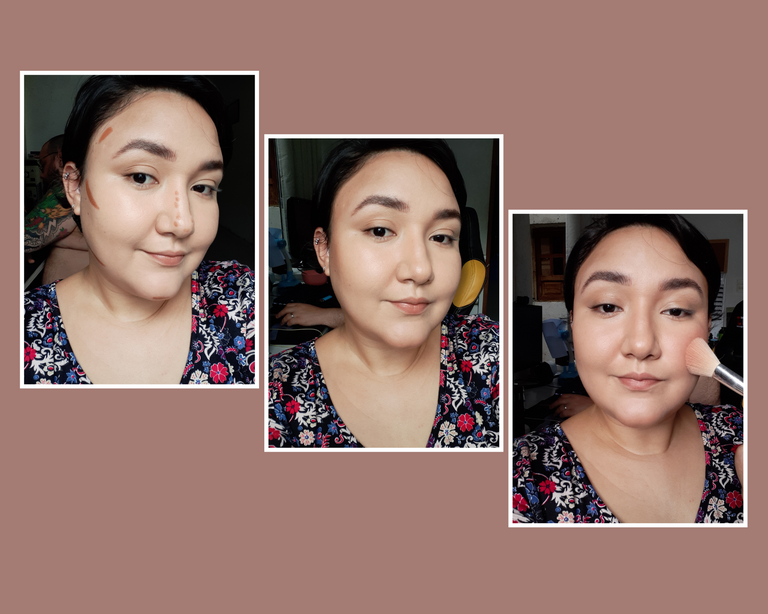
- Contour cream and powder (you don't need to use both if you don't want to);
- Blush;
- Illuminator;
- Loose banana powder;
- Rosé eye shadow;
- Pen, liquid or paste eyeliner;
- Eyelash mask;
- Lip balm and cocoa butter.
_____________________
Sin más preámbulos, vamos a mostrarte este maquillaje paso a paso.
Los materiales necesarios son muy sencillos y creo que todos los tienen por si quieren reproducir. Son estos:
- Lápiz de cejas;
- Máscara incolora;
- Base o corrector según tu tono de piel;
- Contorno en crema y polvo (no hace falta que uses los dos si no quieres);
- Rubor;
- Iluminador;
- Polvo de plátano suelto;
- Sombra de ojos rosé;
- Delineador en lápiz, líquido o en pasta;
- Mascara de cilios;
- Bálsamo labial y manteca de cacao.
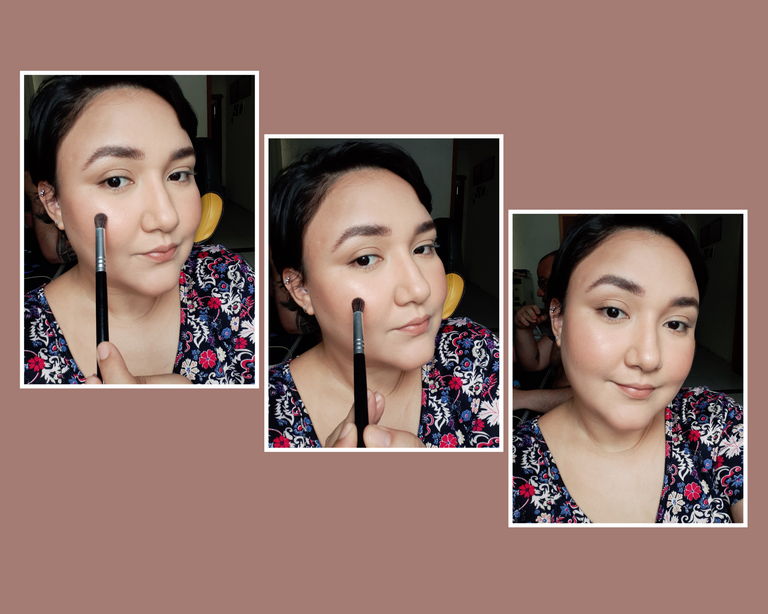
Step 1: Fix eyebrows
Here I use a brown eyebrow pencil and then I apply a colorless mask to give more texture to the wires and leave it in place.
_____________________
Paso 1: arreglar las cejas
Aquí uso un lápiz de cejas marrón y luego aplico una máscara incolora para darle más textura a los alambres y dejarlo en su lugar.
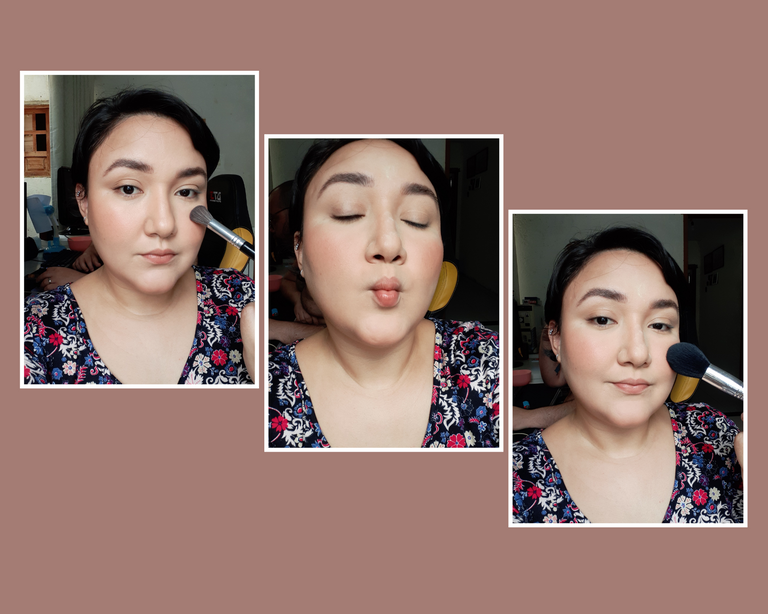
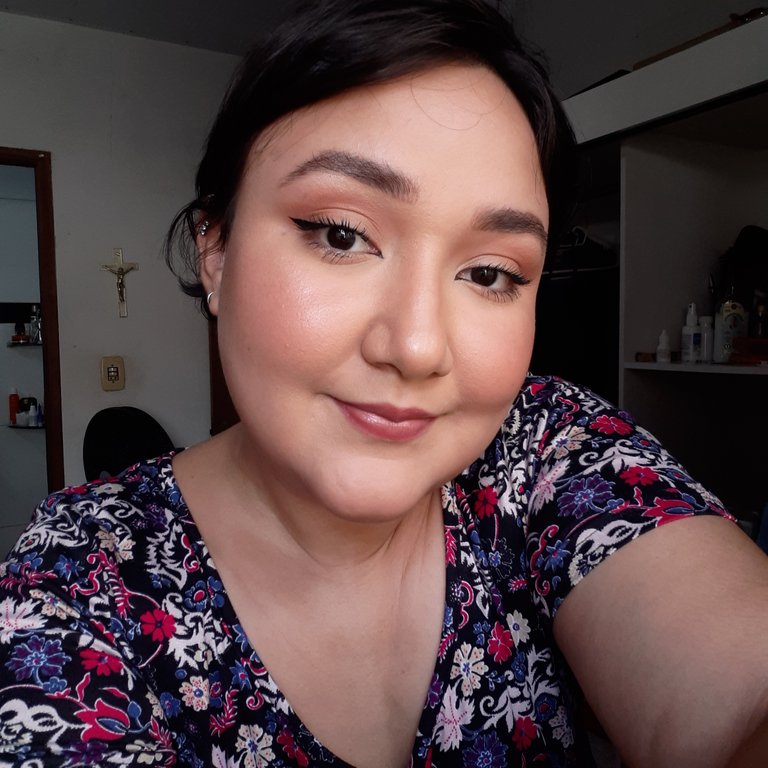
Step 2: Skin
Soon after I start applying my foundation+concealer. I apply in the center of the face a little in the center of the forehead, in the dark circles, side of the nose and chin. I spread it with a fluffy brush.
Then I apply creamy contour to subtly return the shadows of the face.
After spreading the contour with a sponge, I apply the blush
I also apply loose banana powder only in a few spots that I want to seal the concealer and foundation, such as under the eyes, nose, forehead, chin and then I use a larger brush to sweep this powder and use what's left on the other parts of the face.
To finish the skin, I use a highlighter above the cheekbones and below the eyebrows very subtly too.
_____________________
Paso 2: Piel
Poco después empiezo a aplicar mi base + corrector. Aplico en el centro del rostro un poco en el centro de la frente, en las ojeras, costado de la nariz y barbilla. Lo extendí con un cepillo esponjoso.
Luego aplico contorno cremoso para devolver sutilmente las sombras del rostro.
Después de extender el contorno con una esponja, aplico el rubor.
También aplico polvo de plátano suelto solo en algunos lugares que quiero sellar el corrector y la base, como debajo de los ojos, la nariz, la frente, la barbilla y luego uso un cepillo más grande para barrer este polvo y uso lo que queda en el otro partes de la cara.
Para terminar la piel, uso un iluminador arriba de los pómulos y debajo de las cejas muy sutilmente también.
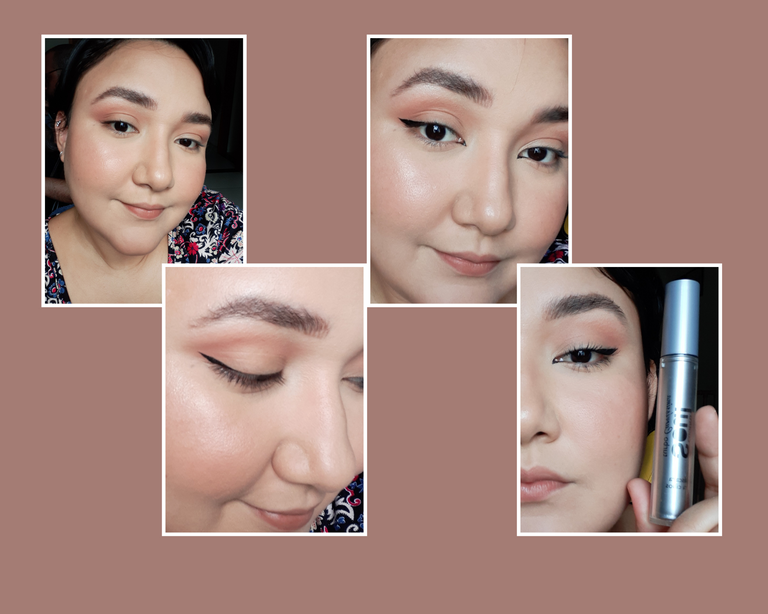
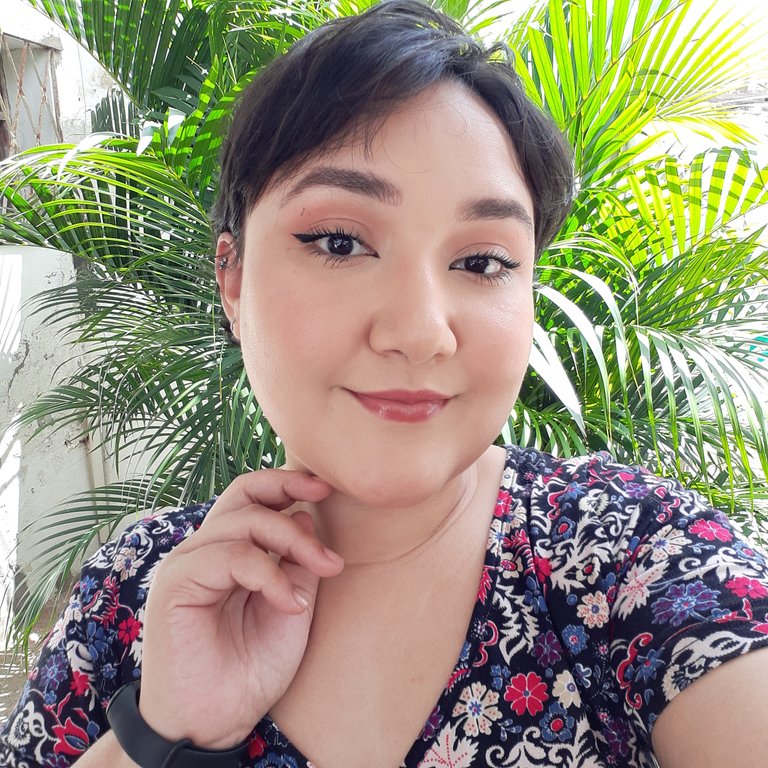
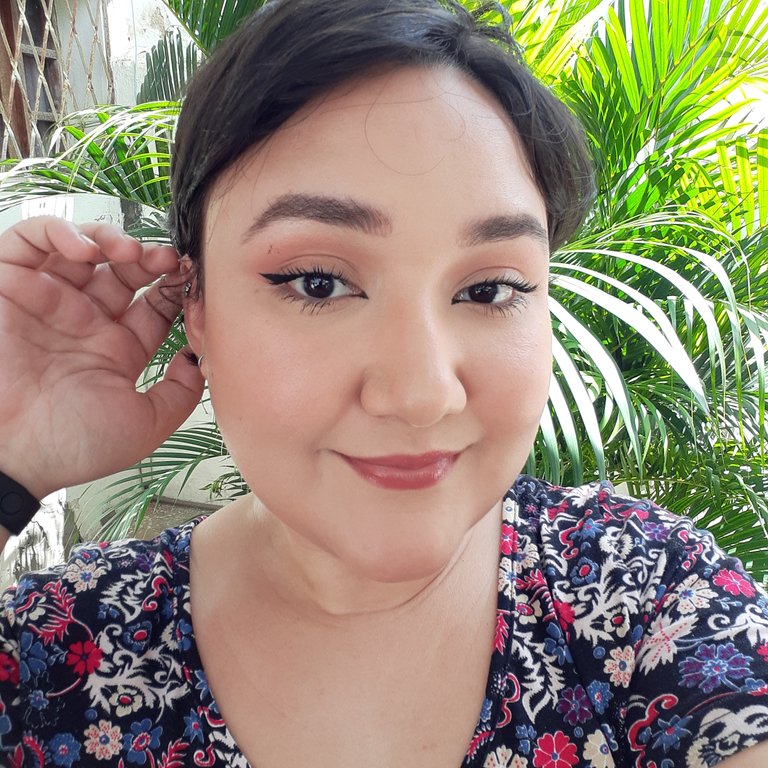
Step 3: Eyes
The eye is pretty simple: a rosé eyeshadow is all you need. Voile!
I blend a little eyeshadow into the crease and that's it.
After that I already made my cat eyeliner. I didn't think much and decided to make an outlined detail in the inner corner of the eye! It gave an incredible charm to the look.
To finish the eye I applied a mascara on the upper and lower lashes.
_____________________
Paso 3: Ojos
El ojo es bastante simple: una sombra de ojos rosada es todo lo que necesitas. Voile!
Difumino un poco de sombra de ojos en el pliegue y listo.
Después de eso ya hice mi delineador de ojos de gato. No lo pensé mucho y decidí hacer un detalle delineado en el ángulo interno del ojo! Le dio un encanto increíble al look.
Para terminar el ojo apliqué una máscara de pestañas en las pestañas superiores e inferiores.
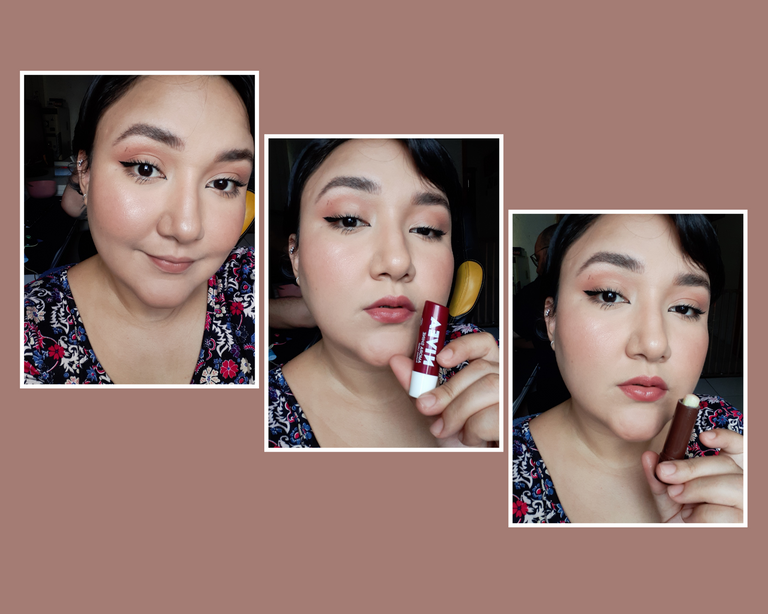
Step 4: Mouth
In the mouth I used two balms: one with color and another colorless, more hydrating. I love ❤️
_____________________
Paso 4: Boca
En boca utilicé dos bálsamos: uno con color y otro incoloro, más hidratante. Me encanta ❤️
The idea here is a versatile makeup for everyday life, but I believe that a glitter would already give a very interesting up in the look if you want to adapt for a party. False eyelashes also make all the difference in the look and are super valid for a more elaborate production.
And that's the makeup! I loved making it and I hope you enjoyed it! 🤩
✨If you've read this far, thank you so much for your time!✨
See you soon in the next post! 😉
📸 Images of my authorship. Montage made in Canva. Photos with natural light and without editing.
®️ Original Content Created by me for Hive. ®️
_____________________
La idea aquí es un maquillaje versátil para el día a día, pero creo que un glitter ya le daría un up muy interesante al look si lo quieres adaptar para una fiesta. Las pestañas postizas también marcan la diferencia en la mirada y son súper válidas para una producción más elaborada.
¡Y ese es el maquillaje! ¡Me encantó hacerlo y espero que lo hayan disfrutado! 🤩
✨Si has leído hasta aquí, ¡muchas gracias por tu tiempo!✨
¡Nos vemos pronto en el próximo post! 😉
📸 Imágenes de mi autoría. Montaje realizado en Canva. Fotos con luz natural y sin editar.
®️ Contenido original creado por mí para Hive. ®️
🌻
Congratulations @alyxcarol! You have completed the following achievement on the Hive blockchain and have been rewarded with new badge(s):
Your next payout target is 50 HP.
The unit is Hive Power equivalent because post and comment rewards can be split into HP and HBD
You can view your badges on your board and compare yourself to others in the Ranking
If you no longer want to receive notifications, reply to this comment with the word
STOPCheck out the last post from @hivebuzz:
Support the HiveBuzz project. Vote for our proposal!
Que pele é essa, hein? Maravilhosa! Adorei a make.