Building The Garden Railway, Part 3, Making Track
Hello, hivers!
For part 3 of my series on building my garden railway, I'll show you how I make the track, and building a turnout.
The first part of making the track is the rails. You can buy 1 inch tall aluminum rail for making track, but the shipping is expensive enough that it's not worth buying a few pieces at a time. If I lived within 100 miles of a dealer, I would drive there and pick it up, but the nearest place that I could get the rail from is about 300 miles away from where I live.
Another way to make track is a method that is referred to as "groovy track". People who use this method use flat steel bar stock that it usually about 3/8ths of an inch thick and 1-1/4 to 1-1/2 inch wide. They cut grooves into the wood ties, or sleepers as they call them in Great Britain, that are just wide enough to be a tight fit for the bar stock and then pound the ties onto the bar stock. The grooves are cut so that the inside of each piece of bar stock is the proper distance apart for the track gauge that they're building. I hadn't heard of this method until several years after I built my track in it's first location.
For my rails, I use steel T posts. These are a fence post that is familiar to anyone who has built farm fences, especially electric fences for horses or cows. It's called a T post, because that's the shape of it, looking at it from the end of the post. A T post has a shape that is similar to a railroad rail, except that the top is thinner than the head of a rail. The main problem with using a T post for a rail is all the "lumps" on the flat side of the post. The flat side is what sits on the ties, and the lumps interfere with that. When I was first experimenting with building track, I tried cutting grooves in the ties for those lumps to fit into so they would sit flat on the ties. That was partly successful, but you have to cut the grooves just the right distance apart in order for the rails to be the right distance apart. In the case of my track, that is 7-1/2 inches inside edge to inside edge of the rails. In the northeast U.S. and Canada, and Great Britain, that is usually 7-1/4 inch gauge. There are other gauges, both wider and more narrow, that people build for their ride on miniature trains, but the 7-1/2 and 7-1/4 gauges are among the most common, and the easiest to get parts for, such as wheels.
For my ties, I use treated wood so that it won't rot very fast with direct ground contact. I dig through the stacks at the big box store to find a 2x6 or 2x8 with as few knots as possible, and I rip them into 2 inch wide strips on my little table saw. Then I cut the ties from the strips. The ties are 1-1/2 inches by 2 inches by 20 inches long. They don't have to be that long, they would work just as well at 16 inches long. I just like the way the longer ties look. They give the track a "narrow gauge" look as opposed to a mainline track look.
The way that I make my track now is to cut the lumps off of the T posts with an angle grinder and an abrasive cutoff wheel. I usually don't cut all the lumps off, just the ones where the rail will be sitting on the ties. This is couple of pictures to show the before and after.
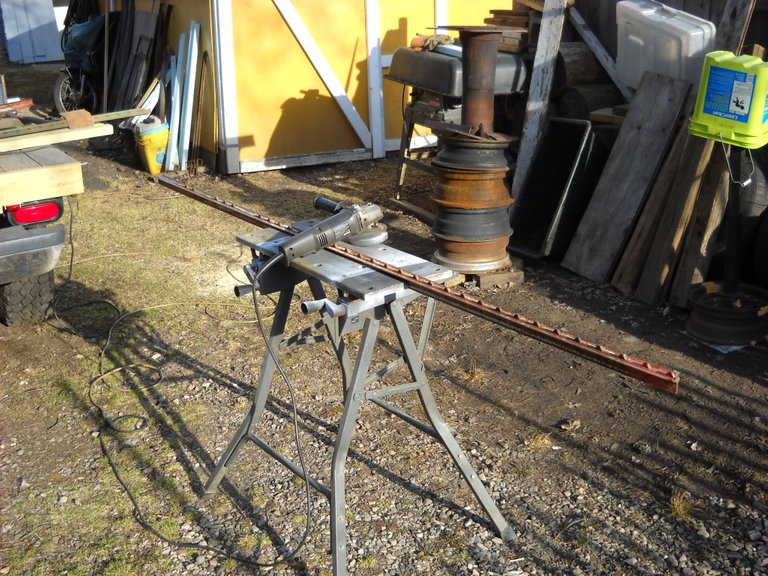
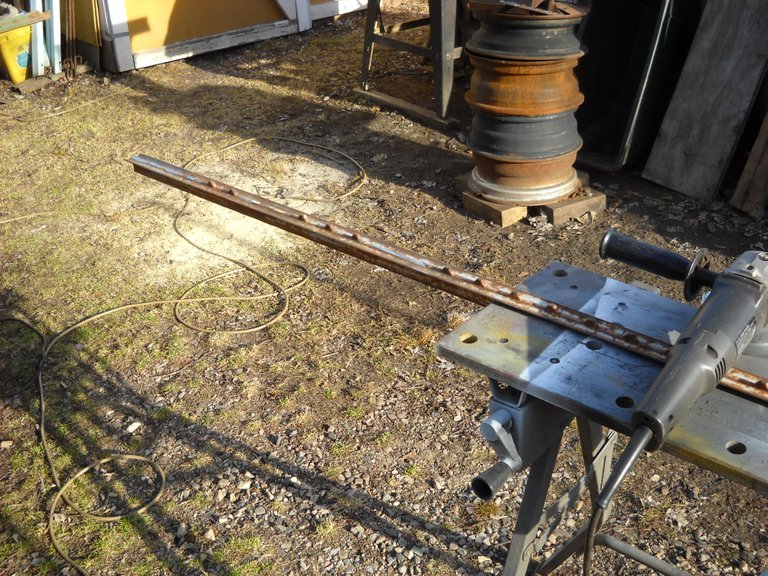
I cut enough of the lumps off to give me some adjustment room for the position of the ties.

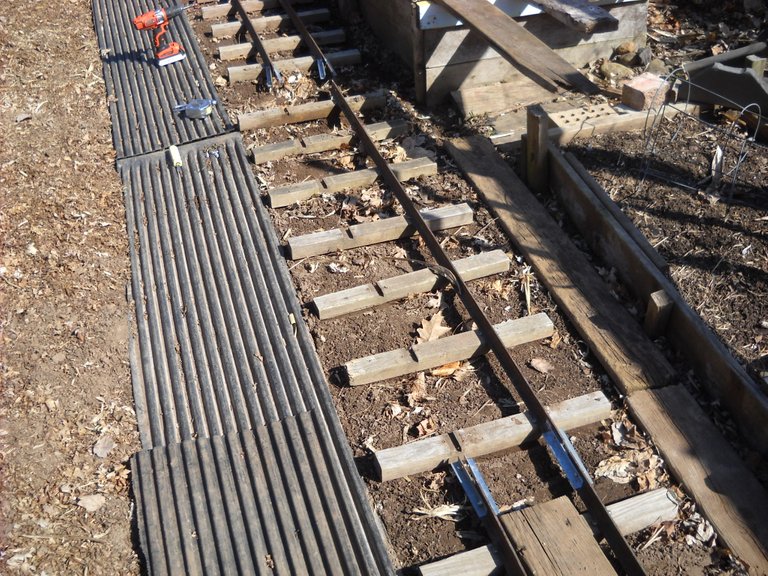
Here's an example of one of my older track sections. I had to modify this section because I couldn't get the rails into the proper gauge, the grooves were slightly in the wrong place, making the gauge too narrow.
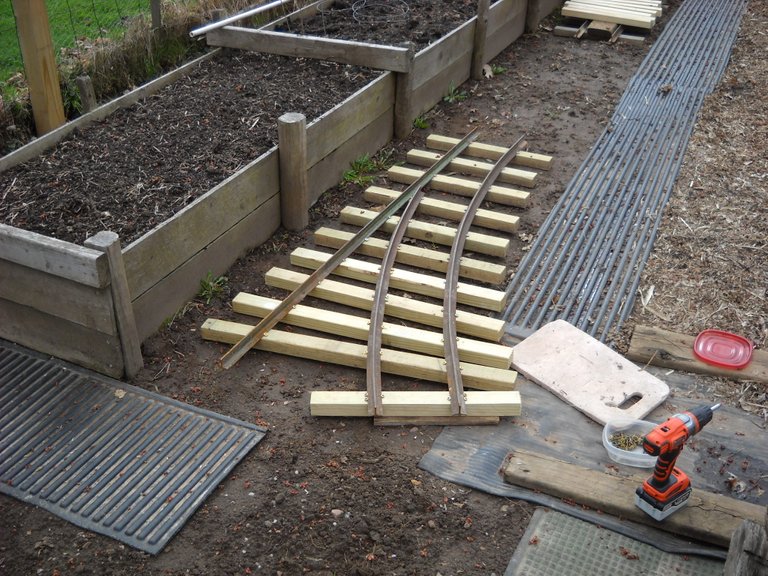
One of the pieces of track that I decided to build early in the process of setting up the track in the garden was a turnout. A turnout gives me the option of building a different route for the track beside going to the greenhouse. With the turnout in place, I could switch between the curve going to the greenhouse, or going straight on a different section of track.
Building a turnout is an "interesting" project. One rail is straight, and the other rail is curved. Then there's all the other parts that go in between the outside rails so that the wheels can go one way or the other.
I had to bend a rail to be able to figure out the dimensions for the rest of the parts.
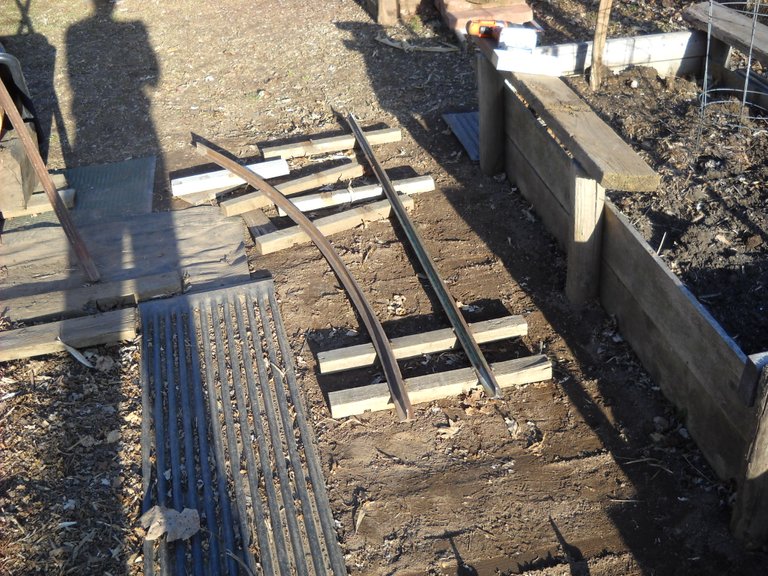
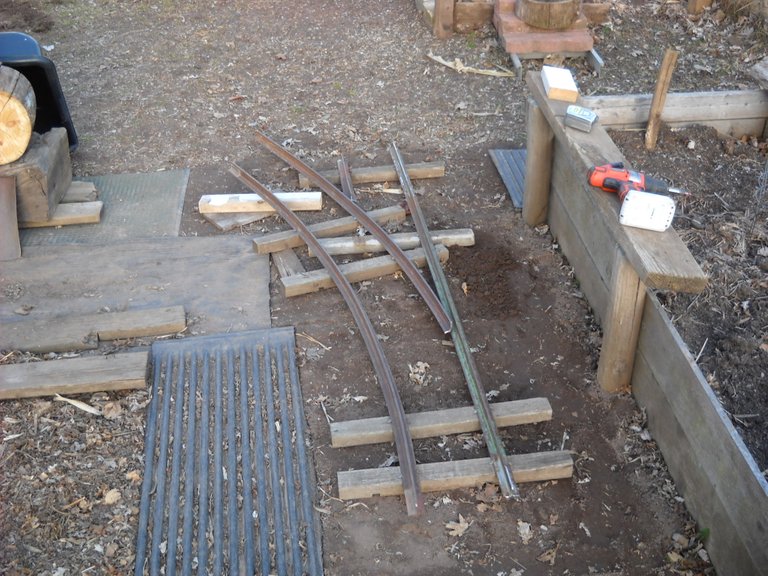
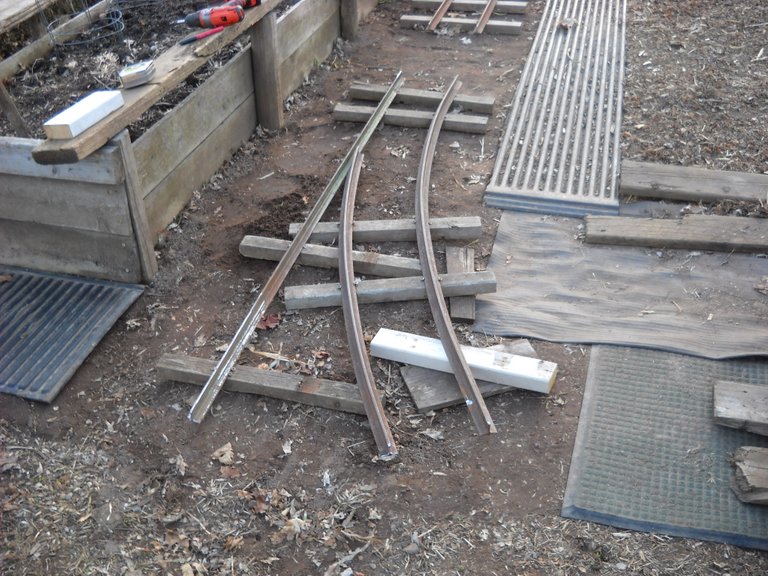
Bending the outside rail of the curve, the rain in the middle, was a bit tricky. I had to get it to match the other rail properly for the curve so that it would be in gauge around the entire curve. I had made a track gauge from a piece of a 2x4 cut to as close to 7-1/2 inches as I could manage. With that and my tape measure, I was able to build the turnout for the curved part.
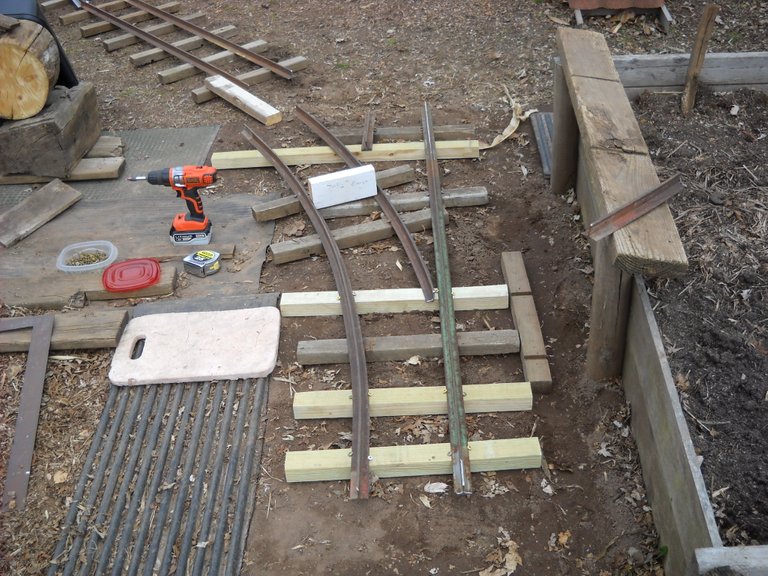
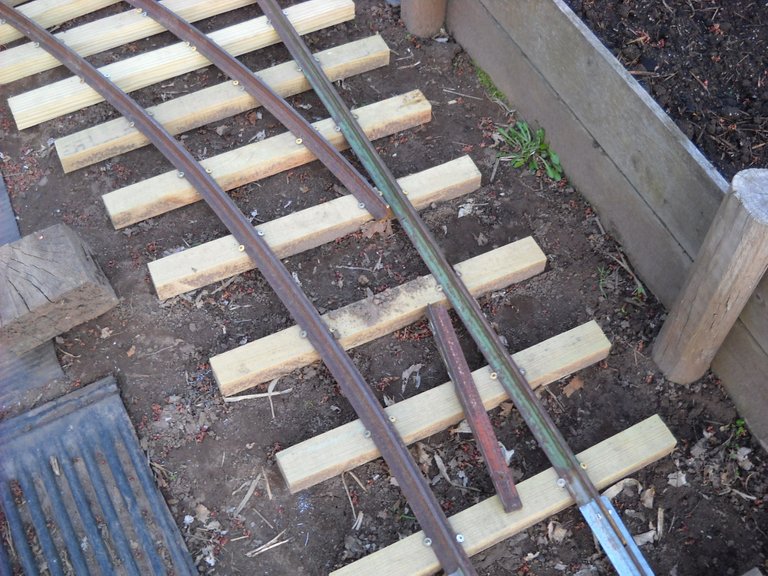
For building the track, I use screws that are made for treated wood that have what I call a washer head and are 1-1/4 inches long. I tried the 1 inch long ones but they didn't hold the rails in place as well as the longer screws.
Once I had the positions of the rails figured out, I cut the necessary longer ties to finish building the turnout.
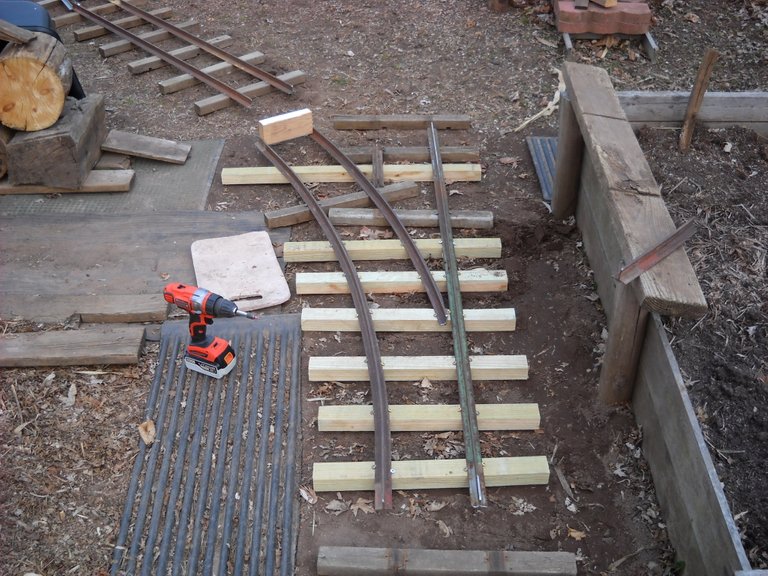
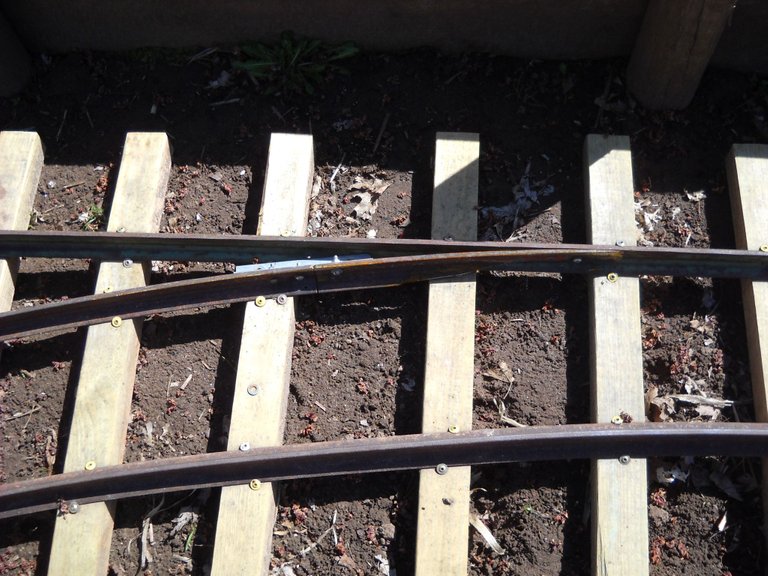
There was one more piece that I needed to make for the turnout to complete the curved side. That is the short section called a point that connects the rest of the curve to the main track. The point is the piece that guides the wheels into the curve. Turnouts usually have 2 points that move together to align the track for either the straight or the curved direction. I only needed the one point at that time because I didn't have any track going straight.
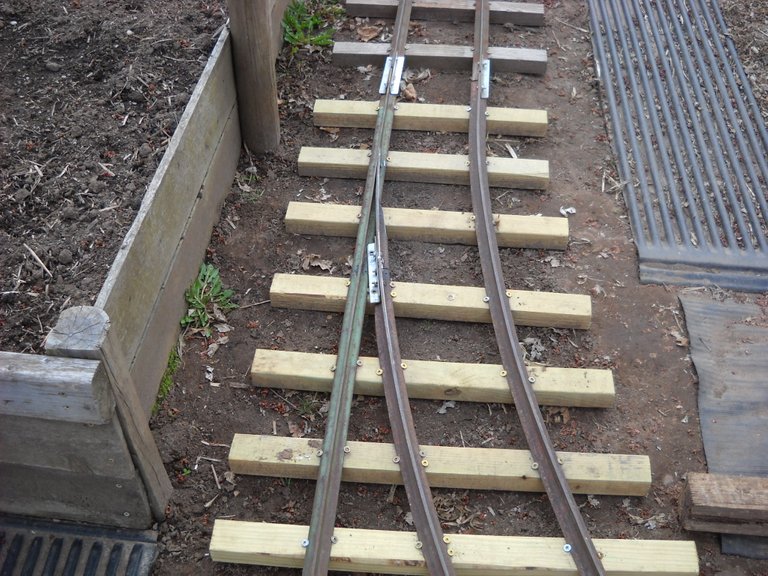
The point is held in place with machine screws right now so that it doesn't move.
I haven't built the other parts for the straight part of the turnout yet because I still haven't built any track going straight past the turnout. That will probably wait until next year.
That's all I have for this post. In my next post about the track, I'll continue with the building of the rest of the track.
Thanks for stopping by to check out this post! I hope you found it interesting.

That' so crazy, thumbs up :)
!LUV
<><
@amberyooper, you've been given LUV from @sifondeseltz.
Check the LUV in your H-E wallet. (1/1)
Thank you!
Seriously impressed with your skills, patience and dedication! Thanks for sharing.
!PIZZA
Thanks!
PIZZA Holders sent $PIZZA tips in this post's comments:
@tdctunes(5/20) tipped @amberyooper (x1)
Learn more at https://hive.pizza.
My 1st thought when I saw this post was , "Oh, goody! Another railroad one!" And I wasn't disappointed! The building of the turnout is cool!
Thank you!
Wow, can’t wait to see this thing hauling goodies from one place to another. Impressive work 🙌🏼 I’m a complete ignorant when it comes down to metal working, the only metal I know my way around is music hehe