Building The Garden Railway, Part 6, Weed Barrier Under The Track
Hello, hivers!
In my last garden railway post, I talked about getting the turnout set up, and connecting the track from the greenhouse to the turnout. In this post, I'll be talking about working on the track through the garden.
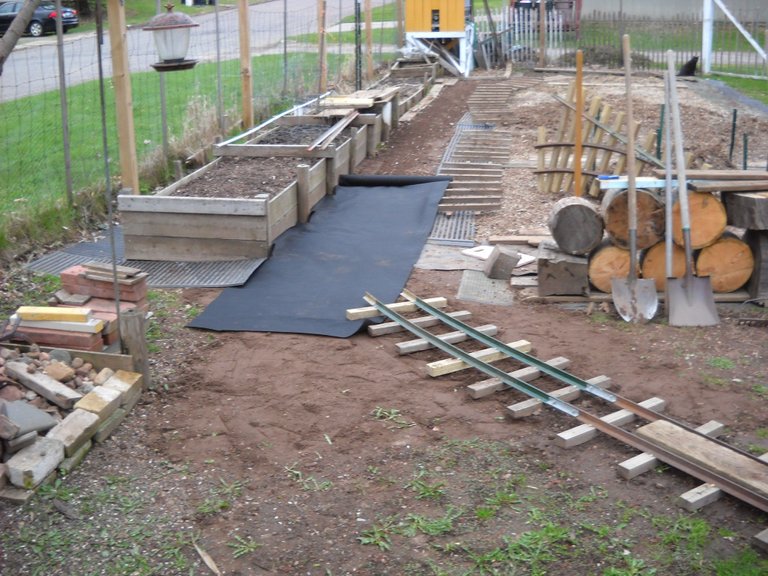
At the end of April, I decided that I wanted to put weed block cloth under the track through the garden because I didn't want weeds growing up through the track. I was also thinking about putting crushed rock ballast between the ties like you see on the full size railroads. The ballast helps to drain rain water away from the track, and it helps a bit to hold the track in place.
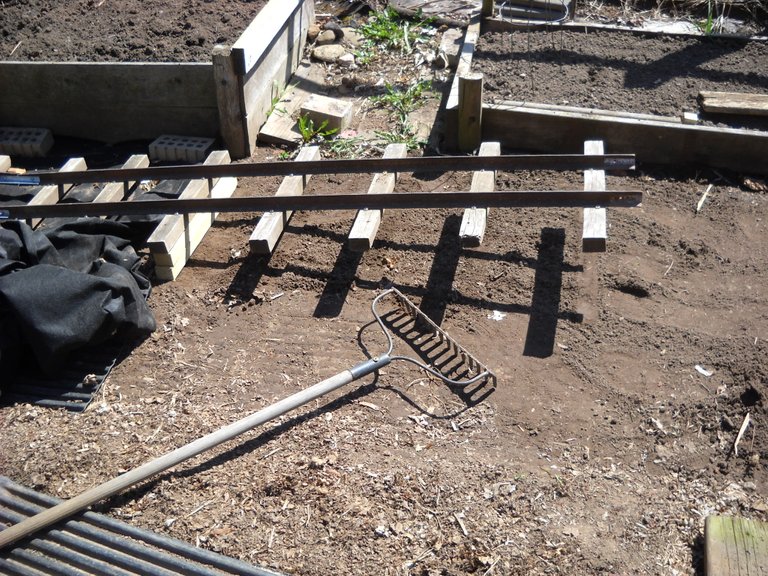
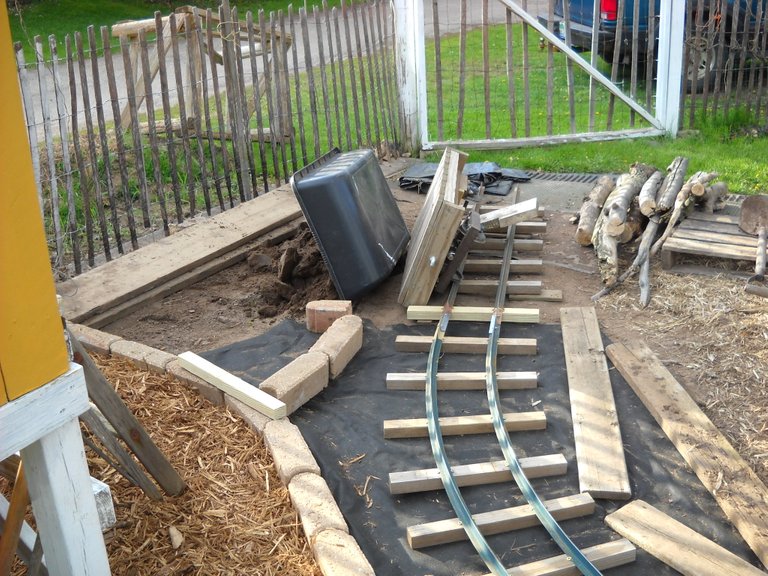
Since I already had the track in place across the garden, the first thing I had to do was remove all the track so that I could roll out the weed block cloth. That meant also pulling up the turnout so that I could get the weed block cloth under it as well. You can see the track sections flipped over to get them out of the way.
After rolling out the cloth a bit, I started putting sections of track back in place.
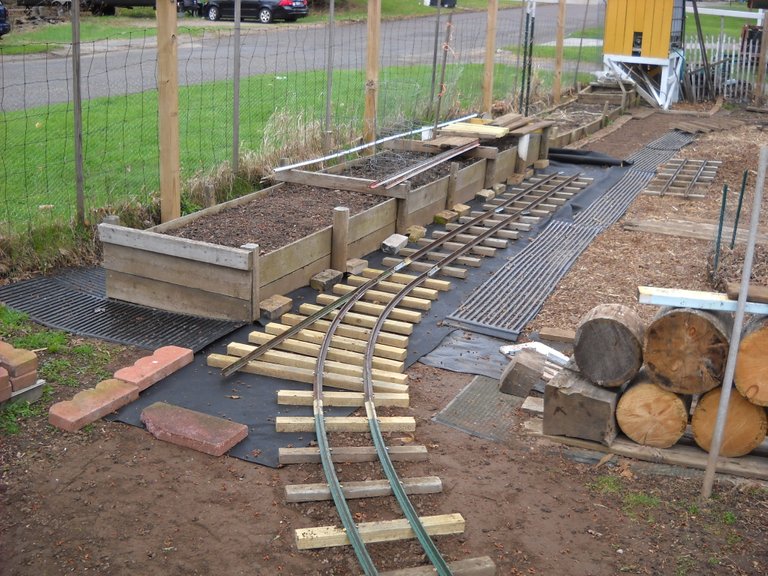
When I got to the third section of track past the turnout, I realized that I needed to do some more dirt leveling work where the track would be sitting.
I had to do some filling and leveling under the third track section, but it was easier to just lift it up rather than remove it. That also made it easier to tell if I had done the leveling the way that I wanted it to end up.
Once I got that part leveled, I moved on to the next track panel to see how it would sit on the ground.
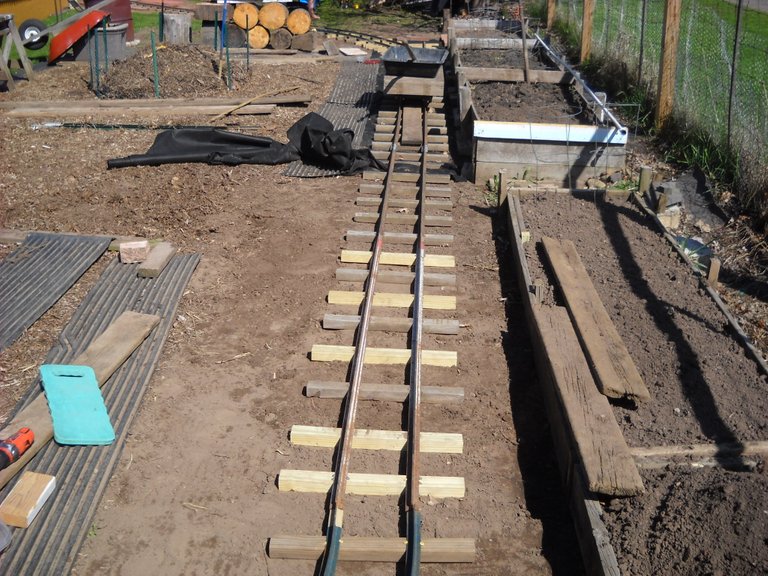
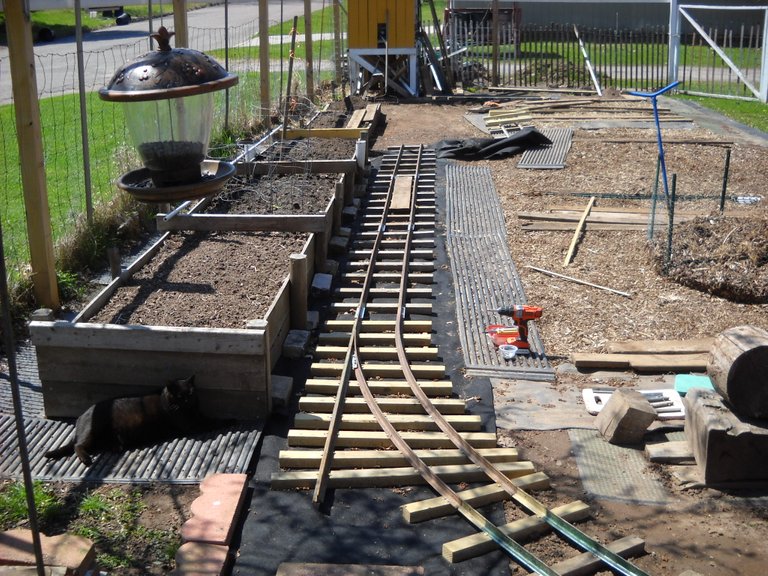
I ended up needing more dirt to fill in the low spots, so I hauled it from the greenhouse area, where I was digging dirt out, to the area that I needed it with the flatcar.

Once the roadbed was leveled out to my satisfaction, I finished rolling out the weed block cloth all the way to where the back curve starts. Since the weed block cloth is black, it's a bit hard to see in the shadow in the picture.
Then it was on to building the curve.
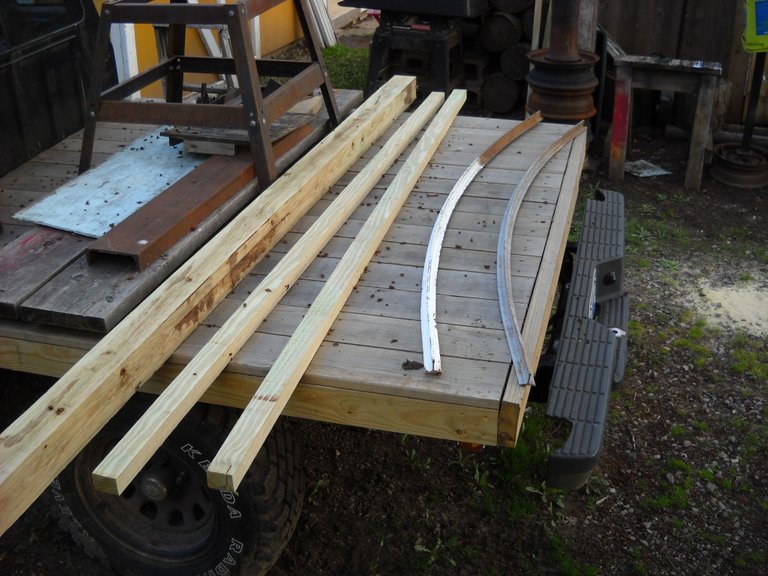
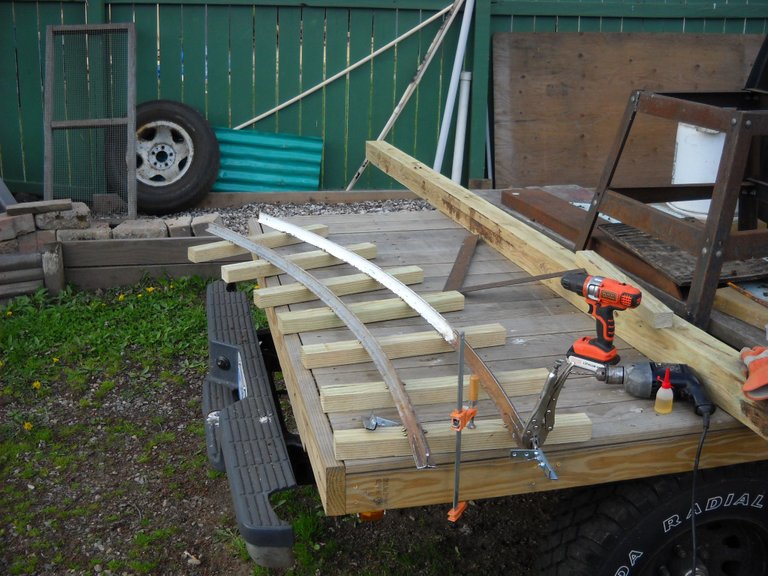
The first thing I had to do was build another curved section of track. I had one section but I needed more to build the curve. I built the next curve section on the flatbed of my pickup truck. The flatbed makes a very handy outside workbench.
Here's the parts. I had to cut the ties from the 2X3s that I had previously ripped to size on my table saw. Those are treated wood to resist rotting on the ground.
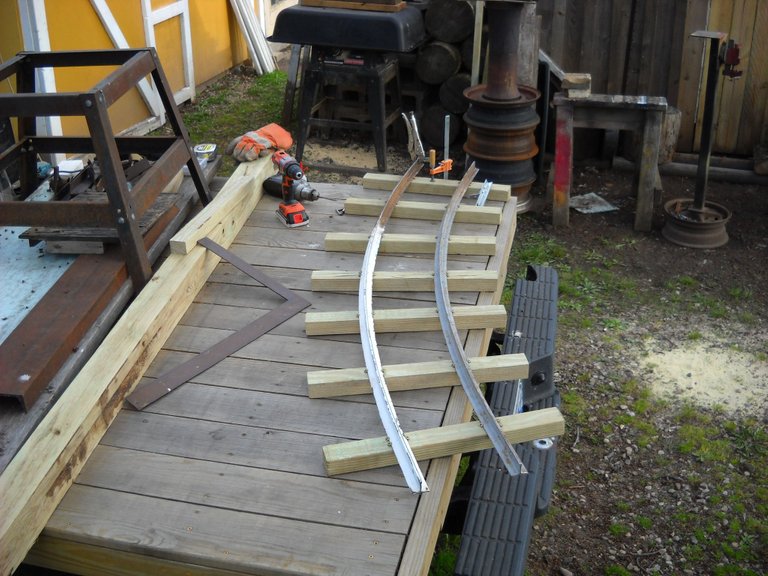
Here's the assembled curve section. I had the rail set up with my drilling jig to drill the hole for the track connector bolts.
This is a better look at the curve section.
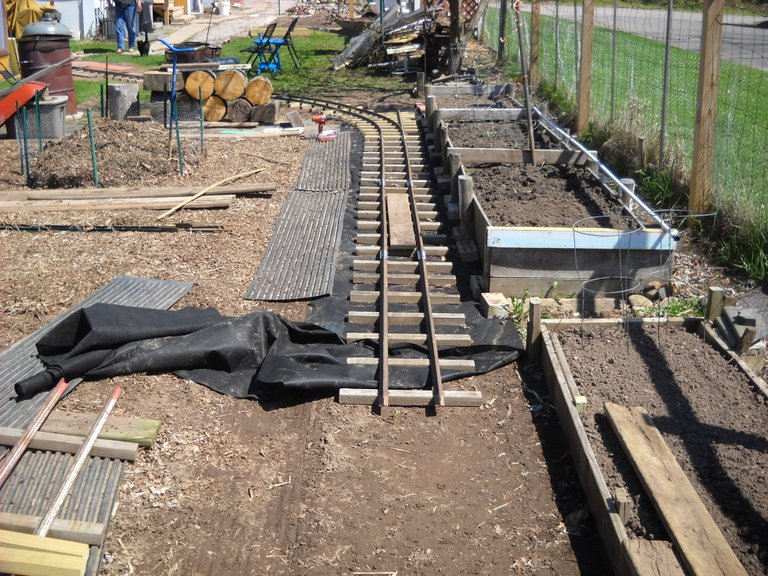
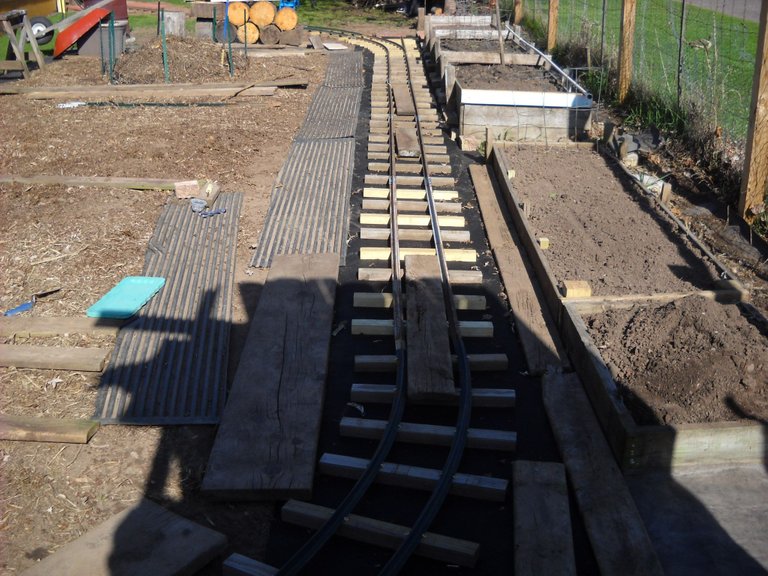
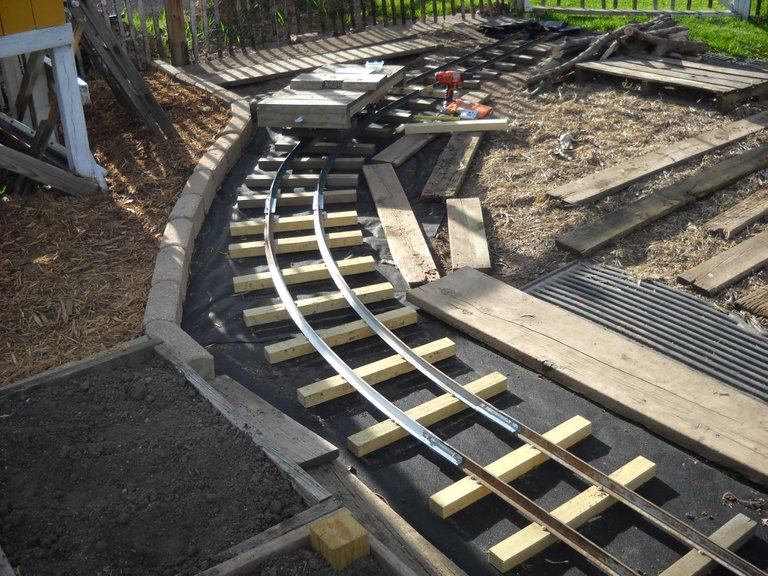
Here's the 2 curved track sections in place with the weed cloth under the track. I had another straight section sitting at the end of the curve to see how that lined up with the back garden gate.

I ended up having to lift the curve sections out again to do a bit more dirt fill under them, but when I was done with that, it looked about the same. Then I tested the curve with the flatcar. I had to make some minor adjustments to the spacing between the rails to keep the flatcar from derailing on the curve. Usually the distance between the rails is slightly wider on curves.
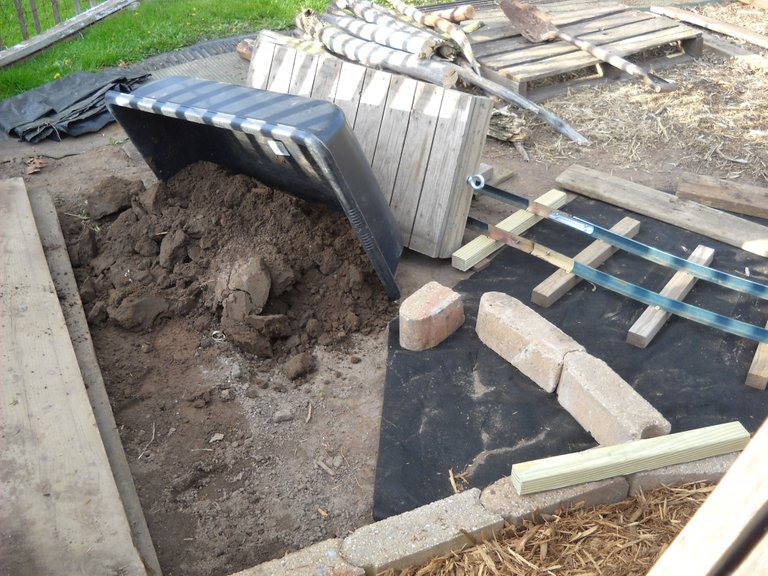
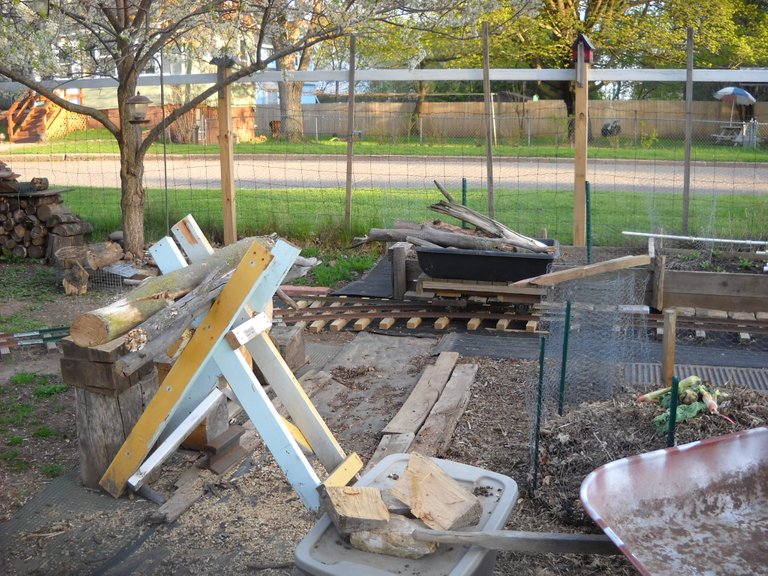
I had a low spot along side the track at the end of the curve because I had used the dirt from there as fill under the track. I also had a bunch of dirt by the greenhouse that needed a new home, so I hauled that dirt from the greenhouse to the back curve with the flatcar. Of course, when you dump the dirt off the side of the flatcar, it flips the car over.
Since I had the flatcar at the end of the track, I decided to haul some of the firewood up to the fire pit area so I could cut it up on the saw buck.
That's all the pictures I have for this post. All of this work took place between April 27 and May 9, 2021.
In the next post, I'll talk about doing more work to the back curve.
As a little bonus for this post, here's a short video of me moving the first load of potting soil to the greenhouse with the flatcar. I was being careful on the curve because my flatcar still didn't like staying on the rails there. I have since fixed that problem.
Thanks for stopping by to check out this post! I hope you found it interesting!

Such an epic project to build your own railway track - enjoying your updates!
I enjoyed the video and the track is already useful for moving stuff!
I had to lookup 'turnout' - in the UK we call them points.
Looking forward to the finished track!
!PIZZA
PIZZA Holders sent $PIZZA tips in this post's comments:
@tdctunes(1/20) tipped @amberyooper (x1)
Learn more at https://hive.pizza.
This is the kind of thing I dreamed of when I was a kid. maybe I will get to copycat you some day.
Just so loving this series. And the video! So very cool! Now I am wondering if you did put the stone down...
Yes, I put stone down. That will be in an upcoming post.
OMG. I am absolutely in love with those tracks. That is fantastic! I never, ever would have thought of anything other than a wheelbarrow for that type of work.
I am in awe, and I tip my hat to you.
Thank you!
I could do all the work with a wheelbarrow, but it wouldn't be as much fun.
My son would lose his mind. You just made real life Minecraft! 😄
Yes, something like that. 😀