(Esp-Ing) Tutorial. Creativo portarretratos Con resorte. Motivo mariquitas 🐞.// Creative picture frame with spring. Ladybugs motif
Special greetings to my dear and appreciated friends of hive diy, as always very attentive to the creative and beautiful publications presented daily by all who give life to this community, I am @amores.sf2 and today I bring you a very nice work inspired by a different picture frame but still beautiful and creative, and with a special motif that makes it look even cuter is the ladybugs or coquitos.
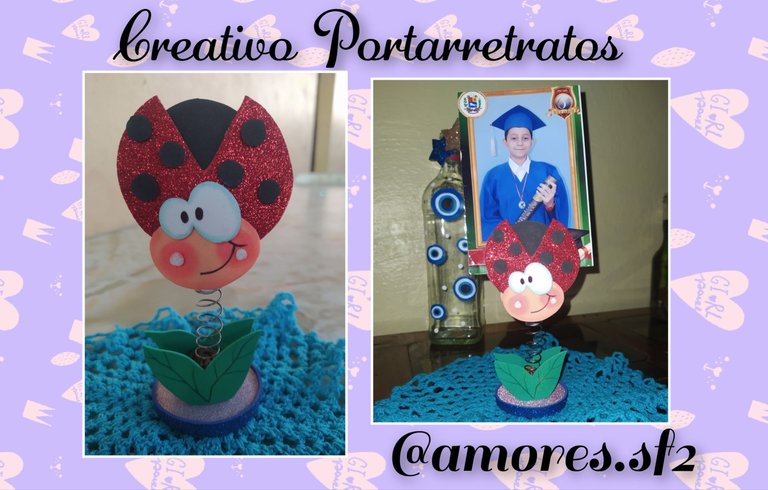
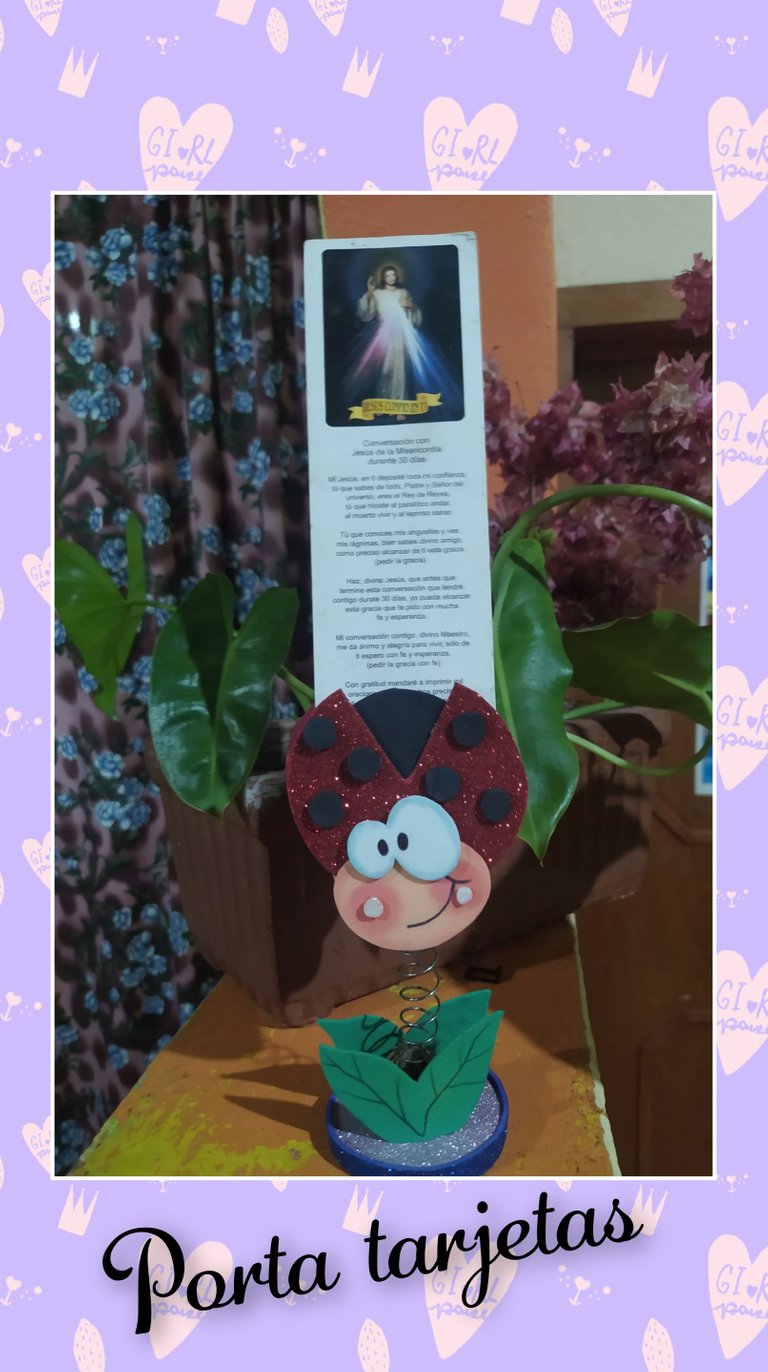
It is a super creative project since we can use it to hang photos, cards or simply to leave our notes of the day, you can give it the use you want, it is a very versatile creation.
With few and simple materials you can create fantastic crafts I invite you to follow me and see the procedure to make this project that I hope you like it as much as I do!

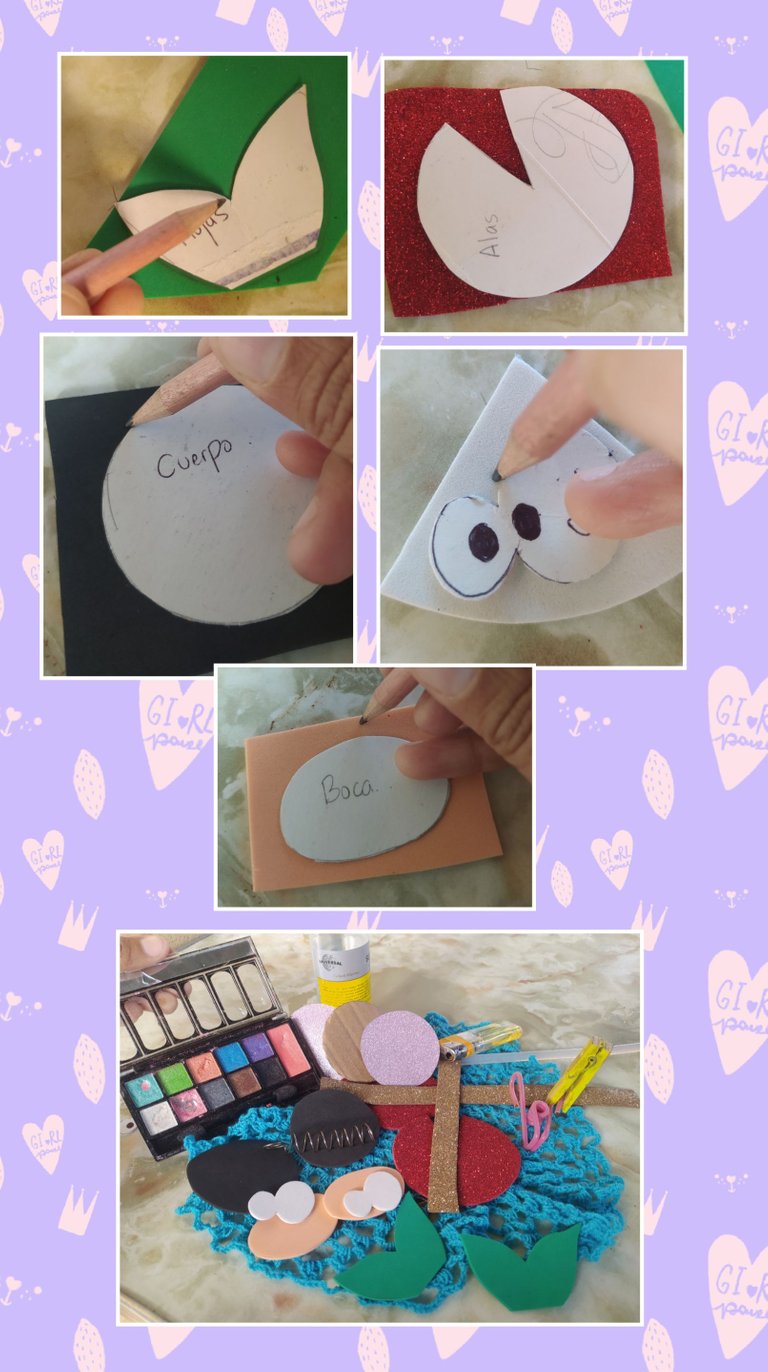
Materials
🐞 Foamis escarchados rojo
🐞 Foami negro blanco piel verde
🐞 Cartulina escarchada para la base
🐞 Patrones del diseño mariquita y hojas
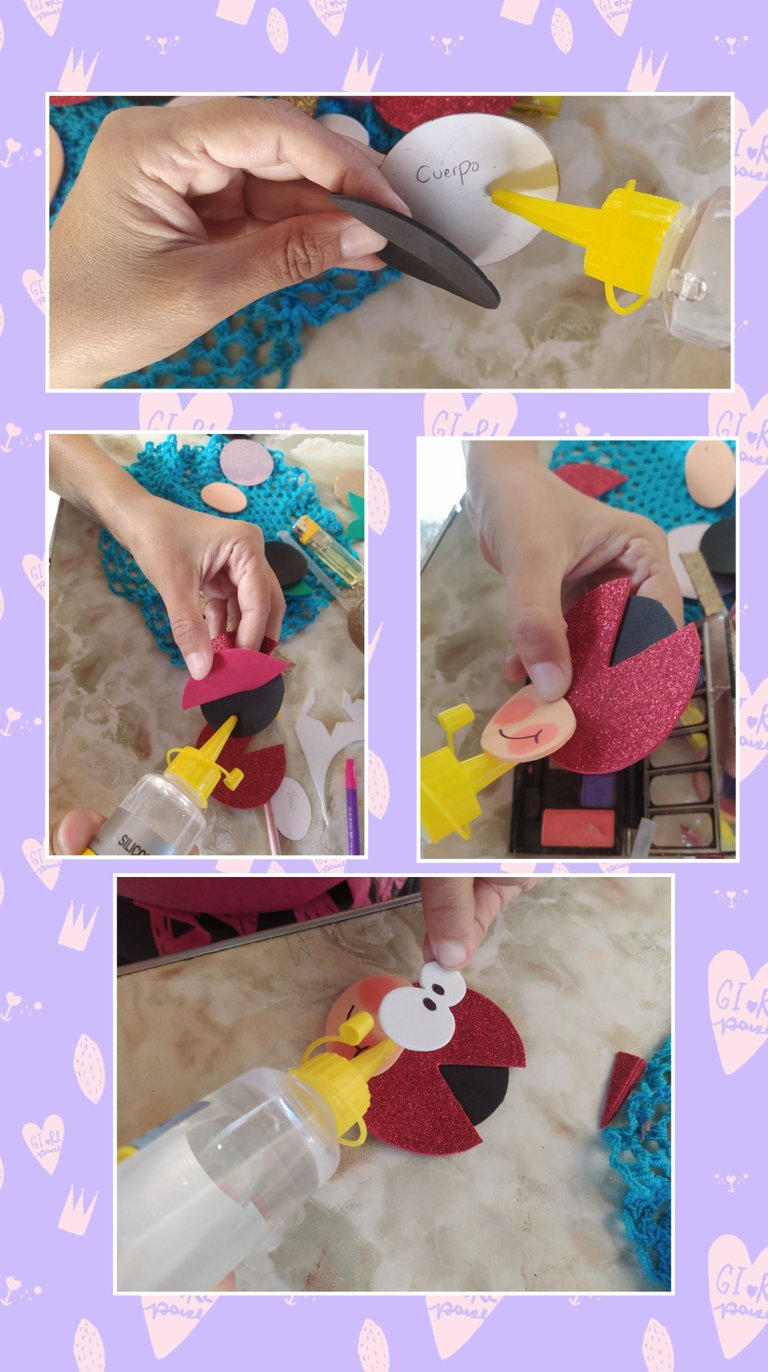
🐞 Resorte
🐞 Silicon líquido, barra Silicon
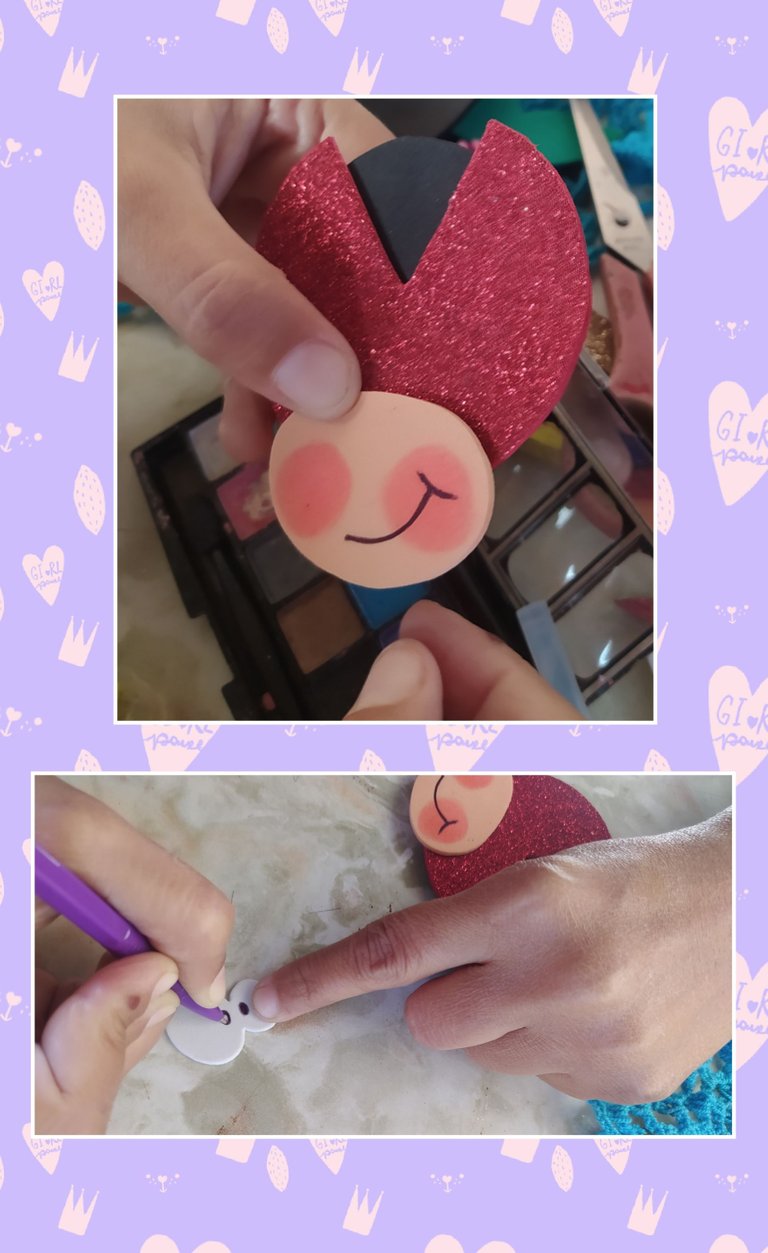
🐞 Rubor para pintar la carita
🐞 Tijera y yesquero
🐞 Foto para el portaretrato.
🐞 Foamis frosted red
🐞 Green skin black white foami
🐞 Frosted cardboard for the base
🐞 Ladybug and leaf design patterns.
🐞 Spring
🐞 Liquid silicon, silicon bar
🐞 Blush for face painting
🐞 Scissors and plasterboard
🐞 Photo for the picture frame.


Step by step

step #1
The first thing we are going to do is to mark each pattern to the corresponding foami, remembering that the pieces are double since they will be two ladybugs because the Portarretratos is shown on both sides, ready we cut all the pieces and proceed to paint the mouth and eyes of the ladybug.

step # 2
We are now going to assemble the ladybug pieces using Liquid Silicon.

step # 3
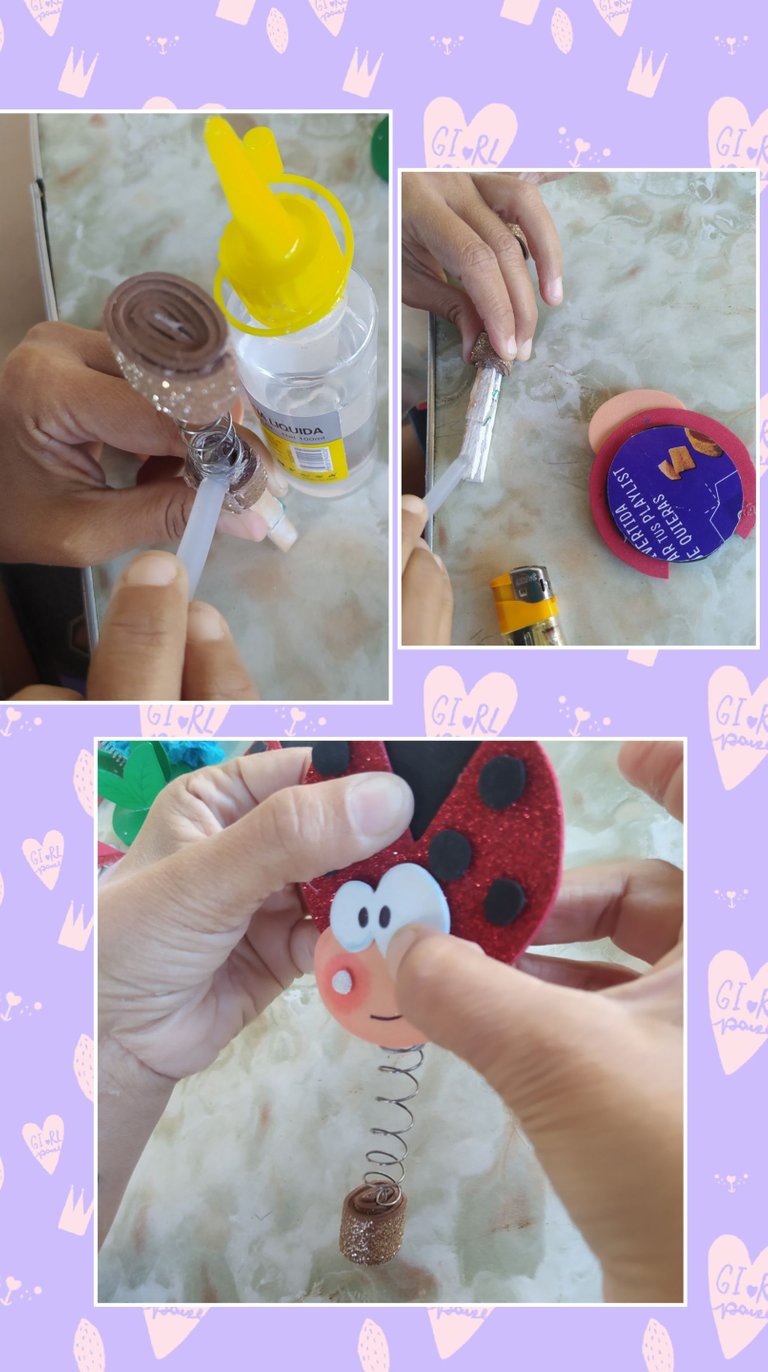
At this point we are going to assemble what will be the body of the portrait holder for it we will use the spring that is the protagonist of this project as well as the hook or clothespin, as it gives that different touch and makes it look super cute, we will cut a foami tape desired color and with hot Silicon we will paste a part of the foami wire and we will roll the foami tape as shown in the photo, this is done in order to make a base to the spring so that it can be fixed.


step # 4
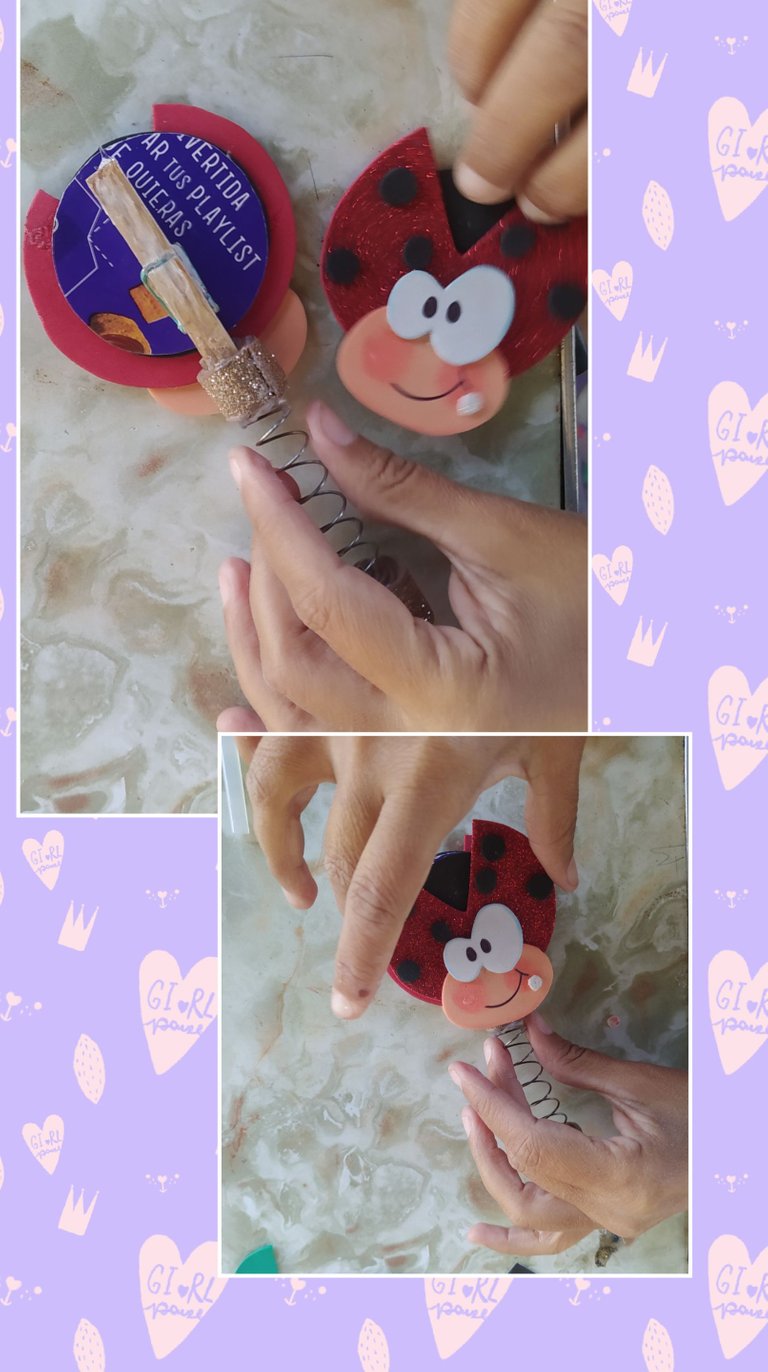
Now I am going to do the same on the clothespin or hook in the same way I use hot silicon and roll the foami tape over it, ready this I glue it to the other end of the spring, now we are going to glue on the body of the hook one of the ladybugs trying to completely cover the hook, and I also glue on the back the other ladybug remember that they are two sides of the picture frame.

step # 5
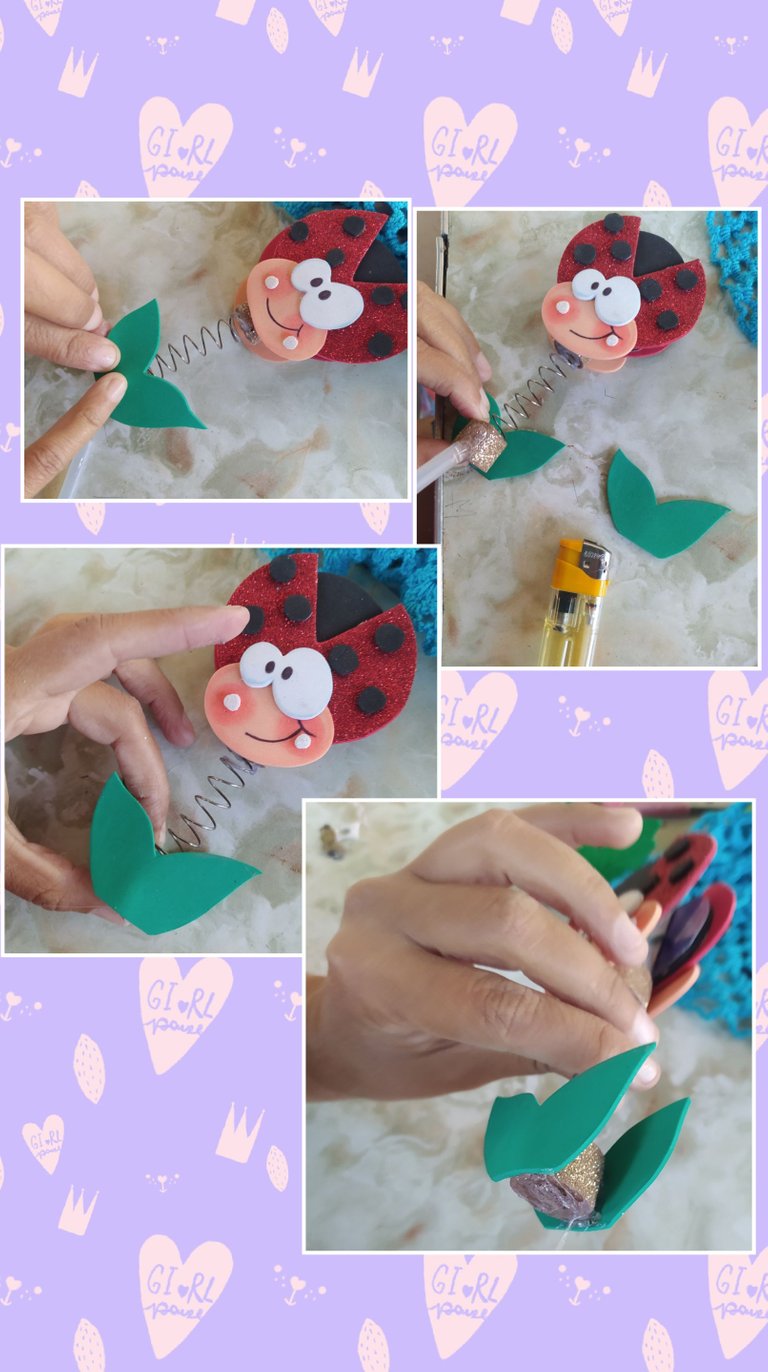
We continue gluing the details, this time the leaves at the foot of the spring where we made the base with the foami tape, we glue them on both sides.

step # 6
Almost finished the project we will cut a circle of 6cm in diameter in cardboard and 2 caps of the same size in frosted cardboard, glue it and on this base we will paste the ladybug already armed with the spring and the hook, ready we cut a thin ribbon I used blue frosted foami. And glue to the edge of the circle to cover the imperfections and that is a very clean work, as we will see in the photo.
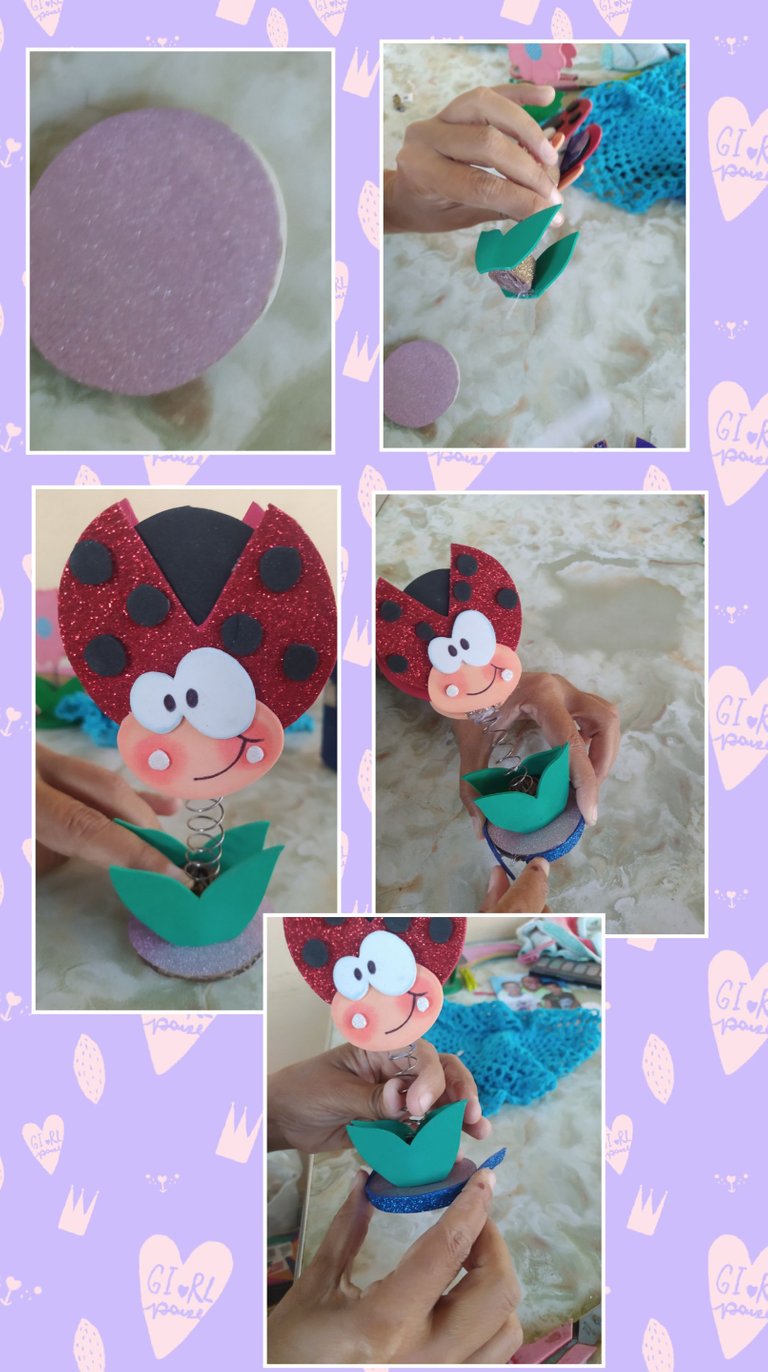
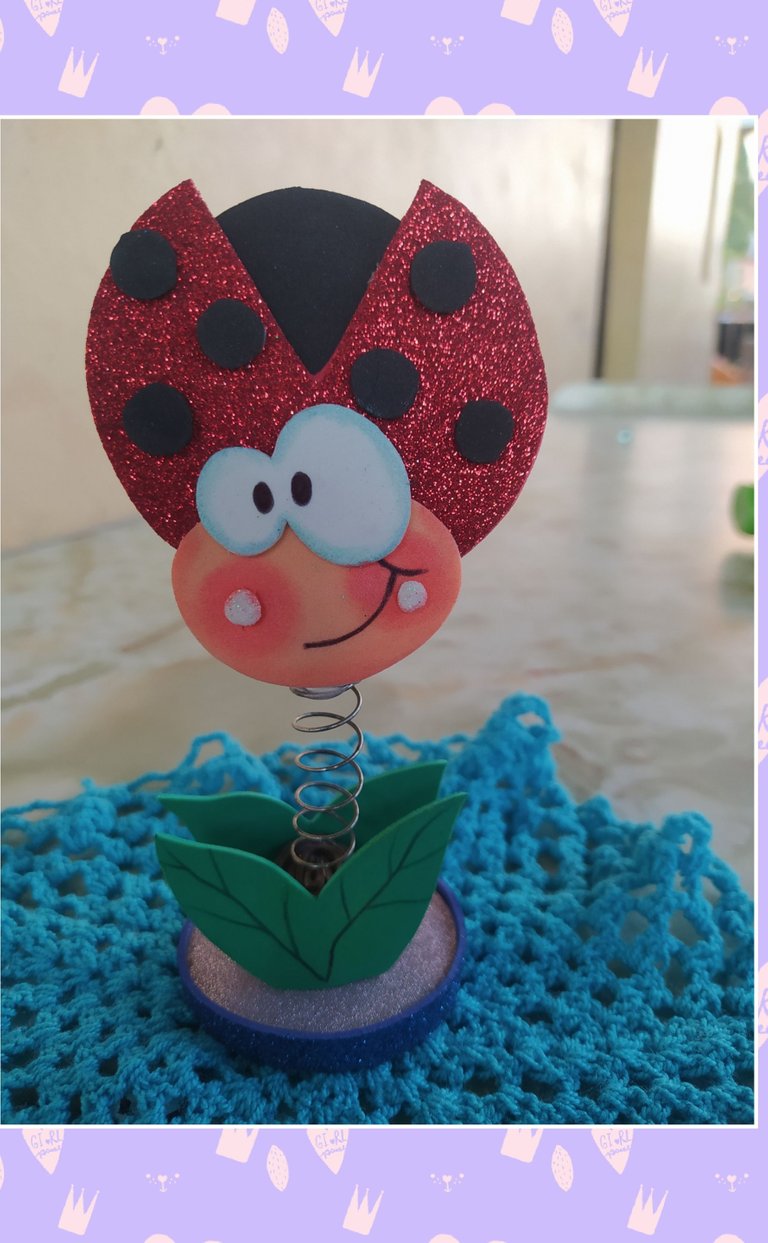
Y ahora siiií culmine mi proyecto teniendo como resultado este bello y creativo portarretrato con resorte motivo mariquitas o coquitos 🐞.
And now I've finished my project and the result is this beautiful and creative spring-loaded picture frame with ladybugs or coquitos motif 🐞.
All photos presented in my publication are my own taken with my personal phone and edited in Incollaje, my text is translated by Deepl.
A thousand thanks for reading my content, see you next time.
❤️ blessings ❤️
Genial! buen trabajo.
Mil gracias ❤️
Thank you for sharing this amazing post on HIVE!
Your content got selected by our fellow curator @rezoanulvibes & you just received a little thank you via an upvote from our non-profit curation initiative!
You will be featured in one of our recurring curation compilations and on our pinterest boards! Both are aiming to offer you a stage to widen your audience within and outside of the DIY scene of hive.
Join the official DIYHub community on HIVE and show us more of your amazing work and feel free to connect with us and other DIYers via our discord server: https://discord.gg/mY5uCfQ !
If you want to support our goal to motivate other DIY/art/music/homesteading/... creators just delegate to us and earn 100% of your curation rewards!
Stay creative & hive on!
Mil gracias @rezoanulvibes agradecida por tu apoyo al igual que a la c/DIYHub en HIVE..❤️
Congratulations @amores.sf2! You have completed the following achievement on the Hive blockchain and have been rewarded with new badge(s):
Your next target is to reach 300 upvotes.
You can view your badges on your board and compare yourself to others in the Ranking
If you no longer want to receive notifications, reply to this comment with the word
STOPTo support your work, I also upvoted your post!
Check out the last post from @hivebuzz:
Support the HiveBuzz project. Vote for our proposal!