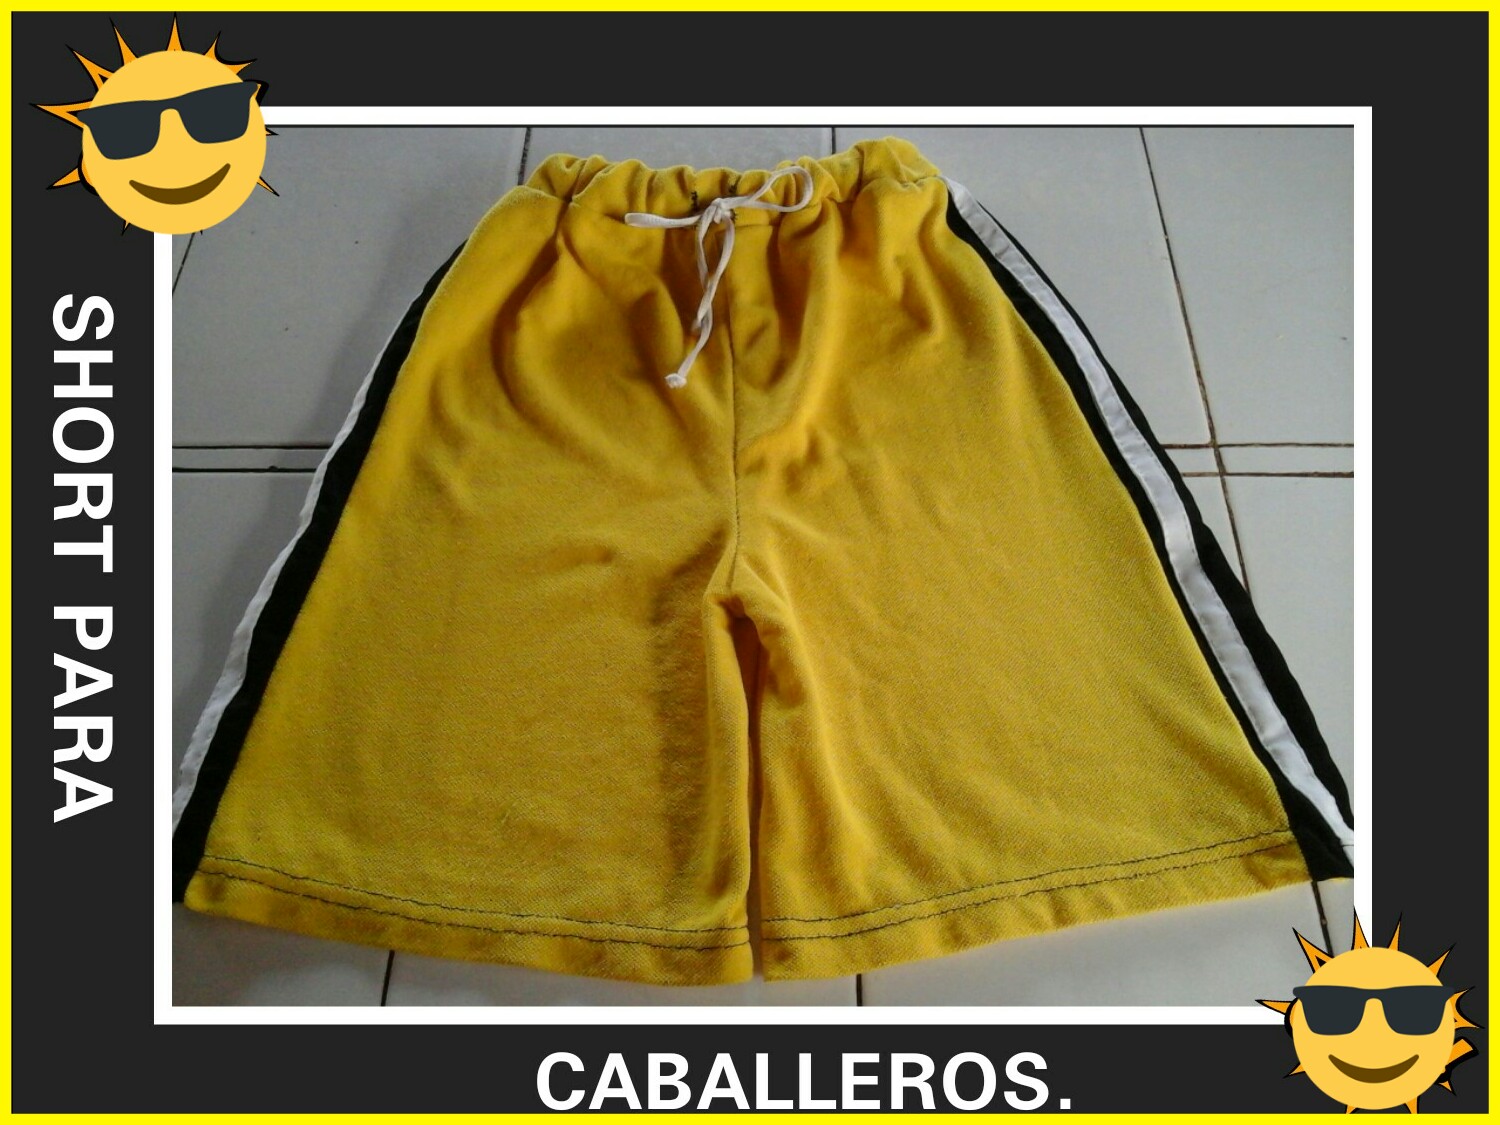
Cómodo y colorido short 💙para caballeros👷/costura a mano//Comfortable and colorful shorts 💙 for gentlemen 👷 / hand sewing.
¡FELIZ DIA AMIGOS DE NEEDLEWORK MONDAY!.💖
¡HAPPY NEEDLEWORK MONDAY FRIENDS!.💖
Hola mi gente hermosa! bendiciones para todos en el día de hoy. Agradecida de Dios por darme la oportunidad de volver a estar compartiendo nuevamente con todos ustedes a través de esta fabulosa comunidad.😀
Seguimos trabajando con mucho esfuerzo, esmero y dedicación, para poder compartir hermosos proyectos. En éste día quiero mostrarles como hacer un short para caballeros.
Creo que este no es un simple short, pues les cuento que esta tela que utilice es tipo(pique, de algodón o policotton) el cual es exclusiva para hacer chemises. Observandola un poco pude notar que es muy gruesa como para confeccionar alguna prenda para mis pequeños😞 ¡Estuve tentada a desecharla! porque además de ser muy gruesa tiene un color amarillo muy intenso, haciendola un poco complicada para diseñar alguna prenda de vestir.
En mi opinión, pienso que no debemos desechar ningún tipo de tela. Si buscamos un poco de ayuda e información, creo podemos sacarles provecho a dichas telas.
Aunque es un poco a riesgado diseñar un lindo atuendo con esta tela, no pude esperar para confeccionar a mano un llamativo y cómodo short, para mi esposo color amarillo con franjas en negro y blanco a los lados, haciendolo lucir muy deportivo.
¡Amigos éste short es famuloso! creo que al igual que a mi, a ustedes también les encantará👍. Les invito a que me acompañen a leer el procedimiento para confeccionar dicho short.
Hello my beautiful people! Blessings to all today. Grateful to God for giving me the opportunity to share again with all of you through this fabulous community.😀 We continue to work with a lot of effort, care and dedication, to be able to share beautiful projects.
On this day I want to show you how to make a short for men. I think that this is not a simple short, because I tell you that this fabric that I use is a type (pique, cotton or polycotton) which is exclusive to make chemises. Observing it a little I could see that it is too thick to make any garment for my little ones😞 I was tempted to discard it! because in addition to being very thick it has a very intense yellow color, making it a bit complicated to design a garment. In my opinion, I think that we should not discard any type of fabric. If we seek a little help and information, I think we can take advantage of these fabrics. Although it is a bit risky to design a nice outfit with this fabric, I couldn't wait to make by hand a striking and comfortable short for my husband, yellow with black and white stripes on the sides, making him look very sporty.
Friends this short is fabulous! I think just like me, you will love it too👍. I invite you to accompany me to read the procedure to make said short.
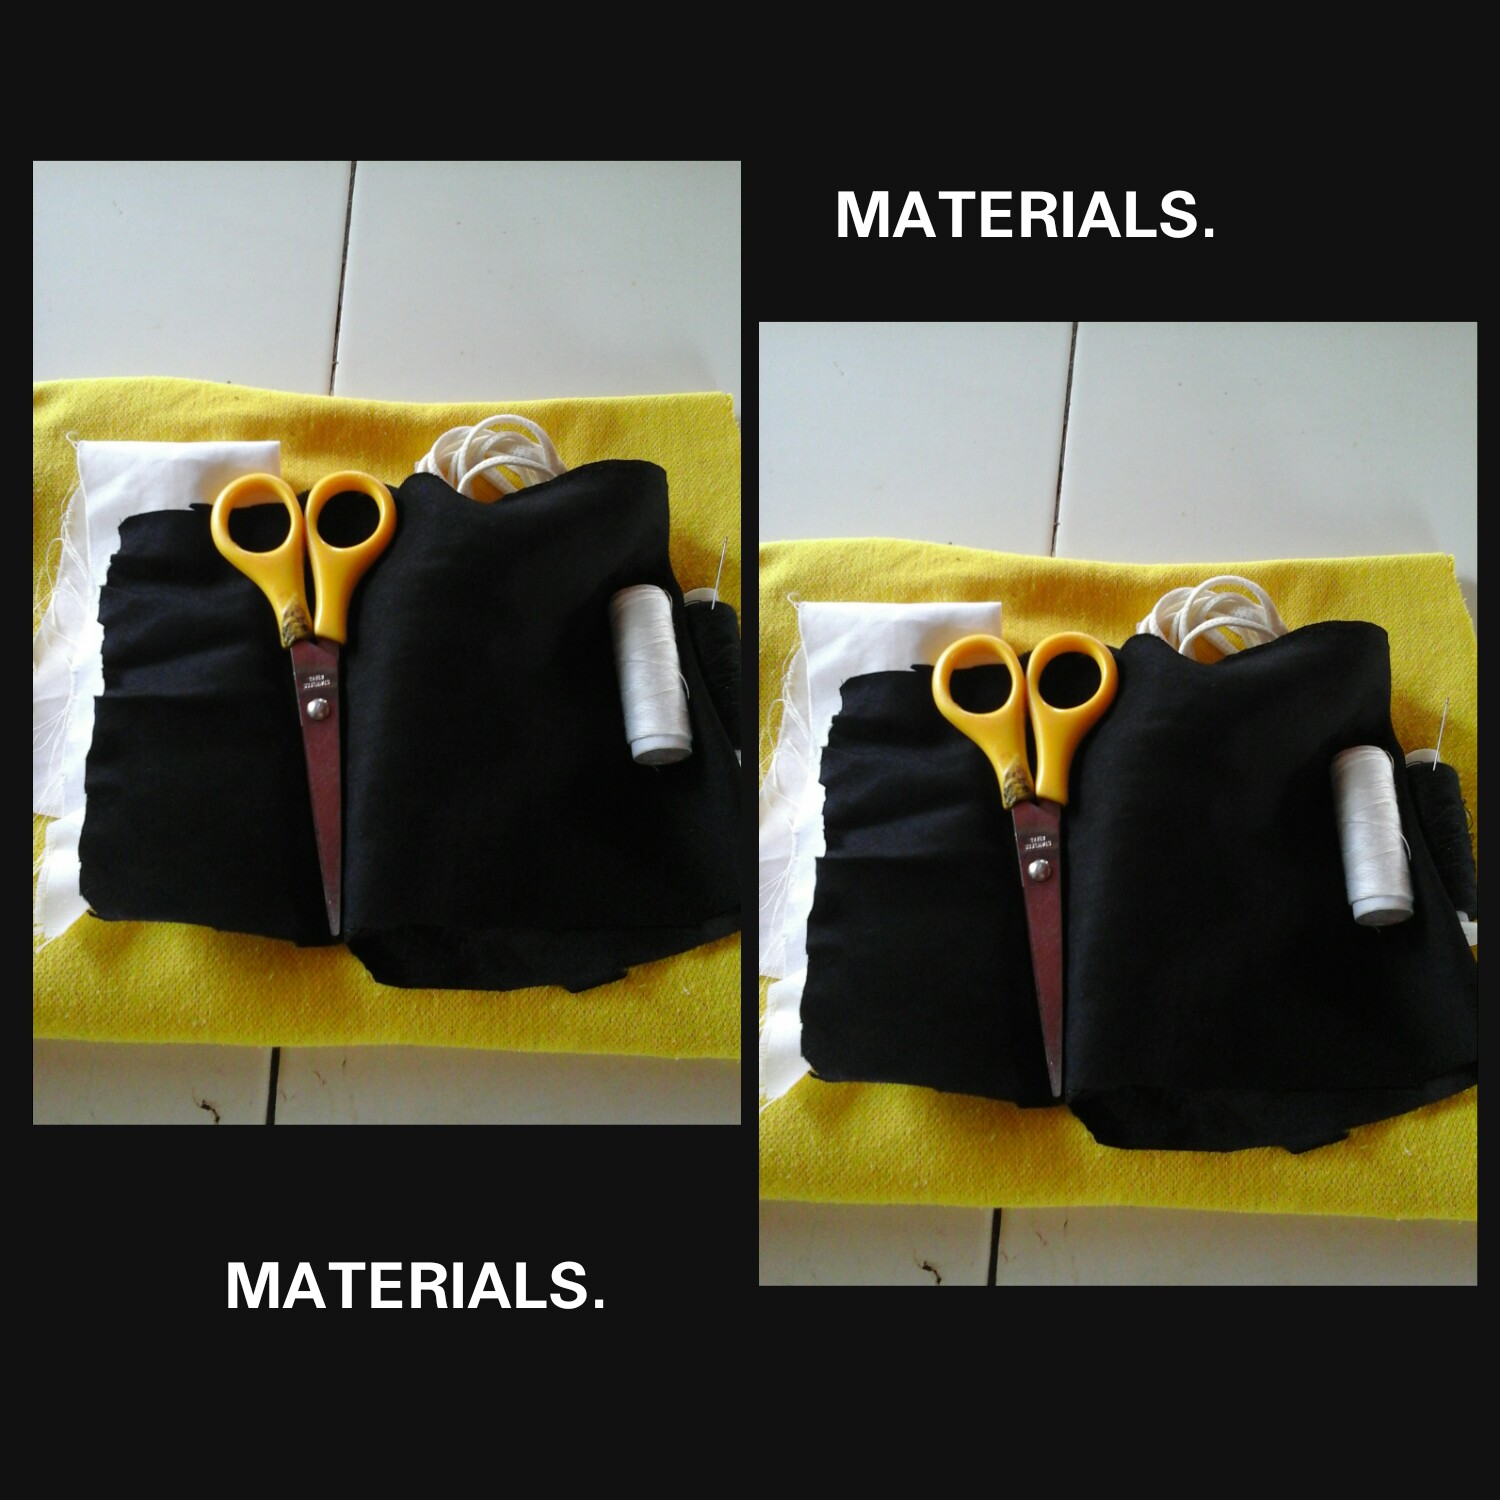
MATERIALES QUE UTILICÉ.✂
- Tela tipo pique, amarillo y algunos retazos negro y blanco.
- Tijera.
- Lápiz o tiza para marcar tela.
- Hilo negro y blanco.
- Aguja.
- Cordón y elástico.
MATERIALS USED.✂
- Pique fabric, yellow and some black and white patches.
- Scissors.
- Pencil or chalk to mark fabric.
- Black and white thread.
- Needle.
- Drawstring and elastic.
¡MANITOS A LA OBRA!.✋
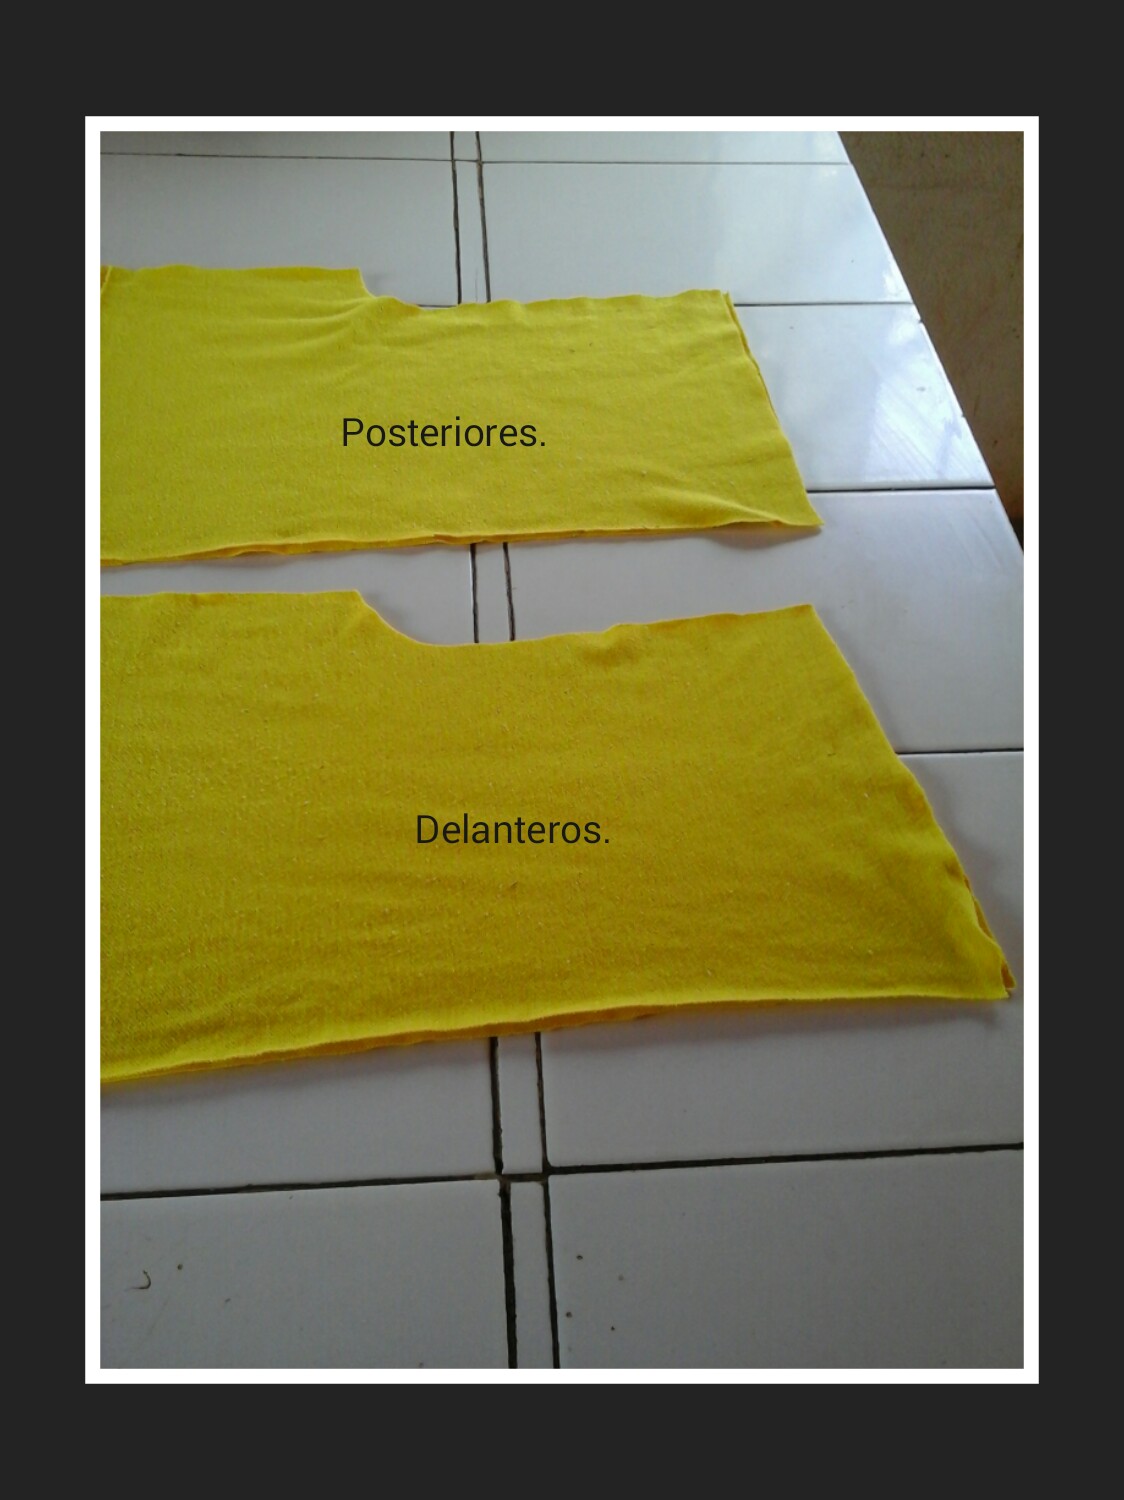
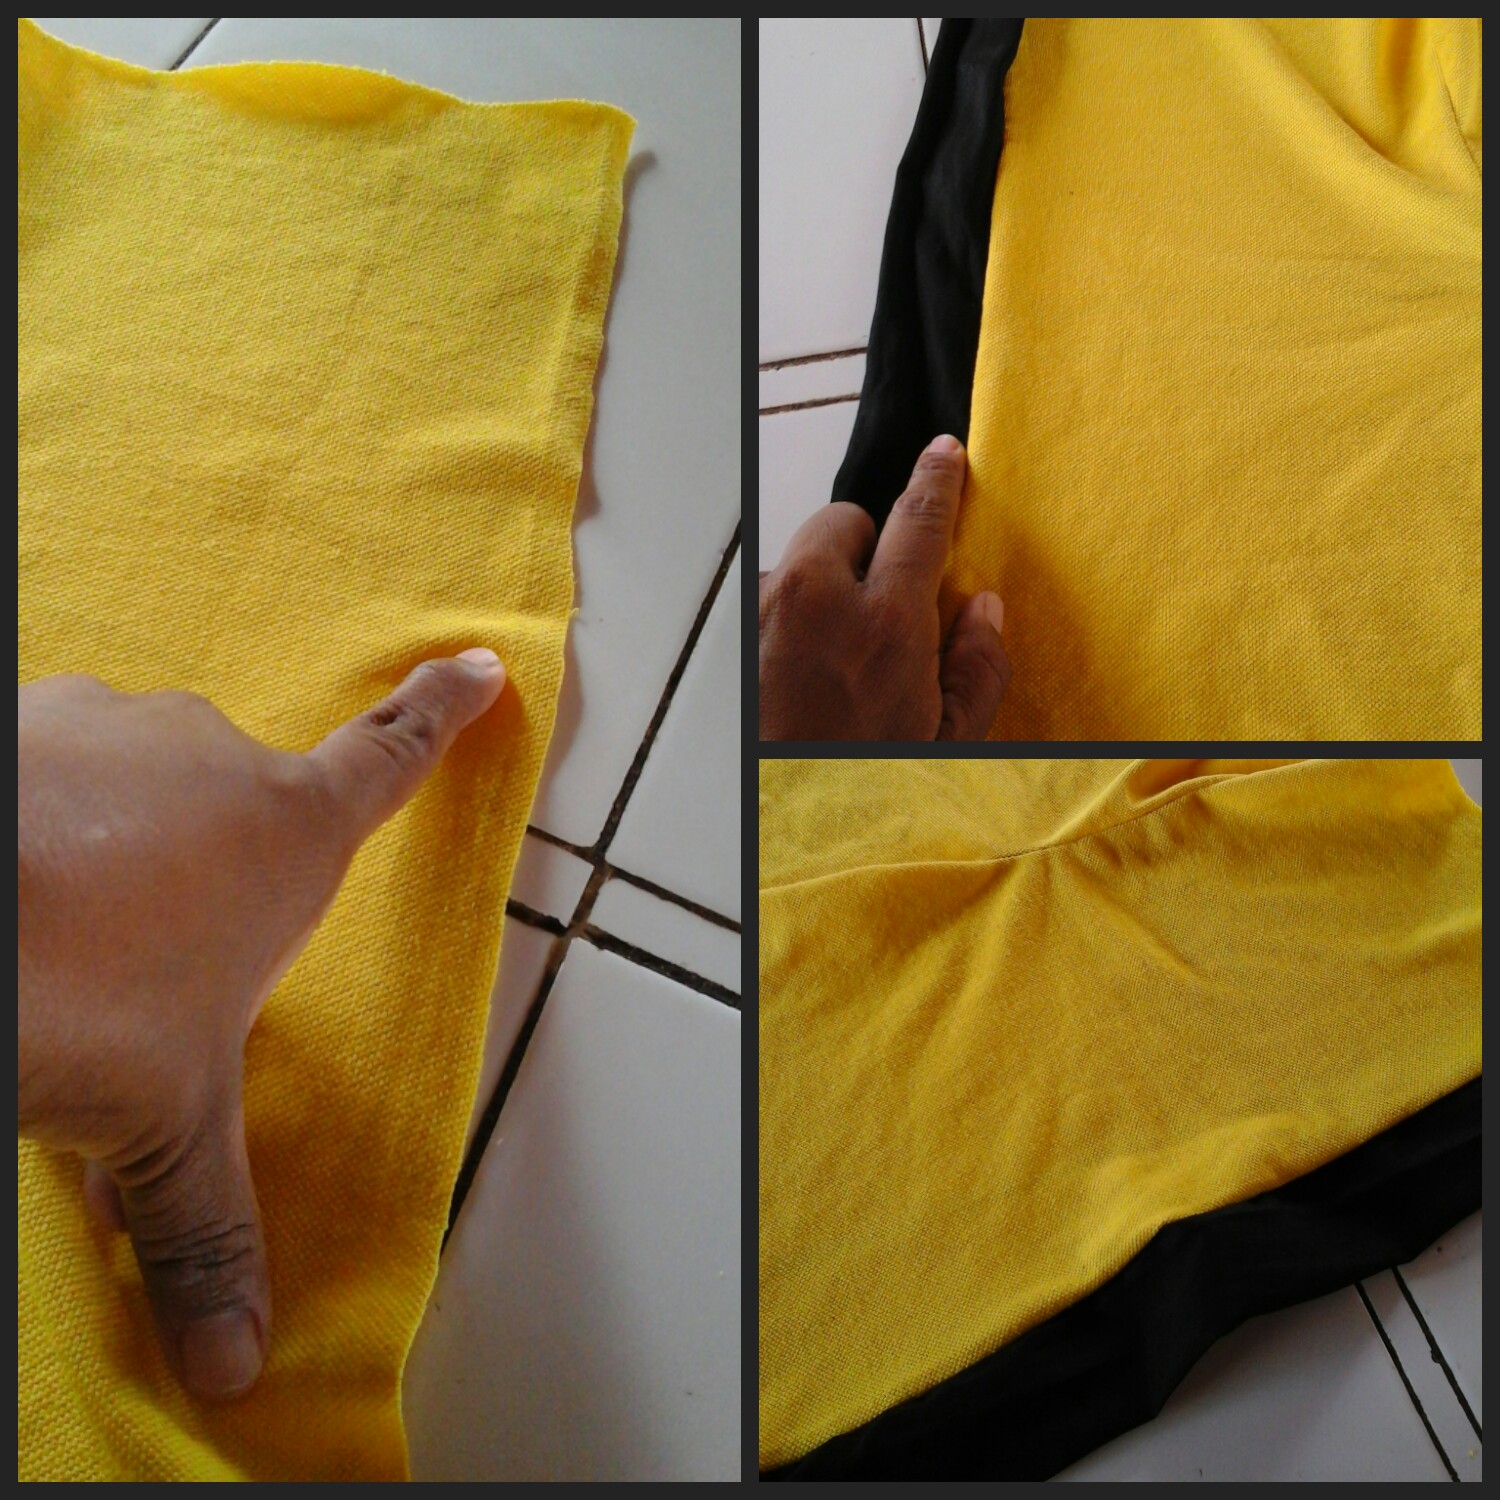
Para iniciar la confección de éste short lo primero será tomar el patrón y colocarlo sobre el doblez de la tela, marcamos por el contorno y recortamos. Puedes tomar algún short con la talla que prefieras y servirá como patrón.
En éste caso utilicé un short de mi esposo el cual me ayudo a obtener unas buenas piezas.
Debemos repetir el procedimiento para obtener un par delantero y otro posterior.
¡HANDS TO WORK!.✋
To start making this short, the first thing to do is take the pattern and place it on the fold of the fabric, mark along the outline and cut out. You can take some shorts with the size you prefer and it will serve as a pattern. In this case I used my husband's shorts which helped me get some good pieces. We must repeat the procedure to obtain a front pair and a rear pair.
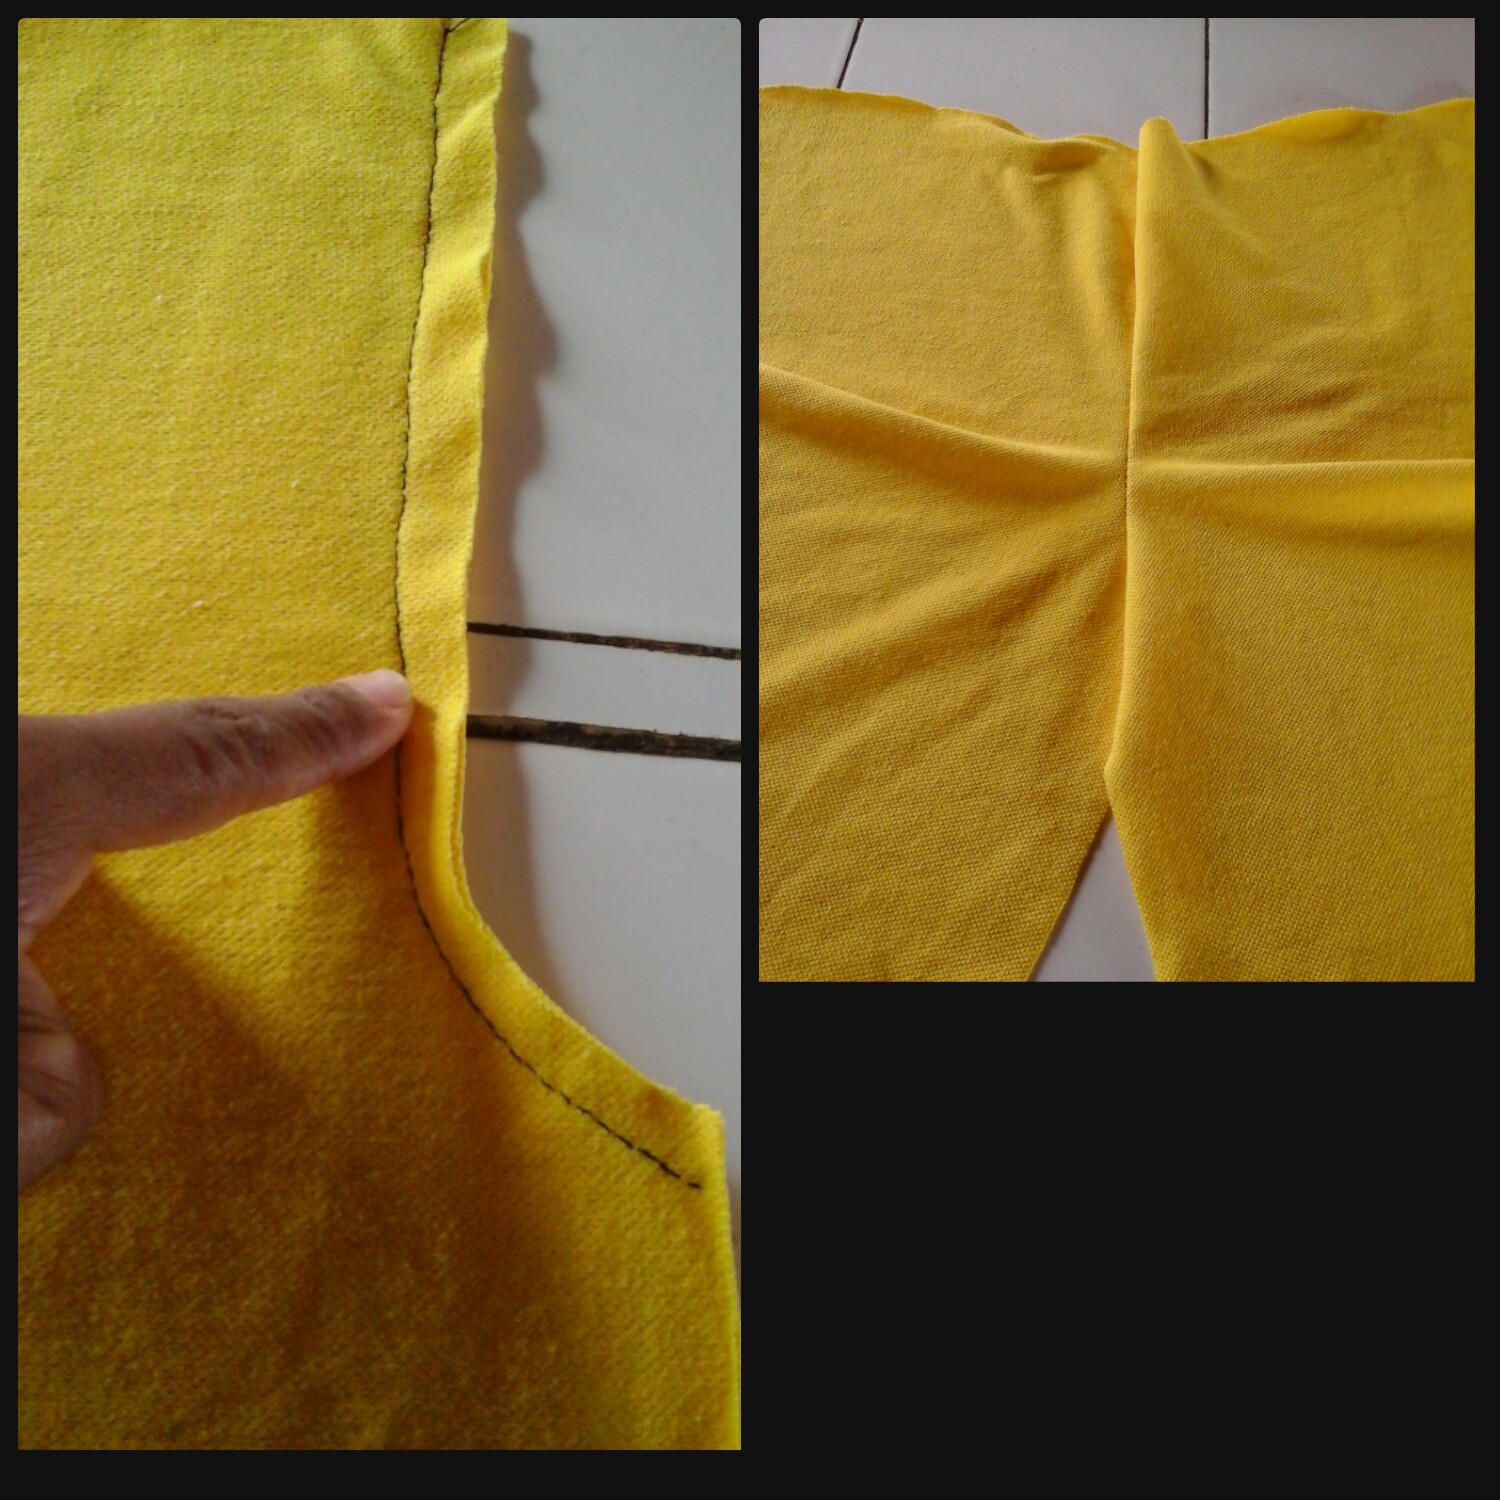
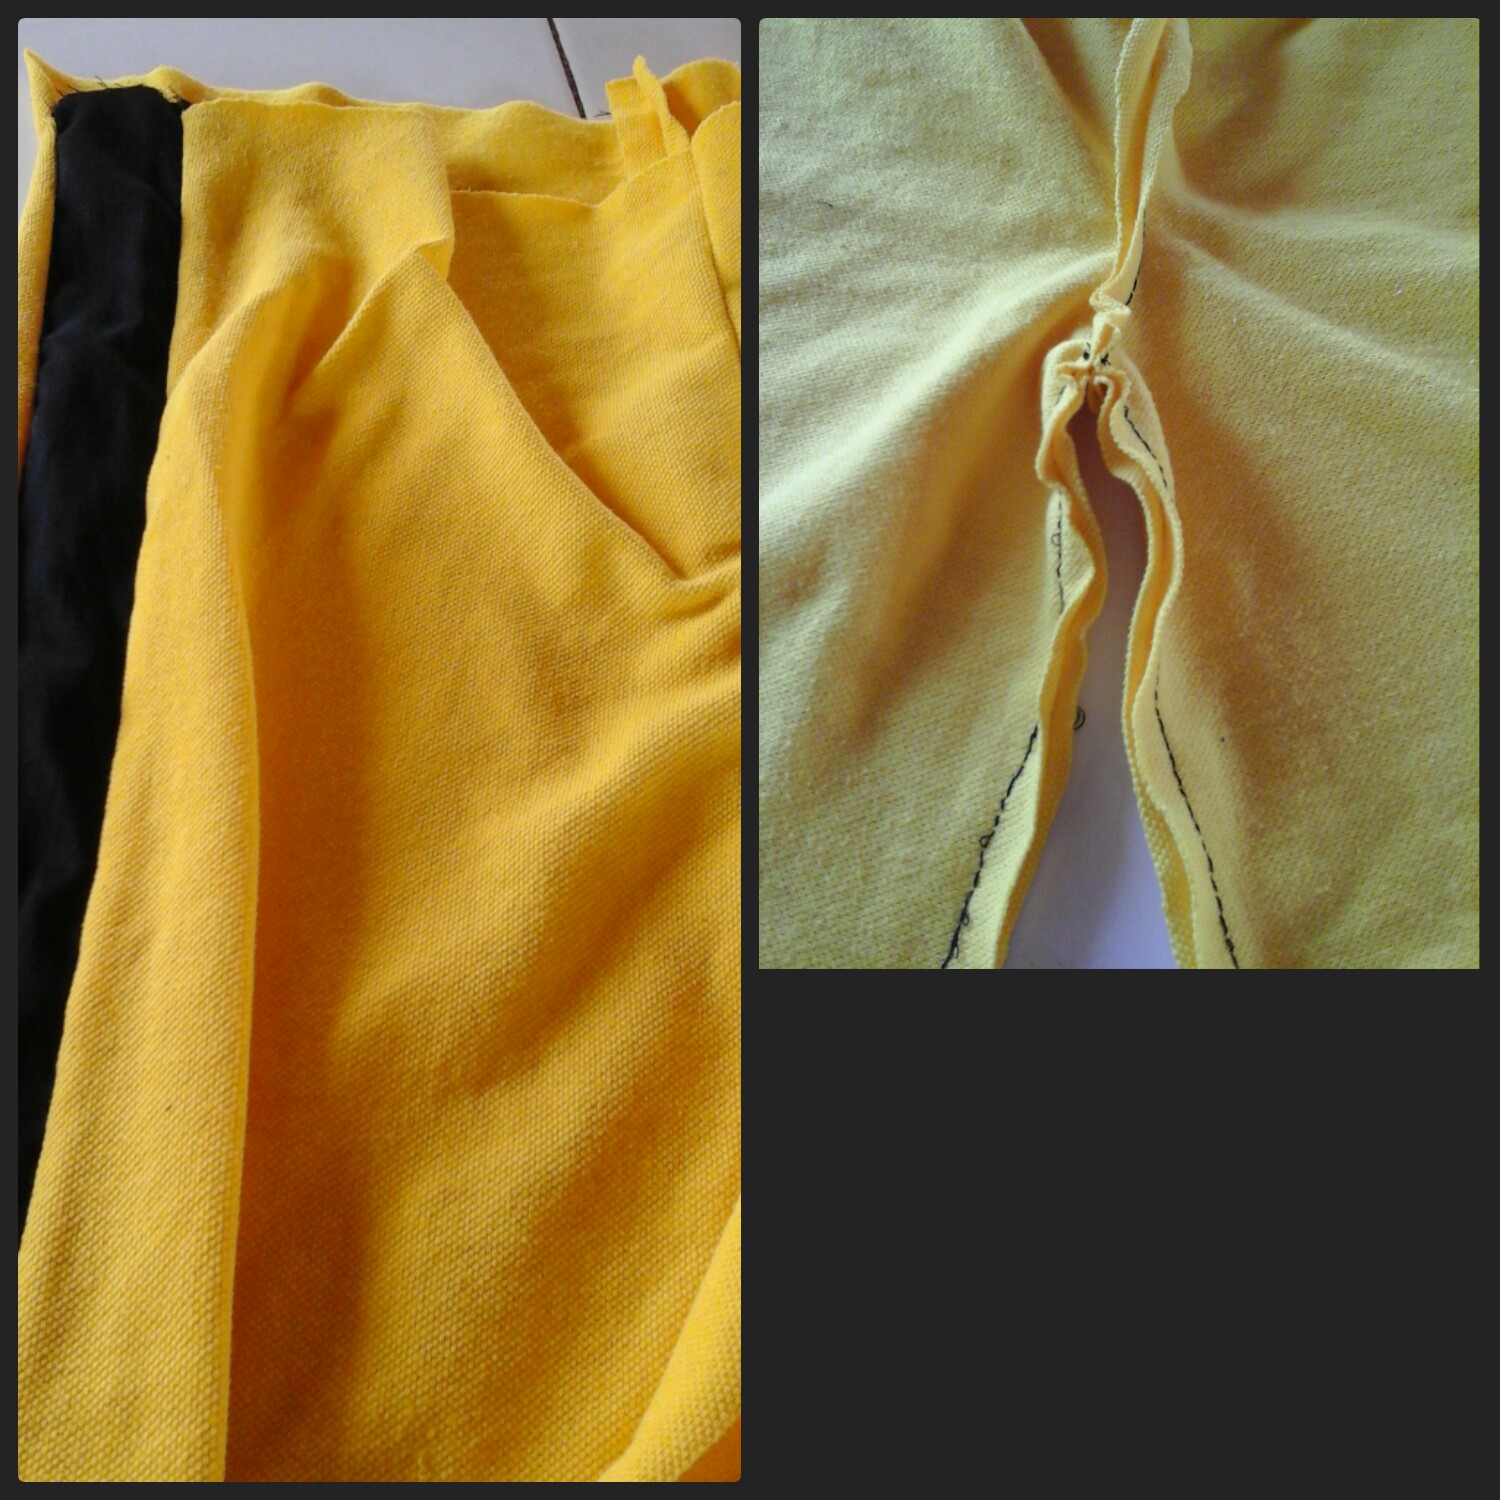
Una vez que hayamos recortado cada pieza, procedemos a unir el par delantero y el par posterior. Hacemos una costura tipo pespunte por la parte trasera de cada pieza.
Once we have cut out each piece, we proceed to join the front pair and the back pair. We make a stitch type seam on the back of each piece.
Para hacer la parte lateral del short debemos recortar un par de tiras color negro y cosemos por los bordes laterales de la pieza delantera. Al terminar de coser, tomamos la pieza posterior y unimos al delantero del short.
To make the side of the shorts we must cut a couple of black strips and sew along the side edges of the front piece. When we finish sewing, we take the back piece and join it to the front of the shorts.
Unimos haciendo costura (pespunte) por la parte de las entrepiernas. De esta menera el short esta casi listo.
We join by sewing (stitch) on the part of the crotches. In this way the short is almost ready.
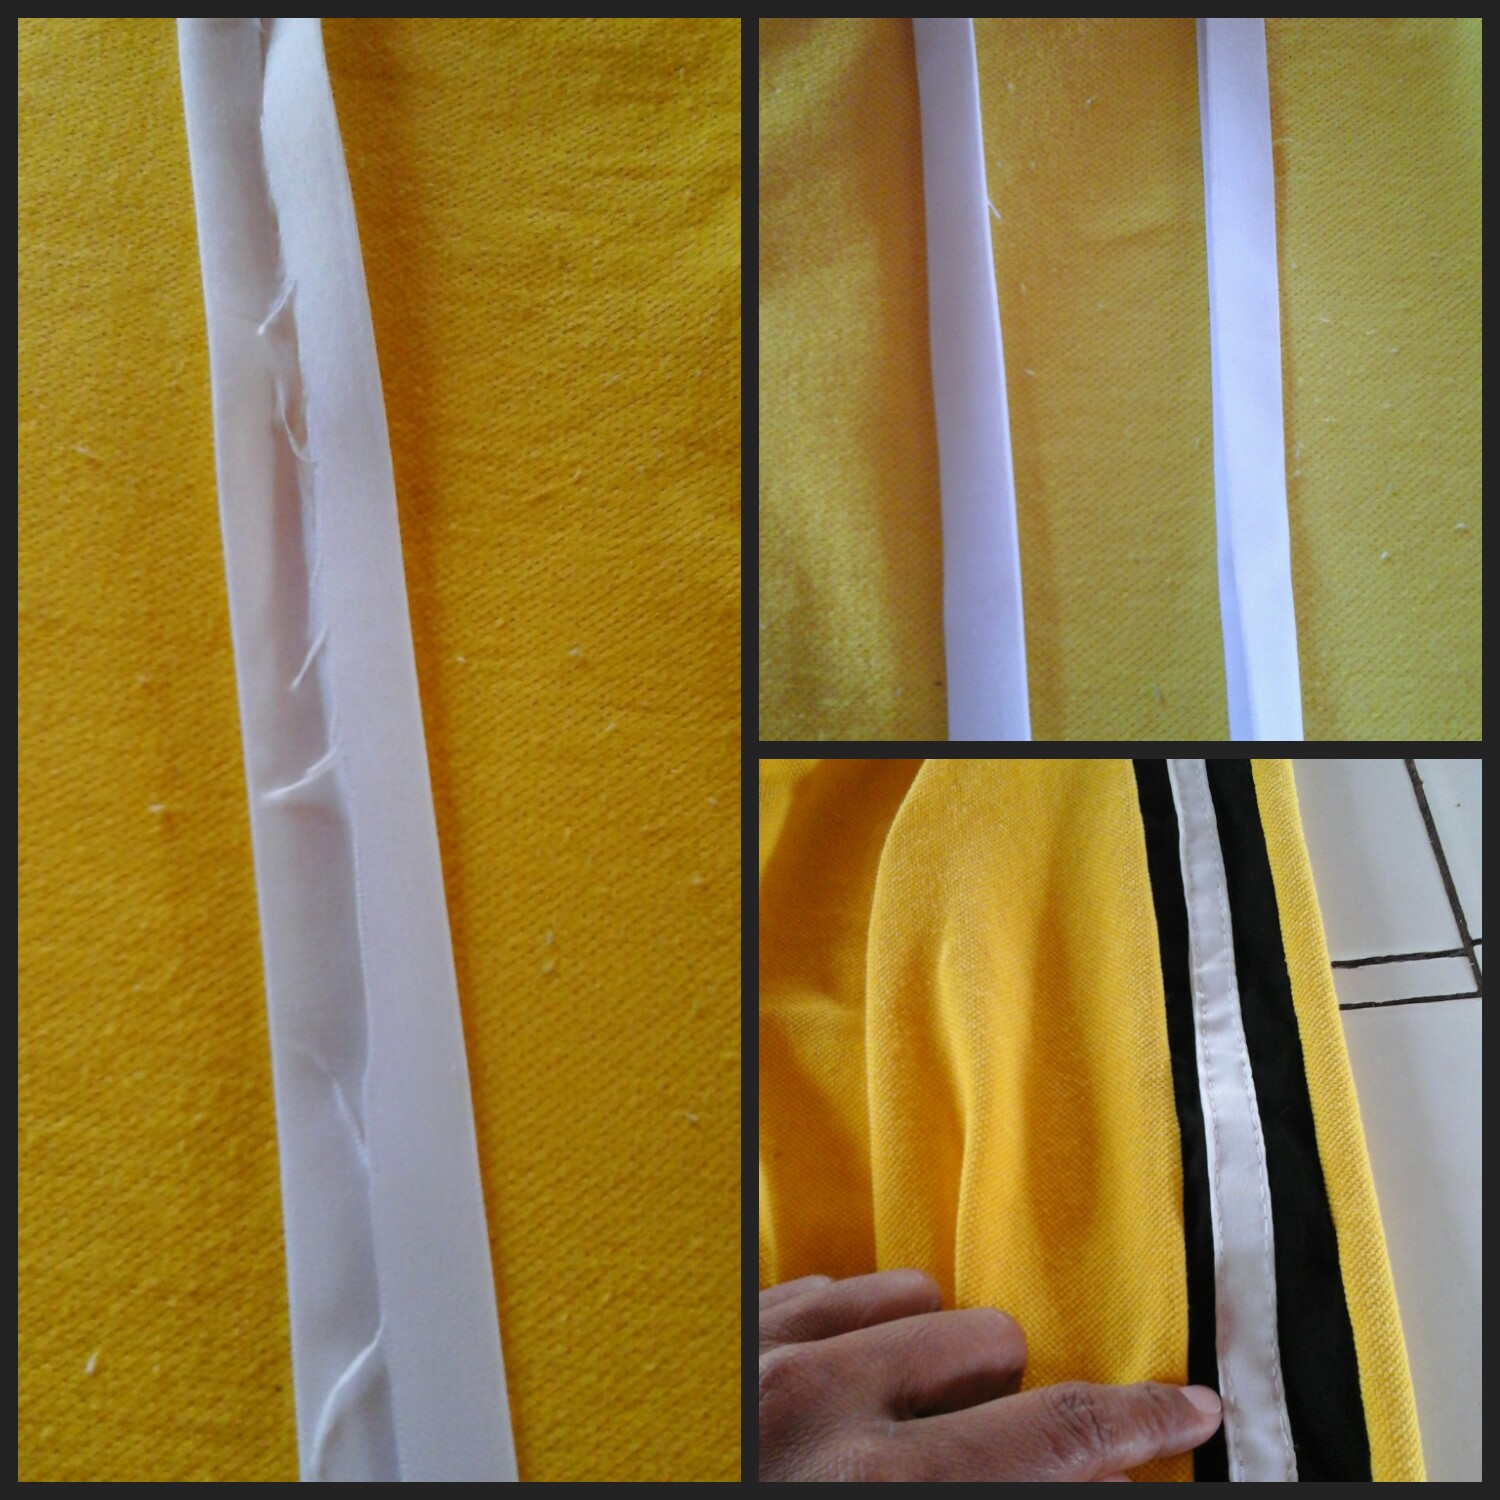
Recortamos un par de finas tiras de color blanco, doblamos los bordes llevandolos hacia adentro. Tomamos una plancha de ropa y la pasamos sobre las tiras.
Doblamos nuevamente las tiras y planchamos. Una vez que las tengamos listas procedemos a coserlas por la parte negra de cada lado.
Cut a couple of thin white strips, fold the edges inwards. We take a clothes iron and pass it over the strips. We fold the strips again and iron. Once we have them ready we proceed to sew them on the black part of each side.
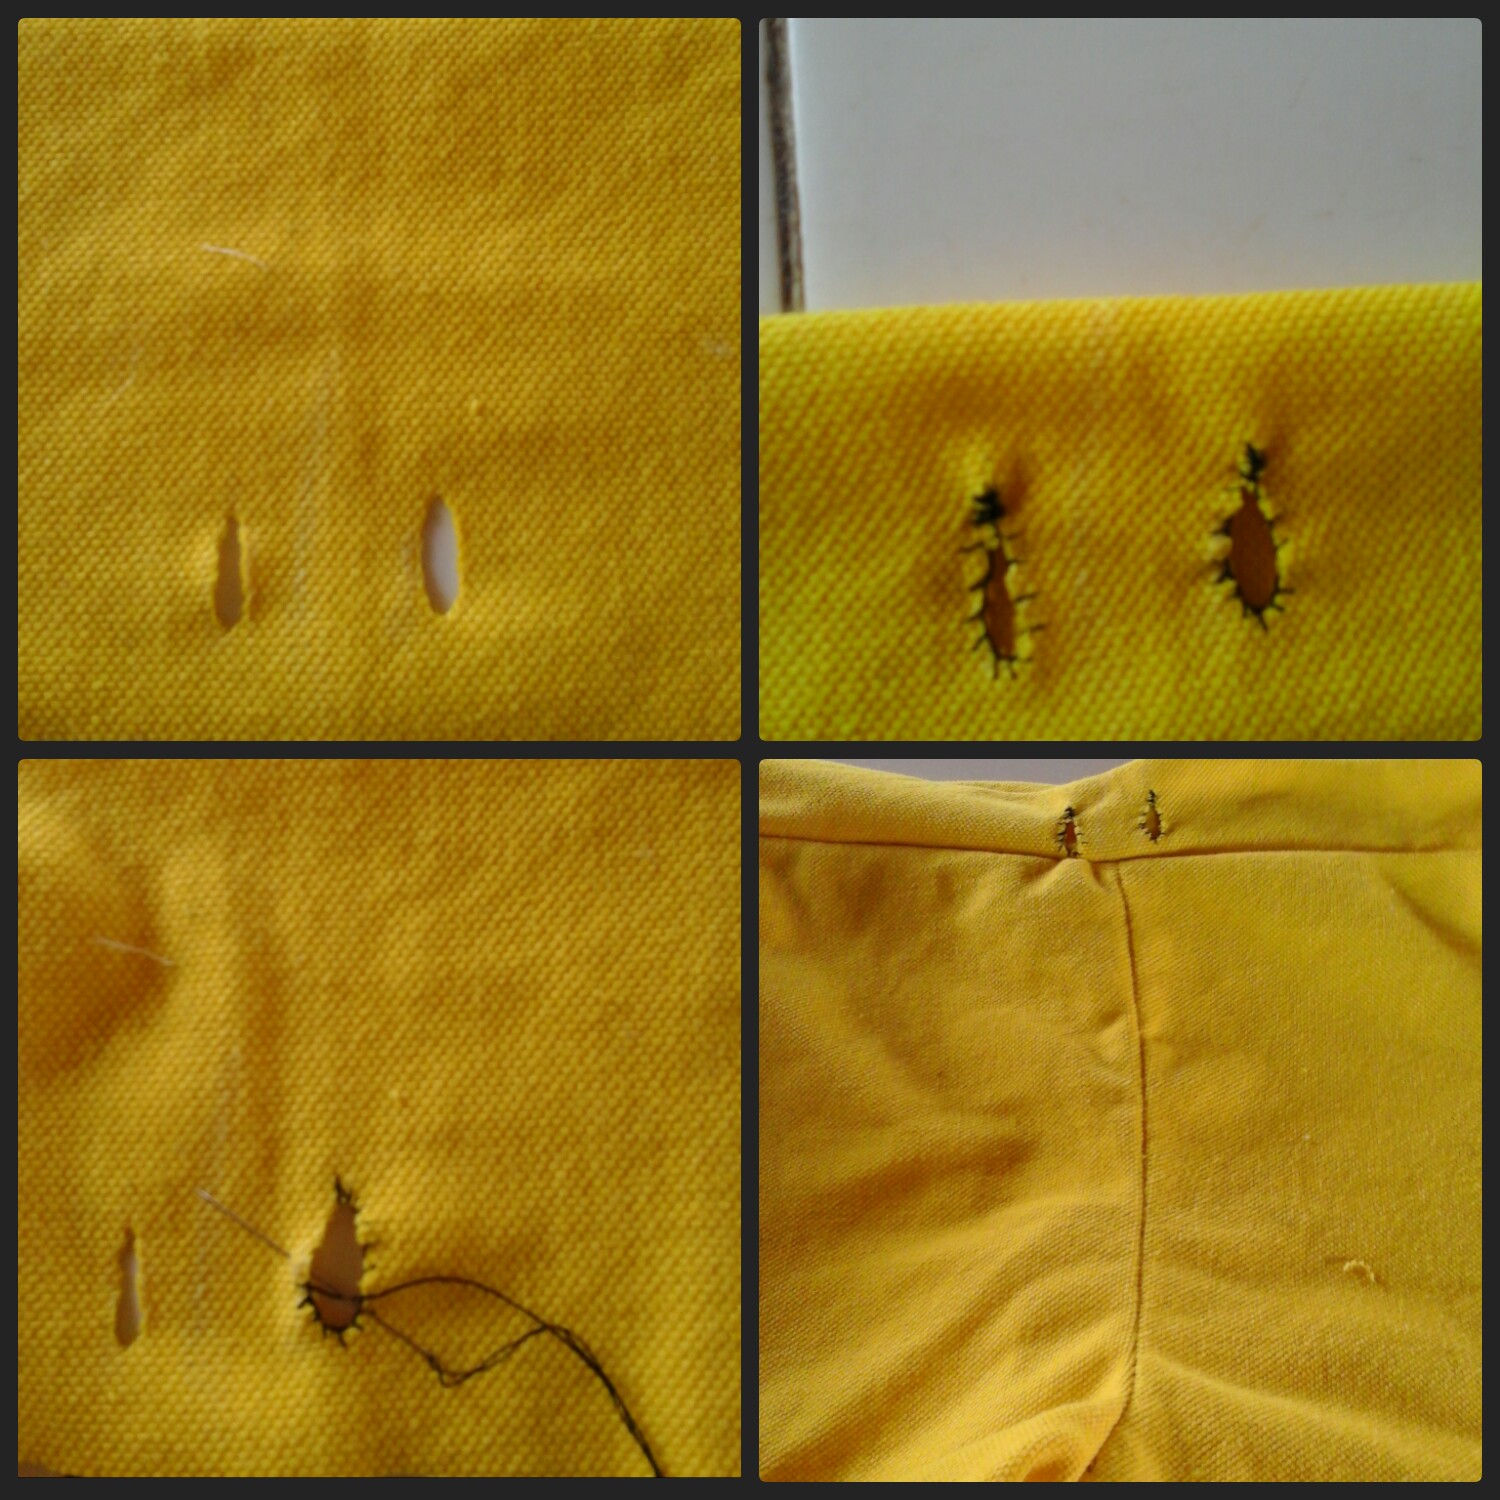
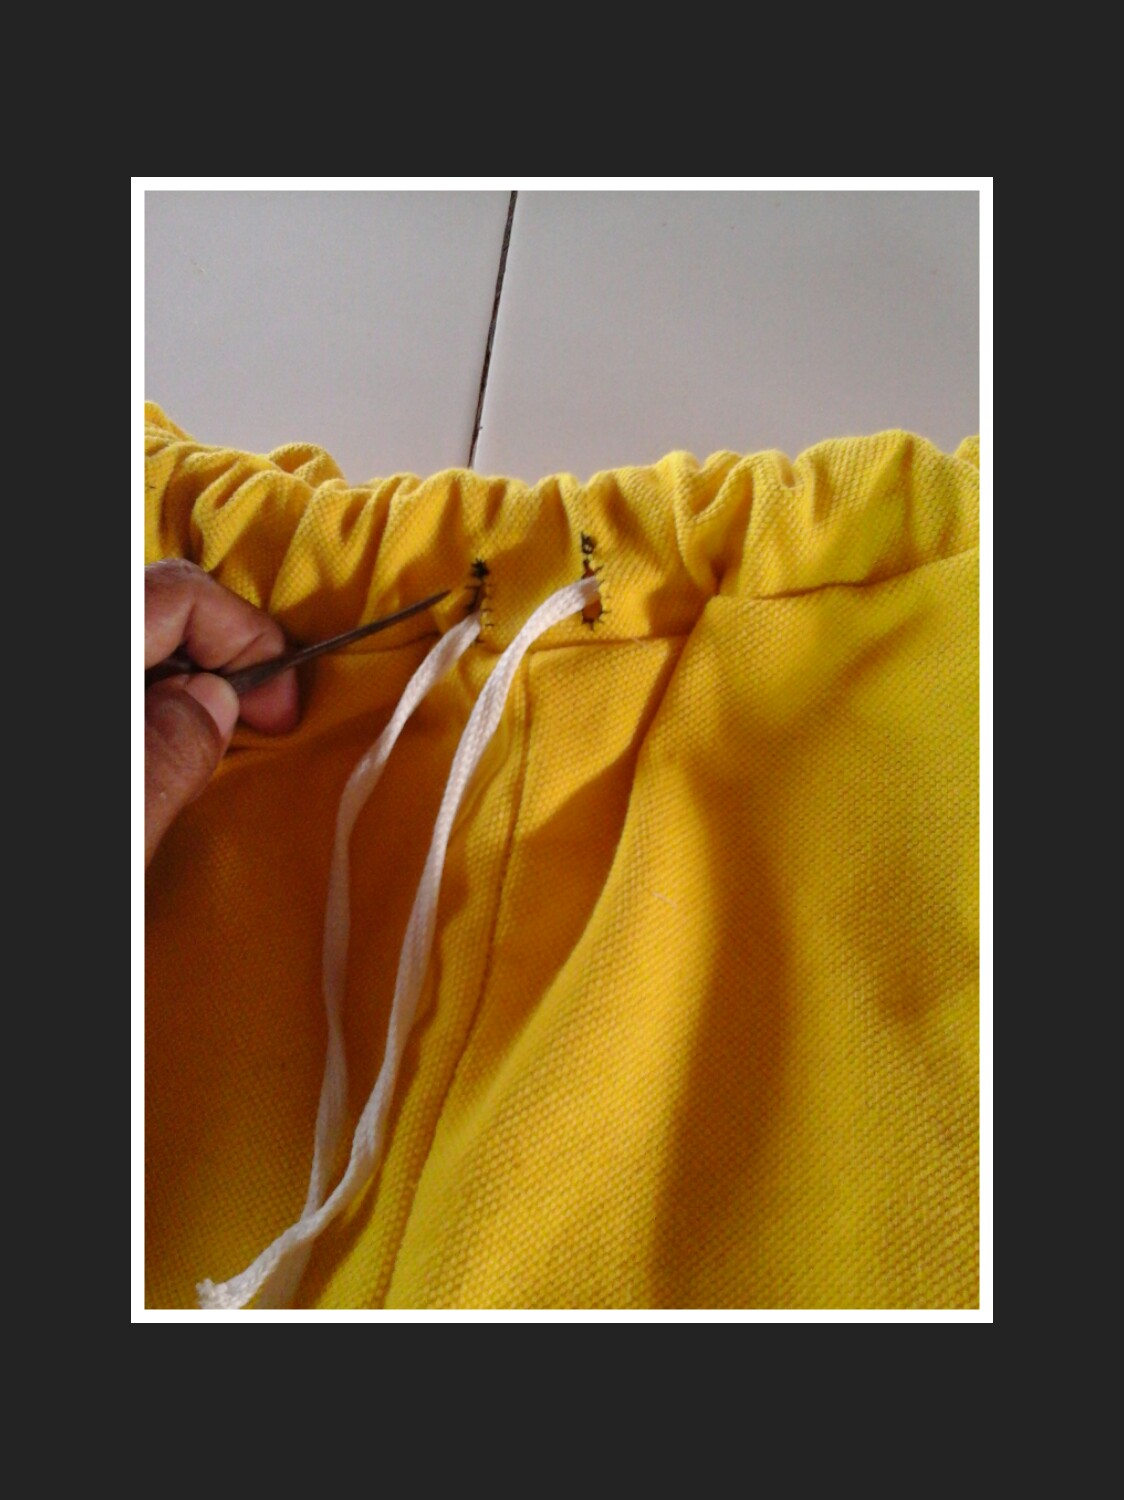
En este paso hacemos la pretina del short, debemos recortar una tira de 10cm largo con aumento para la costura, el ancho debe ser el mismo de la parte superior del short.
Cosemos los extremos para unirlo, marcamos para hacer los ojales y recortamos, deben quedar como dos orificios.
Como todas las costuras son hechas a mano, incluyendo los ojales. Hacemos una costura por los bordes tipo festón o punto de ojal el cual es el indicado. Finalmente cosemos la pretina a la parte superior del short dejando una pequeña abertura para introducir el elástico y cerramos.
In this step we make the waistband of the shorts, we must cut a 10cm long strip with an increase for the seam, the width must be the same as the upper part of the shorts. We sew the ends to join it, we mark to make the buttonholes and we cut, they should be like two holes. As all the seams are done by hand, including the buttonholes. We make a seam along the edges, such as a festoon or buttonhole stitch, which is indicated. Finally we sew the waistband to the top of the shorts leaving a small opening to insert the elastic and close.
Con ayuda de una aguja de tejer introducimos el cordón, puedes utilizar cualquier otro objeto.
Para terminar hacemos doble costura tipo pespunte en la parte del dobladillo.
With the help of a knitting needle we introduce the cord, you can use any other object. To finish we make a double stitch type seam on the hem part.
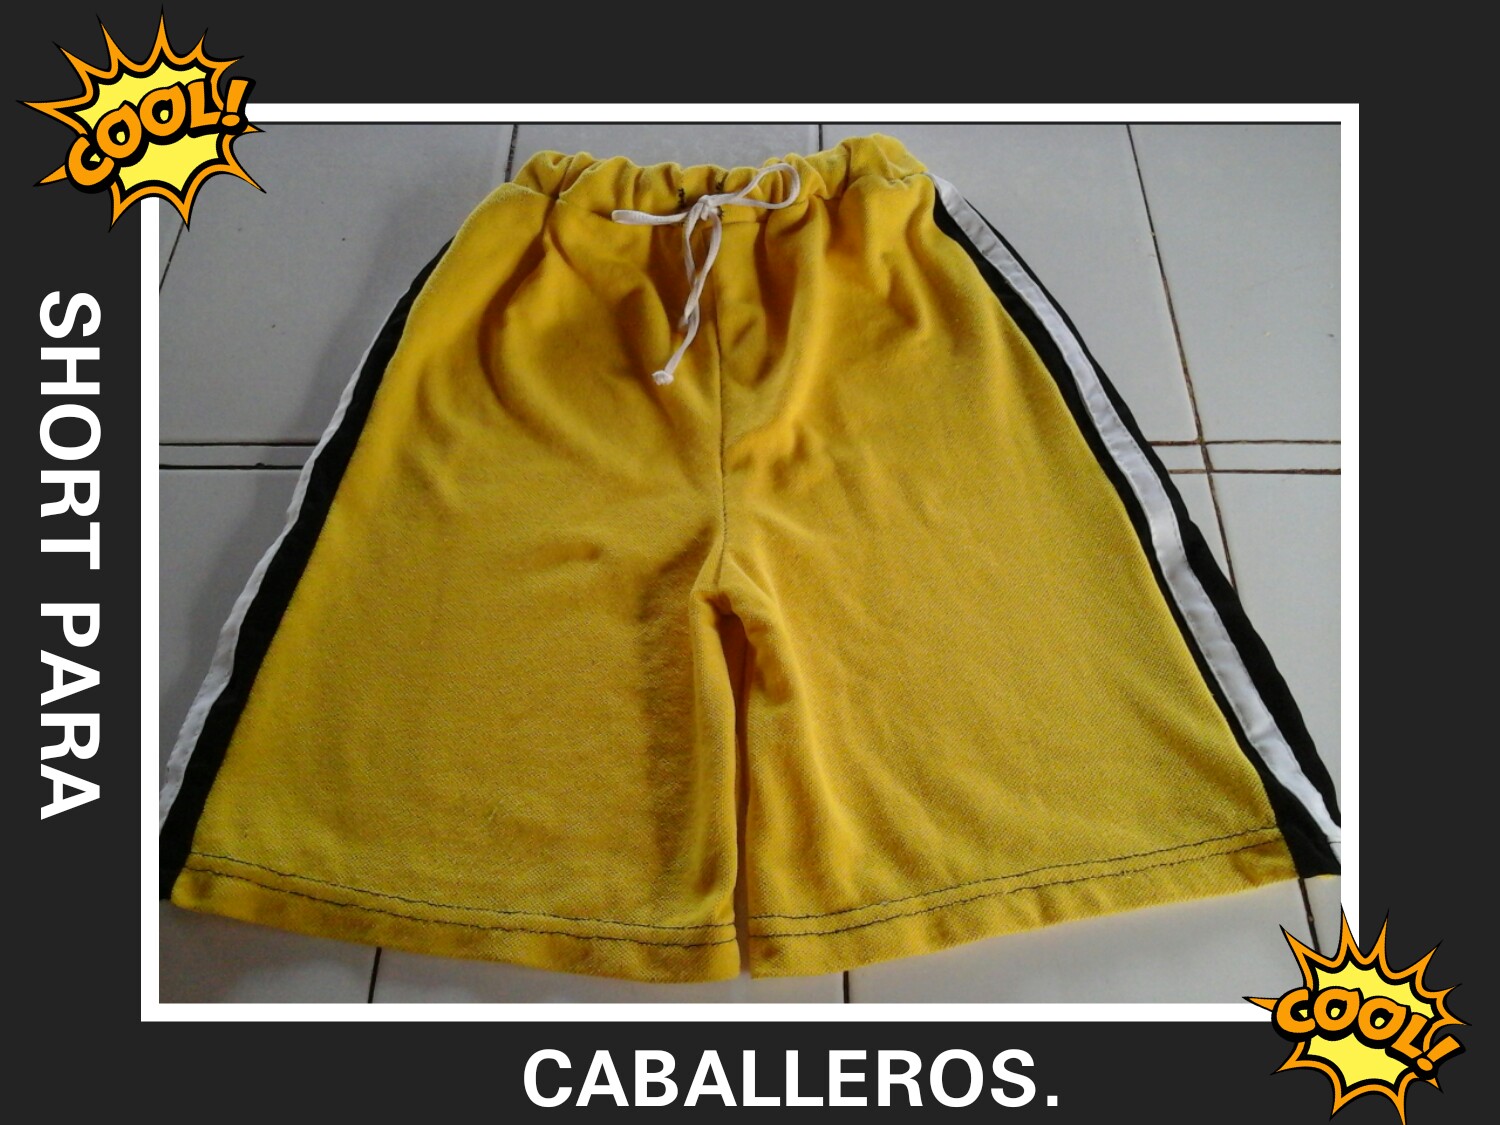
TRABAJO FINAL.💖
De esta manera luce este cómodo y colorido short amarillo con franjas a los lados. Es una satisfacción para mi poder obtener un buen resultado, cuando lo vi terminado no quería creer como quedó😁 jajaja!.
Creo que con un poco de imaginación y dedicación, podemos diseñar muy buenos trabajos de confección. ¡Así que a sacarle provecho a esas telas!.
FINAL WORK.💖
In this way, wear these comfortable and colorful yellow shorts with stripes on the sides. It is a satisfaction for me to be able to obtain a good result, when I saw it finished I did not want to believe how it turned out😁 hahaha! I think that with a little imagination and dedication, we can design very good clothing. So let's take advantage of those fabrics!
Amigos hemos llegado al final de éste post, quiero darte las gracias por tomarte unos minutos de tu tiempo y poder leer éste tutorial hasta el final. Para mi es un placer poder compartir con ustedes cada trabajo que hago.
Me despido de todos deseandoles que tengan un hermoso día, que la paz de Dios rebose en sus corazones cada día más y más.
Nos vemos en una próxima oportunidad, ¡cuidense mucho!.
Friends we have reached the end of this post, I want to thank you for taking a few minutes of your time and being able to read this tutorial to the end. For me it is a pleasure to be able to share with you every job I do. I say goodbye to everyone wishing you have a beautiful day, that the peace of God overflow in your hearts every day more and more. See you in a next opportunity, take care of yourselves!.
¡Se traba con mucho amor💖 y esfuerzo!.😊
It works with a lot of love💖 and effort!.😊
Todas las fotos son de mi autoria capturadas por mi tablet Samsung galaxy.
Editadas por Collage_maker.
Traductor Español/inglés ( google.com).
All photos are my own, captured by my Samsung galaxy tablet.
Edited by Collage_maker.
Spanish/English translator (google.com).
Hacer una costura a mano es un trabajo que requiere de tiempo y mucha paciencia y de verdad que has logrado hacer un trabajo bonito y limpio. Te felicito 👏. Saludos y bendiciones 😊
Hola amiga! Sip, es un trabajo de mucho tiempo. Gracias por apreciar mi trabajo, bendiciones.
😊🖐🏻
Hola amiga @anaarevalo01, siempre te he admirado por todas las prendas de vestir que coses a mano, se nota que lo haces con mucho amor y paciencia, te felicito, quedo excelente.
Gracias querida! bendiciones.😊
Beautiful, job well done, the combination of the colours looks great, thanks for sharing @anaarevalo01
Thank you very much friend!!
Thank you for sharing this amazing post on HIVE!
Your content got selected by our fellow curator @rezoanulvibes & you just received a little thank you via an upvote from our non-profit curation initiative!
You will be featured in one of our recurring curation compilations and on our pinterest boards! Both are aiming to offer you a stage to widen your audience within and outside of the DIY scene of hive.
Join the official DIYHub community on HIVE and show us more of your amazing work and feel free to connect with us and other DIYers via our discord server: https://discord.gg/mY5uCfQ !
If you want to support our goal to motivate other DIY/art/music/homesteading/... creators just delegate to us and earn 100% of your curation rewards!
Stay creative & hive on!