[Eso/ING]Making a turtleneck dress with a cute design on the skirt.💝🌹🎀👗
(Edited)
Hello my dear friends!💝
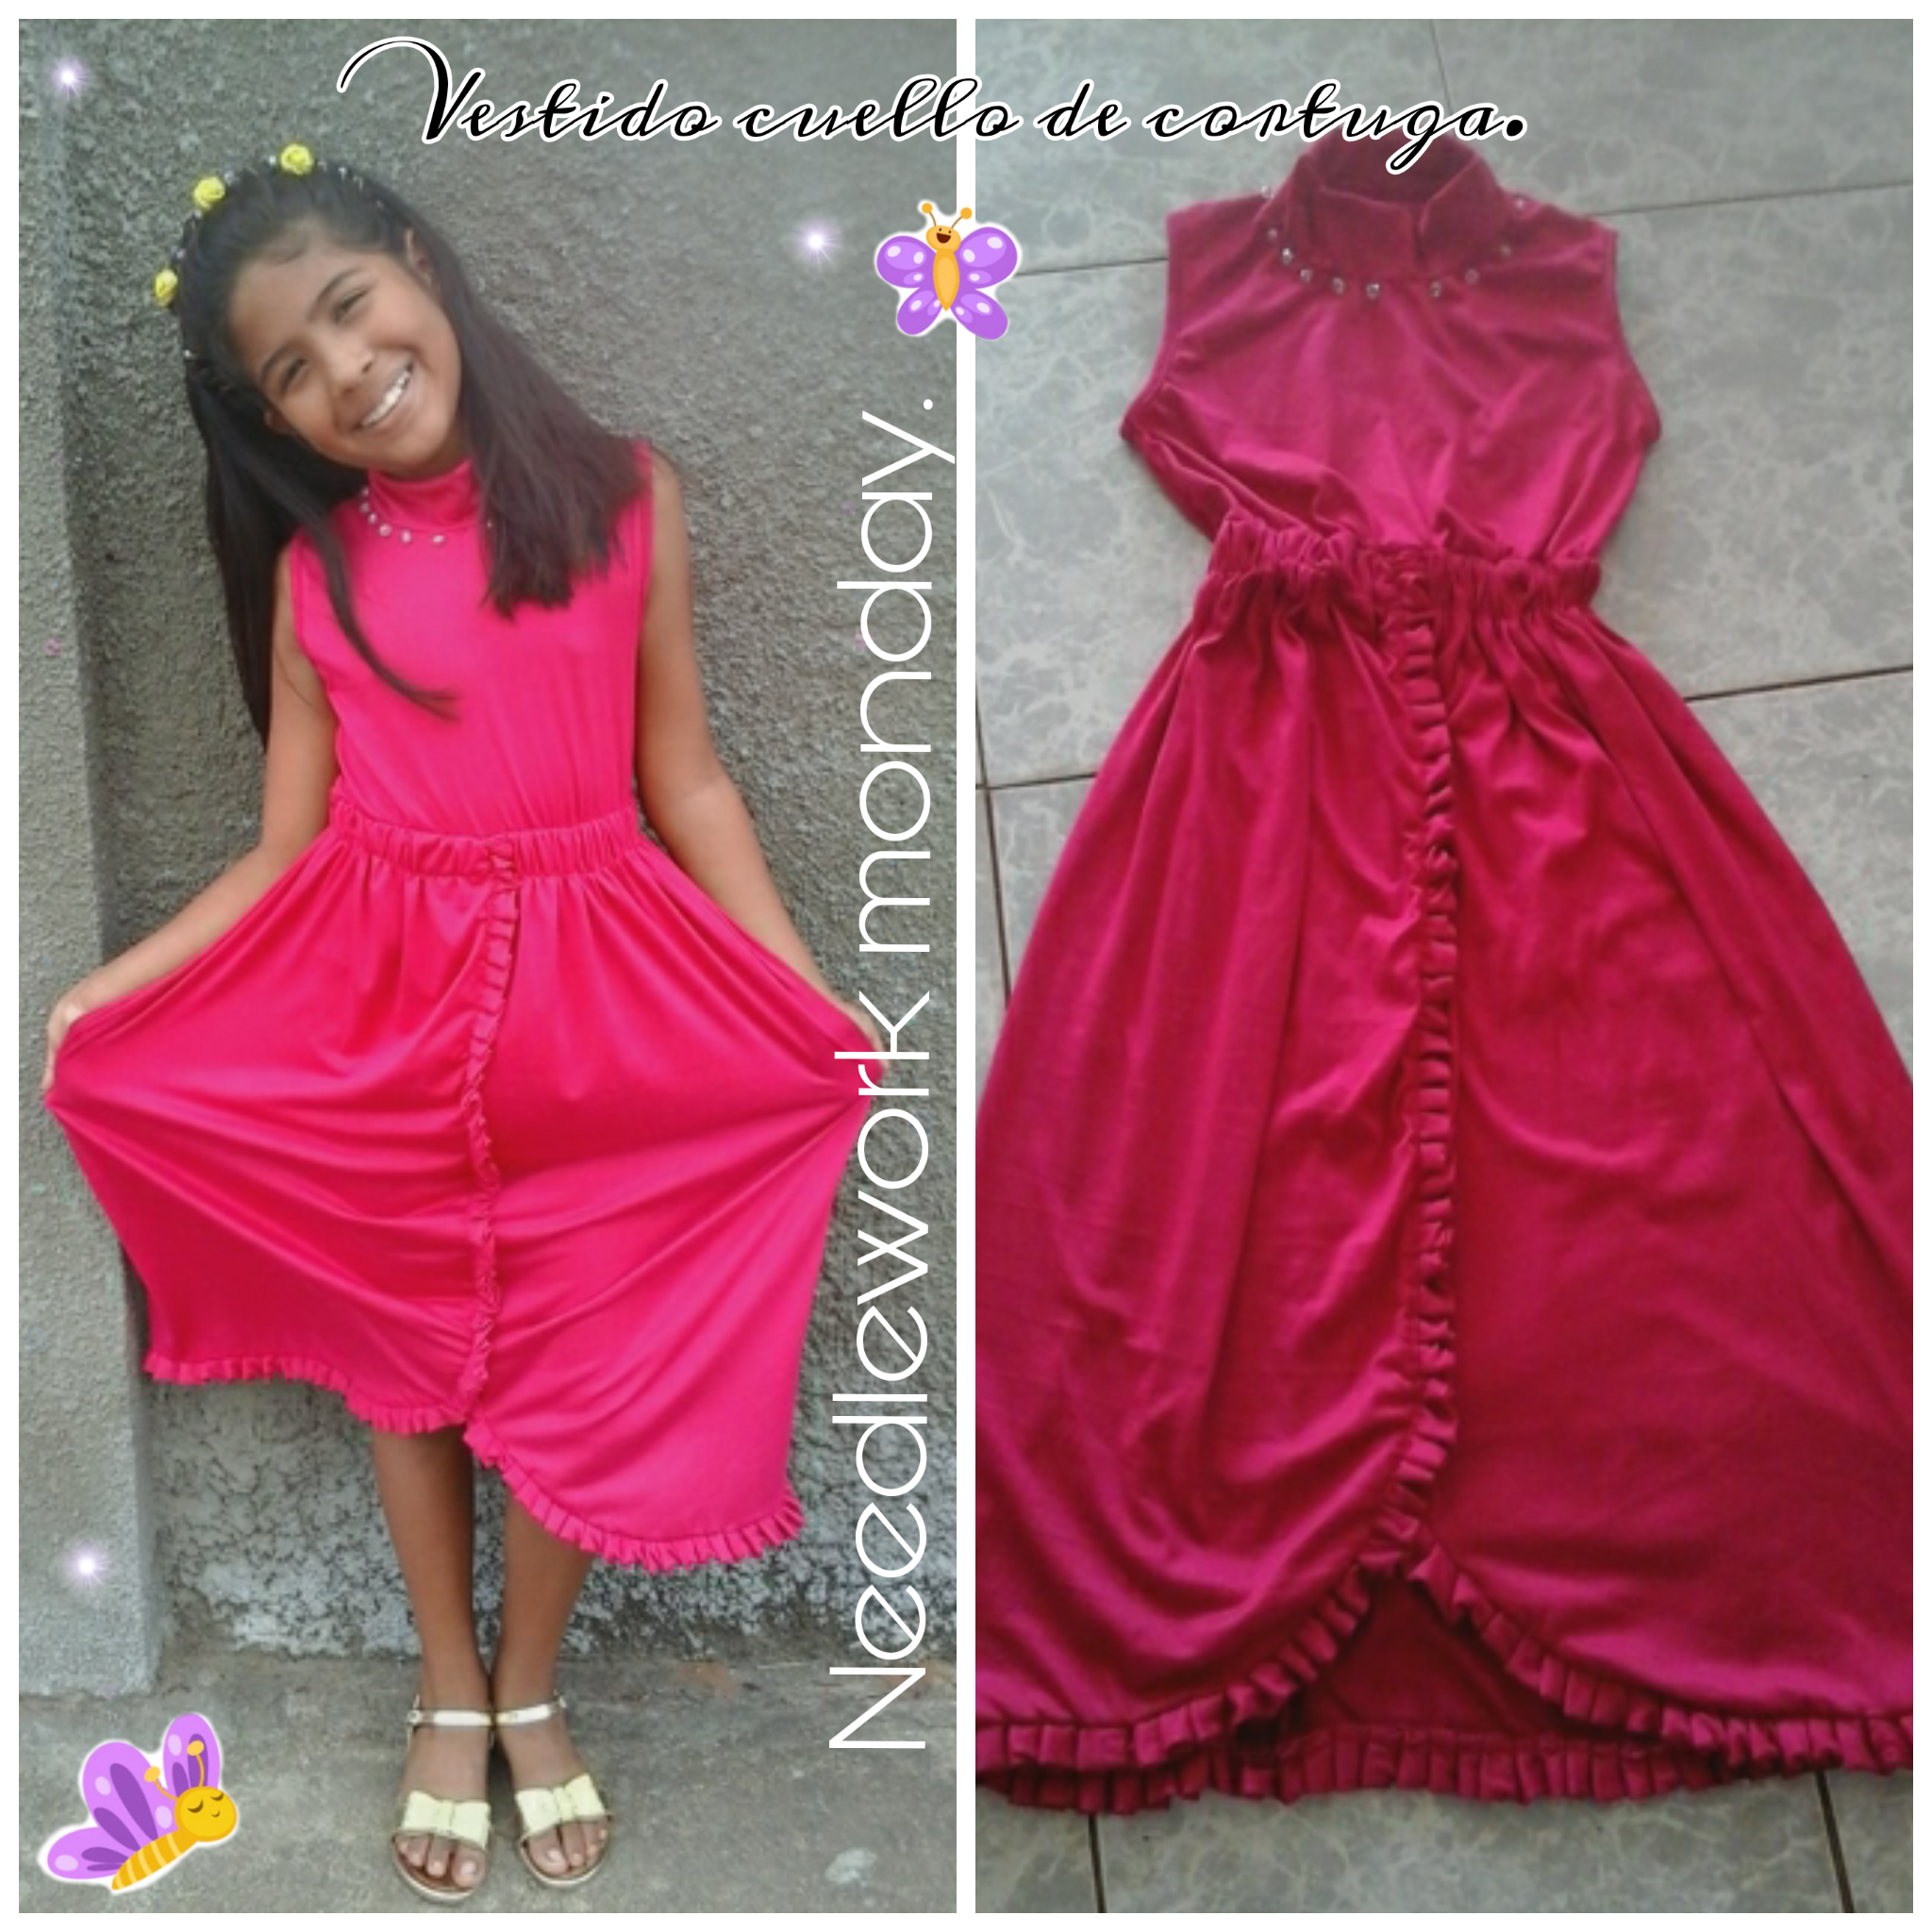
Quiero desearles una linda navidad y próspero año nuevo!. Es muy grato para mí, poder compartir con toda esta hermosa comunidad de costura. Hoy con mucha alegría les traigo un lindo contenido donde les mostraré la confección de un lindo vestido color fucsia y de tela suave y cómoda como lo es este textil piel de durazno. Está es una preciosa tela muy delicada que puede funcionar para hacer ropa para bebé hasta personas adultas. Este vestido que hice es un poco largo con un lindo diseño en la parte de la falda y de cuello largo que lo hace ver muy elegante a la hora de lucirlo. Si les gusta este diseño de vestido, les invito a que me sigan en todo este proceso de confección.
I want to wish you Merry Christmas and a Happy New Year! It is very pleasant for me to be able to share with this entire beautiful sewing community. Today I bring you content where I will show you how to make a beautiful fuchsia dress made of soft and comfortable fabric like this peach skin textile. This is a beautiful, very delicate fabric that can work to make clothes for babies to adults. This dress I made is a little long with a nice design on the skirt and a long neck that makes it look very elegant when it comes to wearing it. If you like this dress design, I invite you to follow me throughout this entire manufacturing process.
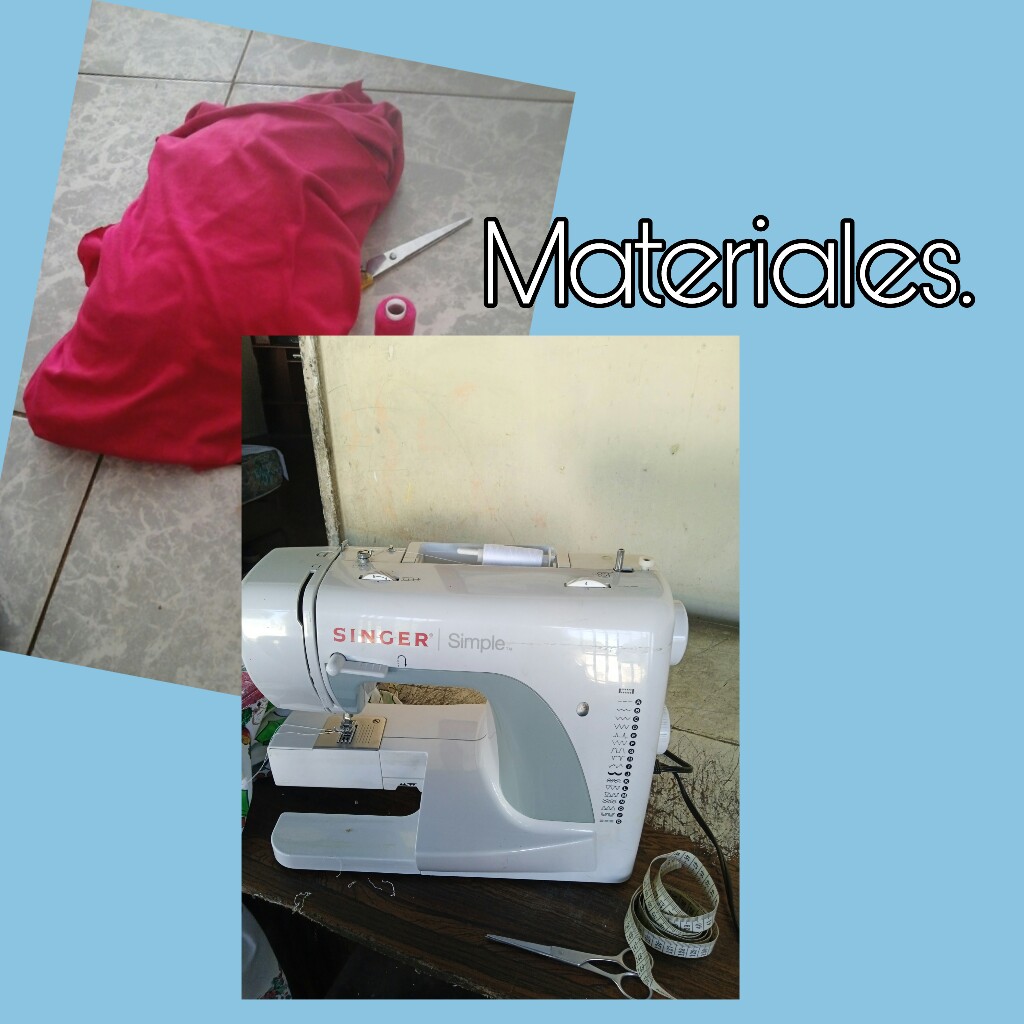
Materiales.
- 1m y 40cm de tela piel de durazno.
- Tijera.
- Hilo y agujas.
- Máquinas de coser.
- Regla y tizas para ropa.
- Patrón de la parte superior.
Materials.
- 1m and 40cm of peach skin fabric.
- Scissors.
- Thread and needles.
- Sewing machines.
- Ruler and chalk for clothes.
- Top pattern.
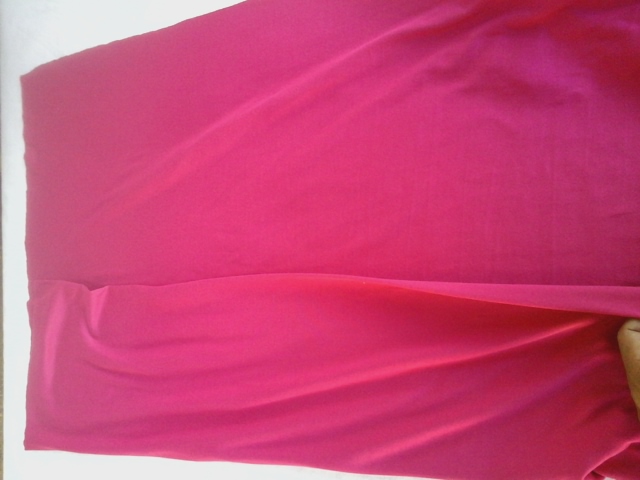
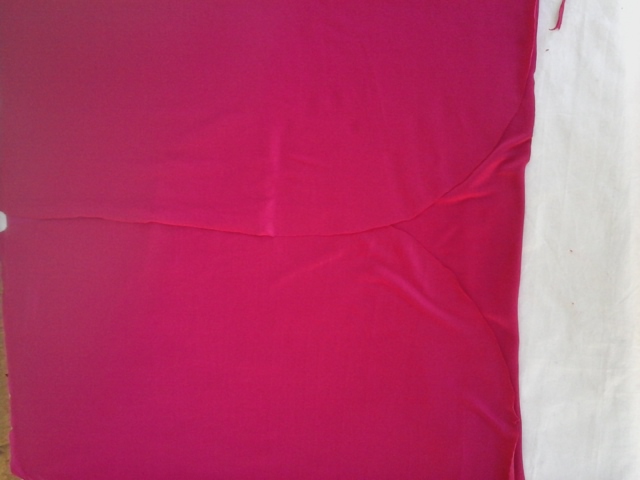
Comencemos primeramente con recortar la tela y hacer la falda, así sacar el diseño que queremos. Este corte es muy fácil, lo que hice fue cortar un pedazo de tela de 70cmx 85cm. Ahora doble los extremos trayendo hacia el frente y quedando los bordes en el centro.
Let's first start with cutting out the fabric and making the skirt, thus getting the design we want. This cut is very easy, what I did was cut a piece of fabric measuring 70cmx 85cm. Now fold the ends bringing them towards the front and leaving the edges in the center.
Vamos a utilizar la tiza para marcar tela o un crayón de color, marcamos haciendo un arco o forma redonda en la parte inferior de la tela. Una vez que marcamos, recortamos para que quede la forma deseada. Observen como queda.
We are going to use chalk to mark fabric or a colored crayon, we mark by making an arc or round shape at the bottom of the fabric. Once we mark, we cut it so that it is the desired shape. See how it looks.
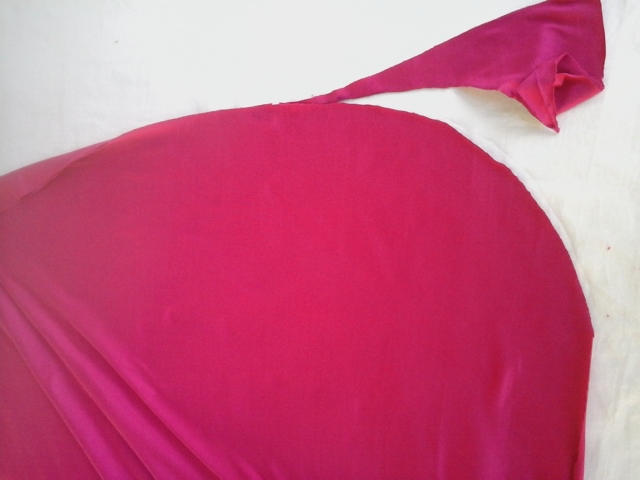
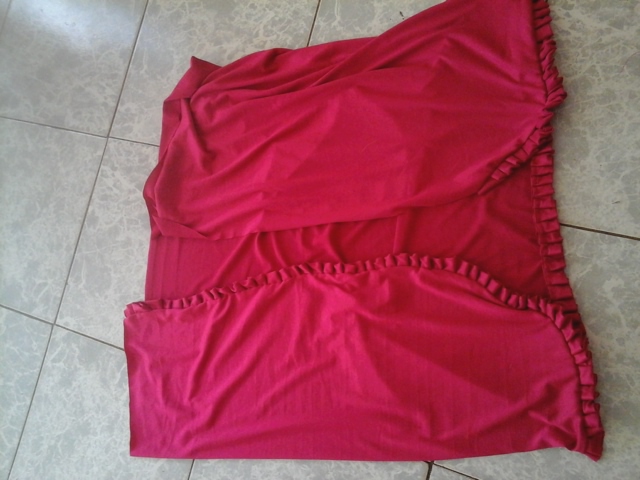
Aquí ya he recortado y les muestro como quedan. Si ustedes desean cortar más para hacerlos más grandes lo pueden hacer.
Here I have already cut out and show you how they look. If you want to cut more to make them bigger what they can do.
Ahora vamos recortar una tira muy larga hasta de 2 m dependiendo el tamaño del vestido. Este listón de tela lo vamos a ir doblando hasta crear pliegues. Yo lo que hice es ir doblando para ir creando los pliegues y de una vez ir cosiendo al vestido. Pero si ustedes quieren pueden hacer primero los pliegues y luego coserlo en el borde de lo que es la falda.
Now we are going to cut a very long strip of up to 2 m depending on the size of the dress. We are going to fold this strip of fabric until we create folds. What I did was fold to create the folds and then sew to the dress. But if you want you can make the pleats first and then sew it on the edge of the skirt.
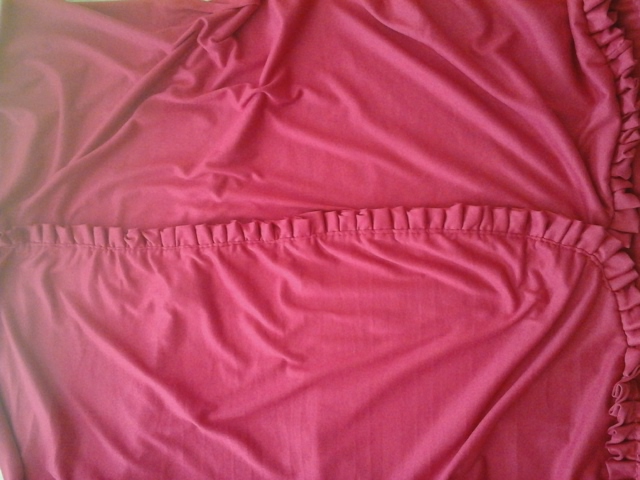
Después de colocar todo el listón en el borde, coloqué uno de los extremos sobre el otro e hice costura en la parte del frente para unir ambas.
After placing the entire ribbon on the edge, I placed one end over the other and sewed the front to join the two.
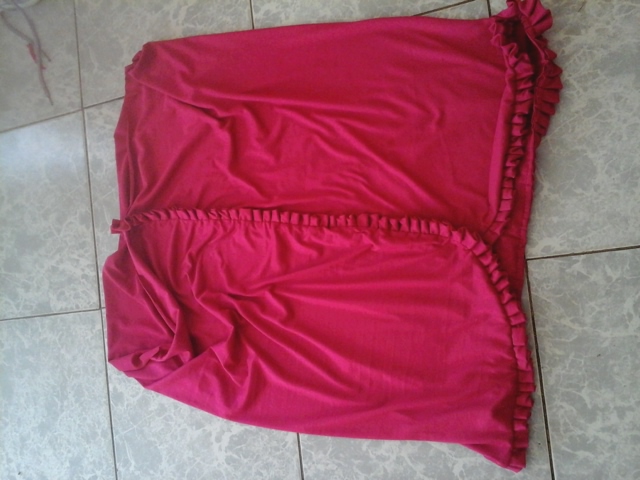
Hice costura recta sobre la tela para que se vea mejor.
I sewed straight on the fabric to make it look better.
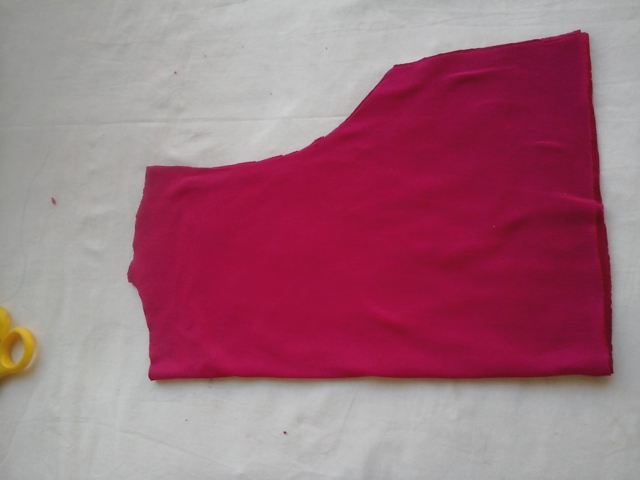
Recorté un rectángulo de 39cm de largo por 57cm de ancho al doblez. Coloqué el patrón sobre la tela marqué y recorté la parte delantera y trasera, así tendremos la pieza superior del vestido.
I cut out a rectangle measuring 39cm long by 57cm wide at the fold. I placed the pattern on the fabric, marked and cut out the front and back, so we will have the top piece of the dress.
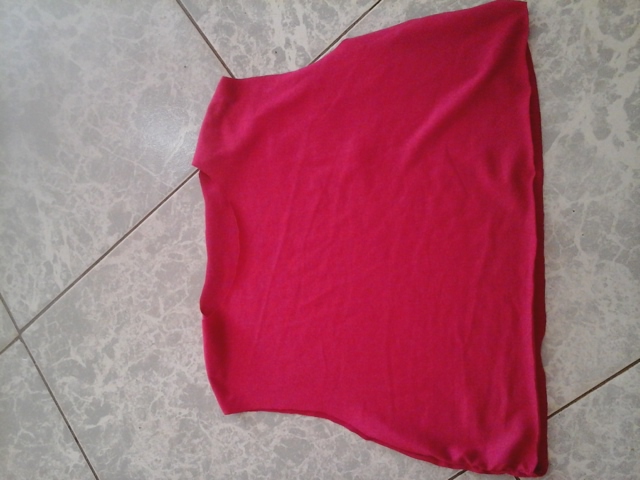
Unimos estás piezas, cosemos por la parte de los hombros y costados. Ahora vamos a coser el ruedo de sisa.
We join these pieces, sew along the shoulders and sides. Now we are going to sew the armhole hem.
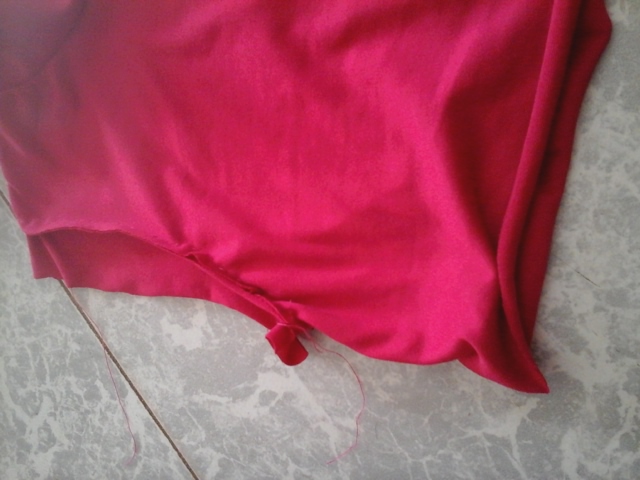
Vamos a recortar unas tiras de aproximadamente 5cm de ancho por 30cm de largo. Cosemos estás, en el borde del ruedo de sisa y doblamos trayendo hacía el frente y volvemos a coser pero sobre la tela.
We are going to cut some strips approximately 5 cm wide by 30 cm long. We sew these, on the edge of the armhole hem and fold towards the front and sew again but on the fabric.
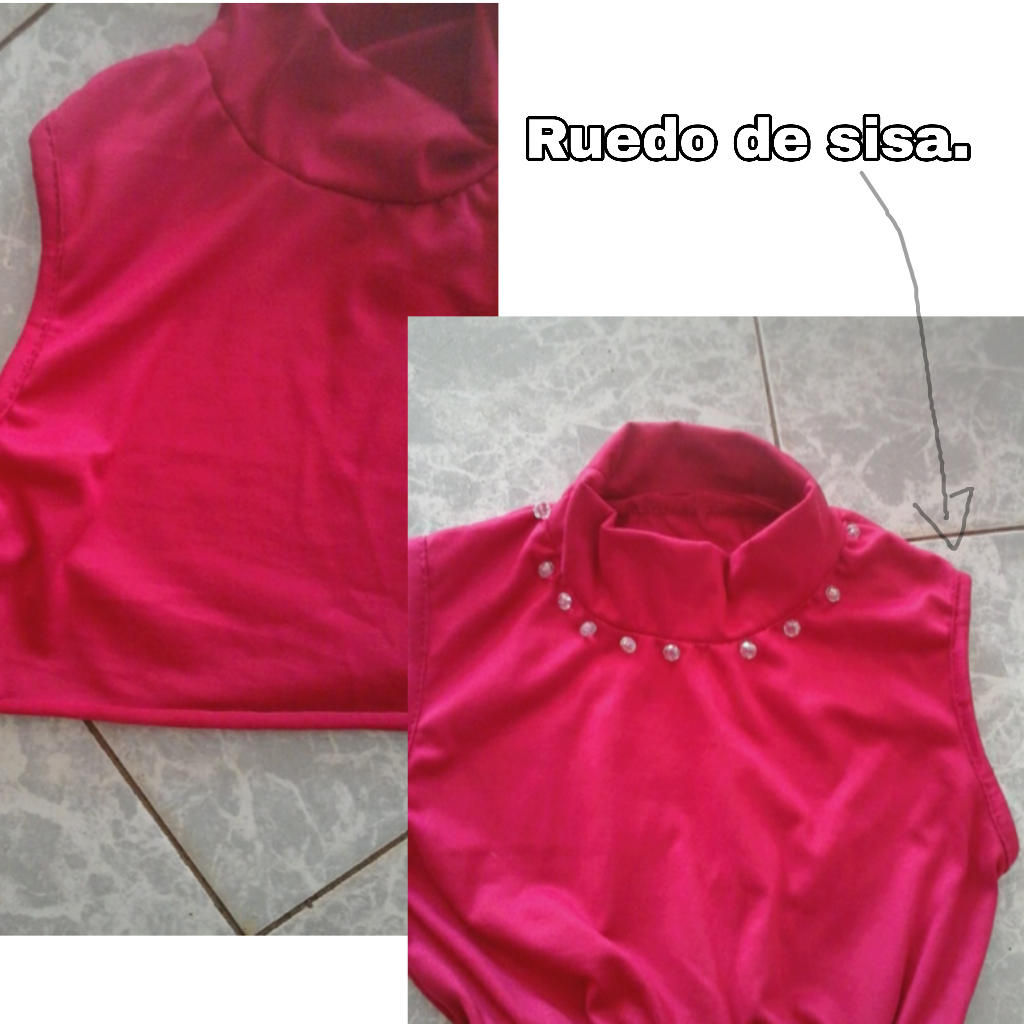
He terminado de coser el ruedo de sisa ahora haremos el cuello. Recortamos un trozo de tela para hacer el cuello de 28cmx 8cm al doblez. Estiramos un poco está pieza y la cosemos en el cuello. Para decorarlo coloqué unos cristales alrededor.
I have finished sewing the armhole hem, now we will make the collar. We cut out a piece of fabric to make the collar measuring 28cmx 8cm when folded. We stretch this piece a little and sew it on the neck. To decorate it I placed some crystals around it.
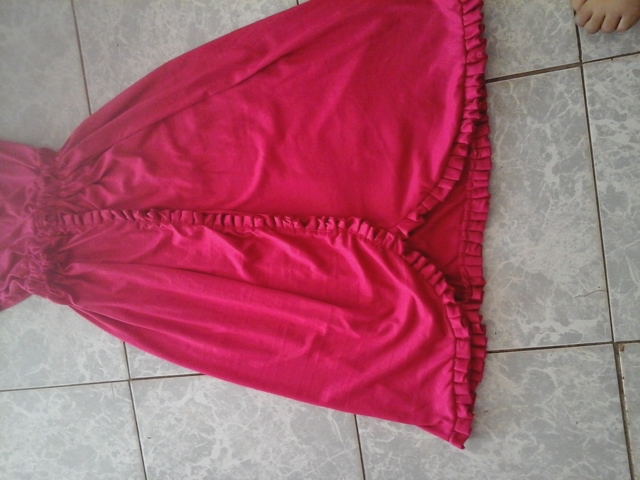
Para finalizar unimos la parte superior con la falda. Antes de coser la falda vamos a fruncir la parte de arriba y luego unimos con la blusa. Finalmente tomamos la elástica y cosemos alrededor de la costura para que se adapte a la cintura. Puedes colocar hilo elástico y quedará súper lindo.
To finish we join the top part with the skirt. Before sewing the skirt we are going to gather the top part and then join it with the blouse. Finally we take the elastic and sew around the seam so that it adapts to the waist. You can add elastic thread and it will be super cute.
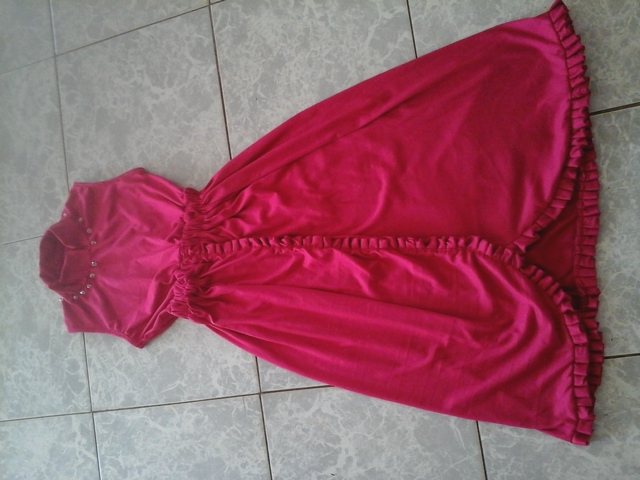
Este es el preciosos resultado, lo ame desde que comencé la confección. Espero que a ustedes también les guste.
This is the beautiful result, I loved it since I started making it. I hope you like it too.
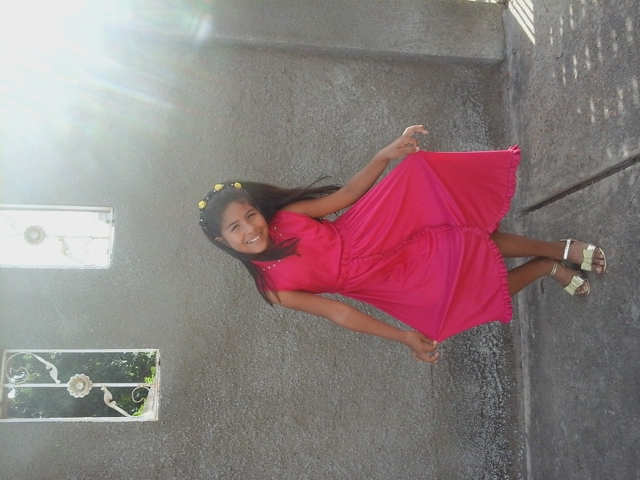

Friends, I thank you for reading until the end, I hope you liked this content that I have prepared with great love for everyone. Without further ado, I say goodbye, wishing you a beautiful afternoon and a prosperous new year. They are loved!!🙏
Contenido de mi autoría.
Fotos capturadas por tablet Samsung galaxy tab3.
Textos traducidos por Google.com
Fotos editadas por PicsArt.
Content of my authorship.
Photos captured by Samsung galaxy tab3 tablet.
Texts translated by Google.com
Photos edited by PicsArt.
0
0
0.000
Wow, this is so beautiful, I love it and I'm sure she will love it, I also love the style thanks for sharing
Hello!! Thank you very much, I did it with great love for my daughter and you.