[Esp/Ing]Confección de mameluco para bebé, hecho en casa💖🐻/Motivando a las madres principiantes en la costura👪//Make a romper for baby, homemade💖🐻 / Motivate mothers who start sewing👪.
💖¡HELLO lovely sewing community!💖
¡Después de una corta ausencia les saludos y les envío un fuerte abrazo! es un gran placer para mi, volver a estar compartiendo con todos ustedes a través de esta fabulosa y creativa comunidad de needlework monday. ¡Deseo que en este nuevo año puedan recibir muchas bendiciones y cosechar muchos exitos!.
¡After a brief absence, I greet you and send you a big hug! It is a great pleasure to share with you all again through this fabulous and creative sewing community on Monday. I wish that in this new year you can receive many blessings and reap many successes!

I am very excited because I bring you beautiful and very interesting content, it is a simple tutorial for all those mommies who are waiting for those beautiful gifts that are our children. Today I want to show you how I made a cute baby onesie from my house, this time I'm not the lucky mom, hehe!😃 but it's a gift for a friend. I tell you that at some point I had the opportunity to make baby clothes, even for my children, since they have grown a bit, I had stopped making this type of clothing.
Although I've been a bit busy, yesterday I took the opportunity to make this beautiful baby garment, since my friend is waiting for the arrival of her baby. With the making of this romper I want to inspire and motivate those beautiful mothers who in one way or another want to make one from the comfort of their home and with their own hands, it is a satisfaction to see our babies wearing this cute and tender clothing made by We. So if you are a beginner at sewing, this tutorial will help you make a cute onesie for your baby.

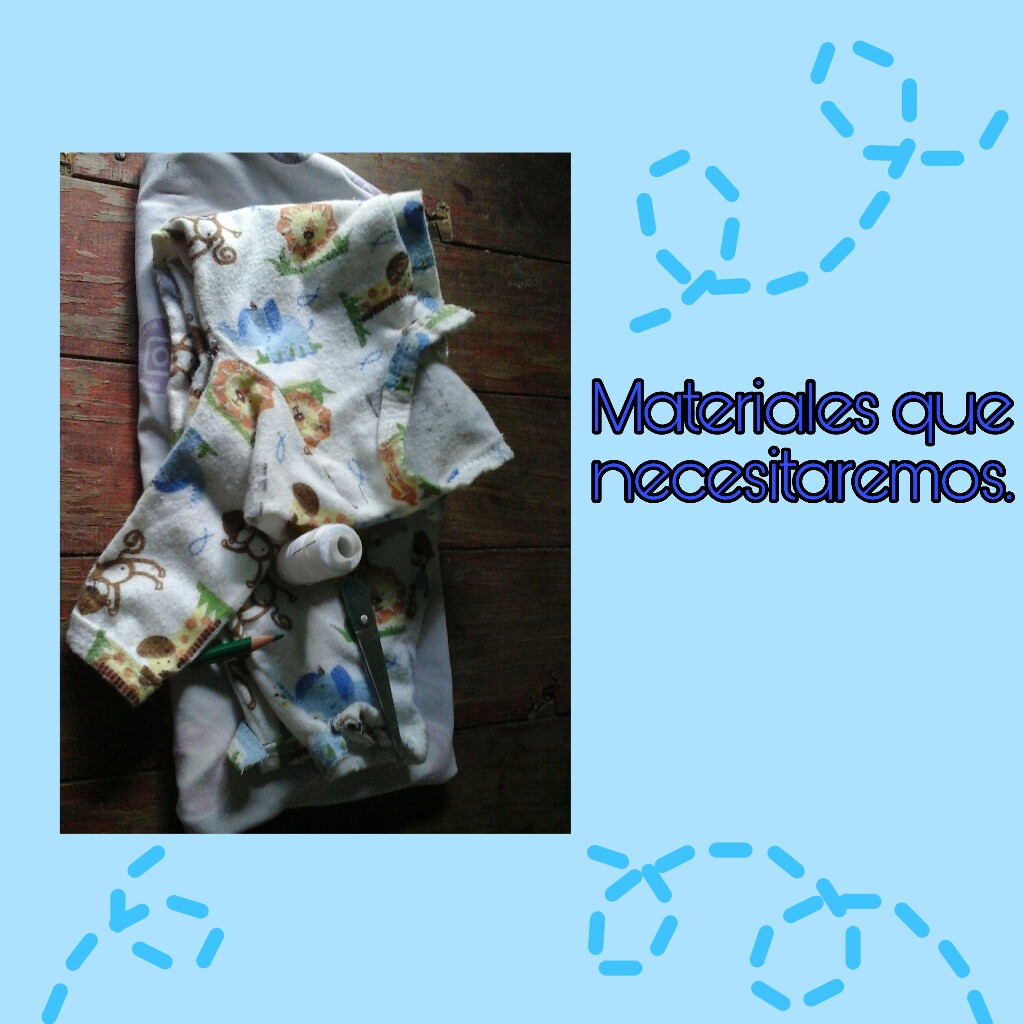
- Tela estampada tipo algodón.
- Patrones.
- Hilo y agujas.
- Tijera.
- Lápiz o tiza para marcar telas.
- Alguna cinta métrica.
- Printed cotton type fabric.
- Patterns.
- Thread and needles.
- Scissors.
- Pencil or chalk to mark fabrics.
- Some tape measure.
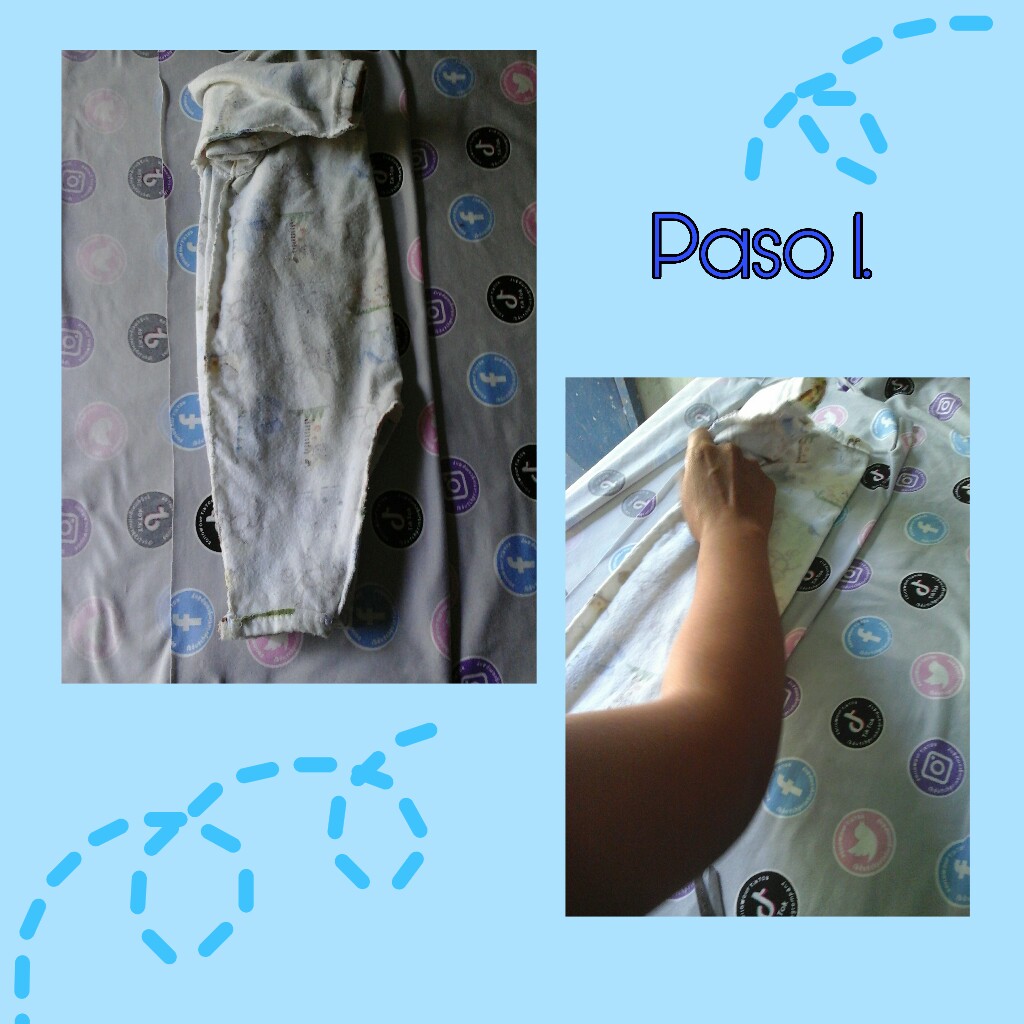
To begin we must place the fabric on a wide surface which allows us to work comfortably, we place the fabric especially of the cotton type. We spread the fabric very well on the table and we take the pattern which will help us obtain the necessary pieces, in this case use a romper that I had saved but you can do it on paper marking the outline of it, we cut and thus we obtain our pattern. We place the patterns on the fabric and mark with a colored pencil or marking chalk.
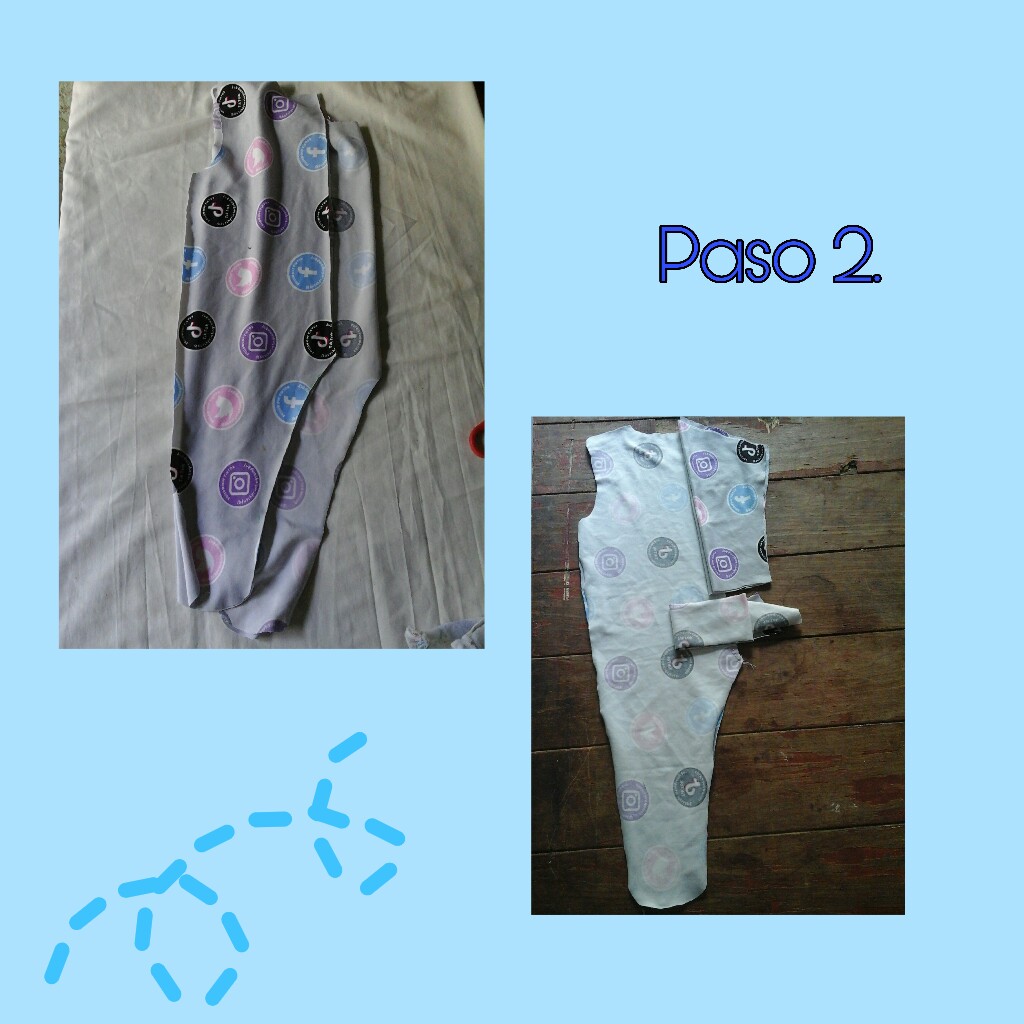
Once we have finished marking around the outline of the pattern, we cut out each piece, here I cut out the front and the back. The front part is divided so that there are two equal pieces, trimming the sleeves and the neck. Something very important that I want to tell you is that when we get to the part of the feet, we must mark in a round shape to make the socks, this will allow the baby to have his feet covered. The front part of the feet should be a few centimeters longer than the back part, since when sewing they will be the same, later I will show you how they should be.
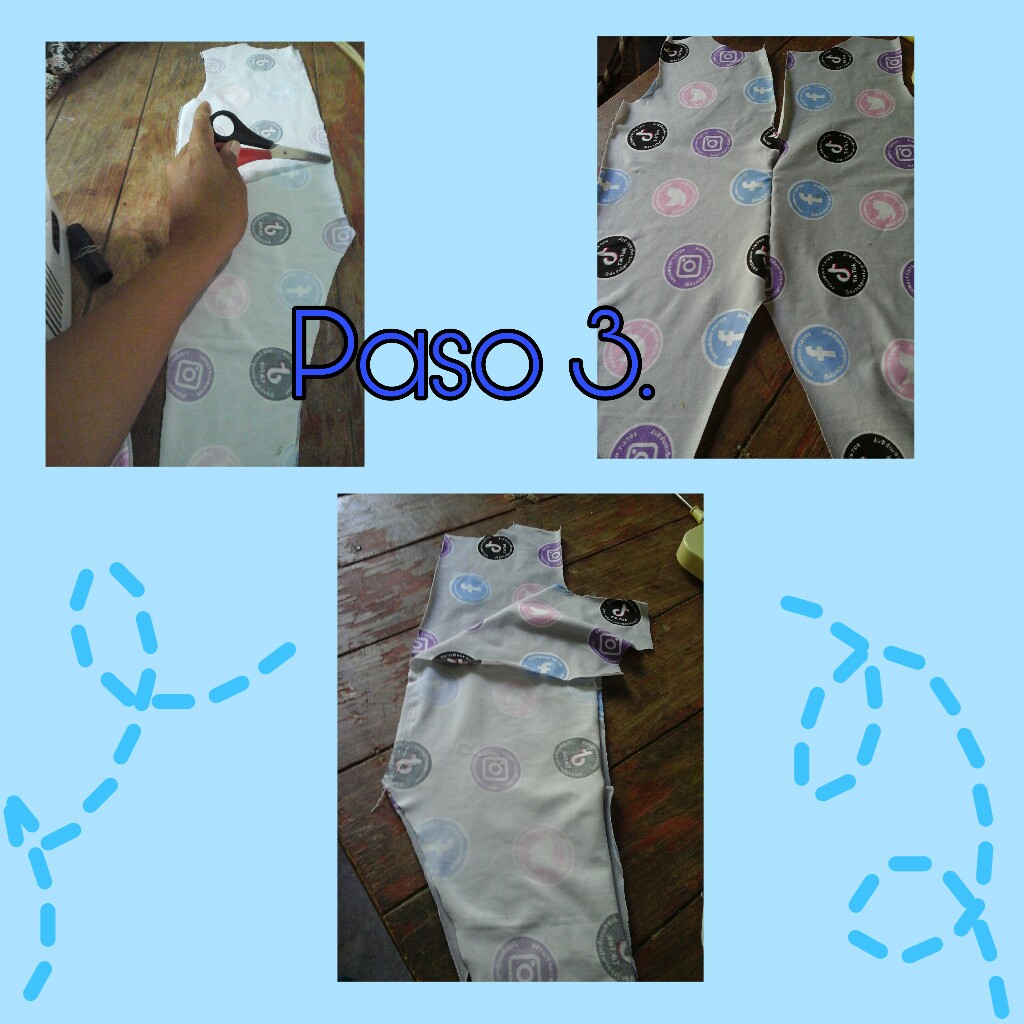
In this step we are going to sew, we measure approximately 10 cm starting from the back tip between the curve and the crotch upwards and we mark to know how far we should sew. We make a straight seam and then a zigzag seam, leaving the rest without a seam to later place the brooches.
Here we will make the front placket, we will cut a strip of approximately (20cm x 4cm) we will fold this strip and divide it in two. We sew each one in this opening where we will place the brooches. We join the front part with the back part and sew, we will also make the neck, which is very easy, we just cut another (10cm x 4cm) stretch a little and sew around the neck. You can place a strip of the color you prefer, as long as it is made of cotton fabric.
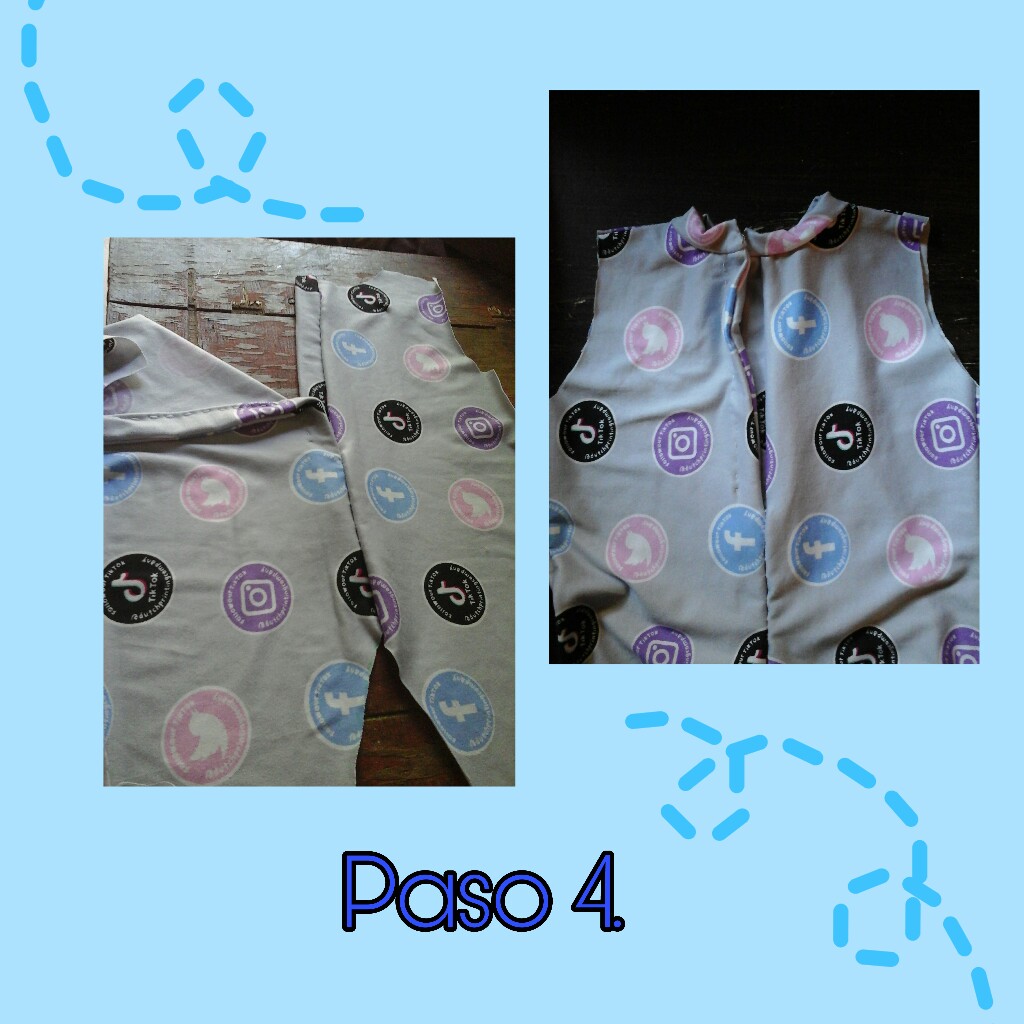
In this step we are going to continue sewing, before joining the front piece with the back piece, we make a straight seam creating a half moon, in this way they will be even, remember that when At first I said that we should cut the end of the sock in a round shape, the front should be 1.5cm longer than the back. We sew everything to join the front part with the back part.
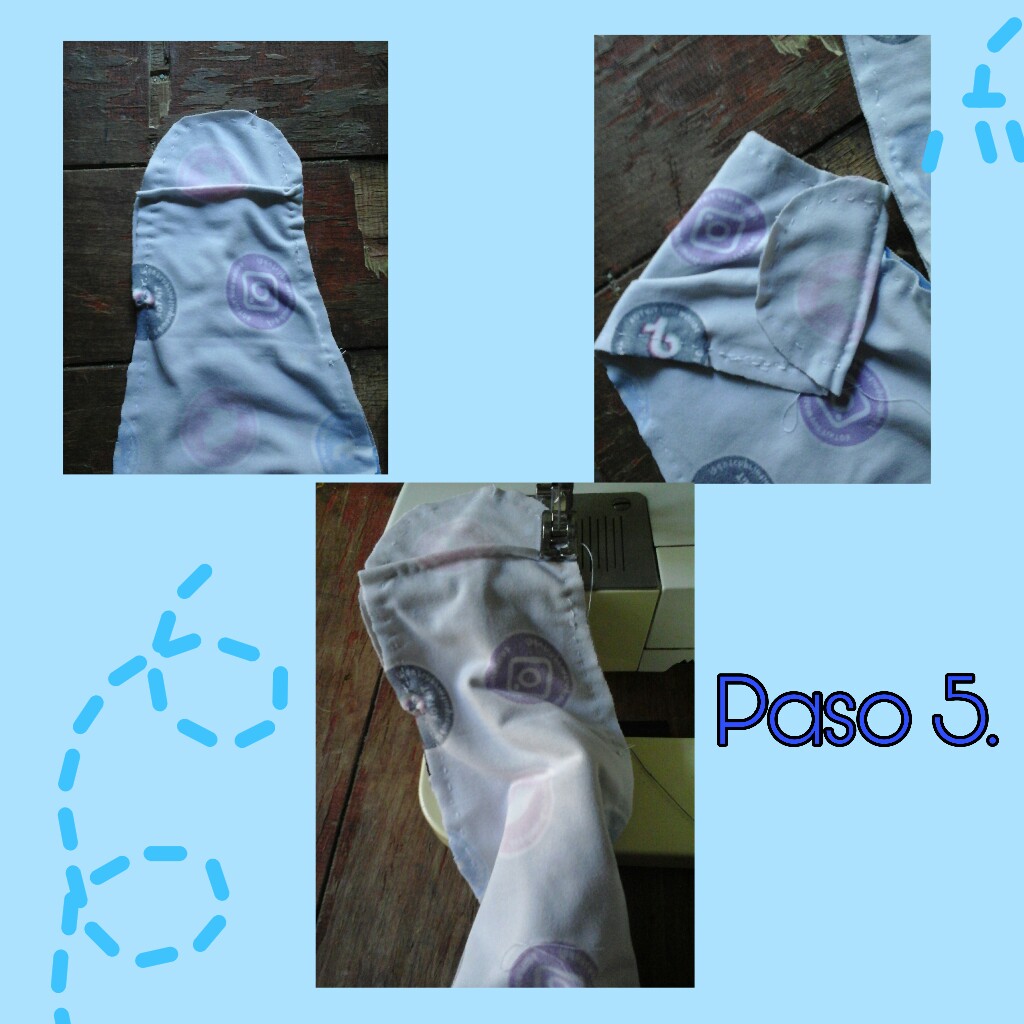
Almost to finish we place the sleeves and sew, let's not forget to make them a nice border since it is part of the romper and gives a nice image to the sleeves, we cut a 6cm wide strip , sew around just where the sleeves end and cut off the excess.

Finally we finished, I wanted to put a cute bear appliqué made with fabric, it's very easy to do, you just have to mark a circle on the fabric of your choice and cut out, so it also you can create whatever you want. It will be the muzzle, the eyes and the ears. You can place the clips by hand or go to a store where they are placed.
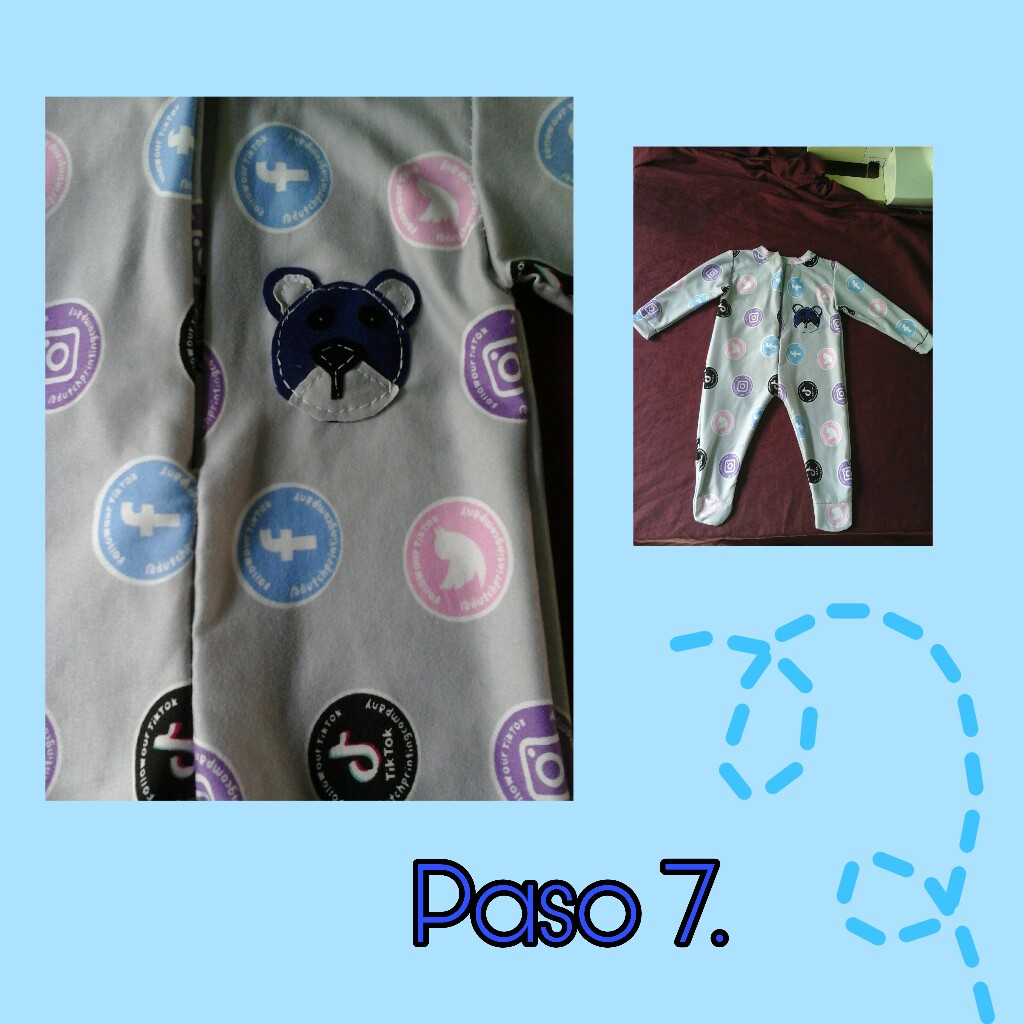

After having obtained this beautiful result, I hope it will serve as motivation for those future mothers, who are looking forward to the arrival of their baby into the world. I just want to encourage you to make your baby's clothes! I hope you enjoy it!

¡Queridos amigos ha sido un placer compartir este tutorial con todos ustedes! ¡Pasenla bien y que la paz de Dios repose en sus corazones!***
¡Dear friends, it has been a pleasure to share this tutorial with all of you! ¡Have a good time and may the peace of God rest in your hearts!

Todo el contenido es de mi autoria.
Fotos capturadas por mi tablet Samsung galaxy, editadas por Picsart.
Algunos fondos fueron tomados de Internet.
fuente
Traductor utilizado ESP/ING google.com
Credits.
All content is mine.
Photos captured by my Samsung galaxy tablet, edited by Picsart.
Some funds were taken from the Internet.
fuente
Used translator SPA/ENG google.com
Thank you for sharing this post on HIVE!
Your content got selected by our fellow curator stevenson7 & you just received a little thank you upvote from us for your great work! Your post will be featured in one of our recurring compilations which are aiming to offer you a stage to widen your audience within the DIY scene of Hive. Stay creative & HIVE ON!
Please vote for our hive witness <3
💖💖😙😙😙