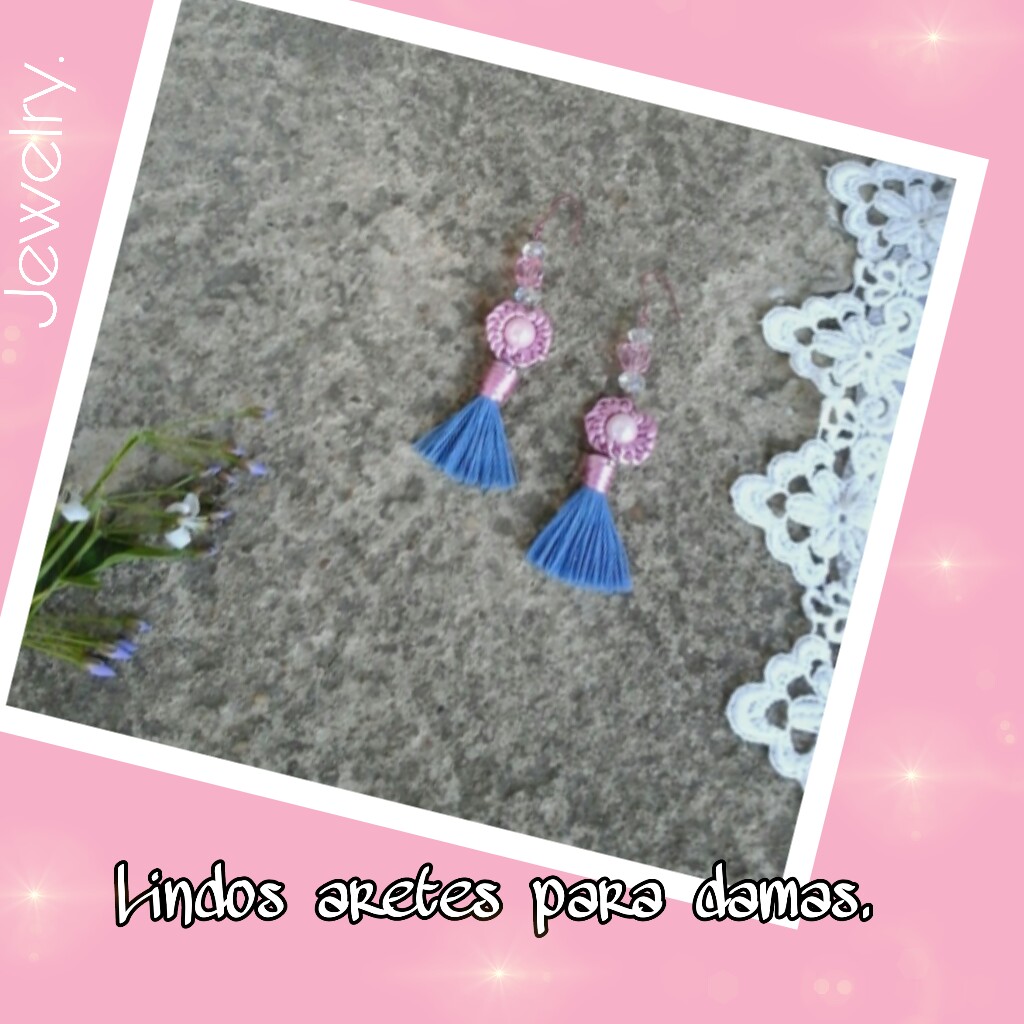
[ESP/ING] Cute and delicate tendrils of fabric and Rhinestones💙💙💙💗💗💗
Blessings friends!💙
Les saludo con muchisimo cariño, deseando que se encuentren bien, llenos de muchas bendiciones. Agradecida con Dios por permitirme nuevamente compartir con toda esta preciosa comunidad de jewelry la cual esta llena de mucho talento y joyas ¡jeje!♥. En la tarde de hoy me complace mostrarles la elaboración de unos lindos zarcillos utilizando tela tipo jens, para ser sincera no conozco el nombre de la tela ya que era un retazo que tenía gurdado. Me gusto mucho el color y quise aprovecharlo para hacer unos zarcillos combinados con rosado claro. Aquí les voy a mostrar el procedimiento y me gustaría que me acompañen.
I greet you with great affection, wishing you well, full of many blessings. Grateful to God for allowing me to share again with this entire beautiful jewelry community which is full of a lot of talent and jewelry, hehe!♥. This afternoon I am pleased to show you the making of some pretty earrings using jens type fabric, to be honest I don't know the name of the fabric since it was a scrap that I had saved. I really liked the color and I wanted to take advantage of it to make some tendrils combined with light pink. Here I am going to show you the procedure and I would like you to join me.
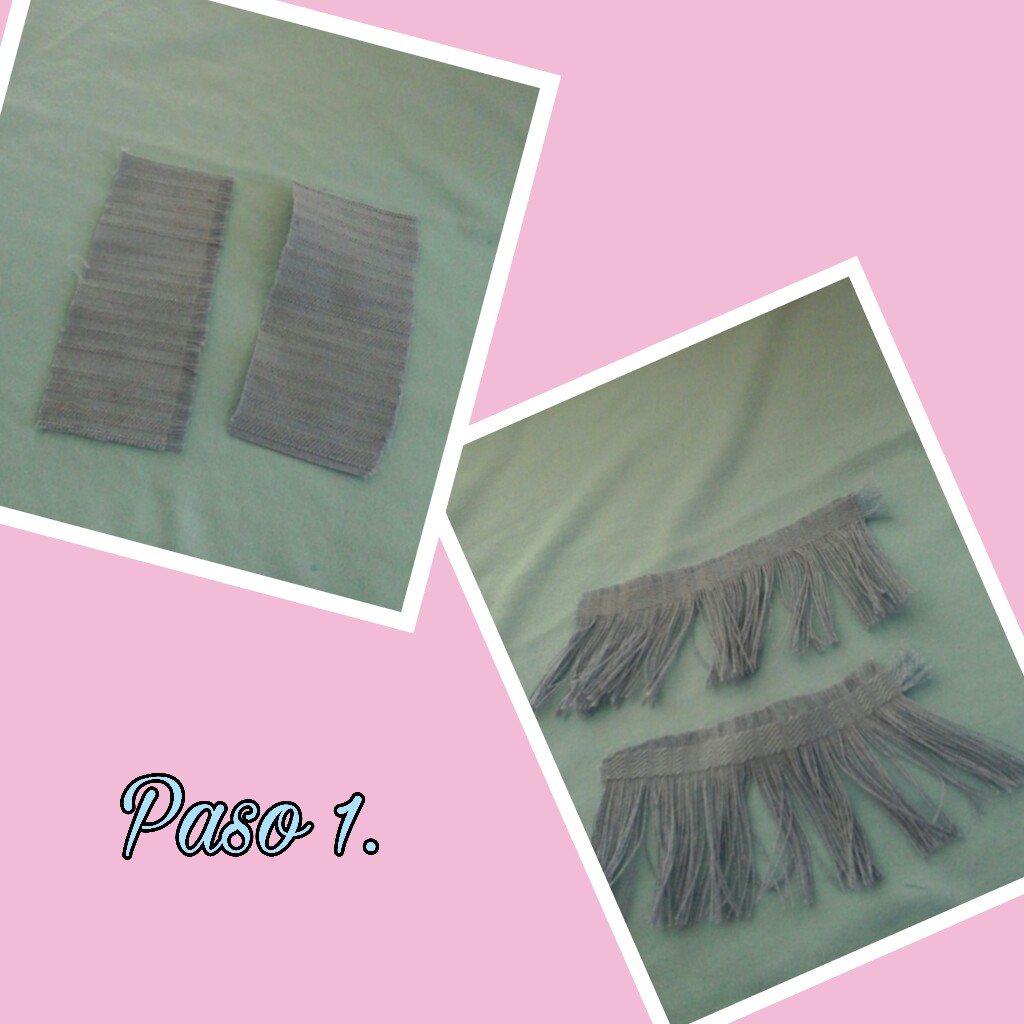
Amigos comencemos con el primer paso, vamos a recortar unos trozos de tela, en este caso un tipo de jens, de aproximadamente 4 o 5 cmx 7cm de longitud. Una vez que tenemos estos pequeños rectángulos, deshilachamos la parte inferior.
Friends, let's start with the first step, we are going to cut out some pieces of fabric, in this case a type of jens, approximately 4 or 5 cmx 7cm in length. Once we have these little rectangles, we fray the bottom part.
Seguidamente vamos a tomar una aguja enhebrada y hacemos costura floja por la parte superior de cada una. Luego halamos el hilo para crear un arruchado y doblamos la tela para que quede como unas brochas.
Next we are going to take a threaded needle and make a loose seam on the top of each one. Then we pull the thread to create a wrinkle and fold the fabric so that it looks like brushes.
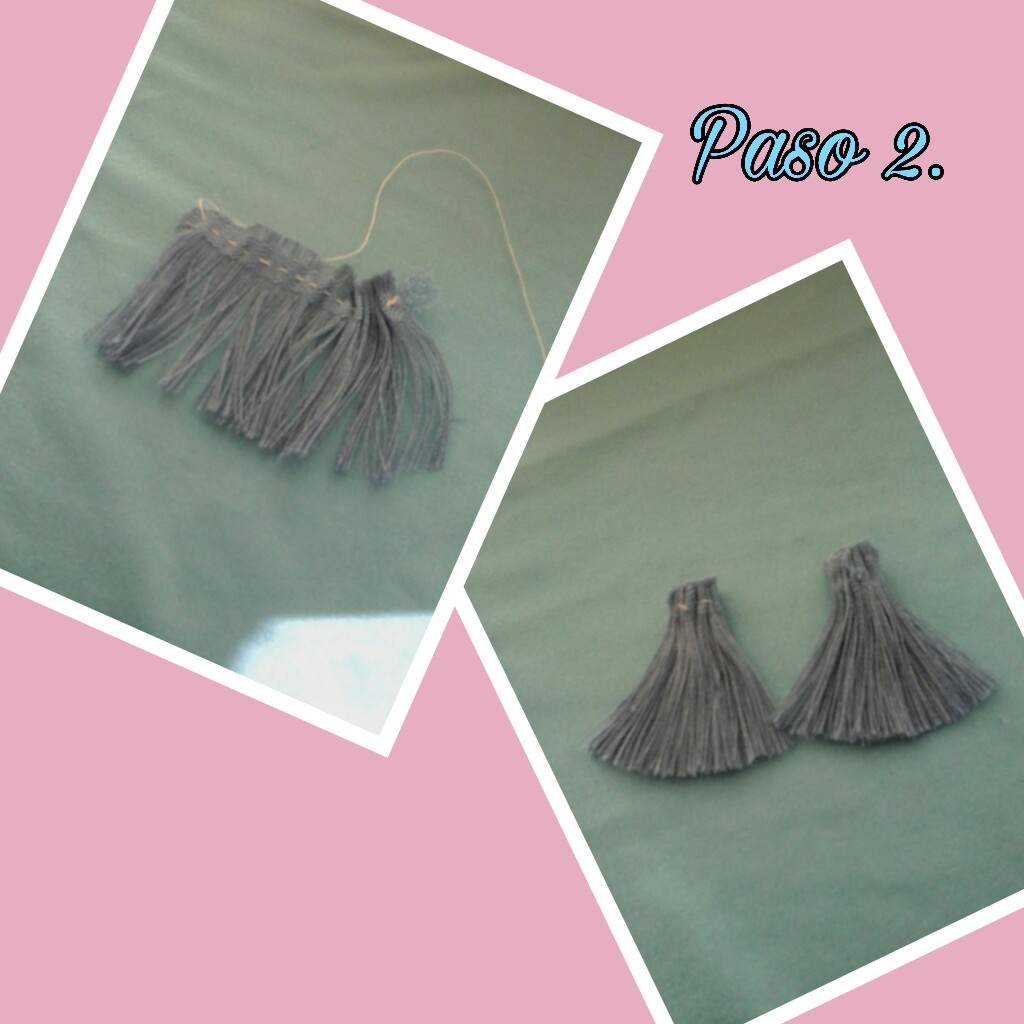
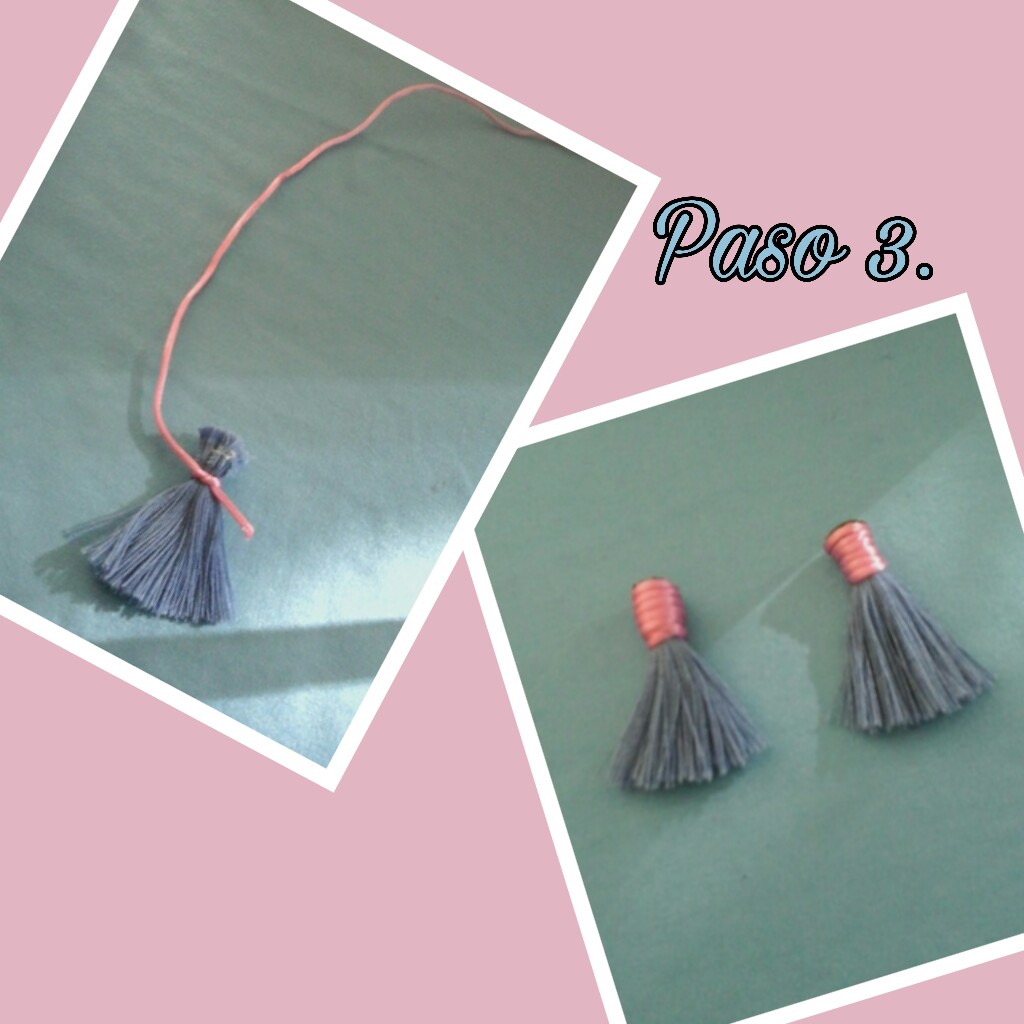
Ahora vamos a utilizar hilo cola de ratón rosado claro, atamos haciendo un nudo alrededor de esta brochita, luego giramos el hilo alrededor de estas piezas hasta cubrir todo. Puedes utilizar algún pegamento como silicona fría y finalmente cortamos el sobrante y quemamos un poco con un encendedor.
Now we are going to use light pink mouse tail thread, we tie a knot around this little brush, then we twist the thread around these pieces until everything is covered. You can use some glue such as cold silicone and finally we cut off the excess and burn a little with a lighter.
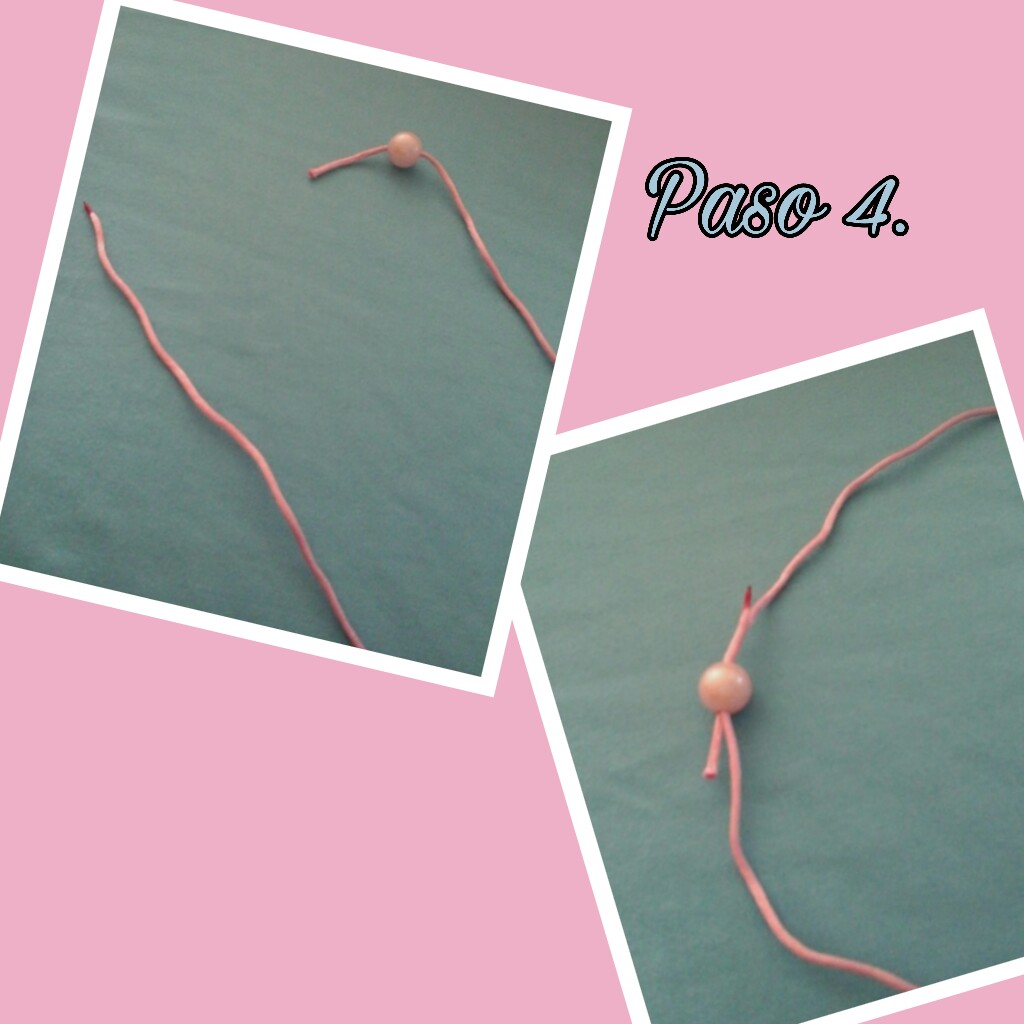
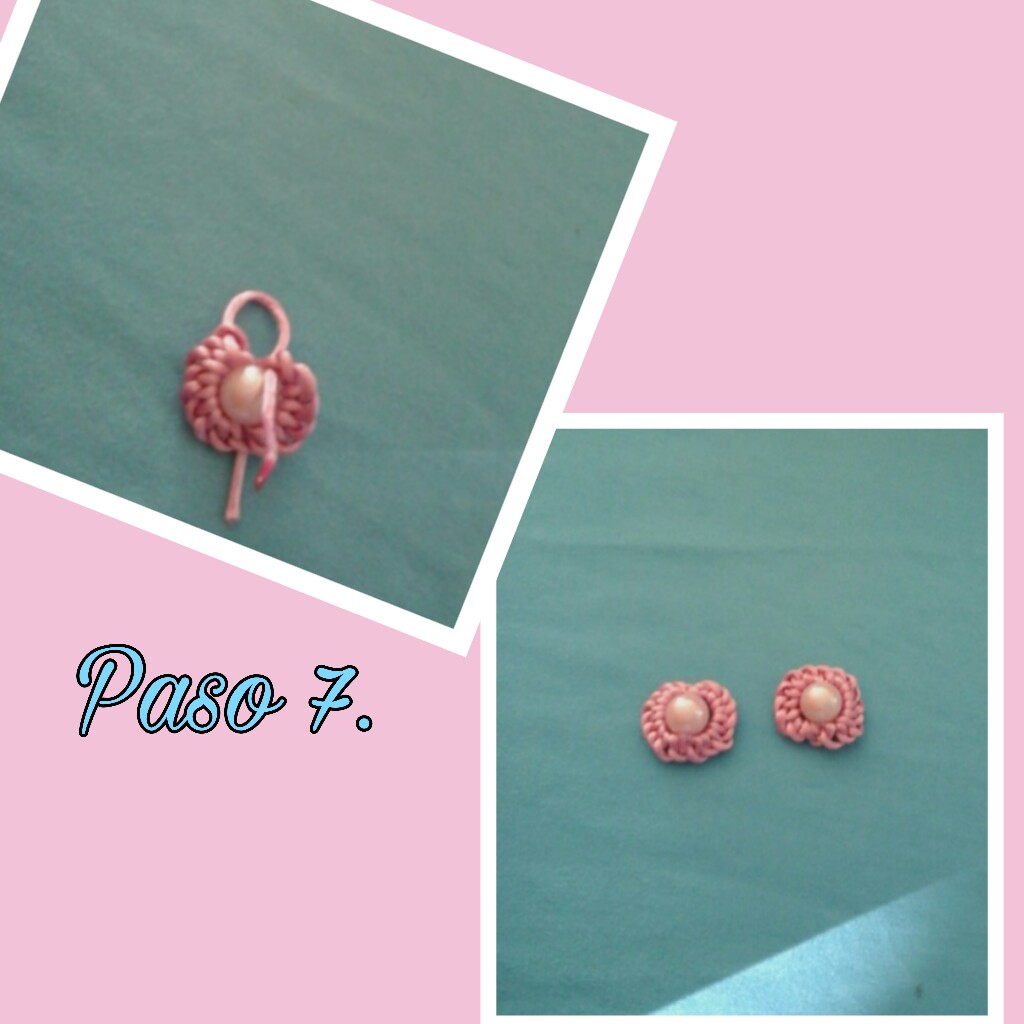
En este paso haremos unas lindas flores rosadas que serán parte de estos zarcillos. Vamos a tomar el hilo cola de ratón y quemamos un poco la punta. Introducimos una perla rosa en dicho hilo y volvemos a pasar la punta del hilo por el orificio de la perla pero de manera invertida y halamos.
In this step we will make some pretty pink flowers that will be part of these tendrils. We are going to take the mouse tail thread and burn the tip a little. We insert a pink pearl into said thread and pass the tip of the thread through the hole of the pearl again but in an inverted manner and pull.
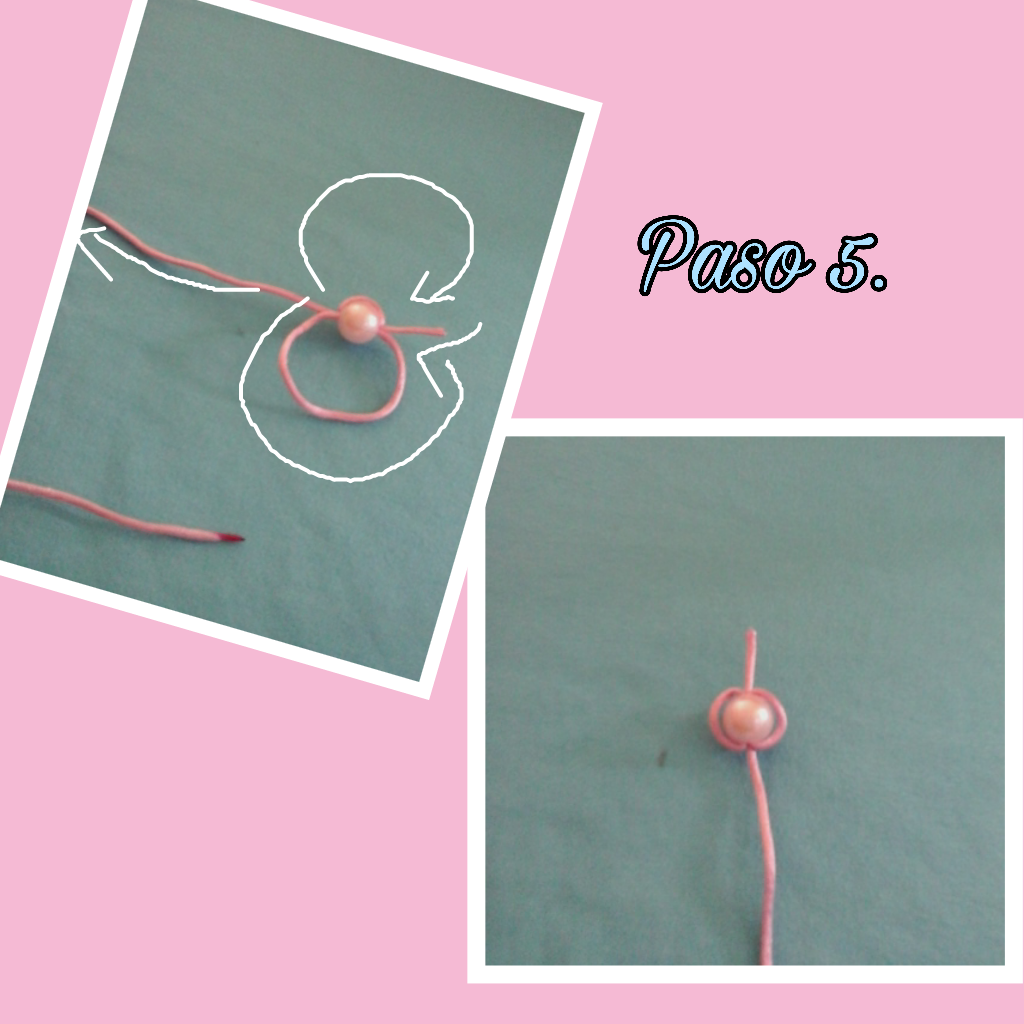
Continuamos tomando nuevamente la punta del hilo y la pasamos sobre la piedra e introducimos por la parte donde esta el extremo corto del hilo. Halamos el hilo para que quede la piedra dentro de estas lazadas.
We continue by taking the end of the thread again and passing it over the stone and inserting it through the part where the short end of the thread is. We pull the thread so that the stone remains inside these loops.
Seguimos repitiendo el paso anterior hasta craer los nudos suficientes que cubrirá todo el hilo que esta alrededor de la piedra.
We continue repeating the previous step until we create enough knots that will cover all the thread that is around the stone.
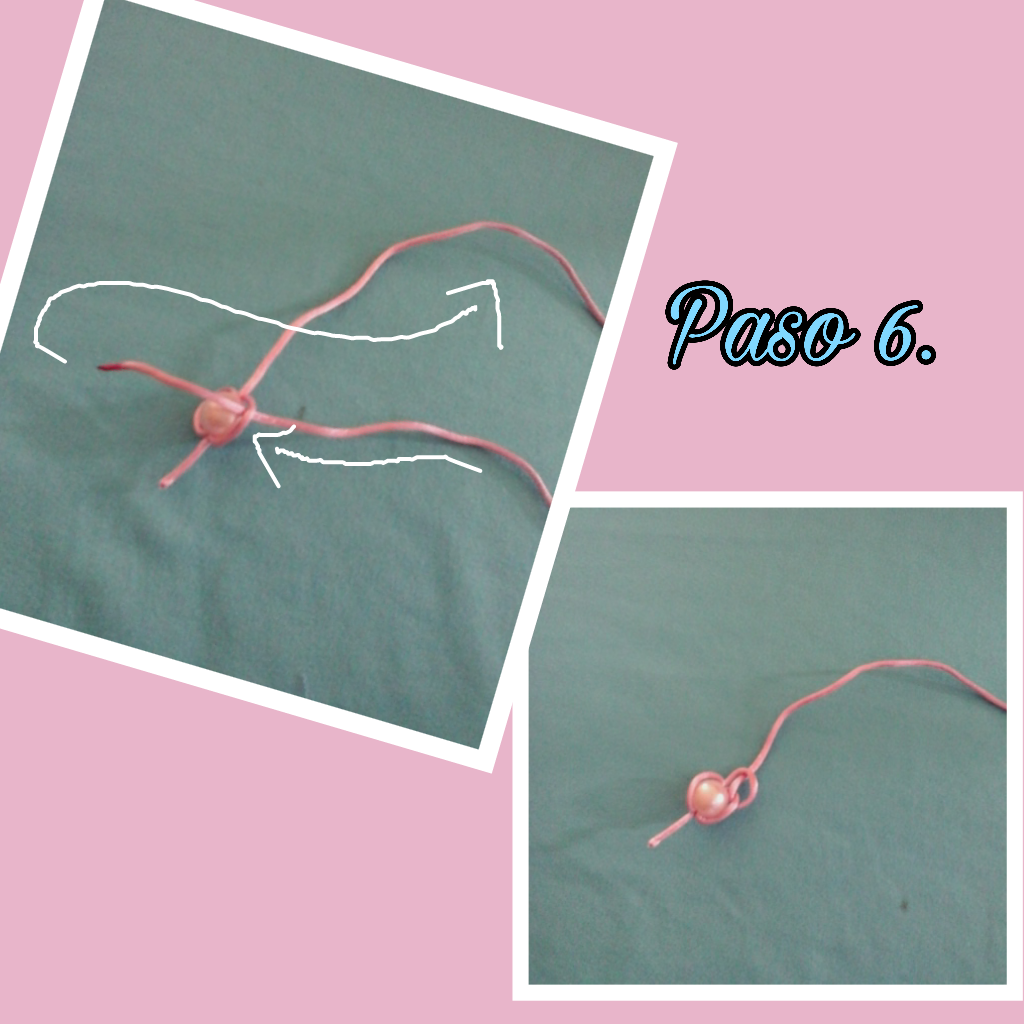
Con estos nudos unimos los hilos alrededor de la piedra para formar una flor. Para terminar cortamos el sobrante y quemamos un poco las puntas.
With these knots we join the threads around the stone to form a flower. To finish, we cut off the excess and burn the ends a little.
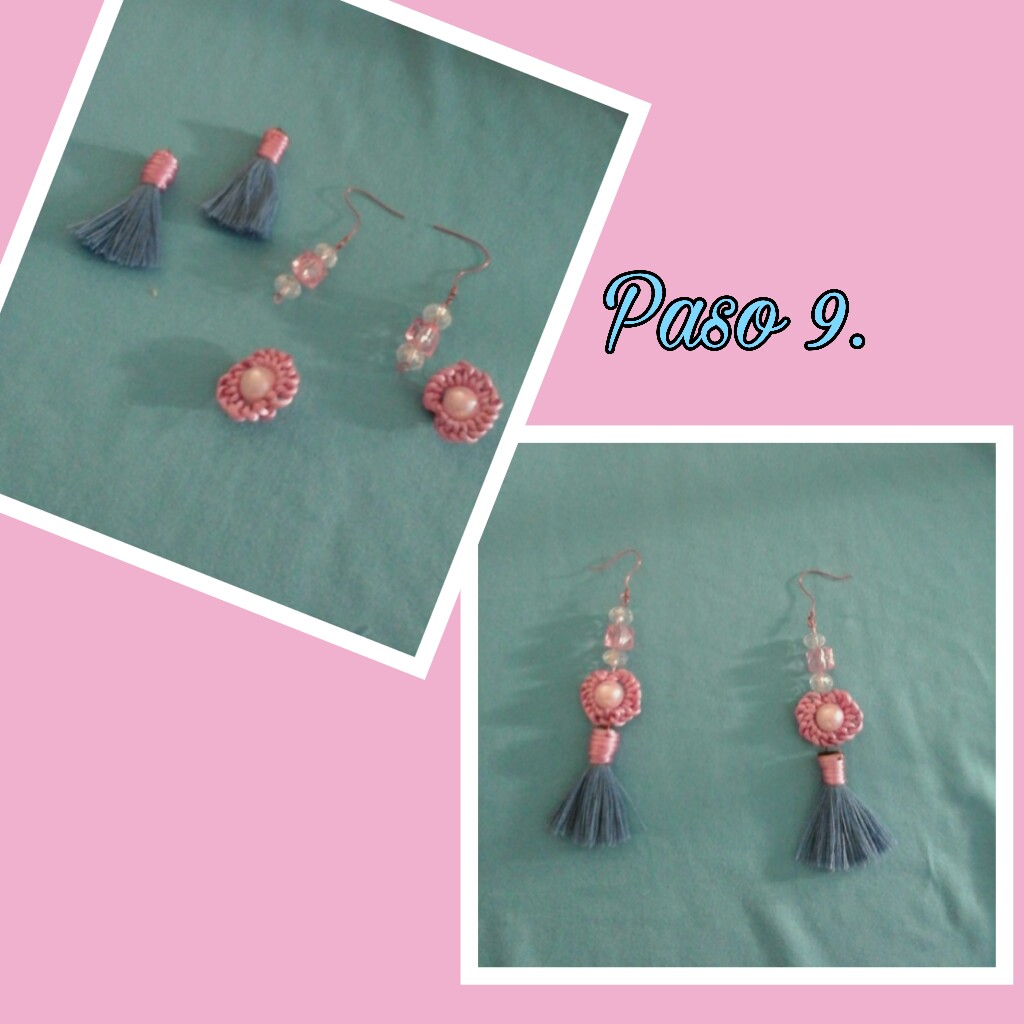
Vamos a elaborar estas pequeñas piezas de piedras, rosadas y cristales, me encanta colocarle cristales por que le da una delicadeza a las piezas. Cortamos unos trozos de alambre e introducimos las piedras, con ayuda de la tenaza de bisutería cortamos y doblamos las puntas.
We are going to make these small pieces of stones, pink and crystals, I love adding crystals because it gives a delicacy to the pieces. We cut some pieces of wire and insert the stones, with the help of the jewelry pliers we cut and bend the tips.

Para terminar, unimos las piezas colocando aritos de alambre para colgar cada pieza y filmente los anzuelos.
To finish, we join the pieces by placing wire rings to hang each piece and film the hooks.
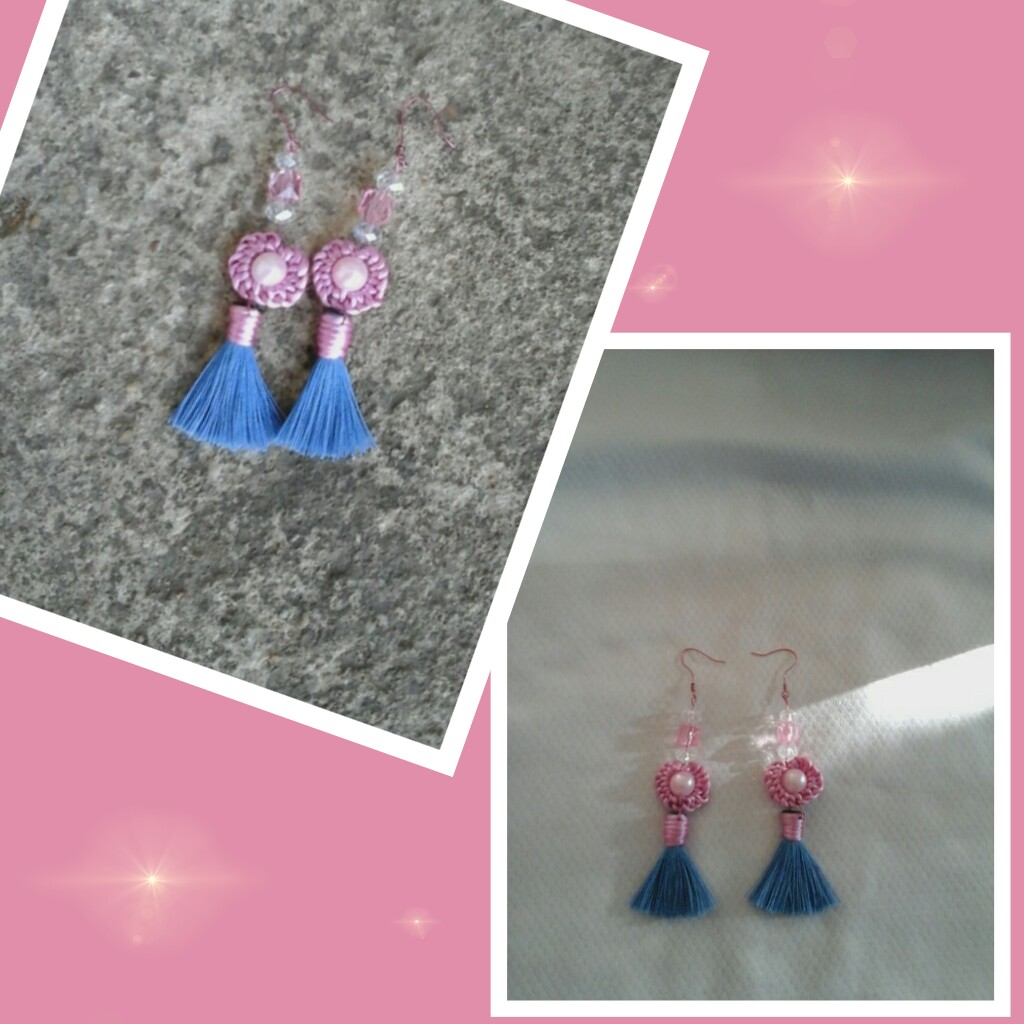
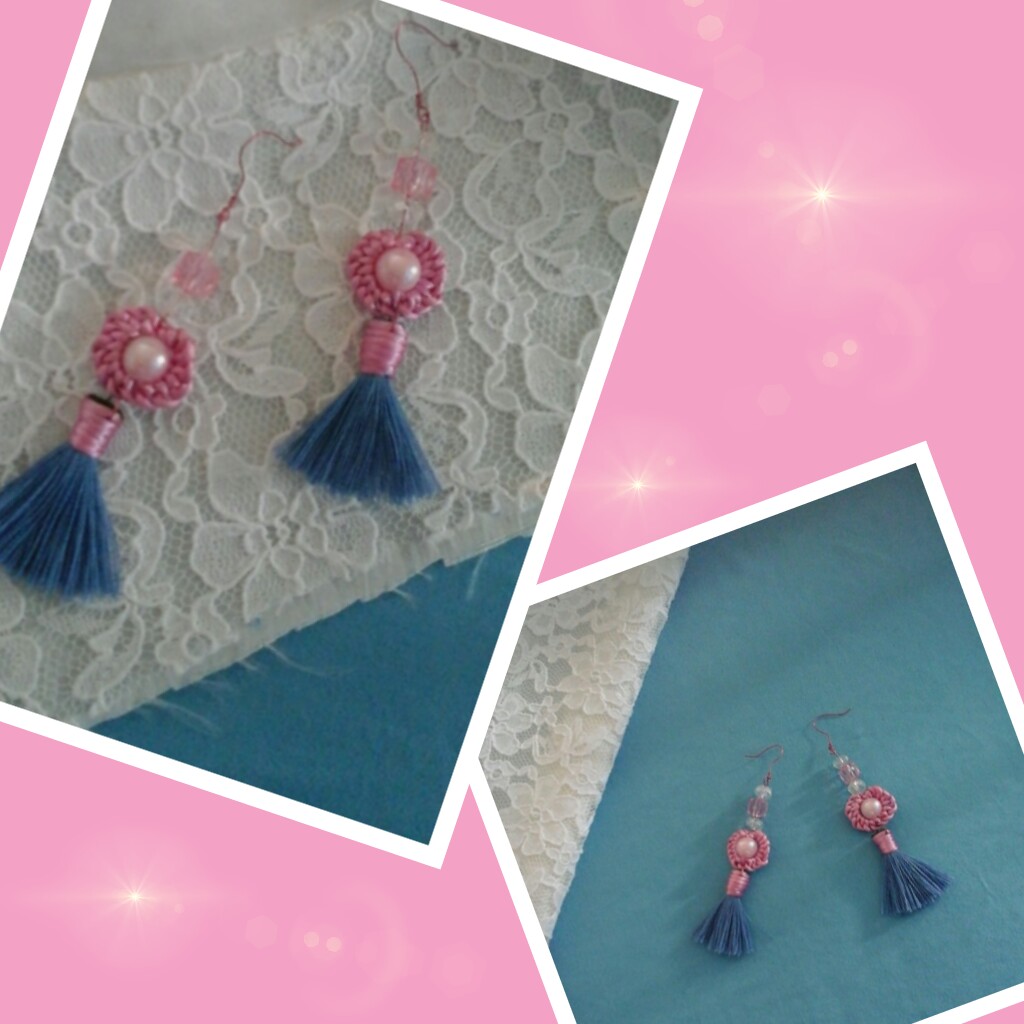
Estoy muy contenta de poder terminar estos aretes, a mi me encantó la combinación de colores suaves y la delicadeza de ellos. Espero que a ustedes también les guste.
I am very happy to be able to finish these earrings, I loved the combination of soft colors and the delicacy of them. I hope you like it too.
Muchas gracias por visitar mi blog y leer este post, estaré pendiente de leer sus comentarios y sugerencias. Sin más, me despido deseándoles una hermosa tarde, pasenla bien, se les quiere😙
Thank you very much for visiting my blog and reading this post, I will be waiting to read your comments and suggestions. Without further ado, I say goodbye wishing you a beautiful afternoon, have a good time, we love you😙.
Todo el contenido es mio propio.
Fotos capturadas por mi tablet Samsung galaxy y teléfono Redmi9A.
Editor para fotos, picsart.
Traductor de Google.com.
All content is my own.
Photos captured by my Samsung galaxy tablet and Redmi9A phone.
Photo editor, picsart.
Google.com translator.
0
0
0.000
!DIY
!discovery 30
This post was shared and voted inside the discord by the curators team of discovery-it
Join our Community and follow our Curation Trail
Discovery-it is also a Witness, vote for us here
Delegate to us for passive income. Check our 80% fee-back Program
Muchas gracias por el apoyo.
they are so beautiful and nice
Muchas gracias por apoyar!
You can query your personal balance by
!DIYSTATSMuchas gracias!
Hermosos y creativos aretes nos encanta ver los detalles las borlas siempre levanta un toque mágico 😉
Muchas gracias por comentar, ya que me ha ayudado a conocer los nombres de algunas piezas como esta. Muchisimas gracias!
I couldn't believed you made the elegant earring from a jean scrap. With how colorful the earring are, the name of the fabric may not be necessary to me but the creativity is all i want so i can make mine.
Hahaha😀!! It's good that you like it and want to do some like that, it's good to inspire other people through some work. Thank you so much.
Es maravilloso que aún de un retazo de tela puedas hacer algo tan hermoso como estos zarcillos. Te felicito por tu creatividad.
Si, me gusta aprovecharlos, muchas gracias por comentar y apoyar mi trabajo, saludos y muchas bendiciones.