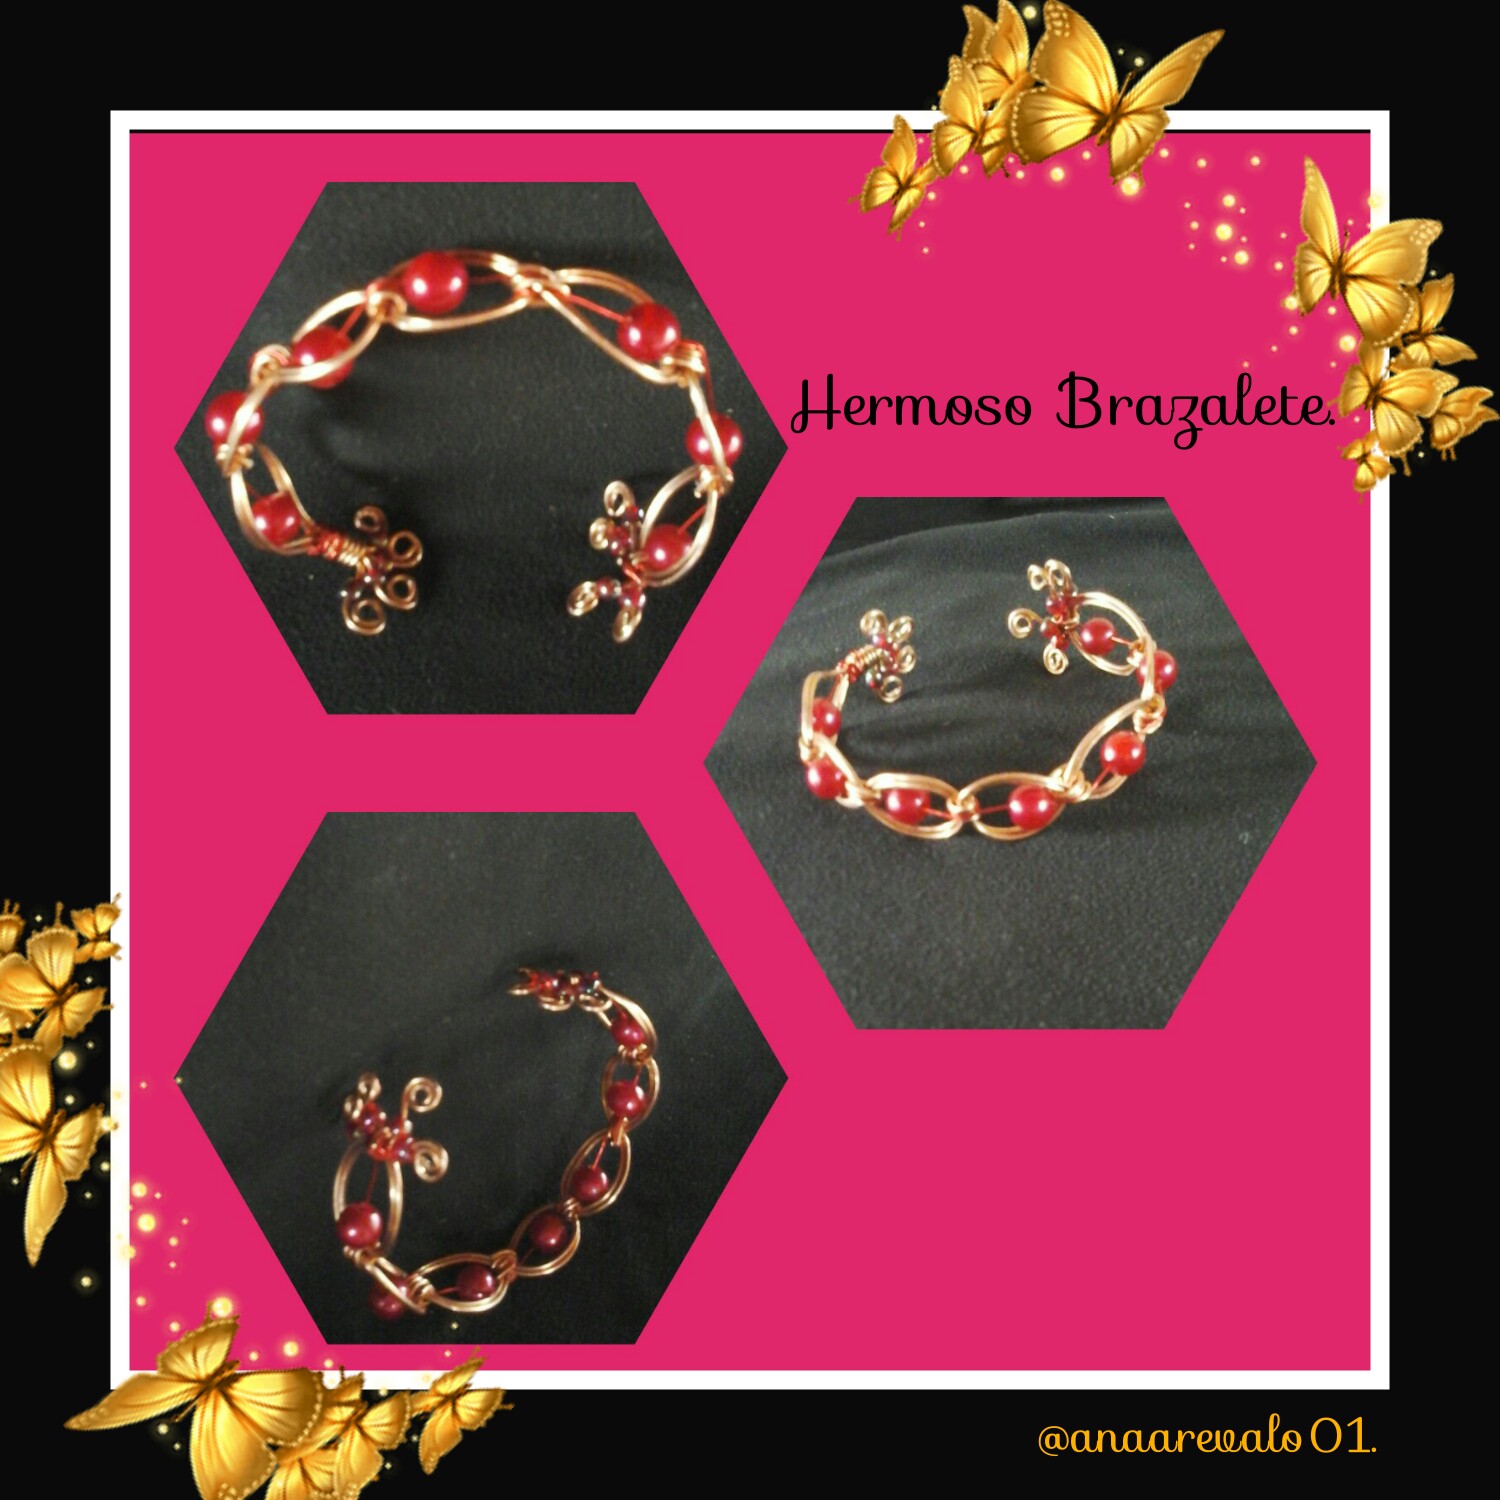
[ESP/ING]Hermoso brazalete con la técnica de alambrismo👑💎/Tutorial paso a paso//Beautiful bracelet with the wire technique💎👑 /Step by step tutorial.
(Edited)
😊¡Hello my friends from @jewelry!.😊
¡Reciban un cordial saludo y un fuerte abrazo virtual! espero que se encuentren muy bien y llenos de muchas bendiciones de Dios. Quiero contarles que hace días tenía muchas ganas de elaborar un lindo brazalete con la técnica de alambrismo y hoy pude realizarlo, aunque me llevo un poco de tiempo elaborarlo, puede terminarlo.
Es la primera vez que realizó un brazalete con esta técnica, pero siento que lo he hecho muy bien. Así que
quiero compartir el procedímiento de dicho brazalete.
Sin más, quiero invitar a mis amigos lectores a que me acompañen en la elaboración, de este lindo trabajo. ¡Empecemos!
¡Warm regards and a big virtual hug! I hope you are very well and full of many blessings from God. I want to tell you that a few days ago I really wanted to make a beautiful bracelet with the wire technique and today I was able to do it, although it took me a little time to make it, you can finish it. It is the first time that I have made a bracelet with this technique, but I feel that I have done very well. So I want to share the procedure of said bracelet. Without further ado, I want to invite my reader friends to join me in the preparation of this beautiful work. Let us begin!
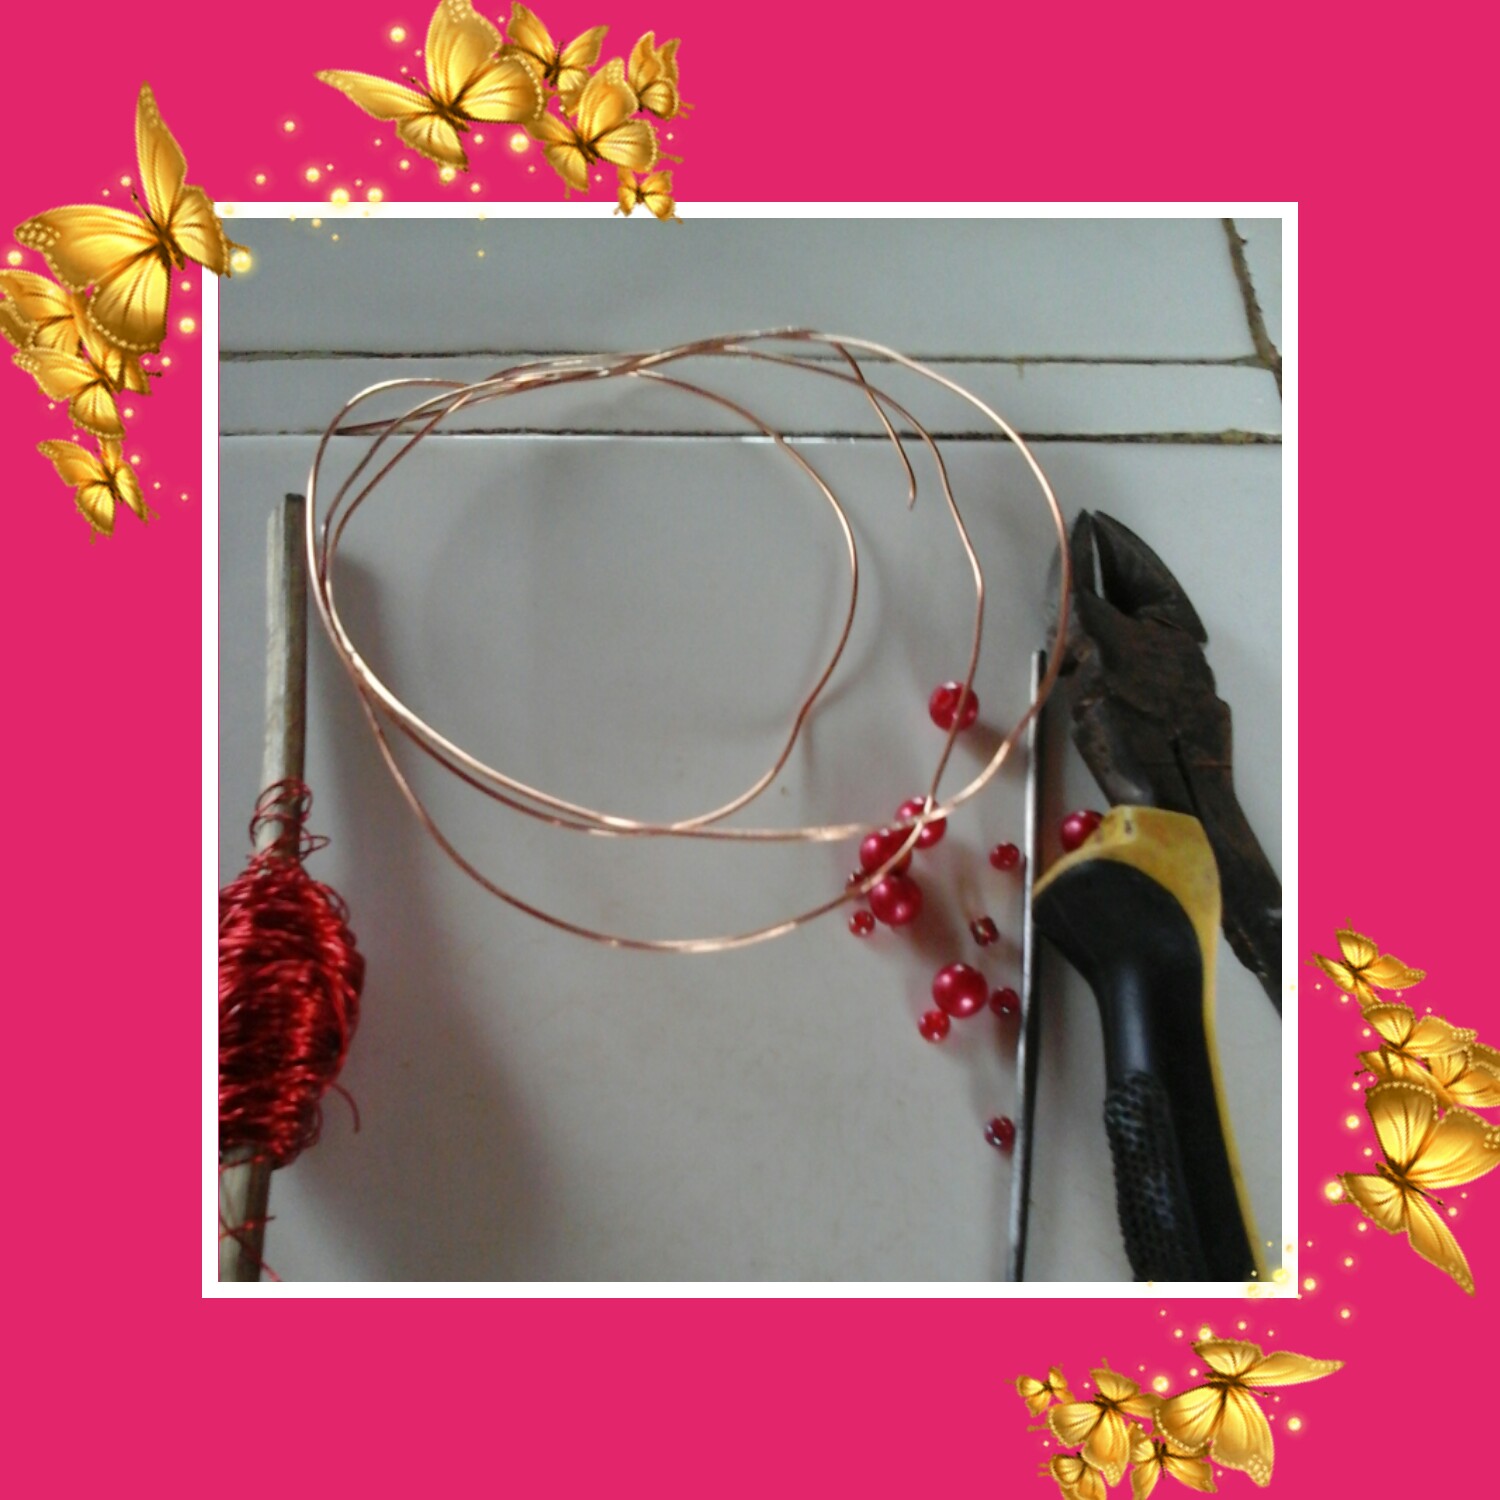
- Alambre de cobre grueso y delgado.
- Algunas piedras redondas y mostacillas.
- Aguja de tejer.
- Tenaza.
Materials that we will use.
- Thick and thin copper wire.
- Some round stones and beads.
- Knitting needle.
- Pincer.
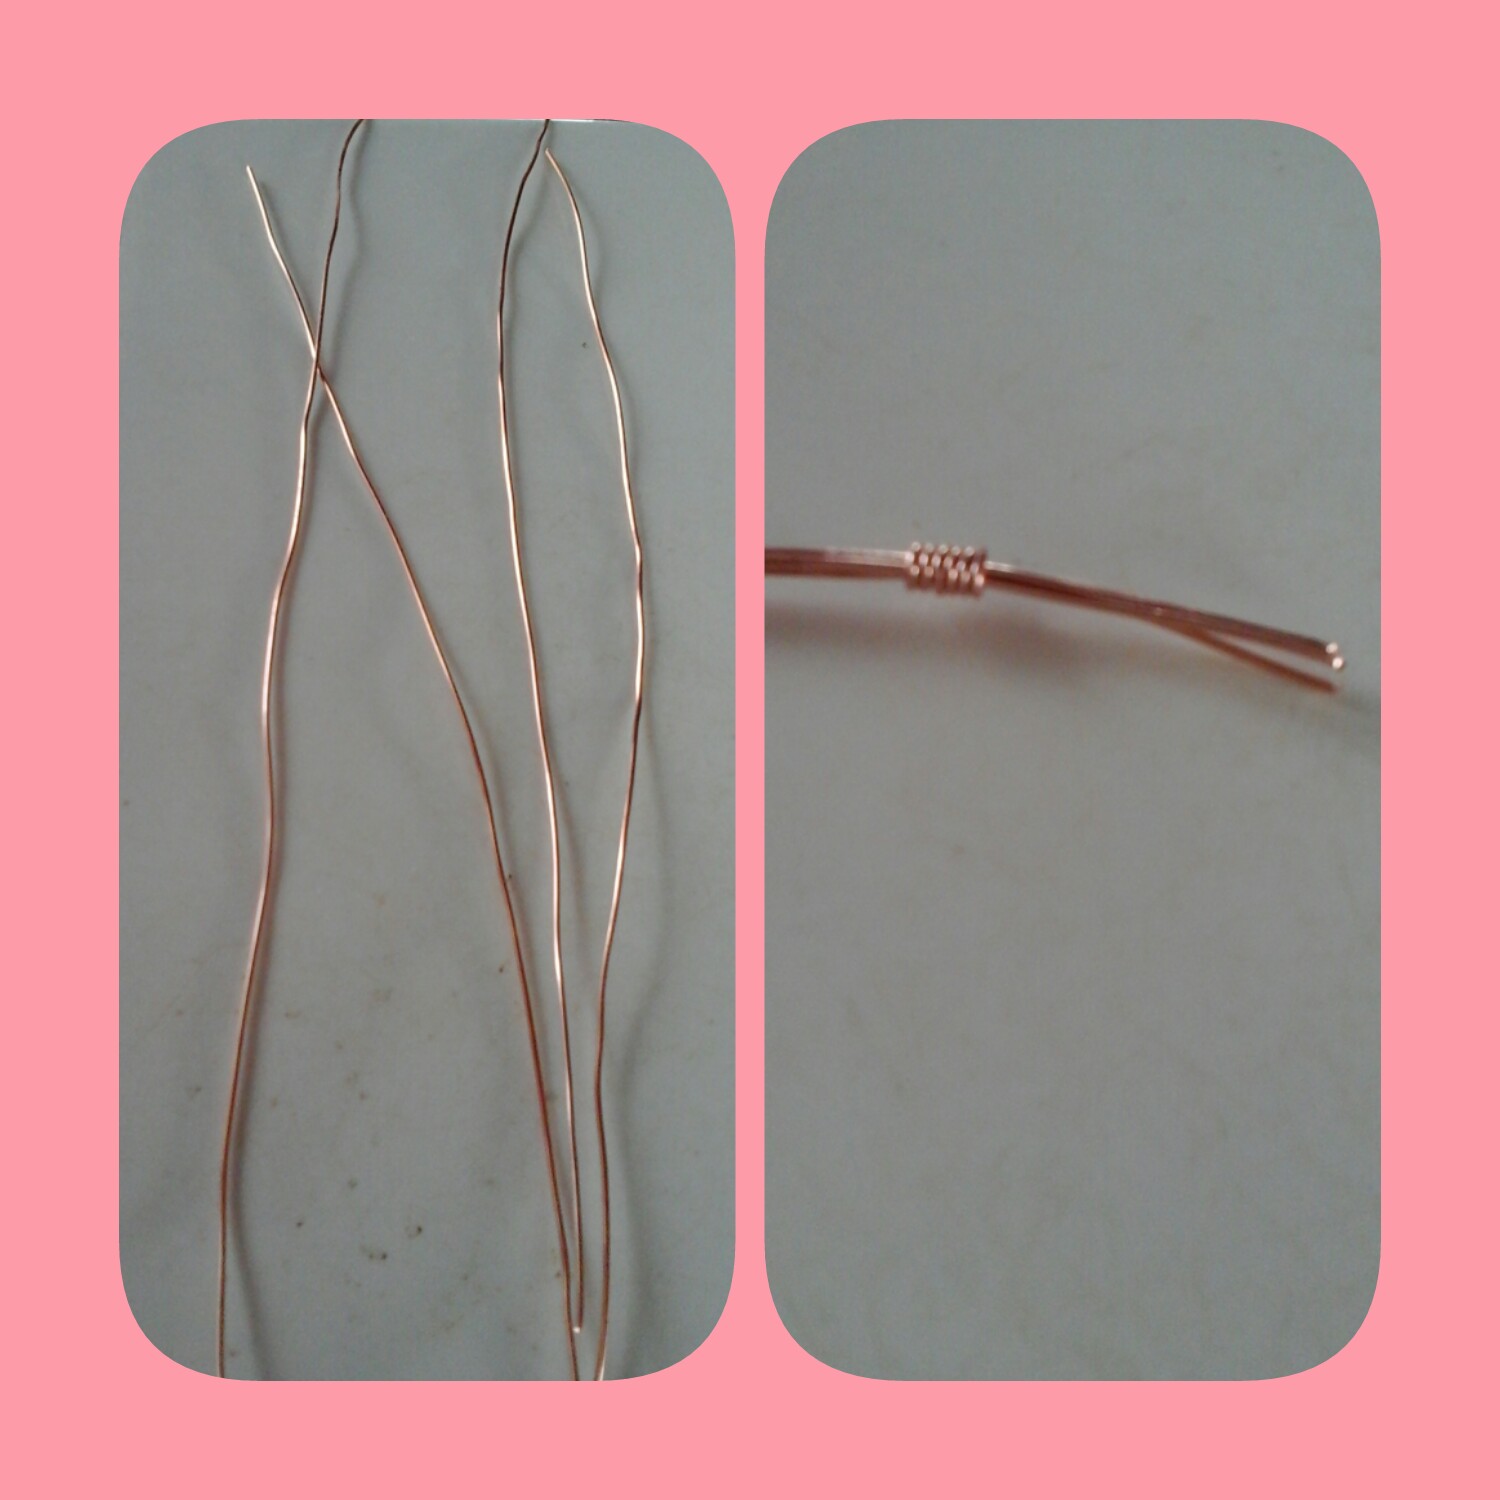
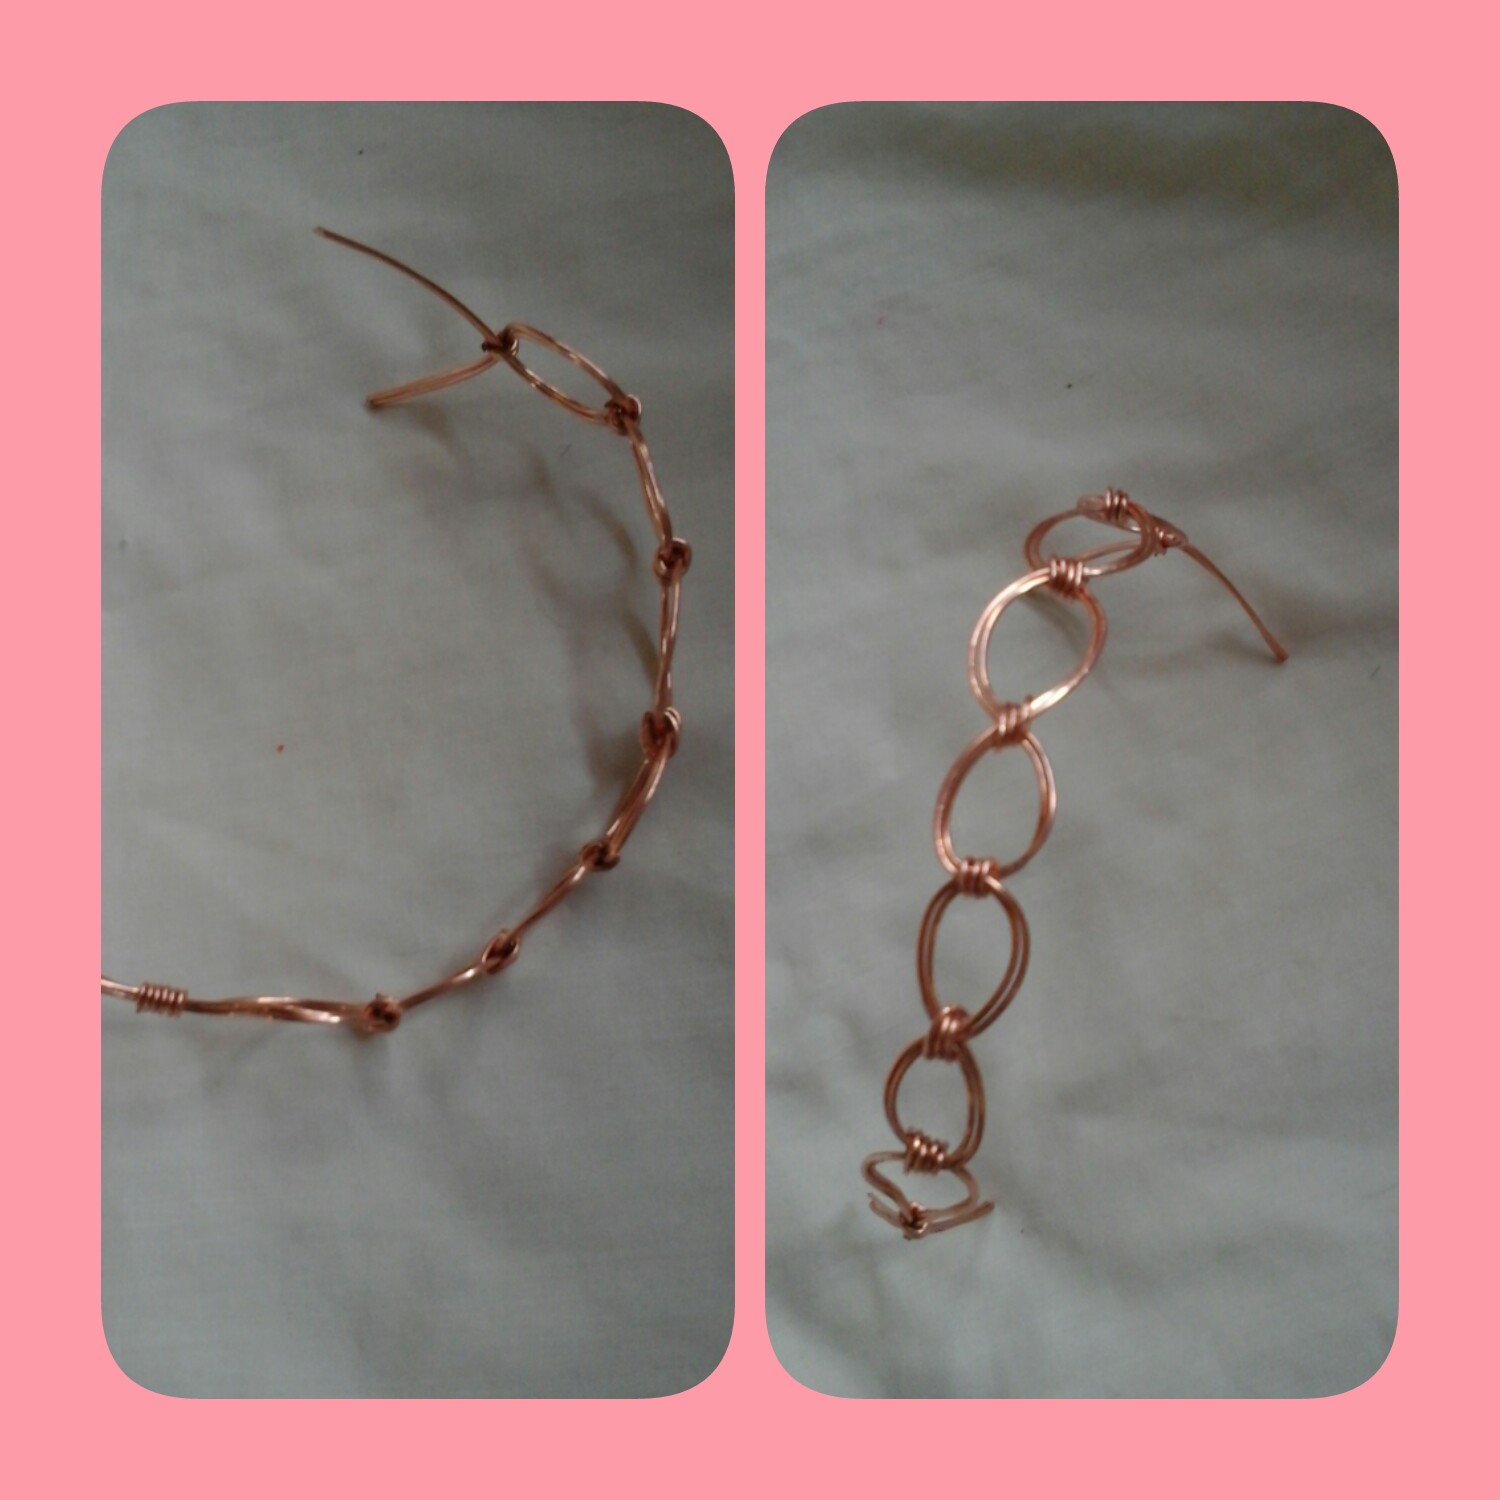
Para comenzar la elaboración de este brazalete, lo primero que debemos hacer, será tomar el alambre y con ayuda de la tenaza, cortar en cuatro pedazos. Unimos estos trozos de alambre y con uno más corto atamos, dejando que sobre 3cm para poder realizar el diseño de los extremos.
Step 1. To begin the elaboration of this bracelet, the first thing we must do is take the wire and with the help of the pliers, cut it into four pieces. We join these pieces of wire and with a shorter one we tie, leaving about 3cm to be able to make the design of the ends.
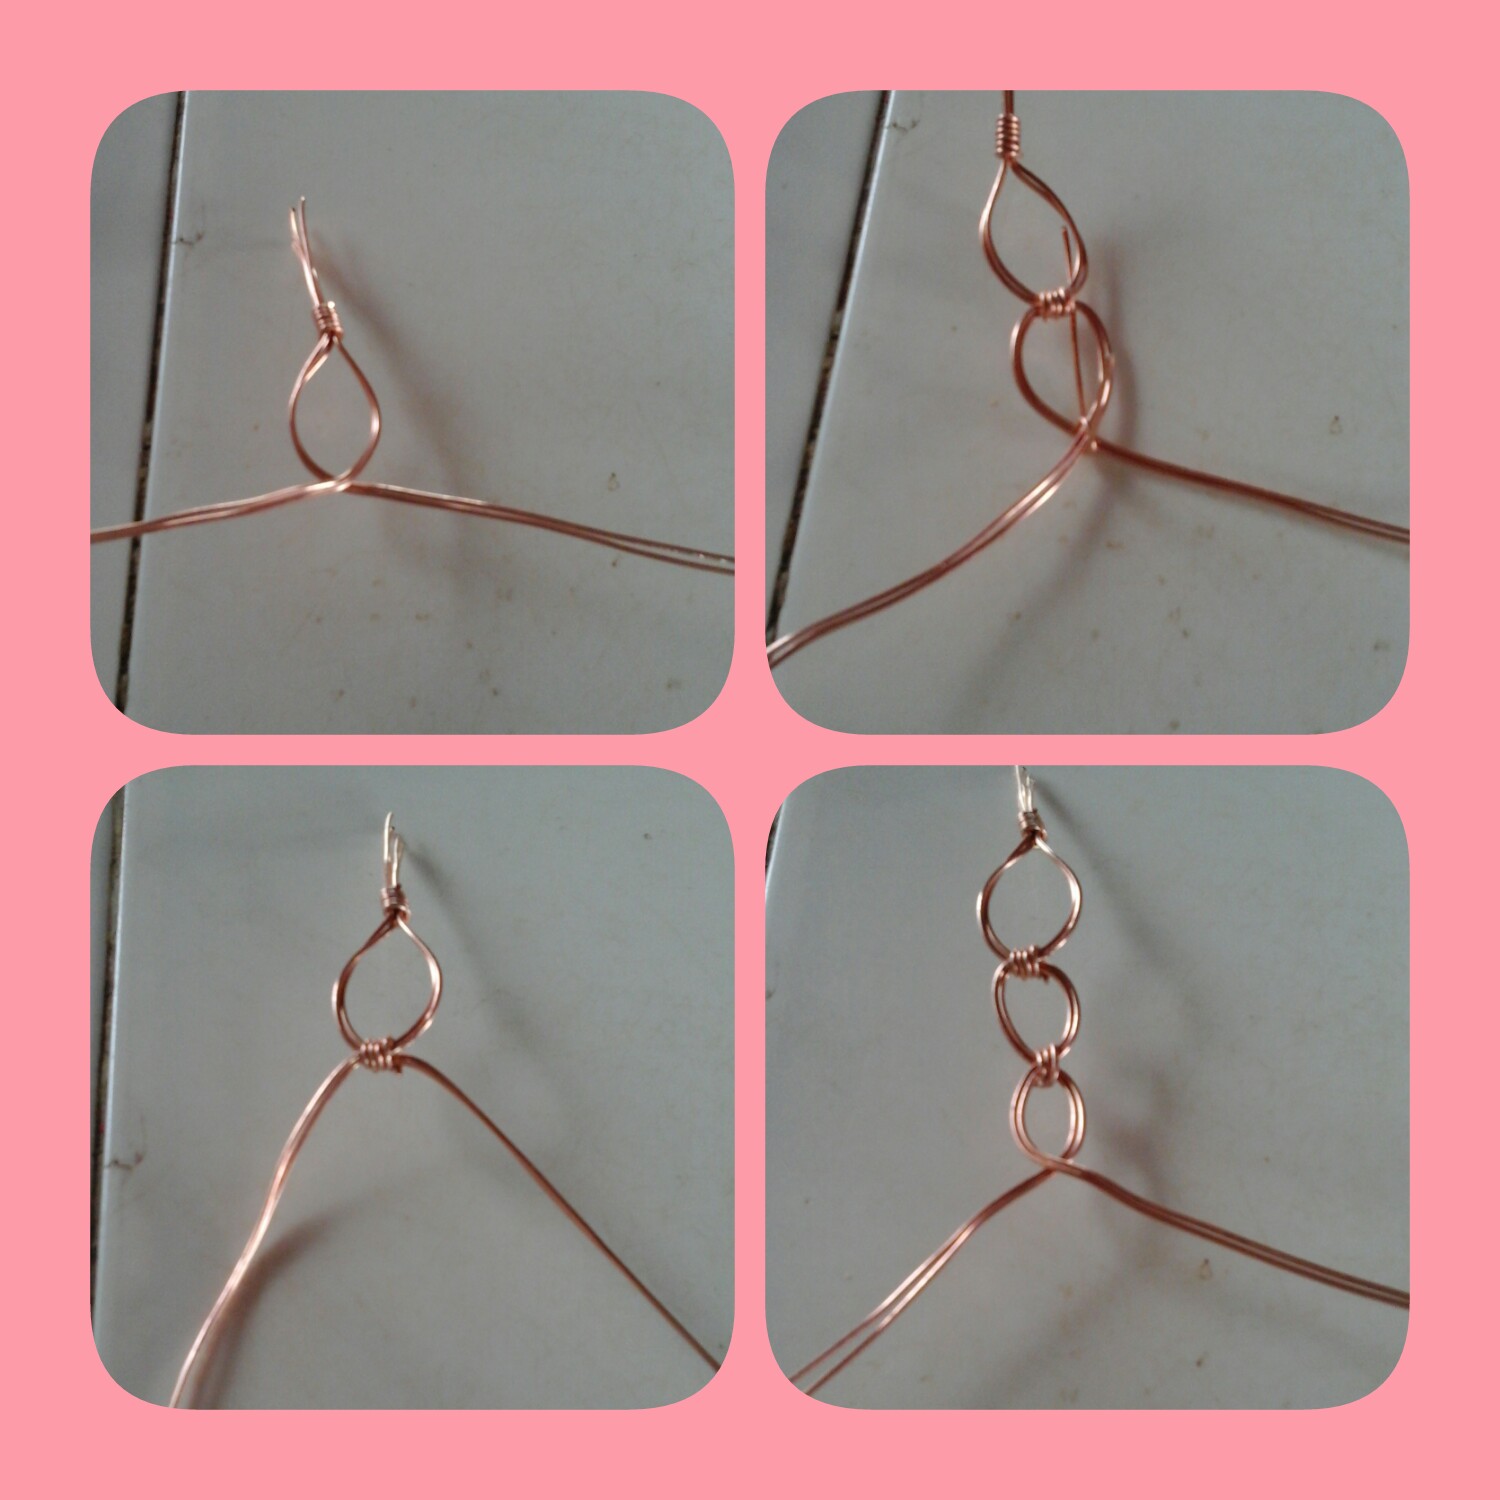
Comenzamos a darle forma al alambre, separamos en pares el alambre y comenzamos a doblar y darle forma, en realidad aquí no busco hacer círculos, sino óvalos. Entonces comenzaremos a invertir los alambres, de manera que se crucen entre si y con un trozo del mismo alambre, vamos atando para mantener la forma. Debemos seguir este procedimiento hasta terminarlo.
Step 2. We start shaping the wire, we separate the wire into pairs and start bending and shaping, actually I'm not looking to make circles here, but ovals. Then we will begin to invert the wires, so that they cross each other and with a piece of the same wire, we will tie to maintain the shape. We must follow this procedure until it is finished.
Una vez que hayamos terminado de darle forma al alambre, miren como debe quedar. Aquí hice siete óvalo para que el brazalete no quede tan grande.
Step 3. Once we've finished shaping the wire, take a look at how it should look. Here I made seven ovals so that it is not so big.
Les confieso que esta fue la parte más complicada, primero debemos insertar las mostacillas para luego darle forma. Aquí utilicé la aguja de tejer, doble la punta y con ayuda de la tenaza le doy un poco esa forma de espiral.
Step 4. I confess that this was the most complicated part, first we must insert the beads and then shape it. Here I used the knitting needle, bend the tip and with the help of the pliers I give it a little bit of that spiral shape.
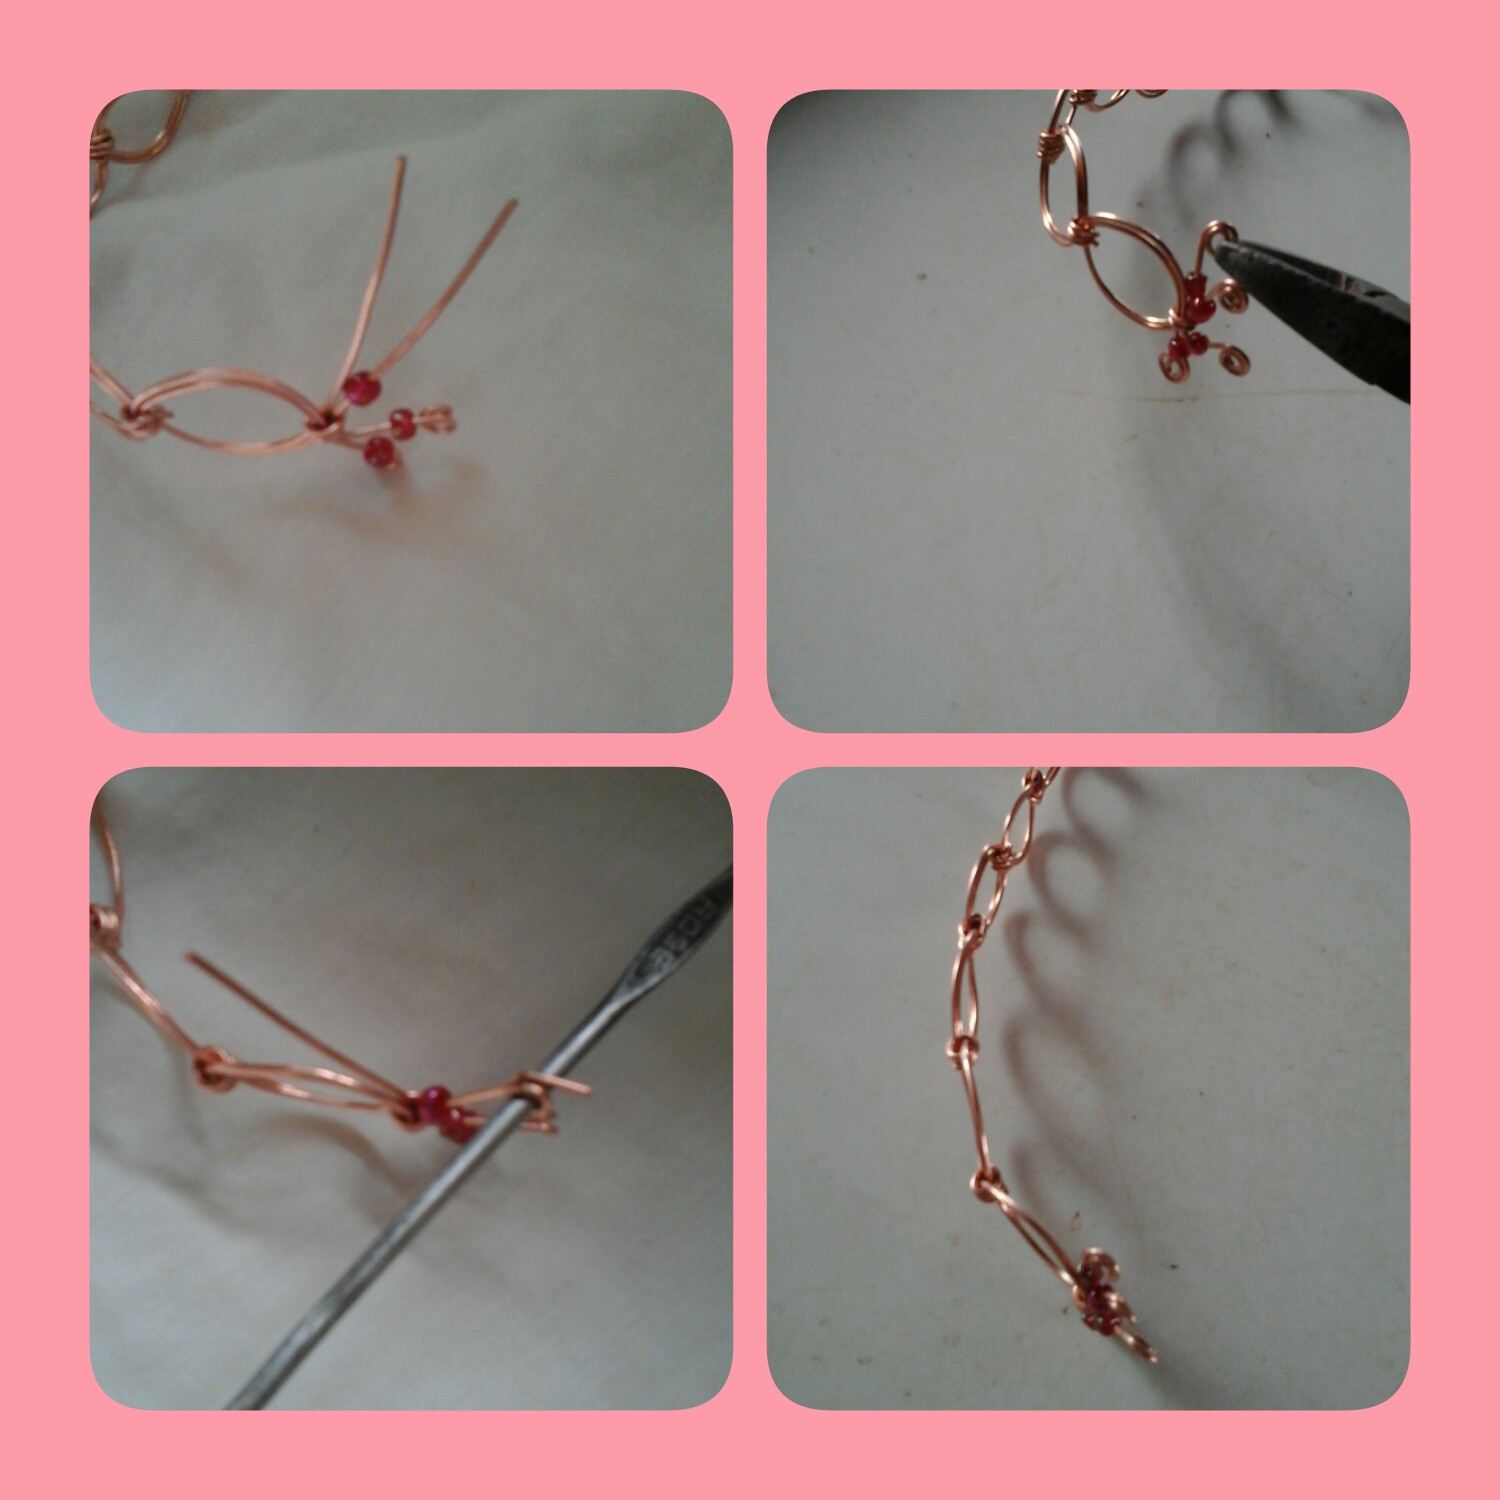
Aquí comenzaremos a colocar las pelotitas, tomamos el alambre más delgado, lo atamos a esta pieza y vamos insertando las pelotitas en cada óvalo.
Step 5. Here we will begin to place the balls, we take the thinnest wire, we tie it to this piece and we insert the balls in each oval.
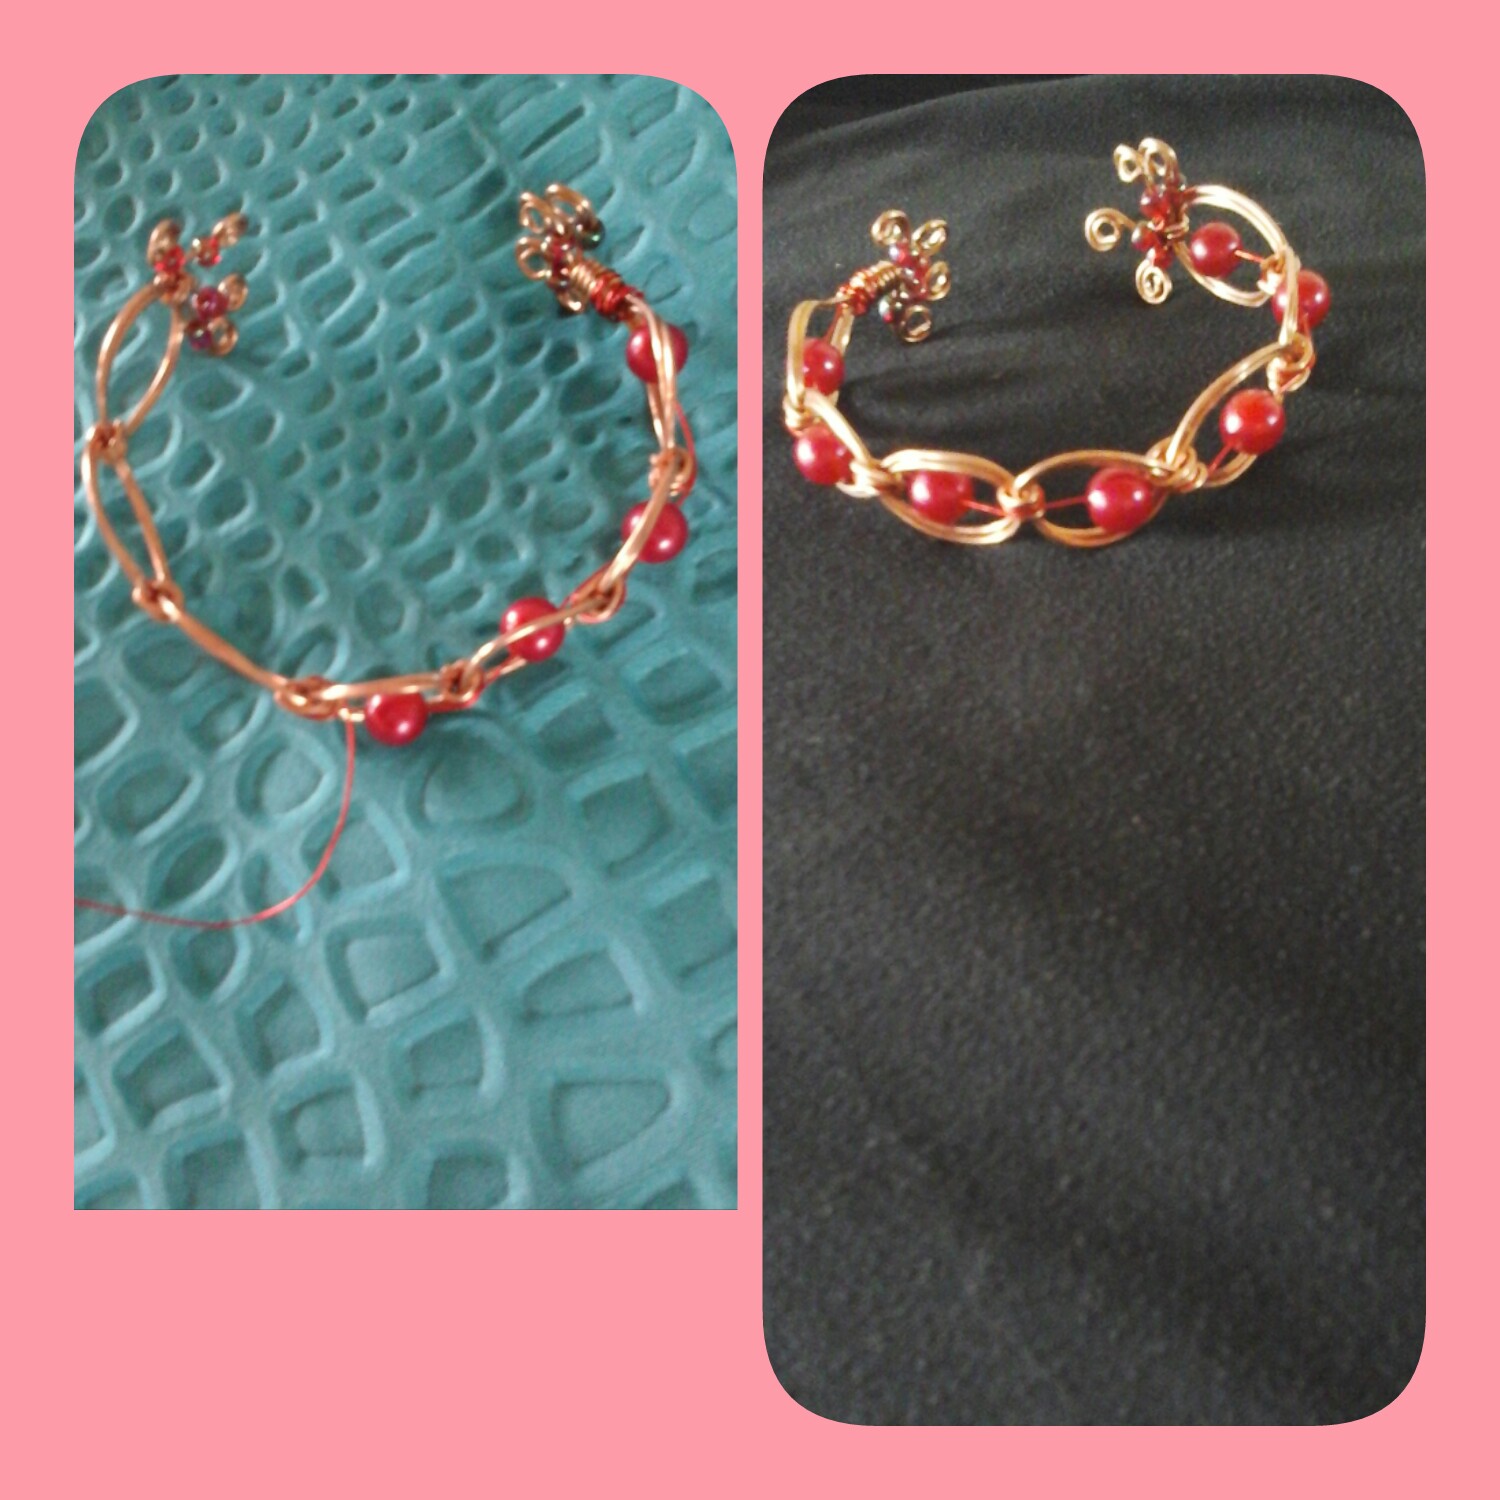
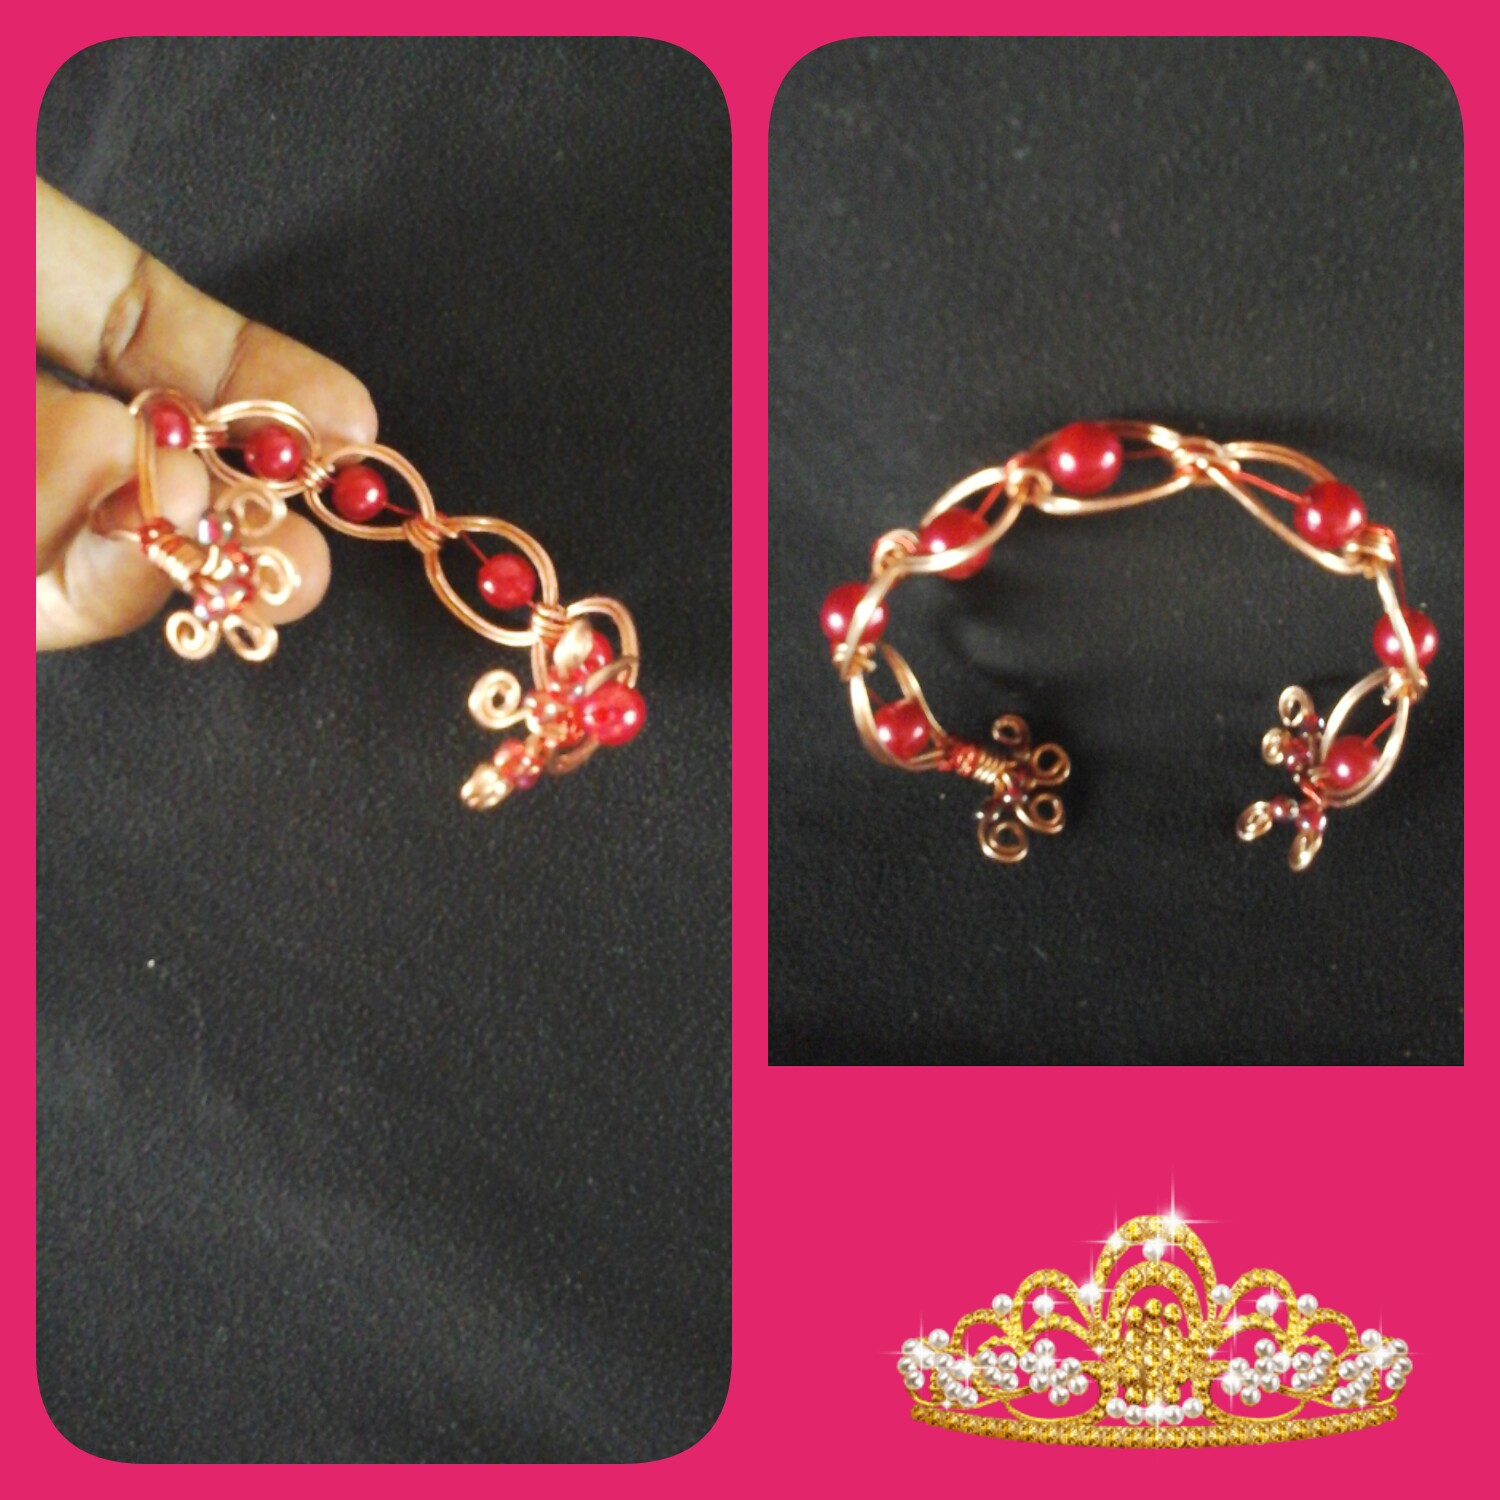
Una vez de terminar el procedimiento, así es como ha quedado este lindo brazalete, con la técnica de alambrismo. Espero que les guste y se animen a elaborar uno.
Once the procedure is finished, this is how this beautiful bracelet has turned out, with the wire technique. I hope you like it and are encouraged to make one.
Mis apreciados amigos, hemos llegado al final, gracias por leer este tutorial y dejar ese hermoso comentario, no me quiero despedir sin antes desearles que tengan una ¡feliz y bendecida noche !. ¡Cuidense mucho, hasta pronto!.
My dear friends, we have reached the end, thank you for reading this tutorial and leaving that beautiful comment, I don't want to say goodbye without first wishing you a happy and blessed night! Take care of yourselves, see you soon!.

😘💖¡Blessings!💖😘
Todo el contenido es de mi autoria.
Fotos capturadas por mi tablet Samsung galaxy, editadas por Collage_maker.
Traductor utilizado ESP/ING (google.com).
All content is my own.
Photos captured by my Samsung galaxy tablet, edited by Collage_maker.
Translator used ESP/ING (google.com).
0
0
0.000
It's actually good that you were able to finish the bracelet using wire not considering the time and energy. More effort dear friend.
Hello friend! Thank you very much for commenting, greetings and a big hug.
Cómo dices, si es la primera vez, lo hicistes muy bien @anaarevalo01, te quedó muy bonito, saluditos.
¡Hola! si, de verdad que quedó muy bien. Saludos😊😁
Hi @anaarevalo01
Do you know you could have used #diy tag for this post to earn some BUIDL tokens? Whenever you are sharing your own work online you can use the #diy tag.
The buidl-it defines Build-it as follow:
In case you are not aware, read this post to know the kinds of content, among others, you could post using #diy tag.
Because most people are not aware of the potential of BUIDL token, it can still be bought at very cheap price now.
Thanks for that very important information.
Te quedó muy hermoso y además es sencillo de hacer, gracias por compartir 👍
¡Hola! si, es muy sencillo de hacer, animate a elaborar uno. Gracias por comentar, un fuerte abrazo😊
Que lindo trabajas con el alambre @anaarevalo01 😸..el diseño que hiciste y la combinación están hermosas, una pulsera bastante llamativa y colorida...además de ese brillo dorado que le da el alambre 😍muchas gracias por compartir!! 💕
¡Hola querida!💗Si, este es un lindo trabajo y además es muy fácil de hacer. Muchas gracias por comentar, ¡mil bendiciones!💖
espectacular. me gusta mucho esta técnica del alambrismo
¡Hola amiga!💖Que bueno que les guste este trabajo. Gracias por comentar, saludos😊
Bello brazalete! me encantó