(Esp//Eng) Hoy le traigo; una linda pulsera con flores de mostacillas, con nudo macramé fácil de hacer//Today I bring you; a beautiful bracelet with beads flowers, with macramé knot easy to make.
Mi versión español.
¡Bienvenido a mi blog!
Hola a toda mi gente de esta comunidad, @jewelry, Hoy les traigo otra de mis creatividades, una linda pulsera con flores de mostacillas, con nudo macramé fácil de hace, está linda pulsera se elaboró con hilo chino de color blanco, mostacilla de color rosada, azul, verde, amarilla, balines de color dorada y tejida con el nudo plano macramé, son fácil de hacer y la puede usar para ti o un regalo familiar o una amiga o ideales para el día de la madre que se ha cerca, la puede llevar para cualquier ocasión, la idea de realizar este tipo de pulsera es que siempre me llamaba la tensión las flores me encanta sus distintos colores y la ve se ve muy delicada y las bolas dorada le da un toque de brillo muy elegante.
Empecemos a mostrarle los materiales y el paso a paso.
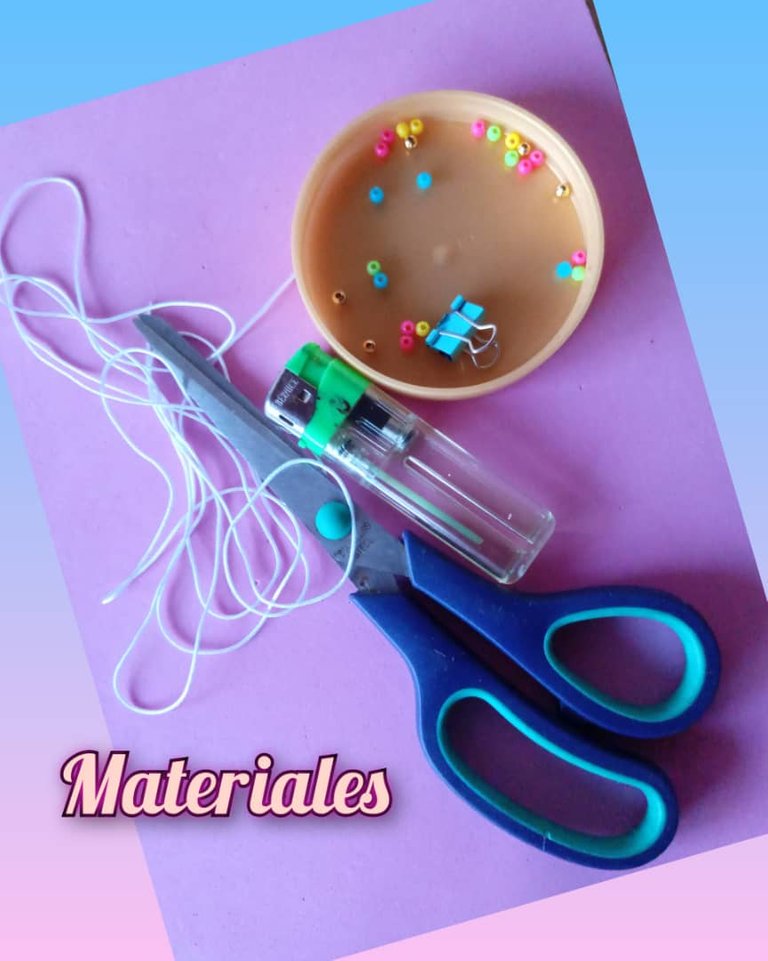
Materiales.
- 2 metros de hilo chino color blanco.
- 8 mostacillas rosada.
- 4 mostacillas verde.
- 4 mostacillas azul.
- 4 mostacillas amarillan.
- 7 balines dorada.
- 1 tijera.
- 1 encendedor.
- 1 tabla con gancho.
- 1 ganchito pequeño.
Paso.
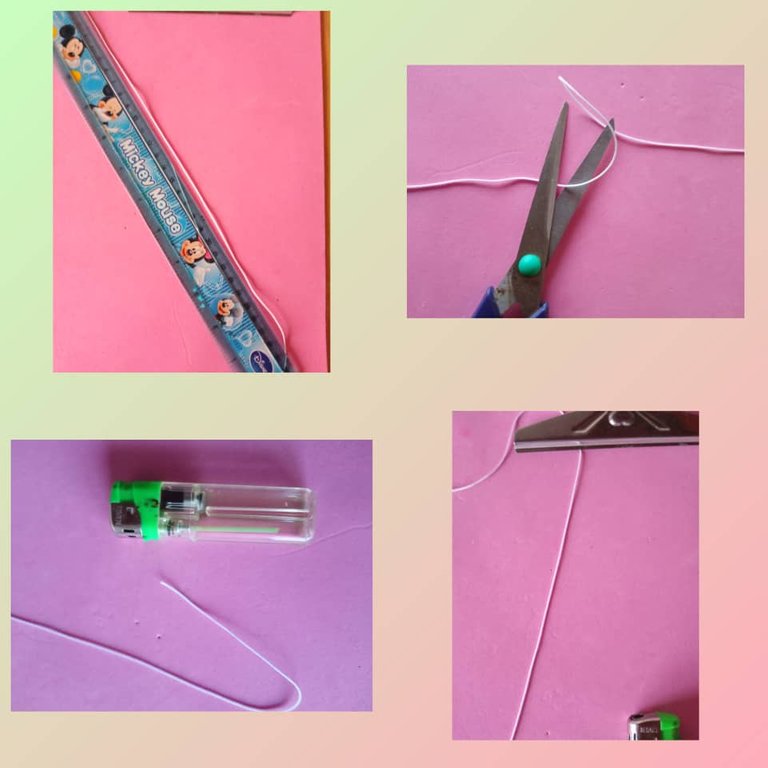
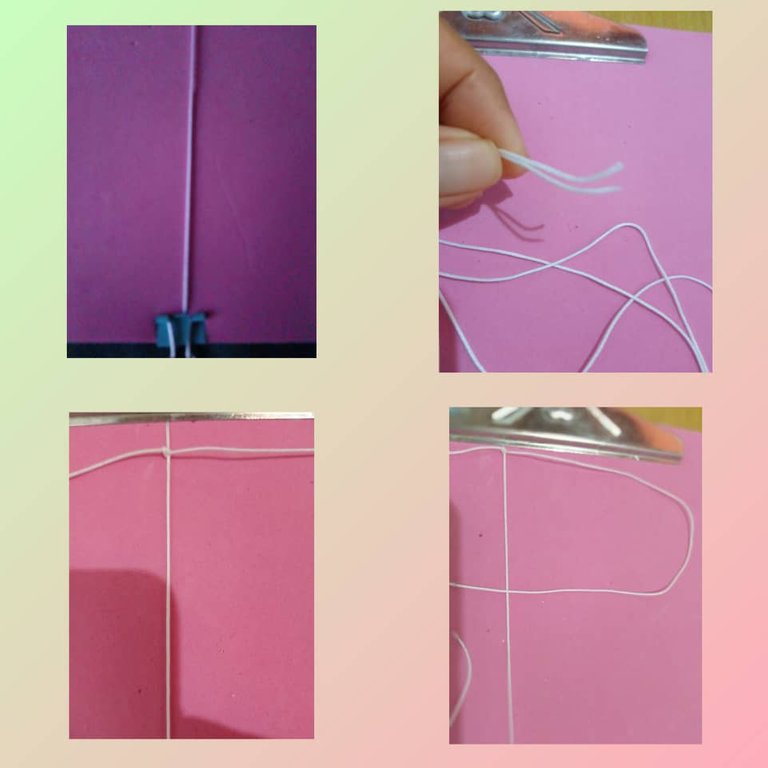
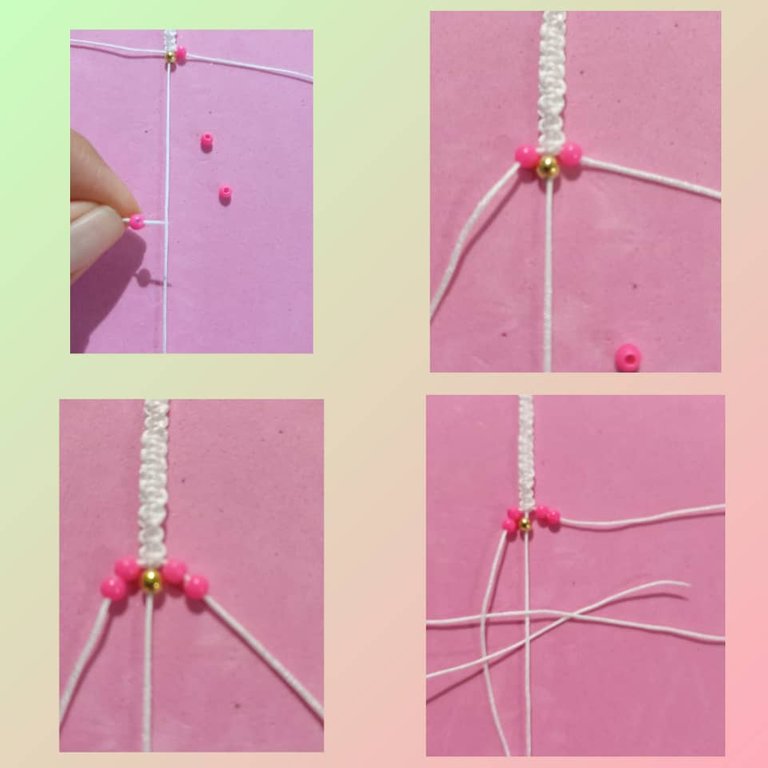
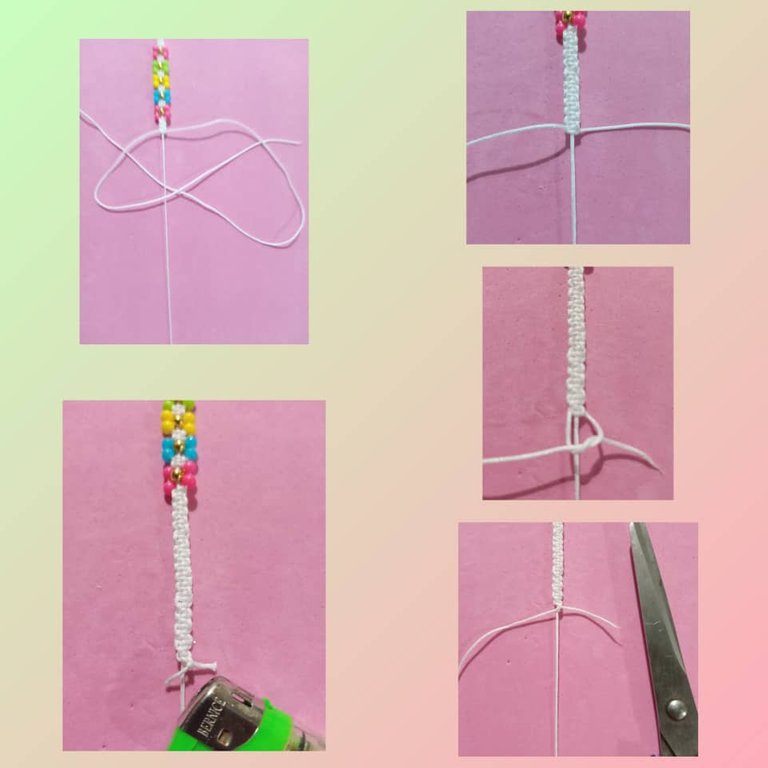
Primero medimos los hilos que vamos utilizar para el medio de la pulsera 40 centímetro cortamos y lo ajustamos en el la tabla con el gancho, dejando 12 centímetro para el cierre de la pulsera.
Quemamos la punta de la parte de abajo donde voy introducir los balines, ya introducidos los 5 balines dorada, ajustamos el hilo del medio en la parte de debajo de la tabla para empezar a tejer.
Comienzo hacer el primer nudo tomo el hilo de 1,5 centímetro lo ajustamos en el medio del hilo por debajo y lo fijamos con un nudo, ahora tomo el hilo de la derecha y hago una forma de una p lo paso por encima del hilo del centro y tomo el hilo de la izquierda y introduzco la punta por debajo del hilo del medio y lo sacamos por el ovalo de la p que había formado jalamos y apretamos bien y tengo mi primer nudo.
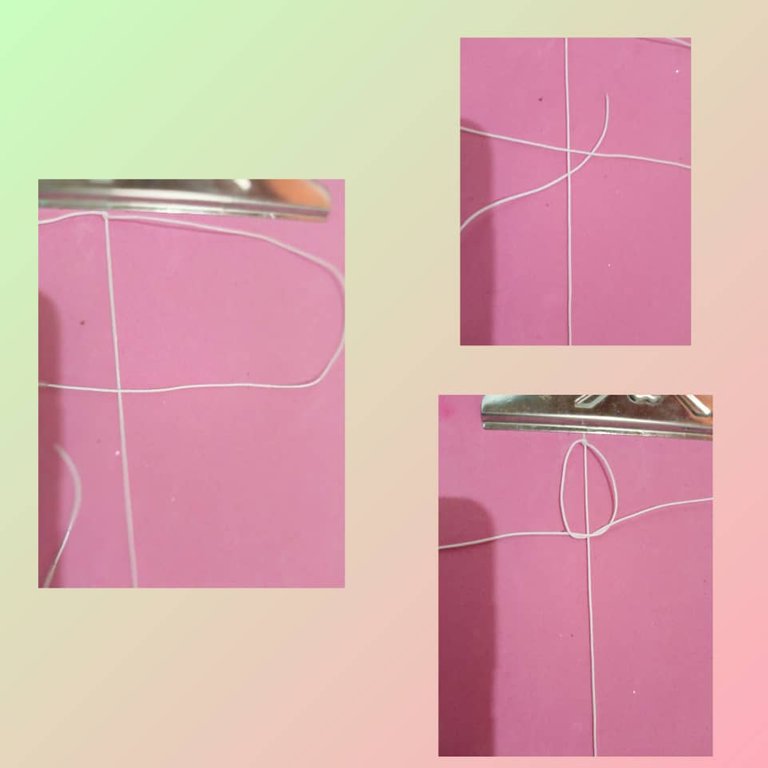
Ahora hago mi segundo nudo paso en hilo de la izquierda por encima del derecho tomo el hilo derecho la punta y lo paso por debajo del hilo del medio sacando por el ovalo que había formado jalamos y apretamos bien hasta llegar arriba y tengo mi segundo nudo plano.
Ahora hago mi tercer nudo ahora formo una p en la parte derecha pongo en hilo en la parte de arriba del hilo del medio y tomo el hilo izquierdo y paso la punta por debajo del hilo del medio sacando la punta por el ovalo que forme en la parte derecha, jalamos apretamos hasta arriba y tengo mi 3 nudo.
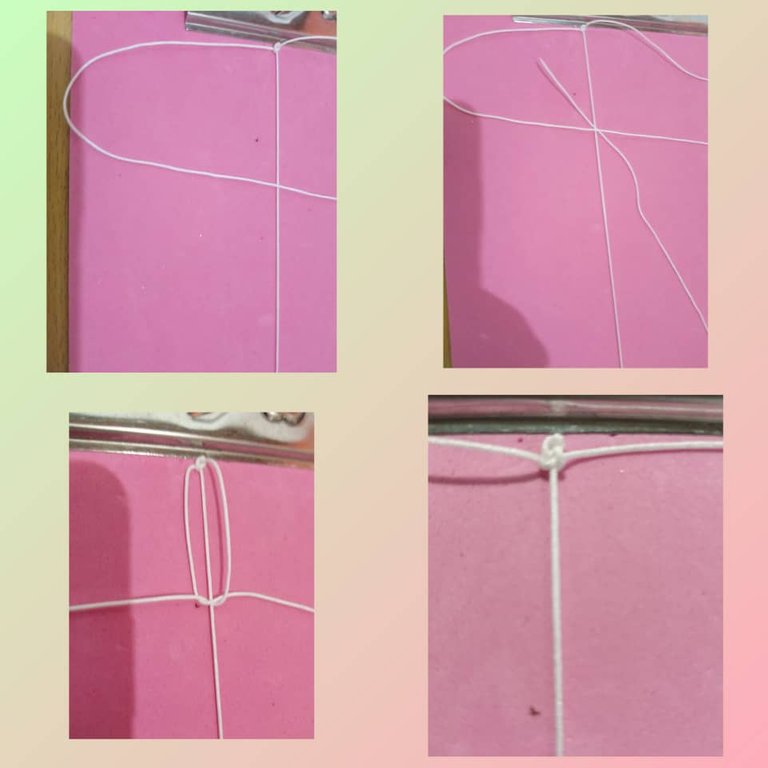
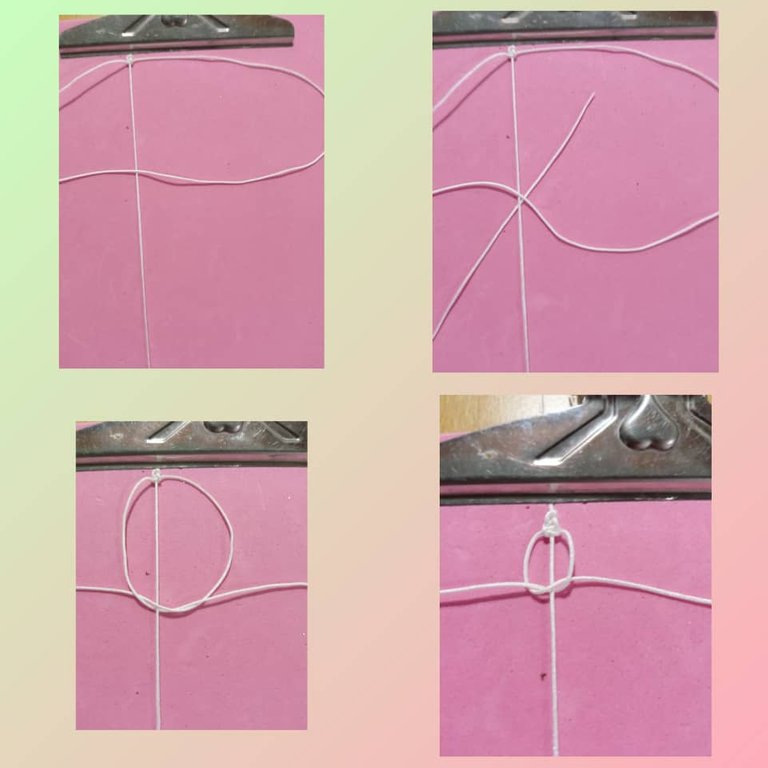
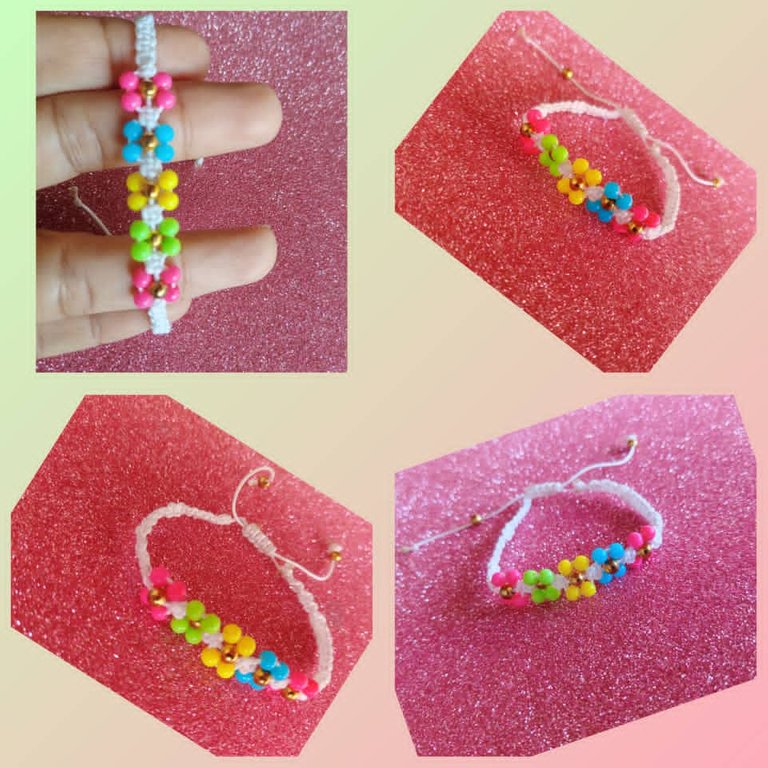
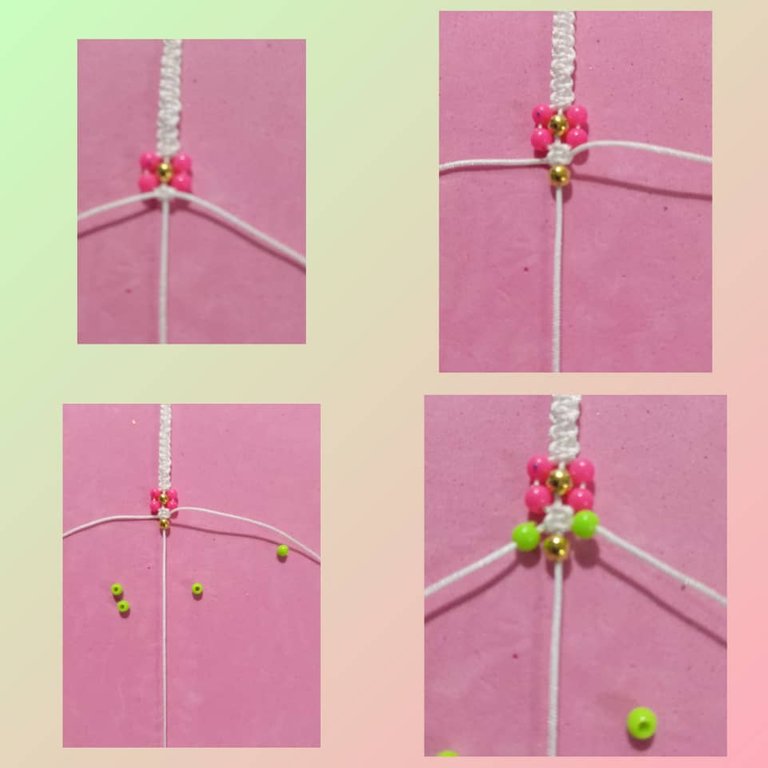
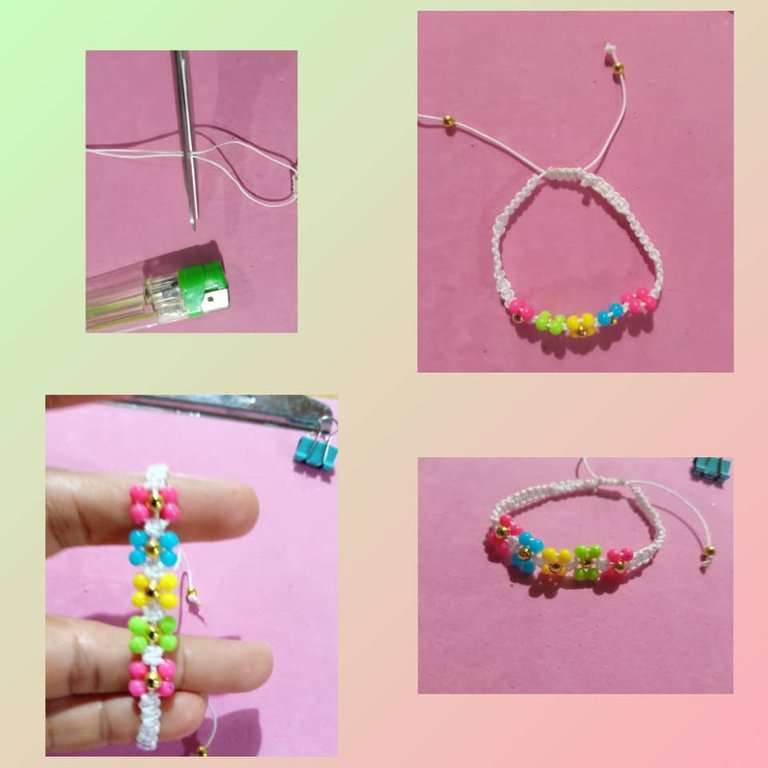
Seguimos haciendo nudo hasta llegar cuatro centímetro que son 16 nudo plano, para empezar hacer mi primera flor que va en el centro de la pulsera, llevo mi primer balín dorado hacia arriba que va en el centro de la flor tomo las mostacillas de color rosado introduzco dos mostacillas en el hilo del lado derecho dos en el lado izquierdo, luego hacemos un nudo plano de 3 puntos para cerrar la flor.
Luego llevo mi segundo balín dorado hacia arriba para hacer la segunda flor, tomo las mostacillas de color verde, introducimos dos en la parte del hilo derecho y luego 2 en el parte del hilo izquierdo, hacemos un nudo plano de 3 puntos para cerrar la segunda flor vea como va agarrando forma.
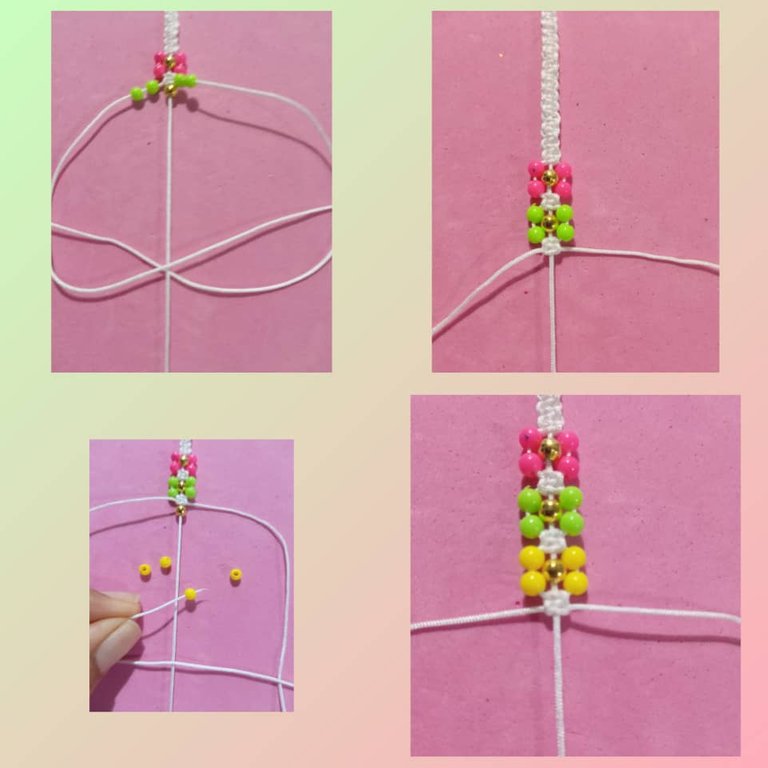
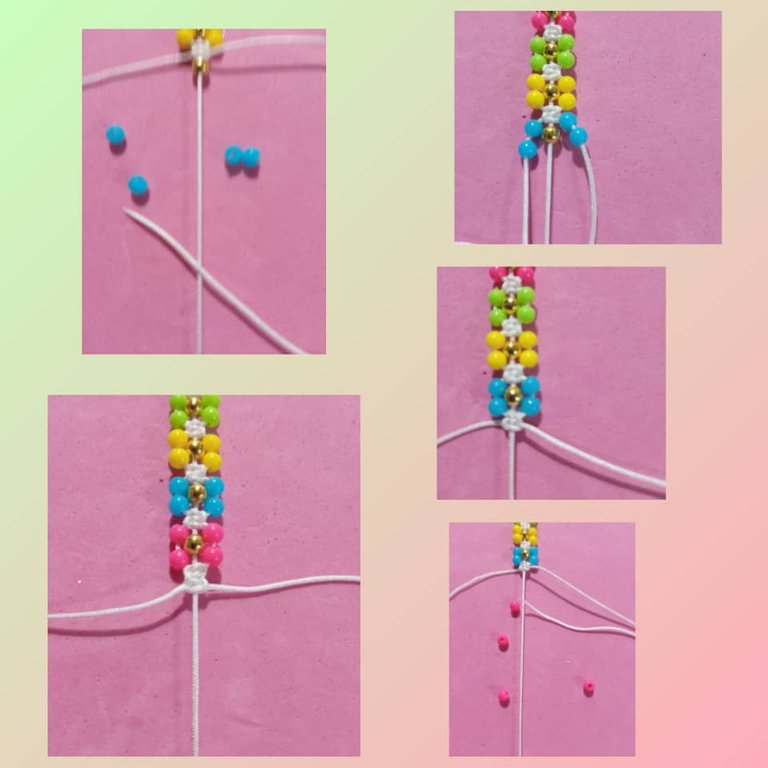
Así sucesivamente voy haciendo con las 3 últimas flores la de color amarilla, azul y la ultima de color rosada recordando que dejamos la separación de 3 nudo plano en cada flor.

Para culminar la parte de debajo de la pulsera después de la última flor, seguimos haciendo nudo plano hasta completar los 4 centímetro que son 16 nudos plano, amarramos bien para que la pulsera no se desasga, cortamos el hilo sobrantes le quemamos la punta con el encendedor.
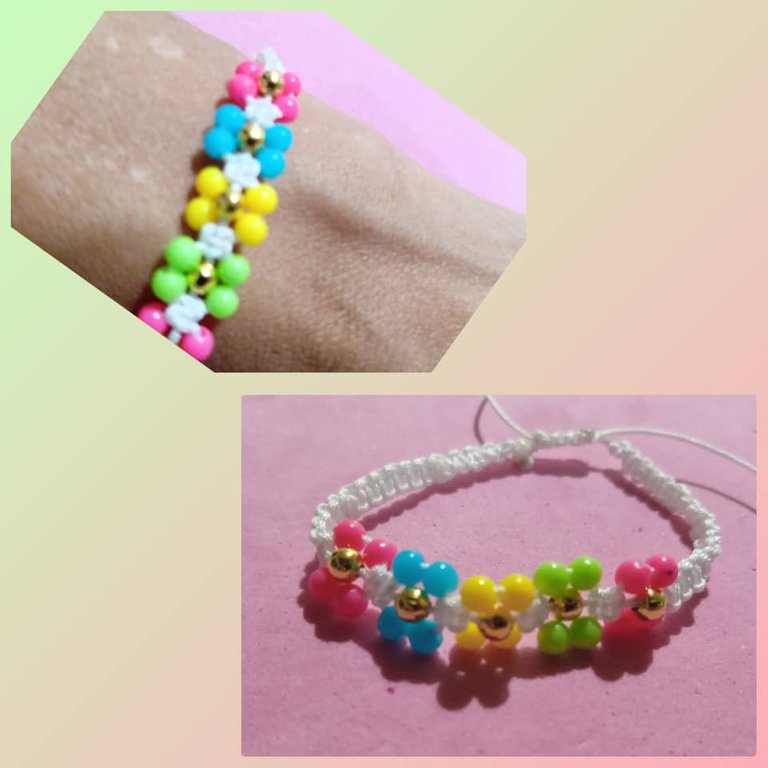
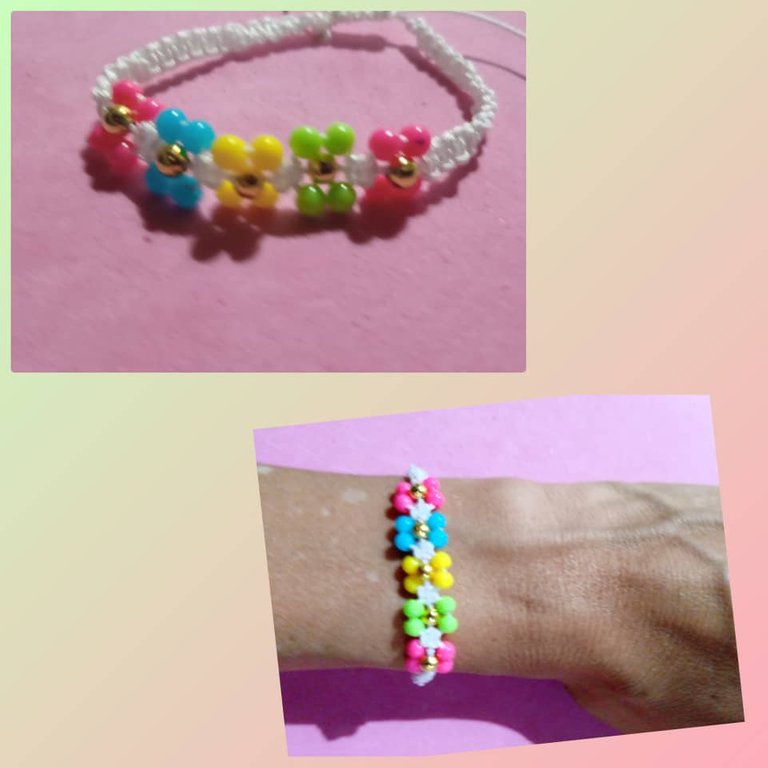
Ya tengo mi pulsera lista hacemos el cierres con nudo plano el que veníamos trabajando desde el principios, cortamos y quemamos. Y tengo lista mi pulsera.

- Vea como me quedo hermosa, delicada y coqueta sus colores muy resaltarte para usarla en cualquier ocasión.
Tenga un feliz días y bendecidos para todos muchas gracias por leer mi post.
Las fotos son mías, tomadas con teléfono alcatel , editadas con incollage y traducidas con Deepl.
Mi versión español.
¡Bienvenido a mi blog!
Hello to all my people of this community, @jewelry, Today I bring you another of my creativities, a nice bracelet with beads flowers, with macramé knot easy to make, this nice bracelet was made with Chinese thread of white color, pink, blue, green, yellow beads, golden color beads and woven with flat macramé knot, they are easy to make and you can use it for you or a family gift or a friend or ideal for Mother's Day that has been near, you can wear it for any occasion, the idea of making this type of bracelet is that I always called the tension of the flowers I love their different colors and looks very delicate and the golden beads gives a touch of shine very elegant.
Let's start showing you the materials and the step-by-step.
Materials.
- 2 meters of white Chinese thread.
- 8 pink beads.
- 4 green beads.
- 4 blue beads.
- 4 yellow beads.
- 7 golden balls.
- 1 scissors.
- 1 lighter.
- 1 board with hook.
- 1 small hook.
Step.
First we measure the threads that we are going to use for the middle of the bracelet 40 centimeter cut and adjust it on the board with the hook, leaving 12 centimeter for the closure of the bracelet.
We burn the tip of the bottom part where I will introduce the balls, once the 5 golden balls are introduced, we adjust the middle thread in the bottom part of the board to start weaving.
I begin to make the first knot I take the thread of 1.5 centimeter we adjust it in the middle of the thread below and we fix it with a knot, now I take the thread of the right and I make a form of a p I pass it over the thread of the center and I take the thread of the left and I introduce the tip below the thread of the middle and we take it out by the oval of the p that I had formed we pull and we tighten well and I have my first knot.
Now I make my second knot I pass the left thread over the right thread I take the right thread the end and pass it under the middle thread pulling through the oval I had formed we pull and tighten well until we get to the top and I have my second flat knot.
Now I make my third knot now I form a p on the right side I put the thread on the top of the middle thread and I take the left thread and pass the tip under the middle thread pulling the tip through the oval that I formed on the right side, we pull and tighten until we reach the top and I have my third knot.
We continue making knots until we reach four centimeters which are 16 flat knots, to start making my first flower that goes in the center of the bracelet, I take my first golden bead upwards that goes in the center of the flower I take the pink beads I introduce two beads in the thread of the right side and two in the left side, then we make a flat knot of 3 points to close the flower.
Then I take my second golden ball up to make the second flower, I take the green beads, I introduce two in the right side thread and then 2 in the left side thread, we make a flat knot of 3 points to close the second flower, see how it is taking shape.
So successively I am doing with the last 3 flowers the yellow, blue and the last one of pink color remembering that we leave the separation of 3 flat knot in each flower.
To finish the bottom of the bracelet after the last flower, we continue making flat knot to complete the 4 centimeters which are 16 knots flat, tie well so that the bracelet does not come unstuck, cut the excess thread burn the tip with the lighter.
Now I have my bracelet ready, we make the clasp with the flat knot that we have been working on since the beginning, cut and burn. And I have my bracelet ready.
- See how I was beautiful, delicate and flirtatious its colors very resaltarte to wear it on any occasion.
Have a happy day and blessed to all thank you very much for reading my post.
The photos are mine, taken with alcatel phone , edited with incollage and translated with Deepl.
Congratulations @anacarolina2022! You have completed the following achievement on the Hive blockchain And have been rewarded with New badge(s)
Your next target is to reach 700 comments.
You can view your badges on your board and compare yourself to others in the Ranking
If you no longer want to receive notifications, reply to this comment with the word
STOPTo support your work, I also upvoted your post!
Check out our last posts:
Support the HiveBuzz project. Vote for our proposal!
gracias por su apoyo..
¡Eso es perfecto @anacarolina2022! ¡Eres un verdadero campeón de Hive! ¡Adelante hacia esa nueva meta!
Has sido votado por
PROYECTO ENLACE
'Conectando Ideas y Comunidades'
PROYECTO ENLACE es un proyecto de curación de habla hispana enfocado en recompensar contenido de calidad y apoyar autores en su proceso de crecimiento en HIVE.
Creemos y apostamos por el futuro de esta gran plataforma, y estamos muy emocionados de poder hacerla crecer junto a esta comunidad. Así que te invitamos a publicar en nuestra COMUNIDAD y estar atento a todas las actividades que tenemos preparadas y que estaremos publicando en breve.
¿QUIERES AUTOMATIZAR TUS GANANCIAS DE CURACIÓN? SE PARTE DEL PROYECTO ENLACE APOYANDO A NUESTRO TRAIL EN HIVE.VOTE INGRESA AQUÍ PARA CONOCER LOS DETALLES.
¿QUIERES INVERTIR ENLACE? DESCUBRE COMO HACERLO Y GENERAR INGRESOS DE FORMA SEMANAL MEDIANTE TU DELEGACIÓN DE HP AQUÍ TE EXPLICAMOS COMO.
Te invitamos a participar en nuestro servidor de Discord: https://discord.gg/3S9y7BbWfS
Atentamente
EQUIPO ENLACE 2023
Very nice design. The different colors makes a nice combination.
Gracias me alegra que le guste, gracias por el apoyo y voto
Muy bonita pulsera, la combinación de colores la hace ver muy linda.