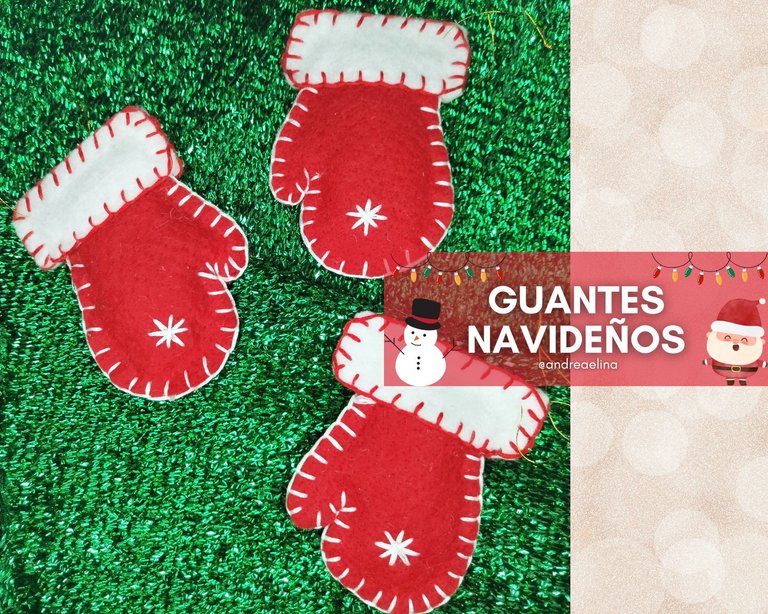
Decora tu casa con estos lindos guantes navideños • Decorate your house with these cute Christmas gloves
🇪🇸 ESPAÑOL
¡¡Hola hive amigos!!
Hoy quiero enseñarles como fabriqué unos lindos guantecitos navideños que son geniales para usarlos en la decoración de tu arbolito u otros sitios de tu hogar, oficina y cualquier espacio que quieras decorar.
La navidad es una época que llena de alegría todos los hogares, la ilusión de decorar bonita tu casa y los espacios donde convives es hermosa. Si en tu familia hay niños ese espíritu navideño se aviva mucho más, al ver sus caritas emocionadas con toda la magia que produce la navidad es motivo suficiente para siempre querer mantener encendido ese sentimiento.
Algunas personas queremos cambiar los adornos todos los años, hay quienes se inventan hasta decoraciones de colores fuera de lo tradicional, sin embargo, esto es un gasto que no siempre se puede asumir, así que una forma supereconómica y genial para tener nuevos adornos es crearlos tu mismo, bien sea con material reciclable o material de manualidades que si se compran en cantidades grandes salen muchos adornitos.
Como les comenté hace unos días, este año comencé con un nuevo emprendimiento que se trata de elaborar muñequitos de fieltro para decoraciones navideñas.
Entonces, siguiendo el tema de los muñequitos de navidad, hoy verán como se hace este hermoso guante navideño.
Pará elaborarlo vamos a necesitar:

*Fieltro Rojo Navidad (o el color de tu preferencia)
*Fieltro Blanco
*Madeja para bordar de color blanco y rojo
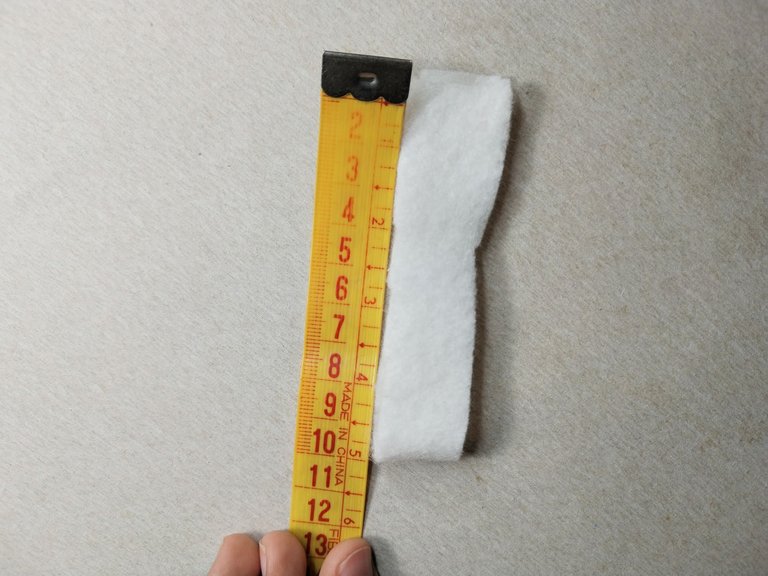
*Guata
*Silicona
*Tijera
*Regla
*Aguja para bordar.
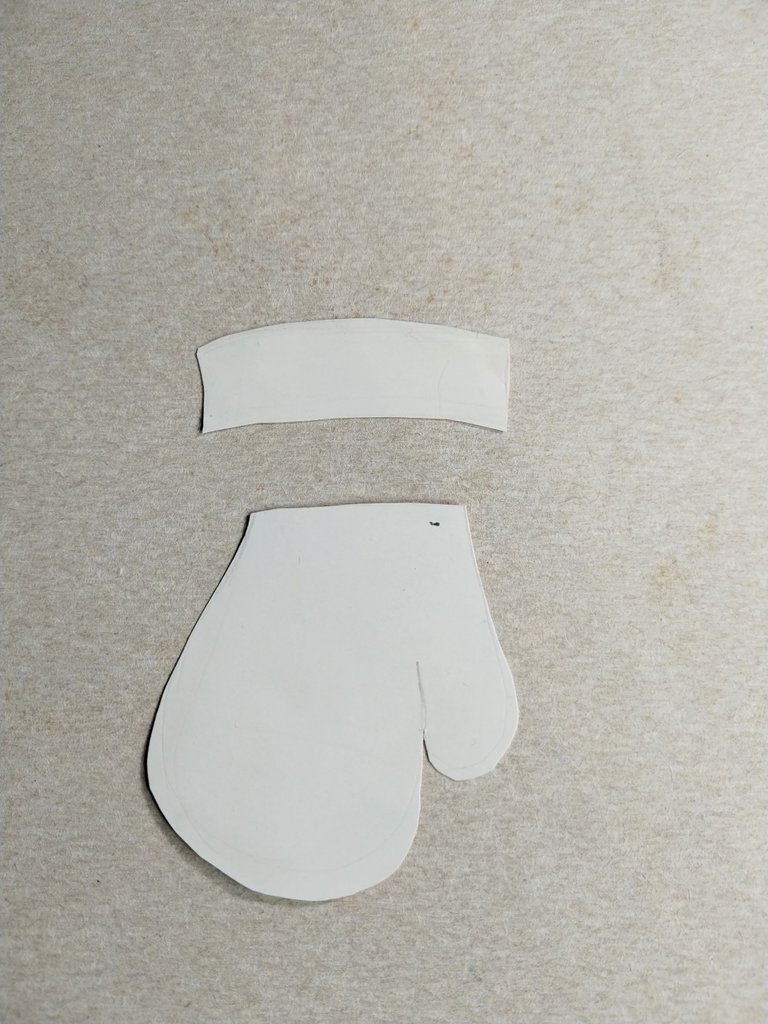
Como primer paso confeccionamos un patrón en cartón de lo que serán las piezas de nuestro guante.
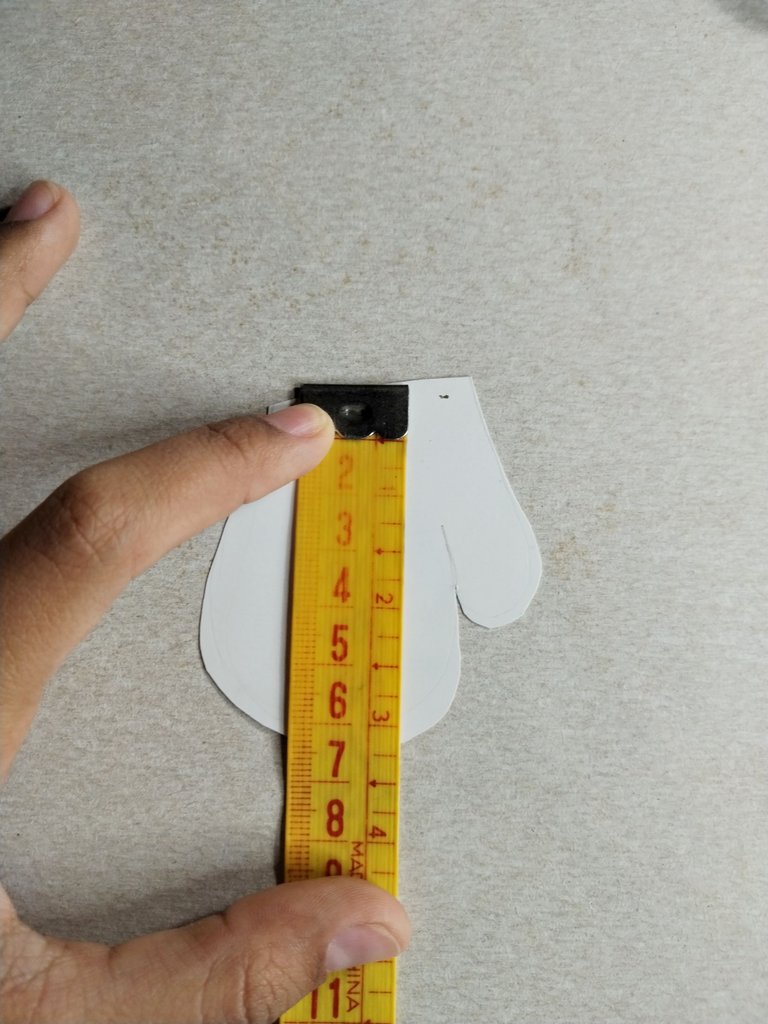
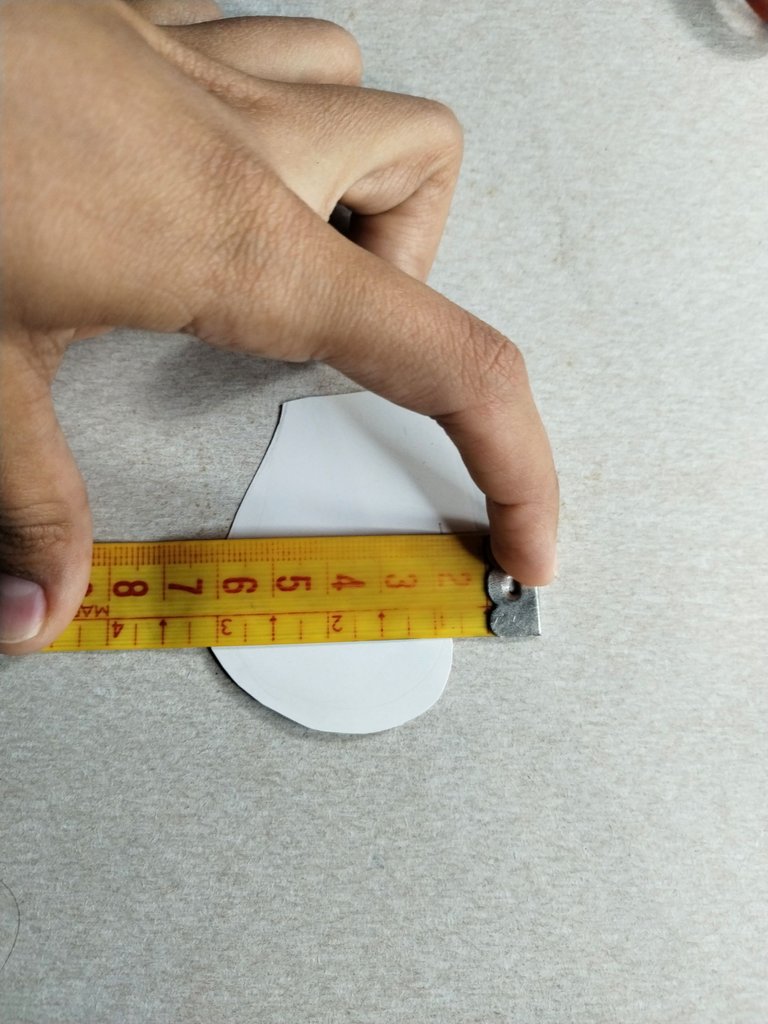
El guante como tal tiene unas medidas de 6,5 centímetros de ancho por 6,5 centímetros de largo y la manga de lo que será nuestro guantecito tendrá 5,5 centímetros de largo por 2,5 centímetros de ancho.
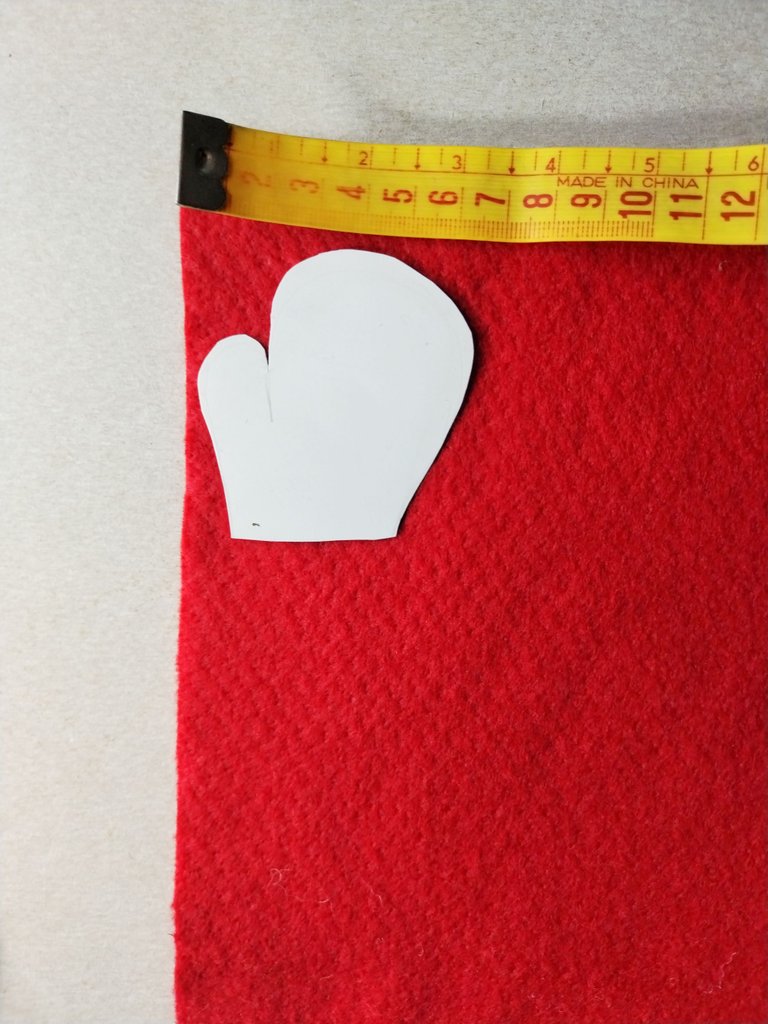
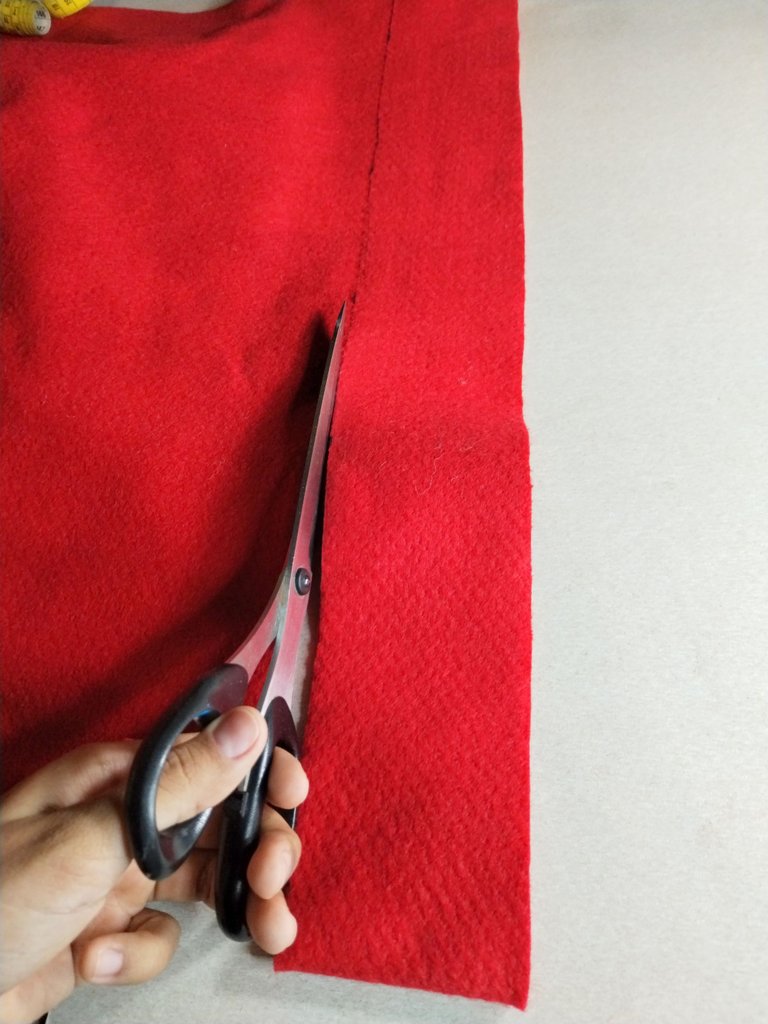
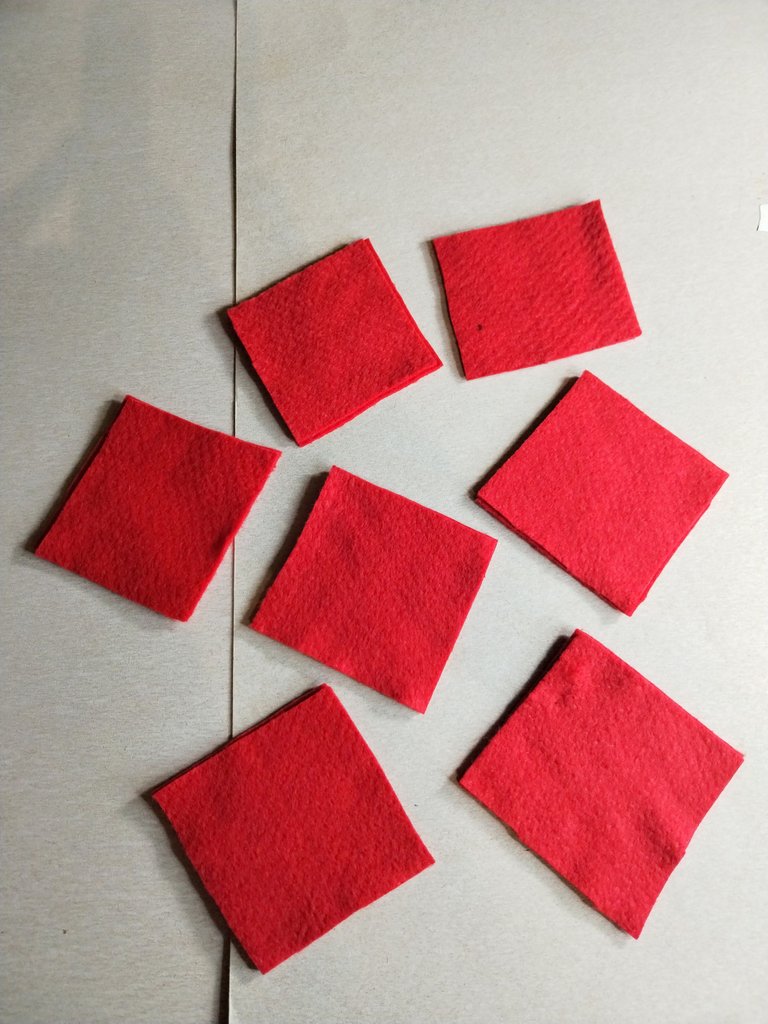

Ya con el patrón cortado nos disponemos a cortar los cuadros de color rojo y blanco respectivamente.

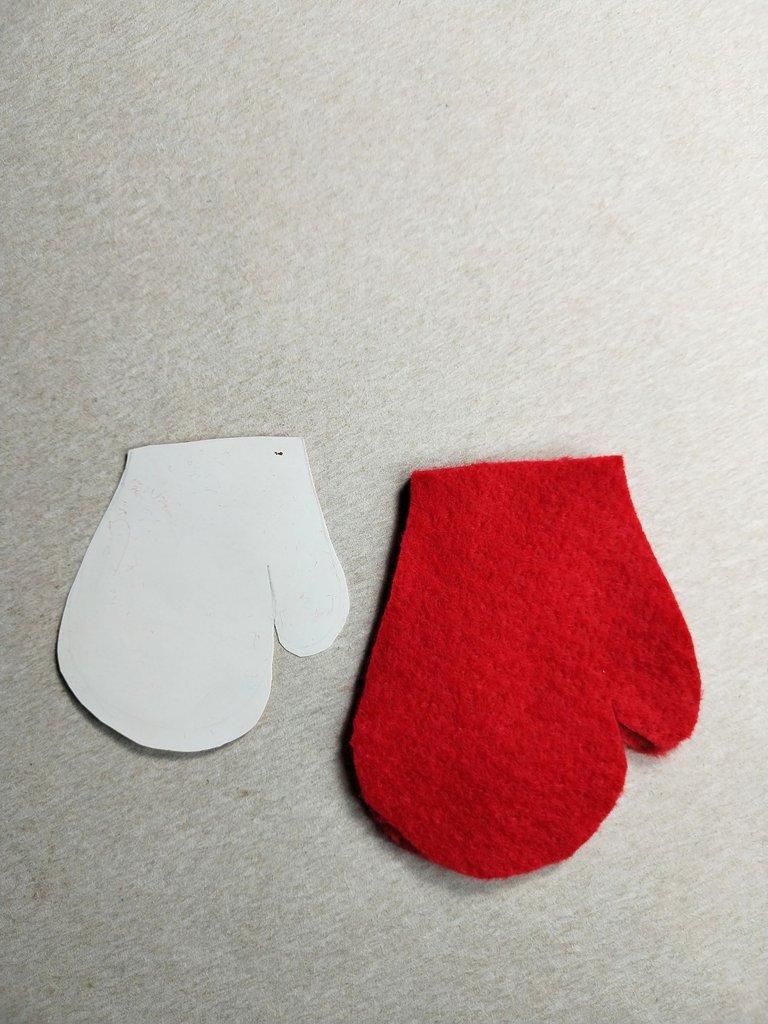
En estos cuadros colocaremos el patrón para sacar la forma del guante en las piezas de fieltro.
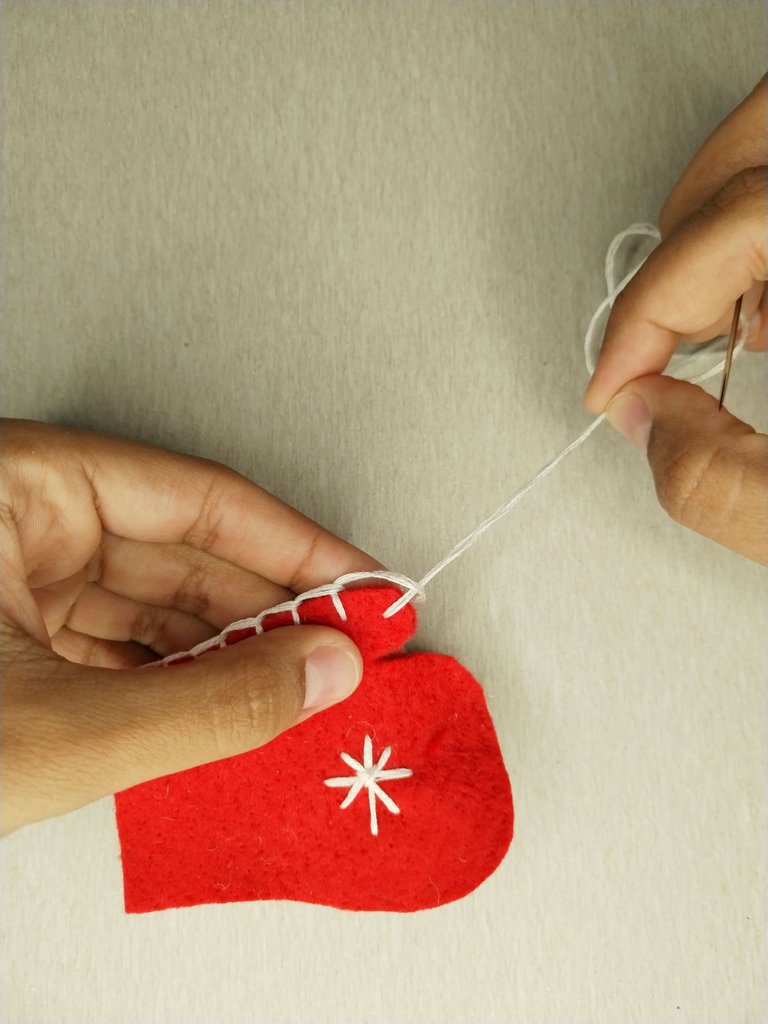
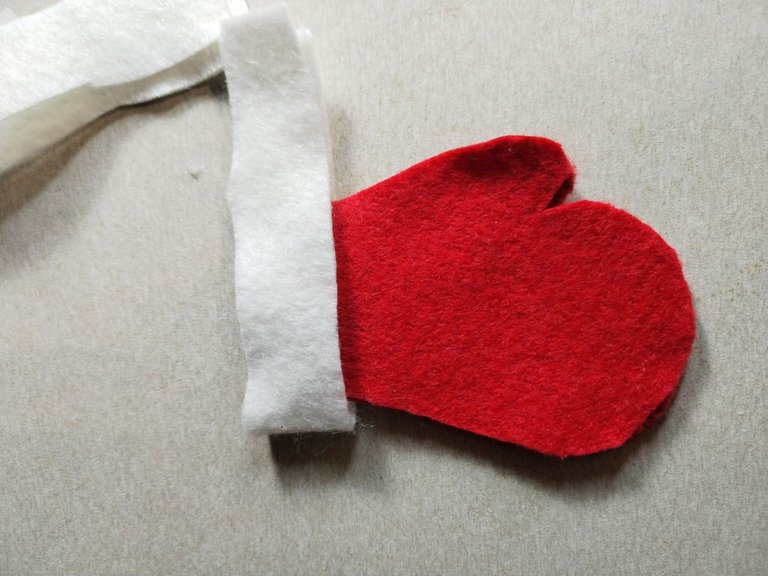
Luego, con la madeja para bordar blanca, hice las puntadas necesarias para unir ambas caras del guantecito.
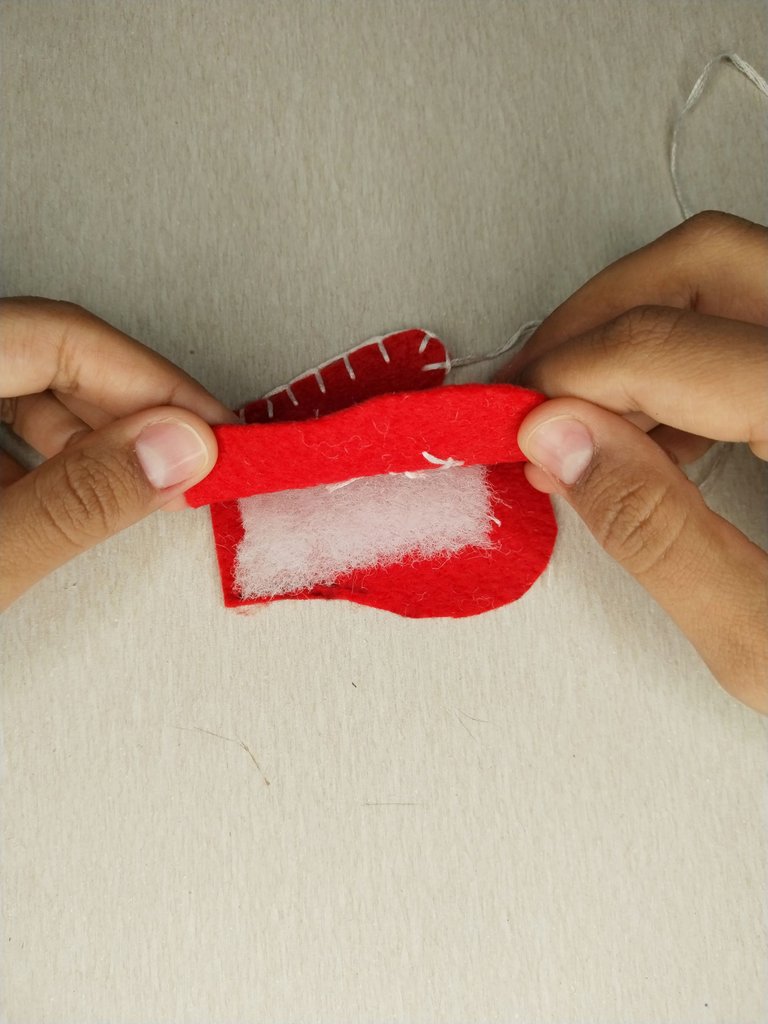
Una vez bordado casi todo su alrededor, dejando el extremo donde va la manga sin bordar, procedemos a introducir la guata o relleno para darle la forma más acolchada a nuestra futura figurita de navidad.
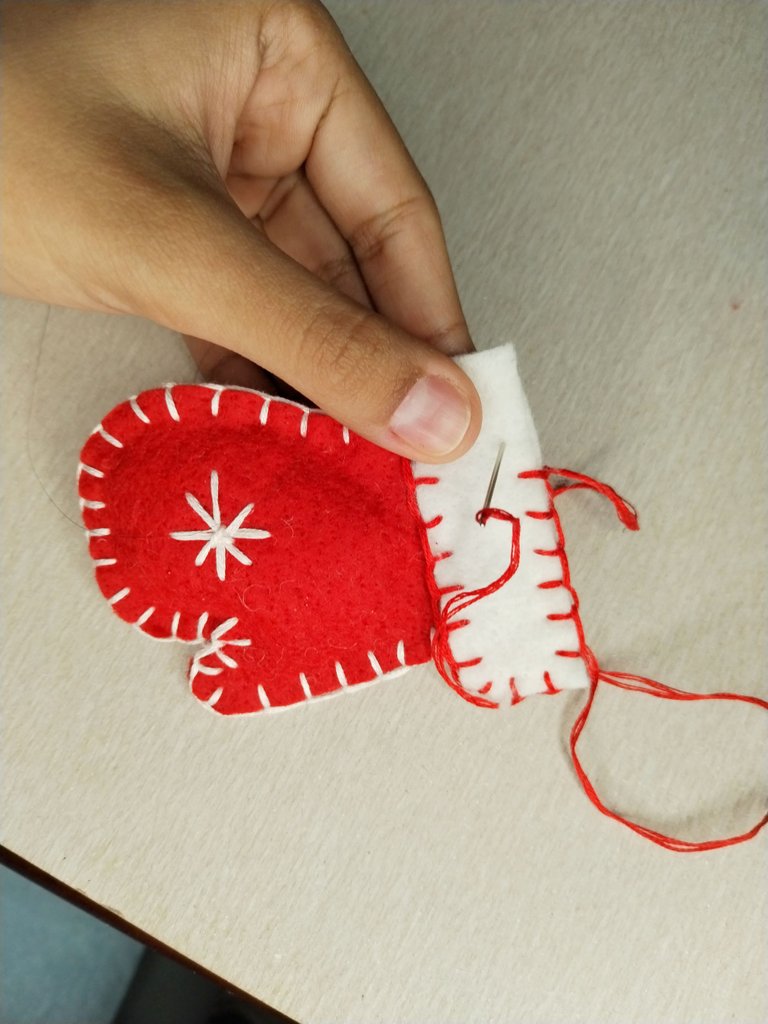
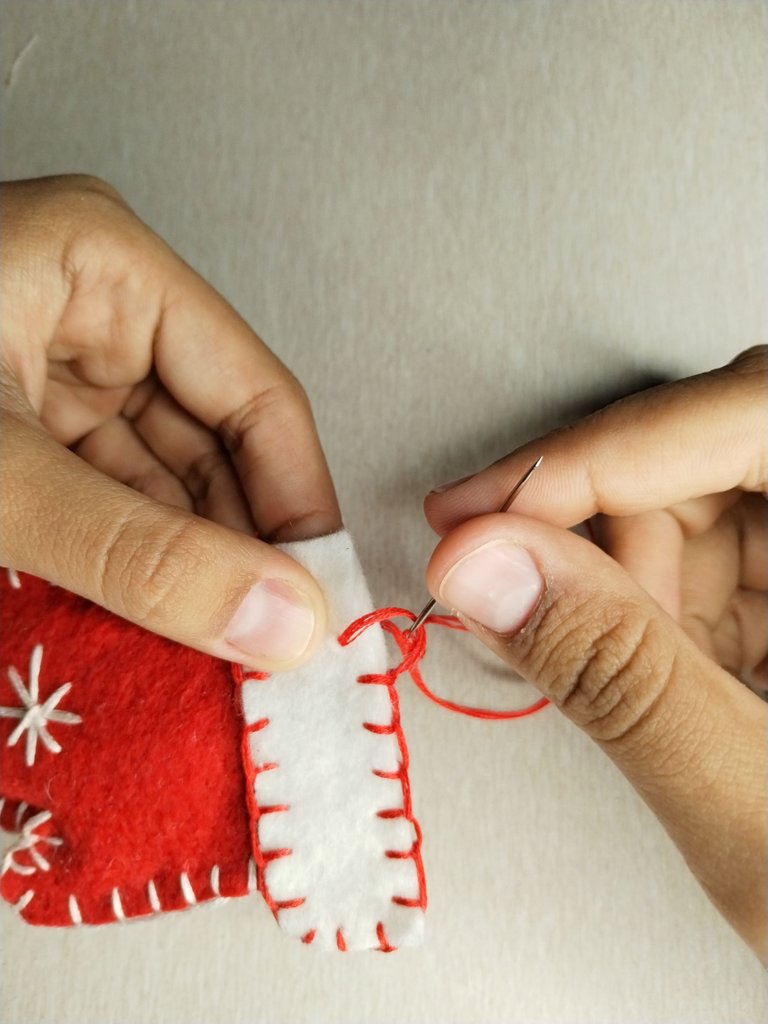
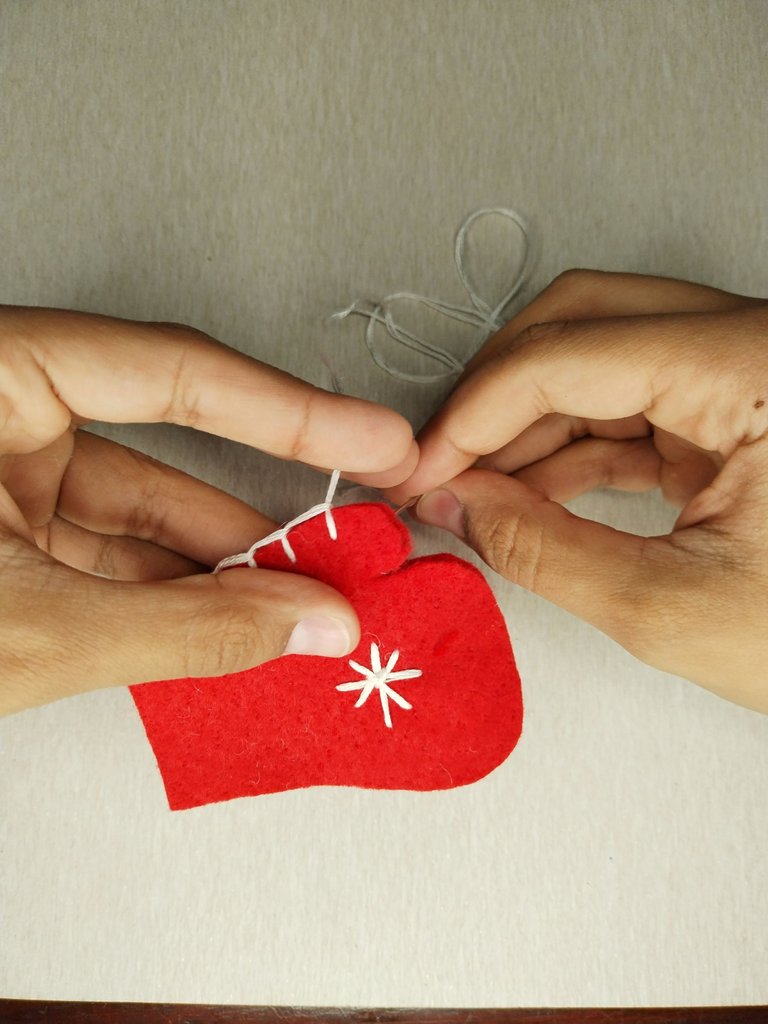
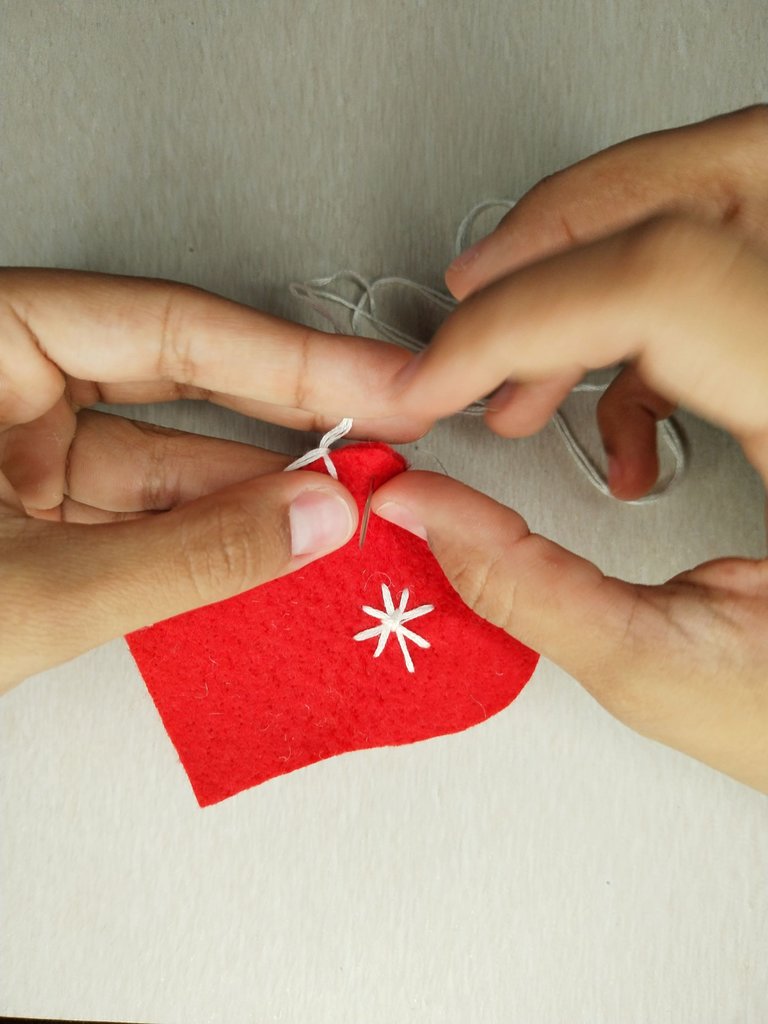
Una vez el relleno completo, pasamos a bordar los extremos de la manga de nuestro guante y a unirla con la pieza anterior.
Pará este extremo utilicé hilo rojo con el fin de crear un lindo contraste entre los colores.

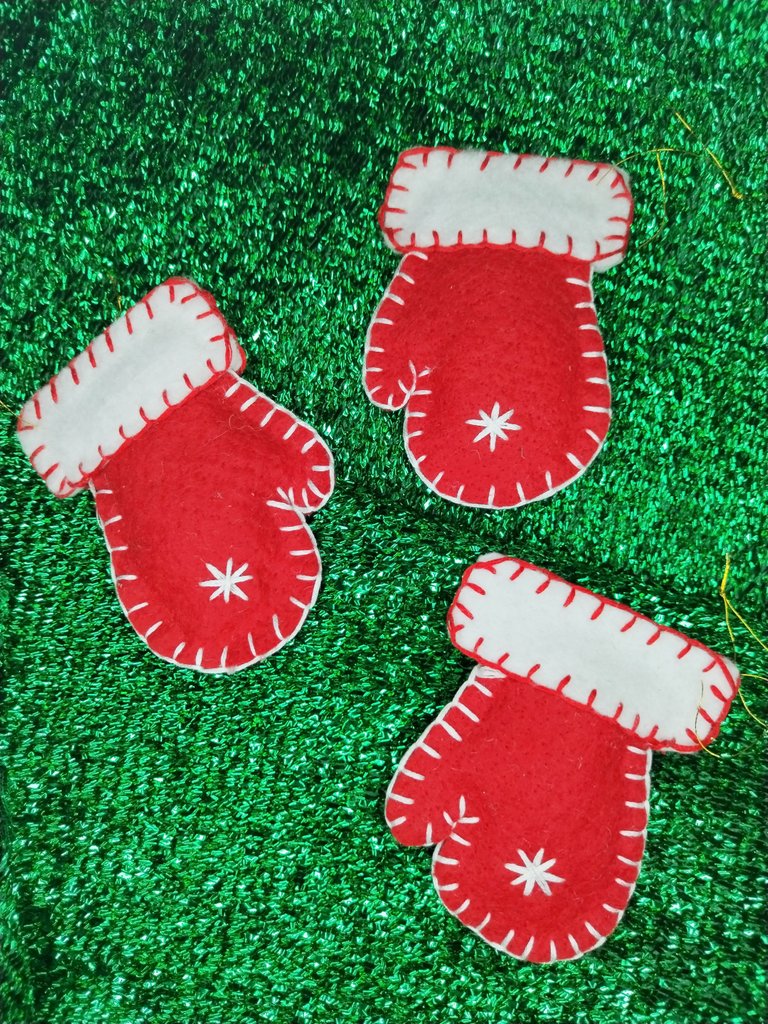
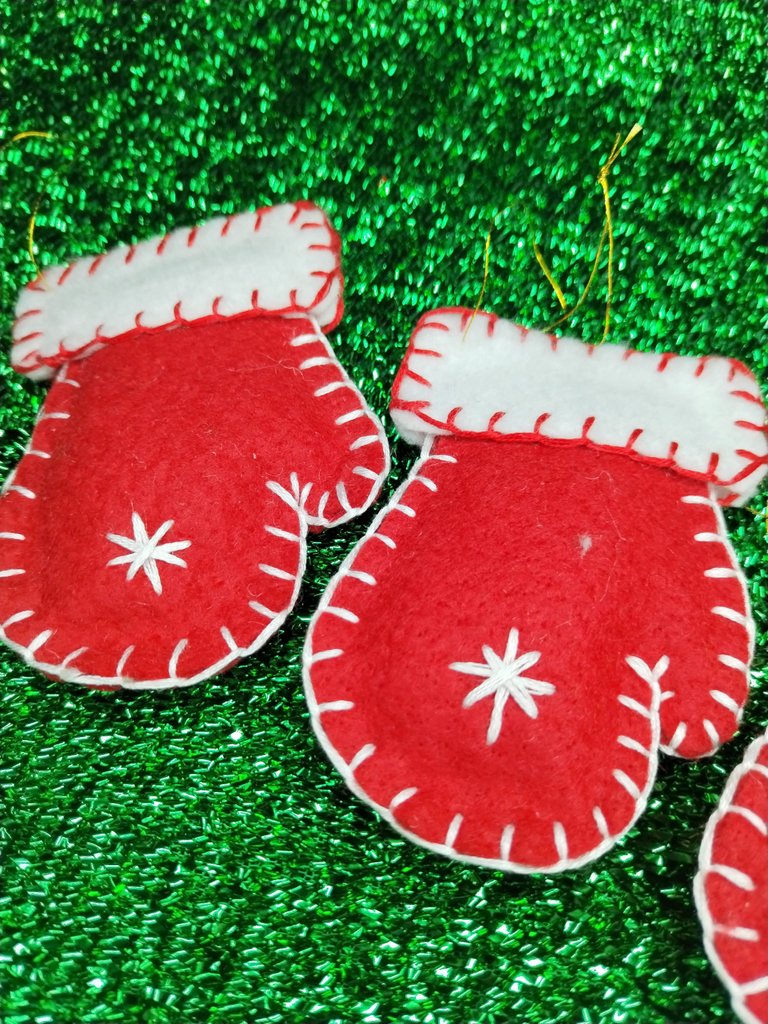
Ya con todas las piezas unidas tenemos nuestra figura de guante de navidad ¡¡lista!!
Como pueden ver es muy rápida y fácil de hacer y lo mejor es que con el mismo patrón pueden utilizar el color de su preferencia e incluso hacer combinaciones entre el hilo y el fieltro para hacer del mismo modelo varios guantecitos distintos.
Juega con tu imaginación y verás cómo con un solo diseño puedes crear muchas cosas bonitas.
Espero les haya gustado y próximamente les estaré mostrando más formitas de navidad para que armen en sus casas.
Gracias por visitar mi blog.
¡¡Saludos!!
🇺🇸 ENGLISH
Hello hive friends!!
Today I want to show you how to make some cute little Christmas gloves that are great to use to decorate your little tree or other places in your home, office and any space you want to decorate.
Christmas is a time that fills all homes with joy, the illusion of decorating your house beautifully and the spaces where you live is beautiful, if there are children in your family that Christmas spirit is much more enlivened, see their faces excited with all the magic that Christmas produces is reason enough to always want to keep that feeling on.
Some people want to change the decorations every year, there are those who even invent decorations of colors that are out of the traditional, however, this is an expense that cannot always be assumed, so a super cheap and great way to have new decorations is to create them yourself, either with recyclable material or craft material that if bought in large quantities, many ornaments come out.
As I told you a few days ago, this year I started a new venture that is about making felt dolls for Christmas decorations.
So, following the theme of Christmas dolls, today you will see how this beautiful Christmas glove is made.
To make it we will need:
*Christmas Red Felt (or the color of your choice)
*White Felt
*Skein to embroider in white and red
*Wadding
*Silicone
*Scissors
*Rule
*Embroidery needle.
As a first step, we make a cardboard pattern of what the pieces of our glove will be.
The glove as such measures 6.5 centimeters wide by 6.5 centimeters long and the sleeve of what will be our little glove will be 5.5 centimeters long by 2.5 centimeters wide.
Once the pattern is cut, we are ready to cut the red and white squares, respectively.
In these squares we will place the pattern to draw the shape of the glove on the felt pieces.
Then, with the white embroidery skein, I made the necessary stitches to join both sides of the glove.
Once almost everything around it is embroidered, leaving the end where the sleeve goes without embroidery, we proceed to introduce the wadding or filling to give our future Christmas figure the most padded shape.
Once the filling is complete, we proceed to embroider the ends of the sleeve of our glove and join it with the previous piece.
For this end I used red thread in order to create a nice contrast between the colors.
With all the pieces together, we have our Christmas glove figure ready!
As you can see, it is very quick and easy to do and the best thing is that with the same pattern you can use the color of your choice and even make combinations between the thread and the felt to make several different little gloves from the same model.
Play with your imagination and you will see how with a single design you can create many beautiful things.
I hope you liked it and soon I will be showing you more Christmas forms to assemble at home.
Thank you for visiting my blog.
Thank you for sharing this amazing post on HIVE!
Your content got selected by our fellow curator @rezoanulvibes & you just received a little thank you via an upvote from our non-profit curation initiative!
You will be featured in one of our recurring curation compilations and on our pinterest boards! Both are aiming to offer you a stage to widen your audience within and outside of the DIY scene of hive.
Join the official DIYHub community on HIVE and show us more of your amazing work and feel free to connect with us and other DIYers via our discord server: https://discord.gg/mY5uCfQ !
If you want to support our goal to motivate other DIY/art/music/homesteading/... creators just delegate to us and earn 100% of your curation rewards!
Stay creative & hive on!