✨🦋Hermoso cuadro vintage Hecho con latas de aluminio y cartón//✨🦋Beautiful vintage painting made with aluminum cans and cardboard✨🦋
Buen día linda comunidad un gusto saludarlos a cada uno de ustedes,como acaban de leer en el título en esta ocasión hice un bonito cuadro o marco para colocar una de mis fotos que tenia guardada por eso me he decidido hacerlo con materiales que tenia aqui en casa como un par de latas y unos cartones sobrantes de una caja ,en esta ocasión vamos a aplicar una tecnica que le da un acabado muy vintage a la lata que se trata de quemar el material con la estufa asi se podrá apreciar ese tono dorado que se puede observar en las flores del marco ..
Éste acabado dorado es el que le da el tono especial a las flores a la hora de decorar cosas recicladas ,aquí en este tutorial que hice con mucho amor para ustedes se los voy a explicar asi pueden hacerlo y darle un toque único a sus manualidades,ahora vamos a empezar este lindo proceso ,¡manos a la obra!.
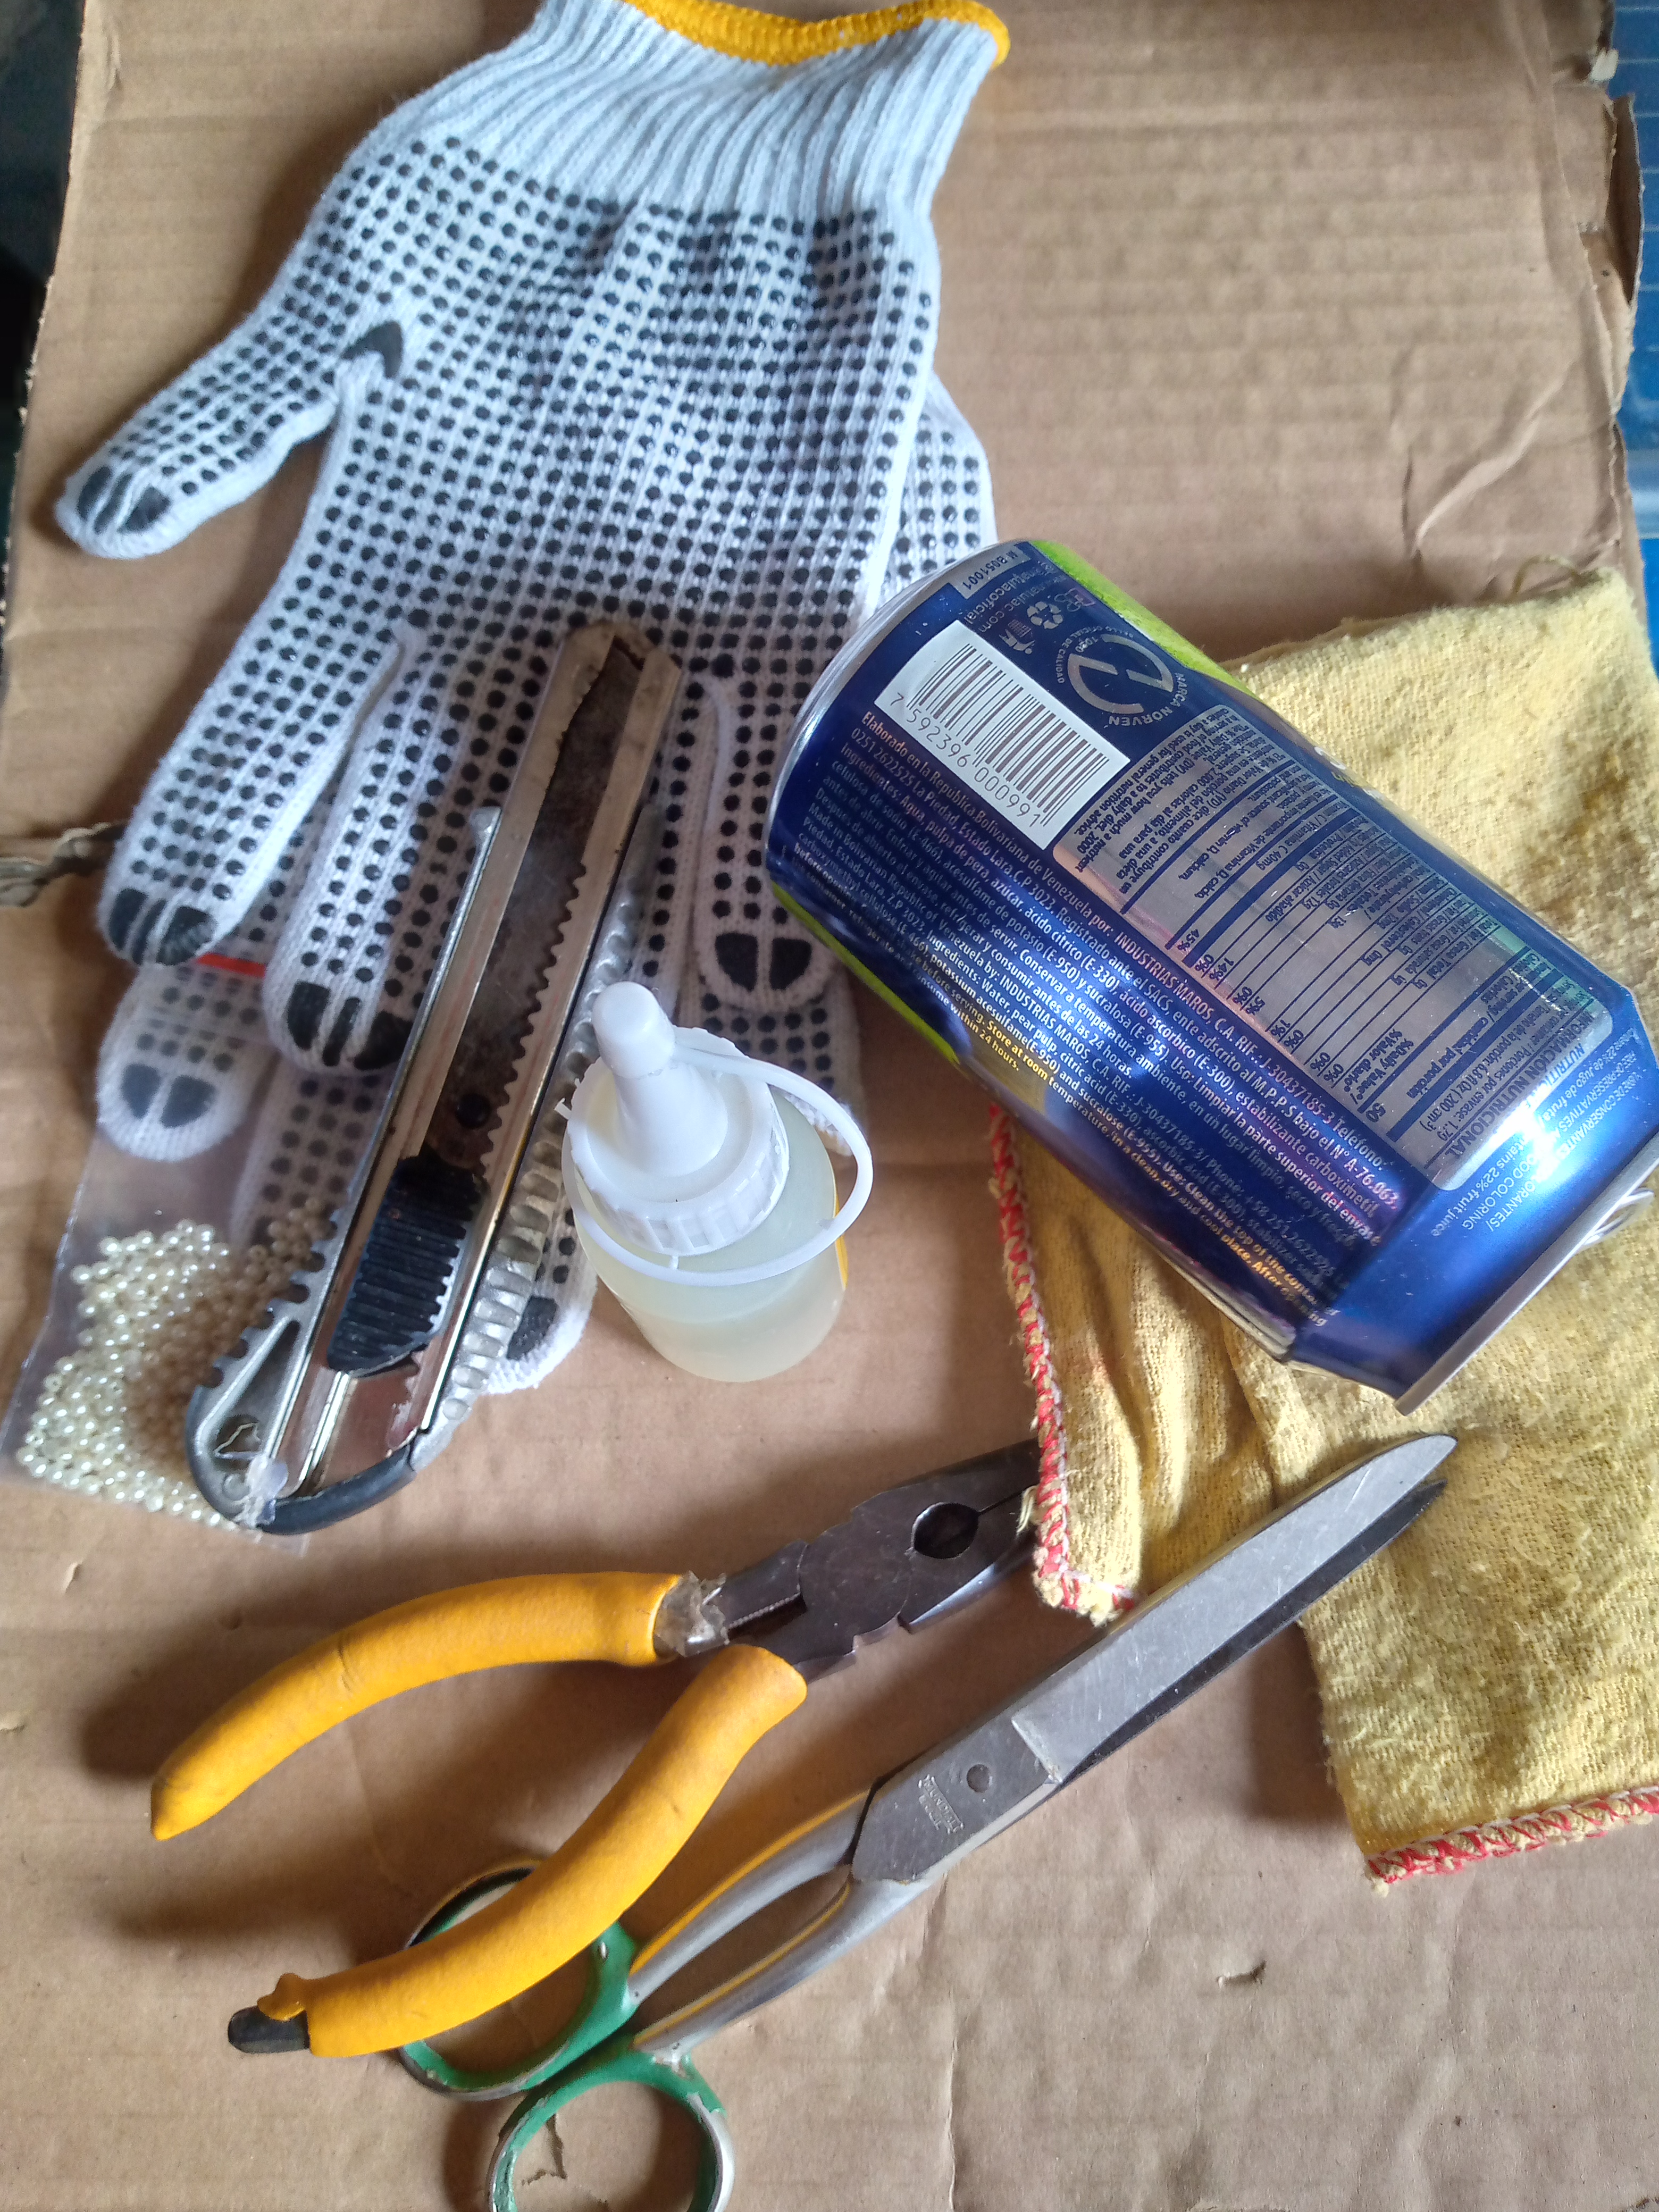
🦋✨Materiales que usé :✨🦋
- Cartón
- Silicón
- Cúter
- Tijeras
- Guantes
- Perlas para decorar
- Latas
- Pinza
- Paño de cocina
🦋✨(Pasos a seguir)✨🦋
Paso 01
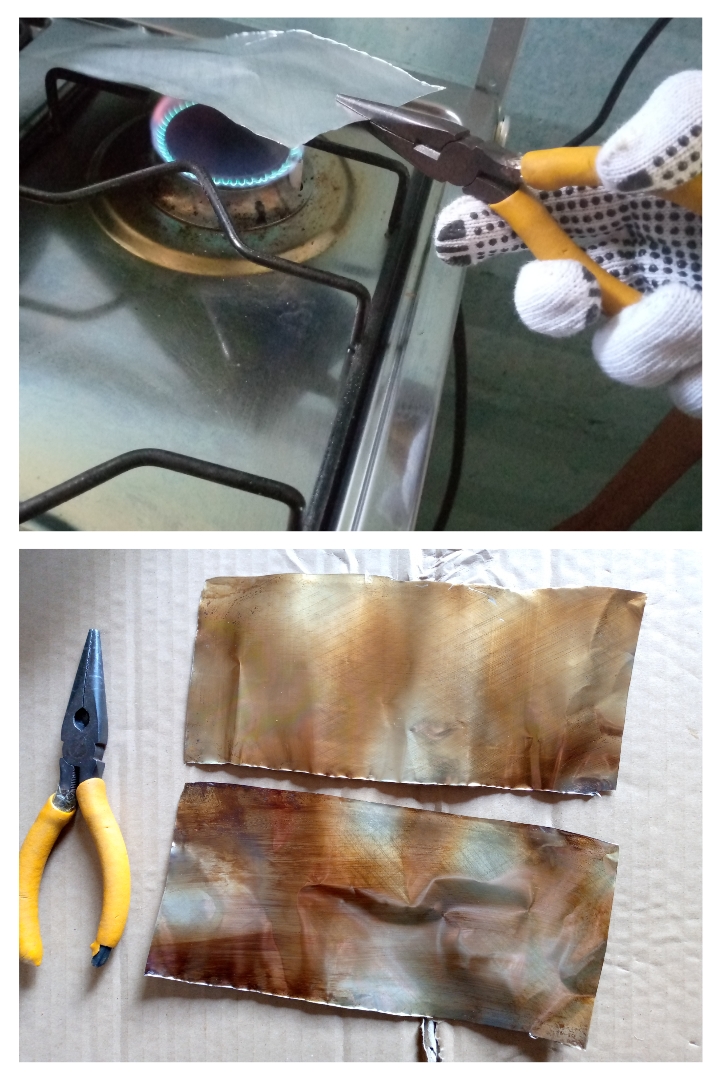
Lo primero que debemos hacer colocarnos nuestros guantes para trabajar con seguridad y no nos cortemos las manos esto hay que hacerlo con delicadeza ya que la lata nos puede cortar por eso es recomendable usar guantes a la hora de trabajar la lata,bien ,hecho esto vamos a lavarla anteriormente y dejarla secar ,cuando esté seca vamos a colocar la lata sobre el paño de cocina esto lo hacemos para que no se resbale y procedemos a cortarla con el cúter muy lentamente sin doblar la lata la cortaremos tal cual se muestra en las imágenes de ambos lados arriba y abajo .
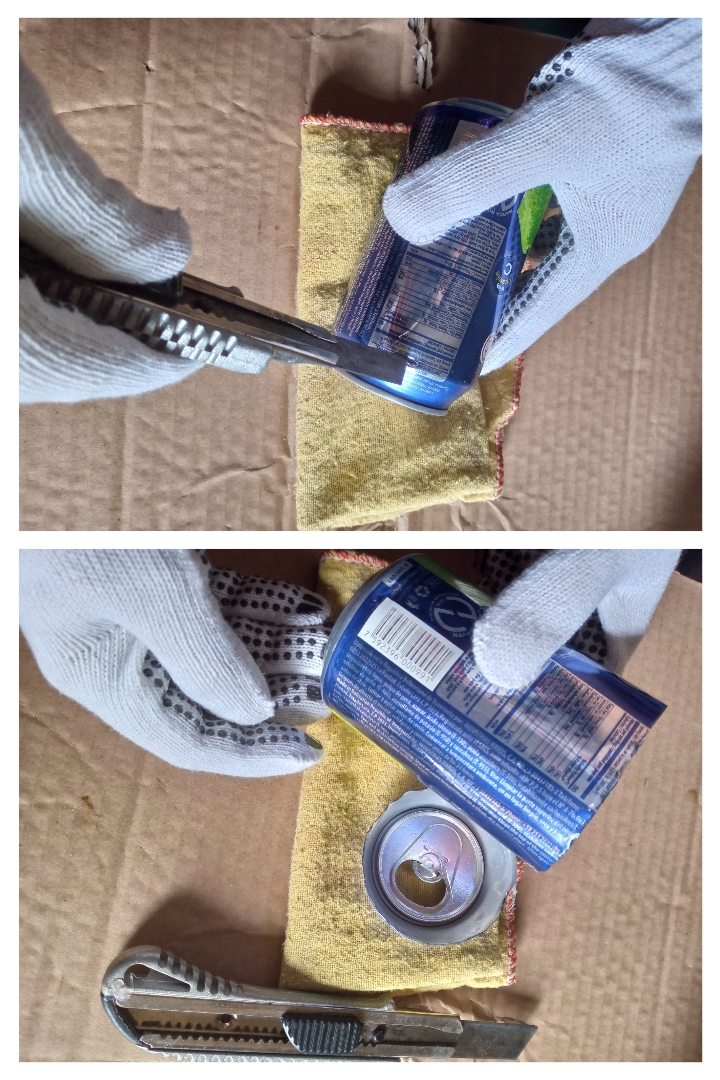
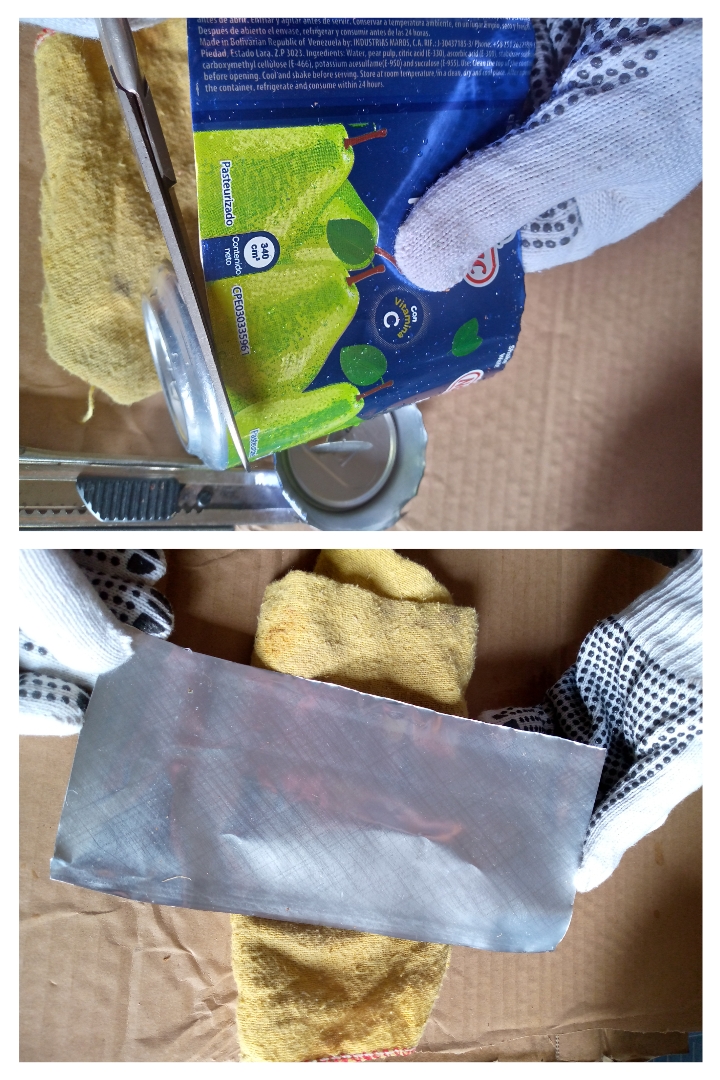
Paso 02
Terminamos de cortar la lata por ambos lados de ella y nos quedará un rectángulo ,yo usé tres latas para realizar las flores ustedes pueden usar más si desean colocarle al cuadro más flores.
Paso 03
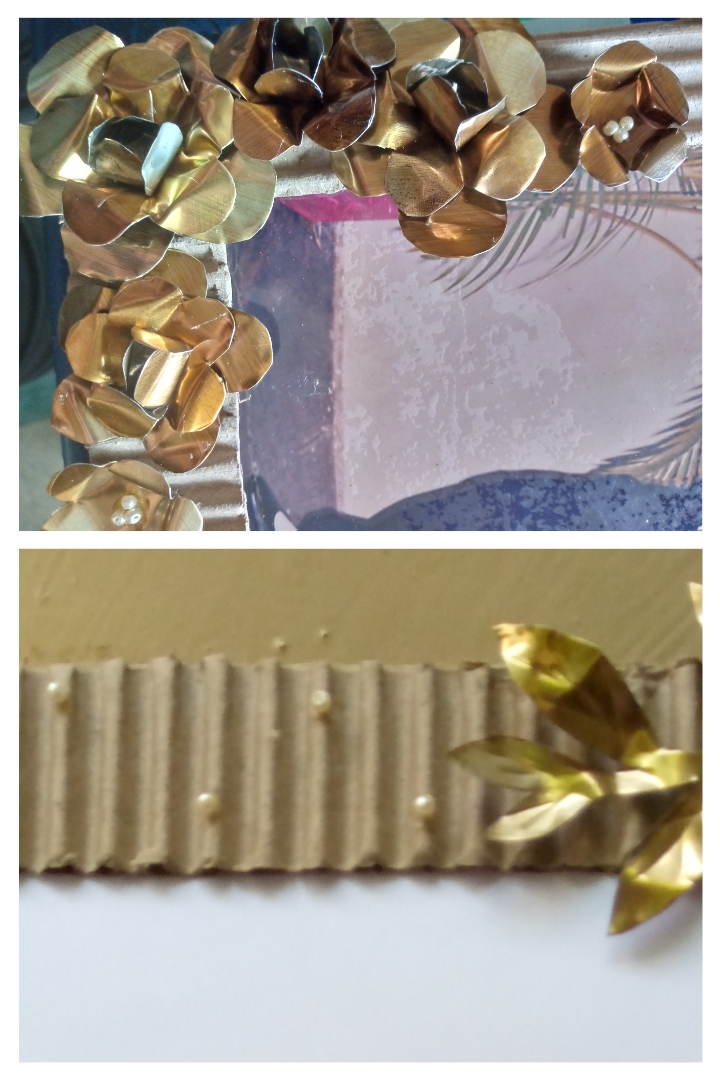
Una vez terminamos de recortar las láminas de la lata procedemos con el paso más importante que es quemarlas, acá podemos hacerlo con ayuda de terceros , podemos usar la estufa a fuego bajo de nuestra cocina o una vela encendida lo importante el quemar la lámina poco a poco ,para esto usamos la pinza para sostener la lamina bien ,es importante que nos quede los dibujos de la lata hacia abajo asi se quemará osea quemaremos del lado superior de nuestra lata sin dejarla mucho en el fuego ya que puede quemarse demasiado ,debe realizarse en un termino medio y con precaución sin contacto con el viento ,así nos quedará ese acabo dorado que se muestra en la imagen.
Paso 04
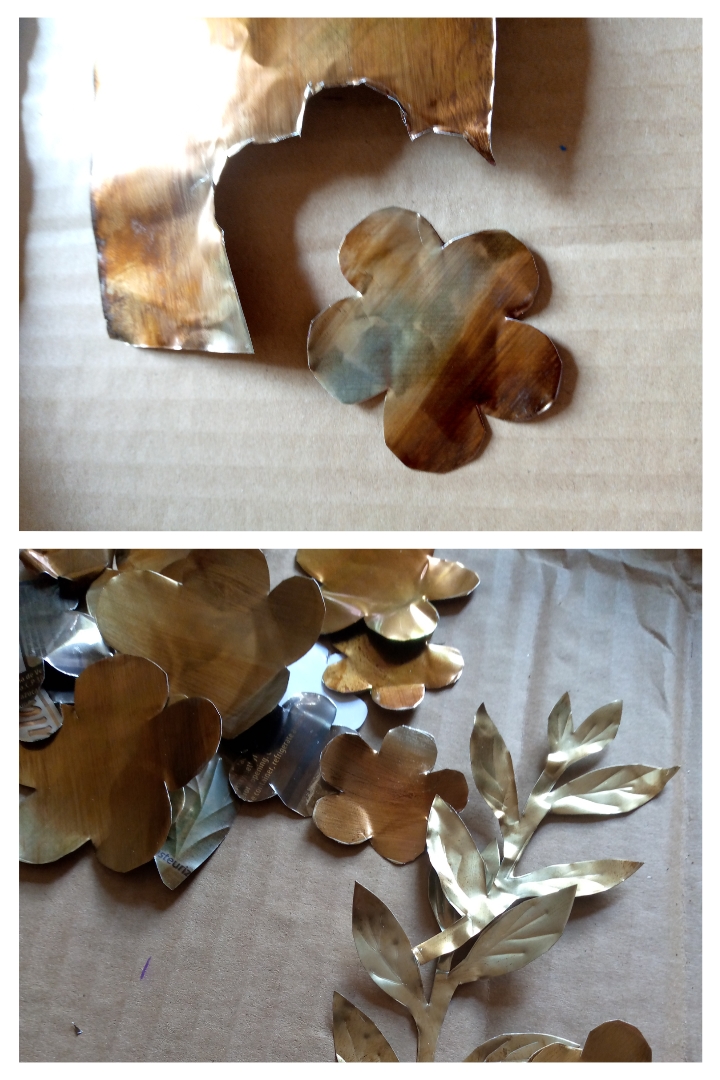
Después de quemar o broncear nuestras láminas vamos a hacer unas flores que van a componer el cuadro ,podemos hacer un molde en cartón luego transferirlas a la lámina para marcarlas podemos ayudarnos con un alfiler ya que el material es resbaloso y no se marca la tinta con que vayamos a dibujar las flores,cuando ya las tengamos marcadas procedemos a cortarlas con cuidado porque a pesar de ser un material duro también se puede romper con facilidad al cortar ,así que tengamos mucha paciencia al hacerlo ,aquí pueden cortar cuantas flores deseen y agregarle algunos ramilletes de hojas del mismo material ustedes dejen volar su imaginación cualquier detalle bonito cuenta ya que trabajamos con materiales de provecho.
Paso 05
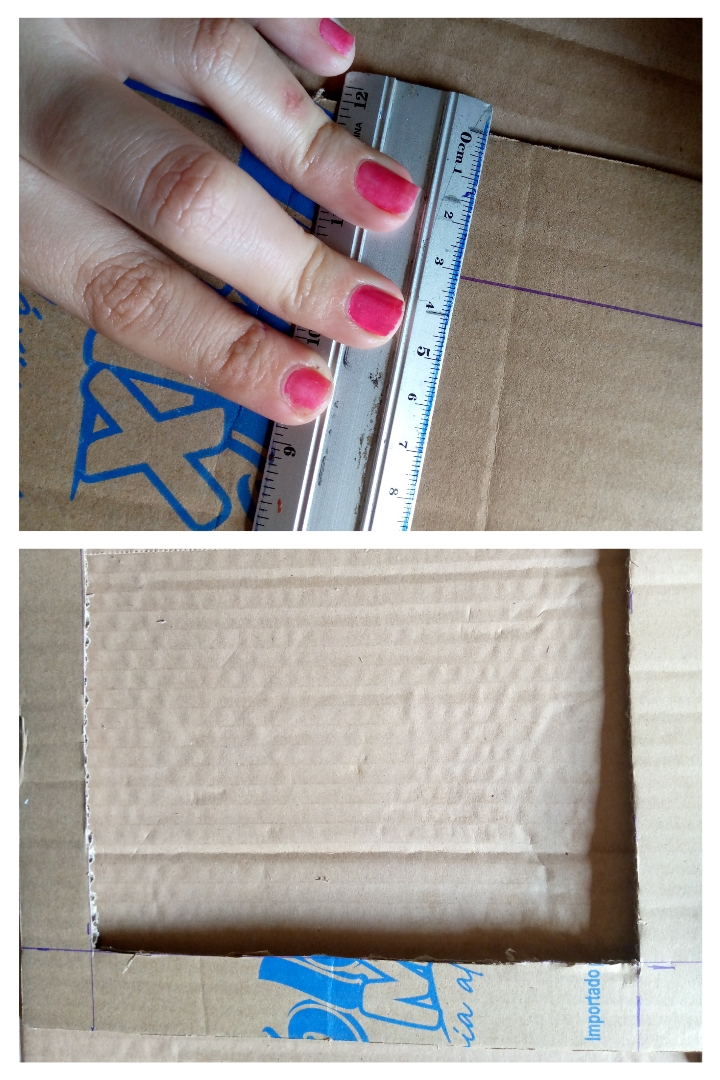
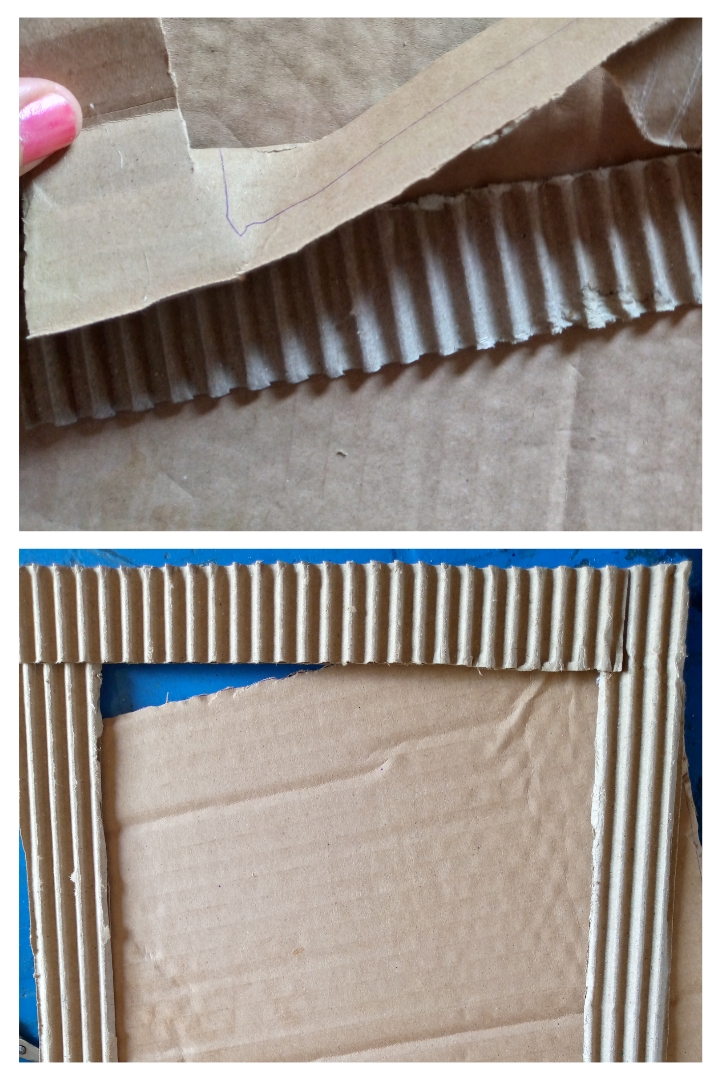
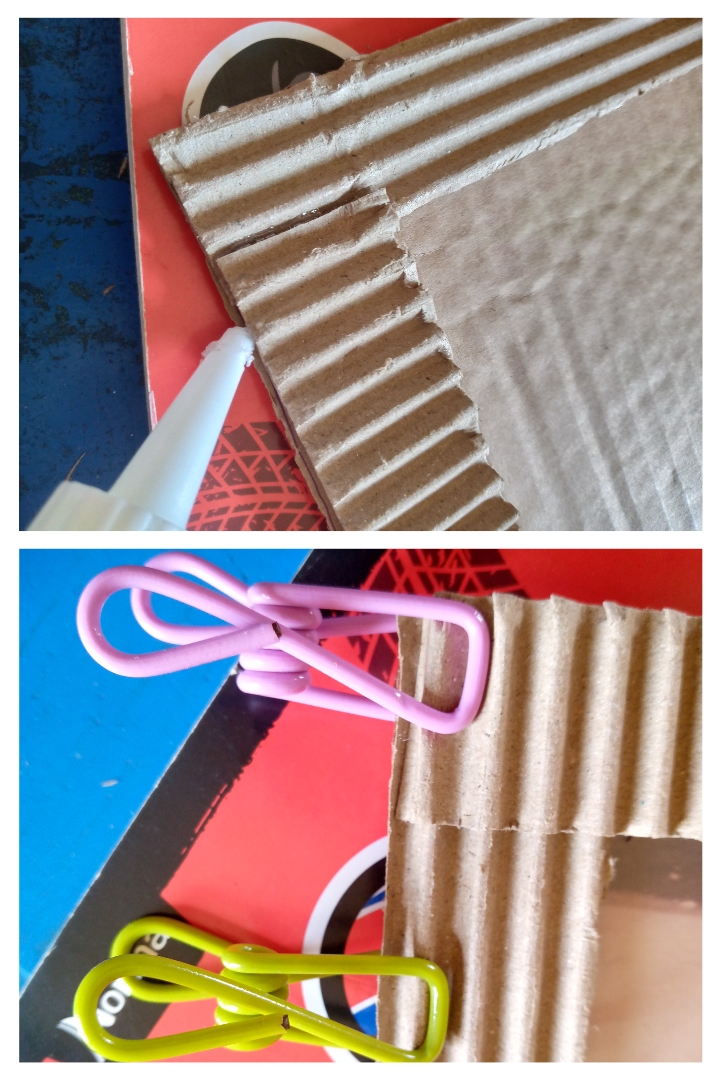
Procedemos después a hacer nuestro marco aquí varía el tamaño que deseen hacerlo yo lo hice con éstas medidas (28 cm de largo x 24 cm de ancho ,grosor del marco 3-4 cm ),algo que le hice al marco para que se viera con efecto de cartulina corrugada fue quitarle la parte de encima del carton una pequeña lámina que lo cubría al quitarlo se puede apreciar ese lindo diseño.
Paso 06
Después procedemos a pegar el marco con cuidado con nuestro silicón líquido y presionamos con ganchos de ropa que tengamos disponibles,al secarse podemos empezar a armar y ubicar nuestras flores en el marco también decoramos con unas perlitas dónde más nos guste y listo.
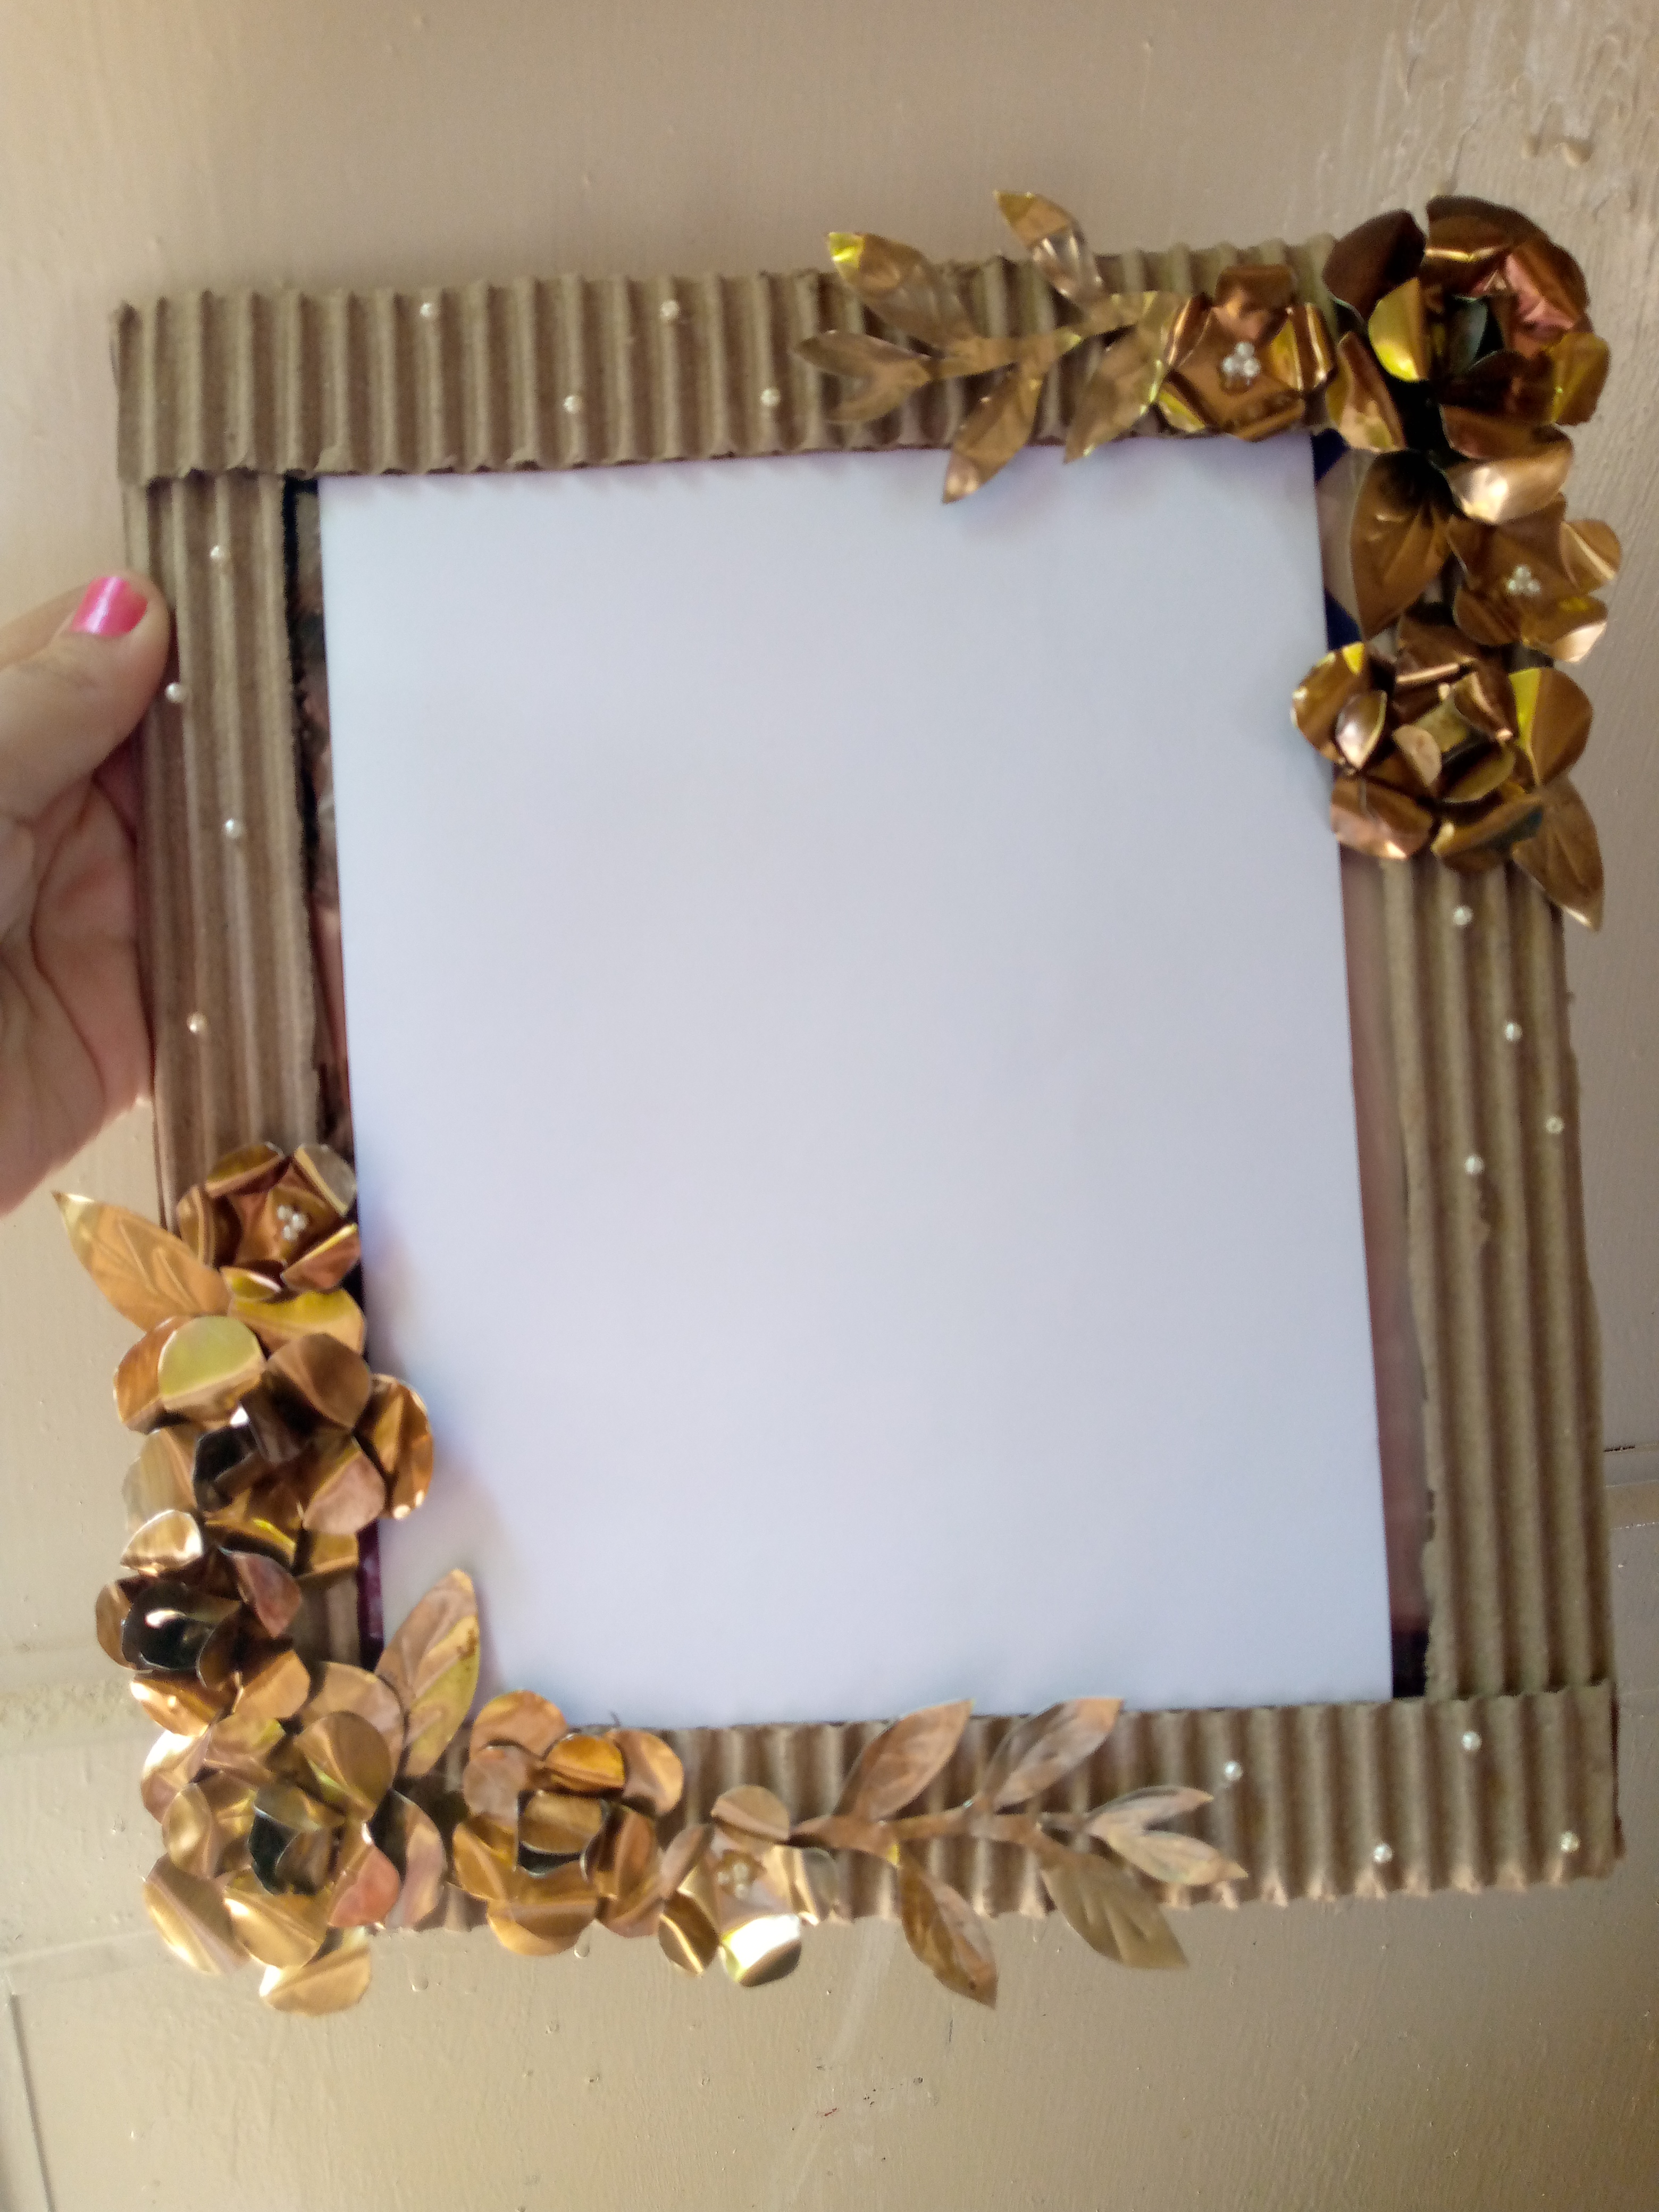
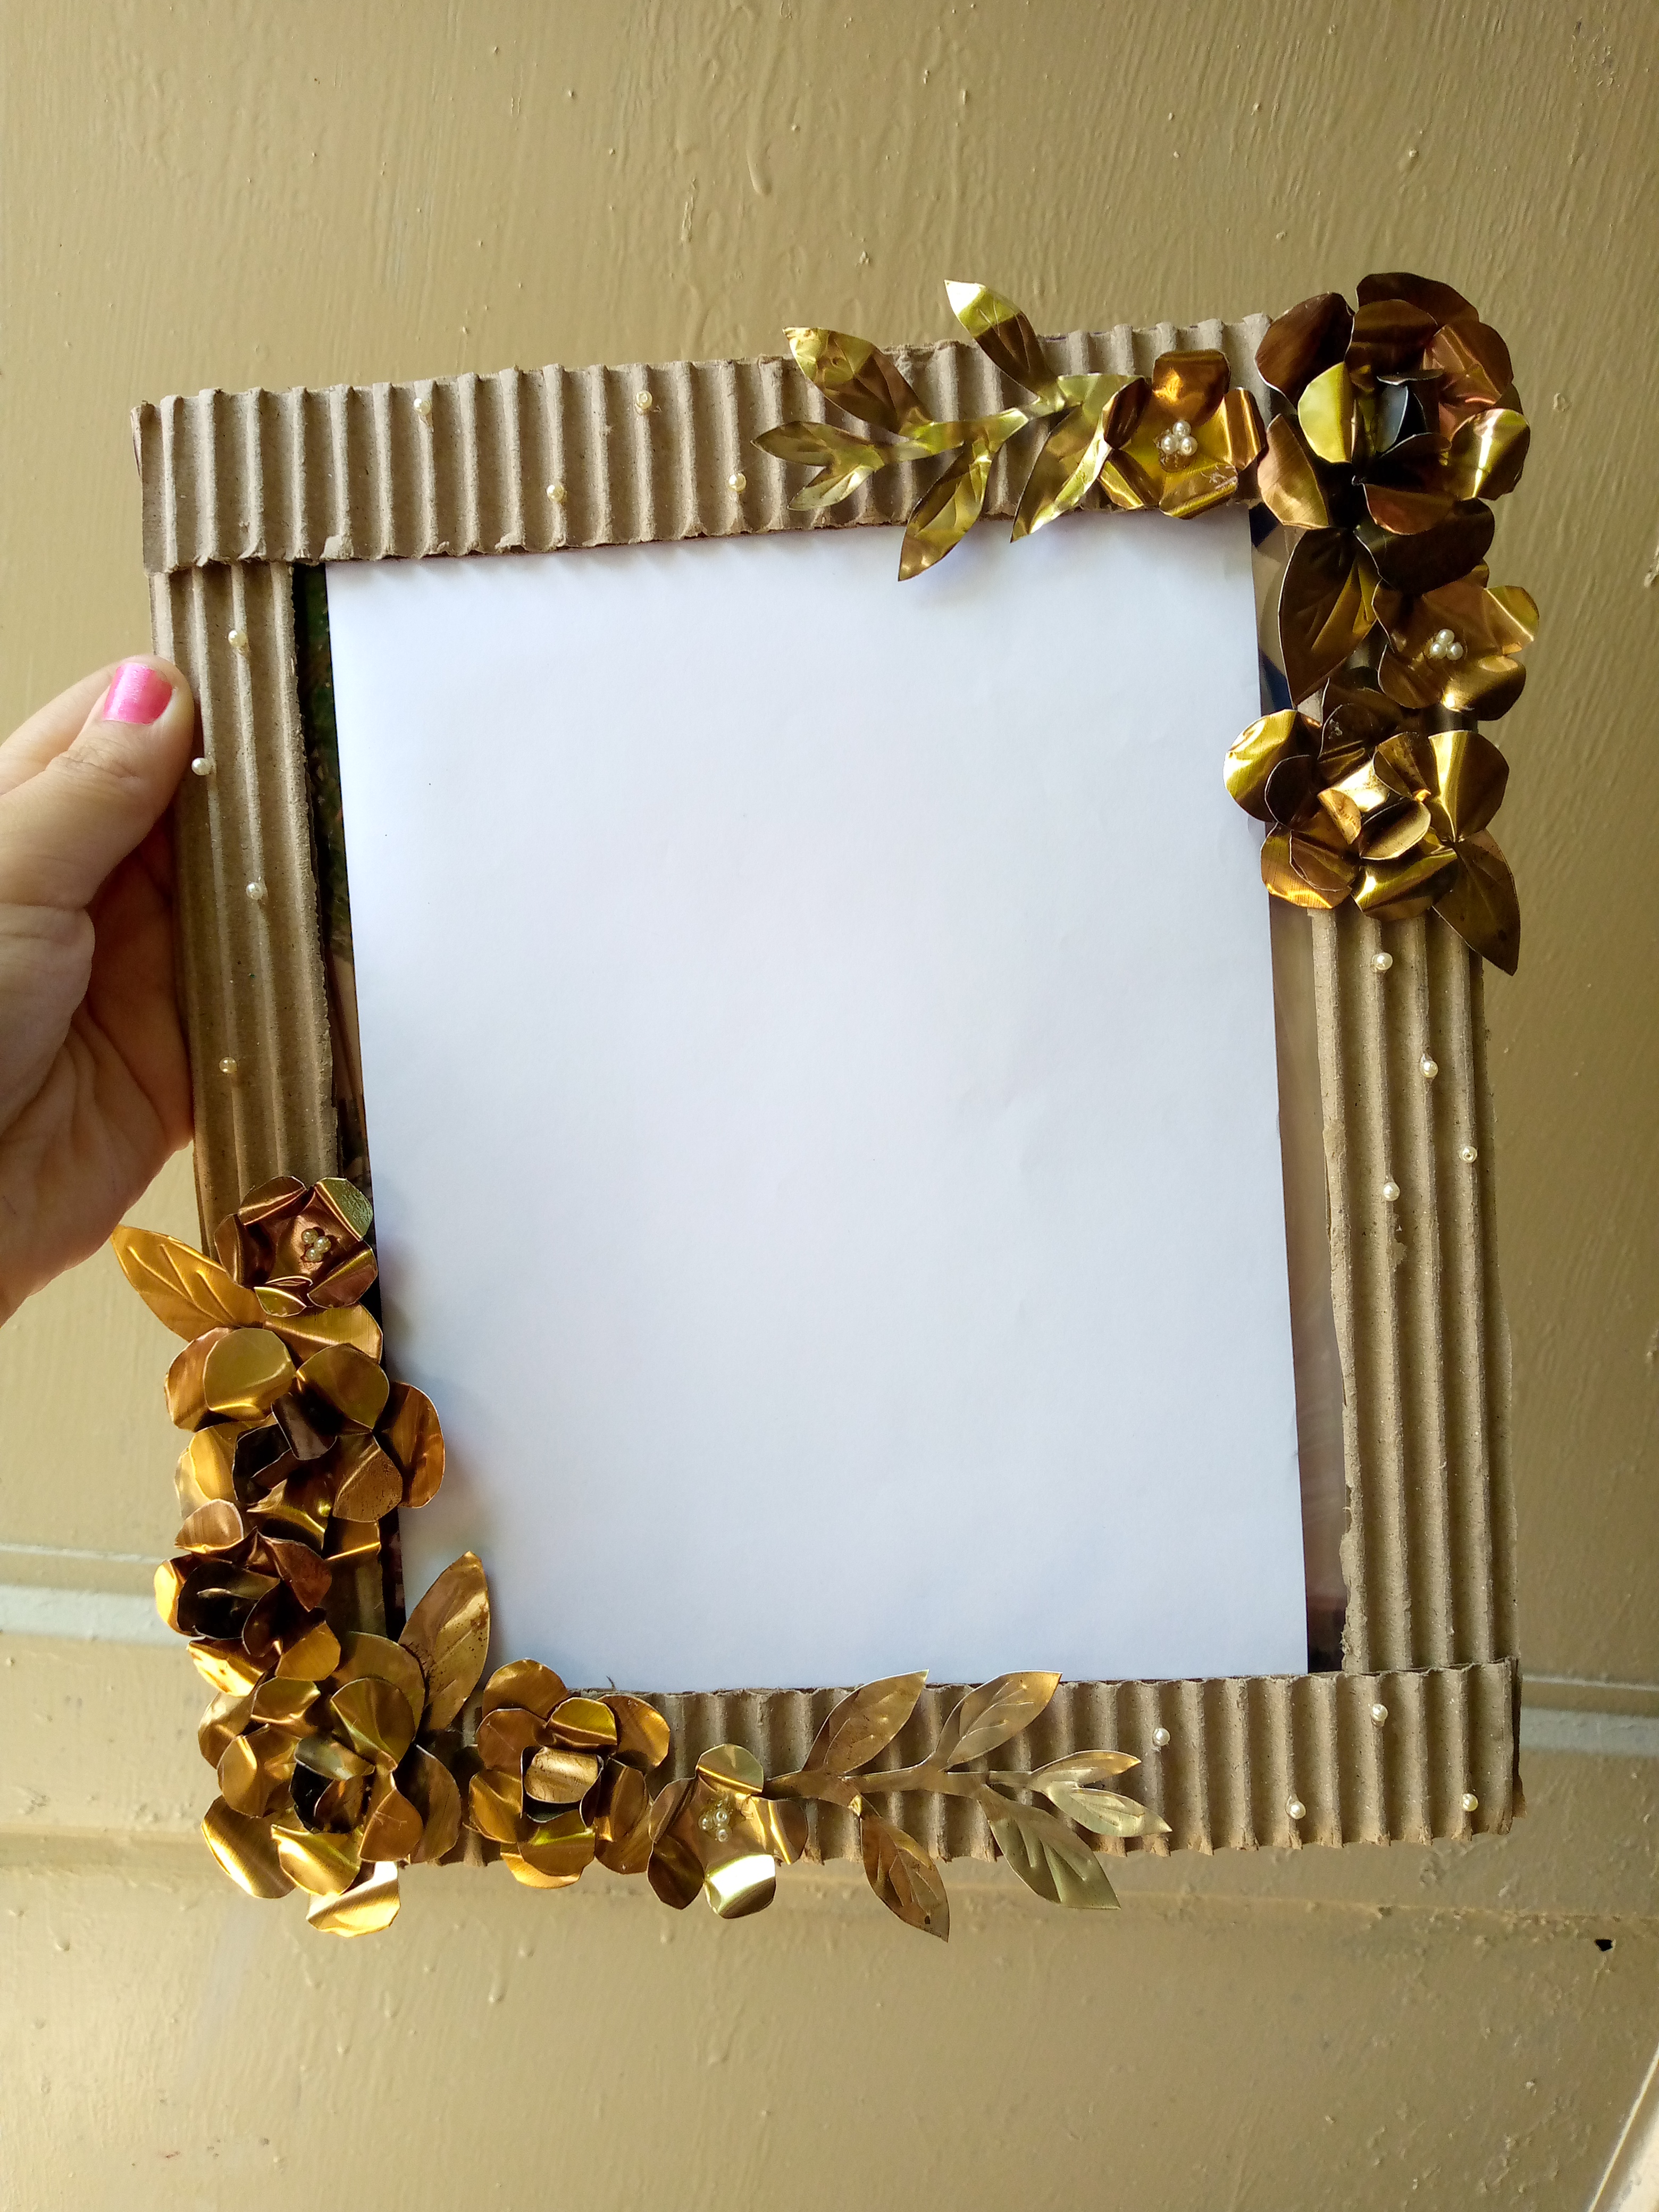
🦋✨Resultado!✨🦋
Me encantó lo lindo que se mira el acabado dorado al quemar la lata ,ideas como éstas podemos realizar con esta técnica bien sea mariposas, rosas, girasoles,corazones y muchas mas ideas ,espero les haya gustado mucho mi trabajo igual que a mi ,me encanta reciclar y se que a ustedes igual ...Saludos ,¡Pasen hermosa semana amigos !. ❤️✨

Good morning beautiful community, it is a pleasure to greet each of you, as you have just read in the title, on this occasion I made a nice painting or frame to place one of my photos that I had saved, that is why I have decided to do it with materials that I had here at home like a couple of cans and some cardboard left over from a box, this time we are going to apply a technique that gives a very vintage finish to the can, which consists of burning it. the material with the stove so that you can appreciate that golden tone that you can see in the flowers of the frame.
This golden finish is what gives the flowers a special tone when it comes to decorating recycled things. Here in this tutorial that I made with a lot of love for you, I am going to explain it to you so you can do it and give a unique touch to your crafts. Now we are going to start this beautiful process, let's get to work!
🦋✨Materials I used:✨🦋
- Cardboard
- Silicone
- Cutter
- Scissors
- Gloves
- Pearls to decorate
- Cans
- Gripper
- Dish towel
🦋✨(Steps to follow.)✨🦋
Step 01
The first thing we must do is put on our gloves to work safely and not cut our hands. This must be done delicately since the can can cut us, which is why it is advisable to use gloves when working with the can. Well, once this is done, let's go. Wash it first and let it dry. When it is dry, we are going to place the can on the kitchen towel. We do this so that it does not slip and we proceed to cut it with the cutter very slowly without bending the can. We will cut it as shown in the images. from both sides up and down.
Step 02
We finish cutting the can on both sides of it and we will be left with a rectangle. I used three cans to make the flowers. You can use more if you want to add more flowers to the painting.
Step 03
Once we finish cutting the sheets of the can, we proceed with the most important step, which is to burn them. Here we can do it with the help of third parties. We can use the stove at low heat in our kitchen or a lit candle. The important thing is to burn the sheet little by little. little, for this we use the clamp to hold the sheet well, it is important that we have the drawings of the can facing down so it will burn, that is, we will burn on the upper side of our can without leaving it too much in the fire since it can burn too much, it must be done in a medium term and with caution without contact with the wind, this is how we will have that golden finish shown in the image.
Step 04
After burning or tanning our sheets we are going to make some flowers that will make up the painting. We can make a cardboard mold then transfer them to the sheet to mark them. We can help ourselves with a pin since the material is slippery and the ink does not mark with Let's draw the flowers, when we have them marked we proceed to cut them carefully because despite being a hard material it can also break easily when cutting, so let's be very patient when doing it, here you can cut as many flowers as you want and add some bouquets of leaves of the same material, let your imagination fly, any nice detail counts since we work with useful materials.
Step 05
We then proceed to make our frame here, vary the size you want to make it, I made it with these measurements (28 cm long x 24 cm wide, thickness of the frame 3-4 cm), something I did to the frame so that it could be seen clearly. corrugated cardboard effect was to remove the top part of the cardboard, a small sheet that covered it. When you remove it, you can see that beautiful design.
Step 06
Then we proceed to glue the frame carefully with our liquid silicone and press with clothespins that we have available. When it dries we can begin to assemble and place our flowers in the frame. We also decorate with some pearls where we like the most and that's it.
🦋✨Result!✨🦋
I loved how beautiful the golden finish looked when burning the can. We can make ideas like these with this technique, be it butterflies, roses, sunflowers, hearts and many more ideas. I hope you liked my work as much as I did. I love recycling and I know you do the same... Greetings, have a wonderful week friends!❤️✨
0
0
0.000
Congratulations @anne002! You have completed the following achievement on the Hive blockchain And have been rewarded with New badge(s)
Your next target is to reach 50 upvotes.
You can view your badges on your board and compare yourself to others in the Ranking
If you no longer want to receive notifications, reply to this comment with the word
STOPCheck out our last posts:
Me encantan los trabajos con materiales reciclados. Este marco te quedó muy bonito, el detalle con las latas está maravilloso.
Gracias !! Me alegra te haya gustado mucho mi trabajo a mi también me encanta reciclar 🥰
Hermoso portaretrato!! Me encantaron las flores, no sabía el truco de la lata en el fuego... Bello detalle!! Gracias por compartir el paso a paso!
Bello trabajo cariño definitivamente tienes mucho potencial. El mejor de los éxitos para ti @anne002
!diy
!discovery 45
!LADY
View or trade
LOHtokens.@dayadam, you successfully shared 0.1000 LOH with @anne002 and you earned 0.1000 LOH as tips. (1/3 calls)
Use !LADY command to share LOH! More details available in this post.
This post was shared and voted inside the discord by the curators team of discovery-it
Join our Community and follow our Curation Trail
Discovery-it is also a Witness, vote for us here
Delegate to us for passive income. Check our 80% fee-back Program
You can query your personal balance by
!DIYSTATSFrom Venezuela, our witness drives decentralization and the adoption of Web3 technology, creating opportunities for the local community and contributing to the global ecosystem. // Desde Venezuela, nuestro testigo impulsa la descentralización y la adopción de la tecnología Web3, generando oportunidades para la comunidad local y contribuyendo al ecosistema global.
Sigue, contacta y se parte del testigo en: // Follow, contact and be part of the witness in:
a community encouraging first-hand content, and each individual living their best life.
Quedó muy hermoso, me encantó.
que bello!
so cute!