🎀Hermoso Lacito Coquette🎀//Beautiful Coquette Bow🎀

Hola linda y hermosa comunidad espero estén teniendo una semana muy bonita y la estén disfrutando mucho ,en esta oportunidad me he decidido a hacer un emprendimiento muy bonito que ha estado en tendencia estos meses que son los Lacitos Coquette...tu Coquette,yo Coquette, nosotros "Coquette"..
Los lacitos son muy prácticos a la hora de salir bien sea a una reunión,a pasear ,a caminar o algún evento importante,son muy bonitos y puedes hacerlo con muy pocos materiales,solo hay que dejar volar la imaginación para hacerlos de diferentes colores y con diferentes tipos de tela ,en esta oportunidad yo lo haré con pequeños recortes de tela de ceda que me quedó de un trabajo anterior ,aqui te dejaré las medidas y el procedimiento paso a paso ,ahora ¡Vamos! a realizar este lindo lacito :
Hello, beautiful and beautiful community, I hope you are having a very nice week and are enjoying it a lot, on this occasion I have decided to do a very nice venture that has been in trend these months, which are the Coquette Bows... your Coquette, me Coquette , we "Coquette"..
The little bows are very practical when it comes to going out, whether to a meeting, a walk, a walk or some important event. They are very pretty and you can do it with very few materials. You just have to let your imagination fly to make them in different colors and with different types of fabric, this time I will do it with small cuts of silk fabric that I had left from a previous job, here I will leave you the measurements and the step by step procedure, now Let's go! to make this cute little bow:
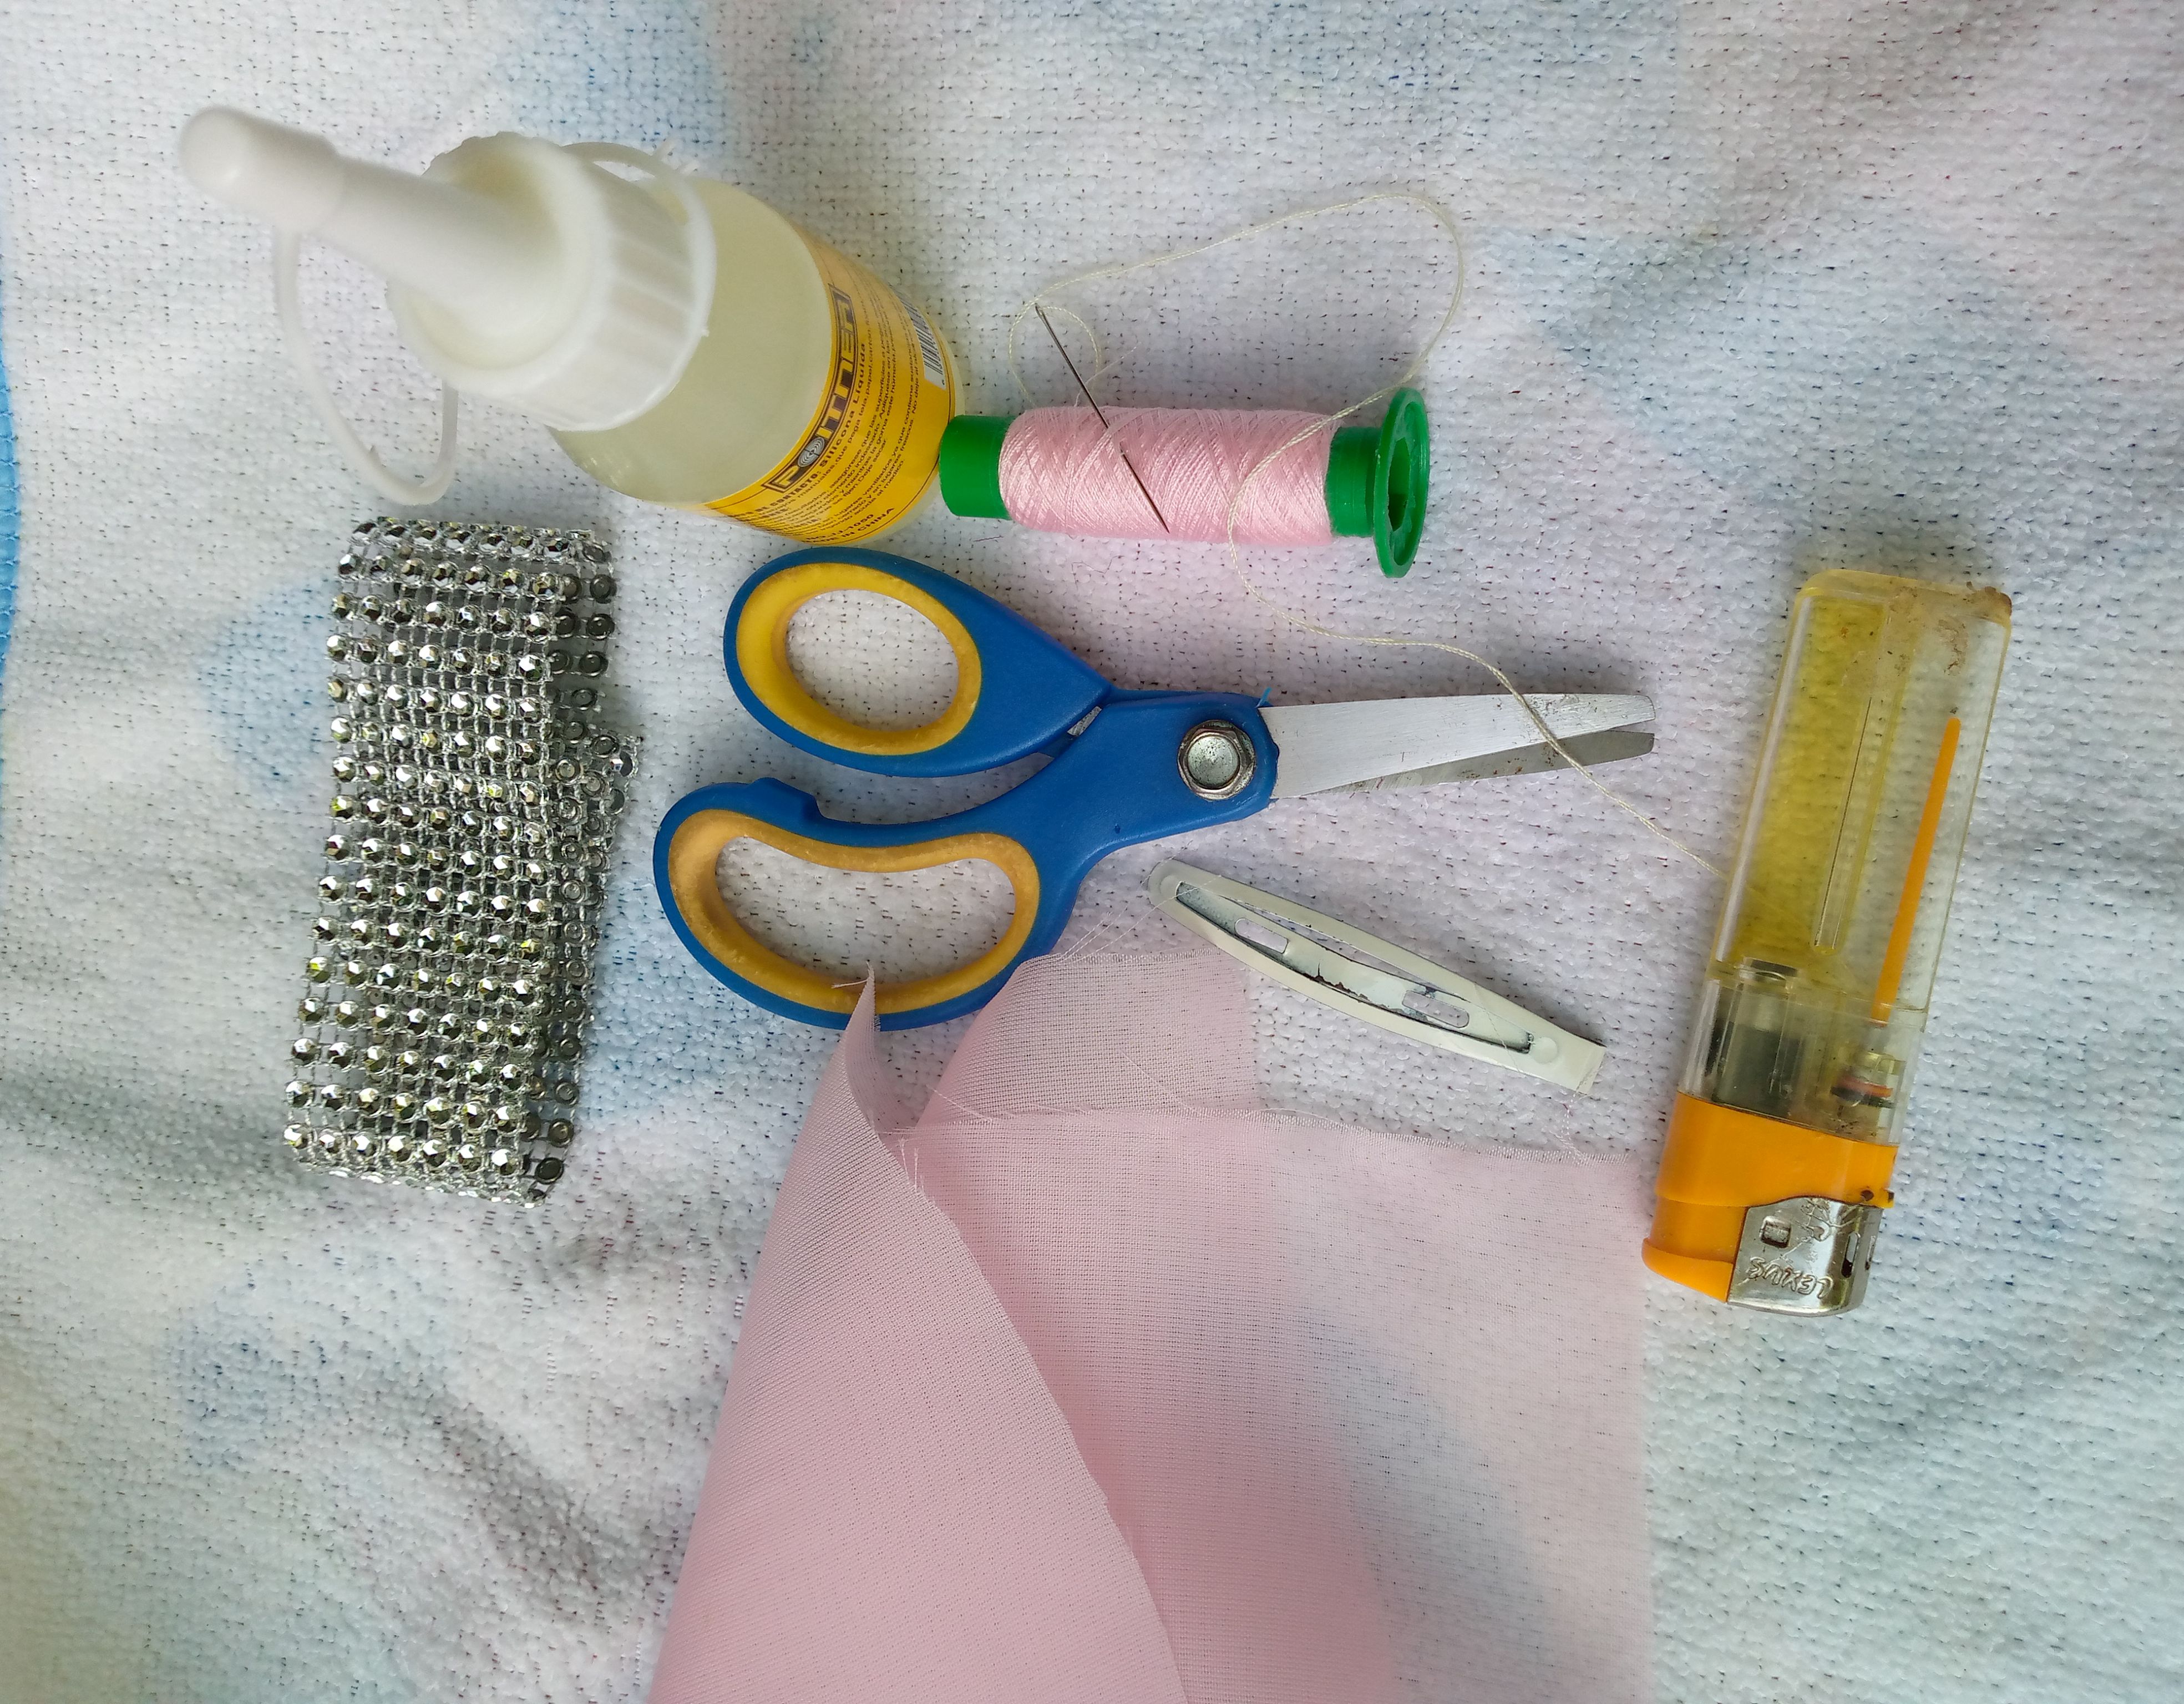
Materiales:
- Tijera
- Encendedor
- Trozo de tela
- Hilo y agujas
- Silicona
- Detalle plateado
- Pinzas
- Scissors
- Lighter
- Piece of cloth
- Thread and needles
- Silicone
- Silver detail
- Tweezers
(Pasos a seguir.)
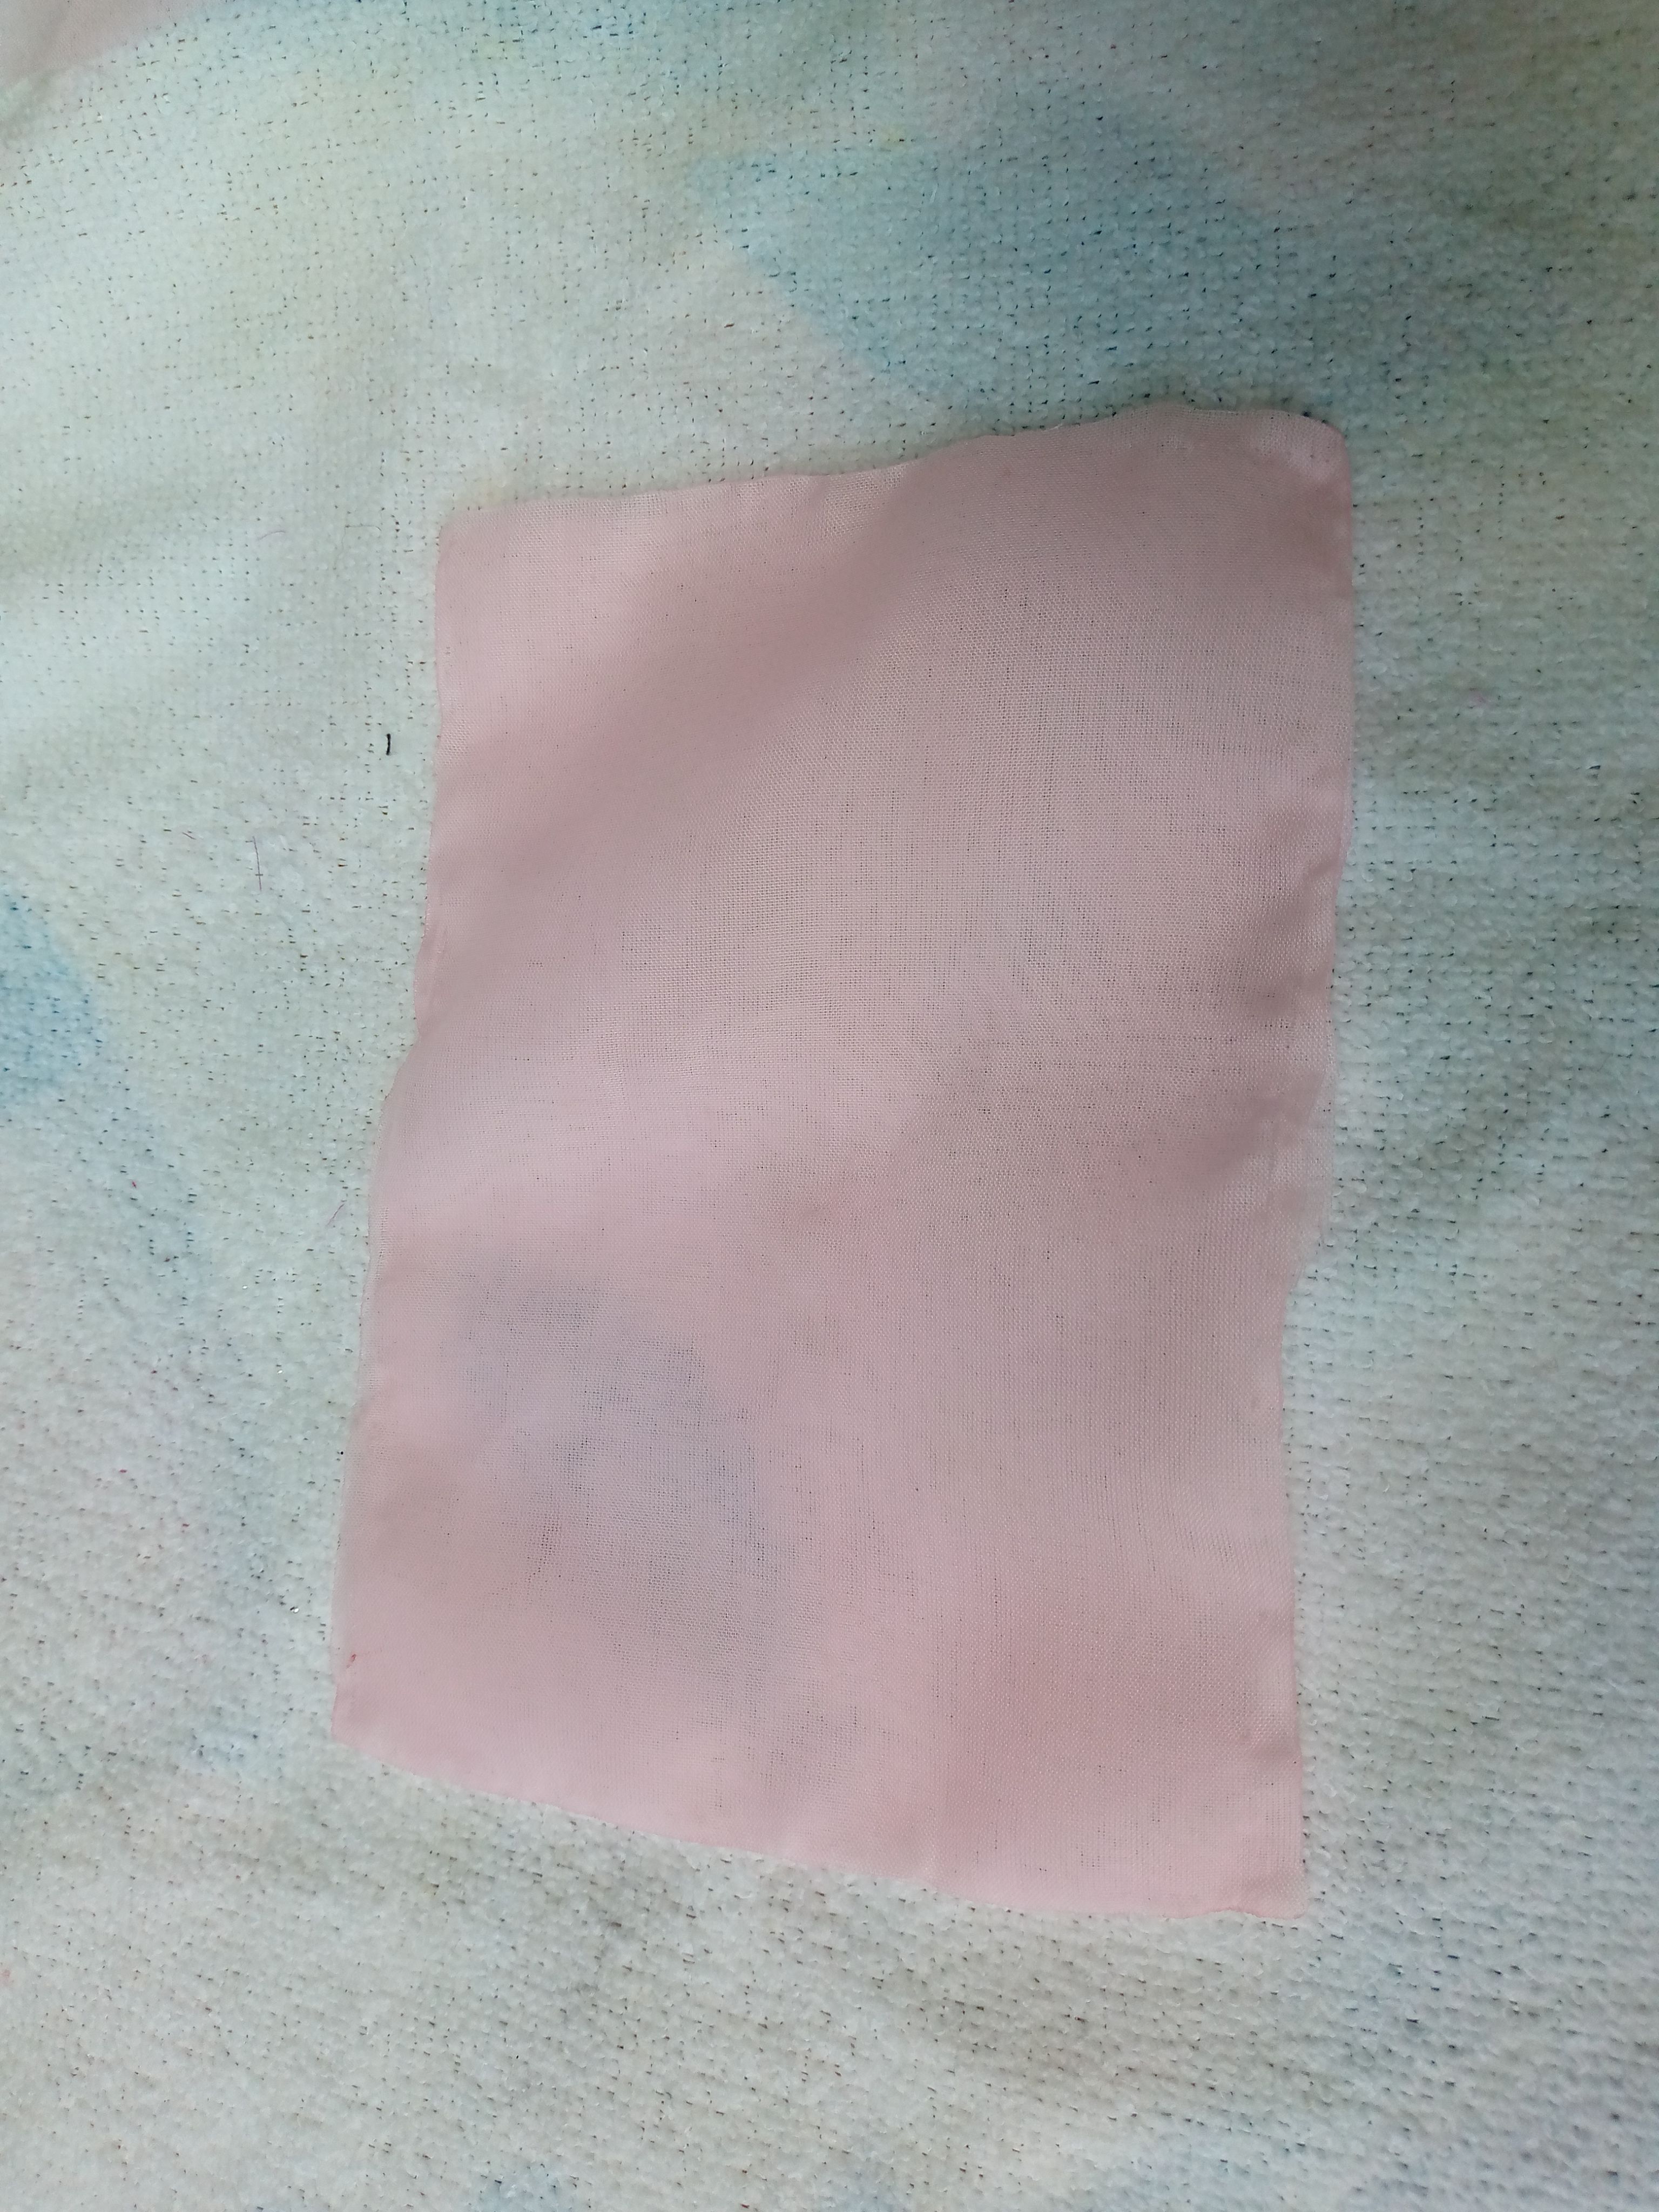
Paso 01
Comenzamos primeramente cortando en nuestra tela un cuadrado de 17 cm de ancho x 12 cm de largo ,un rectángulo para unir el lazo de 9 cm de ancho x 4 cm de largo,y un triángulo de 43 cm de ancho x 22 cm de alto ,estas medidas son los moldes para hacer nuestro lacito ,si deseas puedes hacer primeramente tu patrón con el que puedes trabajar a futuro haciendo otros lazos y así no perder el molde ,bien una vez hecho esto procedemos al siguiente paso.
Step 01:
We begin by first cutting out a Square 17 cm wide x 12 cm long, a rectangle to join the bow 9 cm wide x 4 cm long, and a triangle 43 cm wide x 22 cm high, these are measurements of the molds to make our little bow, if you want you can first make your pattern with which you can work in the future making other bows and thus not lose the mold, well once this is done we proceed to the next step>
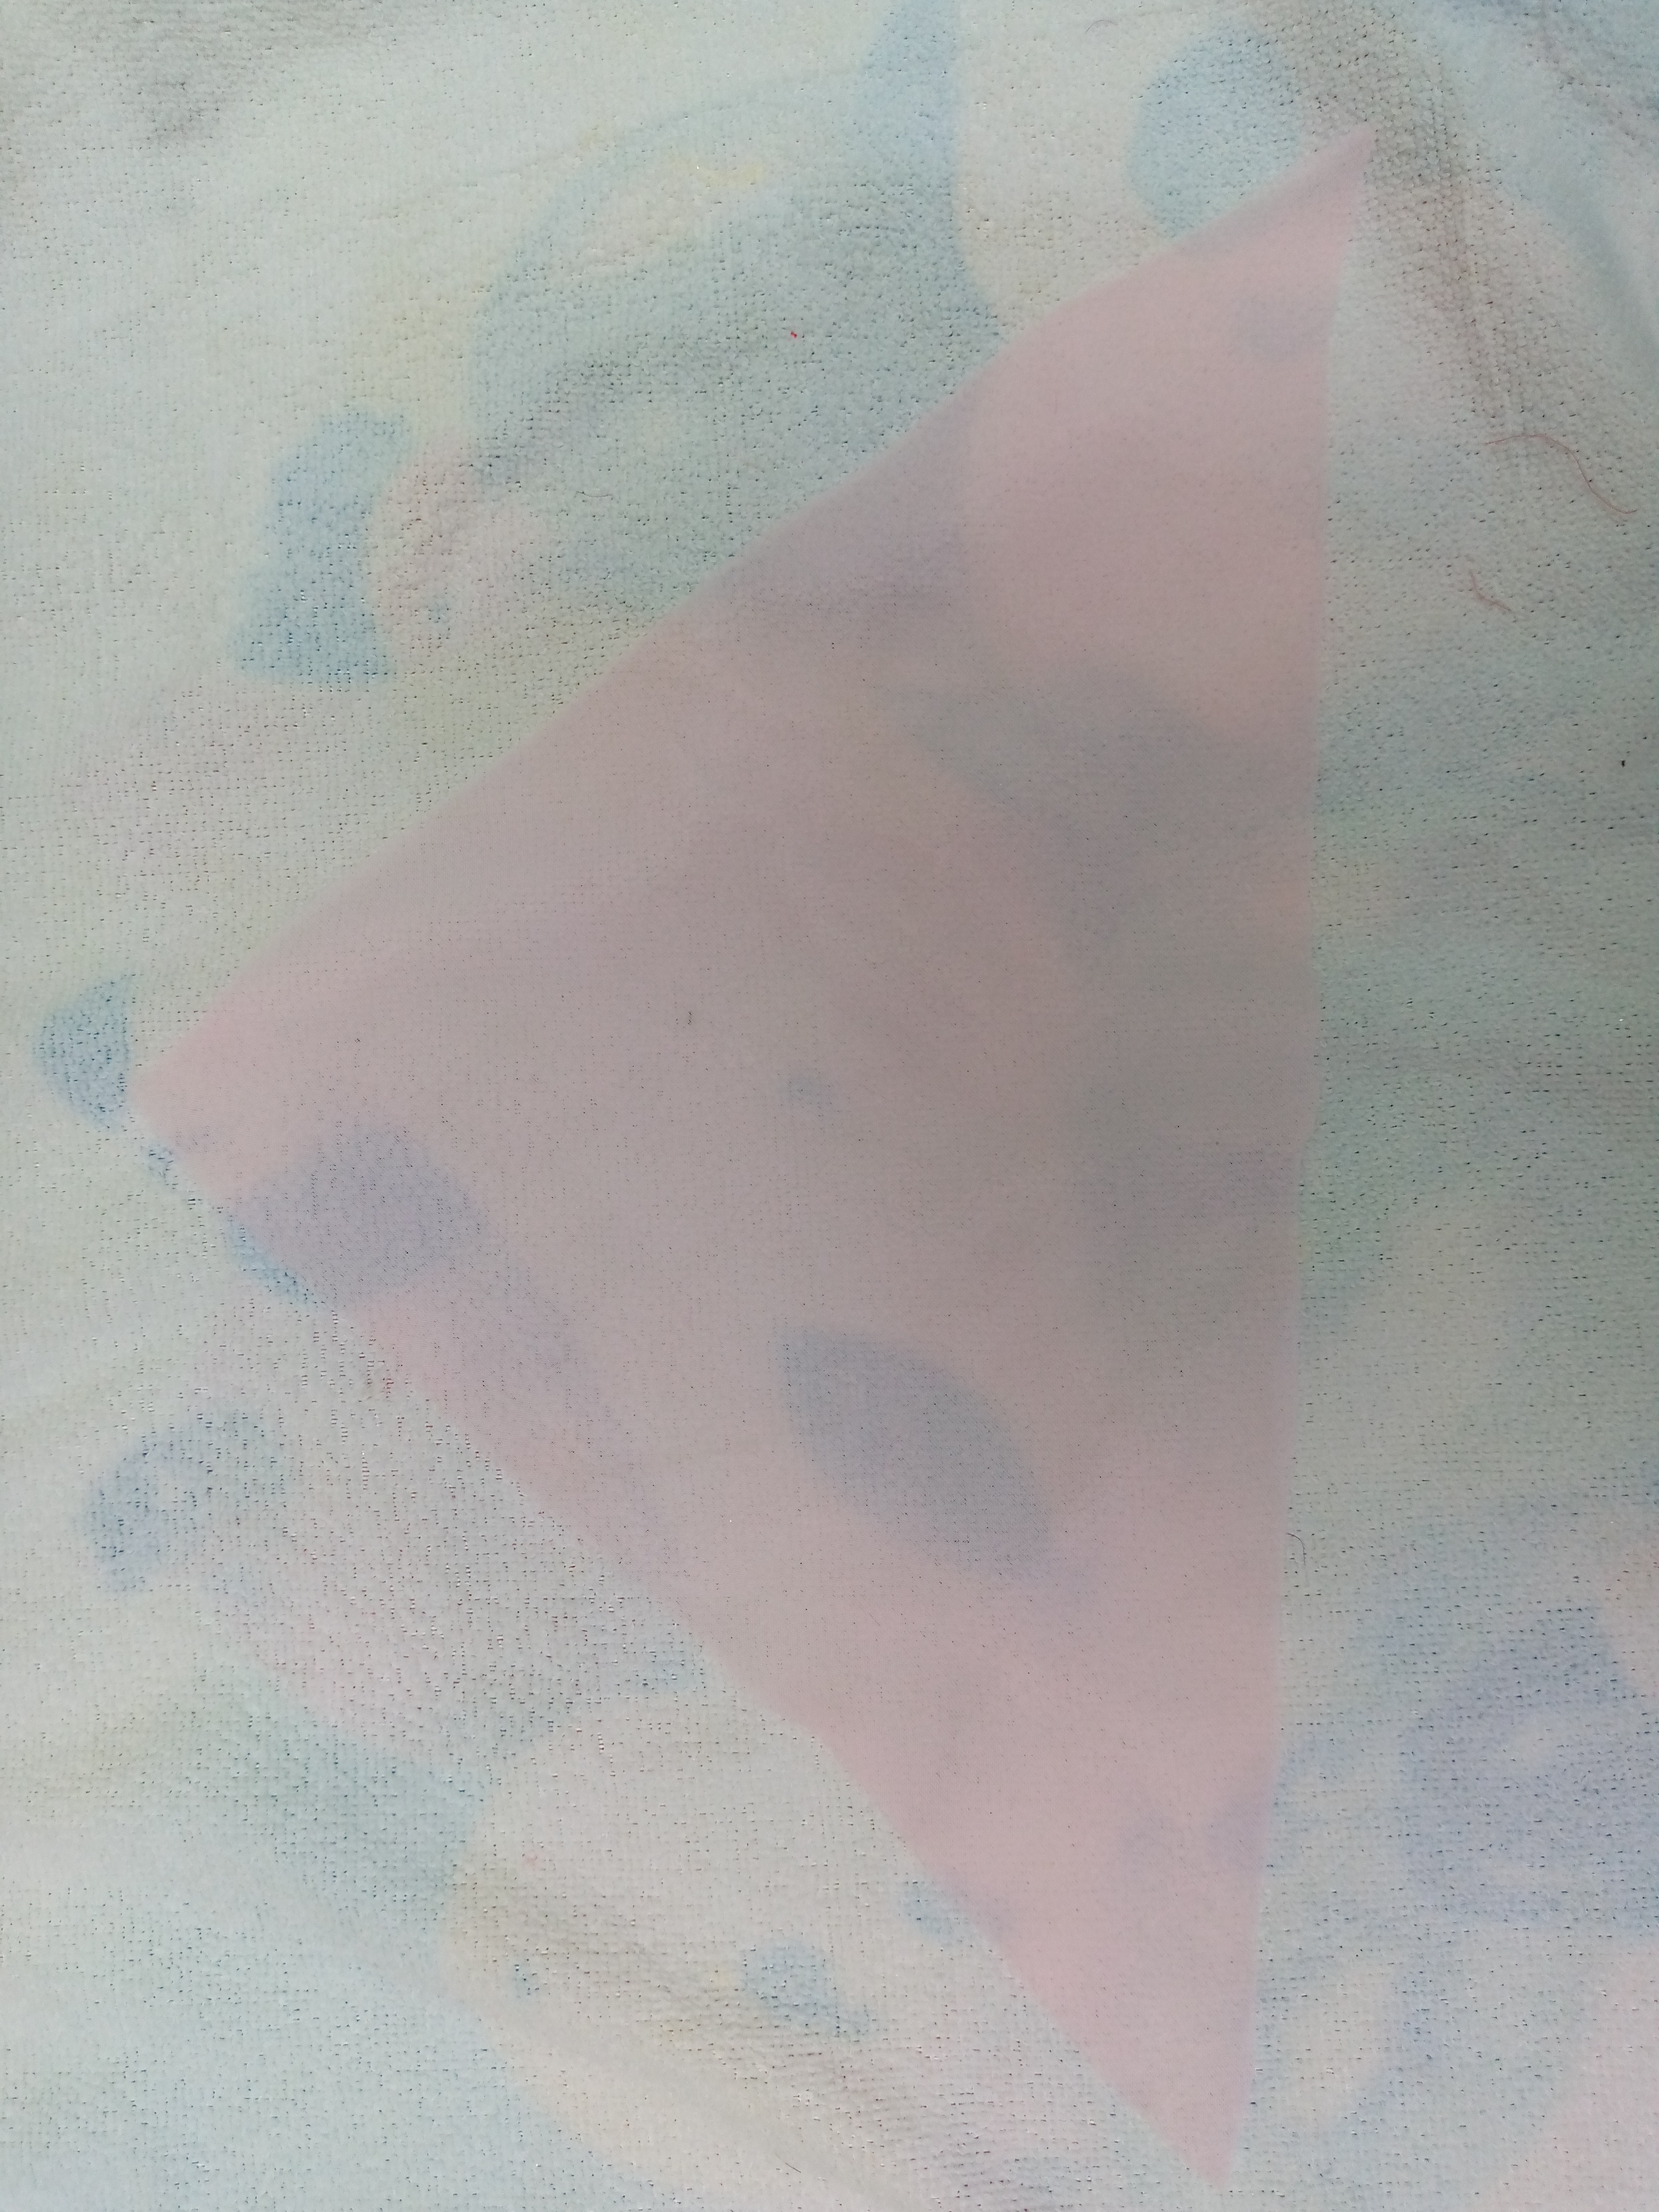
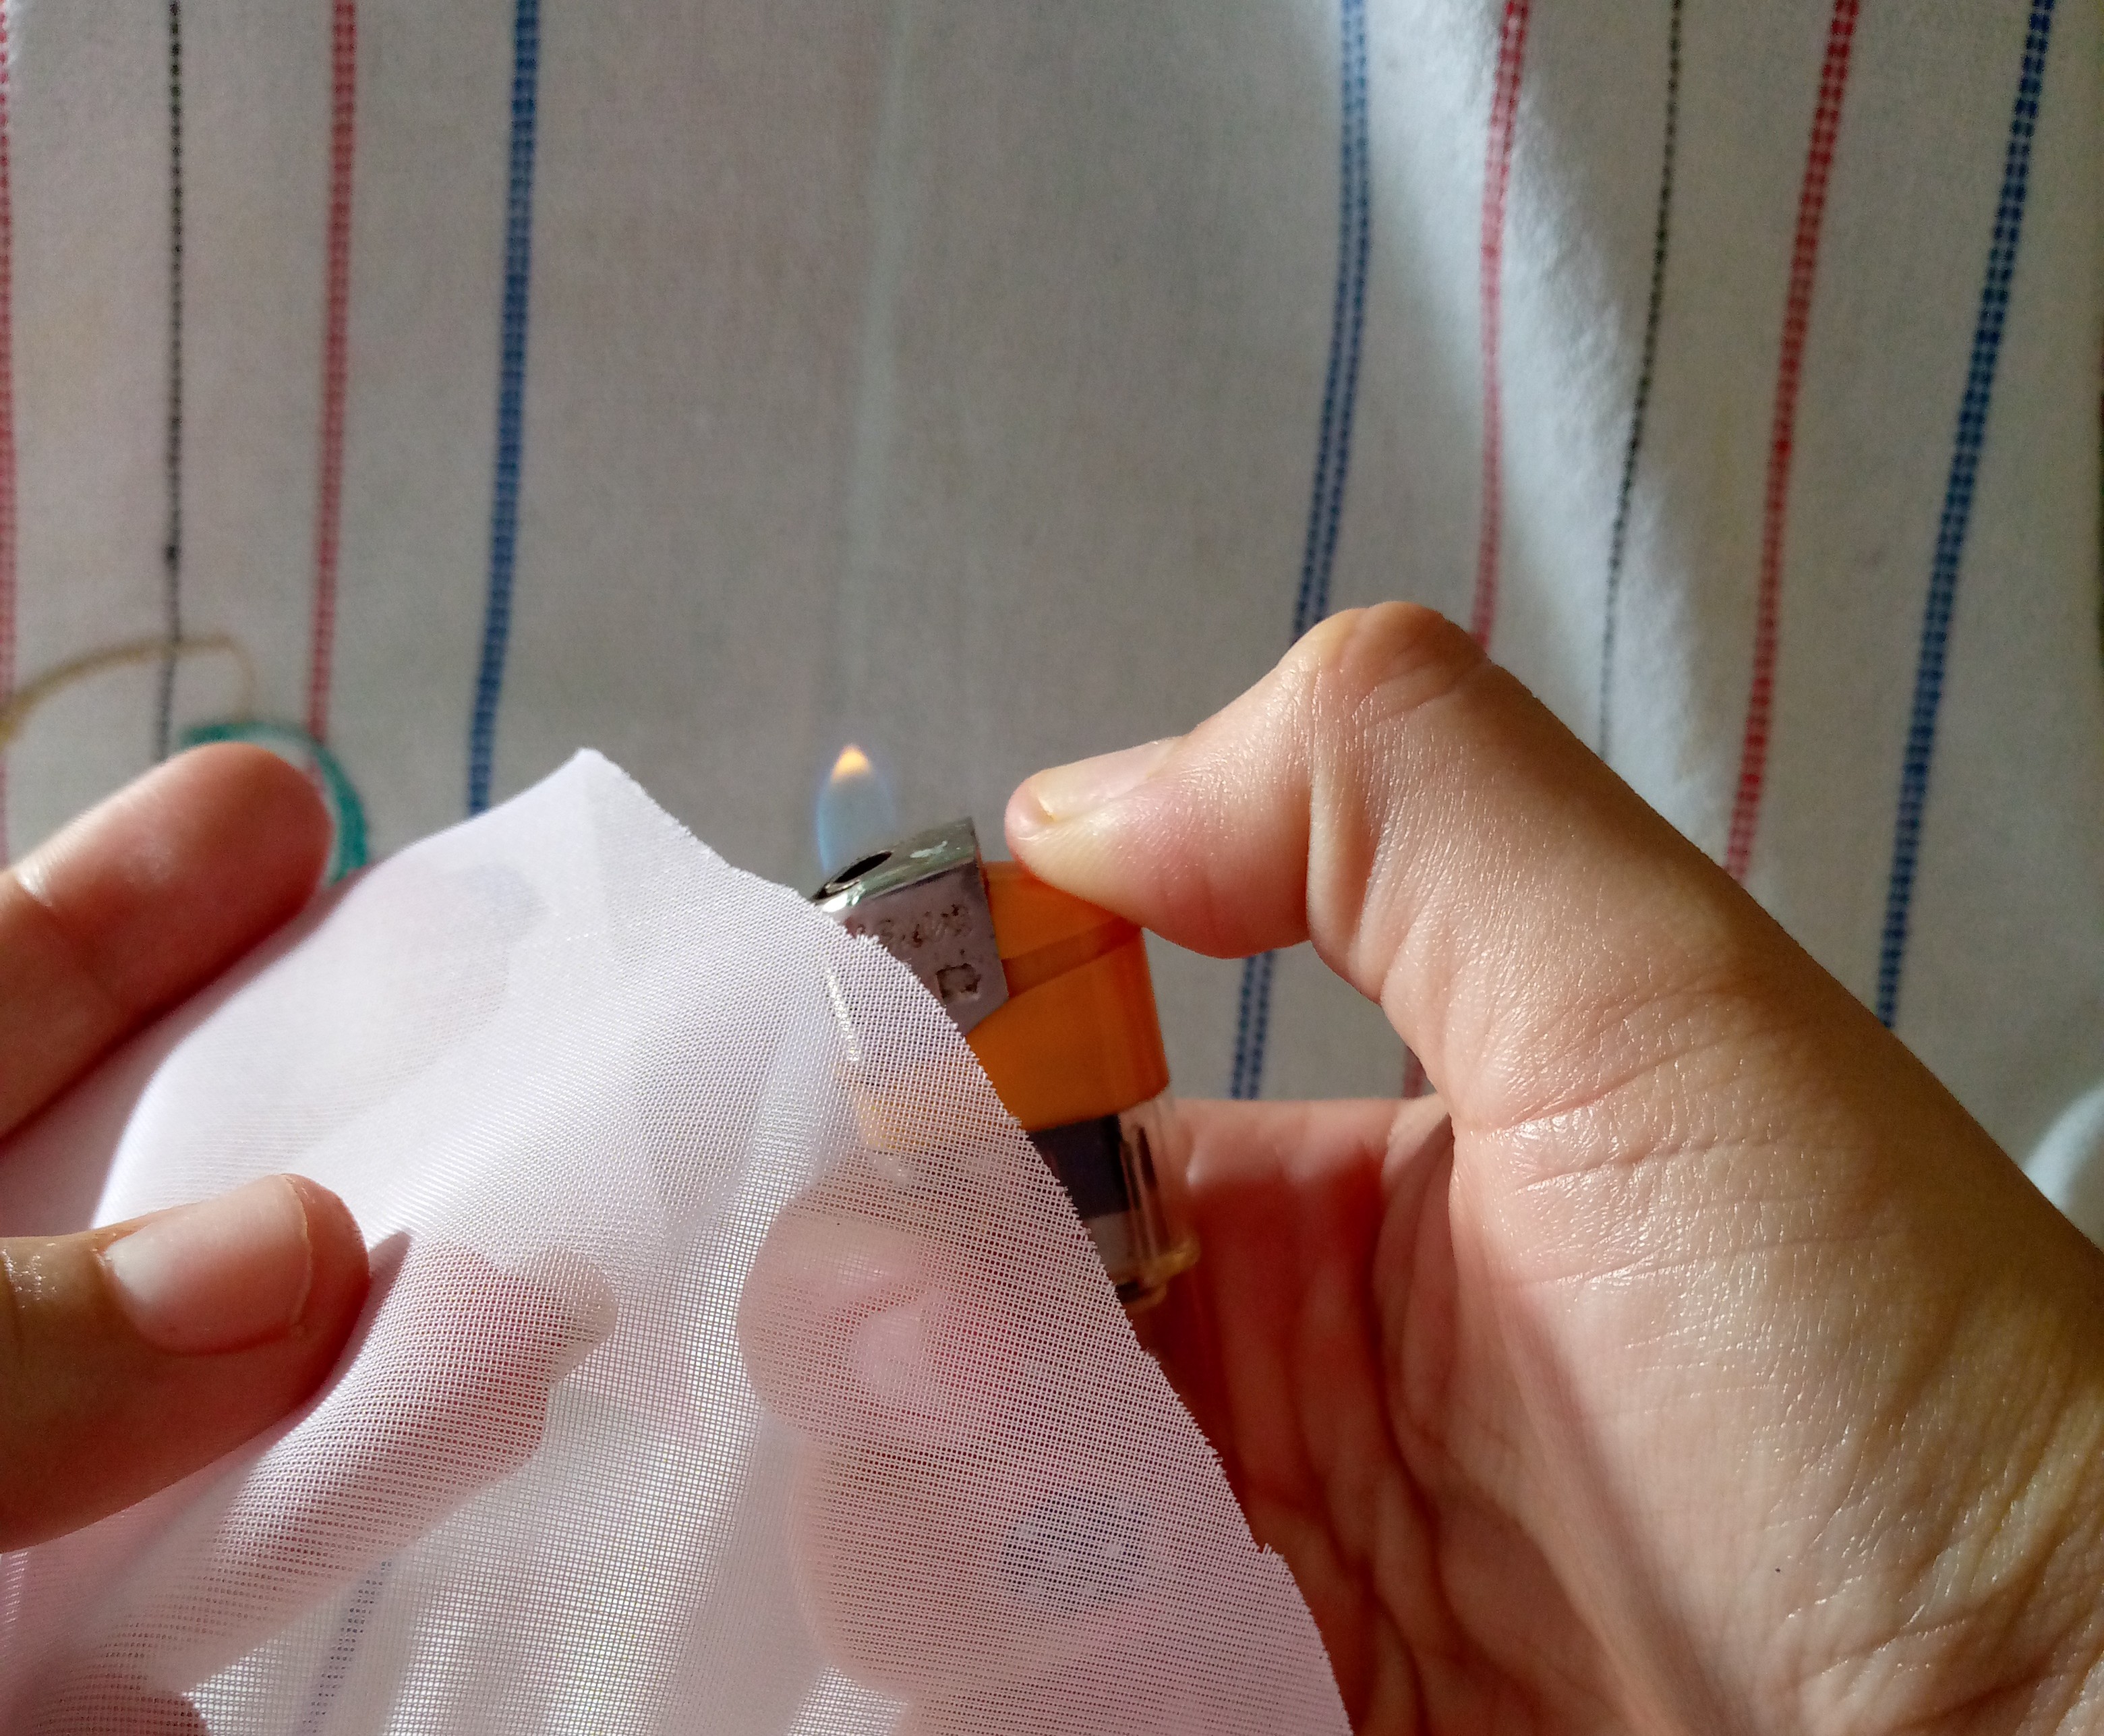
Paso 02
Una vez tengamos nuestras piezas de tela cortadas con un encendedor vamos a sellar o quemar los bordes de la pieza del triángulo solo esa pieza poco a poco lo hacemos sin quemar la tela ,para esto deberás hacerlo con mucha paciencia ,yo lo hice en un lugar cerrado para que el viento no me impidiera poder quemar los bordes.
Step 02:
Once we have our pieces of fabric cut with a lighter we are going to seal or burn the edges of the triangle piece, only that piece little by little we do it without burning the fabric, for this you will have to do it with a lot of patience, I did it in one place closed so that the wind would not prevent me from burning the edges.
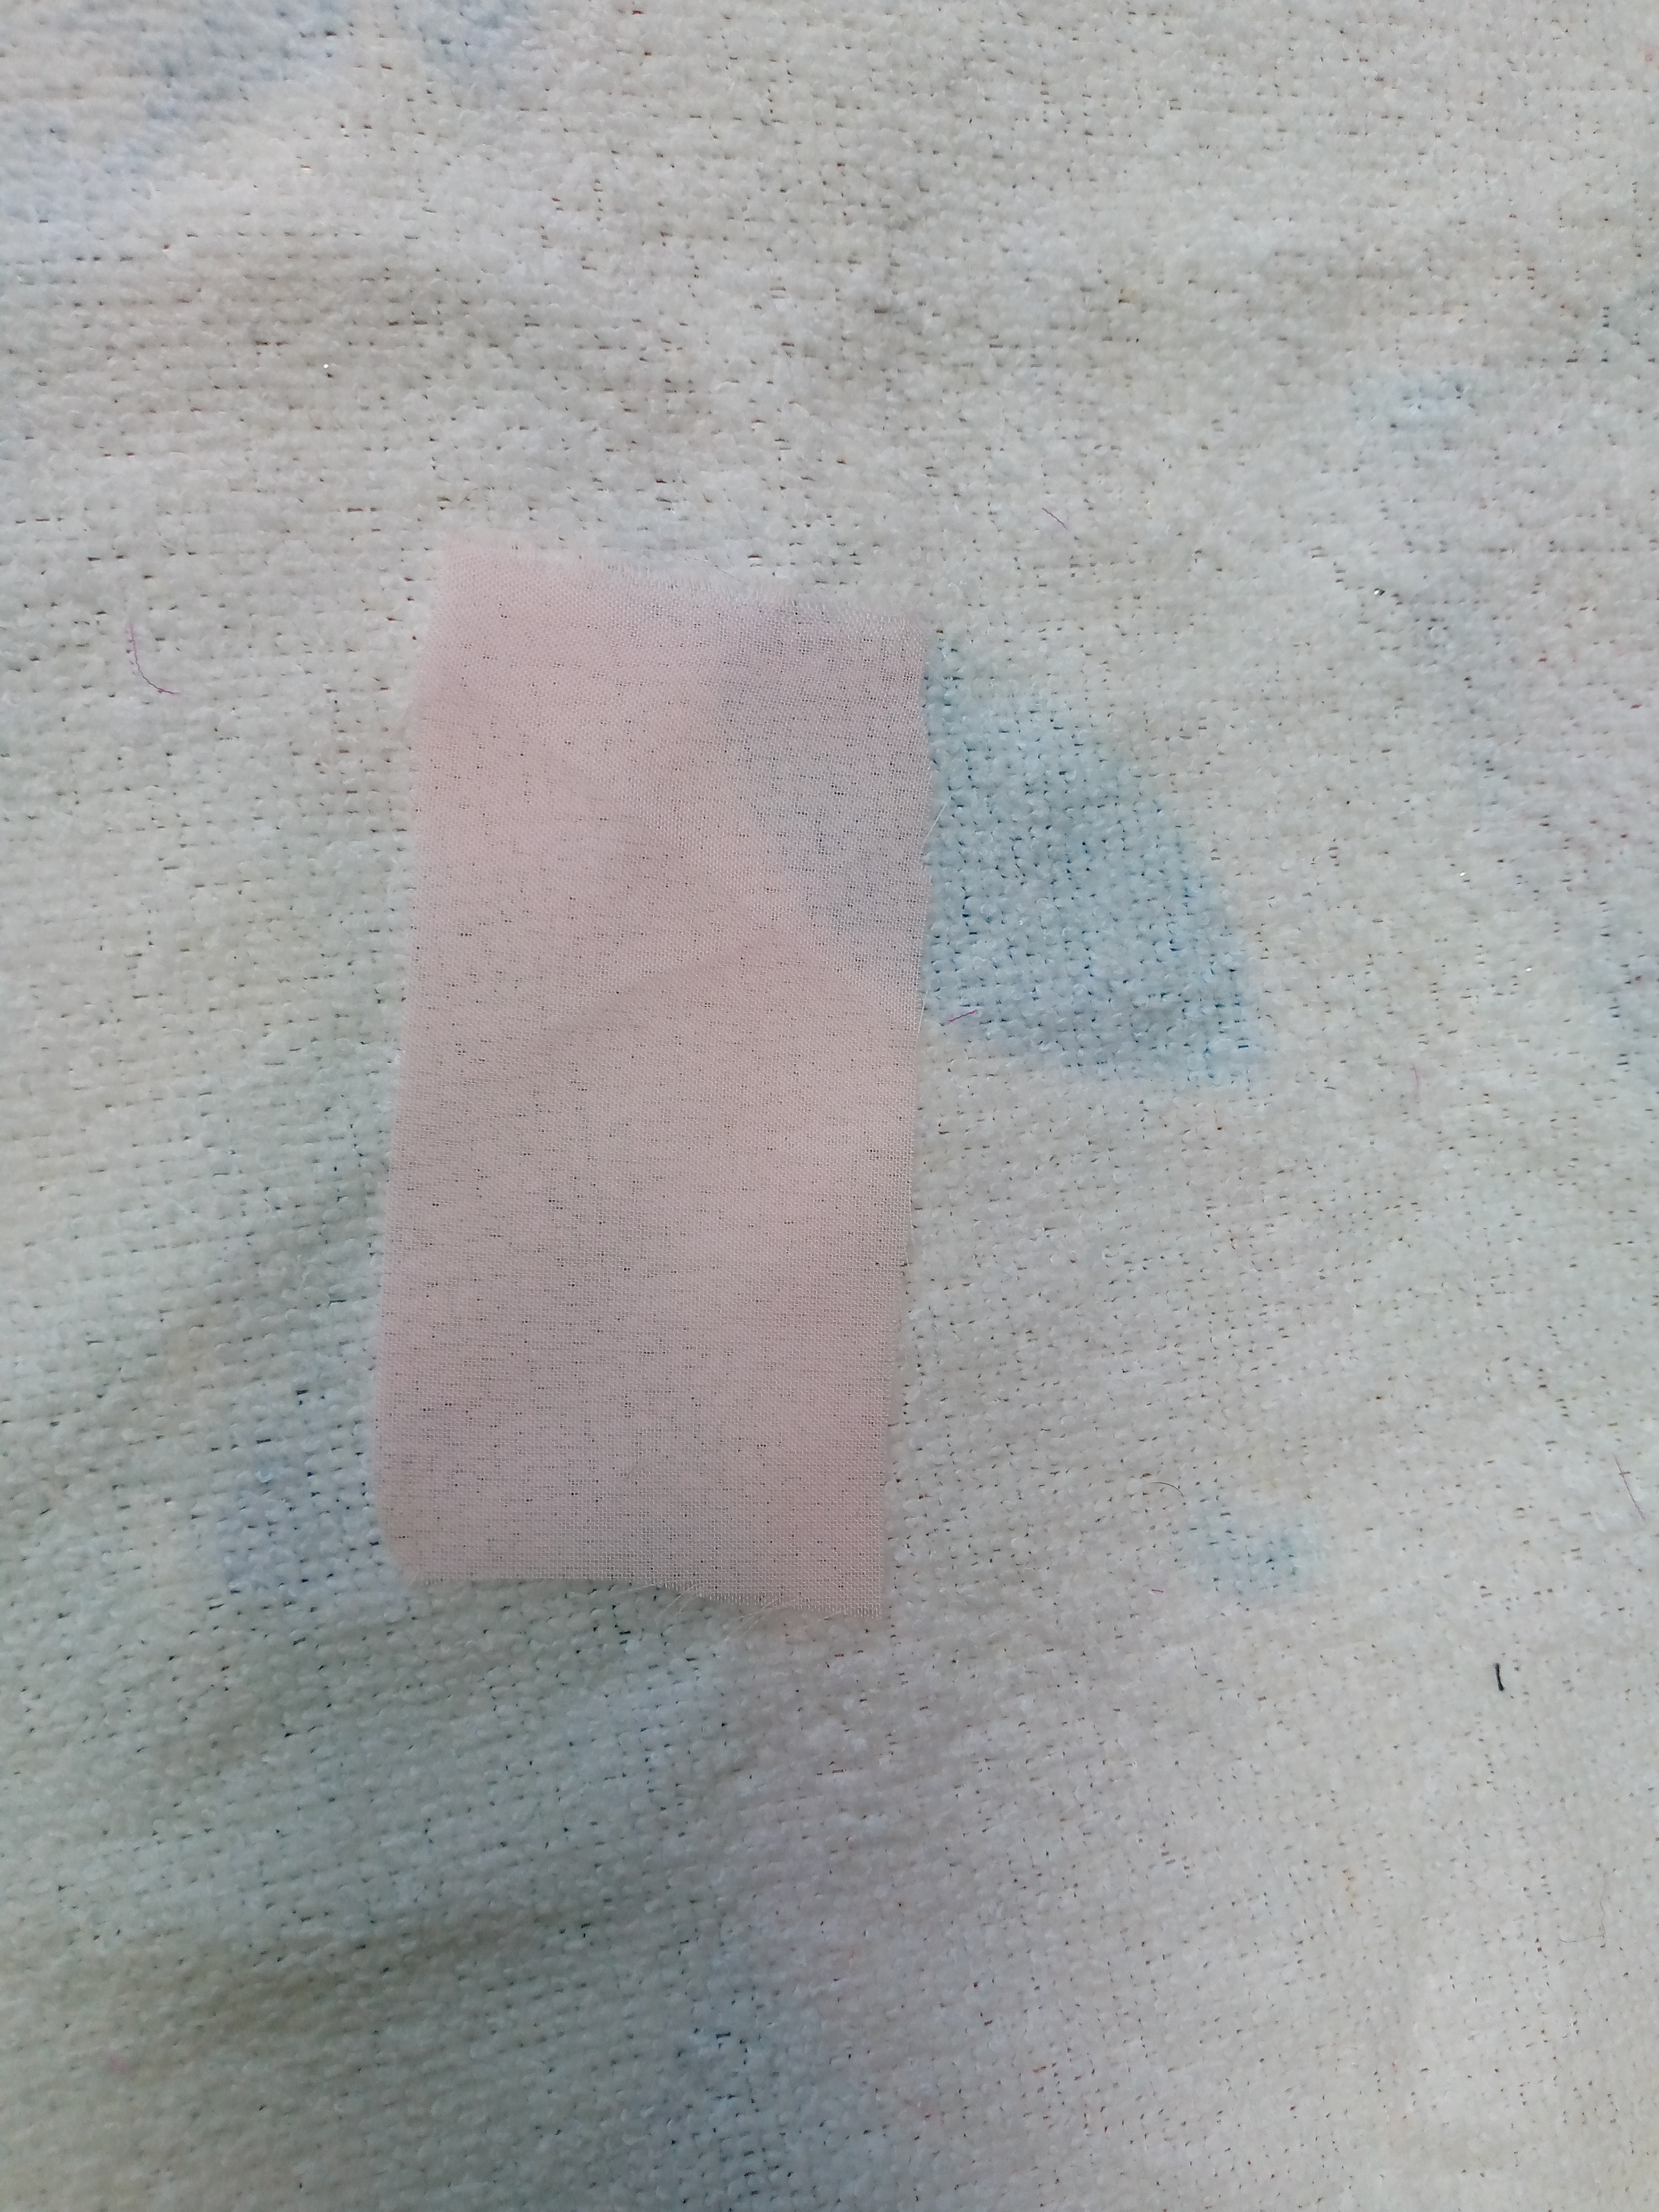
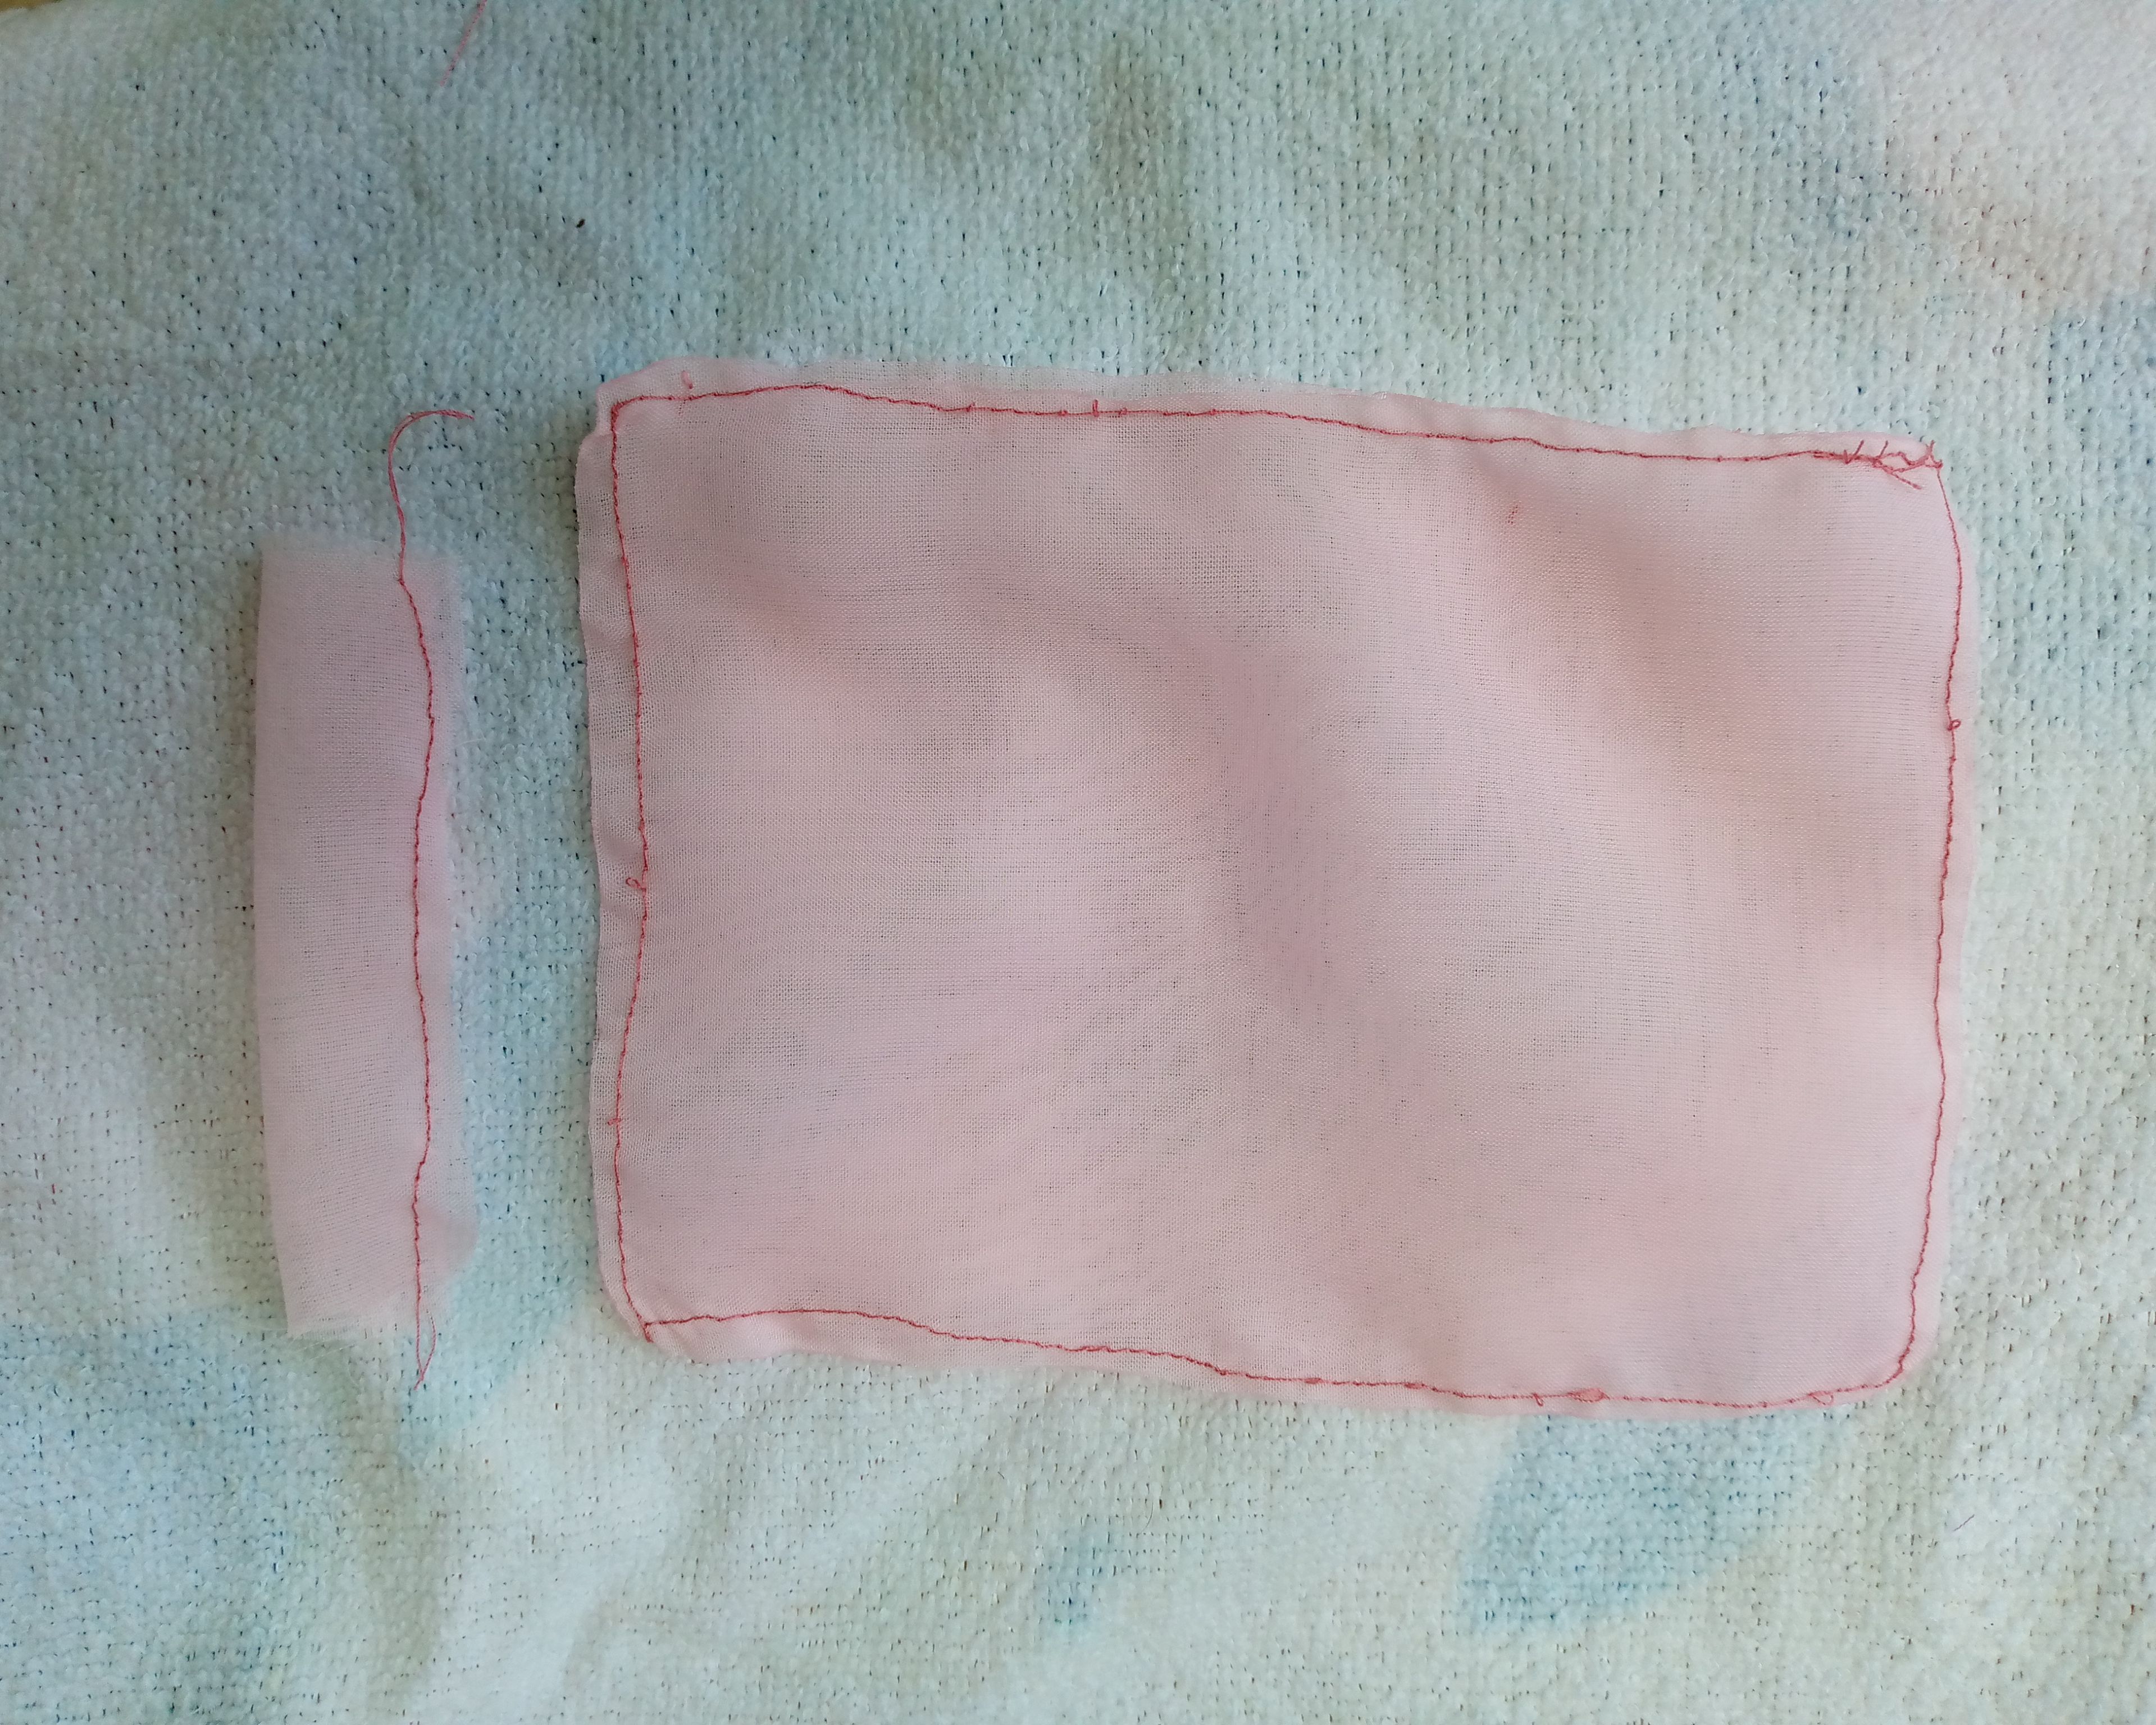
Paso 03
Luego de quemar los bordes del molde del triángulo vamos a coser las piezas el cuadrado que va a ser el lazo y el otro rectángulo que usaremos para unir el lazo ,luego procedemos a voltear las piezas así tal cual se muestra en las imágenes.
Step 03:
After burning the edges of the triangle mold we are going to sew the pieces, the square that will be the bow and the other rectangle that we will use to join the bow, then we proceed to turn the pieces as shown in the images.
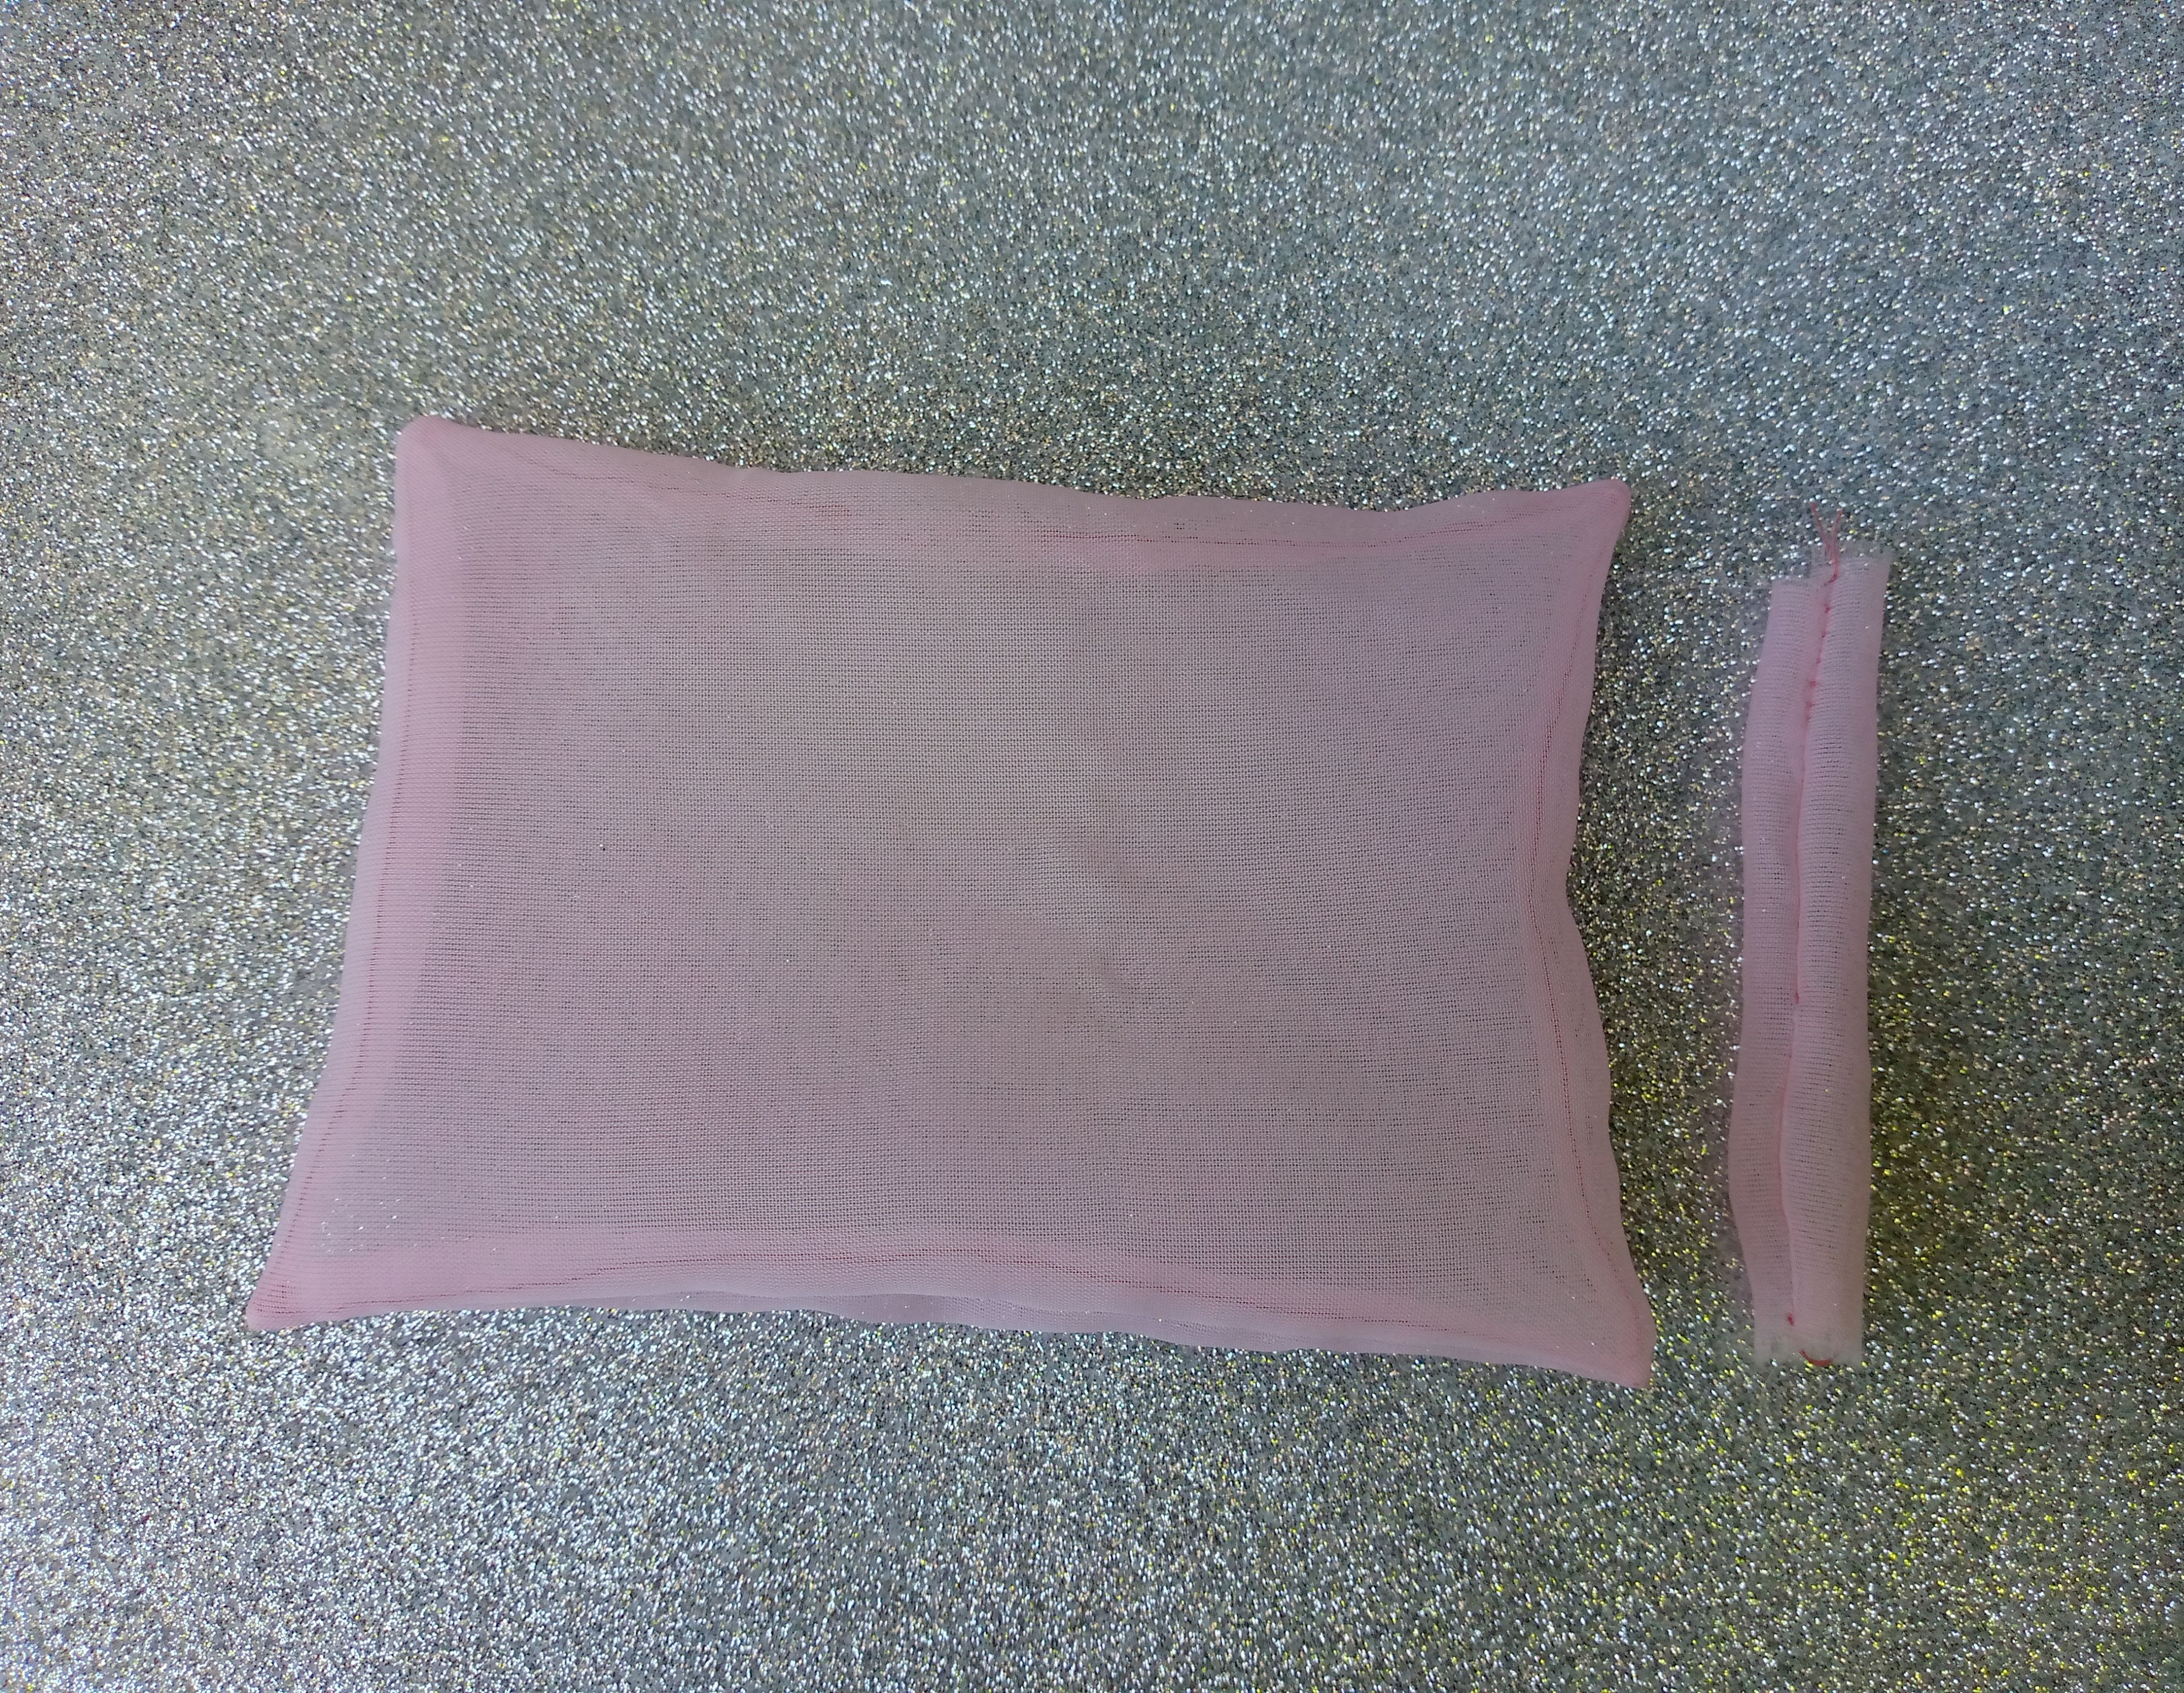
Paso 04
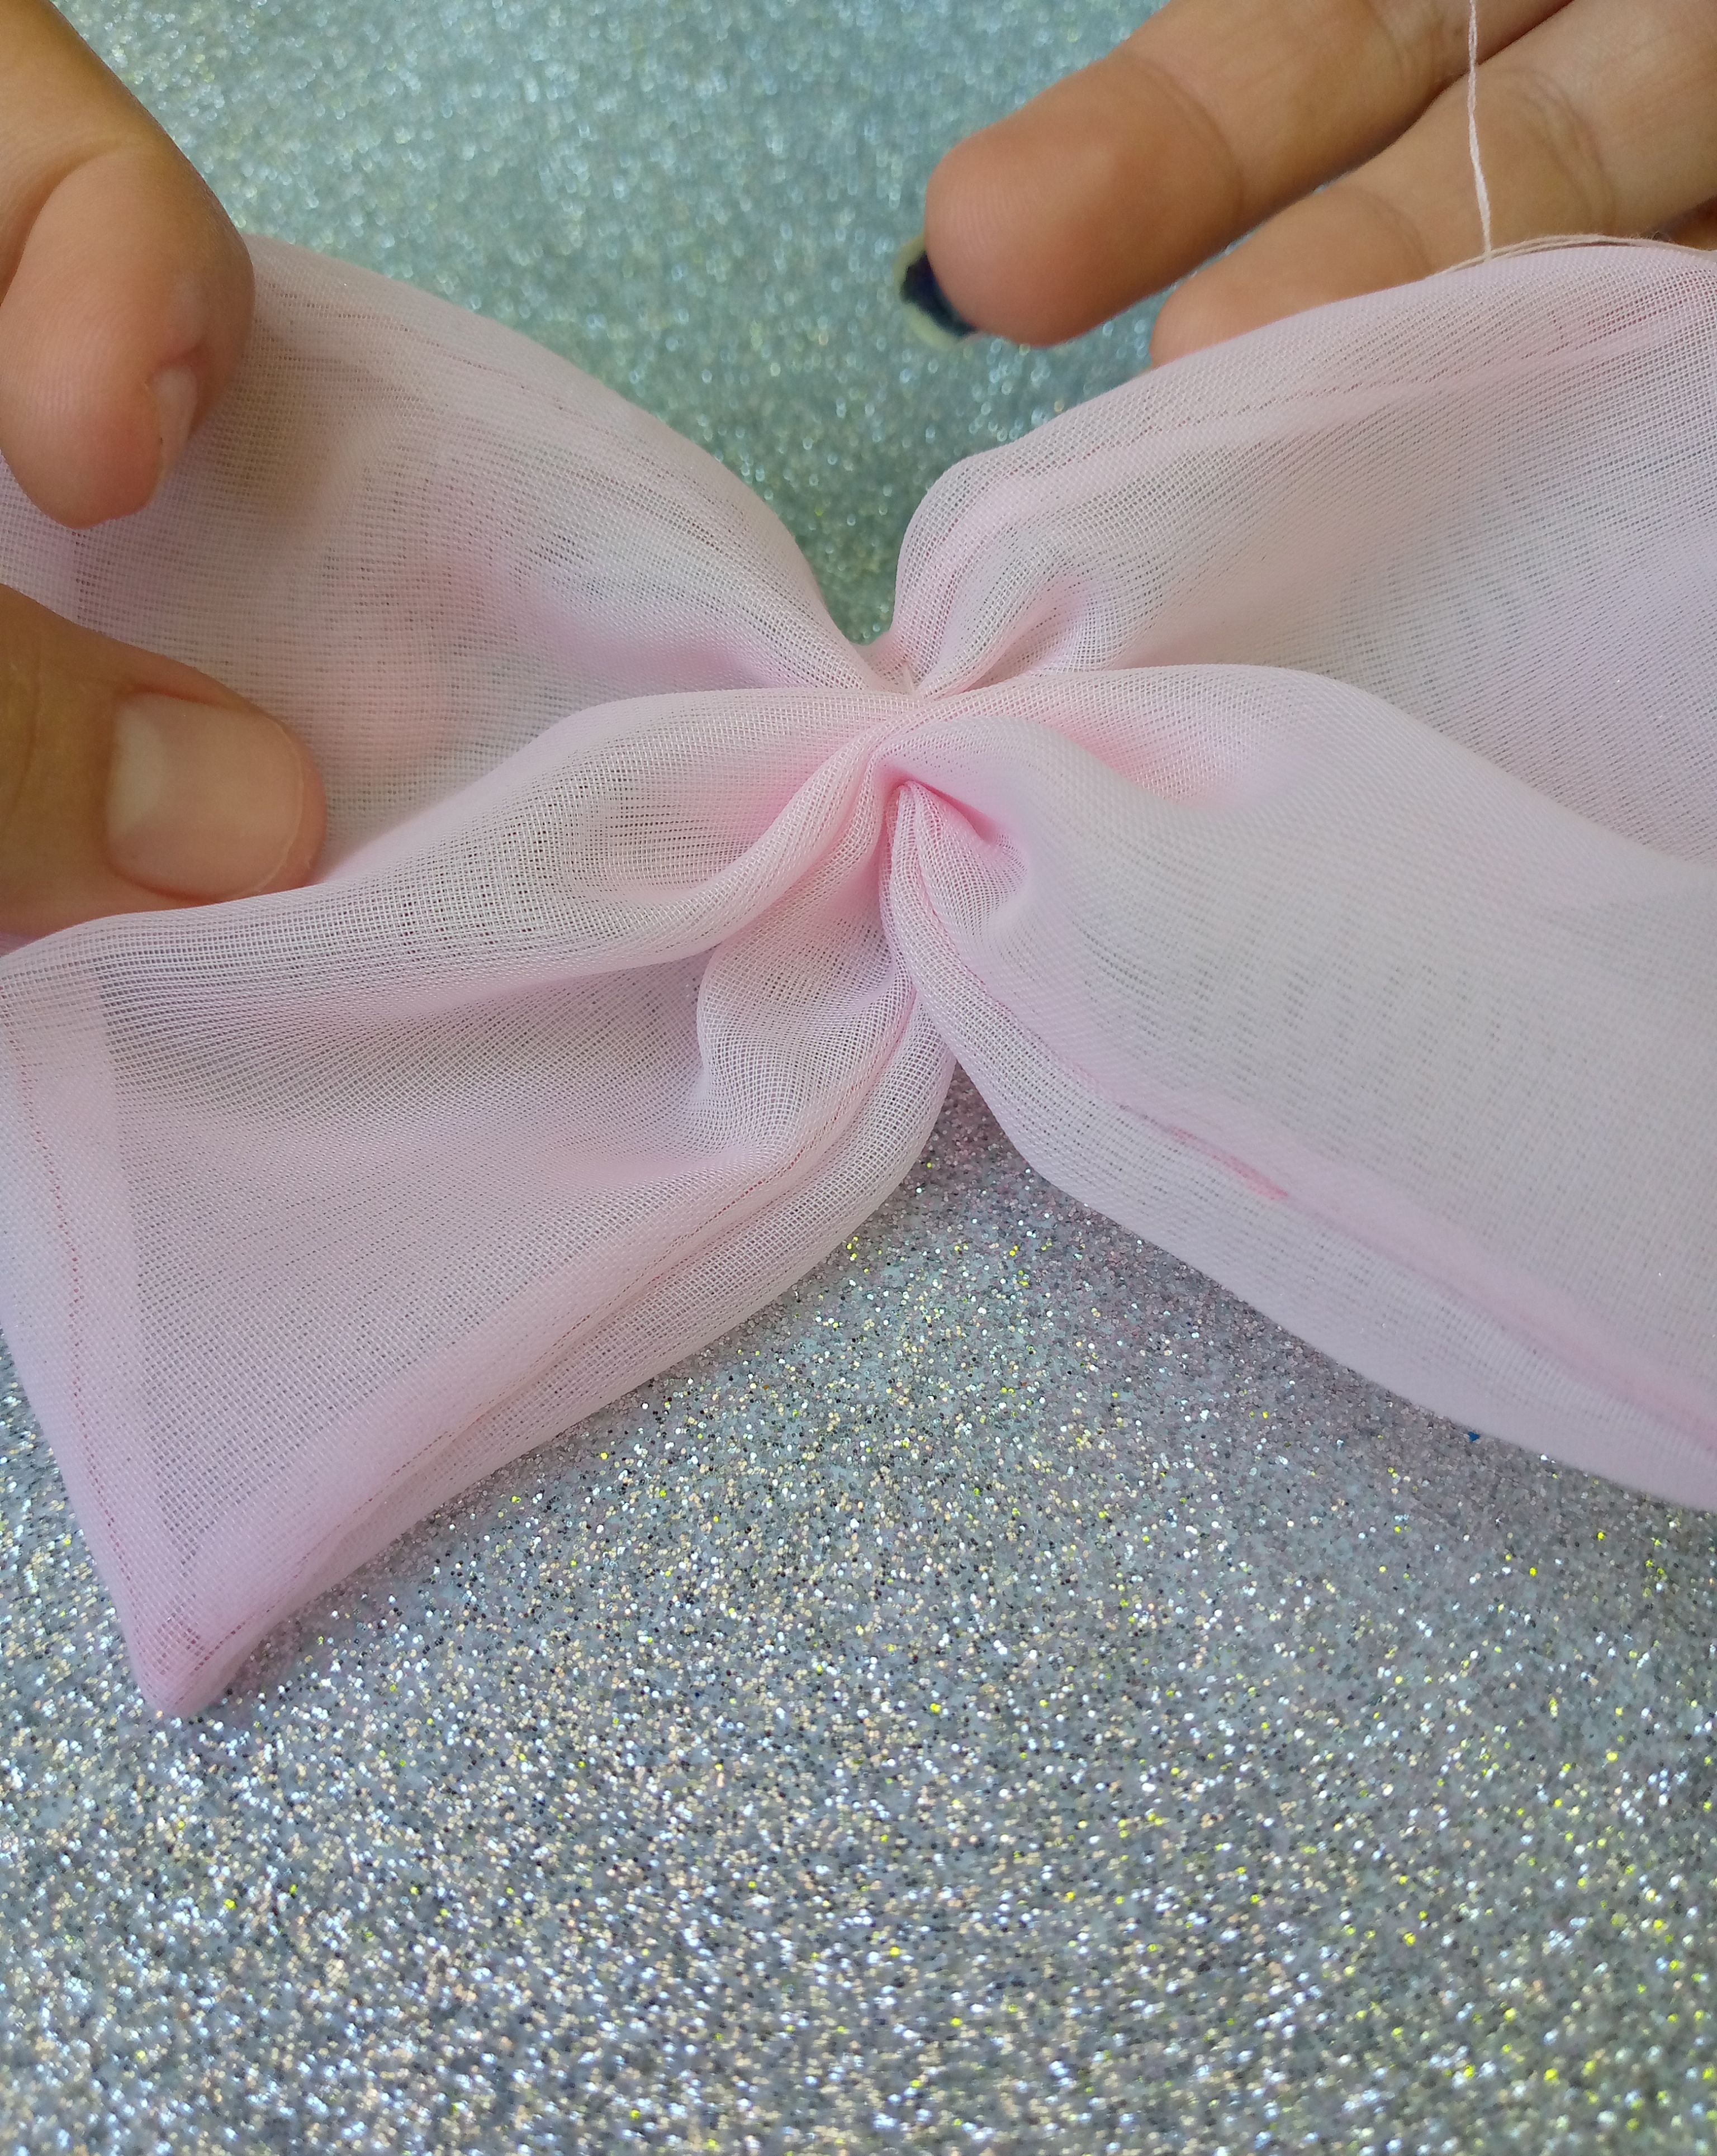
Ya que tengamos estás piezas listas vamos a coser el cuadrado a mano con una aguja e hilo lo cosemos por la mitad y cuando terminemos tiramos de el hilo y apretamos para formar la pieza del lazo y hacemos el mismo paso con la pieza del triángulo cosemos por el medio y tiramos del hilo para recogerlo y así nos quedarán las dos piezas ya fruncidas con el hilo ,ahora solo nos queda armar nuestro lacito con las piezas.
Step 04:
Once we have these pieces ready, we are going to sew the square by hand with a needle and thread, we sew it in half and when we finish, we pull the thread and press it to form the bow piece and we do the same step with the triangle piece, we sew it down. the middle and we pull the thread to pick it up and thus we will have the two pieces already gathered with the thread, now we only have to put together our little bow with the pieces.
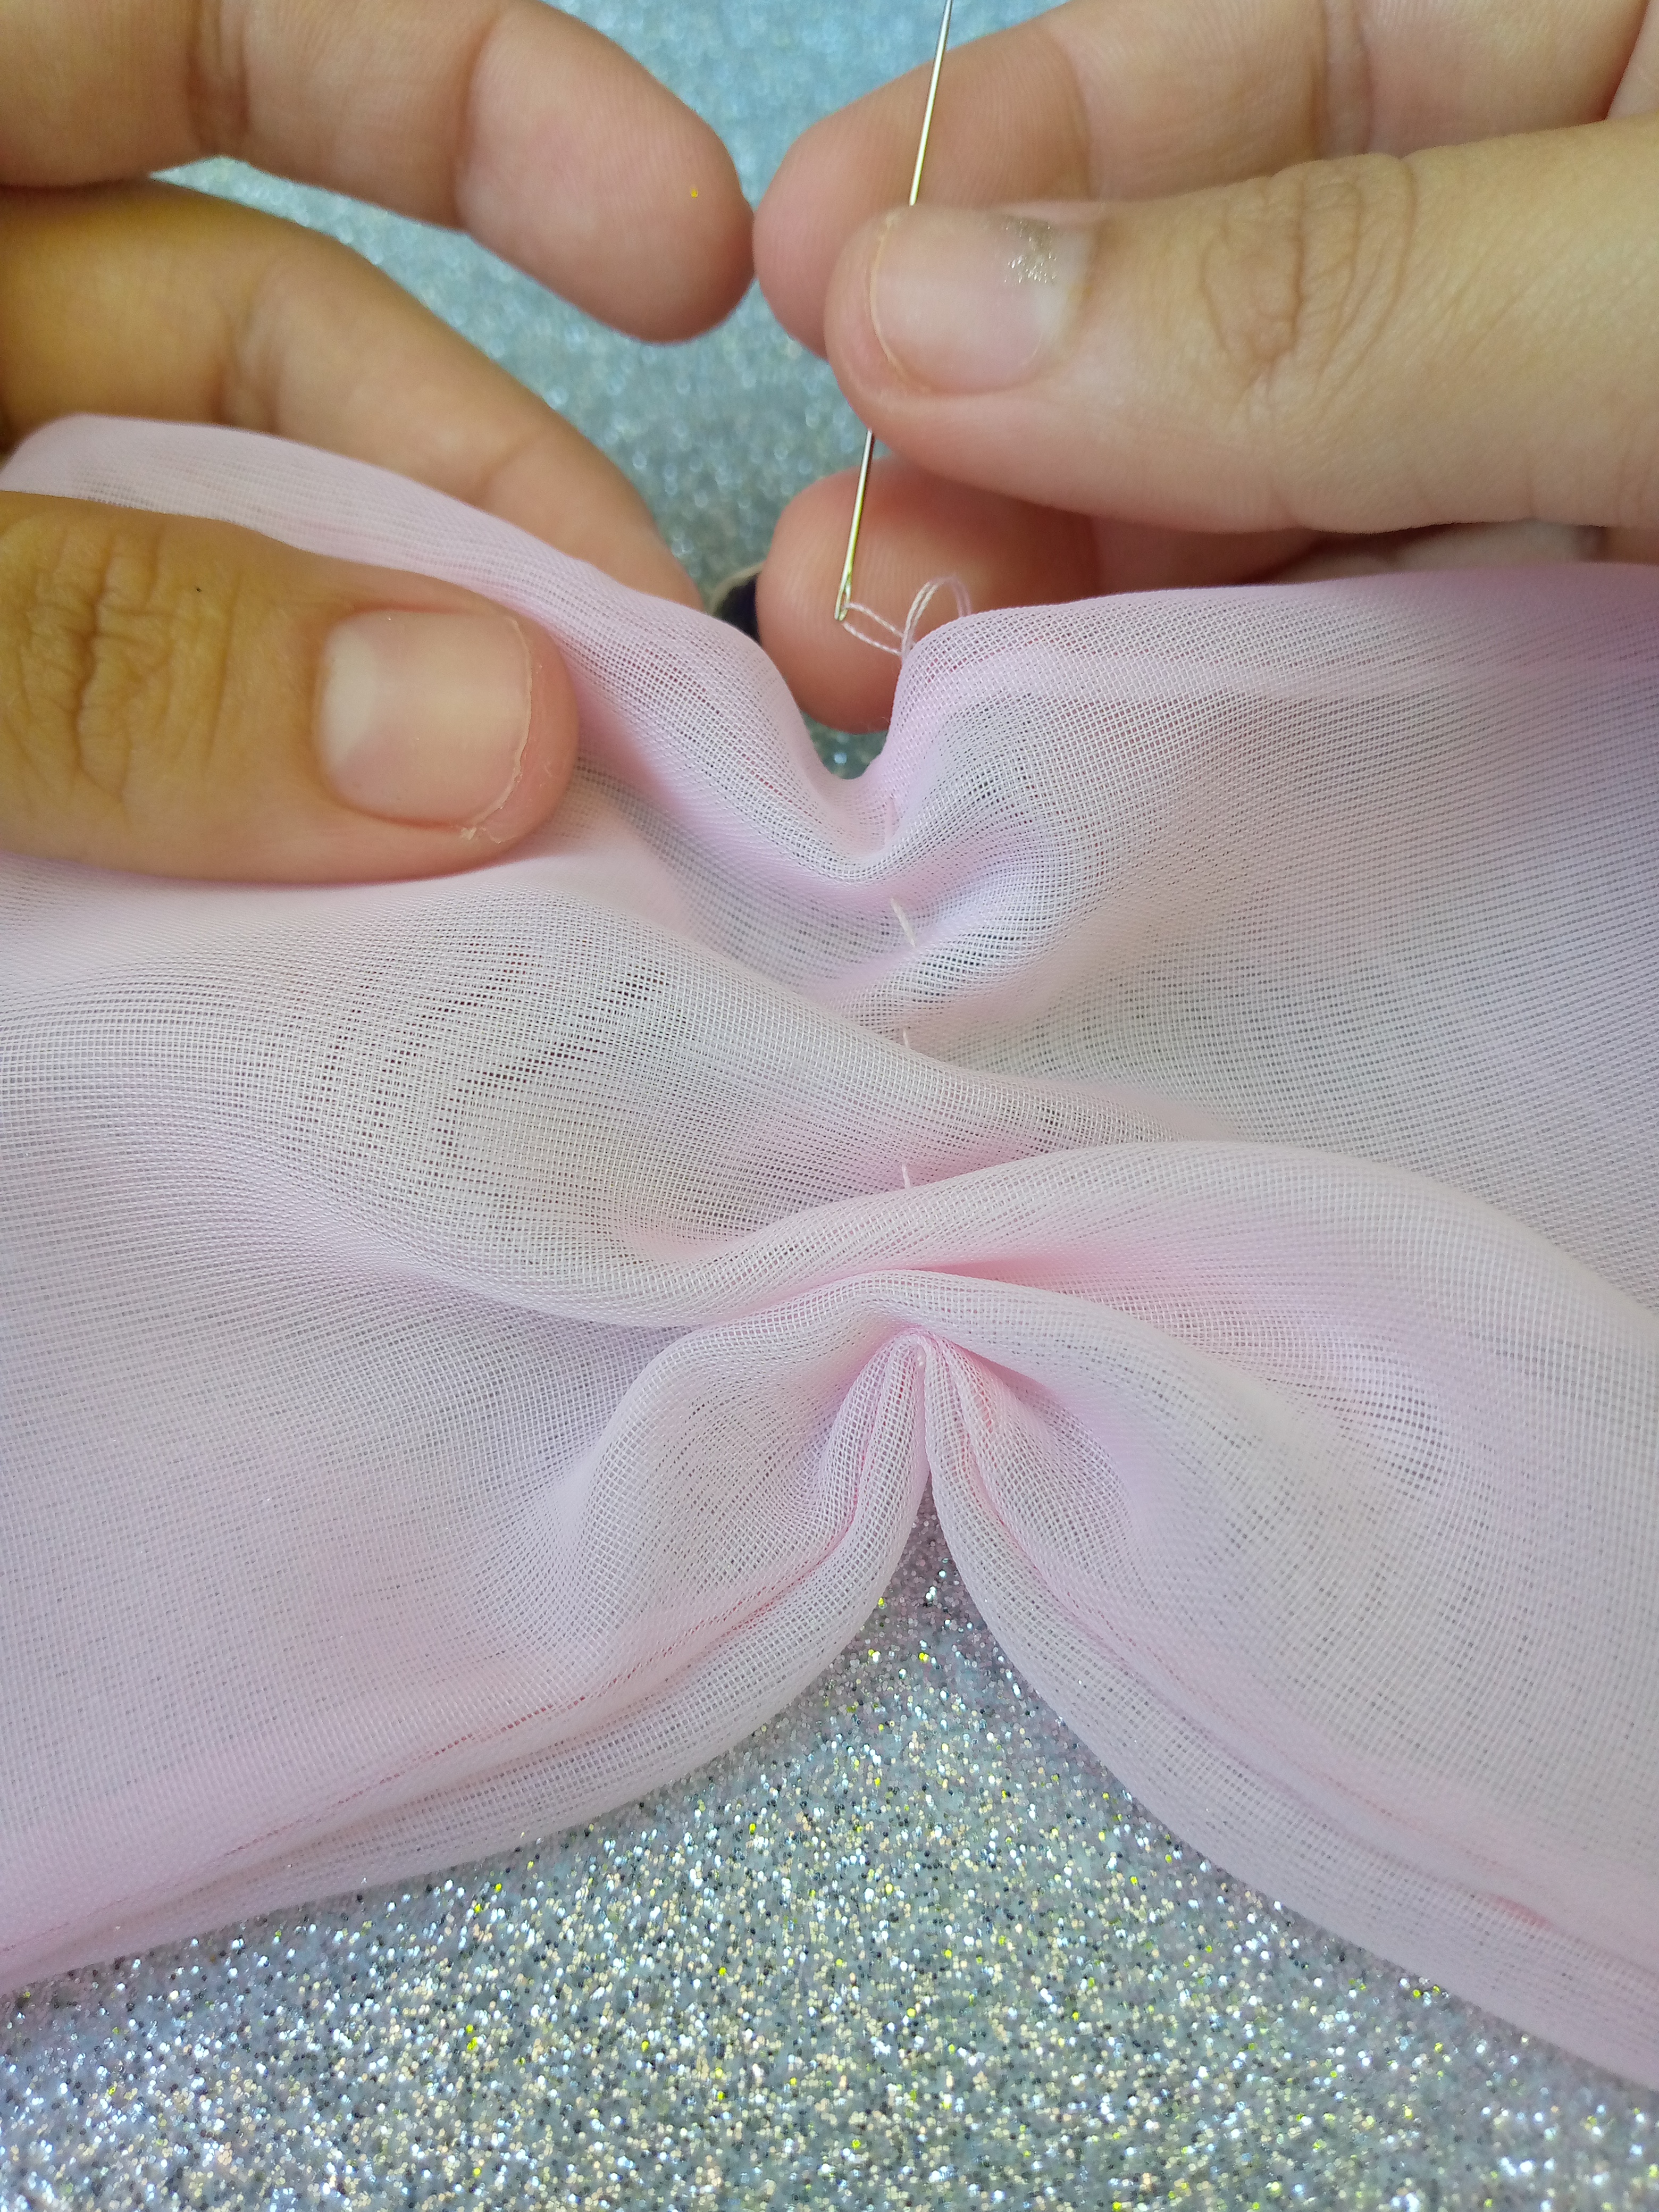

Paso 05
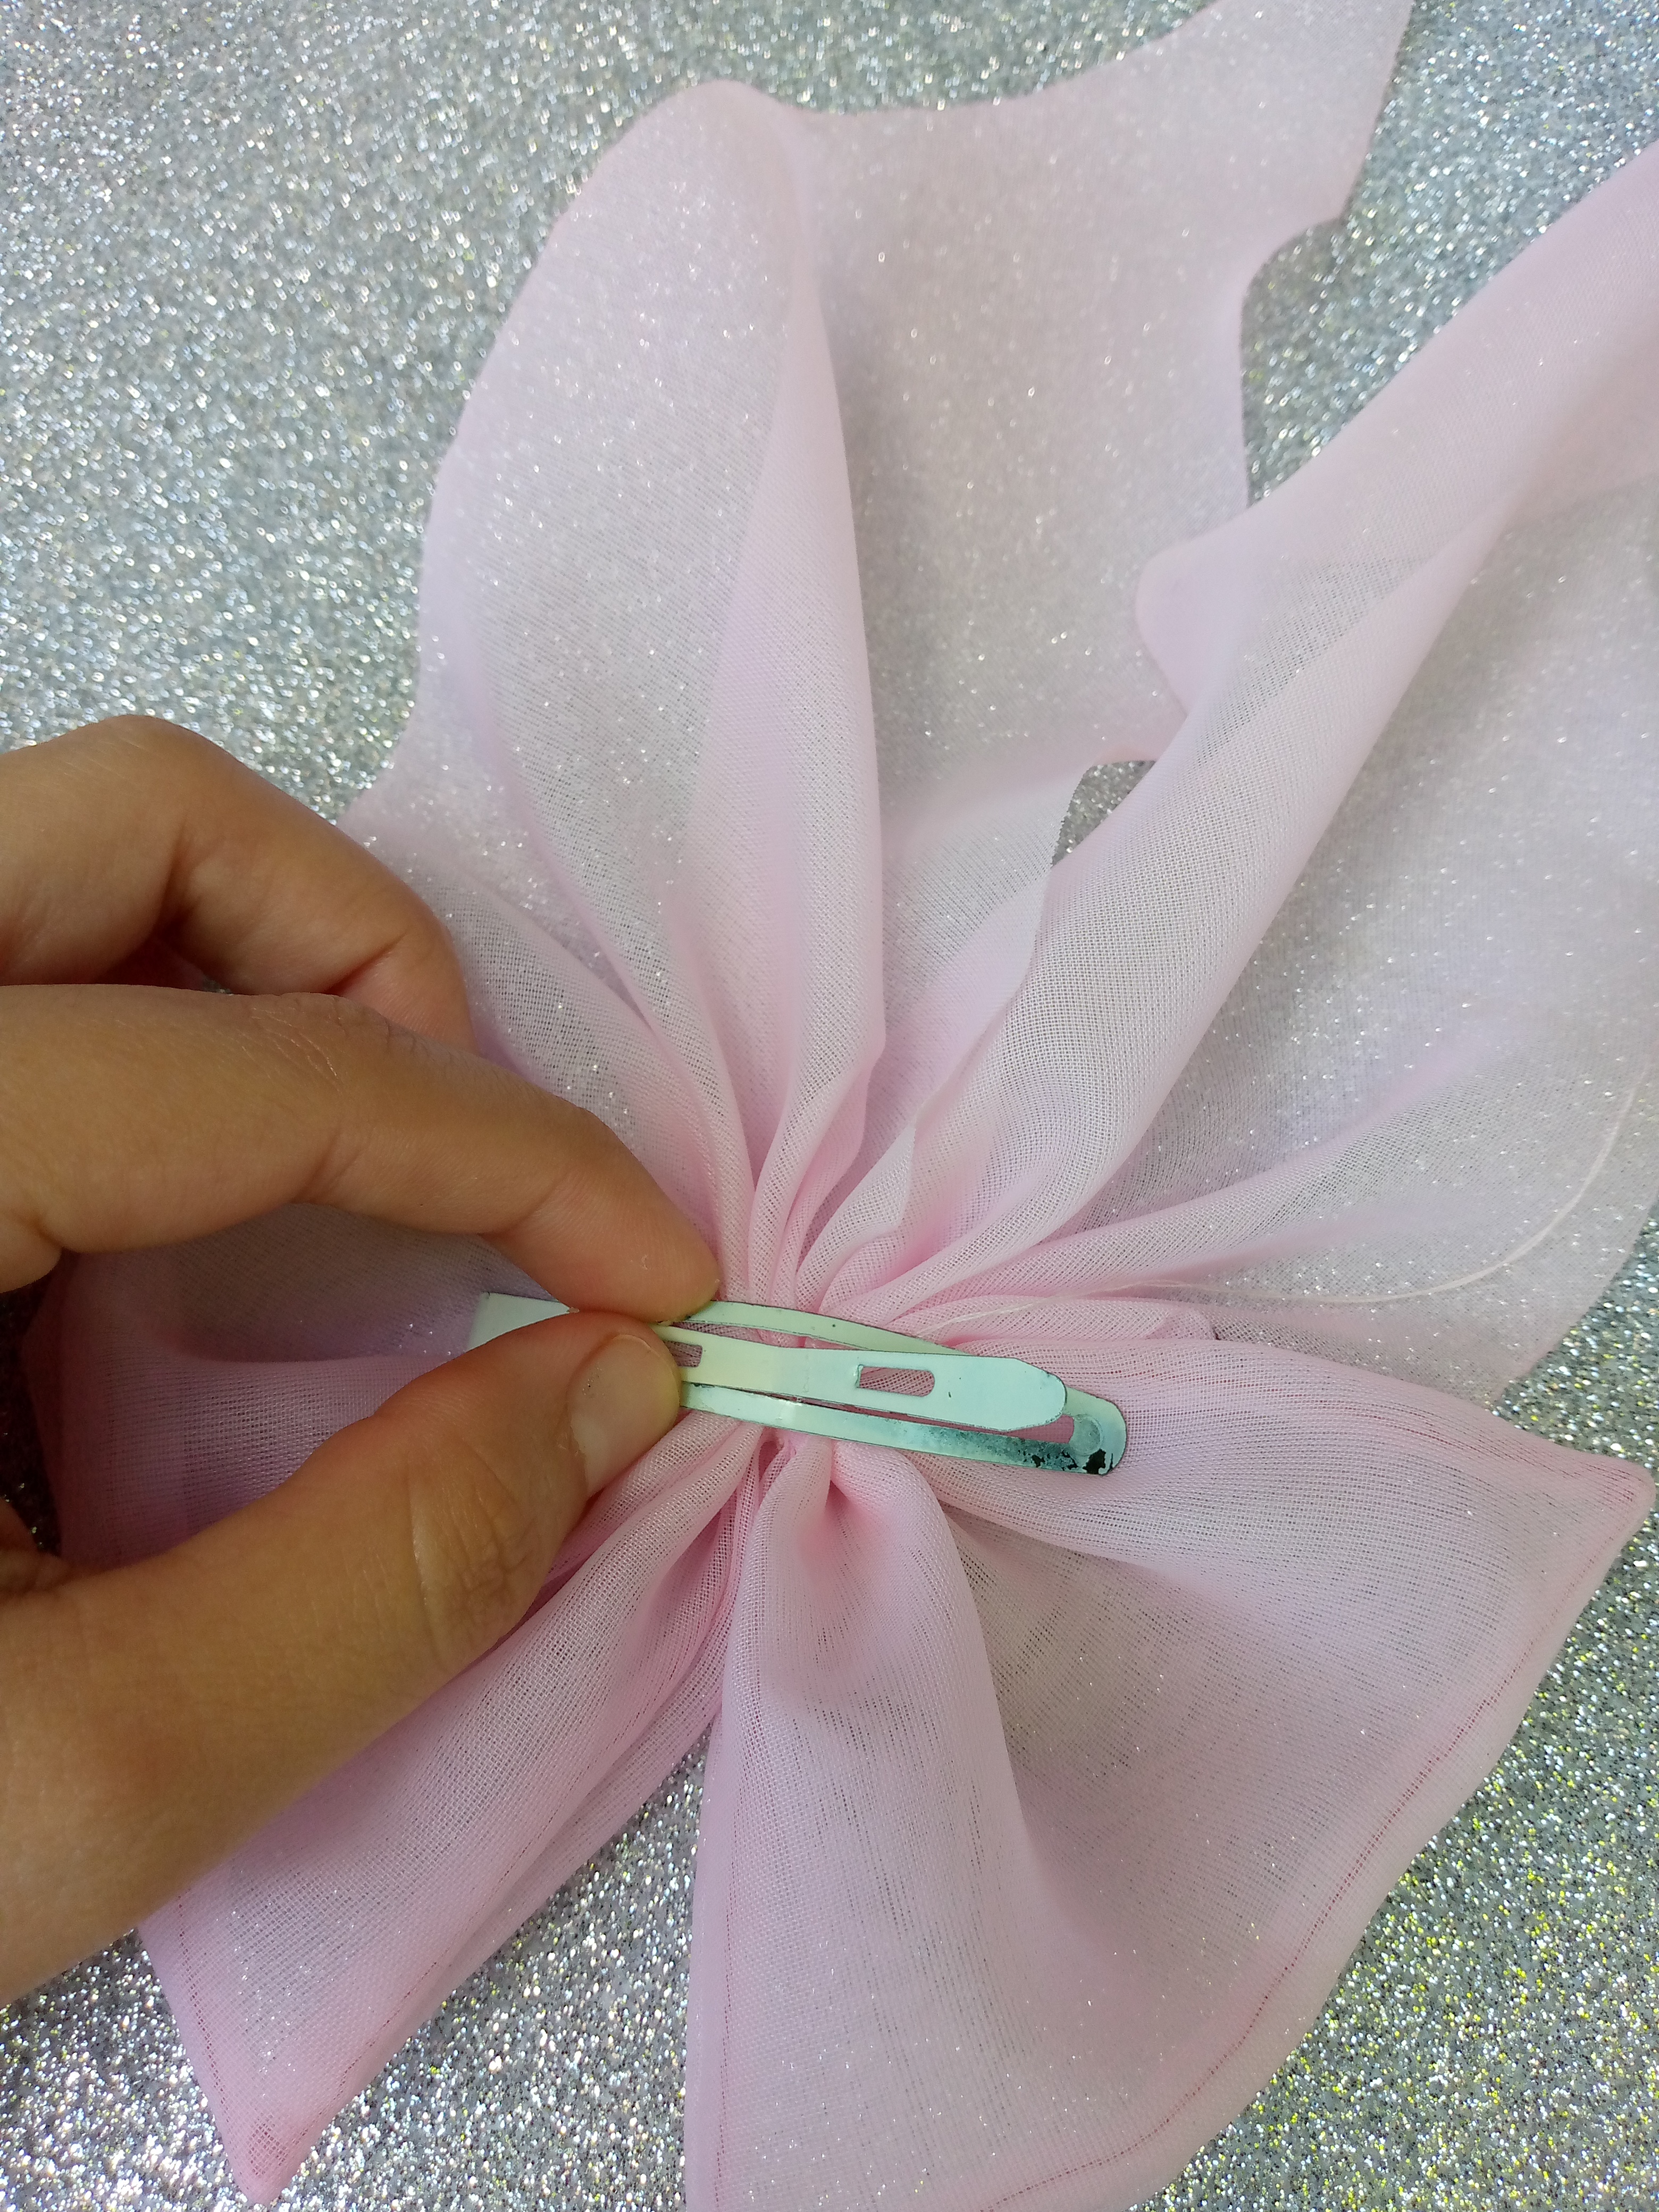
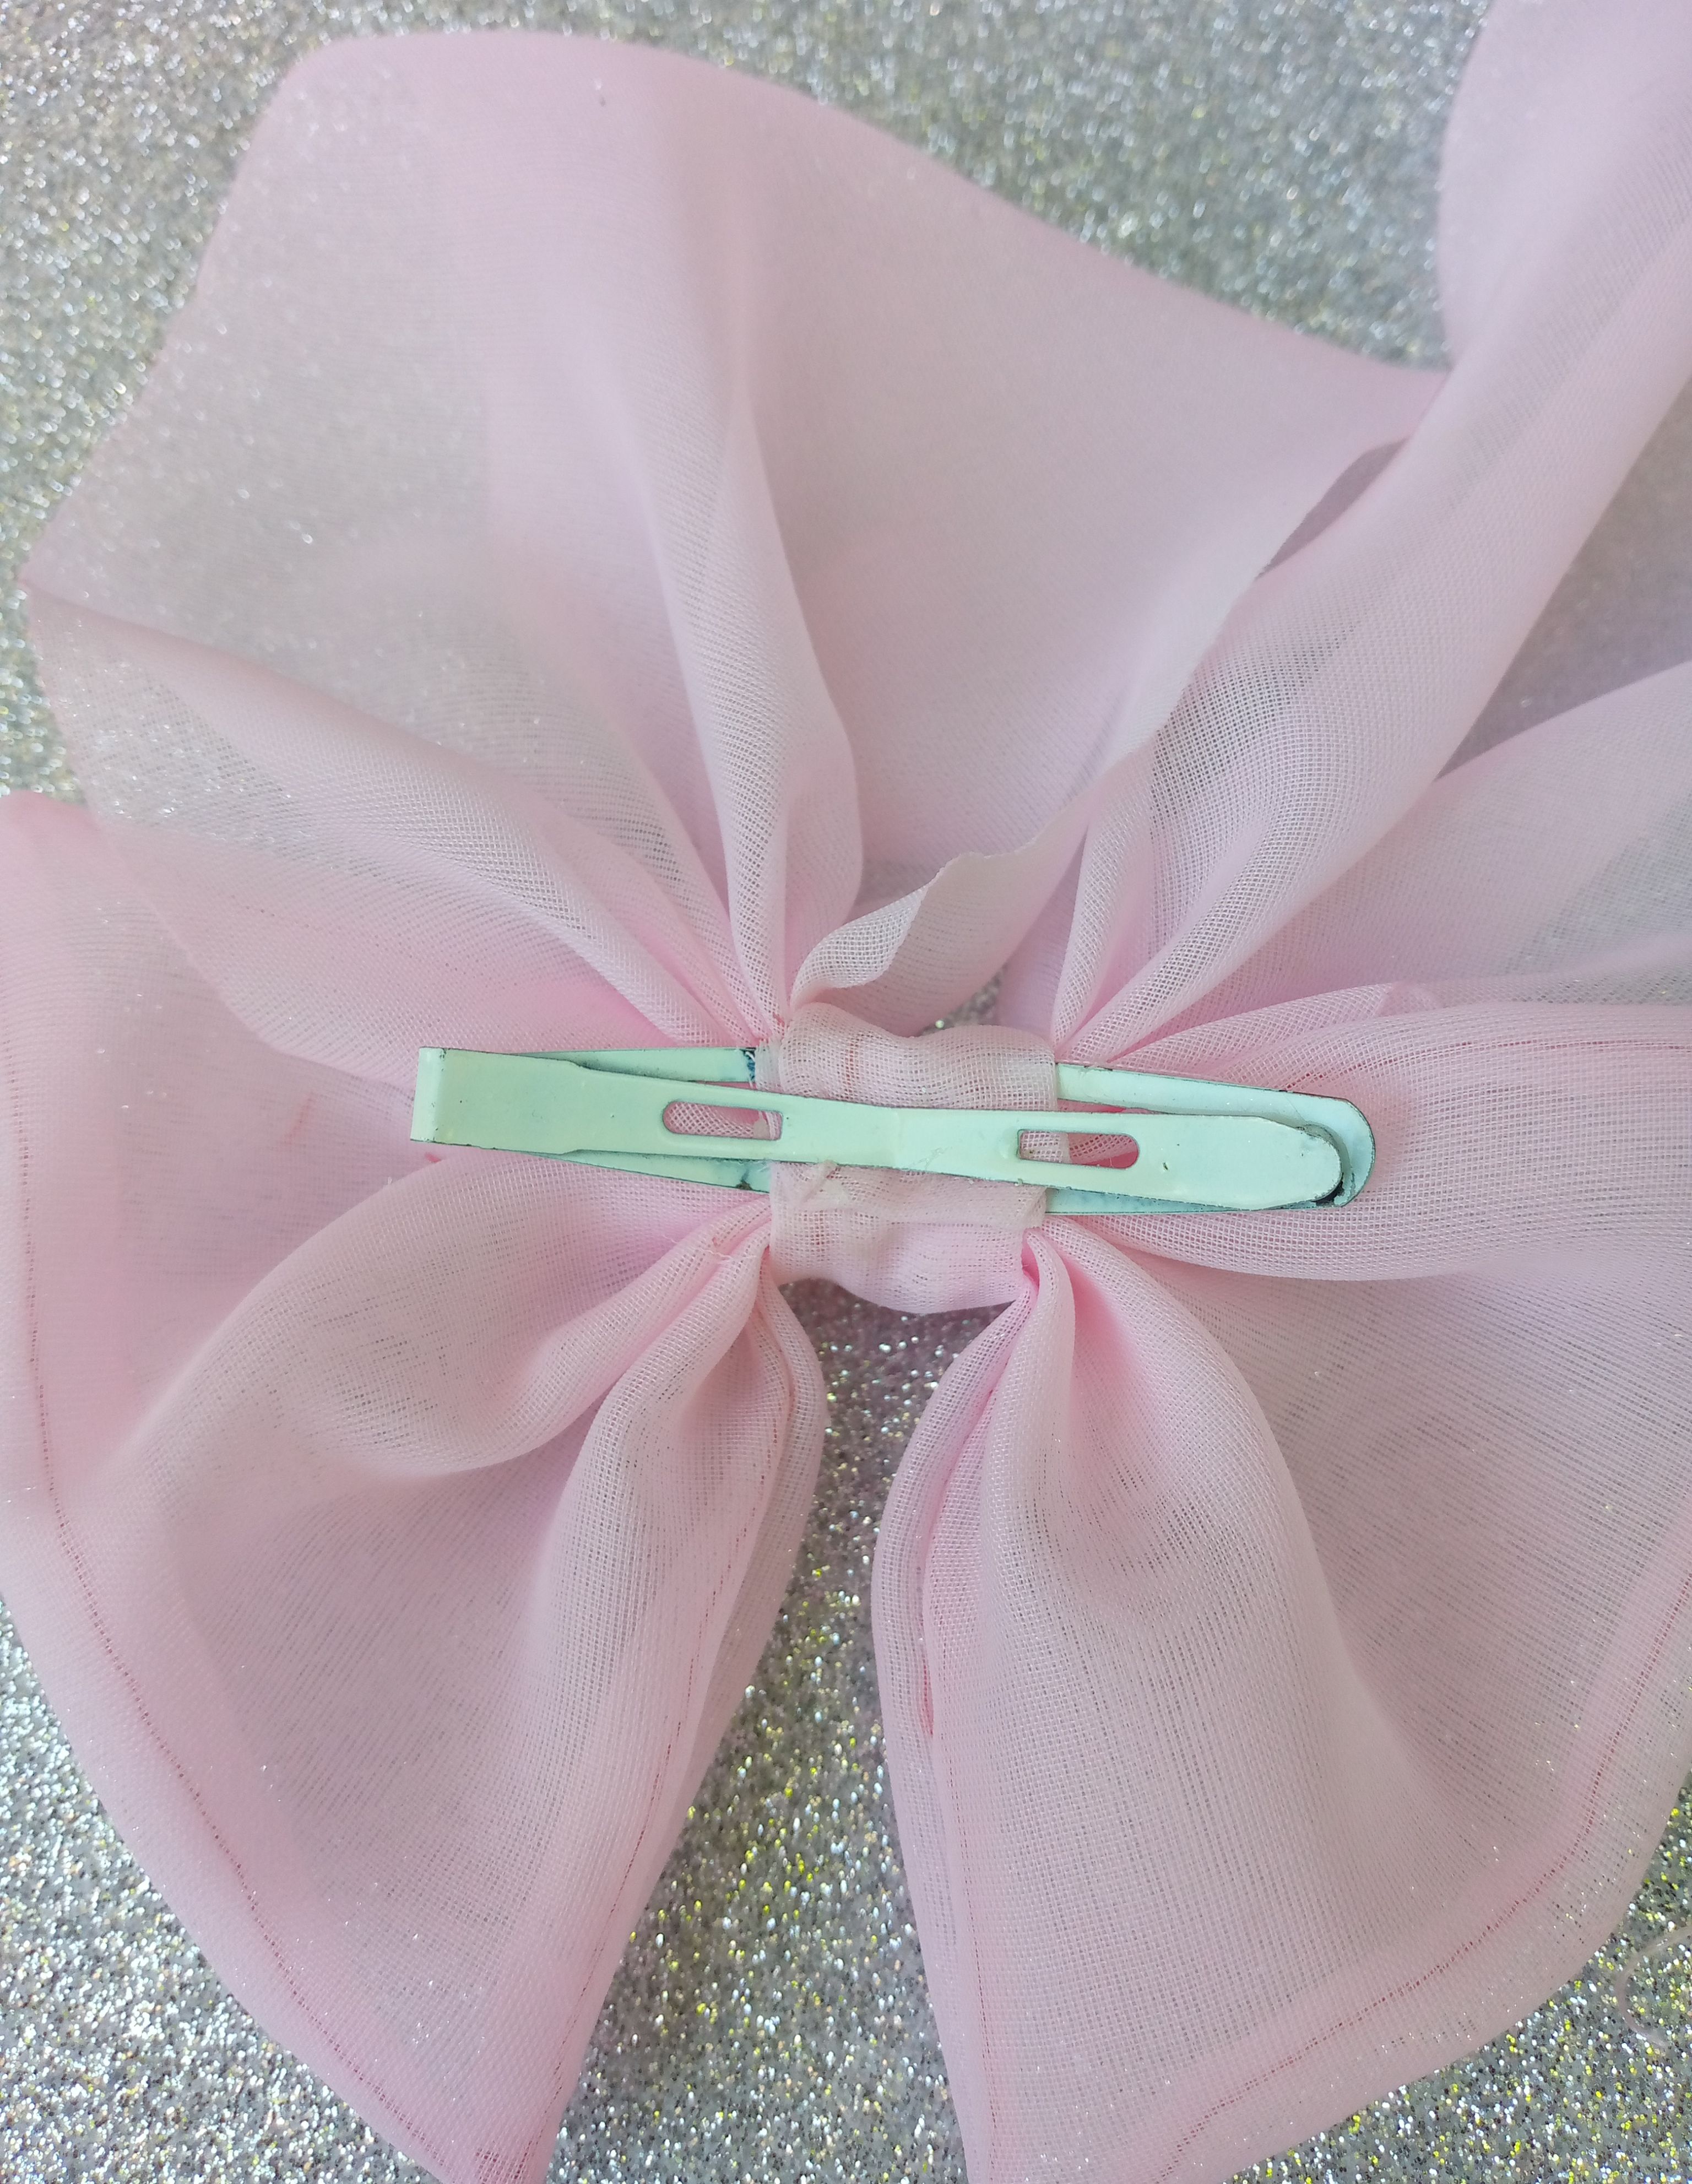
Para unir las dos piezas hacemos el mismo procedimiento que hicimos en el paso anterior para fruncir las piezas y unirlas solo cosemos y tiramos de la aguja con el hilo por la mitad y le colocamos nuestra pinza por la parte inferior de nuestro lazo ,tal cual se muestra en las imágenes.
Step 05:
To join the two pieces we do the same procedure that we did in the previous step to gather the pieces and join them, we just sew and pull the needle with the thread in the middle and we place our clamp at the bottom of our bow, as shown. shown in the images.
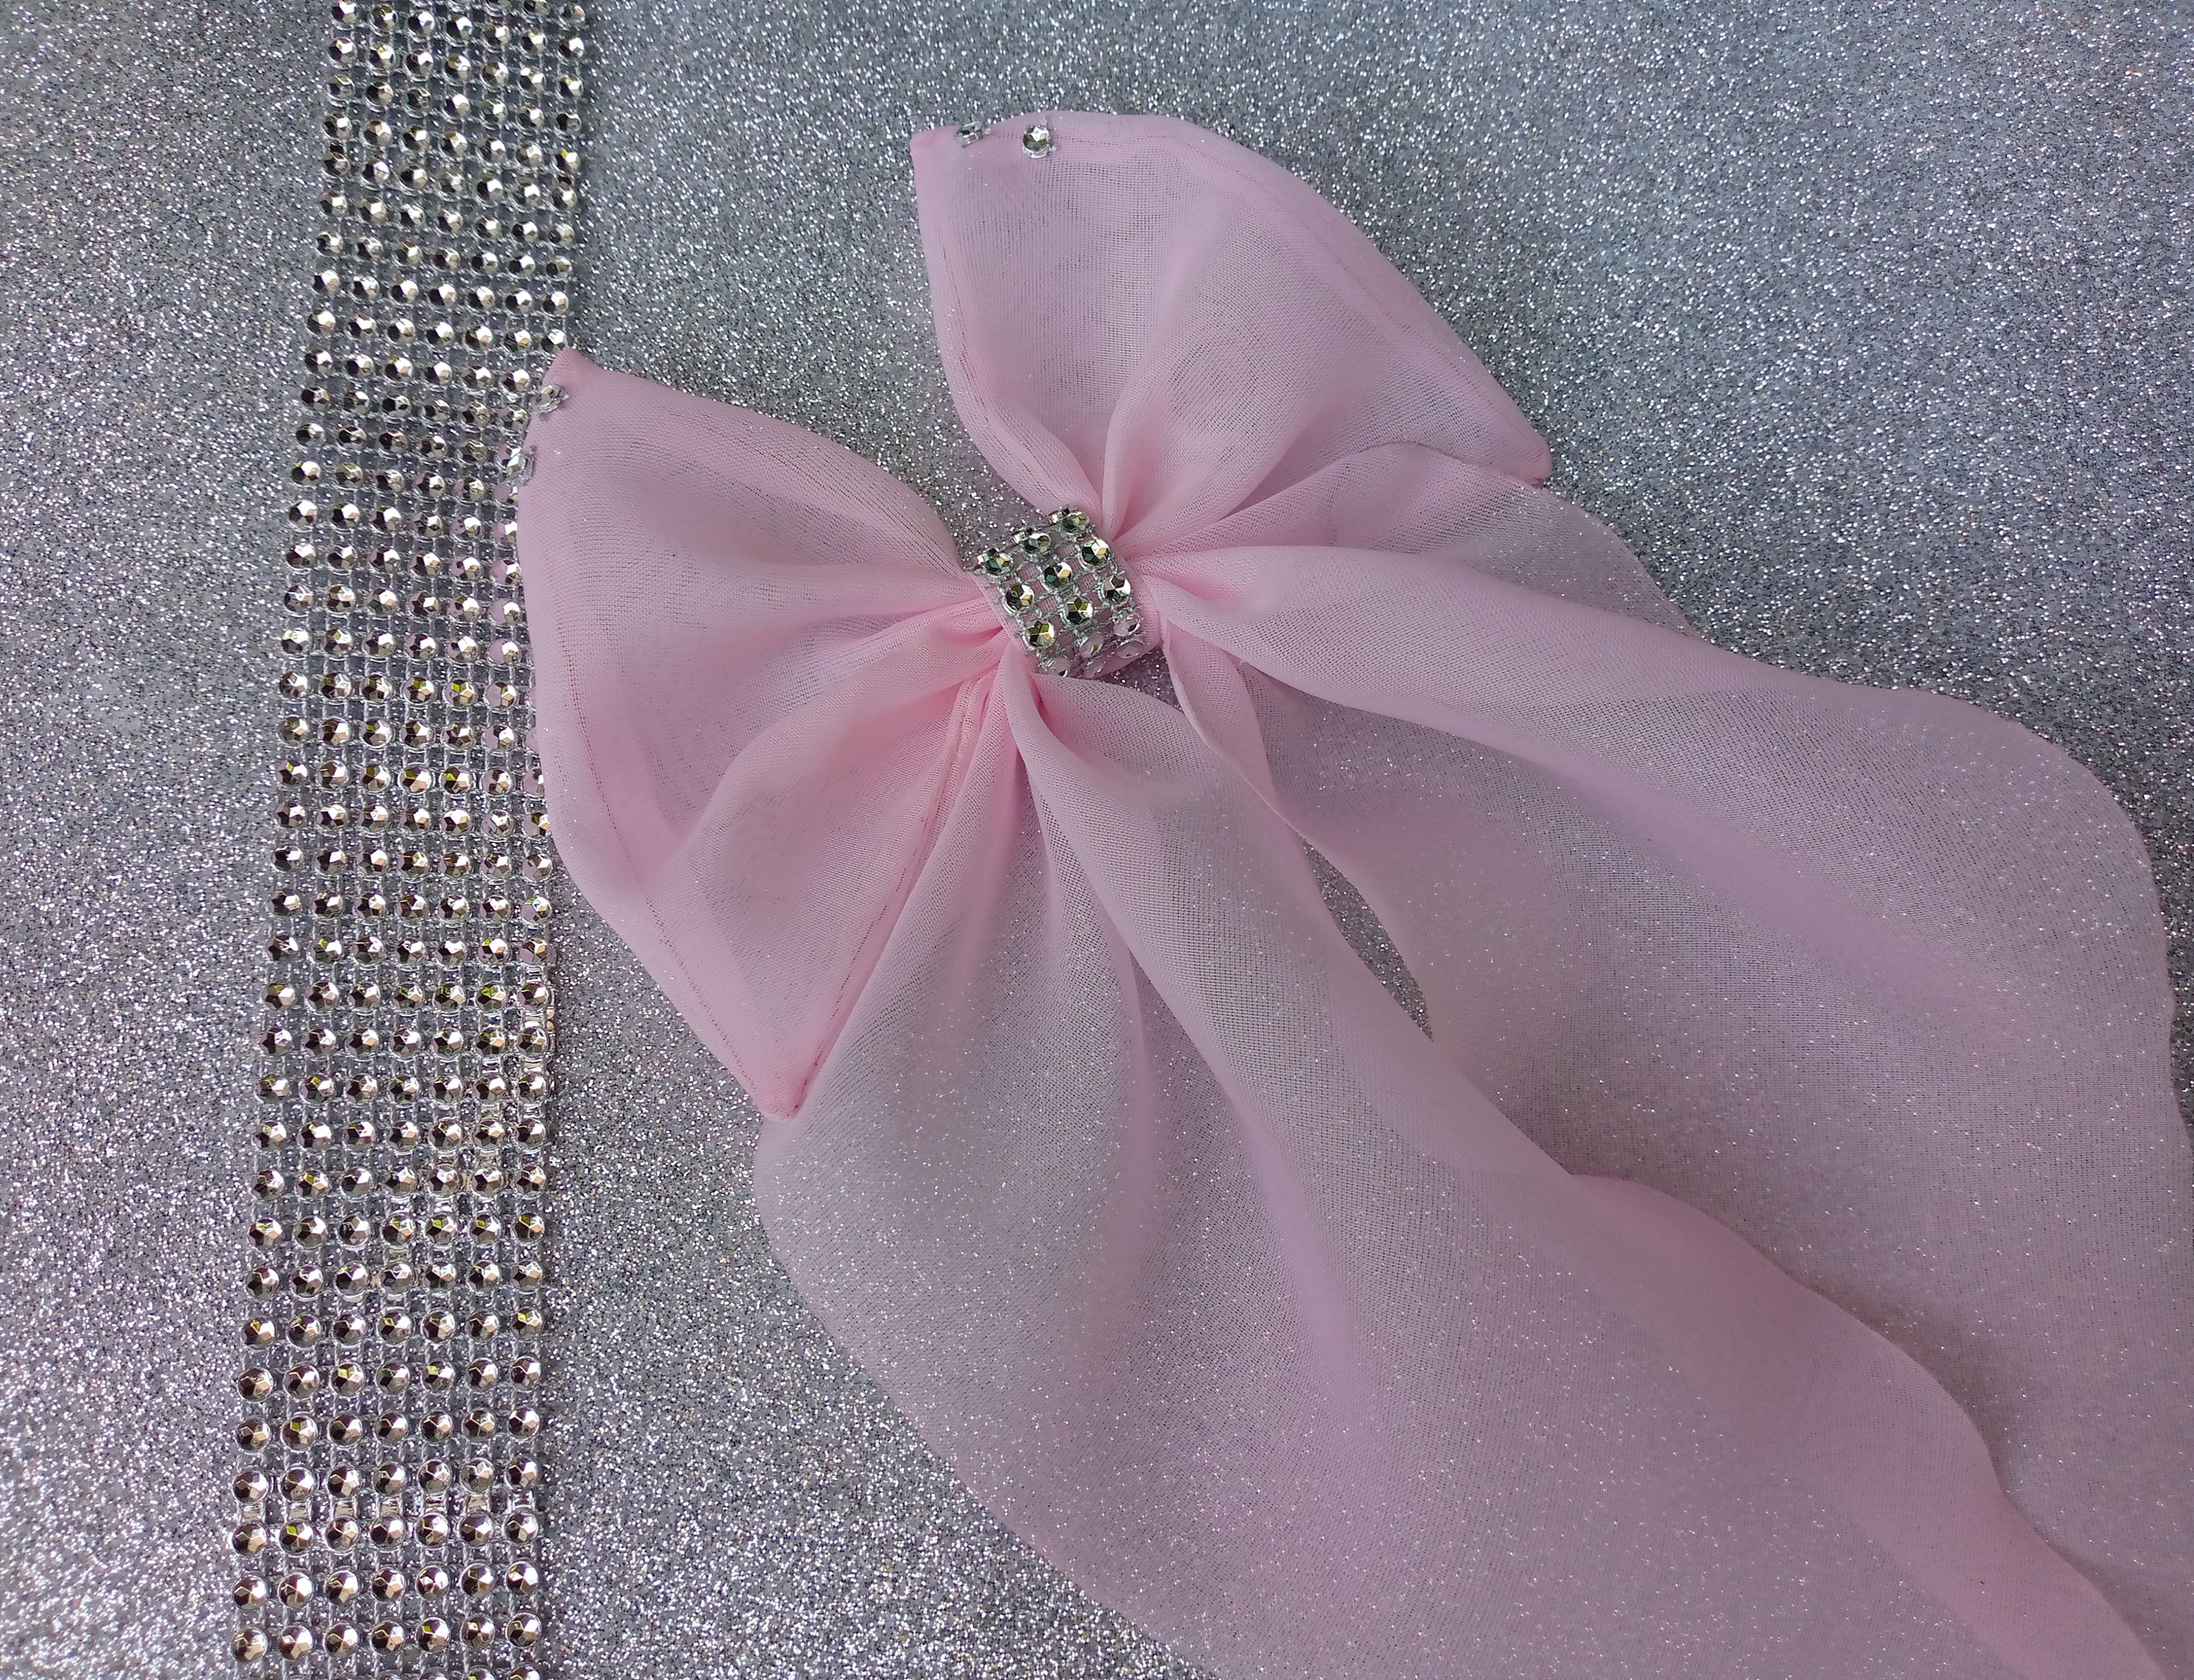
Paso 06
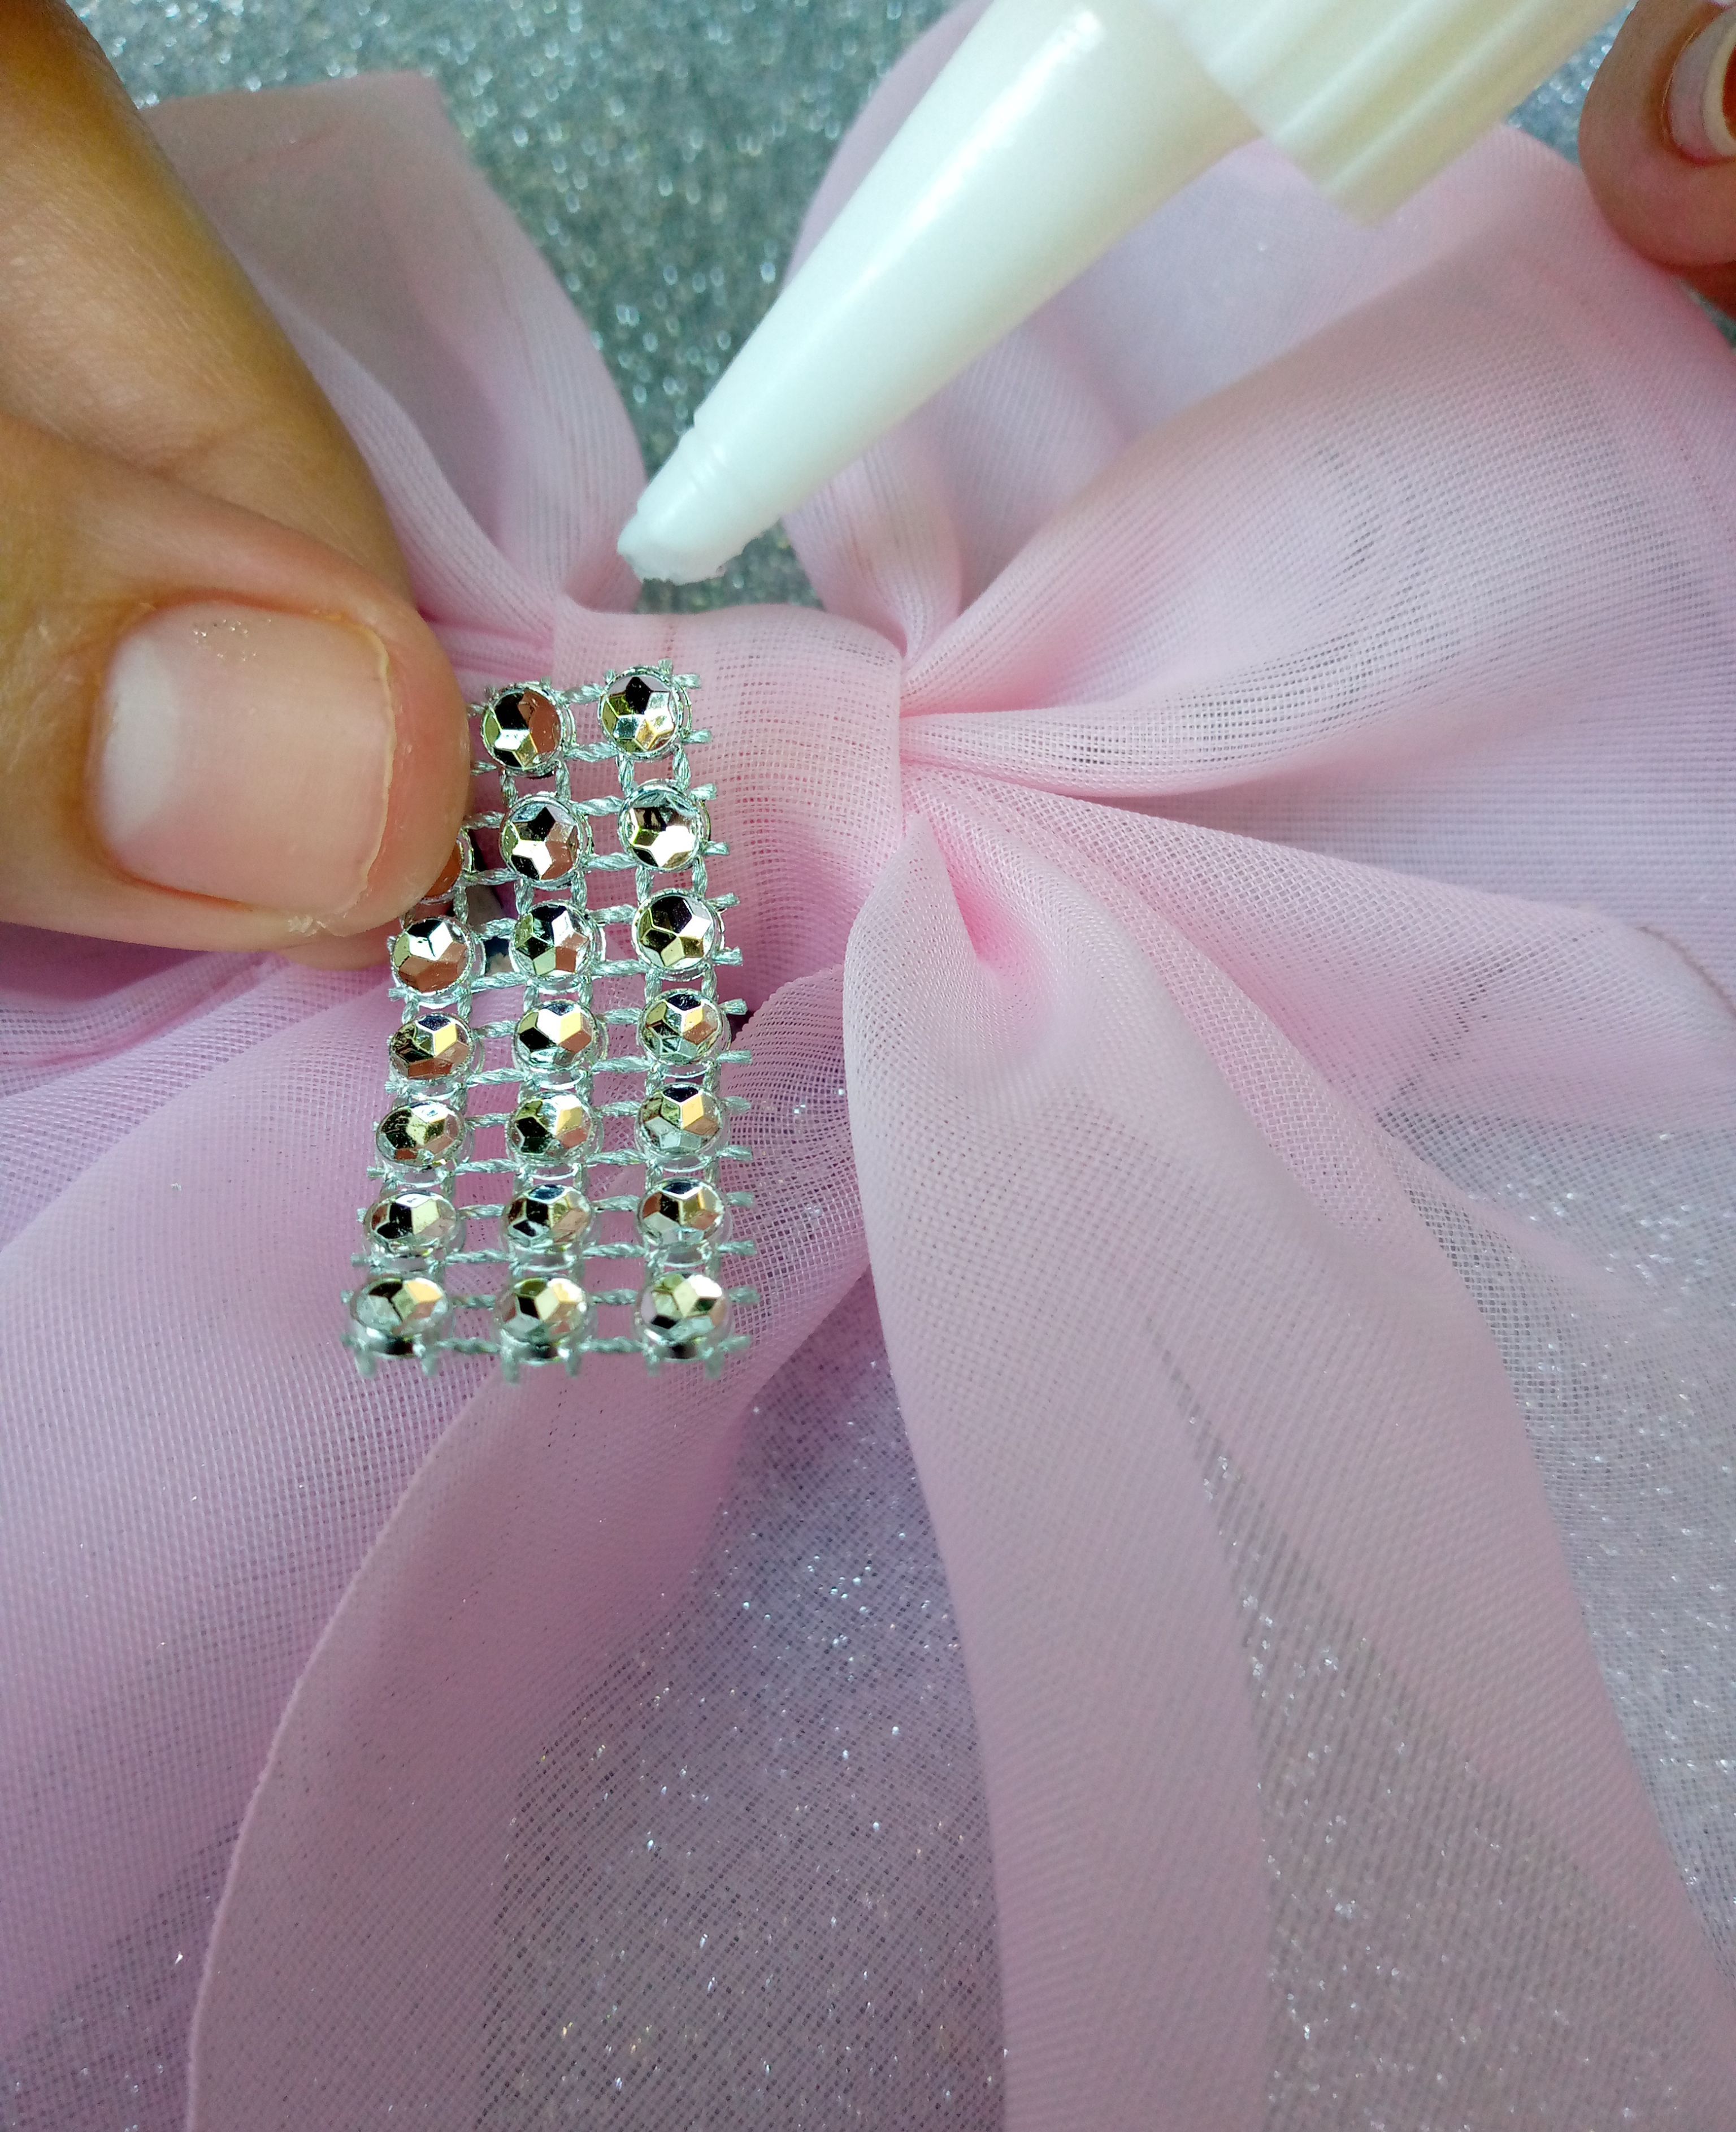
Una vez tengamos nuestro lazo listo lo decoramos como más queramos ,en esta oportunidad yo le voy a colocar un detalle plateado que puedes encontrar en cualquier tienda de mercerias de la zona y listo nuestro ¡Lacito Coquette está terminado!.
Step 06:
Once we have our bow ready, we decorate it however we want. This time I am going to add a silver detail that you can find in any haberdashery store in the area and that's it, our Coquette Bow is finished!
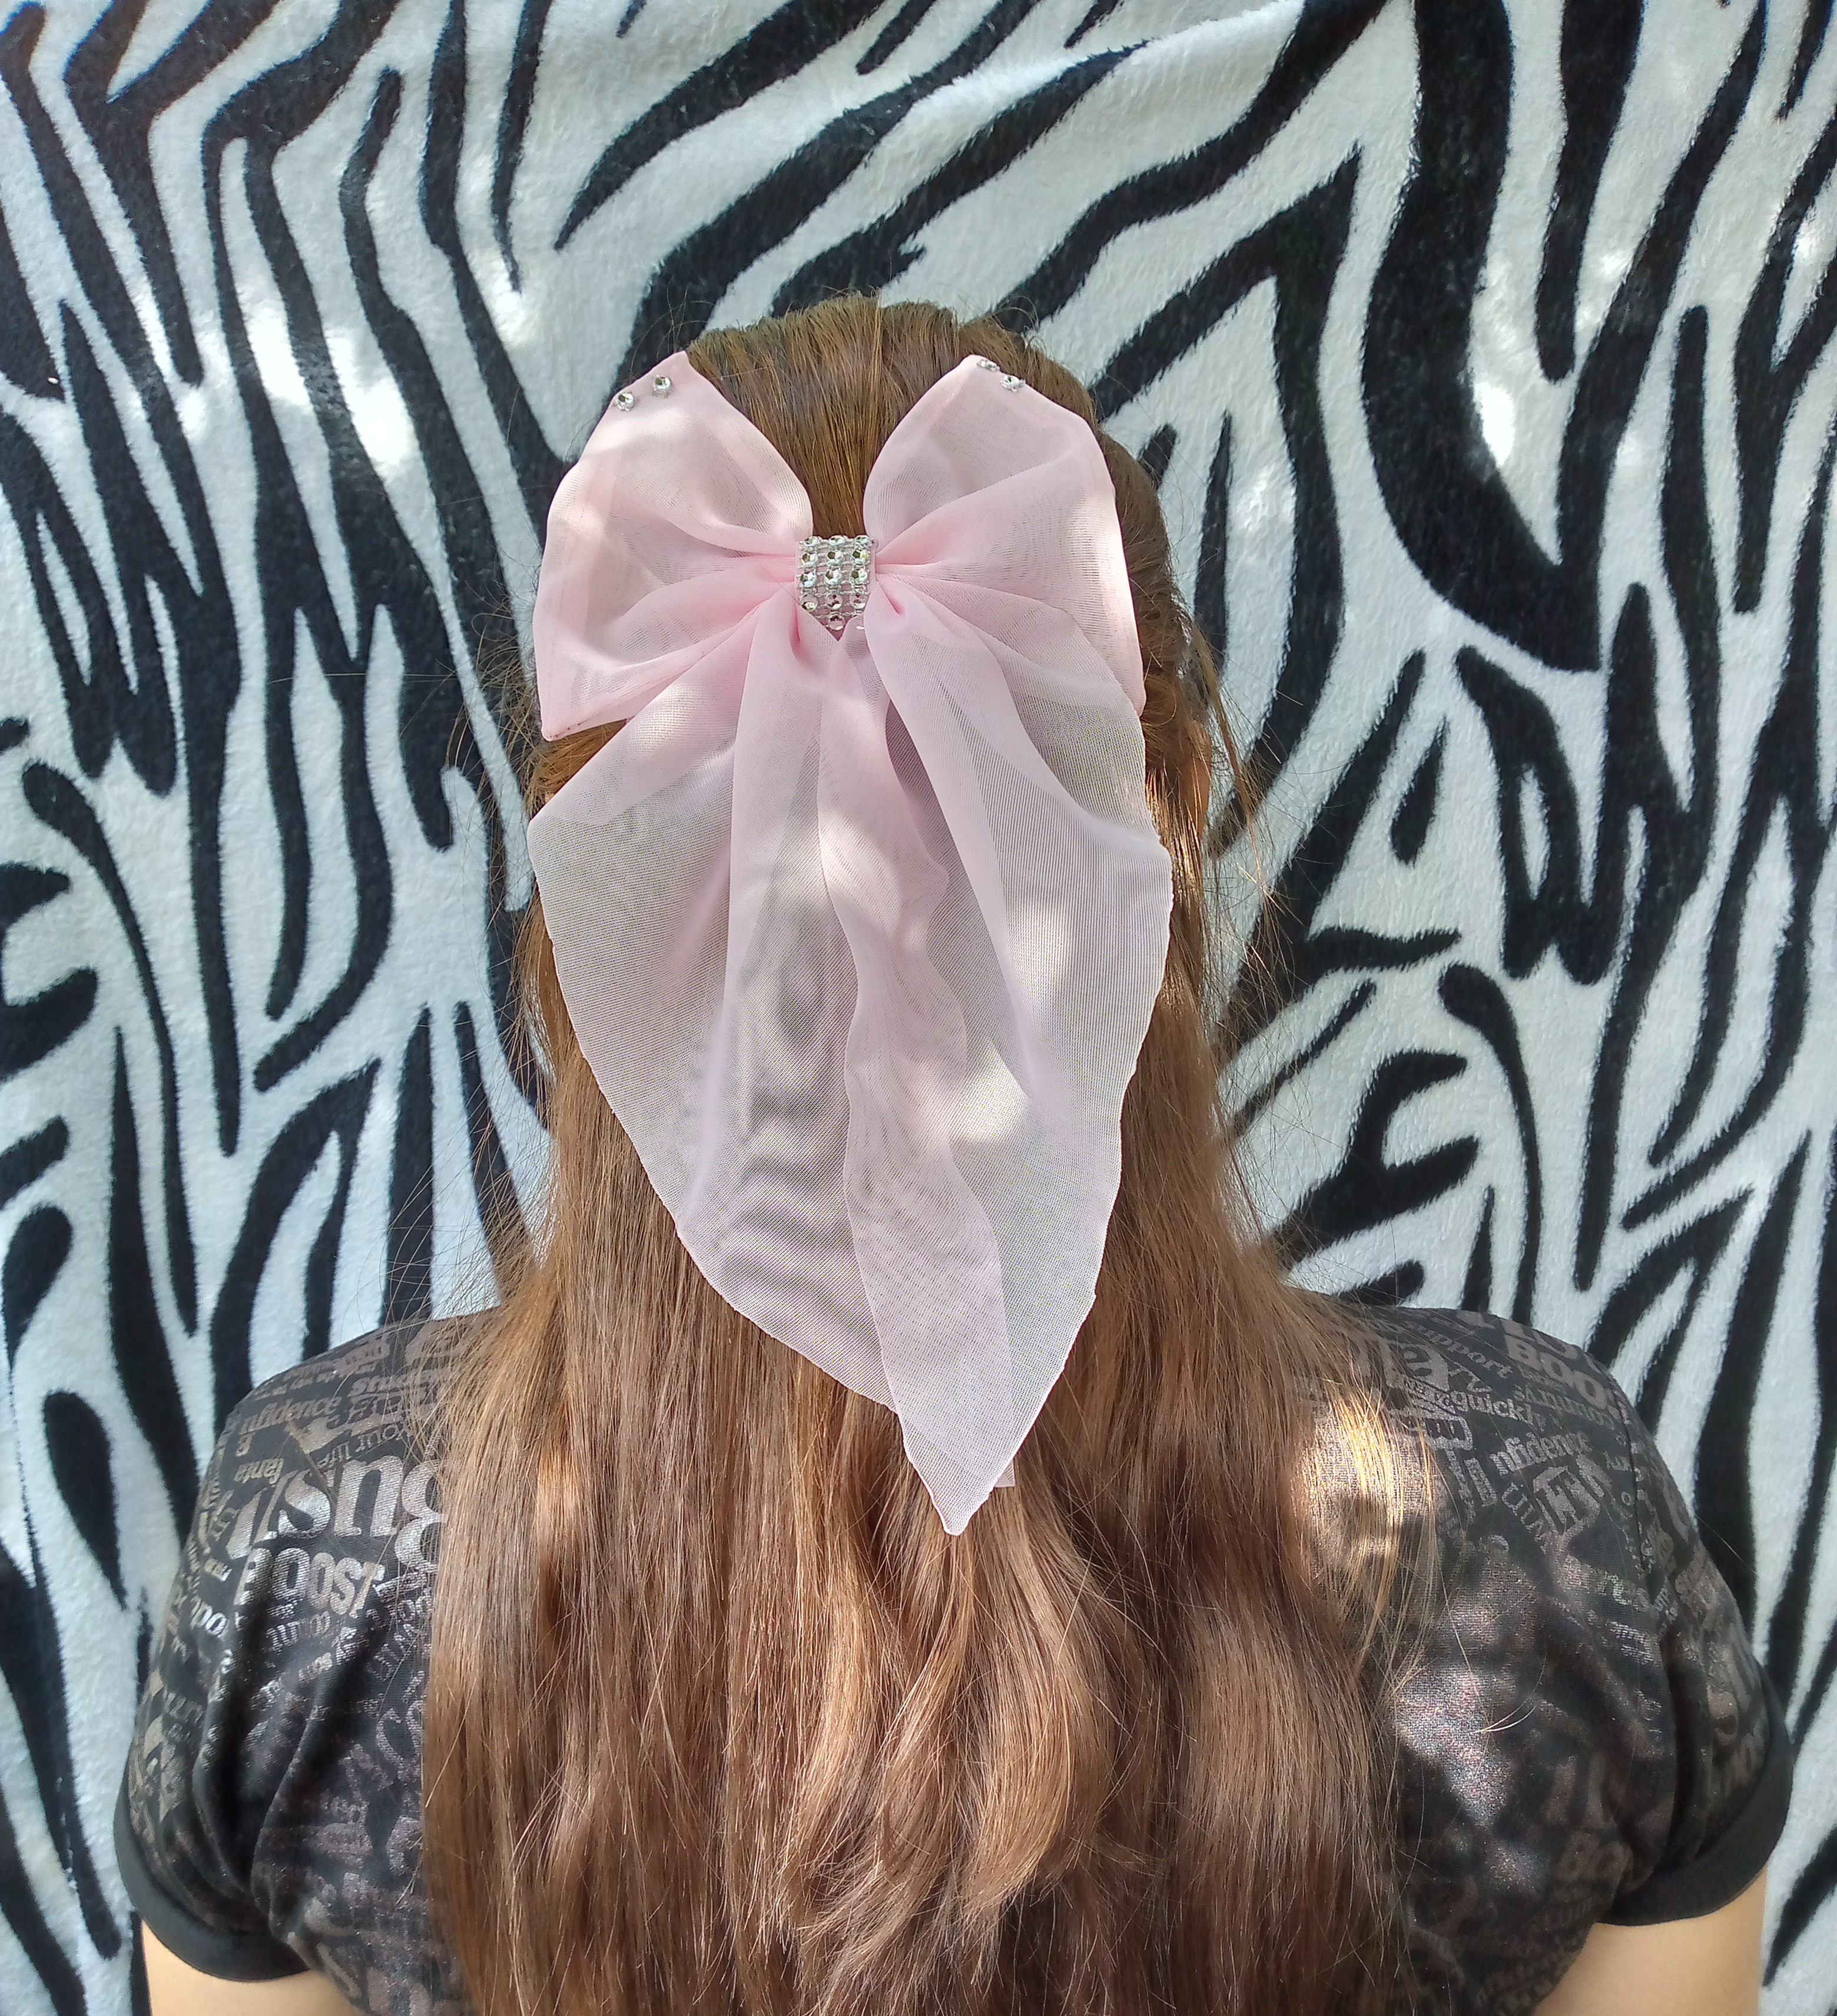
🎀Resultado!🎀
Aquí les dejó el resultado de este hermoso lacito que puede convertirse en un bonito regalo que puedes hacer , también para las pequeñas de la casa que disfrutan de lucir hermosos detalles pues este podría serlo , disfruté haciendo este lindo trabajo y espero ustedes también lo disfruten y les encante tanto como a mi como vimos es muy sencillo y práctico a la hora de realizarlo espero ustedes lo realicen ,me despido sin más nada que agregar y nos veremos en otra oportunidad con mas ideas ,Dios me los bendiga , Saludos ♡.
Here is the result of this beautiful little bow that can become a nice gift that you can give, also for the little ones in the house who enjoy showing off beautiful details because this could be it, I enjoyed doing this nice job and I hope you enjoy it too and You love it as much as I do, as we saw, it is very simple and practical when it comes to doing it, I hope you do it, I say goodbye without anything else to add and we will see you another time with more ideas, God bless you, Greetings ♡.
0
0
0.000
Bienvenida a Hive, y a esta bella comunidad de artistas de Jewelry.
Que trabajo tan hermoso y delicado nos presentas en tu primera vez por acá, espero verte muchísimo mas transitando por este maravilloso mundo donde puedes crear y compartir tus talentos y lo que en realidad amas hacer.
Te deseo muchos éxitos y bendiciones.
Gracias por regalarnos este proceso creativo, estoy a la orden por acá en lo que este en mis manos.
Saludos @anne002
!diy
!discovery 40
Gracias por tu bienvenida me emociona la idea de publicar tutoriales donde todos aprendemos a hacer realidad lo que tenemos en mente ,saludos una vez mas gracias por tus alentador comentario 🤗
This post was shared and voted inside the discord by the curators team of discovery-it
Join our Community and follow our Curation Trail
Discovery-it is also a Witness, vote for us here
Delegate to us for passive income. Check our 80% fee-back Program
Que bonito te quedó, felicitaciones 😉
Gracias hermosa te haya gustado mi trabajo 😊🎀❤️
You can query your personal balance by
!DIYSTATSA very elegant and beautiful work, full of great delicacy. Thank you for giving us this nice step by step, with such a beautiful final result. Best wishes
Thank you very much for your encouraging comments.♡♡
¡Felicidades! Esta publicación obtuvo upvote y fue compartido por @la-colmena, un proyecto de Curación Manual para la comunidad hispana de Hive que cuenta con el respaldo de @curie.
Si te gusta el trabajo que hacemos, te invitamos a darle tu voto a este comentario y a votar como testigo por La Colmena.
Si quieres saber más sobre nuestro proyecto, te invitamos a acompañarnos en nuestro servidor de Discord.
We welcome you to our beautiful community of artists, A beautiful coquette bow, surely if it is in trend and the color is tender and the best is special and this is how it looks on the model, great job 😉
a community encouraging first-hand content, and each individual living their best life.
Congratulations @anne002! You have completed the following achievement on the Hive blockchain And have been rewarded with New badge(s)
Your next target is to reach 800 upvotes.
Your next target is to reach 50 replies.
You can view your badges on your board and compare yourself to others in the Ranking
If you no longer want to receive notifications, reply to this comment with the word
STOPHola, bienvenida a nuestra hermosa comunidad. Te quedo muy bonito el lazo 😊