💍💙Joyero de corazón con foami brillante y lentejuelas💙💍//💍💙heart jewelry box with shiny foam and sequins💙💍
hola linda comunidad espero la estén pasando súper este dia,quería compartir con ustedes una linda manualidad sencilla que hice recientemente,y bien organizando mis joyas estos días me di cuenta que necesitaba organizar mis cadenas aparte así que me decidí hacer este lindo joyero en forma de corazón ideal para guardar cadenas ,anillos aretes entre otras cositas,es por eso aquí les dejo el paso a paso para que ustedes también lo realicen.asi que vamos ¡Manos a la obra! .😍💍
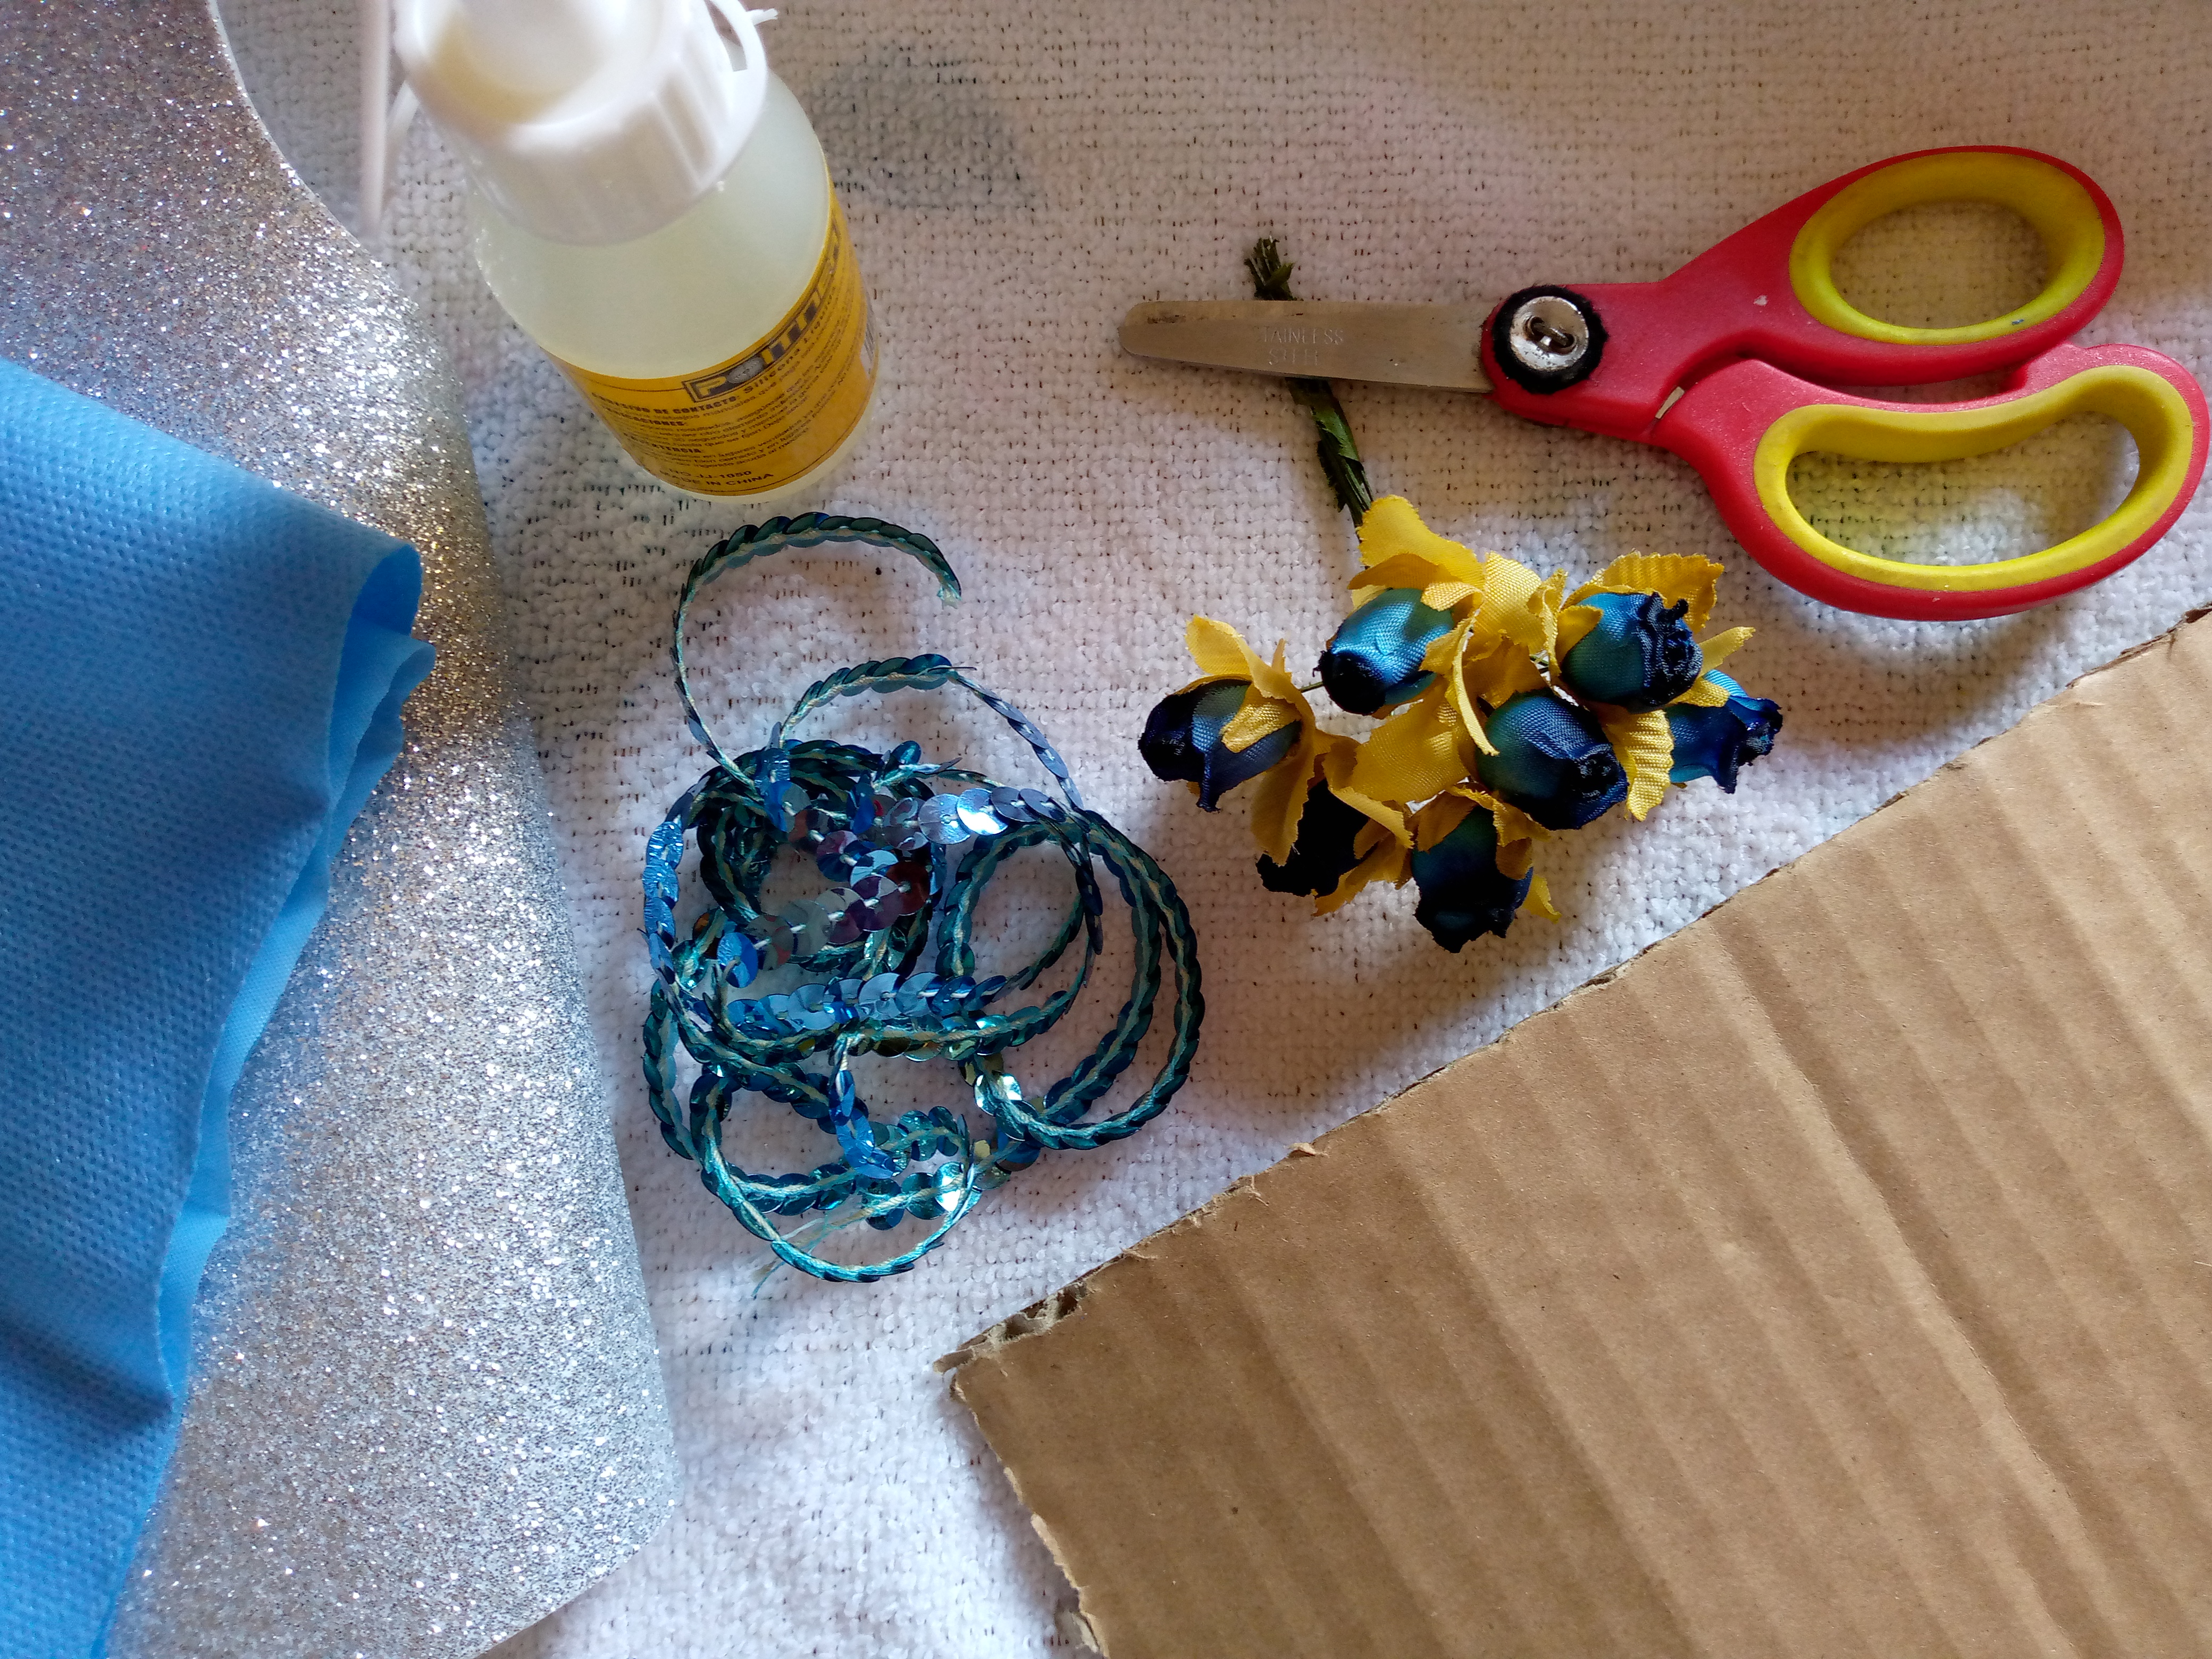
Materiales:
- silicón
- Cartón
- Tijeras
- Foami brillante plateado
- Flores artificiales
- Lentejuelas azules
- Tela
💙(Pasos a seguir.)💙
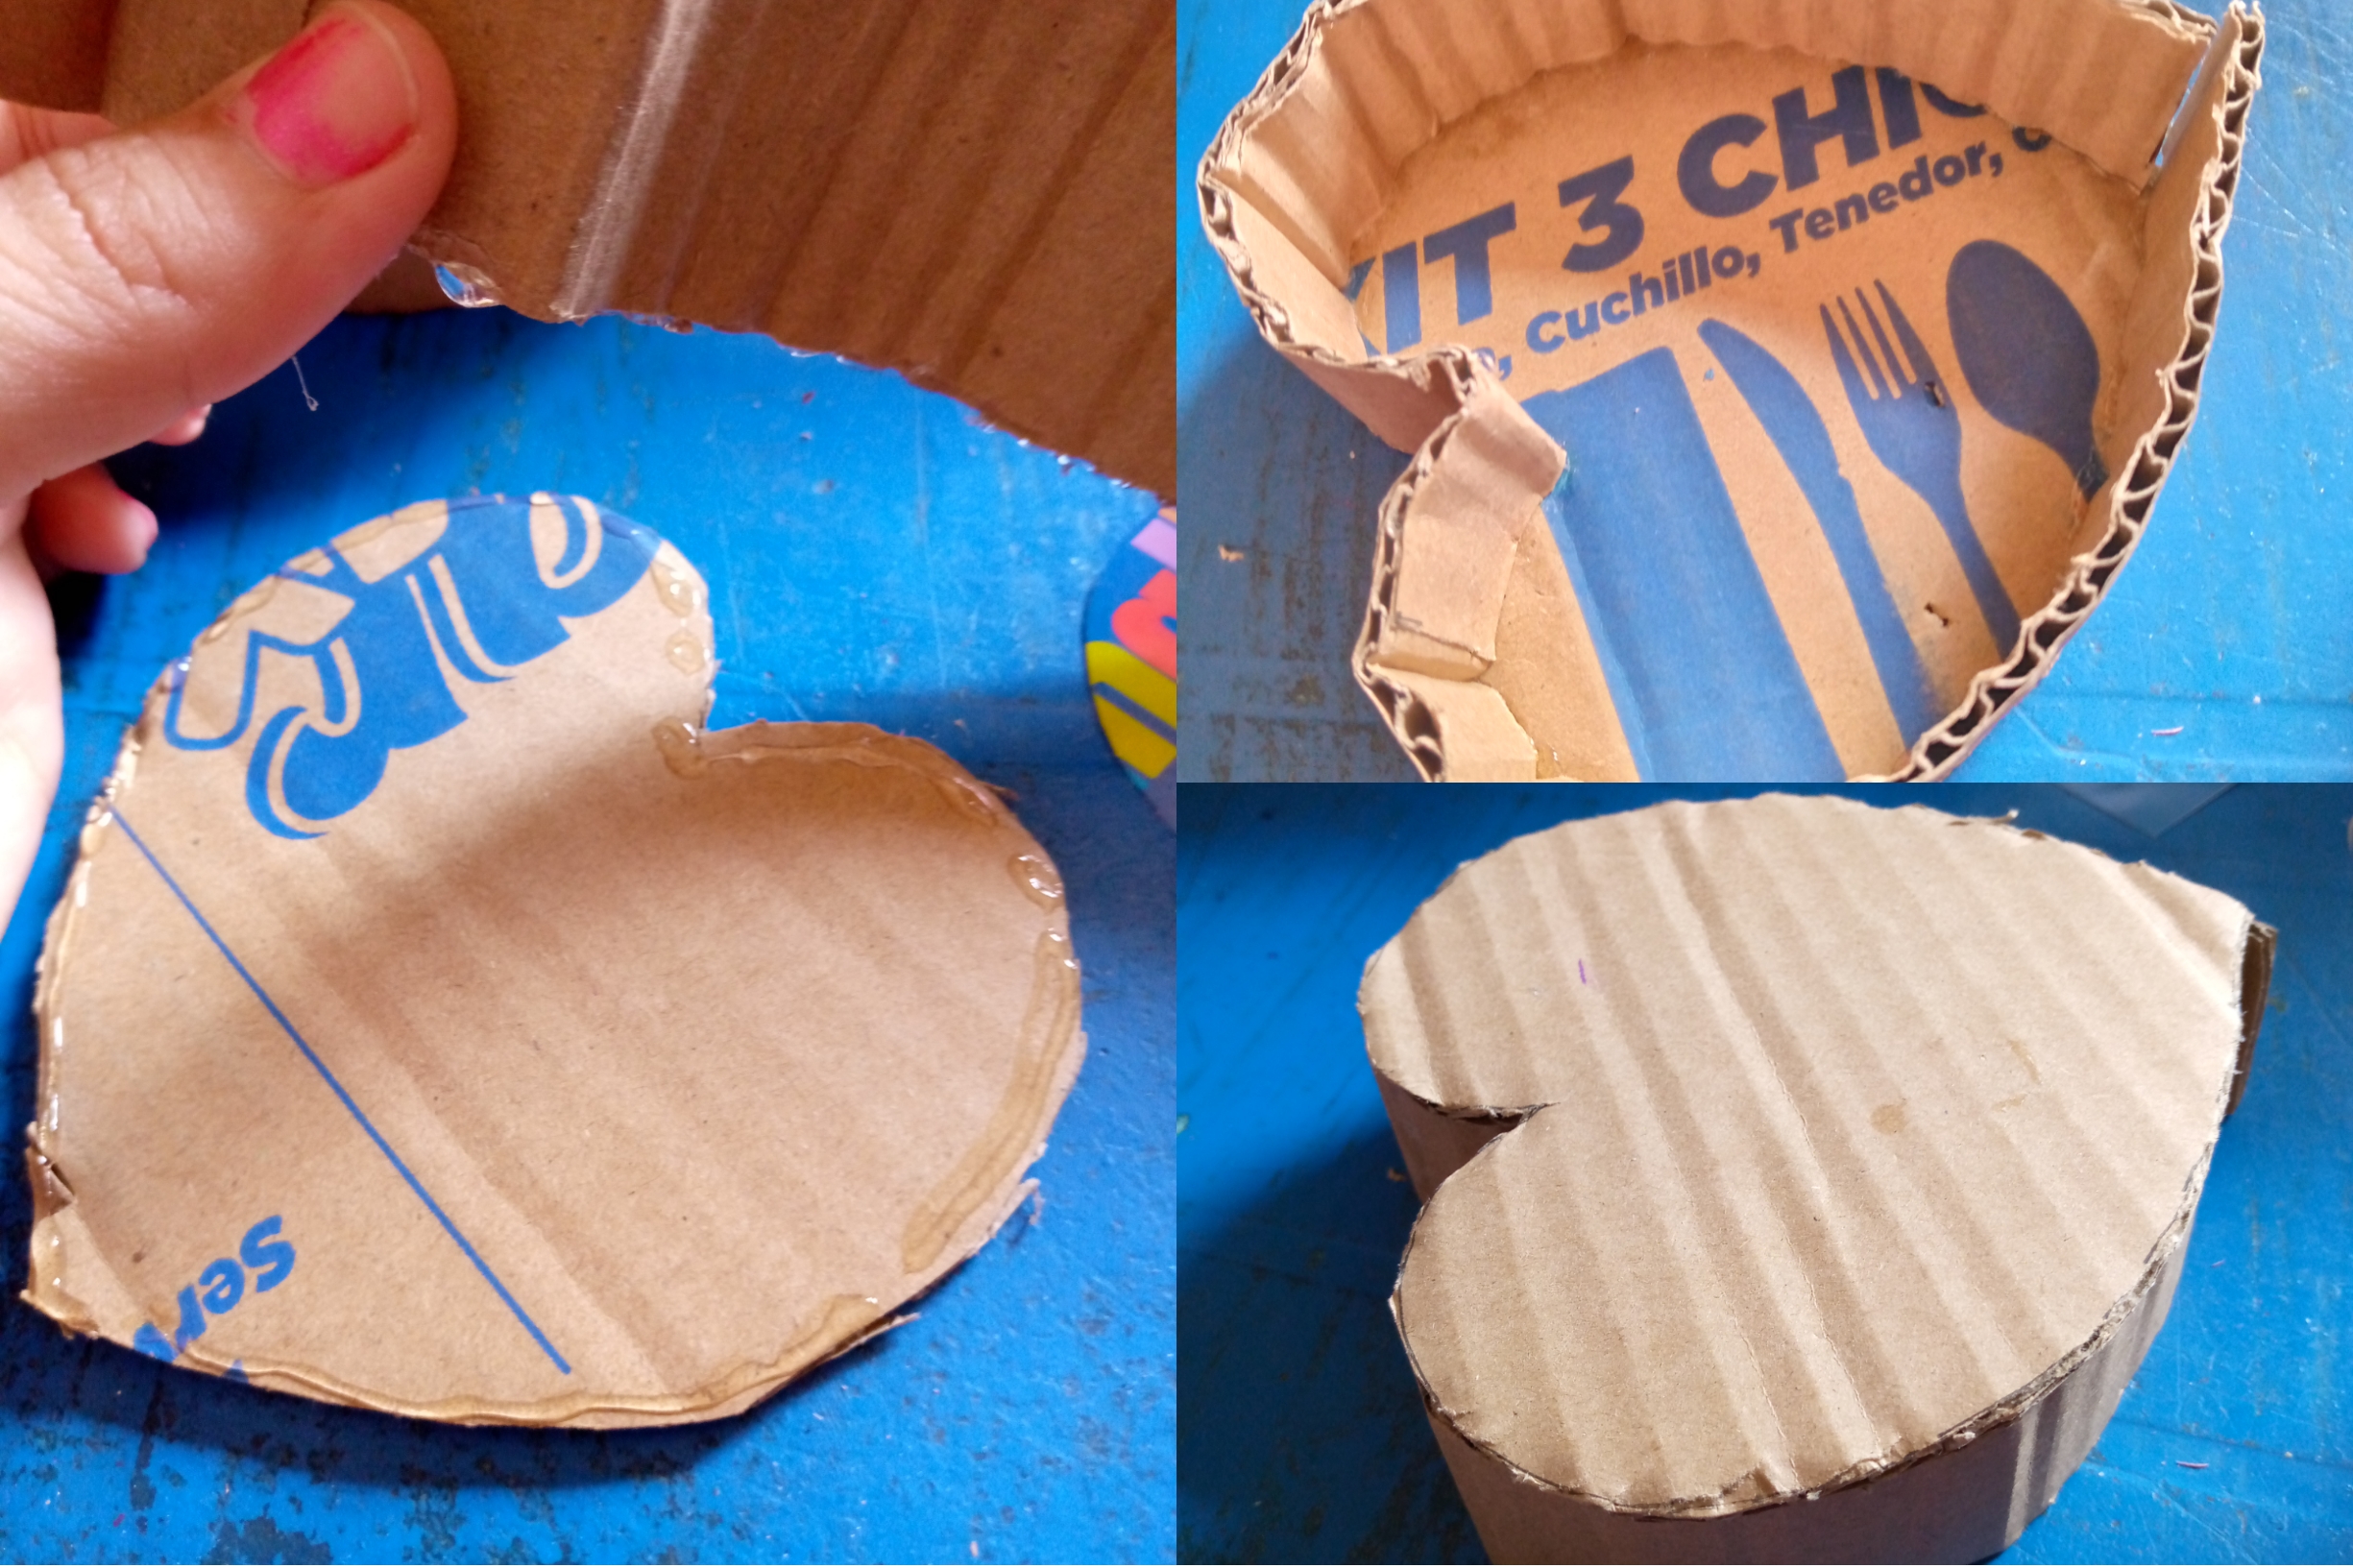
Paso 01
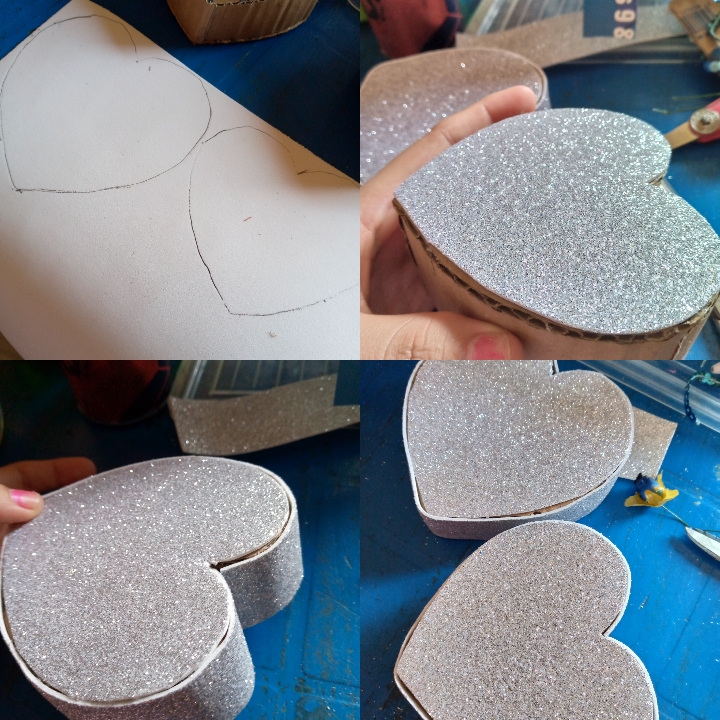
Comenzamos marcando nuestros patrones en el cartón,es por ello que acá yo les dejaré las medidas exactas para que puedan realizar su molde antes de cortar en el cartón (corazón base : 10.5 cm ancho x 10 cm largo,Corazón tapa: 11 cm ancho x 11.5 cm de largo,contorno de la tapa 37 cm ancho x 3 cm largo ,contorno de base: 35 cm ancho x 5 cm largo),cuando ya tengamos nuestros patrones marcados procedemos a cotar las piezas.
.jpg)
.jpg)
Paso 02
Después de cortar los moldes vamos a pegar y unir las piezas con nuestro silicón,la tapa con el contorno y la base con el contorno así como se muestra en las siguientes imágenes.
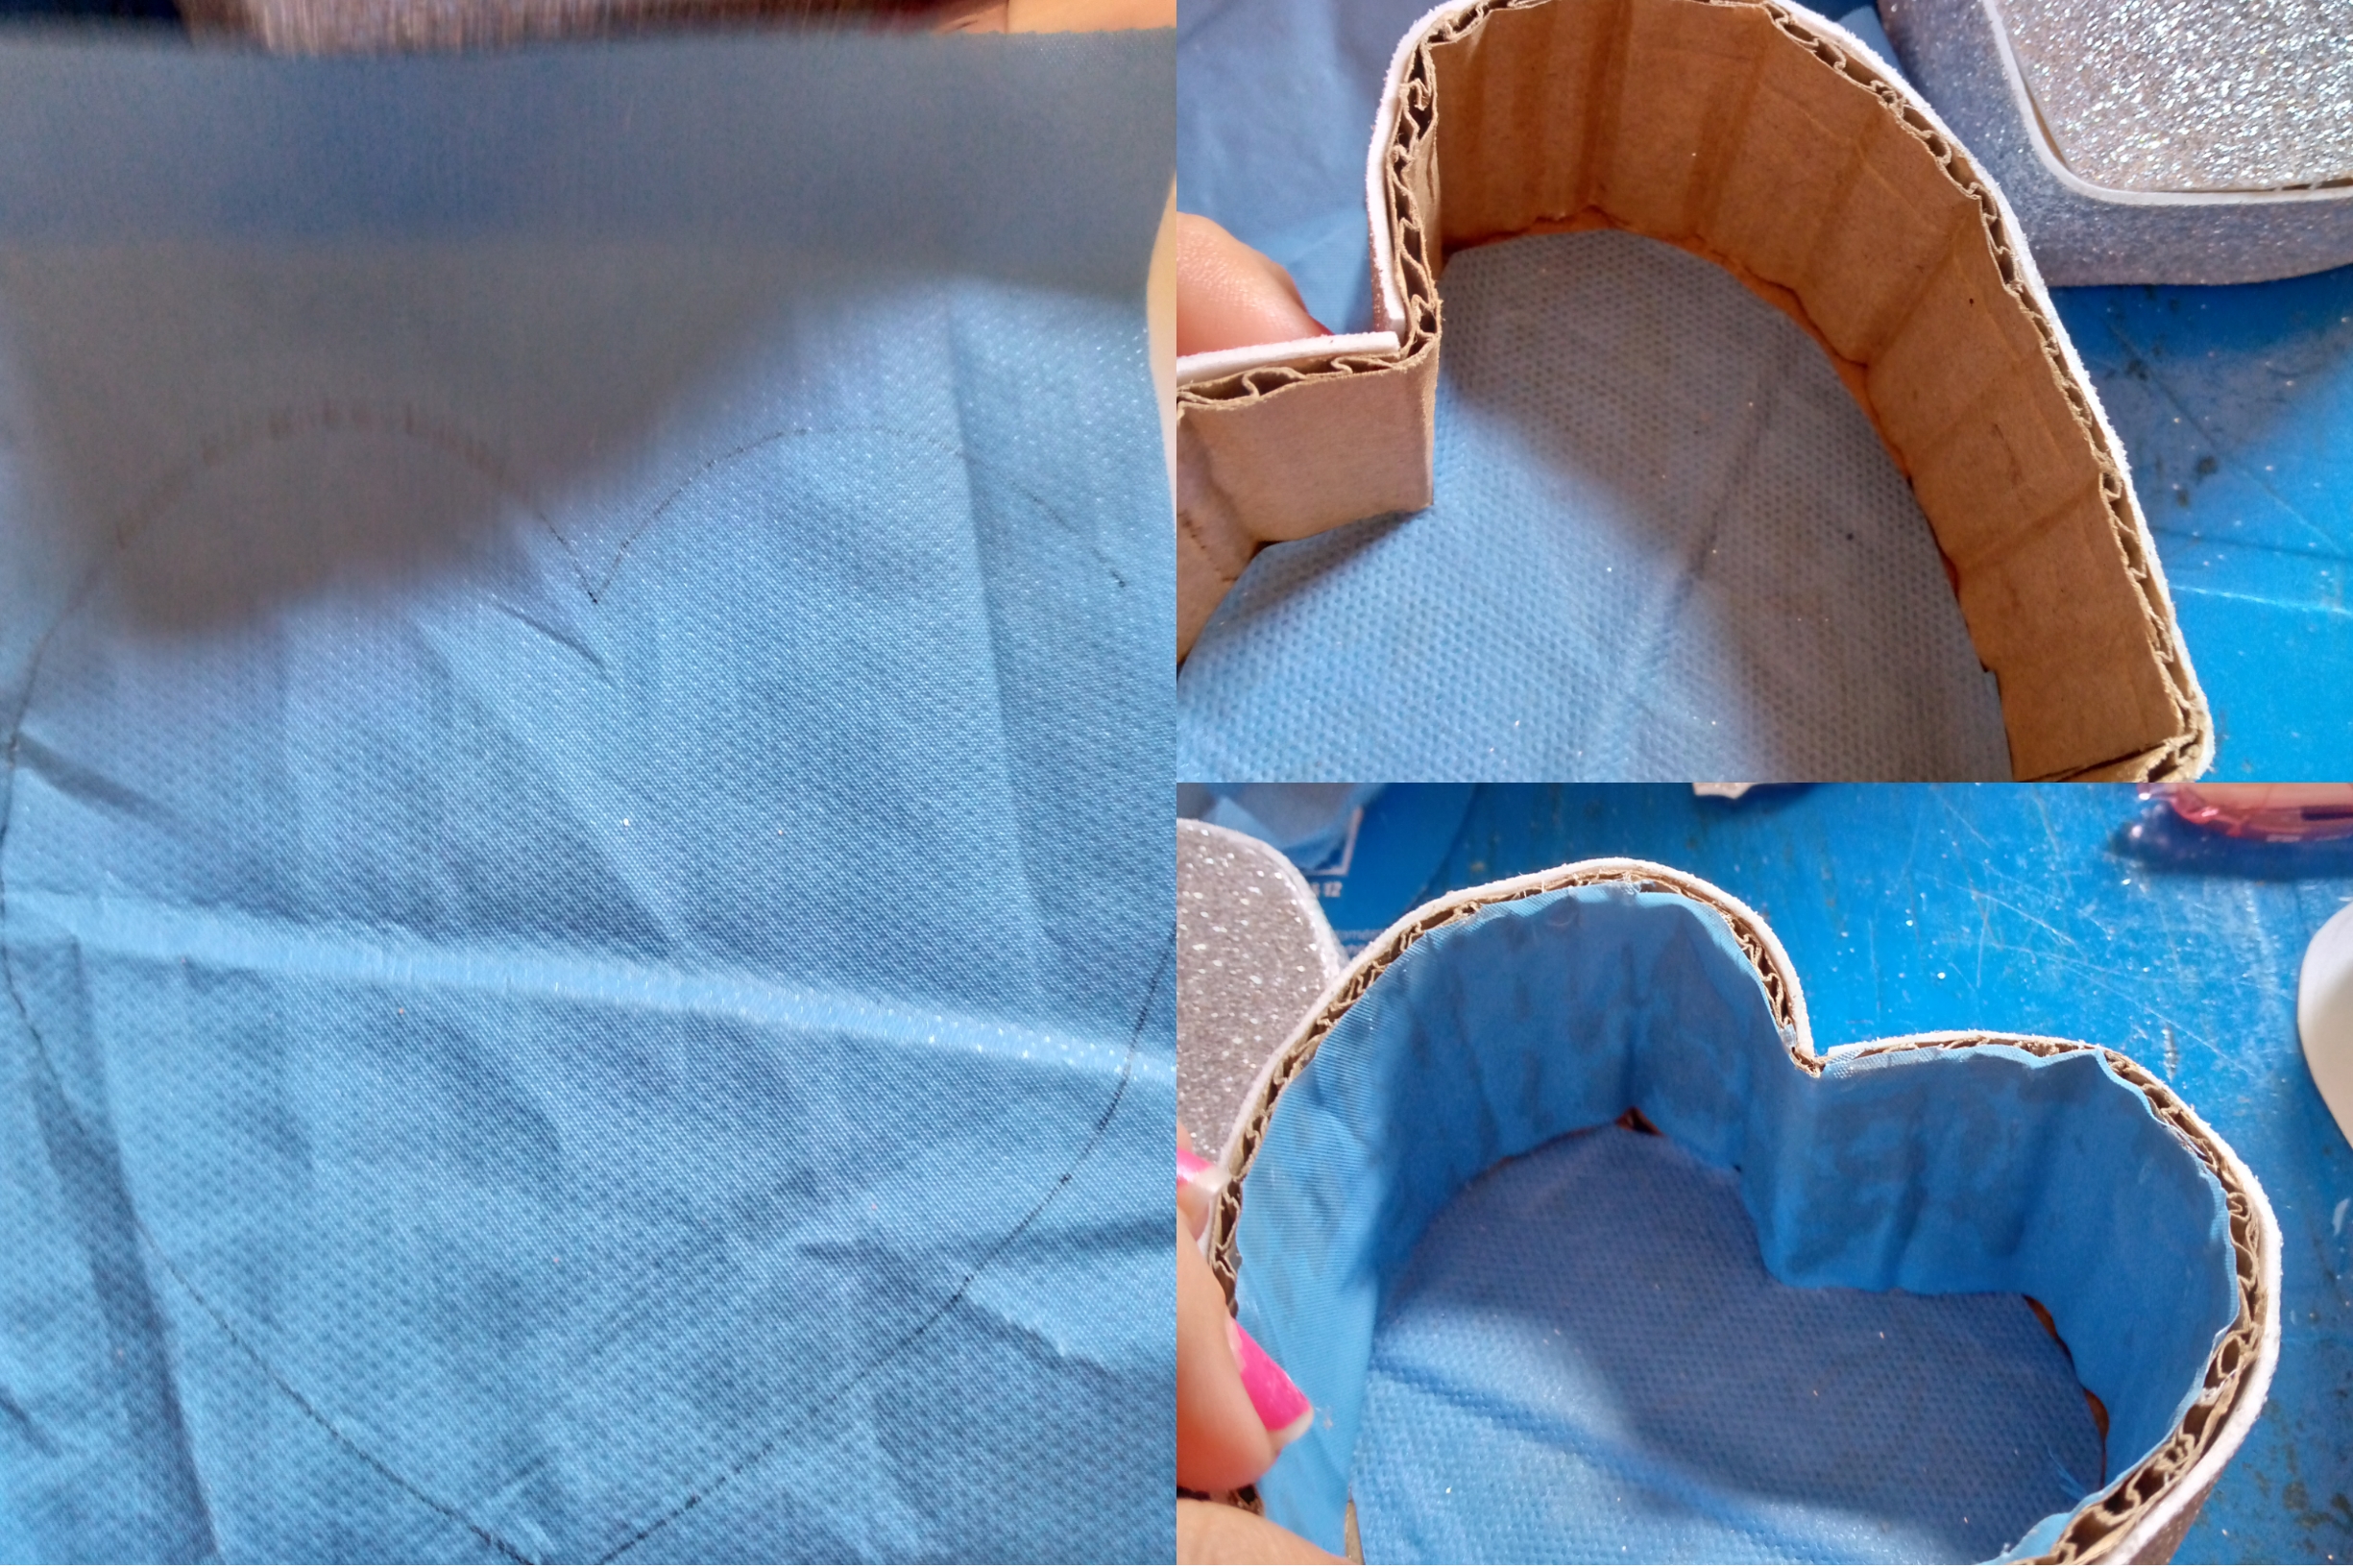
Paso 03
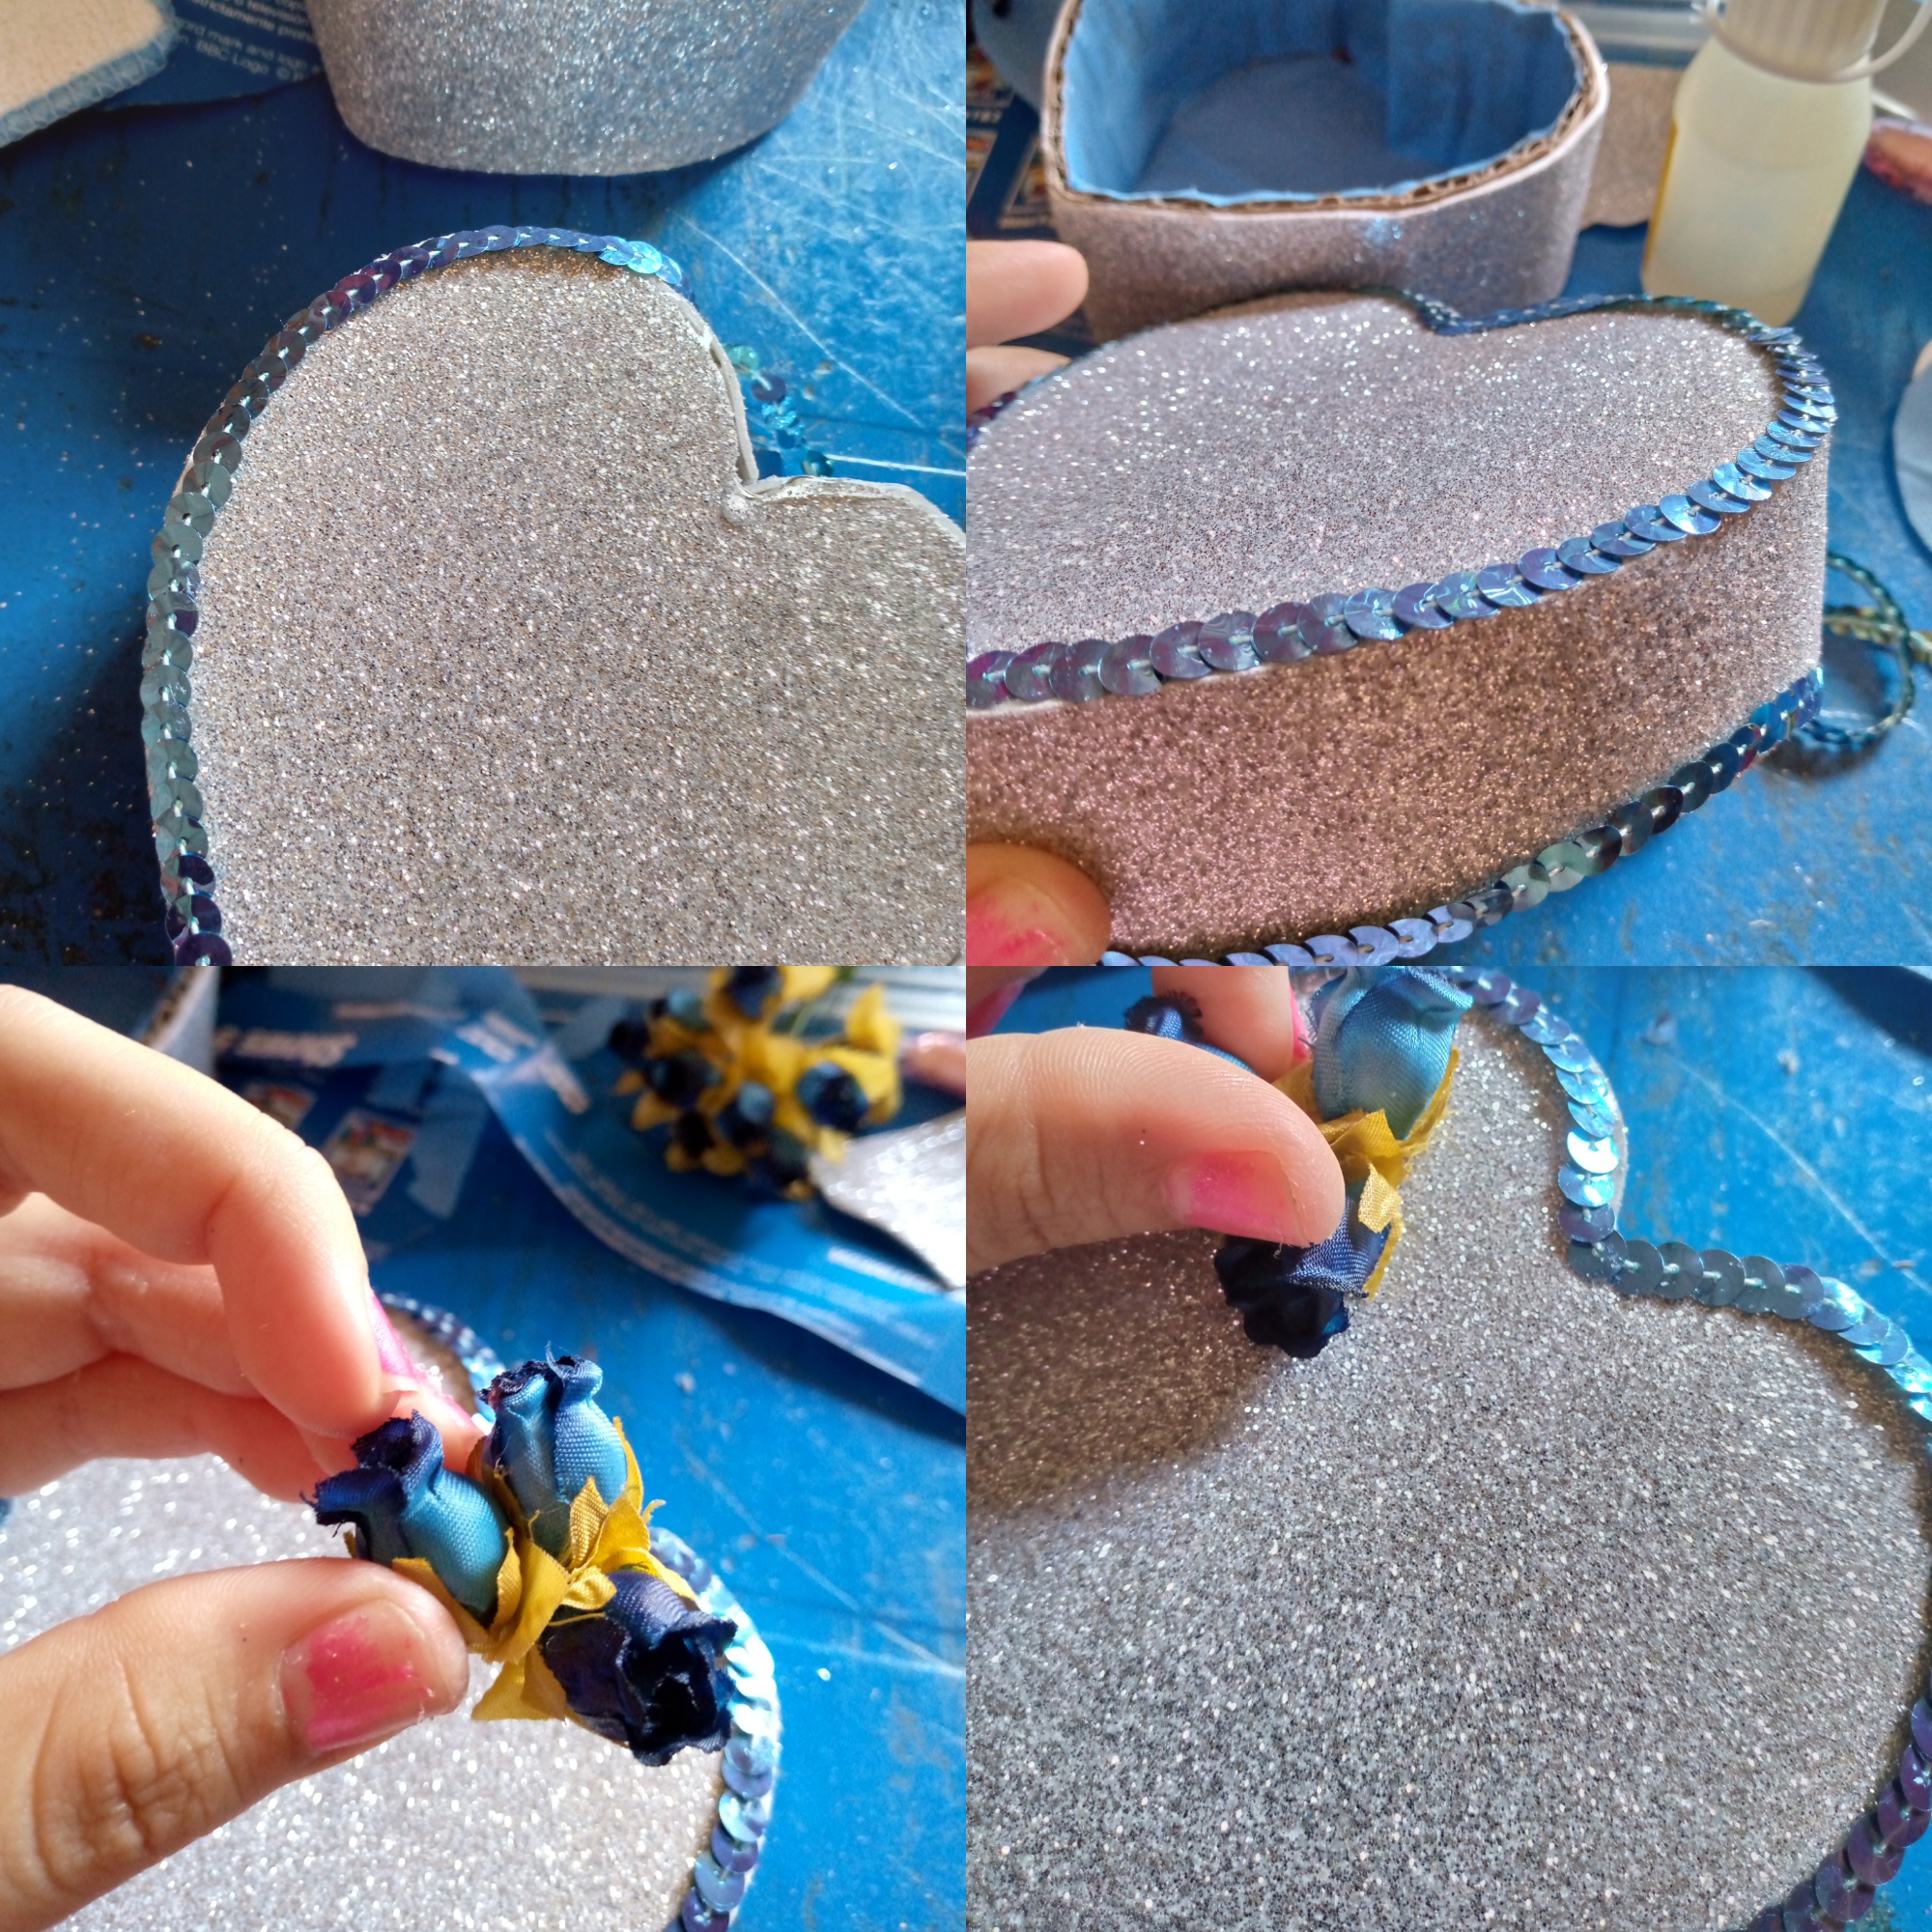
Una vez tengamos nuestro joyero armado procederemos a forrarlo por dentro con nuestra tela ,marcamos los patrones a la tela ,cortamos y pegamos por dentro de cada pieza armada.
Paso 04
Como cuarto paso seguimos forrando por fuera nuestro joyero con el foami brillante,marcamos las piezas en el foami recortamos y vamos pegando las piezas con cuidado y haciendo un poco de presión para que se adhiera bien las piezas al cartón.
Paso 05
Como último y divertido paso nos toca decorar a nuestro gusto nuestro joyero ,en este caso yo usé algunas lentejuelas y las coloqué alrededor de la tapa,esto es necesario ya que cubrirá los remates del foami y asi no se apreciará las grietas ,puedes usar encaje, pasa cinta, o cualquier diseño que sea bonito para decorar, también le coloqué un ramo de florecillas artificiales para darle un toque más vintage y listo terminamos nuestro joyero.
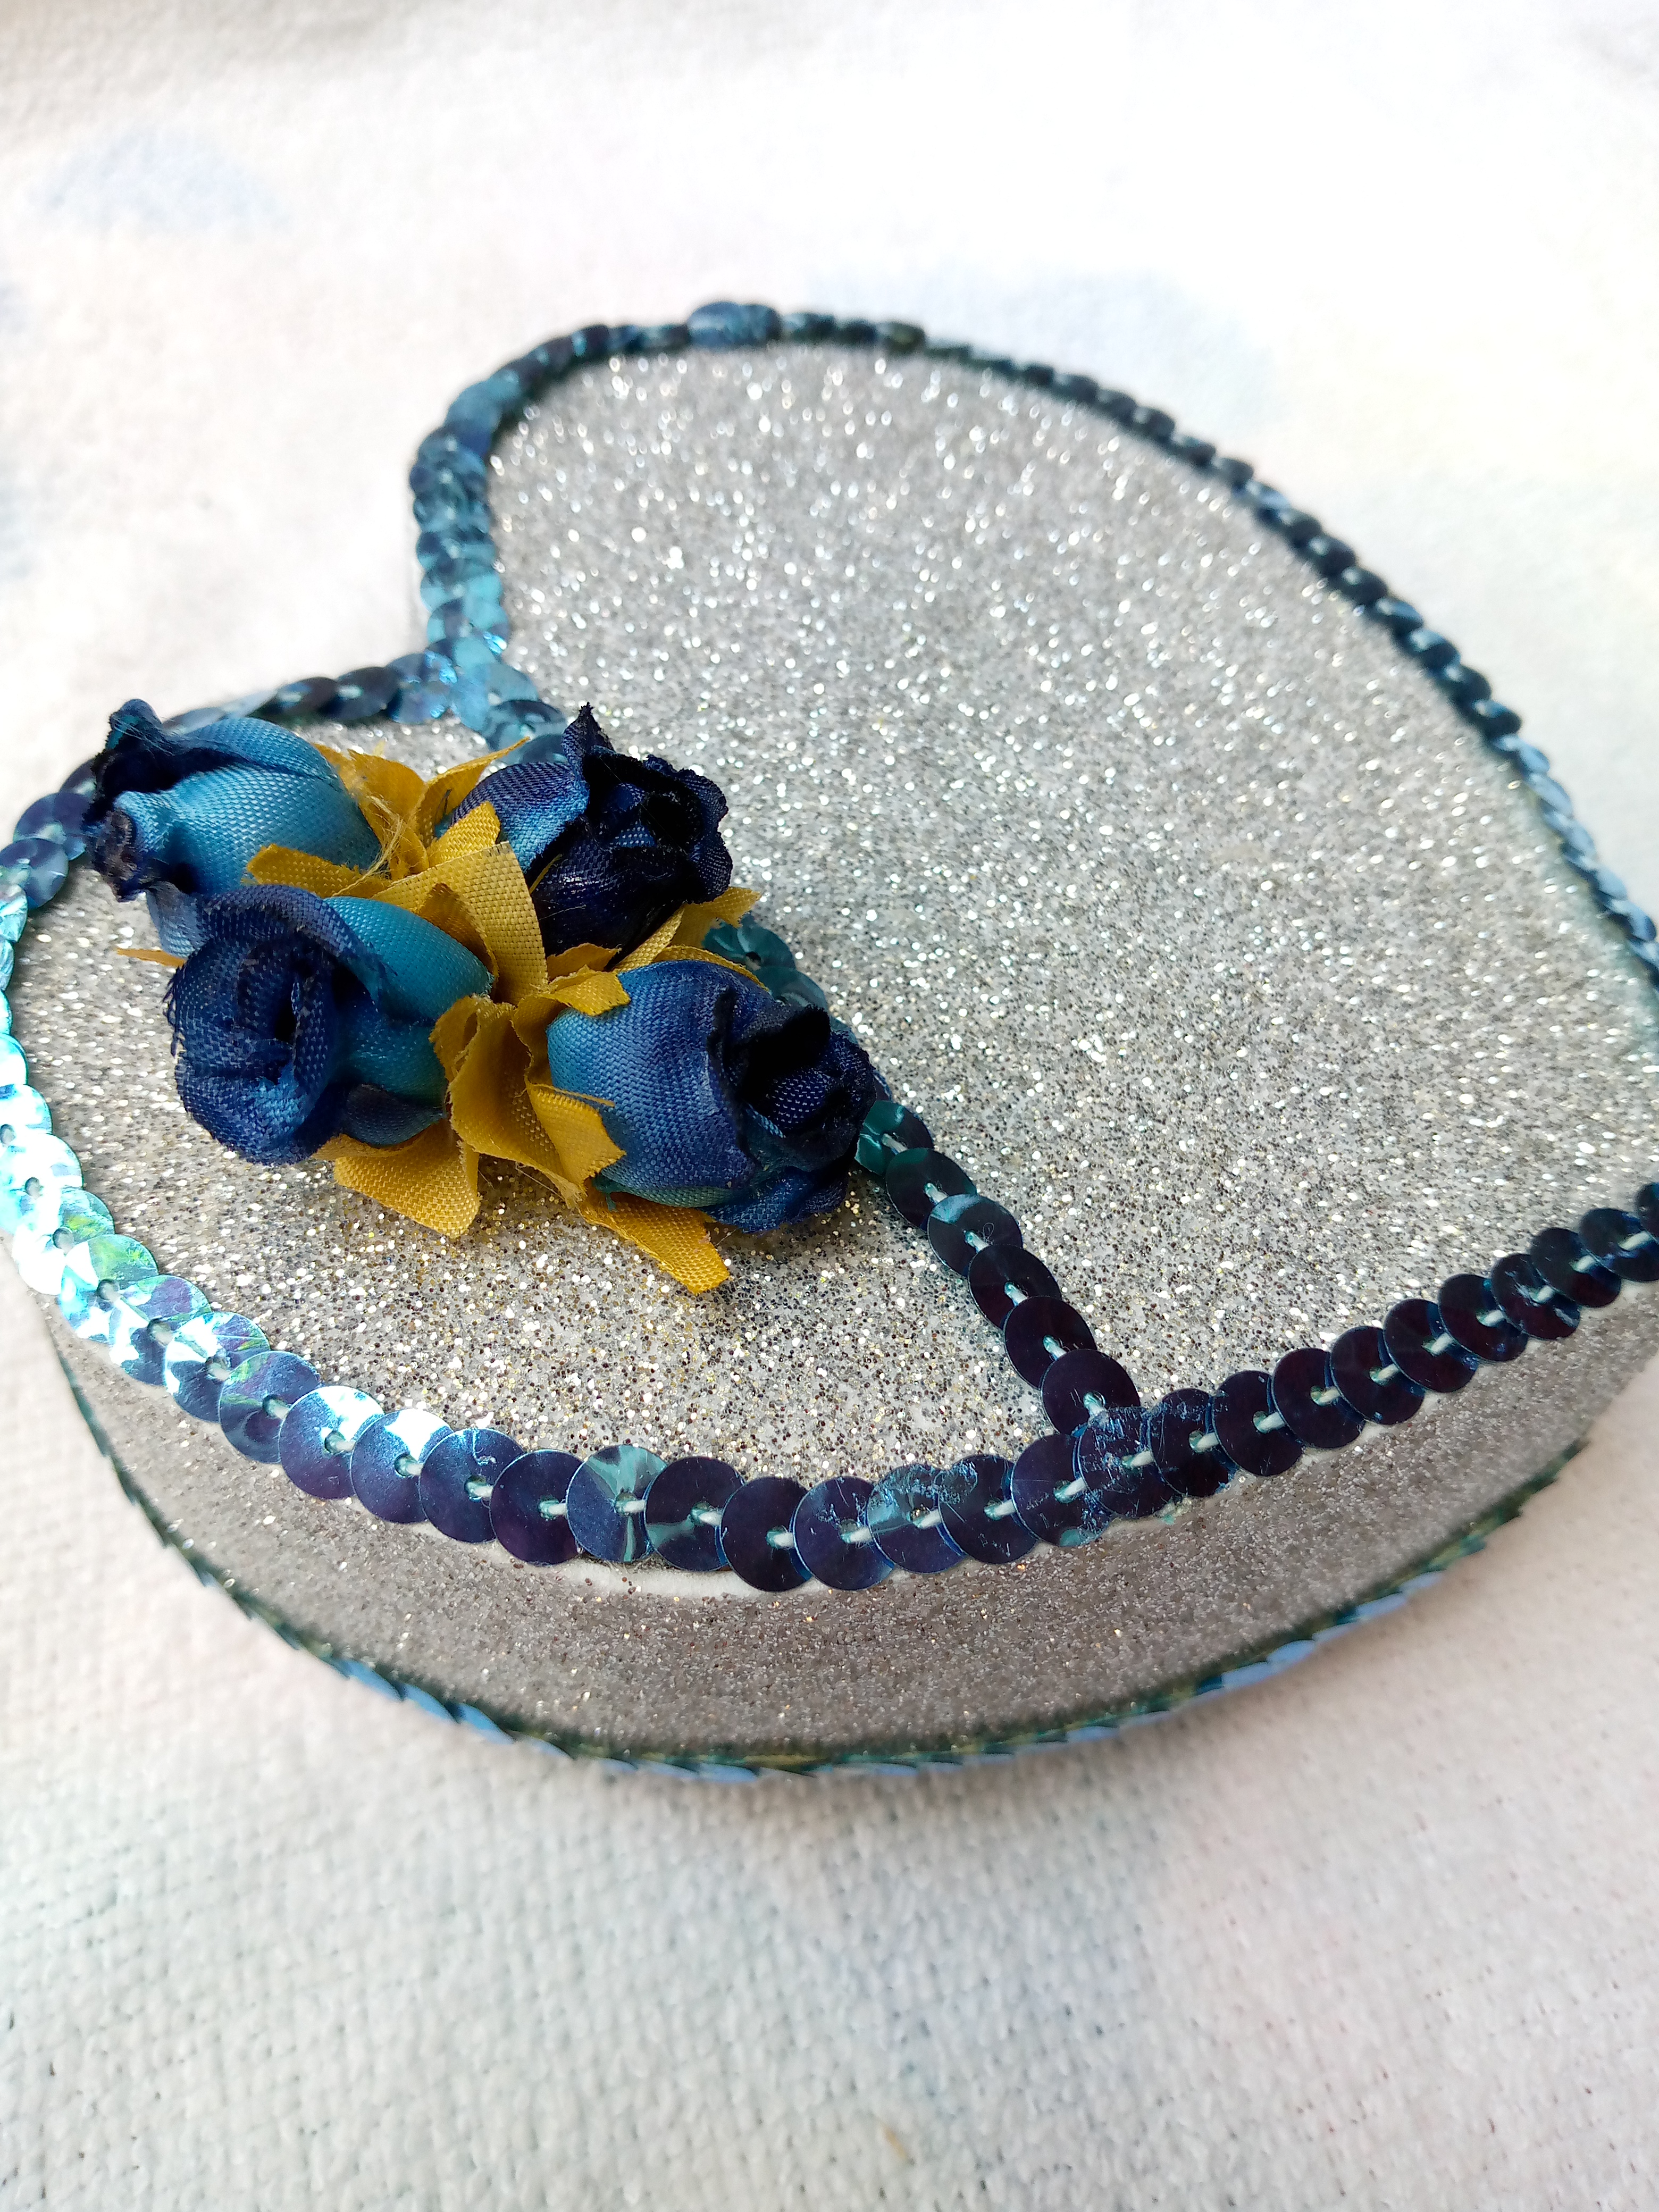
💙¡Resultado!💙
Este hermoso joyero se puede convertir en un hermoso y lindo regalo ,puedes regalarlo a tu abuela tu mami o cualquiera otra chica que le encante tener sus joyas ordenadas y en un sitio ,a mi me encantó mucho el resultado,espero a ustedes también lo hagan , gracias por llegar hasta aquí y tomarte tu tiempo de leer mi blog ,aprecio mucho tu apoyo y nos veremos en otro próximo tutorial de cositas como estás y reciclaje,tengan una exelente semana adiós amigos de Hive .🥰💙


Hello beautiful community, I hope you are having a great time this day, I wanted to share with you a nice simple craft that I did recently, and while organizing my jewelry these days I realized that I needed to organize my chains separately so I decided to make this cute jewelry box in heart shape ideal for storing chains, rings, earrings among other things, that is why here I leave you the step by step so that you can do it too. So let's get to work! .😍💍
Materials:
- silicone
- Cardboard
- Scissors
- Silver shiny foami
- Artificial flowers
- blue sequins
- Fabric
(Steps to follow.)
Step 01
We begin by marking our patterns on the cardboard, that is why here I will leave you the exact measurements so that you can make your mold before cutting on the cardboard (base heart: 10.5 cm wide x 10 cm long, Lid heart: 11 cm wide x 11.5 cm long, lid contour 37 cm wide x 3 cm long, base contour: 35 cm wide x 5 cm long), when we have our patterns marked we proceed to measure the pieces.
Step 02
After cutting the molds we are going to glue and join the pieces with our silicone, the lid with the outline and the base with the outline as shown in the following images.
Step 03
Once we have our jewelry box assembled, we will proceed to line it inside with our fabric, we mark the patterns on the fabric, we cut and glue the inside of each assembled piece.
Step 04
As a fourth step, we continue lining the outside of our jewelry box with the shiny foam, we mark the pieces on the foam, we cut out and we glue the pieces carefully and applying a little pressure so that the pieces adhere well to the cardboard.
Step 05
As a last and fun step we have to decorate our jewelry box to our liking, in this case I used some sequins and placed them around the lid, this is necessary since it will cover the ends of the foam and so the cracks will not be visible, you can use lace , pass ribbon, or any design that is beautiful to decorate, I also placed a bouquet of artificial flowers to give it a more vintage touch and that's it we finished our jewelry box.
💙Result!💙
This beautiful jewelry box can be turned into a beautiful and cute gift, you can give it to your grandmother, your mom or any other girl who loves to have her jewelry organized and in one place, I really loved the result, I hope you do too Thank you for coming this far and taking your time to read my blog, I really appreciate your support and we will see you in another next tutorial on things like you are and recycling, have a great week goodbye Hive friends. 💙🥰
0
0
0.000
Quedo muy bonito tu trabajo @anne002, delicado y muy prolijo. Te felicito, este es un joyero con materiales reciclables que muchos podemos hacer para obsequiar o tener en casa para uso personal. Bello, bello...
!diy
!discovery 40
This post was shared and voted inside the discord by the curators team of discovery-it
Join our Community and follow our Curation Trail
Discovery-it is also a Witness, vote for us here
Delegate to us for passive income. Check our 80% fee-back Program
You can query your personal balance by
!DIYSTATSExcelente tutorial con un paso a paso muy detallado y bien explicado, me encanta el resultado final. Yo no uso joyas jaja pero puede servir para guardar muchisimas cositas mas 😍 me gusaron los colores, el azul me fascina 🦉
Gracias así es puede servir para guardar lo que uno quiera 😇
Saludos, quería felicitarte por tan lindo trabajo.
Gracias por compartirlo.
Congratulations @anne002! You have completed the following achievement on the Hive blockchain And have been rewarded with New badge(s)
Your next target is to reach 1500 upvotes.
You can view your badges on your board and compare yourself to others in the Ranking
If you no longer want to receive notifications, reply to this comment with the word
STOPCheck out our last posts:
¡¡¡Buen trabajo!!! Gracias por publicar tu excelente contenido en Hive Diy, me gusto mucho, se ve llamativo los colores de tu manualidad, excelente trabajo
Tu comunidad artesana ahora es testigo

Super bonito,ese azul está bello🥰