[ESP-ENG] DIY: Original cuadro decorativo de flores y mariposas - Reciclaje || DIY: Original decorative painting with flowers and butterflies - Recycling
Me complace traerles el cuadro que quedó pendiente y que les dije en el post de las mariposas. Digamos que es la segunda parte, aprenderemos a hacer flores con material de desecho.
I am pleased to bring you the painting that was pending and that I told you in the post about butterflies. Let's say it's the second part, we will learn how to make flowers from scrap material.

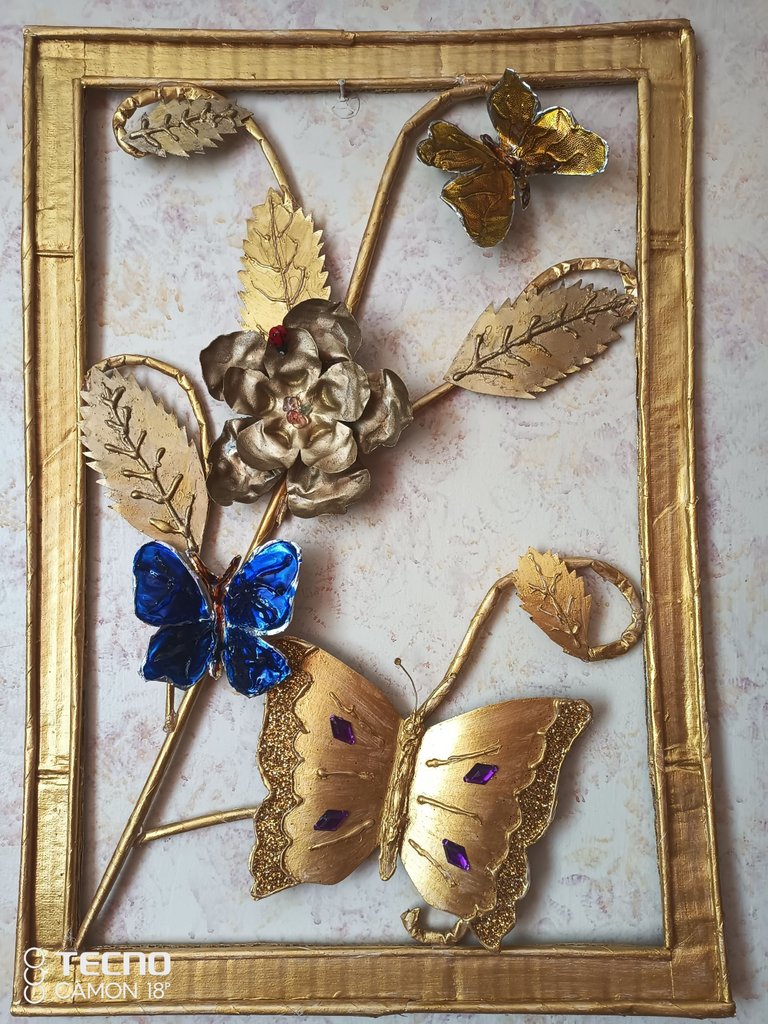
Cuadro de flores y mariposas / Picture of flowers and butterflies
Material
| Material | Material |
|---|---|
| 1 botella plástica grande y otra pequeña | 1 plastic bottles big and small one |
| Tijera | Scissors |
| Pega | Glue |
| Pistola de silicón | Silicone gun |
| Silicón en barra | Silicone stick |
| Plancha para ropa | Clothes iron |
| Pincel | Brush |
| Pintura al frio color dorado | Gold colored cold paint |
| Pinturas vitral color dorado | Gold colored stained glass paints |
| Tubos hechos de papel | Paper tubes |
| Cartón grueso | Thick cardboard |
| Piedras de adorno, cuentas violeta y una mariquita | Decorative stones, purple beads and a ladybug |

Procedimiento Flores / Procedure Flowers
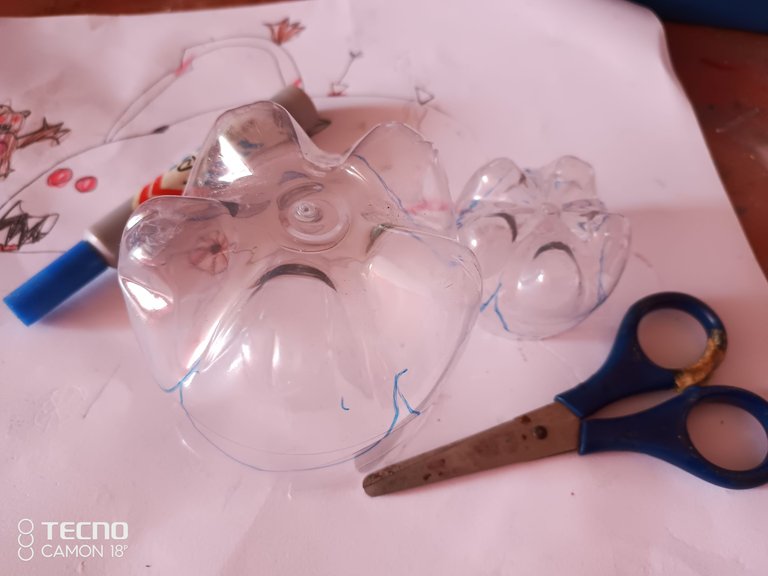
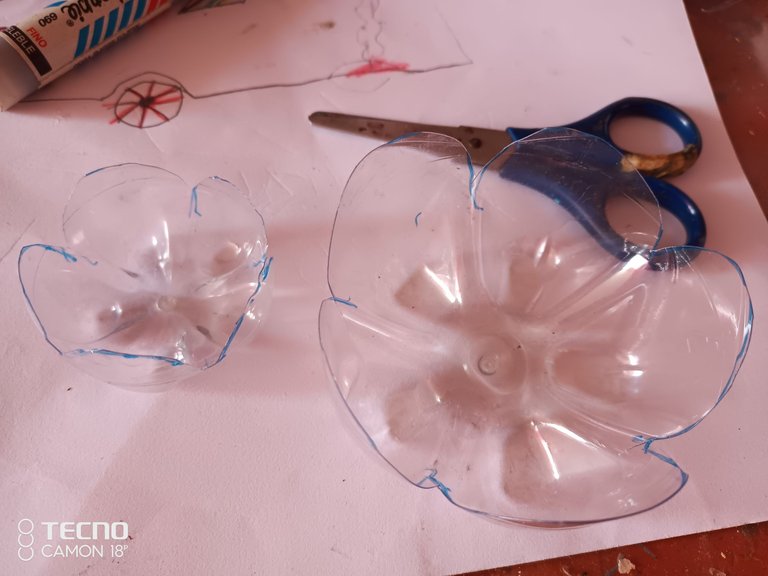
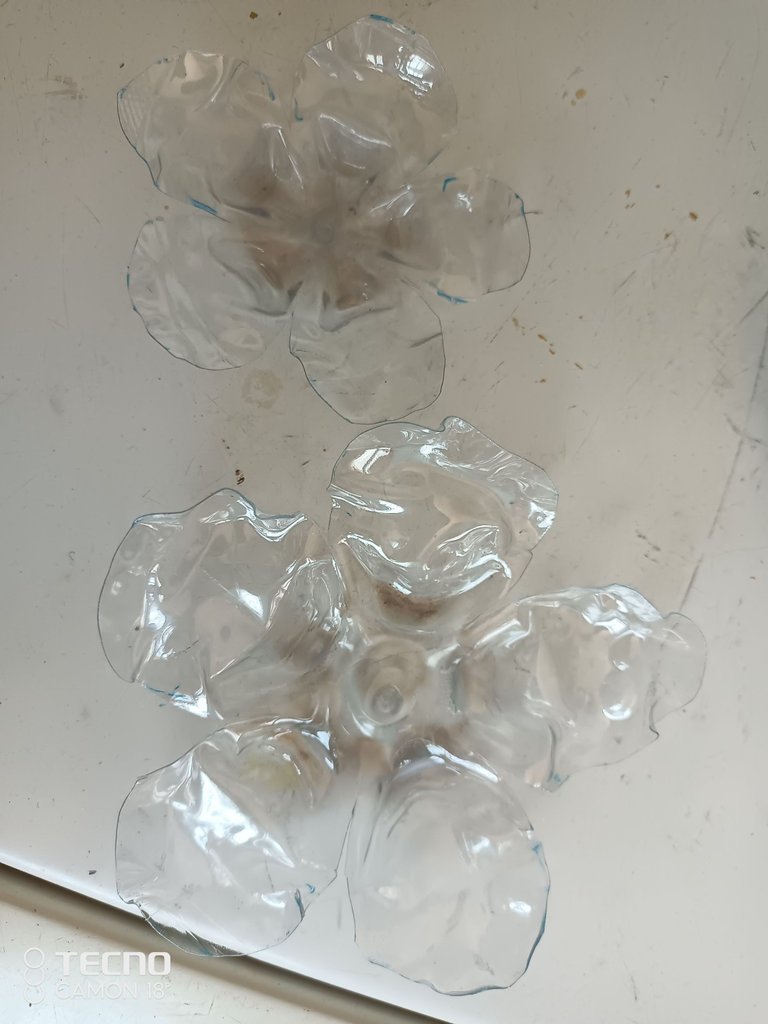
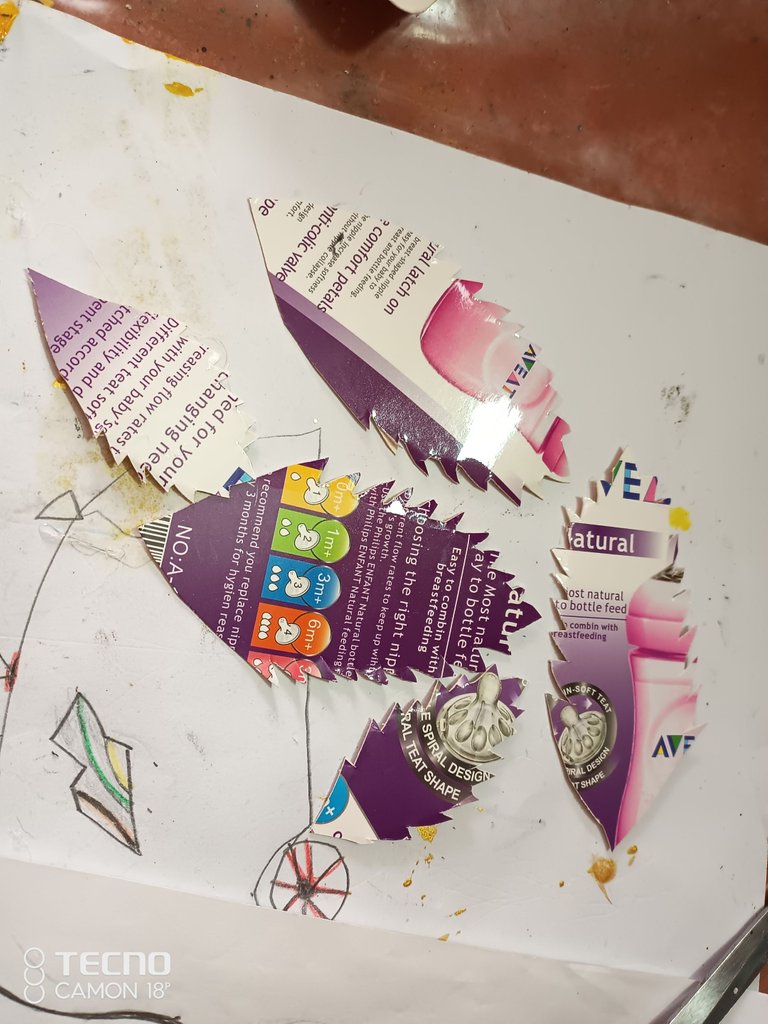
- Cortar la parte de abajo de las botellas. Dibujar la flor en cada botella y recortar.
- Cut the bottom of the bottles. Draw the flower on each bottle and cut it out.
 |  |  |
|---|
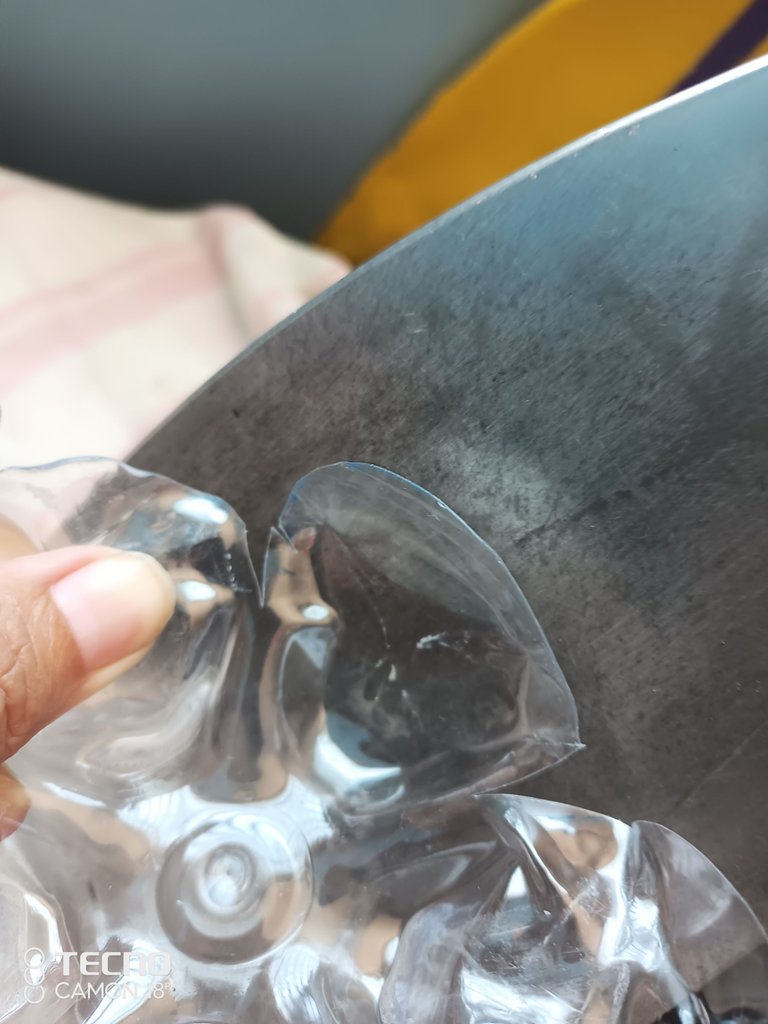
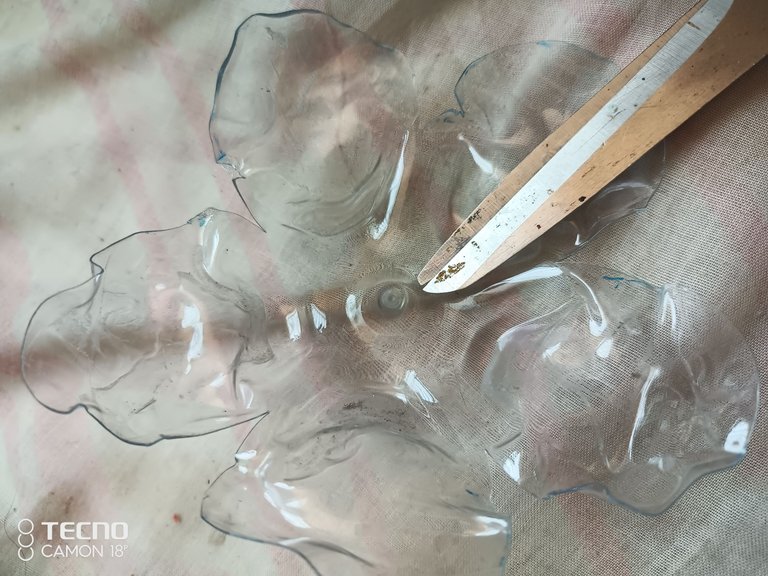
- Calentar la plancha previamente para colocar la base de la flor. Al aflojar el plástico de inmediato dar la forma de pétalo con la tijera.
- Preheat the iron to place the base of the flower. When loosening the plastic, immediately shape the petal with the scissors.
 |  |
|---|
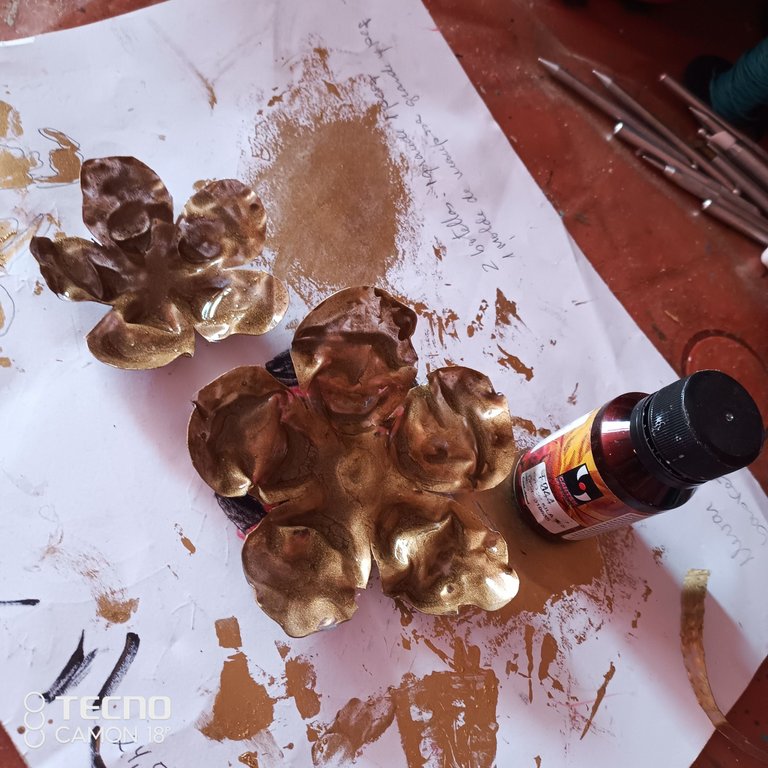
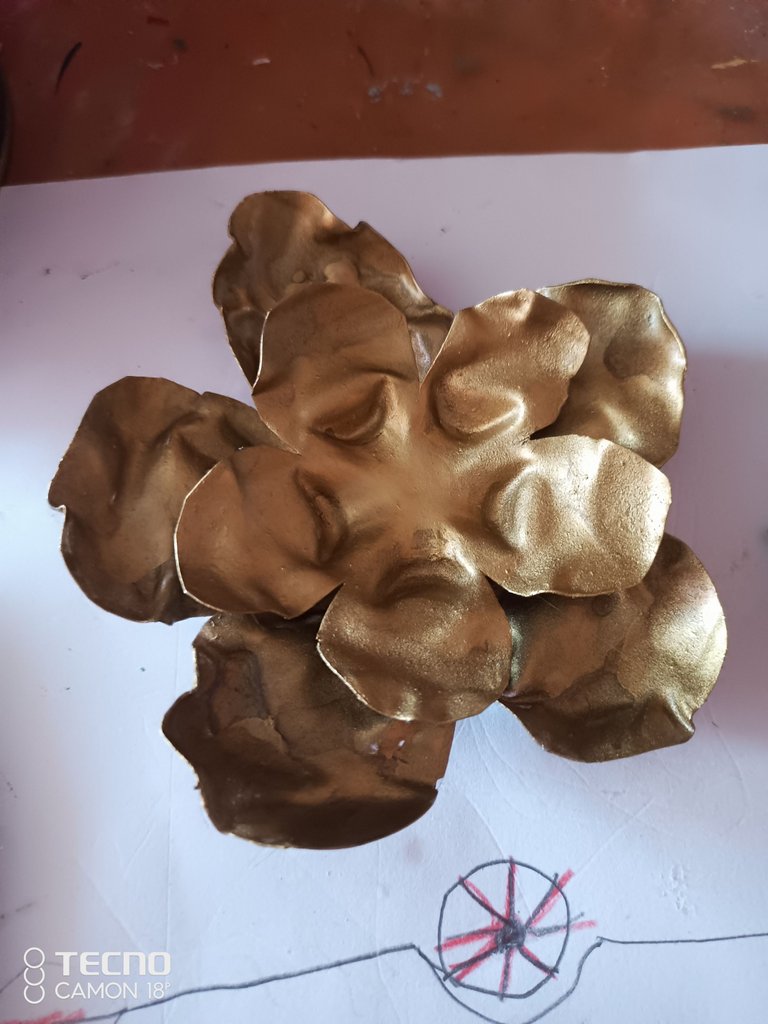
- Pintar con la pintura de vitral dorado y pegar las dos flores juntas.
- Paint with gold stained glass paint and glue the two flowers together.
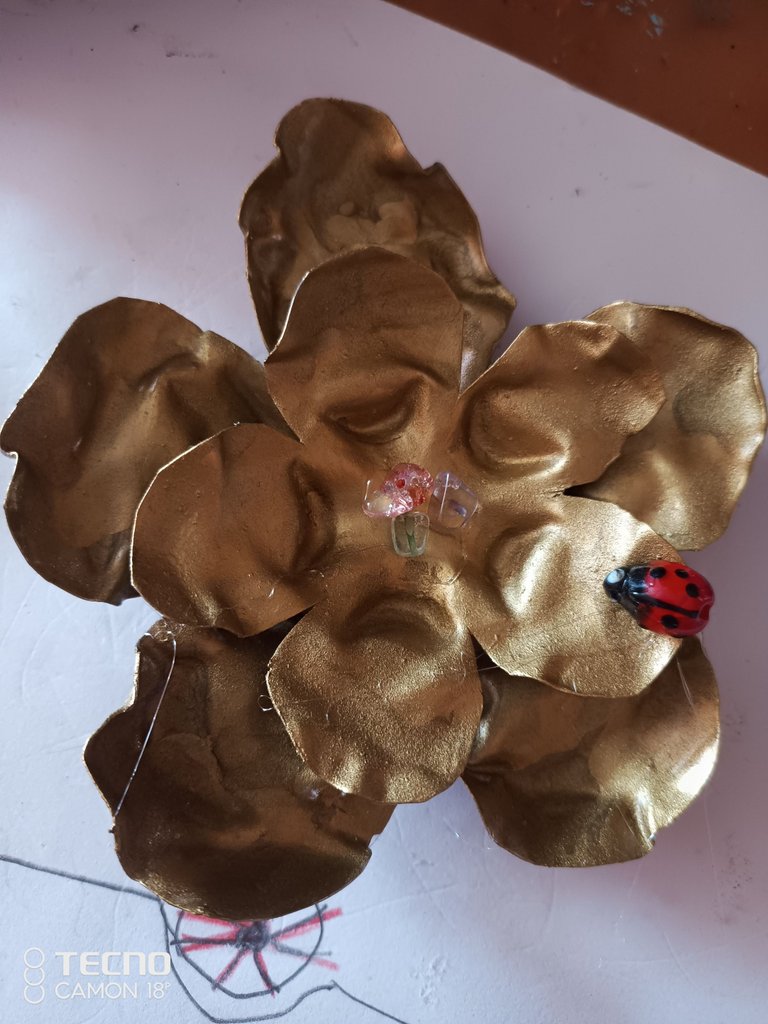
- Pegar con silicón caliente las piedras en el centro y la mariquita al borde.
- Glue with hot silicone the stones in the center and the ladybug at the edge.
Procedimiento Hojas / Leaves Procedure
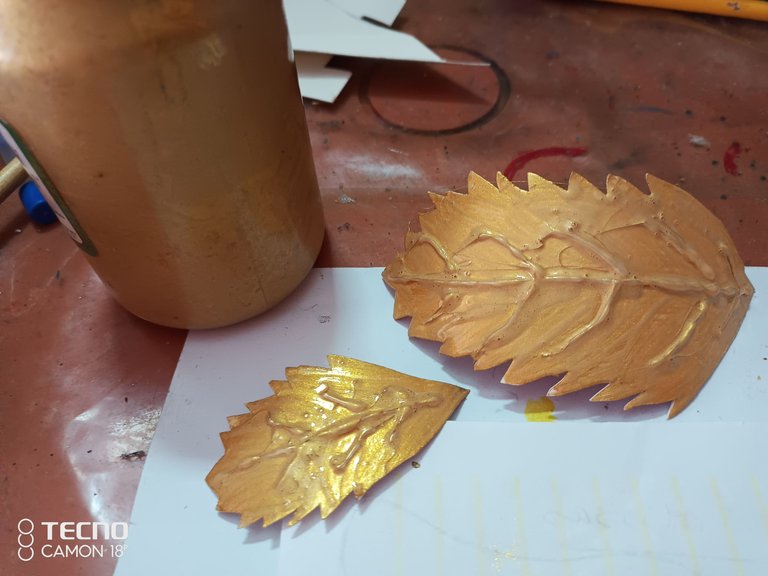
- Diseñar las hojas, entre pequeñas y más grandes.
- Design the leaves, from small to larger.

- Hacer las nervaduras con silicón caliente.
- Make the ribs with hot silicone.
 |  |
|---|
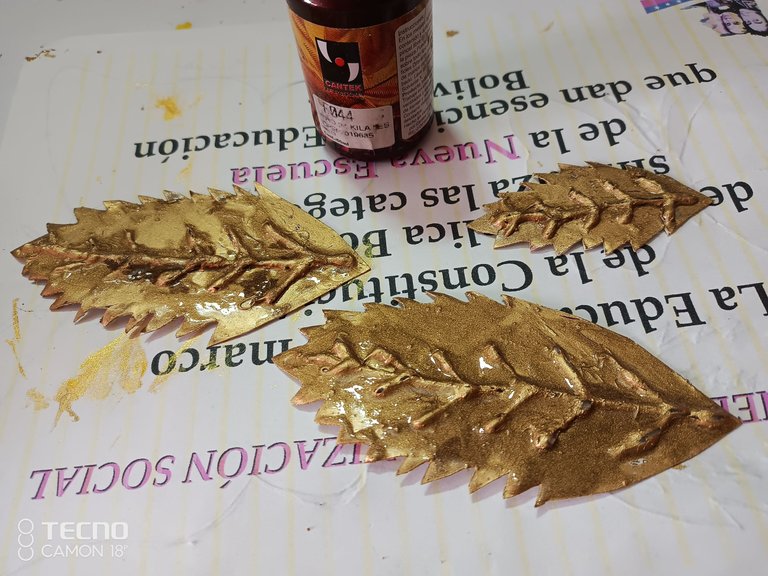
- Pintar unas hojas con pintura acrílica dorada y otras con pintura vitral; estas últimas se matizan un poquito con dorado de pintura acrílica.
- Paint some leaves with gold acrylic paint and others with stained glass paint; the latter are shaded a little with gold acrylic paint.
Ensamblaje del cuadro / Assembling the frame
 |  |  |
|---|
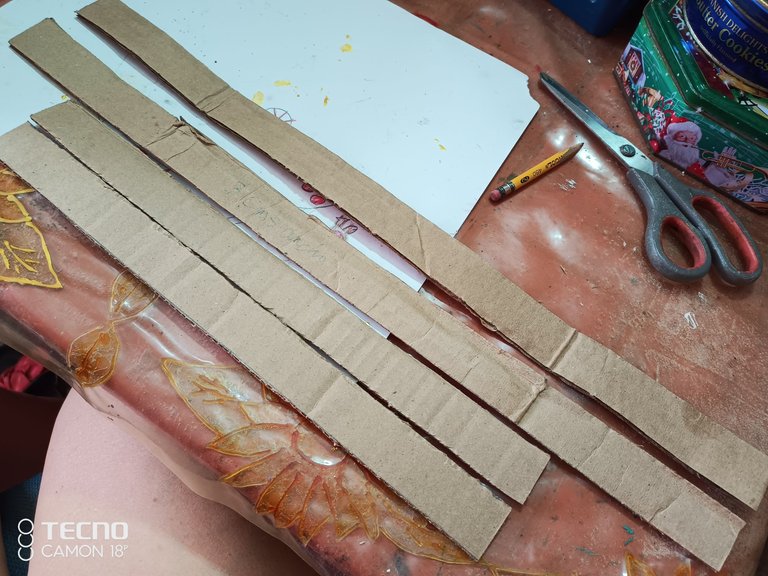
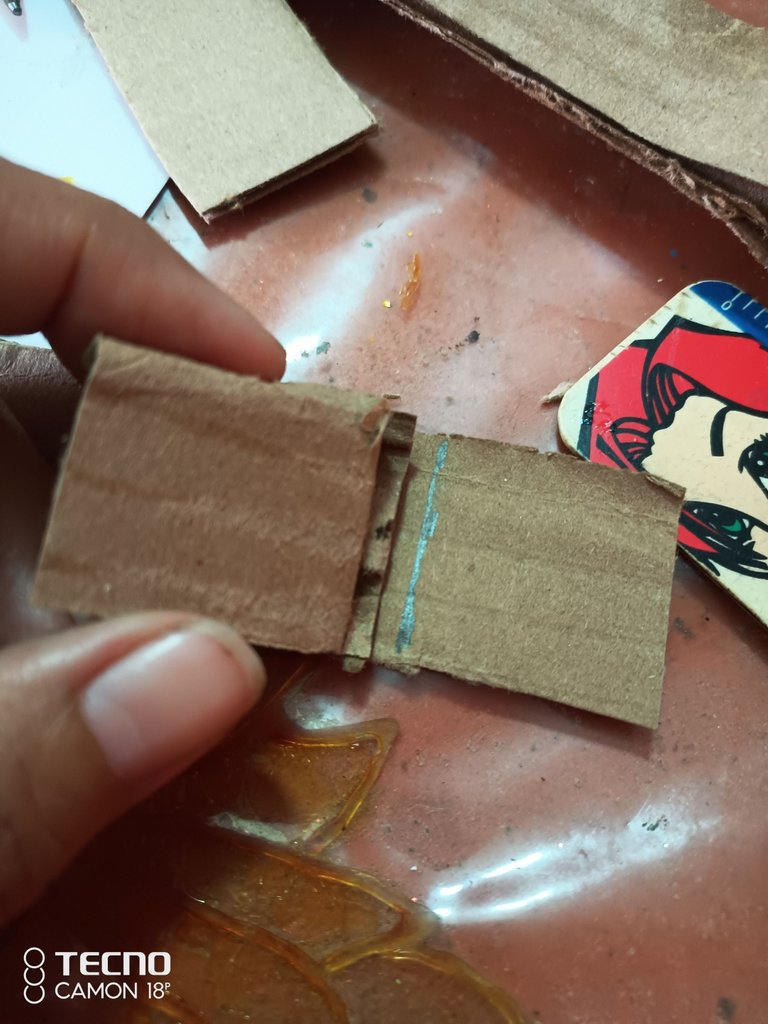
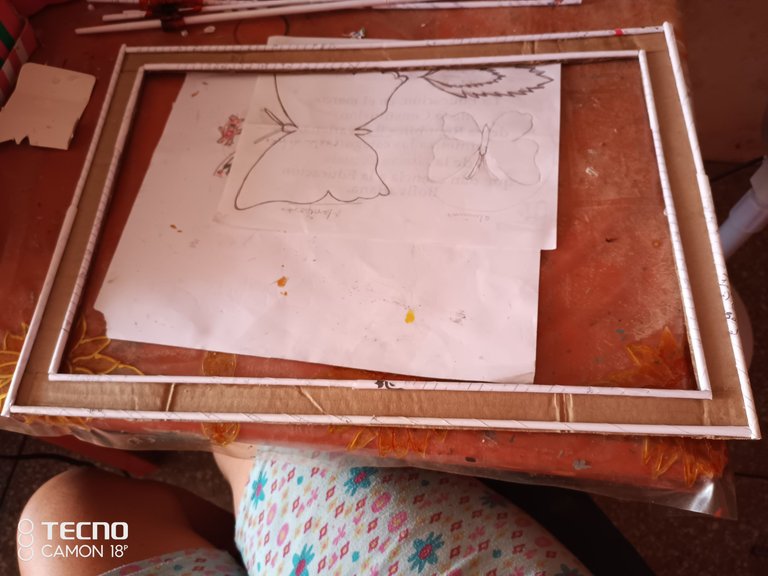
- Hacer el marco con cartón, abriendo en los extremos del listón largo para calzar los listones pequeños, con la intención de que no queden abultados.
- Make the frame with cardboard, opening the ends of the long strip to fit the small strips, so that they are not bulky.
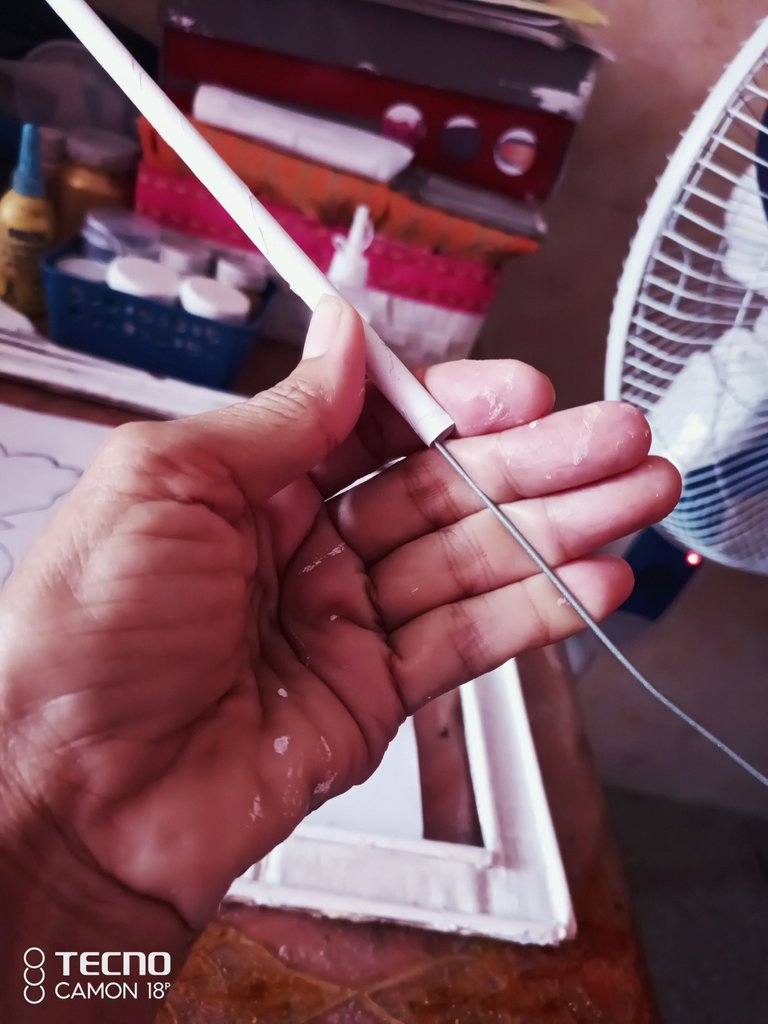
- Colocar tubos de papel por todo el borde del marco.
- Place paper tubes all around the edge of the frame.
 |  |
|---|
- Introducir alambre otros tubos de papel y pintarlos de dorado. Pintar con el acrílico dorado todo el marco.
- Insert wire other paper tubes and paint them gold. Paint with gold acrylic paint all over the frame.
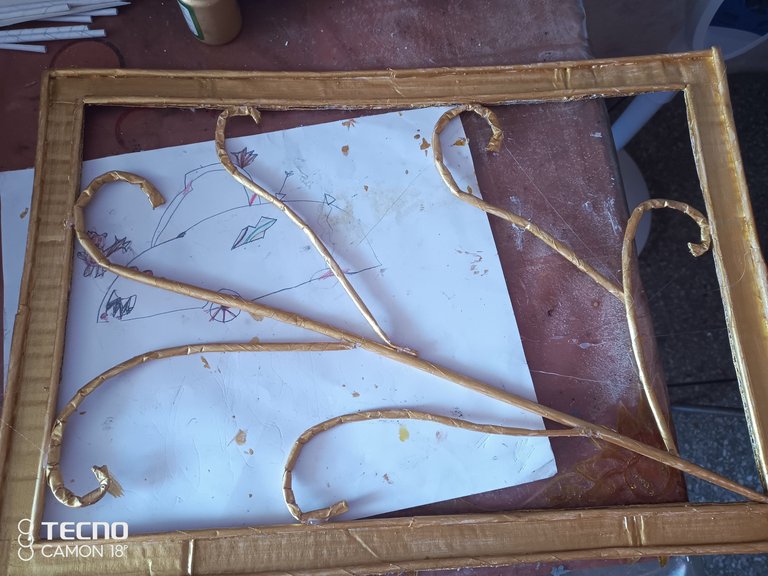
- Pegar por la parte interna del cuadro.
- Glue on the inside of the frame.
- Pegar las figuras al gusto con silicón caliente.
- Glue the figures as desired with hot silicone.
Debido a lo largo del proceso decidí hacerlo en dos partes; primero las mariposas y luego el resto del cuadro, con la intención de facilitar el aprendizaje. El resultado fue genial, con el tono dorado se ve sobrio. Estoy satisfecha con el producto final.
Due to the length of the process I decided to do it in two parts; first the butterflies and then the rest of the frame, with the intention of facilitating the learning process. The result was great, with the golden tone it looks sober. I am satisfied with the final product.
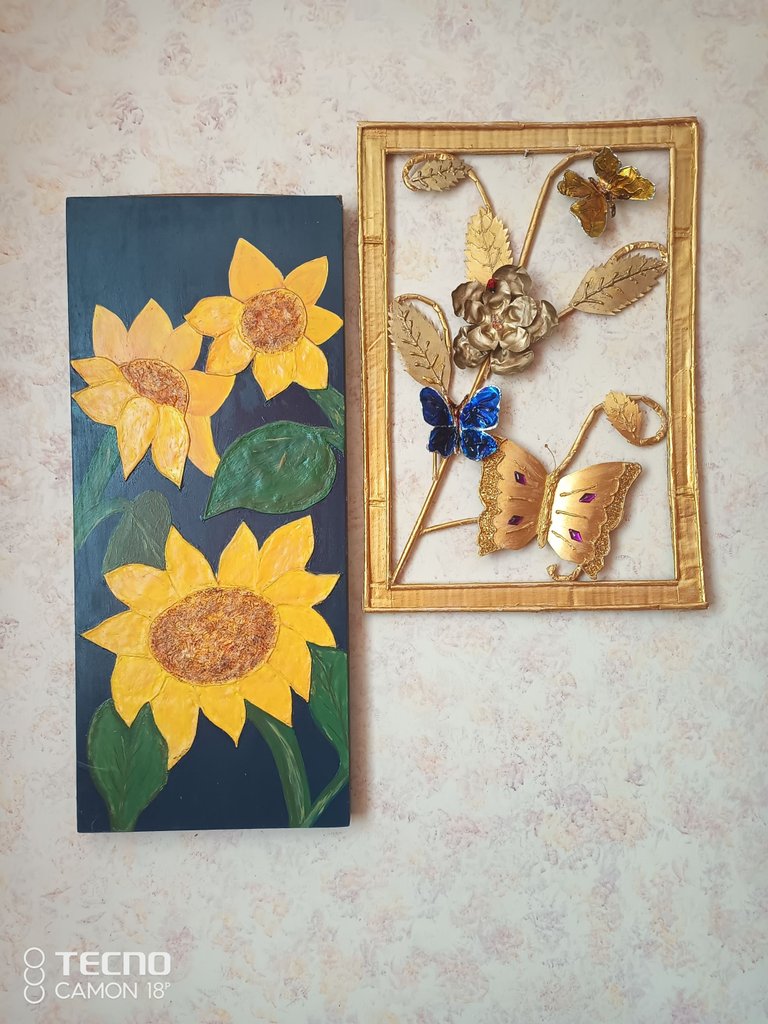
Recuerda que se hacen grandes y lindos proyectos con el reciclaje.
Remember that great and beautiful projects are made with recycling.
Información
Las fotos son propias y el contenido es original. La imagen central editada en Canva. Traducción en traductor Deepl versión gratuita.
Information
The photos are my own and the content is original. The central image edited in Canva. Translation in Deepl translator free version.

Presented something very beautiful, very nice creativity
Thank You Friends!!! 🌷💐🥀🌹
Usted es una artista, le quedó hermoso el cuadro, me encanta. Creo que buscaré de esa pintura vitral, no la conozco.
El detalle de las piedras y de la mariquita 🐞 en la flor es genial, se ve muy llamativa. Gracias por compartir el proceso de elaboración.
Amiga viniendo de ti esas palabras me emociono, gracias. Las pinturas que uso, porque todavía me quedan algunas, son de la marca Cantek; al menos por acá en Cumaná ya no se consiguen.
Preguntaré por aquí. Me gusta mucho ese color dorado 😃 muchas gracias por responder 😊 un abrazo.
Hola, @antoniarhuiz!! Me gusta mucho este trabajo 😍 es sorprendente tu creatividad y lo que pudiste lograr con estos materiales!! Te felicito!!🌼
Saludos muchas gracias por tu visita. Me complace que te haya gustado. Te invito a crear uno. Un abrazo. 🌺🌷💐🥀🌹
Ohhh esto quedo hermoso mi Sra @antoniarhuiz . Toda una obra de arte, quien se imagina que tiene esos materiales, créame que nadie si no se le dice.
Magnifico trabajo. la felicito.
Que tenga un hermoso y bendecido día ✨
!PIZZA
Agradecida por la admiración amiga linda. 🥳🌺🌹💐🌻
💕
$PIZZA slices delivered:
@dayadam(2/5) tipped @antoniarhuiz
Rica pizza @dayadam , gracias
https://leofinance.io/threads/view/dayadam/re-leothreads-caty9hmq
The rewards earned on this comment will go directly to the people ( dayadam ) sharing the post on LeoThreads,LikeTu,dBuzz.
#hive #posh
https://twitter.com/Darcy1387/status/1656726747398668294
Dios bendiga sus manitas mi comay. Hay que ser paciente y creativo para lograr este objetivo. 🥰
Saludos mi Comay bonita. Gracias por las bendiciones. Un abrazo. 💖🥀🙏🌹💐🌻
Esto se ve precioso, de verdad te quedó muy bien, tiene detalles muy bonitos
Hola. Gracias por la visita. Agradecida por la admiración. Saludos 🥀🌺🌷🌹💐🌻
Hola @antoniarhuiz, me encanto el cuadro tan bonito que lograste usando materiales reciclados. Voy a inspirarme en tu obra para hacer un cuadro similar y luego te lo muestro. Saludos
Siii, gracias mi querida amiga. Espero ver esa publicación. Un abrazo 🌹🌷💐🌻🌺🥀
es una bella obra de arte
Saludos!!! Gracias por pasar a mirar y comentar mi trabajo. 🌹🥀🪷💐🌷🌺🌻
En realidad muy original, bonito trabajo amiga.
Muchas gracias. Se llevó algo de tiempo pero lo terminé 🤪. Saludos 💐🌻🥀🥀