Dibujo/ El mundo, sano - contaminado [Esp/Eng]

Hola amigos de por acá de @hivearte, me alegra estar por aquí hoy mostrándoles unos
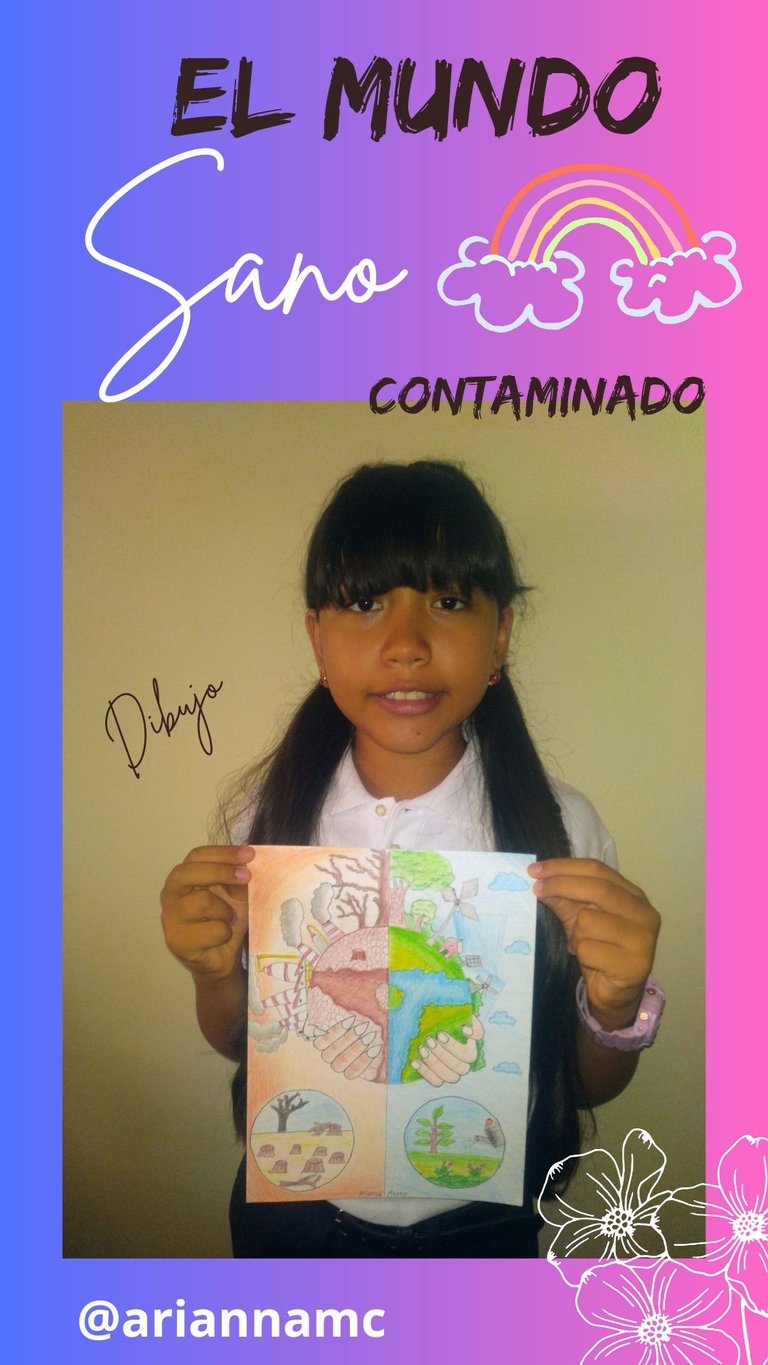
dibujos que me mandaron hacer para mi colegio, en donde nos pidieron que hiciéramos un mundo que de un lado se viera lindo y sano y del otro lado feo y contaminado. Les voy a mostrar el paso a paso de cómo lo hice, espero que les guste.
Materiales
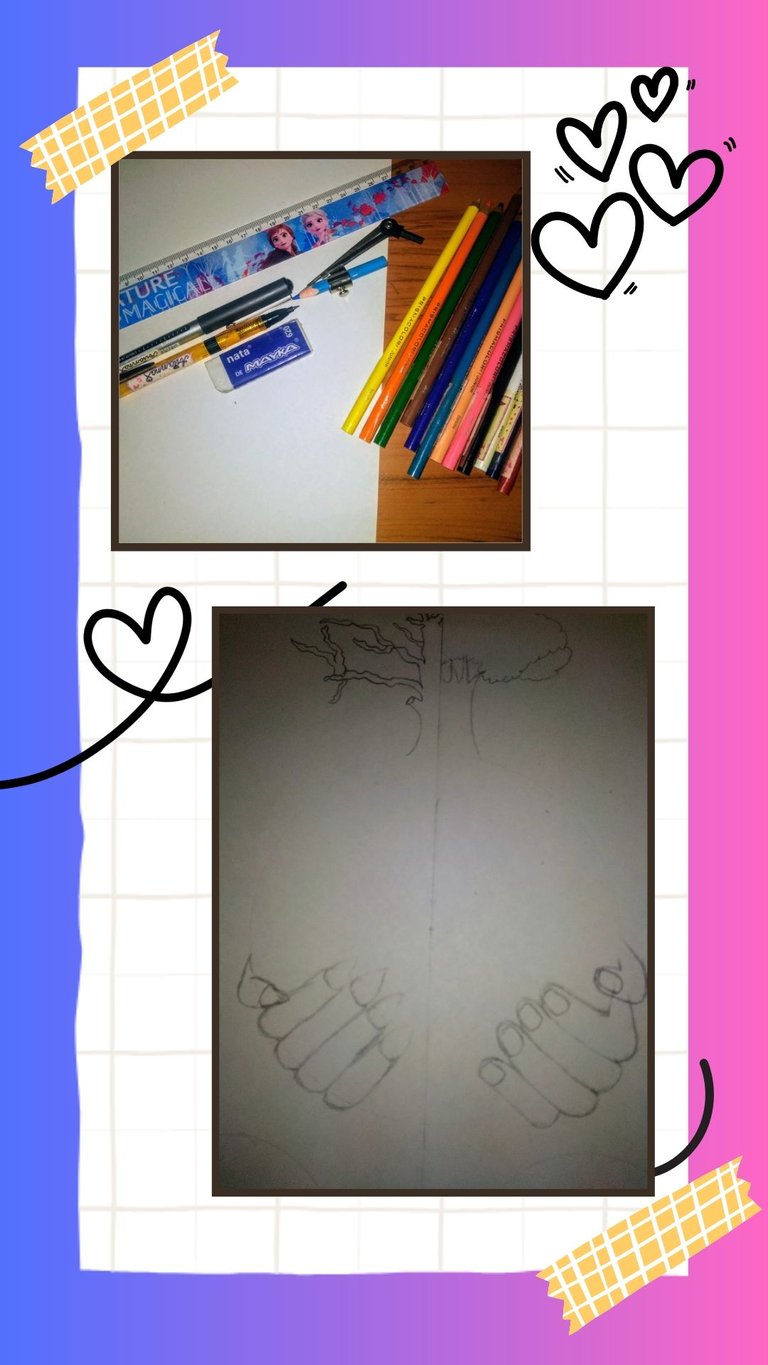
Estos son los materiales que utilicé:
Colores.
Una hoja de papel blanca.
Regla.
Lápiz y goma.
Lapicero.
Compás.
Primer paso:
En la hoja de papel blanco medimos el alto y el ancho, marcamos por donde sea la mitad y pasamos una raya. Eso va a ser la separación del ambiente sano y el ambiente contaminado.
Segundo paso:
Vamos a empezar a hacer el dibujo, primero hacemos un círculo con el compás desde el punto de la mitad, comenzamos haciendo unas manos de cada lado como si estuvieran agarrando el mundo y del lado sano le vamos a hacer muchas plantas y arbustos, un árbol muy grande y frondoso, una pequeña casita, la energía eólica y la energía impulsada por el sol, las nubes y el cielo y dibujamos la parte de la tierra que va a ser con verde y azul.
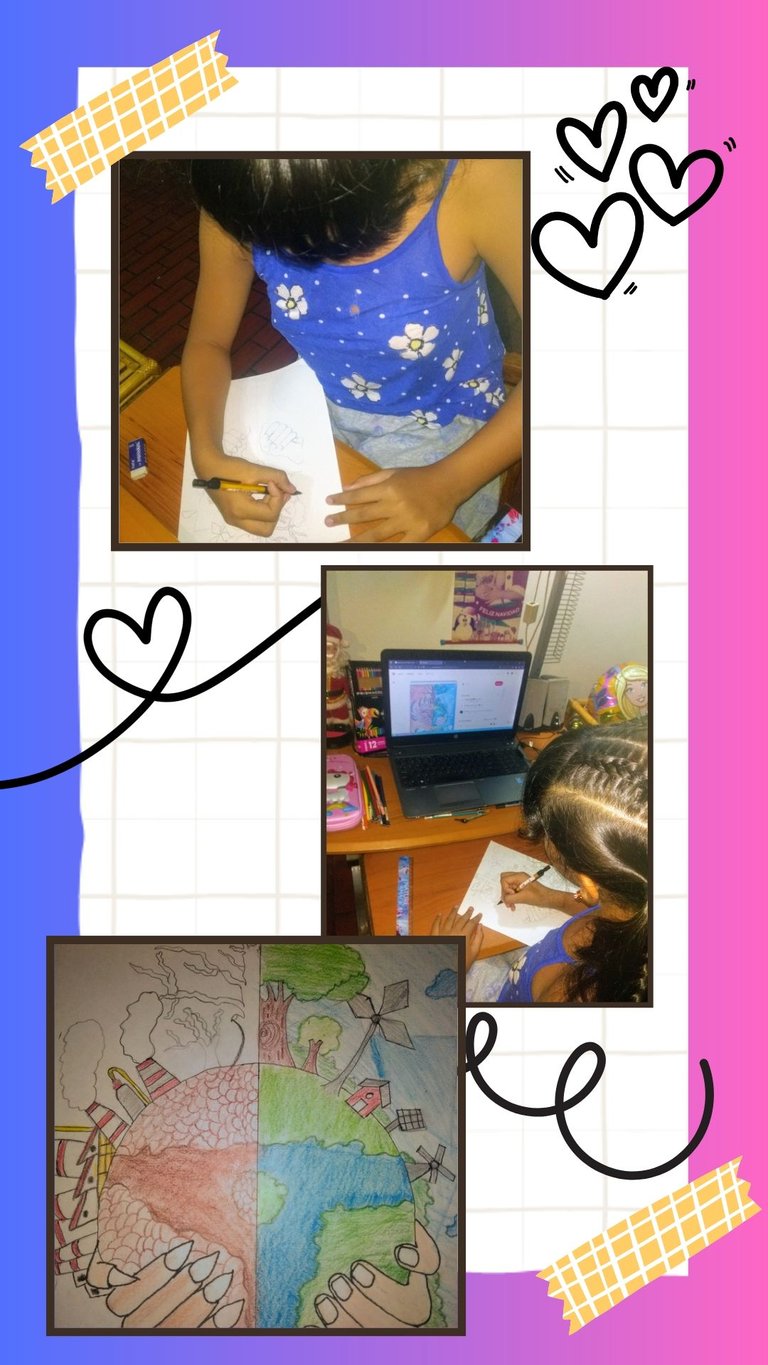
Tercer paso: Ahora vamos a hacer el lado contaminado, primero otra vez hacemos las manos un poco diferentes como se ve en la imagen y le hacemos un árbol grande, pero sin hojas secas y muchas fábricas que ahí está saliendo el humo que contamina el aire y, en cambio, el mundo de ese lado va a estar dibujado en vez de azul y verde seco, sin mucha tierra y el agua seca.
Cuarto paso:
Ya que el dibujo está hecho vamos a empezar a dibujar, primero que todo empezamos con el lado sano, primero dibujamos las manos y después el resto del dibujo, una cosa muy importante, unos tics tienen que tratar de que el dibujo quede con la mayor profundidad o sombras así como se ve en esa parte, como yo no soy muy experta mi mamá me ayudó un poco, pero espero que ustedes si puedan aprender un poco más, como yo que también estoy aprendiendo.
Quinto paso:
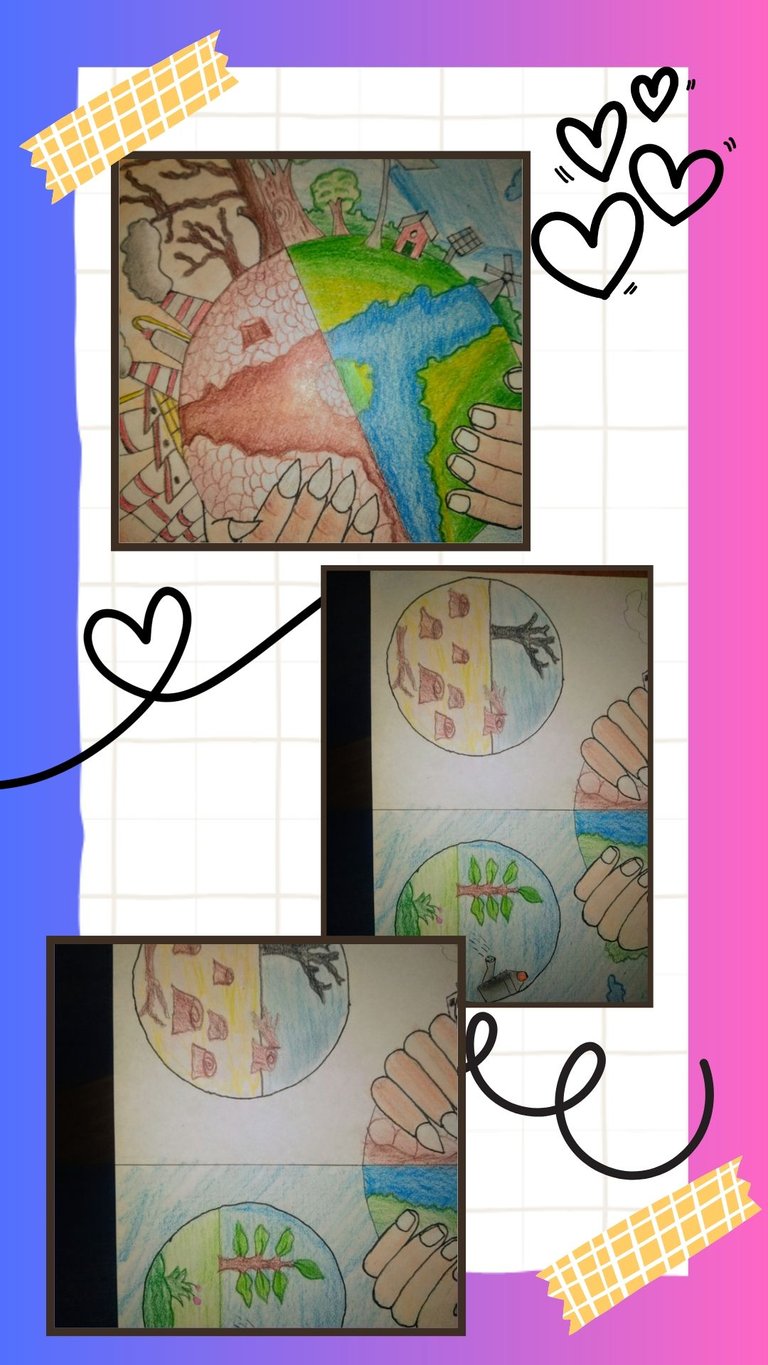
Ahora vamos a dibujar el lado contaminado y comenzamos dibujando las fábricas de un tono un poco oscuro, como se ve en la imagen, como gris, así y los humitos que salen, eso lo tenemos que hacer un poco de técnica para dibujarlos y que queden así como si fuera un lado clarito y un lado oscuro, primero le echamos blanco a la mitad y vamos pintando con el negro flojito después un poco más duro y así hasta que quede como si estuviera difuminado, después pintamos el lado de la Tierra así como si estuviera seca con marrón y con un poco de profundidad y también pintamos el gran árbol que está en el medio pero seco.
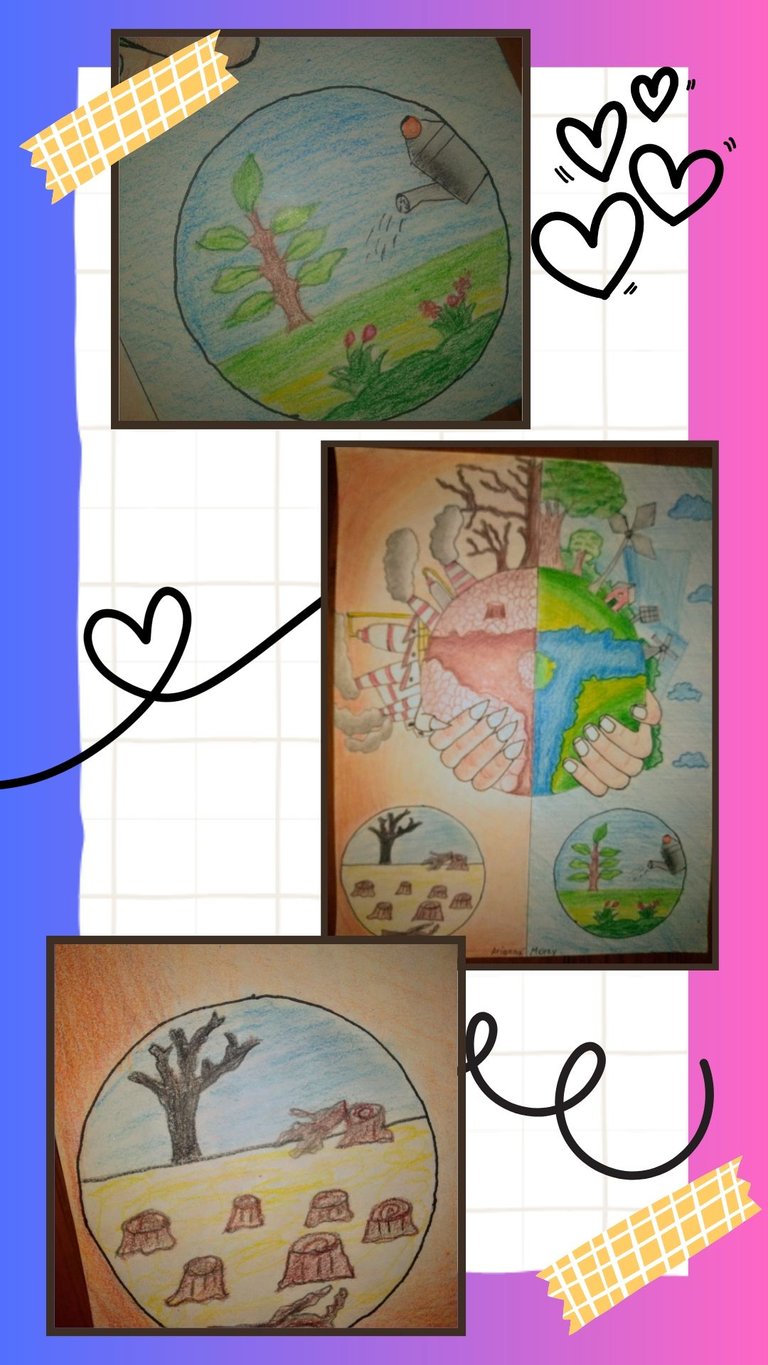
Séptimo paso: Ahora vamos a dibujar unos pequeños círculos de cada lado en la parte de abajo de la hoja, del lado sano va a estar unas plantas y una regadera echándole agua y del otro va a estar un campo seco con árboles talados y también los dibujamos, por supuesto que queden muy bonitos y como les vuelvo a decir con las técnicas de dibujo, que quiero aprender cada día más y compartir mis avances aquí en mi blog.
Bueno, amigos, esto fue todo por el día de hoy. Espero que les haya gustado mi dibujo, a mí me gustó mucho. Que estén muy, pero muy bien, hasta la próxima. Saludos a todos.

Drawing/ The world, healthy - contaminated
Hi friends from @hivearte, I'm glad to be here today showing you some drawings I was asked to do for my school.
drawings that I was asked to do for my school, where we were asked to make a world that looked nice and healthy on one side and ugly and polluted on the other side. I'm going to show you the step by step of how I did it, I hope you like it.
Materials
These are the materials I used:
Colors.
A white sheet of paper.
Ruler.
Pencil and eraser.
Pencil.
Compass.
First step:
On the white sheet of paper we measure the height and width, we mark where the middle is and we draw a line. That is going to be the separation of the healthy environment and the contaminated environment.
Second step:
We are going to start making the drawing, first we make a circle with the compass from the middle point, we start making some hands on each side as if they were holding the world and on the healthy side we are going to make many plants and bushes, a very big and leafy tree, a small house, the wind energy and the energy driven by the sun, the clouds and the sky and we draw the part of the earth that is going to be with green and blue.
Third step: Now we are going to make the polluted side, first again we make the hands a little different as you see in the picture and we make him a big tree, but without dry leaves and many factories that there is coming out the smoke that pollutes the air and instead the world on that side is going to be drawn instead of blue and green dry, without much land and dry water.
Fourth step:
Since the drawing is done we are going to start drawing, first of all we start with the healthy side, first we draw the hands and then the rest of the drawing, a very important thing, some tics have to try that the drawing is with the most depth or shadows as well as you see in that part, as I am not very expert my mom helped me a little, but I hope you if you can learn a little more, as I am also learning.
Fifth step:
Now we are going to draw the contaminated side and we start drawing the factories in a dark tone, as you can see in the image, like gray, and the smoke that comes out, we have to use a little technique to draw them and make them look like a light side and a dark side, first we add white in the middle and we paint with the black, then a little harder and so on until it is as if it were blurred, then we paint the side of the Earth as if it were dry with brown and with a little depth and we also paint the big tree that is in the middle but dry.
Seventh step:
Now we are going to draw some small circles on each side at the bottom of the leaf, on the healthy side are going to be some plants and a watering can pouring water on it and on the other is going to be a dry field with felled trees and we also draw them, of course that they look very nice and as I tell you again with the drawing techniques, that I want to learn more every day and share my progress here on my blog.
Well, friends, that was all for today. I hope you liked my drawing, I liked it a lot. Be very, very well, until next time. Greetings to all.
Este post fue realizado en mi teléfono Motorola One, usando las aplicaciones Canva para la edición de las imágenes. Traducción con DeepL.
This post was made on my Motorola One phone, using Canva applications for image editing. Translation with DeepL.
Hola amiga, te quedo muy bonito el trabajo para la escuela. Bien hecho
Hola amiga, muchas gracias 😘
Que hermoso dibujo
Saludos. Gracias por visitar mi blogs
https://inleo.io/threads/leidimarc/re-leothreads-6wyeaglm
The rewards earned on this comment will go directly to the people ( leidimarc ) sharing the post on LeoThreads,LikeTu,dBuzz.
Very nice work!
@tipu curate 8
@tipu curate 5
Upvoted 👌 (Mana: 25/75) Liquid rewards.
Gracias por el apoyo amiga.
Te quedó muy lindo el dibujo, princesa, eres muy buena artista :3