How I Got Rid of the "Removable" Doorknob Problem!
Hahaha, yes folks, I installed/assembled my first doorknob ever! Thanks to online videos, the instruction manual and a person from a DIY group in social media. Faith in humanity restored! 😆
Last week I wrote about the need to destroy the doorknob. That's why there was a gaping hole on the door until that Thursday night.

The door hole.
Several hand wood splinters, head scratching and online questions in various sites/apps later I finally fixed the doorknob problem! 😆 Thank you Lord! ✨ Maybe this is a level up on my handyman skill eh? From zero to level 1? Happiness! What an accomplishment! Hahaha.
🔸 Why Hire When You Can Do-It-Yourself (DIY)?
Lol that's what we who don't have much cash on hand or even cheapskates say all the time. 😅 Everything can be DIY'd if we have plenty of time and the patience to do something. In my case no one else was around to put the doorknob in.
My cousin told me about a local app where I can find someone to fix stuff but I haven't installed or tried that yet. I couldn't really sleep last night with a gaping door hole. Even with the door chain bolt and door latches, I wanted to cover up the hole myself.
Of course I watched several YouTube tutorials but couldn't really find the same or exact type/model that I bought. What else could I do but rely on the manual.
🔸 DIY No Visible Screws Doorknob Installation!
1 . First thing you can do is lay out everything in one area. All the screws, parts, etc., should be within reach.
2 . Separate one of the knobs from the entire set. You can easily remove the lock handle by using the tool provided. Or use anything that can press on the side knob hole or "button".
3 . Fit this part inside the smaller hole at the side of the door. Make sure it is facing the right way.
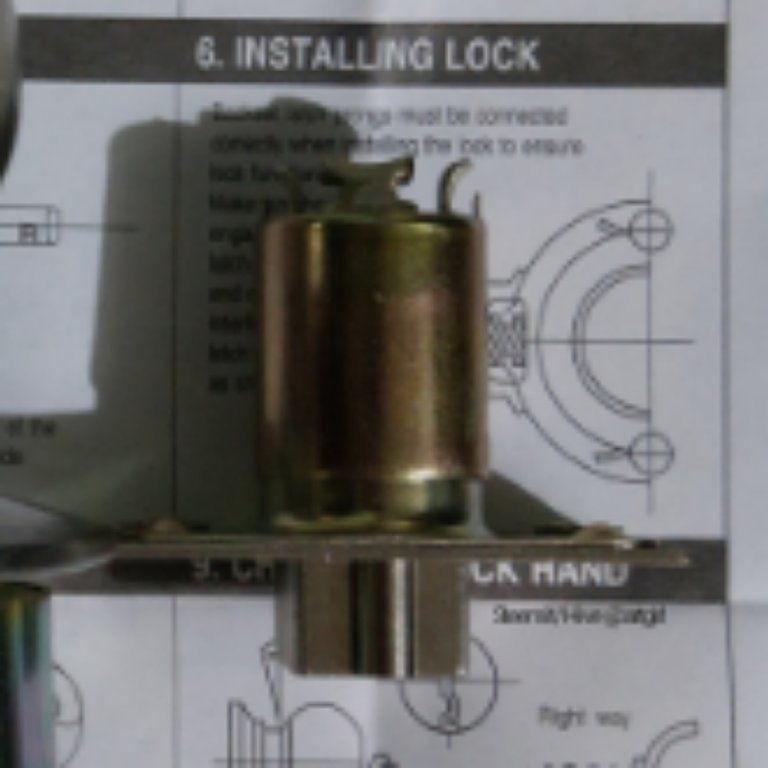
4 . Screw it in to keep it in place.
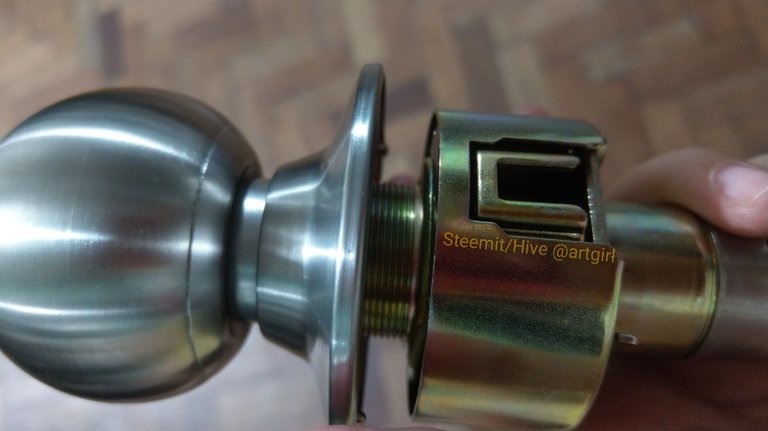
5 . Put the bulkier door knob part through the hole and make sure it latches with the other part you first attached.
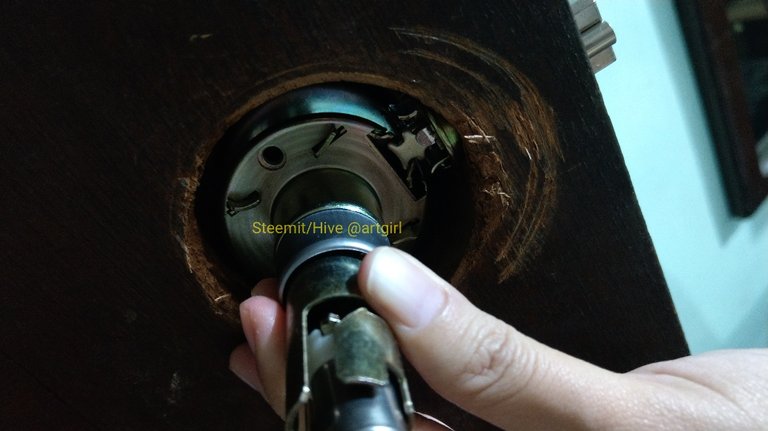
6 . Once it's in place, you can test if the mechanism works whenever you turn the keyhole knob.
7 . If everything is okay then put the round metal plate on the other side. Make sure the four holes are aligned so you can screw it in place too.
8 . Put the cover plate/rosette over the screwed metal to make it tight and keep everything in place.
9 . Lastly, slide in the inner knob making sure the protruded inner part with small horizontal indent is in the space where it should slide in. Put it in and make sure the locking mechanism goes through the small knob hole until you hear a click.
10 . Press on the door lock and use the key to check several times if the door knob will unlock.
11 . Also install the door strike plate. It's where the protruding part of the lock will latch when the door is closed.
12 . Lock the doorknob, close the door and use the key to unlock it to test if everything will work. If it does then congratulations! You've successfully installed the doorknob!
🔸 Troubleshooting My Doorknob Issues
Here comes the tricky part. I thought it would be really easy to just assemble the thing. I mean how could I know there would be some problem when all the videos I saw on YouTube shows how easy it is to install it.
It's got external screws and has different parts than what I installed but it looks easy to do right? Hahaha, wait 'til you install your own doorknob for the first time.
Oh I'm not going to write all the issues you might encounter when installing one on your door but I will share what stumped me the most. I mean, it's not in the instruction manual at all and not even mentioned in the many YouTube videos I watched.
If you've read my noise cash posts about this problem then you already know what it was. For those who haven't read those then here's what happened.
So I installed the doorknob Thursday night but the screw plate cover/rosette wouldn't let me lock the door properly. I mean, when I pull the door towards me using the knob, the knob itself also gets pulled off. Egads.
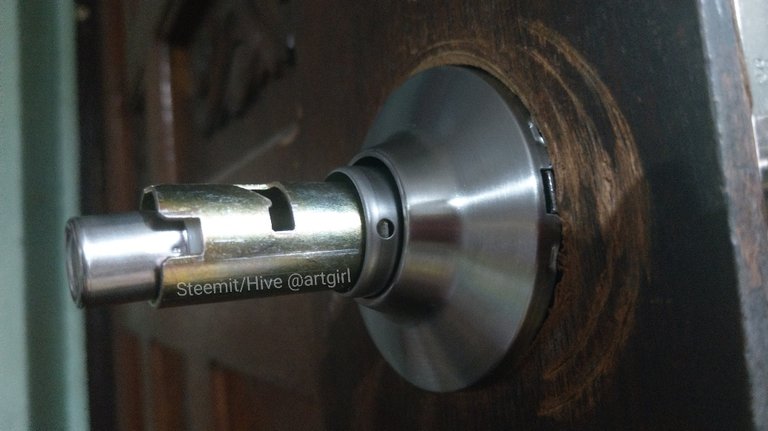
I tried to push it in as hard as I could with the rosette on but to no avail. Then I figured out it's probably not locking in or something. Eventually I found out that if I put the inner knob in without the rosette it would not be removable at all. Look at the difference.

That's like almost 1 cm, I think. 🤔 Okay I didn't measure it and it's quite a close up but it's notably a lot of millimeters in excess that's why the mechanism wasn't working with the rosette on. Oh boy.
It was already past midnight and I still couldn't figure out how to adjust whatever needed to be adjusted. Had to sleep so I just slept with a half-working doorknob.
Upon waking up last Friday morning, that's the first thing I worked on. I removed and checked every part but still couldn't find what I did wrong. Thursday night and Friday morning last week I posted about this ordeal online in various places and asked anyone that could help.
I learned a lot from this experience actually. 😂 Getting locked out is no fun at all. Installing your own doorknob is something else! 😁 Was able to think of things I've never thought of before. 😂 For example, I realized what I should have checked before buying anything.
Things you can check before and while buying a new doorknob:
- Measure your door thickness. Also try to measure the door holes if you can, just so you have an idea.
- When at the hardware store, read the size and measurements of the doorknob sets for sale.
I even contacted the hardware where I bought the thing from but they didn't respond so I didn't know what else to do. So I joined two handyman/DIY groups just to find someone to help me.
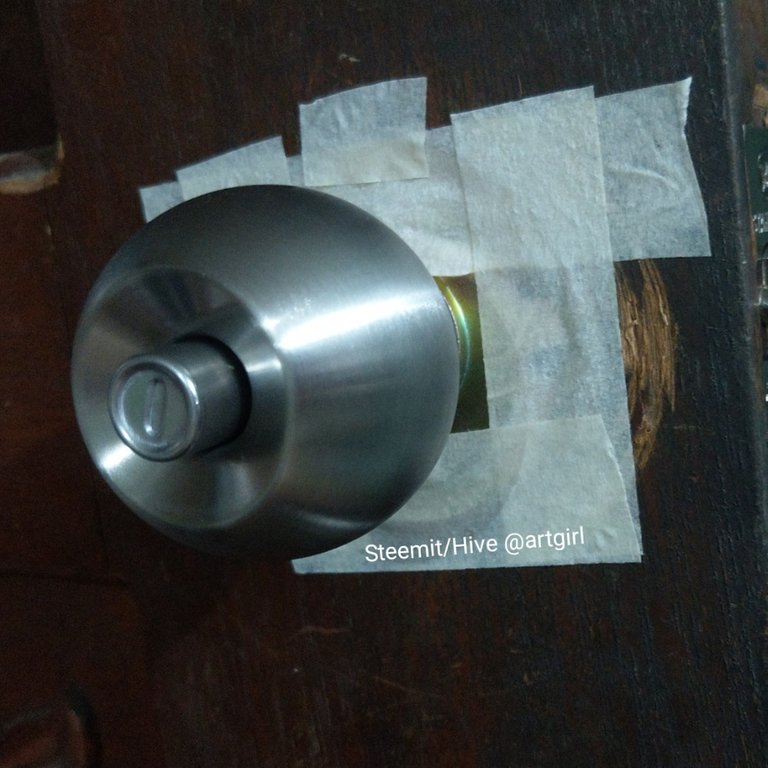
Meanwhile I put the inner knob in without screwing the cover plate. I taped up and covered the holes for the meantime while I figured out how to fix it. I was prepared to have this eyesore for days if needed should the helper not be able to come by and check what's wrong with it. (Or I would have painted it brown. 😆)
I texted the guy telling him I installed the doorknob but couldn't make one handle to stay put. He apologized that he couldn't drop by. Well guess I just had to do things on my own. Also my cousin said he is pricey when it comes to any handyman work so I'd save some money too!
Around almost 1 pm that Friday, my question got approved in one of the online groups. Few minutes later someone responded and told me about a thread I could adjust. Huh? What thread? 🤔 I responded such to the guy.
Several minutes later, the same guy uploaded a video of his partly unattached doorknob and the thread he mentioned (for me to see how to adjust it). Awwww. Faith in humanity restored indeed! Haha.
If he didn't do that I wouldn't have figured it out at all. I mean, I was too careful to touch anything because I didn't want to break or damage the knob. Silly me. 😅 Felt stupid because I didn't realize (on my own) what he showed me but hey there's always a first time to everything.
God bless people like him who can help first timers like me. Hahaha. So I went back to the front door and removed the knobs again. I must have done it more than five times by then. 😆 I was beginning to feel like an expert installer if not for the problem I had. 😆
When I finally had this part in my hand I tried to move it and voila! It can be adjusted indeed!
Watch the video below so you'll know what I'm talking about. Hehe.
Oh my, I laughed at my ignorance and proceeded to adjust it accordingly.
Actually I finally know why the other guys who installed the previous doorknob took hours to finish. They probably also had trouble with the falling handle. 😂 Or I dunno but that was certainly why it took me hours before I did it properly.
I mean, I think I did an even better job because when they installed the previous doorknob, you could see a bit of the uncovered hole (first pic above). Meaning the doorknob was not covering the entire hole at all. That's a security risk but hey I didn't know how to fix it before. Now that I've learned how to install one properly, look how it turned out. Haha.
I took video clips of my installation since I finally know how to do it the right way. Watch the entire tutorial below!
See? Did you see what I did there? Hahaha. I hate getting tiny little wood splinters in my fingers but it doesn't matter now because I finally installed the doorknob properly! Hurray!!! 🥳🎉 Let's partey! 😂💃🕺🎶
So now if you're planning on changing your own doorknobs, everything I mentioned and showed you are what you should check on too! See, I really feel like an expert now after such an accomplishment. Hahaha.
How about you? Have you ever installed your own doorknob? If yes how was your first experience? If no then I hope this will help you when you need it in the future. 😊
XOXO,
@artgirl
Spam or irrelevant comments will be downvoted if not revised upon warning.

Written by @artgirl for Steemit / Hive
© Art x Stephanie Rue / Lucy Stephanie
Join Hive thru ecency, Click Here!
@artgirl is a freelance writer/artist, online seller and real estate agent. My Steemit/Hive posts may contain referral/affiliate/merchandise links.
Contact me for your art, Writing/Research & Metro Manila (NCR) property needs.
For business inquiries, you can chat me up on Telegram or send me a Facebook message. Link in my bio.
Like it?
Upvote, Follow and Resteem/Share for appreciation.
♥ Thanks! ♥
You received 5 LADY(LOH) tokens for posting in Ladies of Hive.
Please note that since our LOH token is still so new, that it will be worth more if we HOLD them for a bit before trying to sell them. Some have been trying to sell them immediately after receiving them, but holding them for a bit will help them to increase in value! We are working behind-the-scenes to try to keep the price stable, but the "sell orders" are hampering the stabilization of the price of this new token. Please hold on to your tokens. Thank you! 🙂