Beautiful Mini Paper Dressing Table
Hello Everyone!
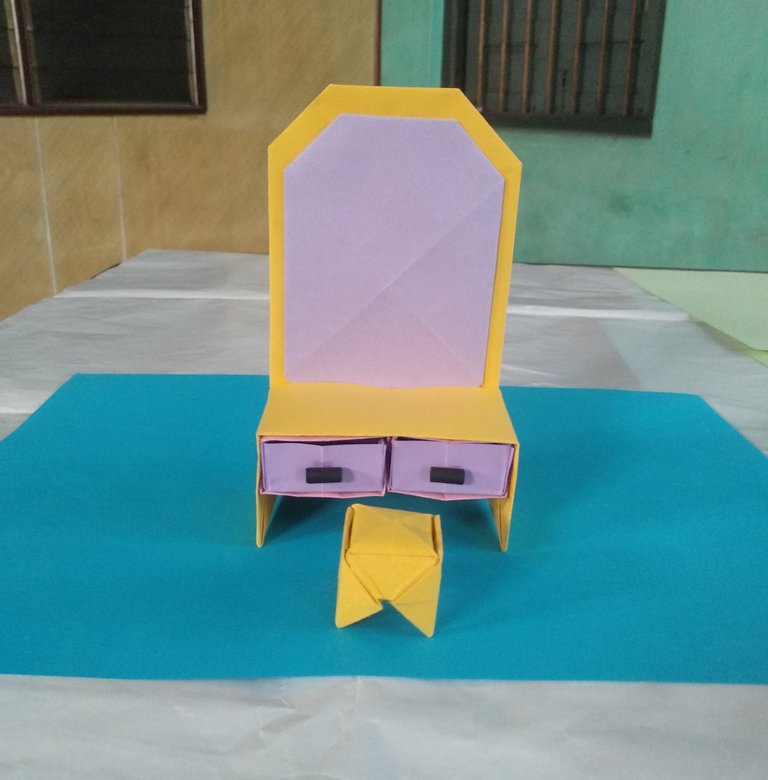
Today I make a beautiful paper dressing table. Need to fold paper table, mirror, seat and two drawers for this one. So have to fold a lot of paper for them. I think this is very beautiful and cute. I have made other types of paper dressing tables before. This is an origami dressing table. Write with texts and you can see the pictures on how to make it step by step.
Needed materials
colored paper
glue
scissors
pencil
ruler


The paper for the seat is cut by the same length and width with 9cm. Fold the paper in half two times and fold the four corners to the middle point. Fold each corner in half again and turn it to the other side. Fold the four corners to the center and gather it step by step to the middle. Fold each edge to the middle and fold the other edge as well. After spreading this area, fold the two edges inwards. Fold the other side in the same way. Make a seat by spreading it. The two edges must be folded inward again.


For the table, cut the paper by the same length and width with 15cm and fold it in half two times. Fold the four corners to the middle line and turn it to one side. Fold the two corners again and fold each side inward. Fold the two sides to each side and spread it.


For the drawers, I cut the paper by equal lengths with 7cm. Fold the paper in half two times and fold the two corners to the middle. Fold the remaining side to the middle line and fold the two corners again. Fold the top edge to the middle and glue them. Fold both sides to the middle. The next step is to spread it as shown. Need to make four boxes of the same size. Glue those two together. I make another two boxes with purple paper. I make them with 6.5cm. In the final step, have to spread them to form square boxes. The two drawers must be glued to the table as shown.


For the mirror, cut the yellow paper by the same length and width with 15cm. Fold it in half two times. Fold the four corners to the middle and fold the two opposite corners in half. Fold the other two corners and fold the other two opposite corners to the middle point. In the same way, another one is made with purple paper. This is made with 13cm. Those two are glued together and used as a mirror. This is attached together with the table.


After I made it, I really like it because it is so beautiful. But it was difficult and it took long time to make. I also take beautiful pictures. Thank you so much for your reading my post to the end.

January 7, 2024
Written by @asterkame
By my photos & made by me
This post has been manually curated by @bhattg from Indiaunited community. Join us on our Discord Server.
Do you know that you can earn a passive income by delegating to @indiaunited. We share more than 100 % of the curation rewards with the delegators in the form of IUC tokens. HP delegators and IUC token holders also get upto 20% additional vote weight.
Here are some handy links for delegations: 100HP, 250HP, 500HP, 1000HP.
100% of the rewards from this comment goes to the curator for their manual curation efforts. Please encourage the curator @bhattg by upvoting this comment and support the community by voting the posts made by @indiaunited.
Thank you so much.
It is a cute little dressing table!
!LUV !MEME !PIZZA
!hiqvote
asterkame, princekham sent you LUV. 🙂 (4/10) tools | trade | connect | daily
Made with LUV by crrdlx.
@princekham, the HiQ Smart Bot has recognized your request (2/2) and will start the voting trail.
In addition, @princekham gets !PIZZA from @hiq.redaktion.
For further questions, check out https://hiq-hive.com or join our Discord. And don't forget to vote HiQs fucking Witness! 😻
Credit: ieronimus
Earn Crypto for your Memes @ HiveMe.me!
Right. It is. Thank you!
!LUV
!PIZZA
!MEME
princekham, asterkame sent you LUV. 🙂 (1/10) tools | trade | connect | daily
Made with LUV by crrdlx.
Credit: ieronimus
Earn Crypto for your Memes @ HiveMe.me!
$PIZZA slices delivered:
princekham tipped asterkame
@asterkame(1/5) tipped @princekham
Congratulations @asterkame! You have completed the following achievement on the Hive blockchain And have been rewarded with New badge(s)
You can view your badges on your board and compare yourself to others in the Ranking
If you no longer want to receive notifications, reply to this comment with the word
STOPCheck out our last posts:
Thank you so much.
You're on fire @asterkame! Your daily posts are keeping Hive lively and exciting.
Yes. I will keep trying with my paperwork.