DIY: Indigenous Handles (Art+History) [Eng-Esp]
This post is written in dual language so you will get a text completely in English followed by one completely written in Spanish.
Este post esta escrito en doble lenguaje por lo que conseguirá un texto completamente en ingles seguido de uno completamente escrito en español.

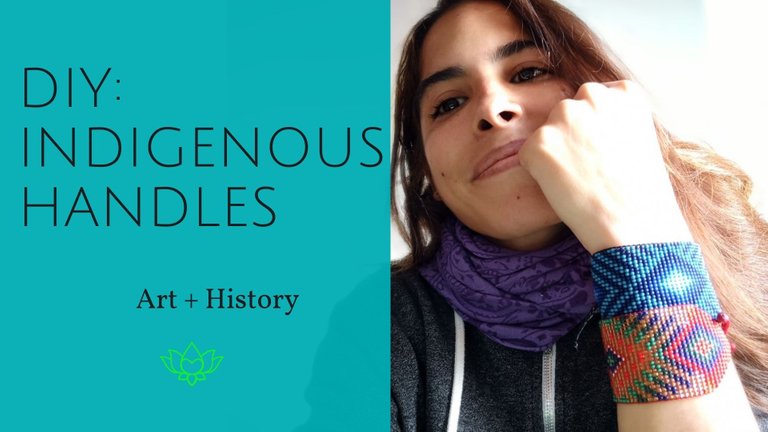

When you go to an indigenous medicine ceremony you usually see on the wrists of everyone present, bracelets made with beads of a thousand colors and extravagant designs, these bracelets are quite striking and are traditional of the people of the Amazon. While Grandpa Rufino was in Caracas I had the opportunity to ask him about this tradition and he told me that originally wearing necklaces and bracelets made with mustacilla (I don't know the name in English) was synonymous with being indigenous royalty or at least a person of high status, because only the shamans and their families had the abundance to make the payments to obtain this material. The shamans went to special waterfalls in the jungle and made the pagamento with different types of corn, they buried the corn of the colors they wanted on the waterfall, some time later the beads began to come out of the waterfall so that the women could weave the bracelets and the protections that the whole family wore on their bodies (hands, necks, arms, legs, ankles).
Over time I felt the call to create with my hands, I really like to create my accessories, grandfather told me once that this was my way and the truth is that when I knit, I feel it, it fills me with peace and I find it a wonderful form of expression, it has been one of the activities that I have enjoyed the most, the desire that I had to knit I joined them to a kind of lucrative idea of selling my art but I have only dedicated my free time and making one of these takes me at least an afternoon so the business has not gone very well hahaha the truth is that I have not yet sold the first handle because every time I make a new one some friend falls in love and I give them to him, but I swear that each of the gifts I have made in the form of bracelets or necklaces, has returned to me in a thousand forms of abundance, besides seeing my friends with their bracelets on is more than beautiful and rewarding for me. Today I would like to show you the process while I weave one of my bracelets hoping that one day someone will be encouraged to create from the art of just enjoying the moment.
Water Dream bracelet
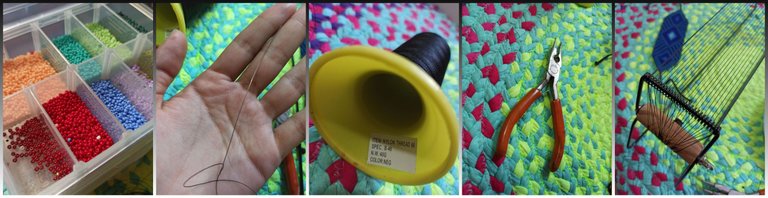
Materials:
- One loom
- Waxed nylon thread
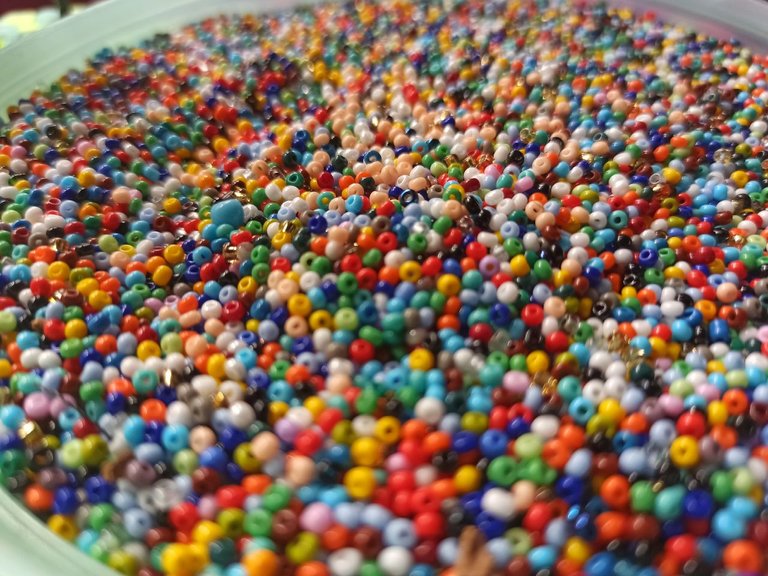
- Colored Czech beads
- 6cm long needle with thin bead head for beads
- Costume jewelry tweezers
- Scissors
Well the first thing to make any pattern is to choose the colors in which you are going to bazaar and from there its degrades, shades and contrasts.
This particular design is quite used in the lands of Putumayo, once a taita told me that the rhombus has meaning, it was the womb of the mother and so I see it, to this rhombus we add some lines and tones can be several thousand ways.
For this bracelet I wanted to use blue tones so I looked for a sequence of 4 similar tones and I started the work without making a pattern because it seemed quite simple to follow (because I make many designs in the form of diamonds), once I have this clear I proceed to assemble the loom, I wanted this bracelet to be thick and the truth is that at the moment the thickest I can make them is 23 beads wide because the loom I have is small, so I put 24 full rows and to make it as good as possible, I made sure that the threads were well tightened.
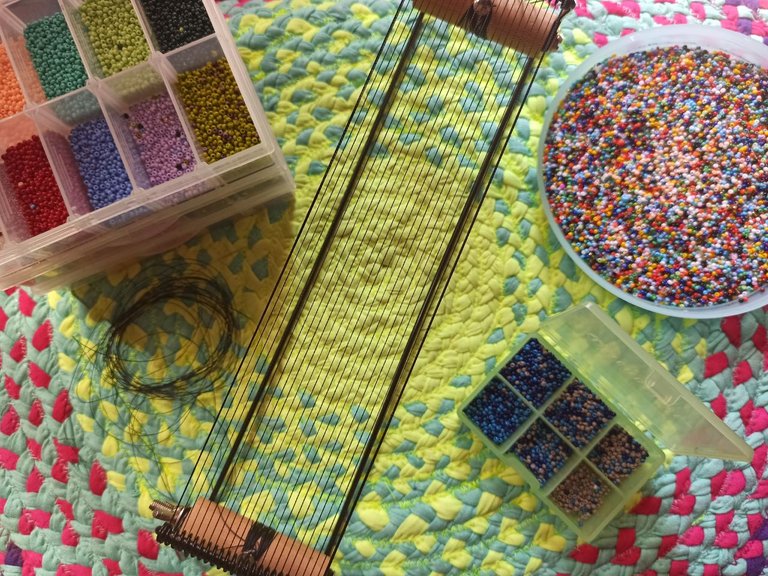
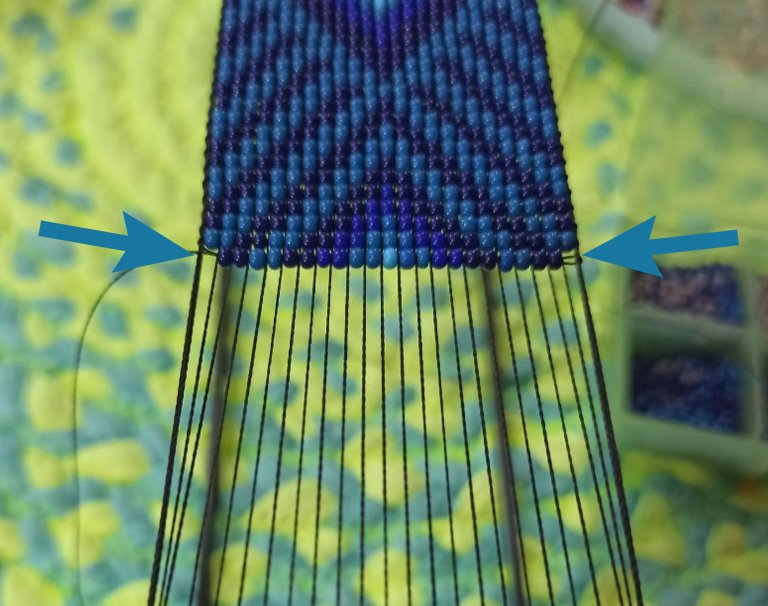
To begin I also prepare the needle with 4 meters of thread and start from the middle of the loom leaving half of the thread to weave the right half and the other for the left half without interrupting the weaving with knots or ties. The first row is important here is where I manage the space, divide it and leave the threads in the most comfortable position for weaving. The idea is to pass the thread through the bead and in turn over each of the threads of the loom, one by one, both above and below. With 23 beads already chosen, I start weaving in this way...
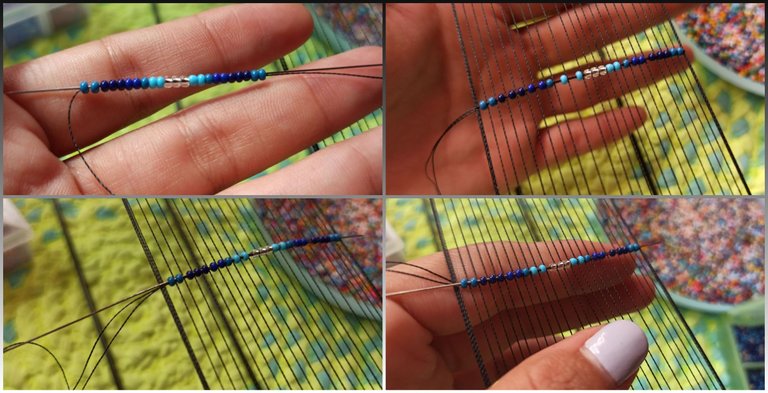
I continue below the threads, present the beads in order and place them one by one between the 23 spaces, passing the needle inside them and above the threads so that it is well gripped. I continue making lines until I cover the entire pattern I chose for the center of the bracelet.
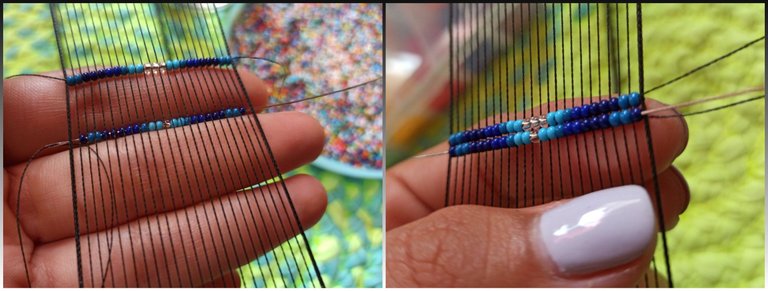
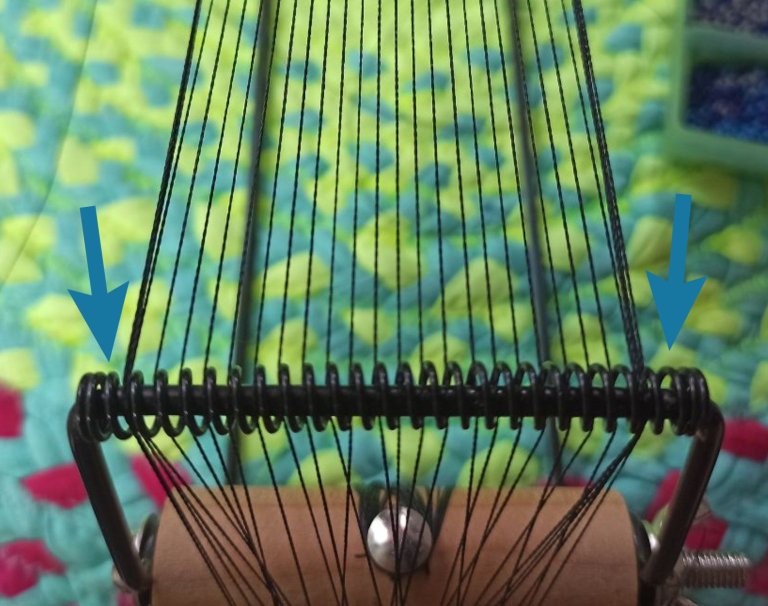
A medida que voy llegando a los extremos los hilos empiezan a tensarse y es entonces cuando toca recoger los extremos y enrollarlos, la intención con estos telares es que la pulsera quede lo más recta y firme posible, sin prensar esto es posible, pero hay que tener un poco de tacto, que sin duda la práctica es lo único que nos puede ayudar a desarrollar la fuerza exacta para que los hilos no queden ni muy tensos ni muy sueltos.
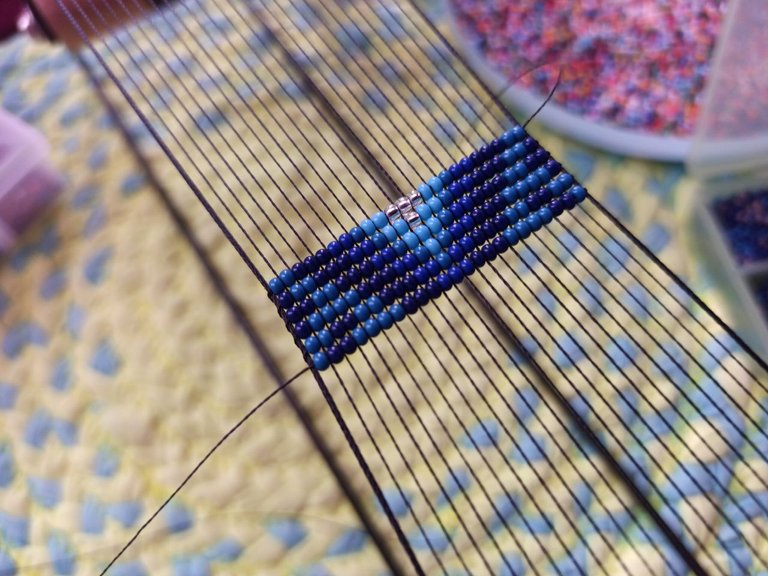
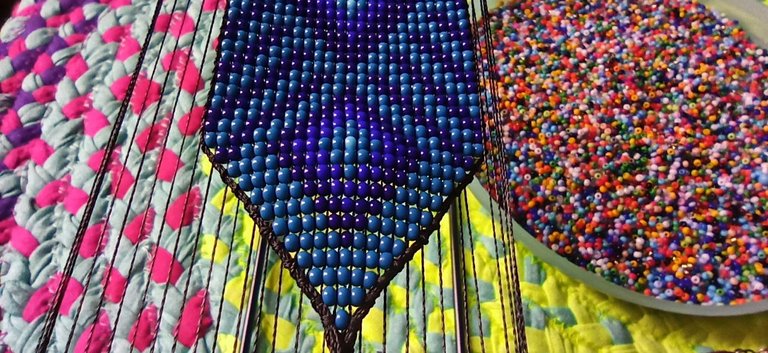
When I have decided that the pattern is finished and the bracelet is the right size for my wrist, the next step is to decrease the beads from the edges.
21, 19, 17, 15, 13, 11, 9, 7, 5, 3 y 1.
To finish the bracelet I cut the threads detaching them from the loom and wove the edges with a braid of three so that there would be two handles, at the ends a couple of knots that I burned with the help of a lighter so that it would stick well and would not fall apart.
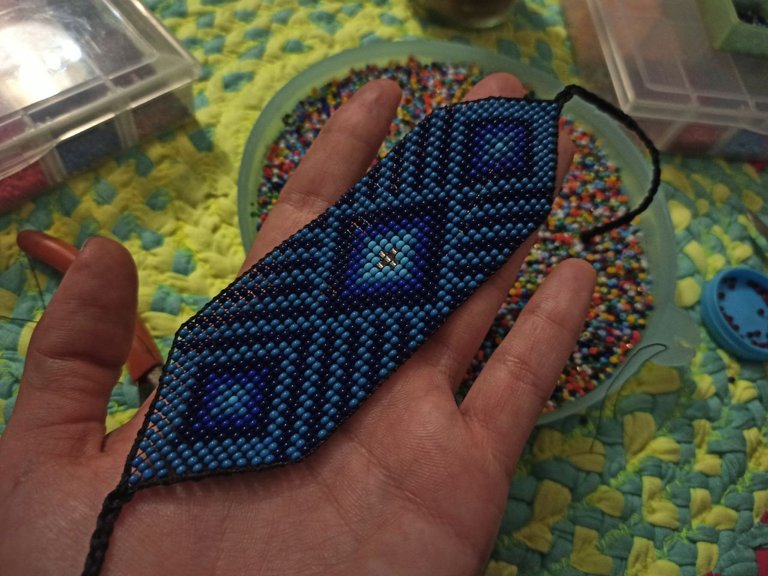
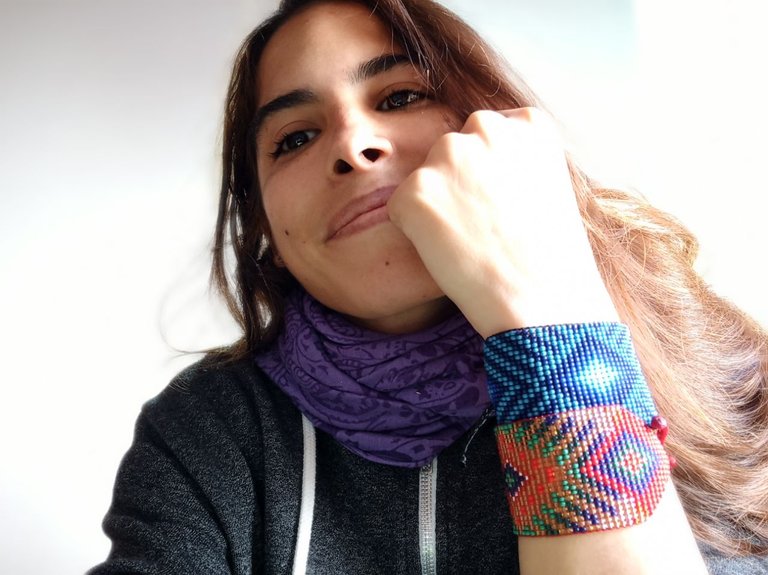
This is your result...
That's all for today, I hope I have stimulated a little bit of that creative imagination that resides in each one of us, I bid you a wonderful start of the week.


Cuando vas a una ceremonia de medicinas indígenas sueles ver en las muñecas de todos los presentes, pulseras hechas con mostacillas de mil colores y diseños extravagantes, estas pulseras son bastante llamativas y son tradicionales de los pueblos del Amazonas. Estando el abuelo Rufino en Caracas tuve la oportunidad de preguntarle acerca de esta tradición y el me conto que en originalmente llevar collares y pulseras hechos con mostacilla era sinónimo de ser de la realeza indígena o al menos una persona con mucho estatus, debido a que solo los chamanes y sus familias tenían la abundancia como para realizar los pagamentos para obtener este material. Los chamanes iban a cascadas especiales selva a dentro y realizaban el pagamento con diferentes tipos de maíz, enterraban sobre la cascada el maíz de los colores que querían, un tiempo después comenzaban a salir las mostacillas de la cascada para que luego las mujeres tejieran las pulseras y las protecciones que llevaba toda la familia en sus cuerpos (manos, cuellos, brazos, piernas, tobillos).
Con el tiempo fui sintiendo el llamado a crear con mis manos, me gusta muchísimo crear mis accesorios, el abuelo llego a decirme en una ocasión que este era mi camino y la verdad es que cuando tejo, así lo siento, me lleno de paz y me parece una forma de expresión maravillosa, ha sido de las actividades que mas he disfrutado, las ganas que tenia de tejer las uni a una especie de idea lucrativa de vender mi arte pero solo le he dedicado mi tiempo libre y hacer una de estas me lleva al menos una tarde asi que no ha andado muy bien el negocio jajaja la verdad es que aun no he vendido la primera manilla porque cada que hago una nueva algún amigo se enamora y se las doy, pero les juro que cada uno de los regalos que he hecho en forma de pulsera o collar, ha vuelto a mi en mil formas de abundancia, a demás de que ver a mis amigos con sus pulseras puestas para mi es mas que hermoso y gratificante. Hoy me gustaría mostrarles el proceso mientras tejo una de mis pulseras esperando que alguno se anime algún día a crear desde el arte de solo disfrutar el momento.
Mostacilla Sueño de Agua
Materiales:
- Un telar
- Hilo nylon encerado
- Mostacilla checa de colores
- Aguja de 6cm de largo con cabezal delgado para mostacillas
- Pinzas de bisuteria
- Tijeras
Bueno lo primero para realizar cualquier patron es elegir los colores en los cuales te vas a bazar y de allí sus degrades, matices y contrastes.
Este diseño en particular es bastante usado en las tierras del putumayo, en una ocasión un taita me comento que el rombo tiene significado, era el vientre de la madre y así lo veo, a este rombo le agregamos algunas líneas y los tonos pueden varias de mil formas.
Para esta pulsera quise usar tonos azules por lo que busque una secuencia de 4 tonos que se parecieran y comencé el trabajo sin hacer patron ya que me parecía bastante sencilla de seguir (Debido a que hago muchos diseños con forma de rombos), una vez que tengo esto claro procedo a armar el telar, con armar me refiero a colocar los hilos en posición comenzando de un lado al otro y poniendo refuerzo en los hilos de los bordes, quería que esta pulsera fuese gruesa y la verdad es que por el momento lo mas grueso que puedo hacerlas es de 23 mostacillas de ancho ya que el telar que tengo es pequeño, así que puse 24 hileras completas y para que quede lo mejor posible, me asegure de que los hilos estuvieran bien tensos.
Para comenzar preparo también la aguja con 4 metros de hilo y comienzo desde la mitad del telar dejando la mitad del hilo para tejer la mitad derecha y la otra para la mitad izquierda sin interrumpir el tejido con nudos o empates. La primera línea es importante aquí es donde administro el espacio, lo divido y dejo los hilos en la posición mas cómoda para tejer. La idea es pasar el hilo a través de la mostacilla y a su vez sobre cada uno de los hilos del telar, uno a uno, tanto por arriba como por abajo. Con 23 mostacillas ya elegidas comienzo a tejer de esta forma...
Sigo por abajo de los hilos, presento las mostacillas en orden y las coloco una a una entre los 23 espacios, pasando la aguja por dentro de ellas y por arriba de los hilos para que quede bien agarrada. Continuo haciendo líneas hasta alcanzar cubrir todo el patron que elegí para el centro de la pulsera.
A medida de que voy llegando a los extremos los hilos comienzan a tensarse y allí es cuando es hora de recoger los extremos y rodarlos, la intención con estos telares es que la pulsera quede lo mas recta y firme posible, sin presionar esto es posible, pero hay que tener un poco de tacto, cosa que sin dudas la practica es la única que nos puede ayudar a desarrollar la fuerza exacta para que los hilos no queden muy apretados o muy sueltos.
Cuando ya he decidido que el patron finalizo y que la pulsera ya tiene el tamaño correcto para mi muñeca, lo que queda es ir disminuyendo las cuentas desde los bordes.
21, 19, 17, 15, 13, 11, 9, 7, 5, 3 y 1.
para concluir la pulsera corte los hilos desprendiéndolos del telar y tejí los bordes con una trenza de tres para que quedaran dos agarraderas, en sus extremos un par de nudos que queme con la ayuda de un encendedor para que quede bien pegada y no se deshaga.
Este es su resultado...
Esto fue todo por hoy espero haber estimulado un poquito de esa imaginación creativa que reside en cada uno de nosotros, me despido deseándoles un maravilloso inicio de semana.
¡Espectaculares! Mi hermana las hace, ella sí ha vendido bastantes jejeje, ojalá te puedas dedicar a ellas unos ratos a la semana, siempre son un éxito :)
Jajajajaja bueno a veces entre las mil cosas que debo hacer no me da chance, pero me disfruto muchísimo el tiempo que le puedo dedicar. Ahorita estamos organizándonos con las mujeres de la comunidad para vender sus artesanías aquí en la ciudad, así que pronto tendremos material bonito. XD
:OO ¡Qué belleza Ire! Yo quiero 15 de esas!!!! Te quedaron espectaculares.
Yeeee... jajaja bueno cuando quieras puedes ser mi primer cliente jajajaja
¡Son hermosas esas pulseras! Desconocía la historia y proceso de creación, gracias por compartirlo. A mí me encantaría tener un collar de esos de mostacillas. 😊 Saludos, guapa. Éxito en tus proyectos.
Son bellísimas, me enamoro de cada una que veo o hago, pronto voy a tratar de hacer un collar y quizás hasta puedas animarte a hacer el tuyo, te juro que no es difícil.
Genial, estaré atenta. 🤓📝
Hola @auelitairene, me da gusto darte la bienvenida a la comunidad #NeedleWorkMonday, una comunidad en donde las protagonista son las agujas.
Estoy fascinada con la historia que compartes, me encanta lo relacionado con los indígenas, me parece que son mágicos, y ensañan tanto con sus vivencias, es maravilloso saber que para ellos todo tienen un significado y un objetivo.
Como soy amante de tejer, tengo dentro de mis pendientes tejer este tipo de pulsera, inclusive tengo el material, lo que me falta es el telar ¿sabes dónde se puede conseguir en Caracas?
Trabajas muy lindo...
Espero tenerte por acá nuevamente con tus hermosas pulseras.
Saludos.
Adiwa! Muchas gracias por la bienvenida, mira la verdad el mío lo compre en el Táchira ahorita justo necesito uno más grande pero he andado buscando y nada, voy a tratar de hacer uno y lo publicó en un post aprovechando quizás esté impulso. Un abrazo. Saludos♥️
Hi @auelitairene!
Wow this technique and art is soooo beautiful! You make it look easy ;D
I love the pattern you chose and the color combination. I really enjoyed reading the history behind this art. Very beautiful work! If you ever decide to open up an online shop please leave the link here in this community! I’d love to wear such a unique and gorgeous bracelet :D
Every week needleworkers from around the globe get together to share our work, patterns, tips, ideas and shortcuts as we support one another. Our goal is to inspire the Hive blockchain to give crafting a try.
On Monday’s we use the #needleworkmonday tag and on all other days we use the #needlework tag without the word Monday attached. We share and post our work directly from the Community page.
We encourage our members to share the process of their work through photos (as you have done here). This not only validates your work but it takes us along the creative journey with you :)
For more information about what we do and for our posting guidelines please visit our FAQs.
I’m looking forward to seeing more of your work!
Thank you ~
Thank you very much, I will try to make a couple of video tutorials without sound maybe to make the process more practical, and maybe soon I will open my own sales page hahahahahah it would be fantastic. thank you very much for the welcome I have received from this kind community, I am anxious to continue sharing this passion with you. Adiwa!
You’re welcome ;)
Oh yes that would be fantastic :D
So glad you feel welcomed ~
Hello @auelitairene! Your post was selected by our staff on behalf of the OCD Community Incubation Program and has received an OCD upvote! Congratulations!!! Please keep sharing these quality posts :)
Written by @crosheille for the NeedleWorkMonday Community ~