Decorated bags for Christmas gifts (ESP-ENG)

Hoy quiero enviar un abrazo especial para toda la gente hermosa y creativa de esta comunidad con todo mi cariño. Va cargado, además, de los mejores deseos y bendiciones para todos ustedes. Espero que estén pasando un día en companía de sus seres queridos, que en sus mesas puedan tener algo que compartir con sabor de amor, paz y armonía y que en esta fecha en la que celebramos la Natividad del Niño Dios, renazca también en los corazones de cada uno de nosotros su bondad, su pureza y su inocencia.
Estos días han sido muy ajetreados, y entre una y otra cosa había dejado para después la decoración de las bolsitas en las que metería unos detallitos para regalar a la familia. Pero anoche comencé a hacer estas figuras navideñas para pegárselas a las bolsitas de papel que había dispuesto para obsequiar, hoy las terminé y ya están listas para ponerlass debajo de mi árbol.
Aqui les dejo la foto de los materiales que usé y les muestro cómo las hice en este paso a paso fotográfico.
Today I want to send a special hug to all the beautiful and creative people of this community with all my love. It is also loaded with the best wishes and blessings for all of you. I hope you are spending a day in the company of your loved ones, that at your tables you may have something to share with a taste of love, peace, and harmony, and that on this date in which we celebrate the Nativity of the Child God, his goodness, purity, and innocence may also be reborn in the hearts of each one of us.
These days have been very busy and between one thing and another I had left for later the decoration of the little bags in which I would put some little gifts to give to the family. But last night I started to make these Christmas figures to stick them to the paper bags I had prepared to give as gifts, today I finished them and they are ready to put them under my tree.
Here is a photo of the materials I used and I show you how I made them in this step-by-step photo.
Bositas de papel
Plantillas de figuras de Navidad
Foamy
Tijeras
Pistola de silicón
Perforadores
Paper bobbins
Christmas figurine stencils
Foamy
Scissors
Silicone gun
Punchers

Lo primero que debemos hacer es marcar las figuras con las plantillas en el foamy. En este caso, marqué y recorté un arbolito de Navidad. Luego bordeé con marcador toda la figura para resaltarla y le pegué bolitas de foamy rojo sacadas con el perforador.También, con el perforador de estrella, saqué una en el foamy dorado y se la puse en la cima del árbol.
 |  |
|---|
The first thing to do is to mark the figures with the stencils on the foamy. In this case, I marked and cut out a Christmas tree. Then, I marked with marker all around the figure to highlight it and glued red foamy balls with the hole punch, and also, with the star punch, I cut one out of the gold foamy and put it on the top of the tree.
 |  |
|---|
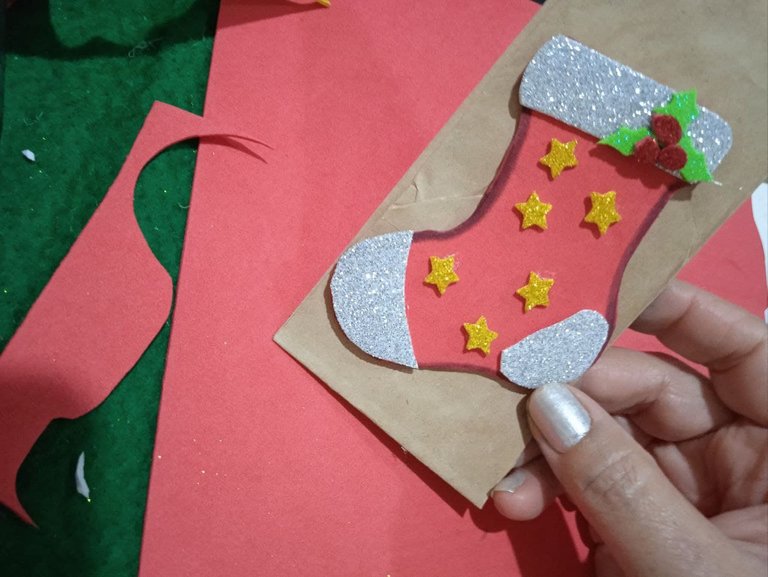
La siguiente figura que elaboré fue una botita navideña. Igual marqué la plantilla en el foamy rojo, recorté y decoré con una ramita de navidad y unas estrellas en foamy dorado.
The next figure I made was a Christmas boot. I marked the template on the red foamy, cut it out and decorated it with a Christmas twig and some stars in gold foamy.
 |  |
|---|
Luego, saqué el molde de una campana amarilla y la decoré con ramitas de Navidad. Todas estas figuras representativas de esta época me gustan mucho y con ellas se pueden adornar diferentes espacios.
Then, I took the mold of a yellow bell and decorated it with Christmas twigs. I really like all these figures representative of this season and with them you can decorate different spaces.
 |  |
|---|
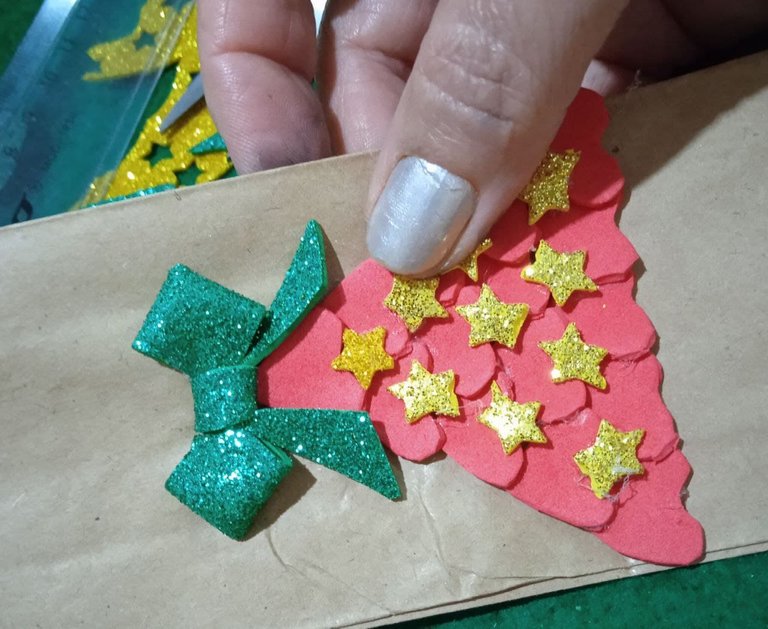
Para hacer estos arbolitos, marqué y recorté corazones para armarlo, pegando en la base cinco en forma invertida, luego cuatro, tres, dos y uno. En la cúspide, le puse un lacito para decorarlo. Uno lo hice con corazones de dos tonos de verde y el otro de corazones rojos. En las uniones les puse estrellitas para dar el toque de brillo final. Me encantaron como quedaron.
To make these little trees, I marked and cut out hearts to assemble them, gluing five at the base in an inverted shape, then four, three, two, and one. At the top, I put a bow to decorate it. One was made with hearts in two shades of green and the other with red hearts. At the joints, I put little stars to give the final touch of brightness. I loved how they turned out.
 |  |
|---|
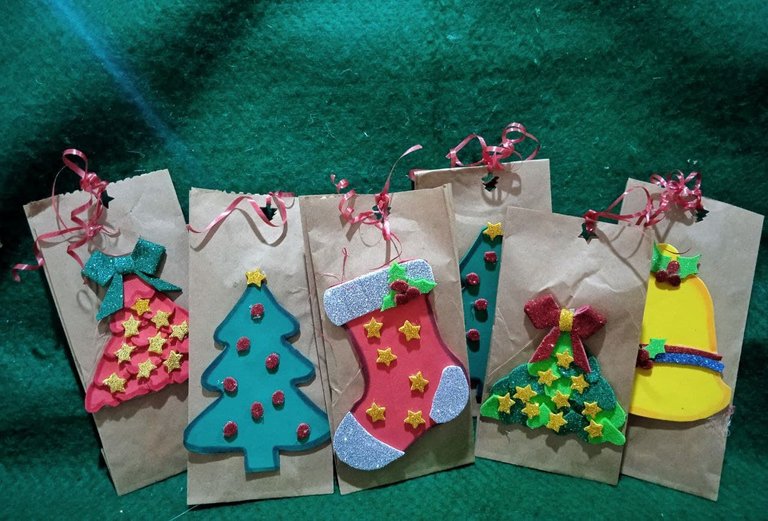
Resultado final/ Final result
Así quedaron las bolsitas decoradas y ya están listas para ser obsequiadas con un detalle que contienen.
This is how the decorated bags turned out and are ready to be given as a gift.
¡Feliz Navidad, amigos creativos de @hivediy, y un abrazo especial para @equipodelta, @marybellrg y @fmbs25, el maravilloso equipo de esta linda comunidad!
¡Hasta otro momento de disfrute y creatividad!
Until another moment of enjoyment and creativity!
Todo el contenido de esta publicación es contenido original y trabajo creativo personal.Los separadores y el banner son mis diseños en Canva. Las fotos son de mi propiedad, tomadas con mi celular Redmi9A
All the content in this post is original content and personal creative work, the banner and dividers are my designs in Canva. The photos are my own, taken with my Redmi9A cell phone.
https://twitter.com/Aurodivys/status/1474432489284419590
The rewards earned on this comment will go directly to the person sharing the post on Twitter as long as they are registered with @poshtoken. Sign up at https://hiveposh.com.
Feliz navidad amiga, gracias por ese compartir con nosotros, por enseñarnos día a día cómo hacer cositas bonitas. que pases un día lleno de hermosas emociones en compañía de tus seres queridos. Gracias por decorar nuestras casas y embellecerla con estupendos detalles.
Feliz navidad amiga pásala muy bien en compañía de tus familiares. Abrazos.
Hermoso 💕 detalle, amiga. Este estilo me gusta porque no es complicado y todo hecho con papel me encanta. Feliz Navidad!
Hola amiga, te quedaron hermosas, felicidades.