Perpetual calendar, practical and very easy to make (Spa- Eng)

Salud, bendiciones y mucho bienestar para toda la gente hermosa y creativa de esta comunidad, durante el recién estrenado 2022.
Esta es mi primera publicación del año en este espacio que nos ofrece @hivediy para desarrollar nuestra creatividad y que todos los que hacemos vida por aquí, amamos porque nos permite un lugar para relajarnos y crear detalles con nuestras manos, y al mismo tiempo, un lugar para compartir con mucha gente creativa y talentosa en #Hive.
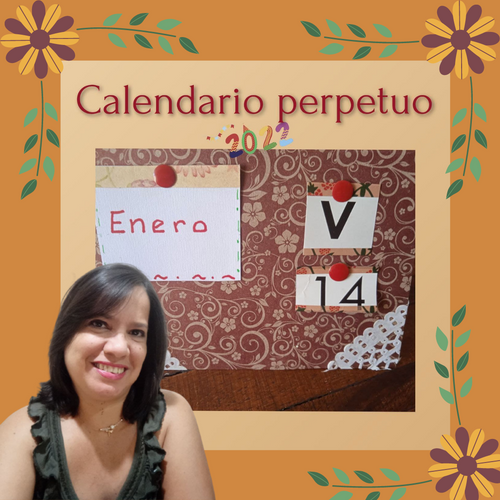
En esta primera publicación quise compartir con ustedes la elaboración de un sencillo calendario perpetuo, práctico y fácil de hacer, pues siempre es necesario tener uno mano para organizar nuestras actividades, nuestra agenda y nuestros compromisos.
Un calendario perpetuo nos permite saber el mes y el día, sin determinar un año específico, por eso podemos usarlo permanentemente durante todos los años.
Recuerdo que hasta hace unos años, los comerciantes de la ciudad regalaban un calendario a todos sus clientes durante todo el mes de diciembre. Y, al inicio del año, tenía tantos que podía regalar. Ya esta costumbre quedó atrás, imagino que resulta muy costoso para los dueños de comercios y tiendas imprimir calendarios para regalar. Hay que reconocer que el papel era de calidad y muchas veces las imágenes escogidas eran verdaderas obras de arte.
La elaboración de este calendario es muy sencilla y como les muestro en los materiales, la mayoría de los que usé son reciclados. Sin más, vamos a ponernos manos a la obra. Espero que se animen a elaborar el suyo y puedan compartirlo con todos por aquí.
Cheers, blessings, and much well-being to all the beautiful and creative people of this community, during the newly released 2022.
This is my first post of the year in this space that @hivediy offers us to develop our creativity and that all of us who make life around here, love because it allows us a place to relax and create details with our hands, and at the same time, a place to share with many creative and talented people in #Hive.
In this first publication I wanted to share with you the elaboration of a simple perpetual calendar, practical and easy to make, because it is always necessary to have one at hand to organize our activities, our agenda, and our commitments.
A perpetual calendar allows us to know the month and the day, without determining a specific year, so we can use it permanently throughout the years.
I remember that until a few years ago, merchants in the city gave a calendar to all their customers for the whole month of December. And, at the beginning of the year, I had so many that I could give away. This custom is now a thing of the past, I imagine that it is very expensive for store owners to print calendars to give away. Admittedly, the paper was of high quality and often the images chosen were true works of art.
The elaboration of this calendar is very simple and as I show you in the materials, most of the ones I used are recycled. Without further ado, let's get down to work. I hope you are encouraged to make yours and share it with everyone here.
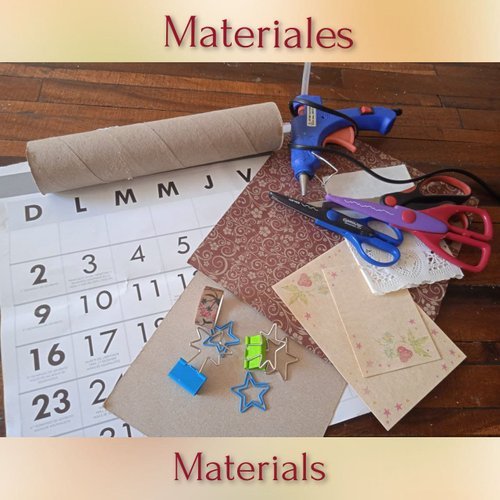
- Hoja de calendario reciclada
- Cartón
- Cartulinas decoradas
- Washi tape
- Tijeras
- Pistola de Silicón
- Papel decorativo para tortas
- Marcadores
- Chinches para corcho
- Recycled calendar sheet
- Cardboard
- Decorated cardboard
- Washi tape
- Scissors
- Silicone gun
- Decorative paper for cakes
- Marker pens
- Cork pins
 |  |
|---|
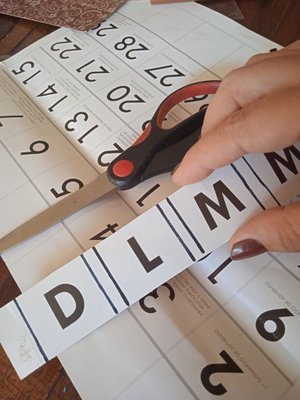
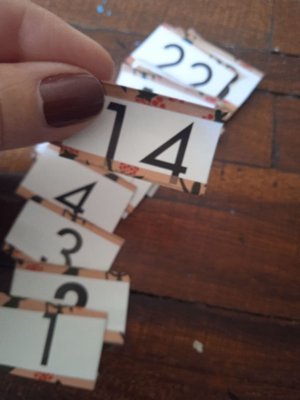
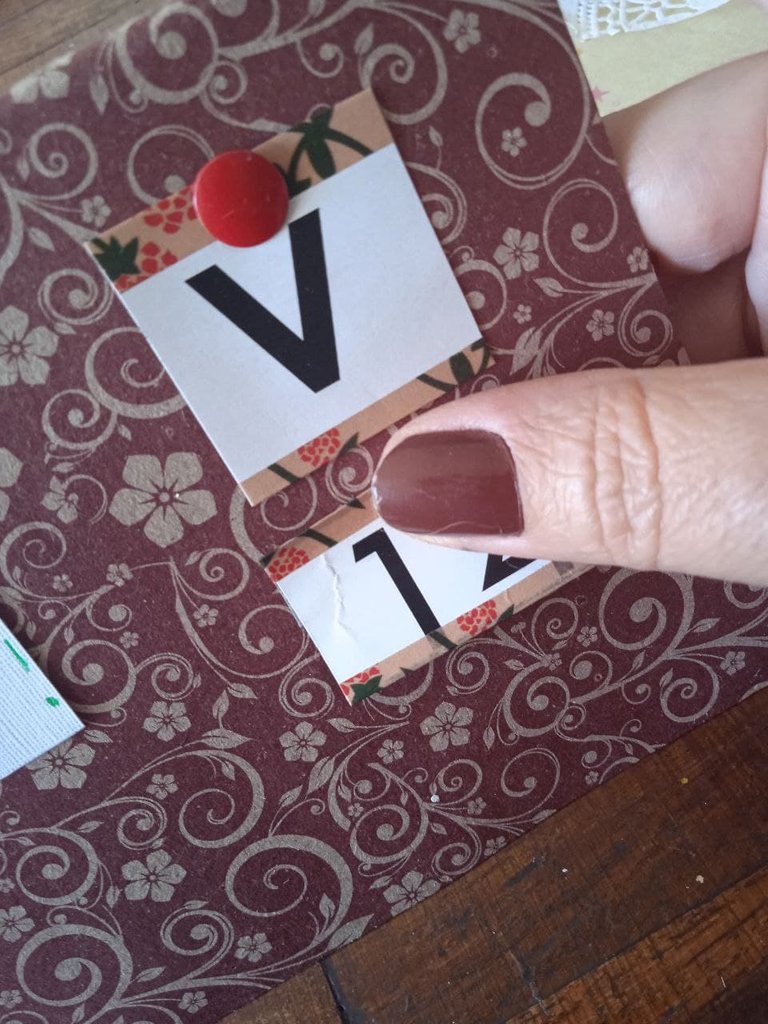
- El primer paso que debemos hacer es recortar los números y las letras que indican los días de la hoja de calendario que hemos reciclado. Debemos hacer los cortes, cuidando de que todo quede del mismo tamaño.
- The first step is to cut out the numbers and letters that indicate the days from the recycled calendar sheet. We must make the cuts, making sure that everything is the same size.
 |  |
|---|
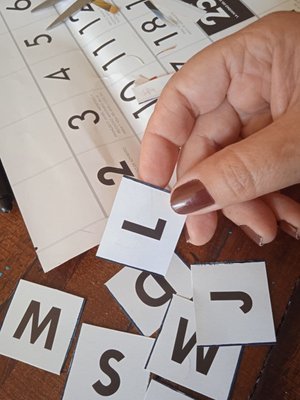
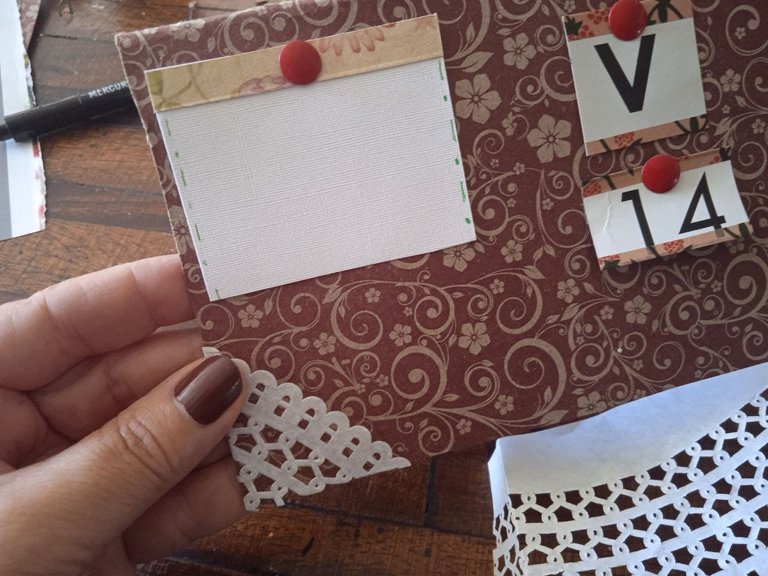
- Después de tener los números y las letras bien recortados, procedemos a decorar los bordes, esto es opcional, según tu gusto. Yo quise resaltarlos pegando en los bordes superior e inferior un trocito de washi tape en tonos similares al fondo de la cartulina que iba a utilizar como base o soporte del calendario.
- After having the numbers and letters well cut out, we proceed to decorate the edges, this is optional, according to your taste. I wanted to highlight them by sticking on the top and bottom edges a little piece of washi tape in similar tones to the background of the cardboard that I was going to use as a base or support for the calendar.
 |  |
|---|
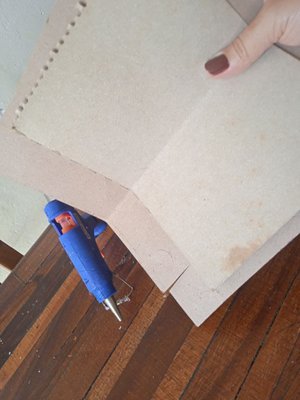
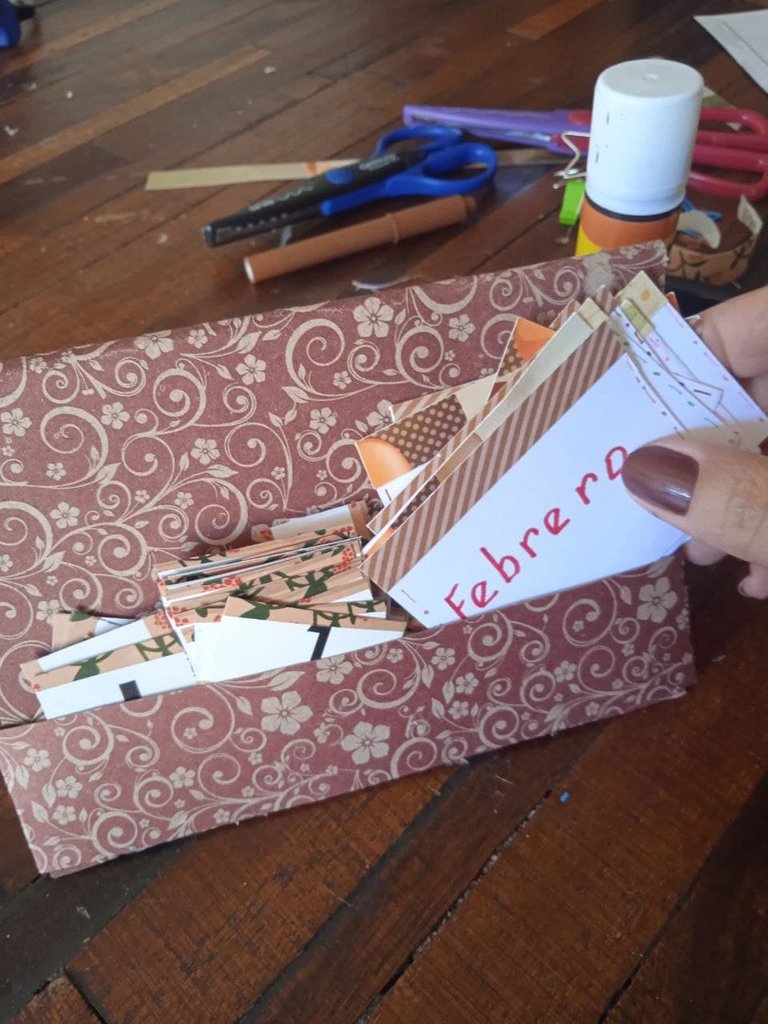
- A continuación, procedemos a forrar el trozo de cartón que será el soporte del calendario perpetuo con la cartulina decorativa que elegimos para este proyecto. Luego cortamos los bordes, pegamos una cinta que servirá para sujetar el cartón en su posición, según la forma que le dimos. También en este punto, pegué otro trozo de cinta que servirá de bolsillo para guardar los números, letras y nombres de los meses que iremos cambiando diariamente.
- Next, we proceed to line the piece of cardboard that will be the support for the perpetual calendar with the decorative cardboard we chose for this project. Then we cut the edges, glue a ribbon that will serve to hold the cardboard in position, according to the shape we gave it. Also at this point, I glued another piece of ribbon that will serve as a pocket to keep the numbers, letters and names of the months that we will be changing daily.
 |  |
|---|
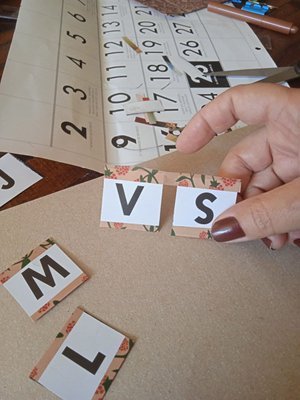
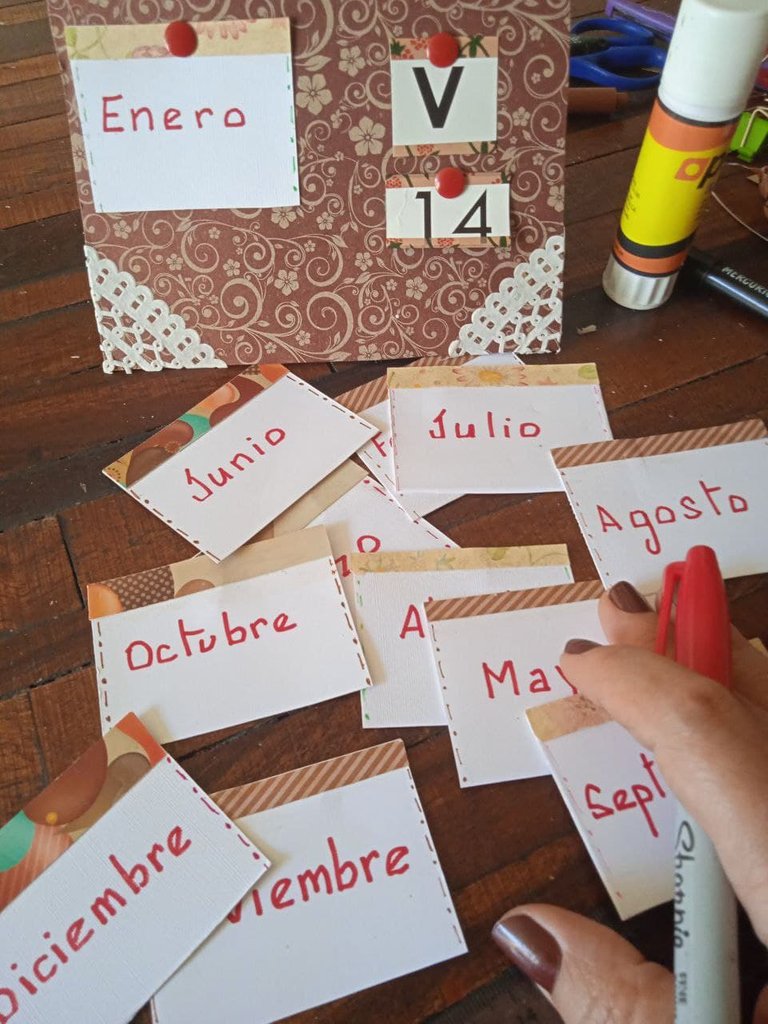
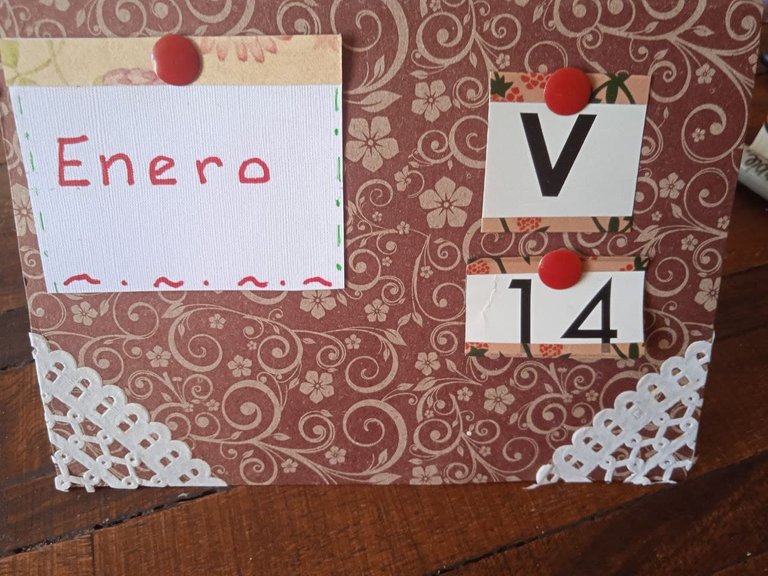
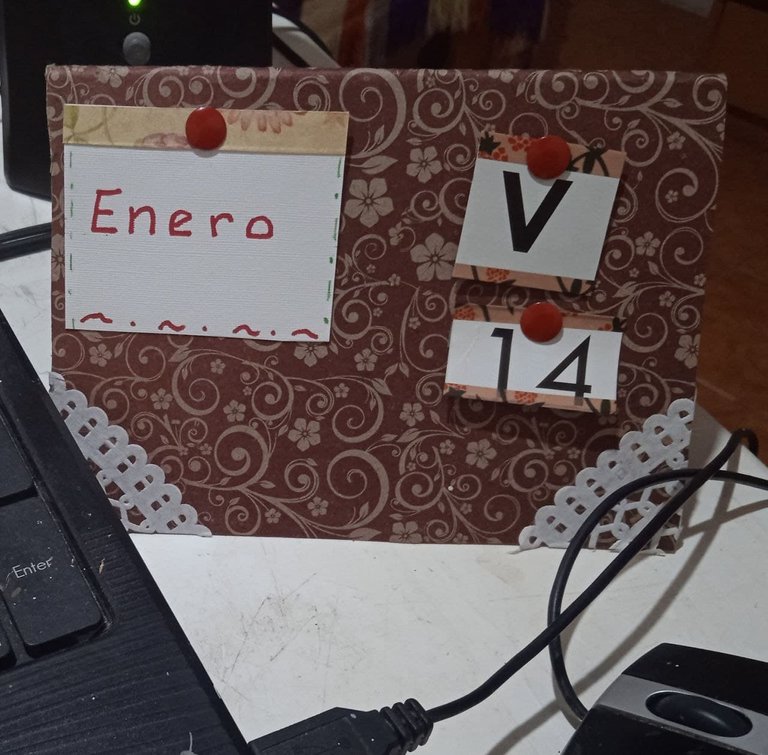
- Luego de esto, comencé a armar mi calendario perpetuo y dispuse del lado izquierdo, el pedazo de cartulina que nos indicará el mes y del lado derecho la letra que nos indica el nombre del día y debajo, en el mismo lado derecho, el número del día. Para decorar los bordes inferiores del calendario, le pegué un pedacito del papel decorativo para tortas y el acabado me gustó mucho.
- After this, I began to assemble my perpetual calendar and I placed on the left side, the piece of cardboard that will indicate the month and on the right side the letter that indicates the name of the day and below it, on the same right side, the number of the day. To decorate the bottom edges of the calendar, I glued a little piece of decorative paper for cakes and I really liked the finish.
 |  |
|---|
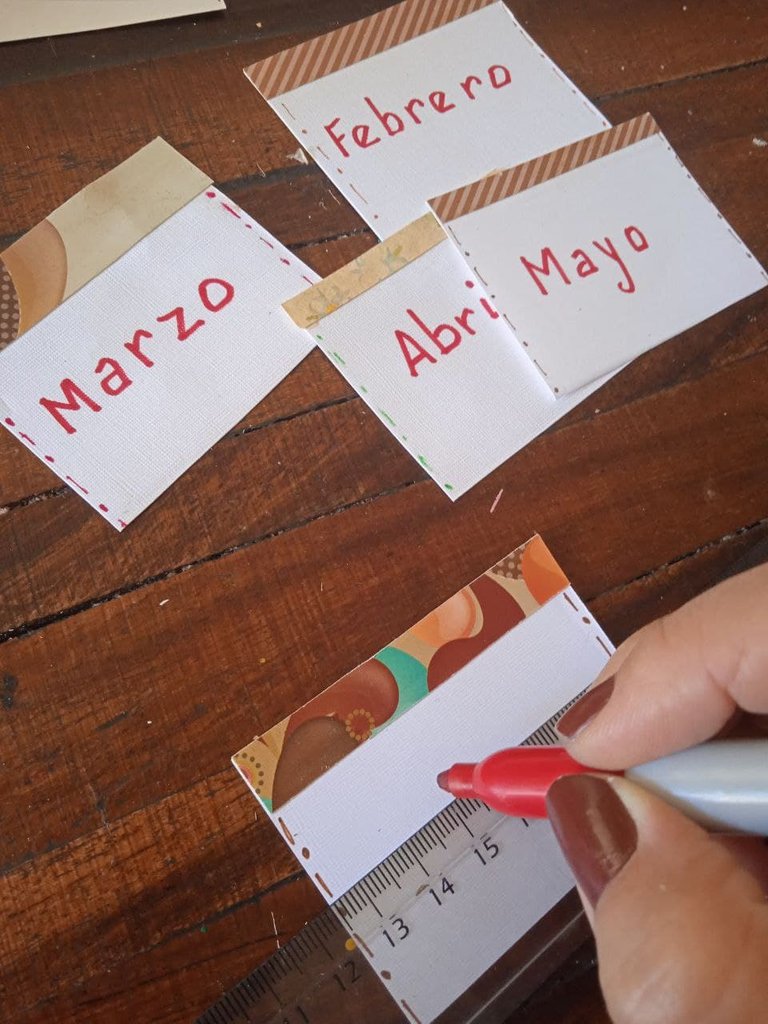
- Decoré el borde superior de la cartulina blanca y con el marcador de color rojo, escribí cada uno de los nombres de los meses del calendario. Puse el del mes de enero para completar la información del calendario y en conjunto se ve muy bien.
- I decorated the top edge of the white cardstock and with the red marker, I wrote each of the names of the months on the calendar. I put the one for the month of January to complete the information on the calendar and overall it looks great.
 |  |
|---|
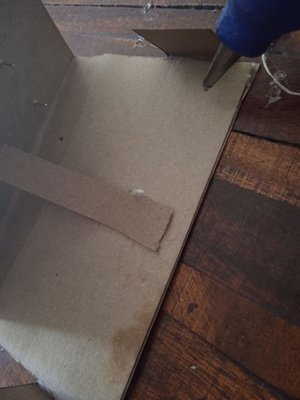
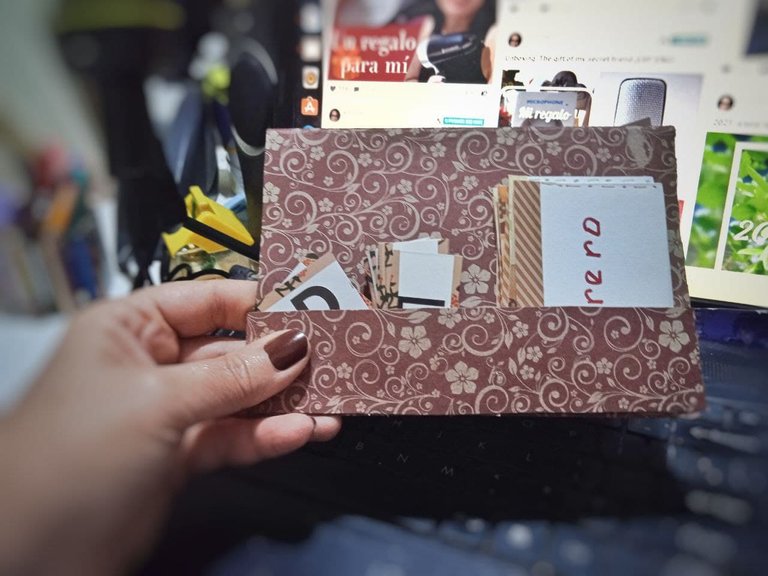
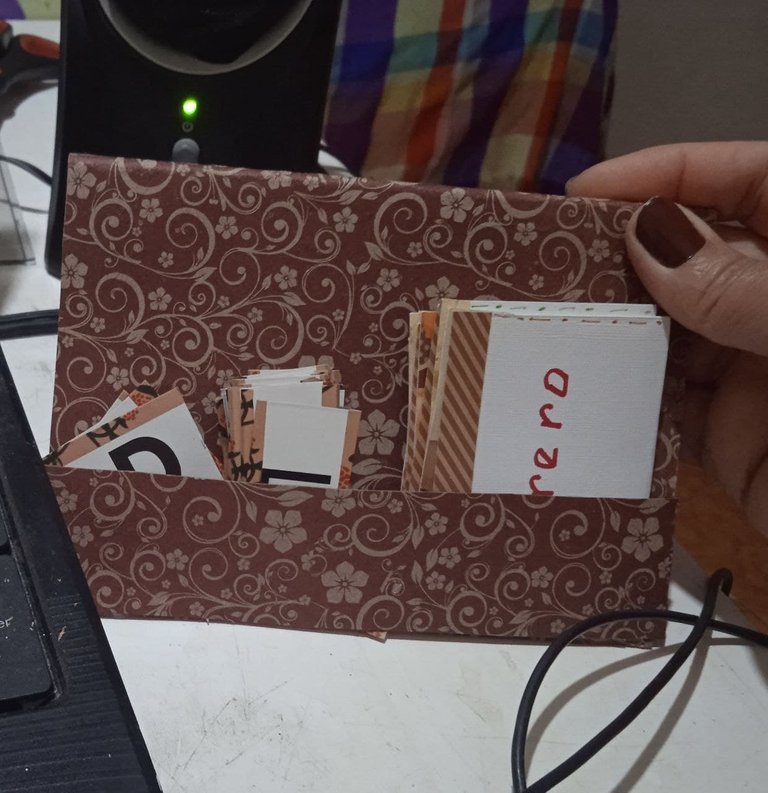
- Como les había indicado más arriba, por la parte trasera pegué un listón de la misma cartulina de base que serviría como bolsillo para guardar las partes del calendario, de esta manera tendríamos todo en orden y la mano a la hora de hacer los cambios de la fecha del día.
- As I had indicated above, on the back I glued a ribbon of the same cardboard base that would serve as a pocket to keep the parts of the calendar, so we would have everything in order and at hand when making changes to the date of the day.
Resultado Final / Final result
 |  |
|---|
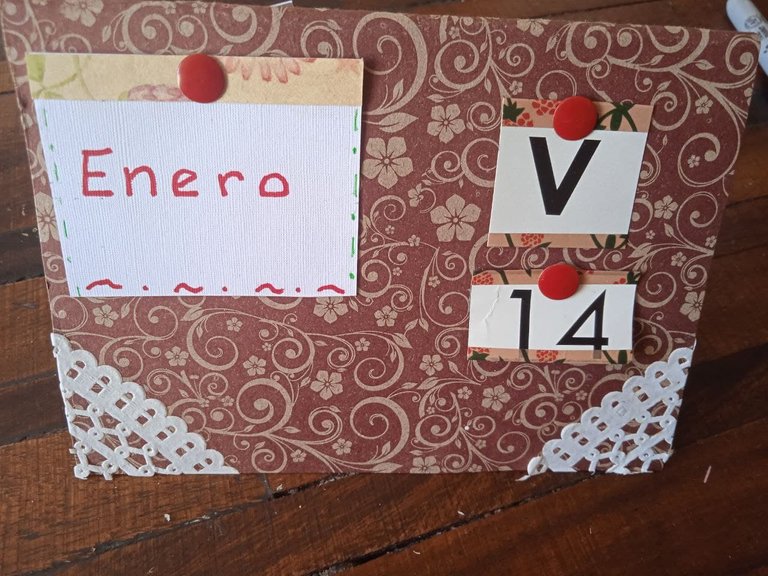
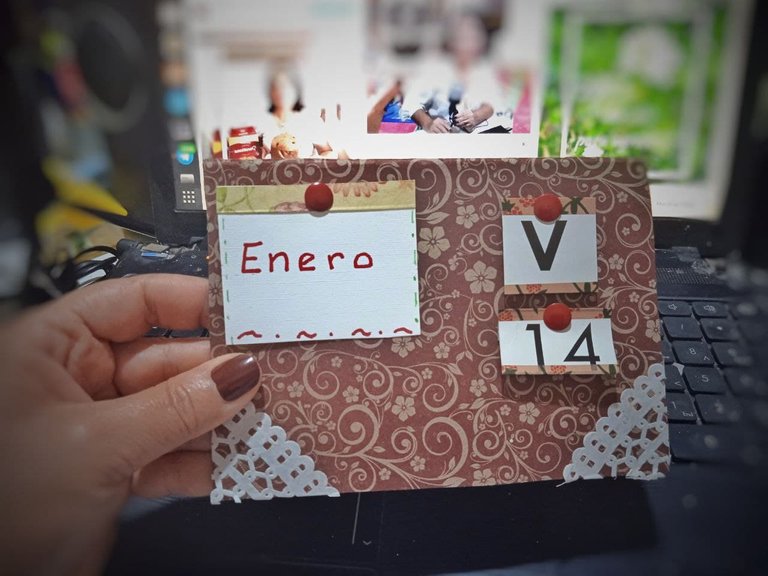
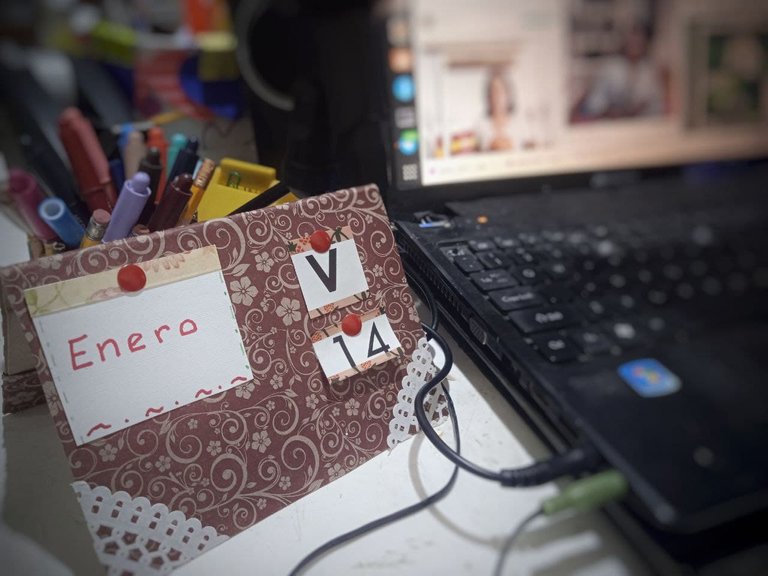
Así quedó terminado mi Calendario perpetuo, yo lo ubiqué en mi mesa de trabajo, al lado de la computadora para tenerlo todo el tiempo visible.
Espero que les haya gustado y que se animen a elaborar el suyo.
 |  |  |
|---|
This is how my Perpetual Calendar was finished, I placed it on my desk, next to the computer to have it visible at all times.
I hope you liked it and that you are encouraged to make your own.
 |  |
|---|
¡Hasta otro momento de disfrute y creatividad!
Until another moment of enjoyment and creativity!
Todo el contenido de esta publicación es contenido original y trabajo creativo personal.Los separadores y el banner son mis diseños en Canva. Las fotos son de mi propiedad, tomadas con mi celular Redmi9A
All the content in this post is original content and personal creative work, the banner and dividers are my designs in Canva. The photos are my own, taken with my Redmi9A cell phone.
Maravilloso amiga. Me encanta con ese estilo algo vintage.
Holaa, querida Isabel, feliz año y muchas bendiciones para ti. Gracias por la apreciación de mi trabajo, yo feliz de compartirlo por aquí. Un abrazo con mi cariño.
https://twitter.com/Aurodivys/status/1482075638815240193
The rewards earned on this comment will go directly to the person sharing the post on Twitter as long as they are registered with @poshtoken. Sign up at https://hiveposh.com.
Me encantaaaaa esta idea, la voy a poner en práctica.