Easy to Follow, From Beginner to Advanced, Guide For Midjourney AI Image Generation. Part 1 - Let's Get Started
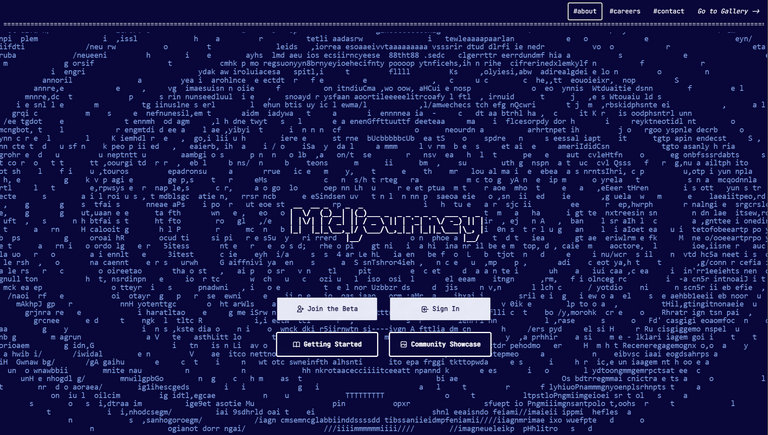 Midjourney Homepage
Before you start with Midjourney please understand the Guidelines and Terms of Service and use this tool responsibly
Let's start with the simple list of do's and don'ts when writing prompts for image generation AIs because you will need to keep this in mind if you want to get something really specific to generate:
Do's:
- Understand the capabilities and limitations of the image generation AI model you are working with.
- Clearly define the objective of the image you want to generate.
- Use specific, concrete nouns and adjectives in your prompt to provide clear instructions for the model.
- Test different variations of your prompt to see which one generates the best image output.
- Continuously monitor and evaluate the quality of the image outputs, and adjust your prompts accordingly.
- Keep in mind that making good prompts is an iterative process, and be prepared to fine-tune your prompts as necessary.
- Use positive and descriptive language.
Don'ts:
- Don't use overly complex or technical language that the model may not understand. (Although this can work with things like UI/UX)
- Don't provide too much or too little information in your prompts.
- Don't give the model instructions that are impossible for it to complete.
- Don't use overly broad or generic terms that can be interpreted in multiple ways.
- Don't provide multiple instructions or concepts in a single prompt.
- Don't use overly negative or restrictive language.
- Don't provide instructions that would create images that violate any laws or ethical standards.
- Don't use abstract or vague terms that can be interpreted in multiple ways.

Discord Setup
If you never used Midjourney, you should know that you are going to be operating this AI through Discord. The setup is easy:
Create a discord account if you don't have one
- that should be fairly straightforward.
Join Midjourney Discord Server
- you can do that by clicking Join the Beta on their website or by clicking on this invite: https://discord.gg/midjourney
Go into a random newbies channel you see. In there
/imagineand it doesn't matter what you type in the prompt. You might as well just typeaand press enter. The reason we don't care about the prompt now is that we are going to get this message:
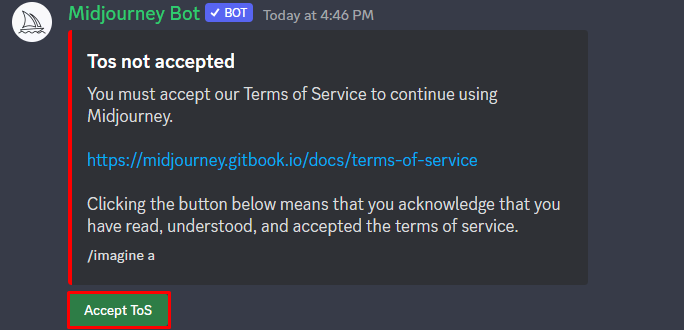
Click on accept ToS to continueClick on the Midjourney Bot (if you don't see a member list on the right, click on the icon left from the search bar, highlighted in the red box). Type in the message box
/settings
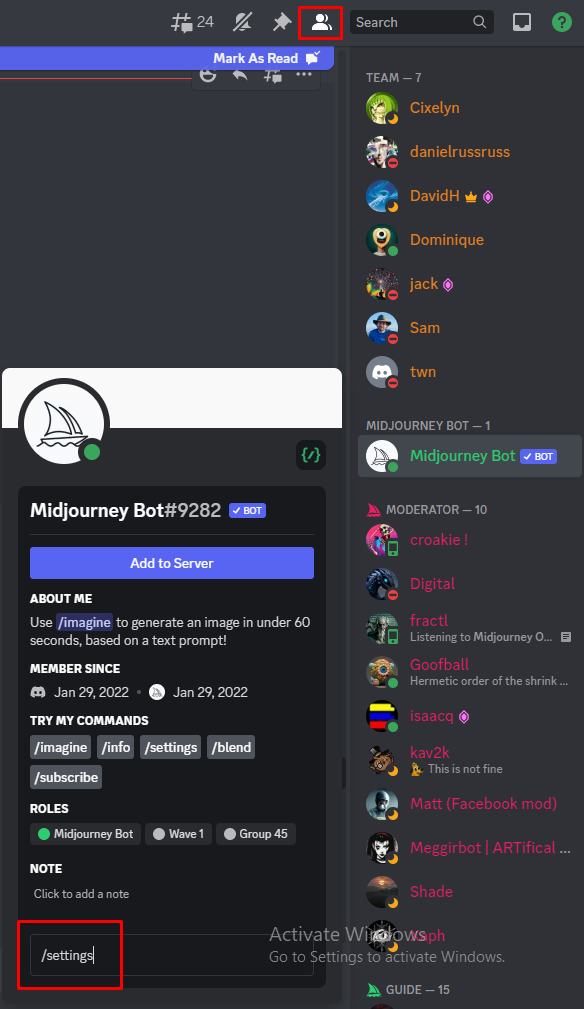
- This step is OPTIONAL and only for subscribers to the service, you can do all of this in the Newbies channel, but this will give you more privacy as it will open up a private chat window.
- This step is OPTIONAL and only for subscribers to the service, you can do all of this in the Newbies channel, but this will give you more privacy as it will open up a private chat window.
When you type
/settingsyou will get this: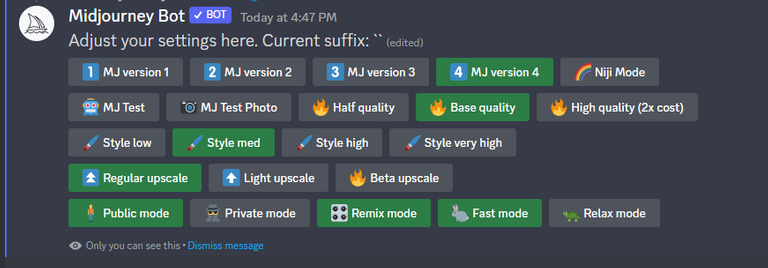
- Most likely the settings should be similar to these ones with some differences.
- current version of Midjourney is 4, in case some other version is selected (the box is green when selected), click on the
MJ version 4. - Other settings should be the same as mine here, except
Remix Mode, turn that one on I'll show you why in a minute - In my opinion, these are the most optimal settings to start with, you can of course experiment with them as you'd like
Now you should be ready to generate your first prompt.
- side note: If you are a subscriber and are writing prompts for Midjourney in your private chat, sometimes after typing
/imagineand pressing space, you can't see the prompt part. There is an easy fix for you:
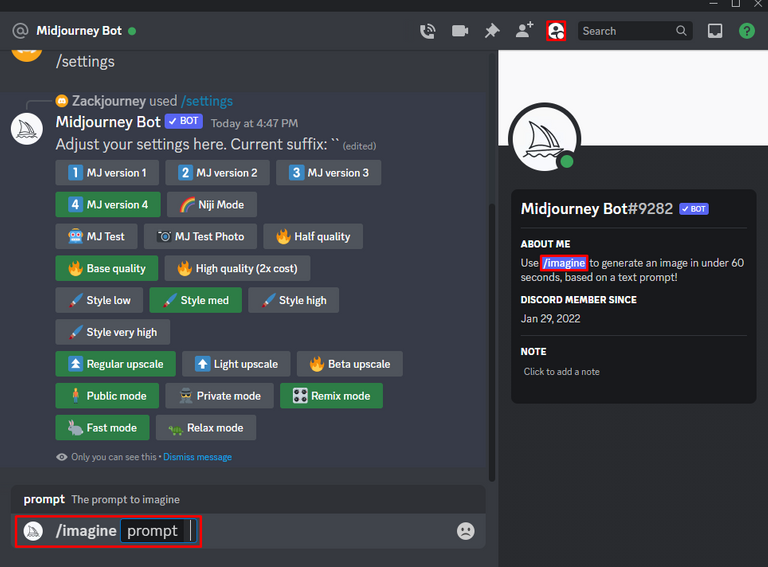
- Instead of writing
/imagine, just click on that button below "ABOUT ME" on the right. If you don't see that window on the right you need to click on the profile-looking icon on top and left from the search bar.
- side note: If you are a subscriber and are writing prompts for Midjourney in your private chat, sometimes after typing
Let's Start Simple
This is going to be our first prompt as an example:

From this image, we can see that the /imagine prompt is divided into multiple parts.
- Text Prompt - where you are giving the AI a description of what you want to generate
- Parameters- additional commands that you can give to the AI to change the way it generates the image, from targeted quality, aspect ratio, seed, and so on.
There is a third part called the Image Prompt where you can give Midjourney an image as some kind of starting point, but we gonna skip that for now. Let's see the results first and then I'll explain the parameters used.

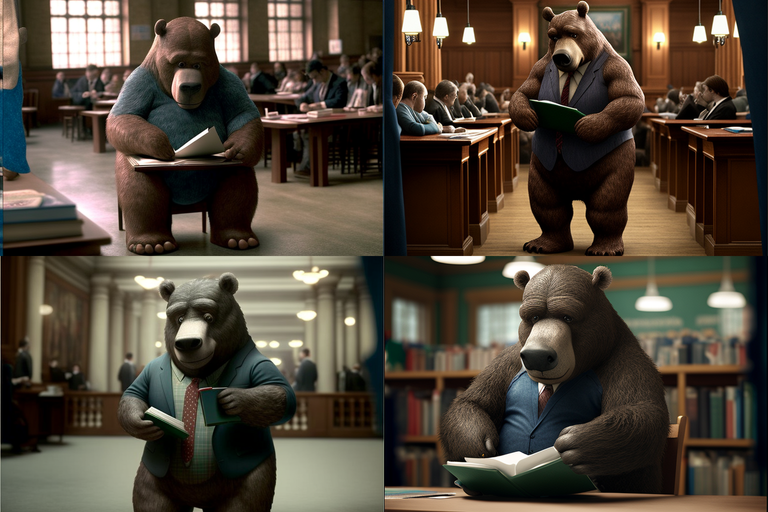
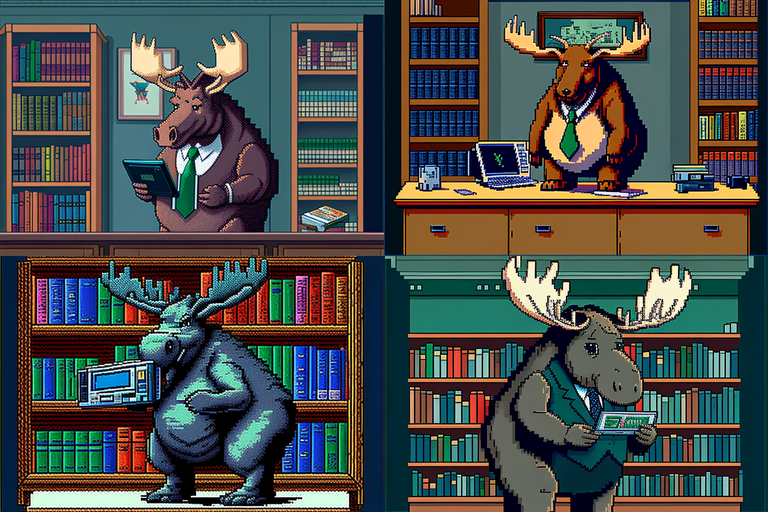
Well... we got a moose in the library, but it isn't wearing a taxido. Whoops! It turns out that the suit I was going for is called Tuxedo so it made the AI a bit confused so we got a moose with random clothing (or no clothing) rather than a suit. You can try for yourself to get results with the correct spelling. I'll instead go a different route:
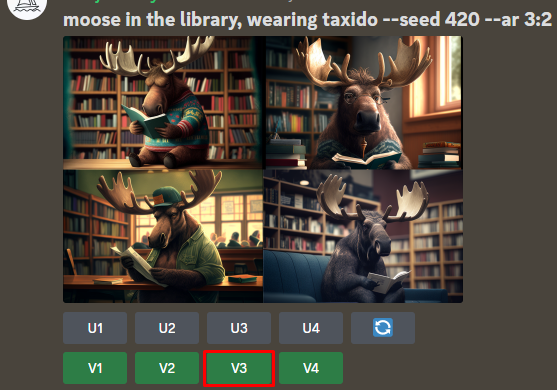
We are going to change our prompt to: /imagine moose in the library, wearing taxido a suit
Also, I kinda like the way image 3 came out so I'm gonna use it as a starting point by clicking on the V3 button. Just to be clear images are sorted like this:
| image 1 | image 2 |
|---|---|
| image 3 | image 4 |
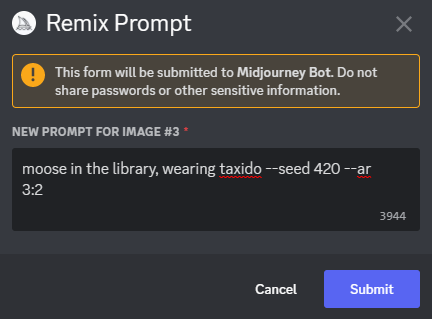
Remember the Remix Mode that we enable in the settings? This is why. If we clicked on the V3 button, the AI would immediately try to give us 4 more variations from the image we selected. This way, we enabled the option to add/remove or change something about our prompt.
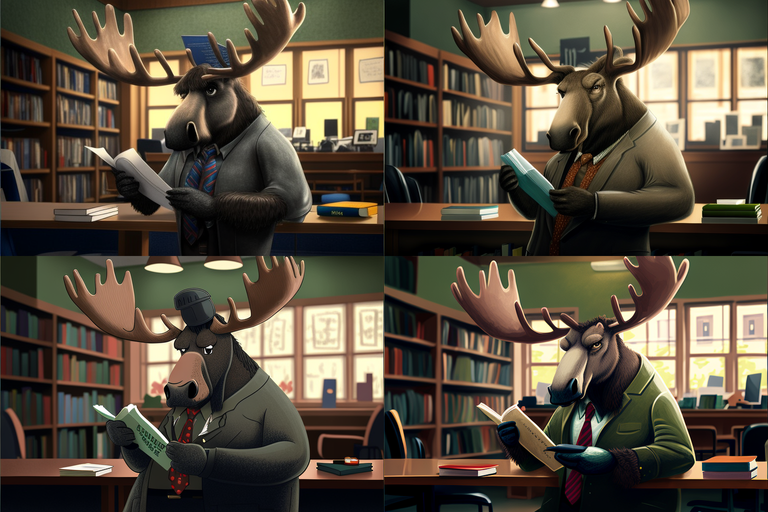
Yes! It worked this time. Remember, don't be like me and use only the words you understand and/or know how to spell in order to get the results you are looking for. That said, image 4 looks cool. I would like to use it later and want to save it somewhere. Before that, we can do something else.
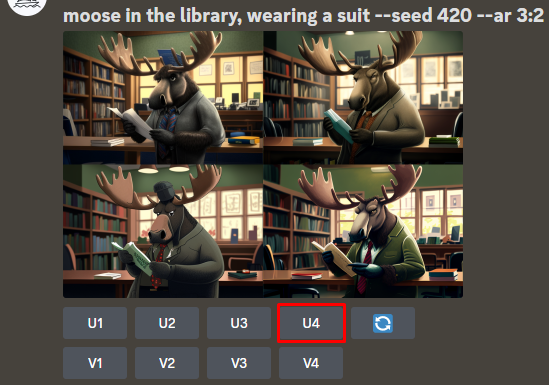
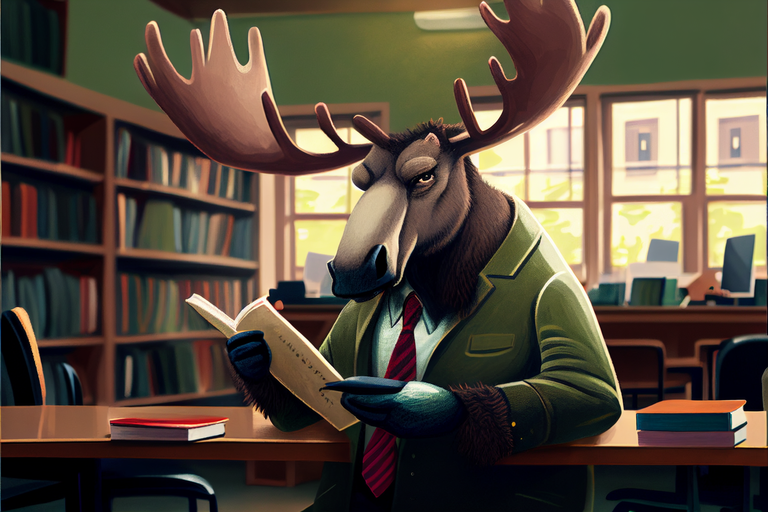
First, we can click on the U4 button. This will upscale the image which will give more detail and higher resolution to the image. The result of upscaling ended up like this:
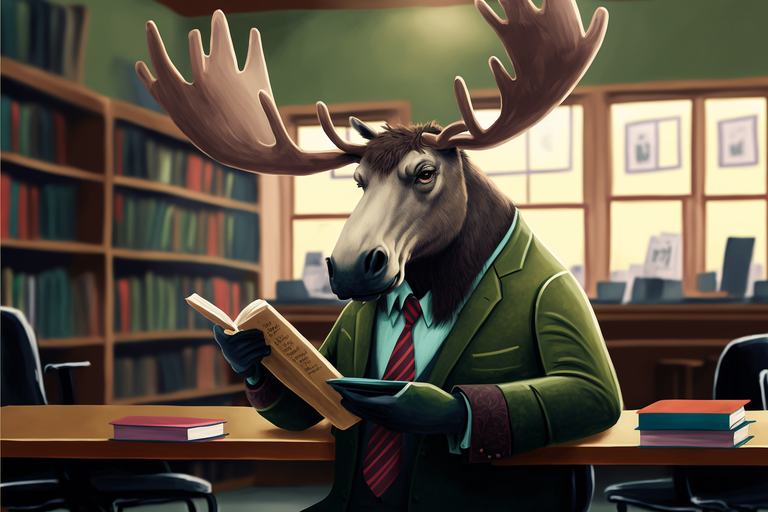
Okay, this is our result. This image looks great now you can click on it in discord, click open in the browser and then right-click on the image in the browser and save it as you would save any other image.
Oh yeah! One more thing before we take a look at Parameters.

If you are using Midjourney free version and are generating prompts from a Discord server.
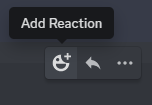
You can add a reaction to any prompt like in the picture above. React with the envelope and that image will be sent to your DM on discord.
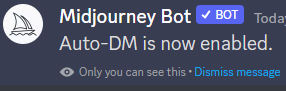
You can also type in /prefer auto_dm True, and this will be done automatically for every image you generate. Although sometimes it gets stuck or comes like 5 minutes later. I suggest you use the manual approach at this time. If you set it up correctly you should get the following message:
Notice also the Upscale Redo buttons. We are going to use the Beta Upscale for example:
As you can see from the earlier upscale, sometimes the result might change a feature from the image we like. We started with image 4 and the first upscale we used changed the moose's snout, his eyes, hair, and even his shirt sleeves. With an upscale redo, we can try to work on returning those features or even improving them. You can try Light Upscale Redo to get the same effect but in my experience beta version work so much better.
Parameters
Before we go into this, understand that any parameter is optional but will greatly benefit your outputs if you know how to use them.
That said, let's look at that second part of the prompt that starts with double dashes like
--seed 420 that we used in the moose examples so far.
Seed parameter is in my opinion essential if you are trying to work on a really specific image because if you use a set Seed (like we used 420 up until this point), it greatly increases reproducibility so if you want to make slight adjustments you can work out details on your image.
By Default - Seed number is a random integer between 0 - 4294967295 so there is a lot of variability.
Another good reason to use set seed is when you want to experiment with all sorts of different parameters that we are going to go through in this section.
If you use the envelope emoji reaction on an image, not only is it sent to your DM but it also tells you the Seed number in case you didn't set it yourself and want to find out.
Also, we used --ar 3:2. AR is a parameter for the aspect ratio, in the current state of version 4 of Midjourney, you really have only two options, 3:2 for landscape and 2:3 for a portrait.
Quality
Okay, now we are going to add a new parameter, quality or --q. Quality can be set anywhere from 0.5 to 5. If we use 0.5 we will get faster outputs but with a less polished result, if we use 2 instead we will get a highly processed image. Both of these can have their advantages depending on what you are looking for. As I said, you can set the quality up to 5, but in my experience and again we will show this, after 2 you rarely get anything out of it, sometimes images end up looking worse for some reason.
By Default the value is set to 1.
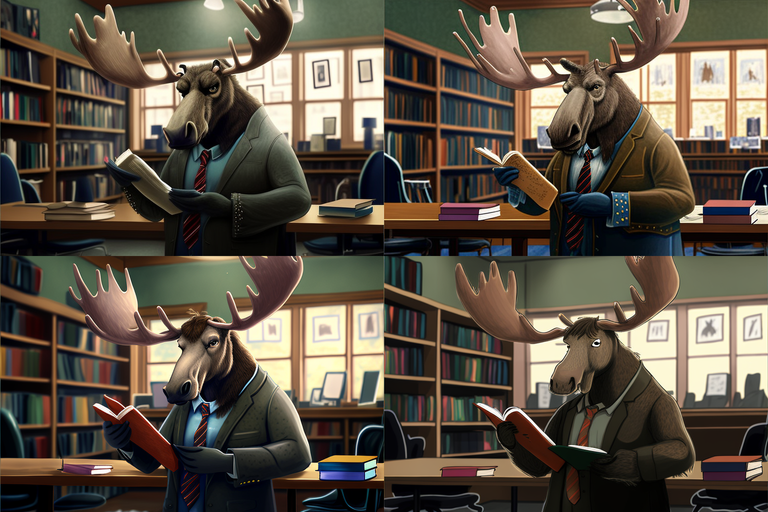
Here are the results for /imagine moose in the library, wearing a suit --seed 420 --ar 3:2 --q 0.5
Haha, image 4 captures this parameter nicely. Before commenting on it, let's look at quality 2.
As you can see, the difference can be quite astounding. Doesn't make one better than the other tho. 0.5 quality can give that drawn artistic feel while 2 looks more engine-like digital art.
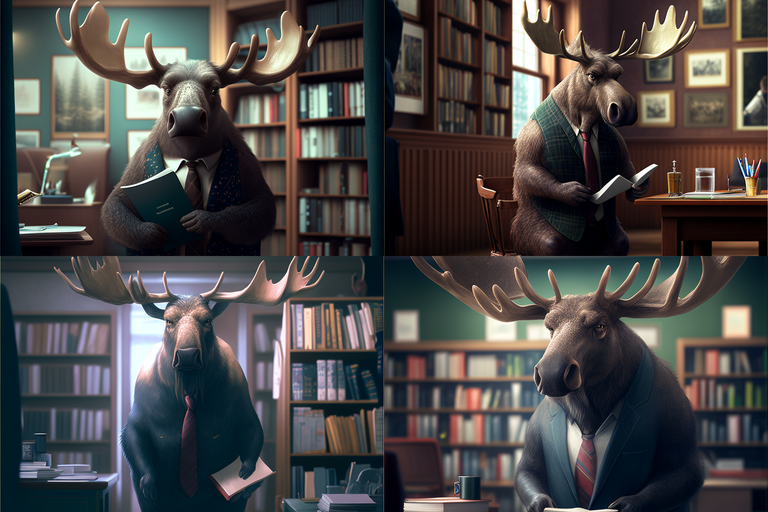
If you want to try it yourself this is the prompt used:
/imagine moose in the library, wearing a suit --seed 420 --ar 3:2 --q 2
Lastly, just to show you a quality 5 settings:
As expected, nothing really changed, images aren't even worse in this case. I can barely see any difference, maybe in a couple of hair here and there, nothing special. As I said, you don't need to use this quality setting. It will only take longer to get results without rarely any benefit.
Chaos
Now, this is a fun little parameter. Basically when you use --chaos you are telling Midjourney how much randomness you want in the output. Values are between 0 - 100.
0 means that you want something that stays true to the prompt you gave the AI while 100 makes things wild and sometimes so wild that you don't even get what you wanted. Let's see a prompt with a chaos of 100 and we gonna remove the quality parameter because we don't really need it right now.
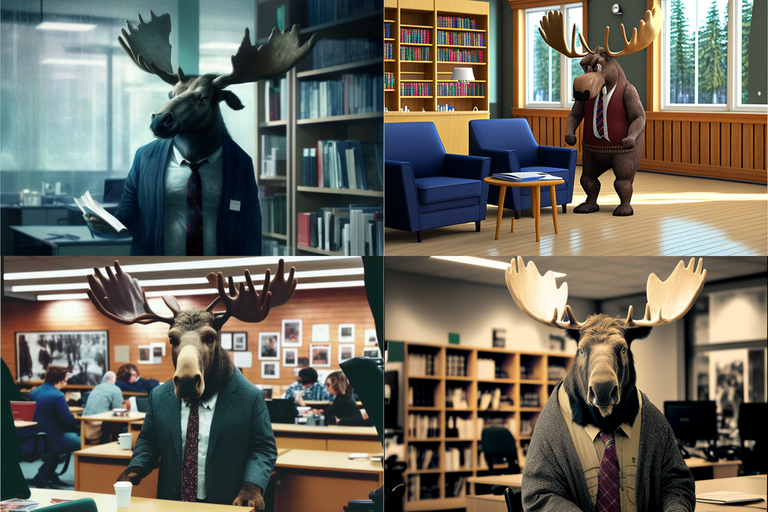
Prompt used what: /imagine moose in the library, wearing a suit --seed 420 --ar 3:2 --chaos 100
See, pure chaos, haha! We got so much variety here, from CSI-looking detective moose to a wacky, almost cartoonish approach, also we can barely call this a library in most images. This parameter is one of those I would use if I have in mind some sort of image but want more inspiration, you never know what you will get. On the other hand:
This might look familiar. Prompt used was: /imagine moose in the library, wearing a suit --seed 420 --ar 3:2 --chaos 0
Well, basically we got the same set of images we got before because we didn't give Midjourney any wiggle room to get creative. So, if you want really reliable and expected outputs you should use 0 but if you need inspiration use 100. What about something halfway, like 50?

With 50, we are still getting a decent variety but you can more clearly see prompt being a moose in a library wearing a suit. Use this one when you have a pretty good idea about the output you want but need a bit of spice to determine where you wanna go next.
No
Yes, no. I mean, the parameter is called --no. One of the less reliable parameters but it's basically the place for negative prompts. Yeah, it's one of the Don'ts from the start of this post and that's probably why it sucks most of the time. If you want to avoid some feature in the image you can use this parameter.
Would you guess the prompt here? Well, it's:
/imagine moose in the library, wearing a suit --seed 420 --ar 3:2 --no antlers
Well... apparently that's a moose without antlers haha. Sure, maybe I used a bad example but do you see my point? Negative prompts are unreliable instead we should be using something called Weights. But I think this is enough for now. This should be enough to grasp the basics and generate some cool-looking images. Next time we are going to add some style. Something like this:
Bye for now. Hope you learned something.
As always, thank you for reading!


Congratulations @awesomeintrigue! You have completed the following achievement on the Hive blockchain And have been rewarded with New badge(s)
Your next target is to reach 600 upvotes.
You can view your badges on your board and compare yourself to others in the Ranking
If you no longer want to receive notifications, reply to this comment with the word
STOPCheck out our last posts:
Support the HiveBuzz project. Vote for our proposal!
Thanks for providing this. I'm trying to understand negative prompts and weights - no hands doesn't work same with no antlers, so I'm trying to figure out how to do it right.
Yep, negative prompting is a pain in the ass right now. But there are some that work. I'll try to explain it better in a couple of days in part 2 of the guide so stay tuned. :)
I'll be sure to check back - I found this post invaluable. Do you mind if I refer to this in a challenge I'll be running at some point?
Go ahead, sorry didn't see until now, work got pretty crazy haha
PS played around with your parameters and great so far. REally looking forward to subsequent posts!
Interesting concept I have to come back and read it one more time.
I'm currently trying it my self and having difficulties getting exactly my visions
This is going to help me a lot thanks
I will review it later one again
Be clear, and avoid grammar errors and typos. That is half the job tho. Also, sometimes you just need to iterate for a while, depending on what your desired result is you might need even a dozen tries until you get it.
I'll cover one important technique that should help in the next part. Make sure to check it out.
This indeed is enough to grasp and a good point.
Happy Thursday
That's what I was hoping, thanks for reading it through!
Have you tried Midjourney already?
No I need time
I'm glad that it's helpful. There's going to be so much more.
Great tips for a complete noob like me! 😁👍 !PIZZA
I gifted $PIZZA slices here:
@blitzzzz(18/20) tipped @awesomeintrigue (x1)
Send $PIZZA tips in Discord via tip.cc!
Thank you for this detailed explanation. I might try it 😁
It's interesting to play around with. Plus it can give some useful outputs. For example, I made my profile pic with it and I'm quite satisfied with the result so I decided to use it. :D
Oh wow! Your profile picture is super cool 😎 I need to find some time to play with it 😁