How to Save Money? Jak ušetřit ?
EN - Electric water heating
Hello. I know that most of you don't trust solar panels and especially the companies that install them. I also do not trust companies because I know that the payback is long and the lifespan of the panels is usually 15 years.
That's why I'll show you how to cheaply make a small but most importantly effective one
solar power plant with a SHORT RETURN OF MONEY.
CZ - Ohřev vody el proudem
Ahoj. Vím že Většina z vás nevěří Solárním panelům a hlavně firmám co je montují. Já také nevěřím Firmám protože vím že návratnost je dlouhá a výdrž panelů je většinou 15 let.
Proto vám ukážu jak levně vyrobit malou ale hlavně účinnou
solární elektrárnu s KRÁTKOU NÁVRATNOSTÍ PENĚZ .
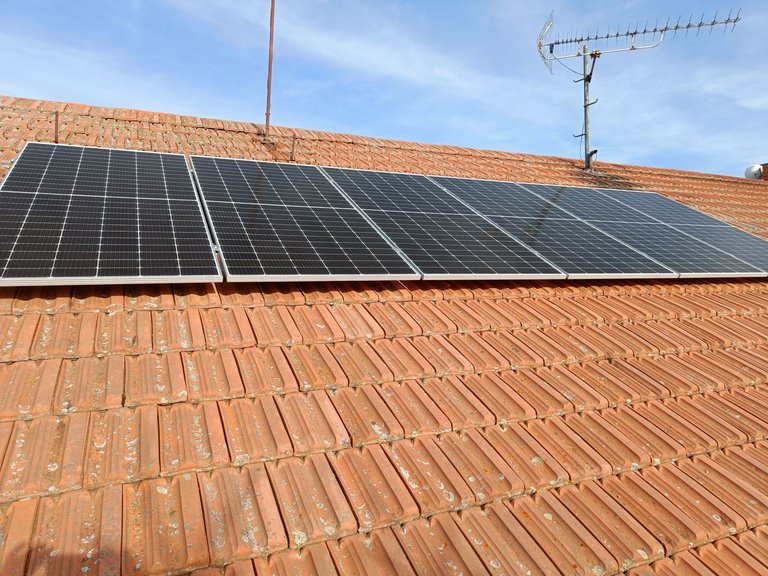
We will install 5-6 solar panels on each with a power of around 500W.
Installation is simple for any handyman. Connections must be in series, this means that we connect one panel to another, but don't worry, you can't get it wrong. panels have connectors into which only the connector that belongs there fits.
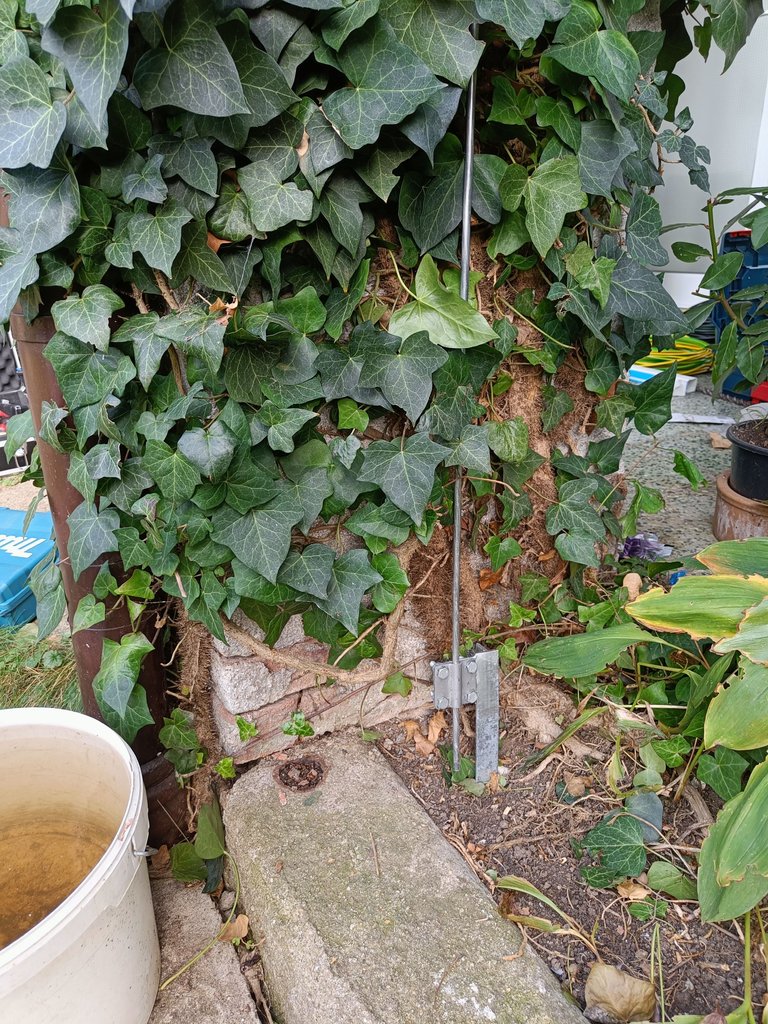
We hammer the grounding rod into the ground and direct the aluminum wire towards the solar panels.
Namontujeme 5-6 solárních panelů na každém o výkonu okolo 500W .
Montáž je pro každého kutila jednoduchá. Zapojení musí být do série to znamená že jeden panel zapojíme do druhého ale nemějte strach , splést se nemůžete. panely mají konektory do kterých pasuje jen konektor který tam patří.
Do země natlučeme zemnící tyč a hliníkovým drátem směřujeme k solárním panelům .
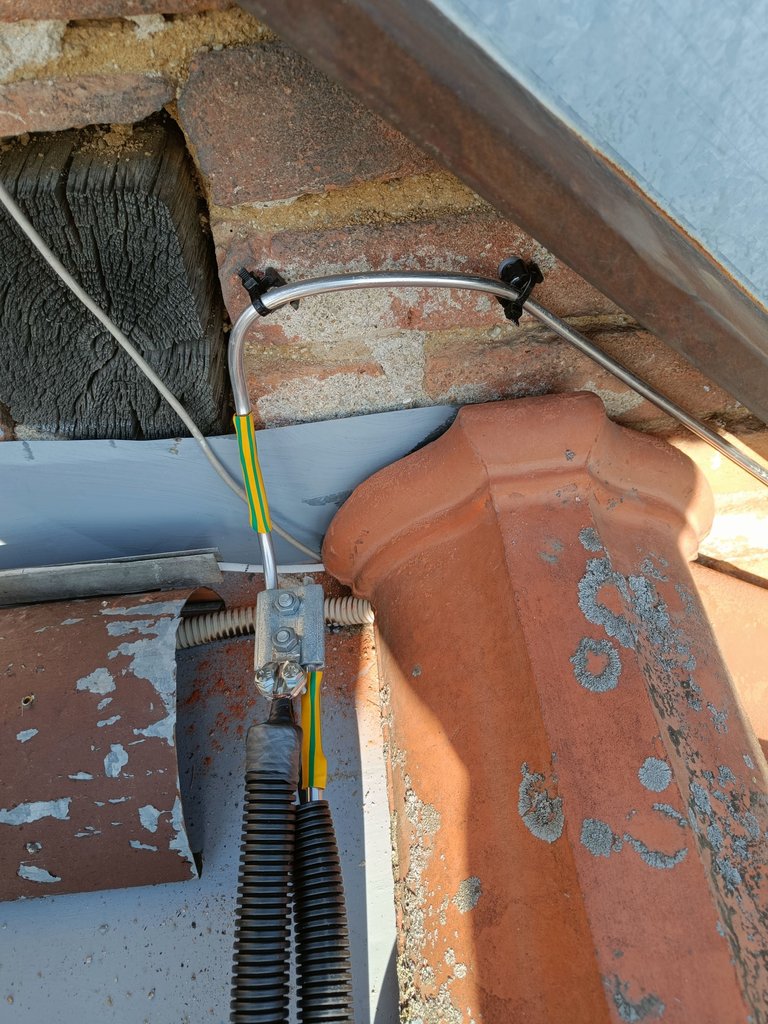
On the roof, we put a clamp on the aluminum wire and connect 2 grounding wires in protectors so that the material does not decompose due to sunlight, i.e. UV radiation.
We connect 1 wire to the solar panels and lead the other wire to the place where the electrical substation will be.
Na střeše dáme na hliníkový drát svorku a připojíme 2 zemnící dráty v chráničkách aby nedocházelo k rozkladu materiálu kvůli slunečnímu svitu tedy UV záření .
1 drát připojíme k solárním panelům a druhý drát vedeme na místo kde bude elektrická rozvodna.
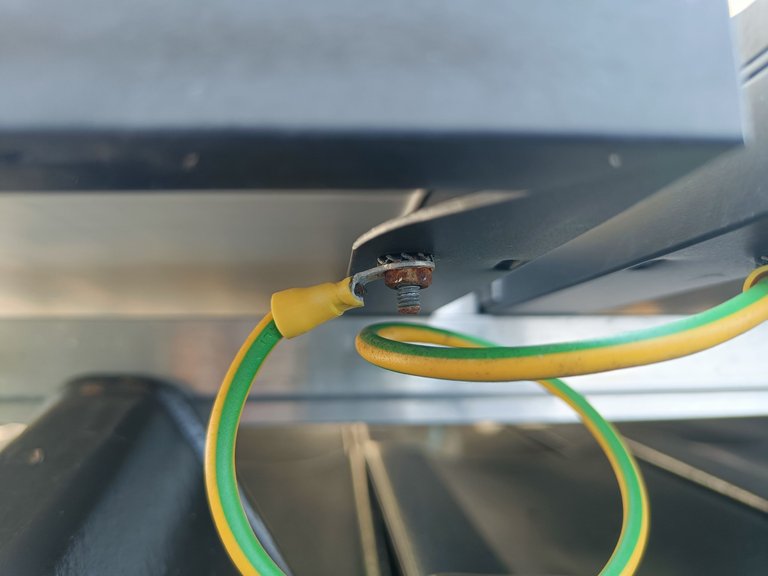
We connect all the panels together with a grounding wire.
And then we continue back down to the place where the electrical installation will be.
So we have a ground wire going down and one cable from the left side of the panel assembly and one cable from the right side of the solar panel assembly.
so cables 3 go down.
1 plus +
1 minus -
1 yellow-green, grounding
Propojíme mezi sebou všechny panely zemnícím drátem . A dále pokračujeme spět dolů do místa kde bude elektro instalace .
Dolů nám tedy vede zemnící drát a jeden kabel z levé strany sestavy panelů a jeden kabel z pravé strany sestavy solárních panelů.
takže dolů vedou kabely 3 .
1 plus +
1 mínus -
1 žlutozelený ,zemnící
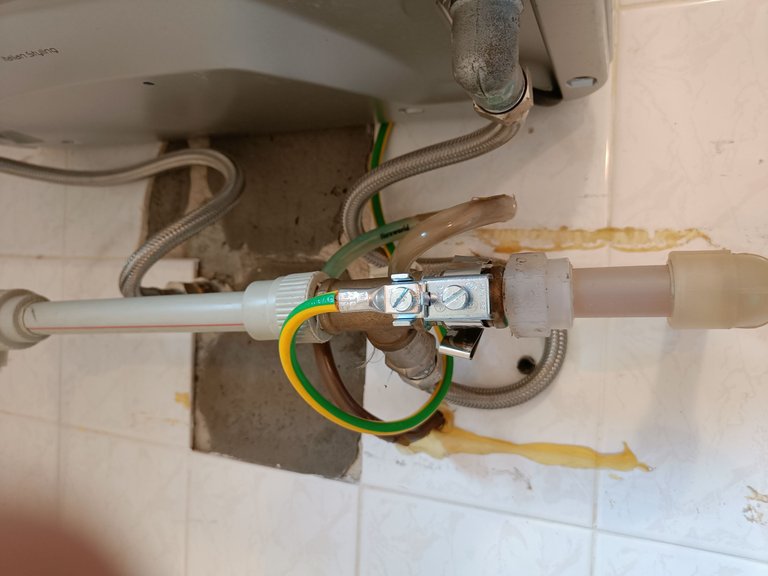
We connect the grounding wire to the outlet of the metal water pipe from the water heater, which we also lead to the electrical substation.
Na vývod kovové trubky vody z ohřívače vody připojíme zemnící drát který také vedeme k El rozvodně .
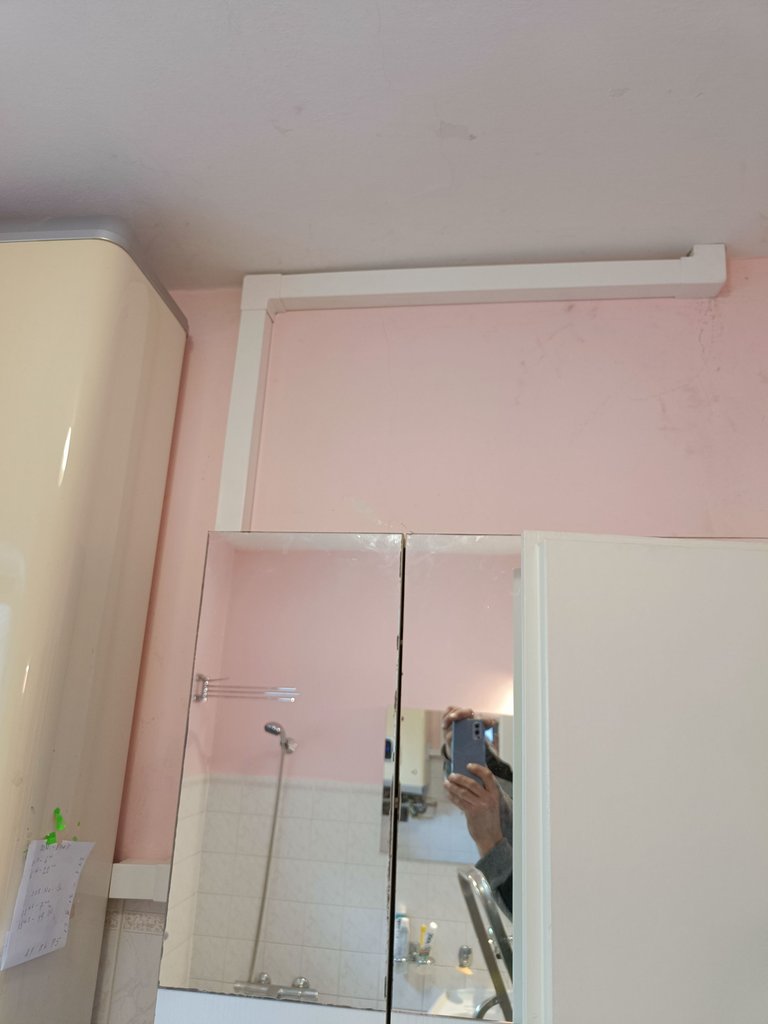 We hide everything in the slats.
Vše schováme do lišt .
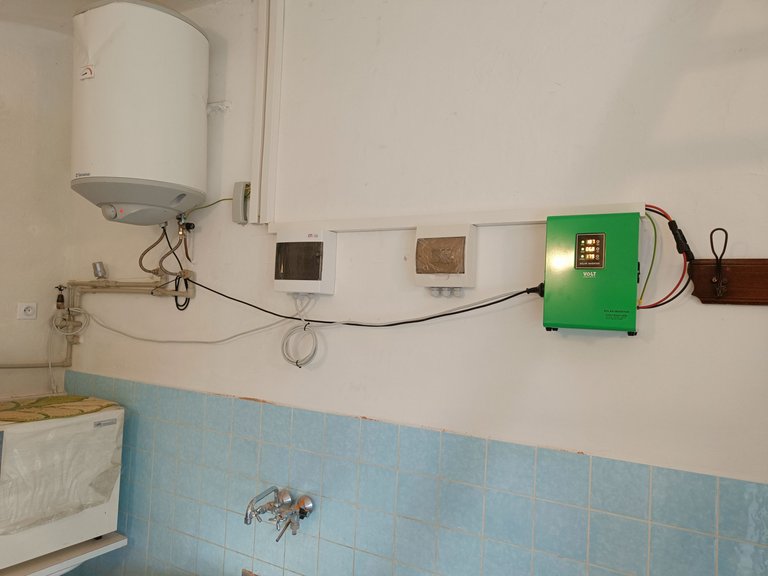
photo for idea.
foto pro představu .
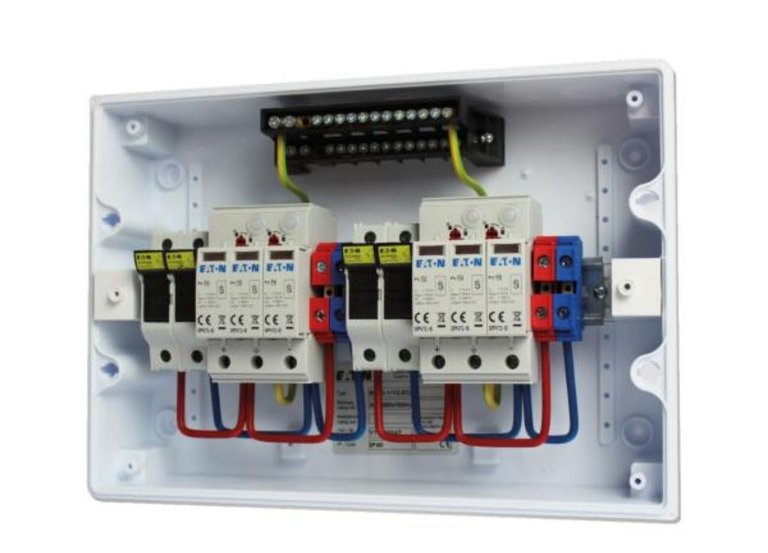
DC switchboard.
In the left part of the cabinet there are 2 fuses for the plus cable and the minus cable.
Next to the fuses are the so-called SEDUCER. These are for when lightning strikes the panels or somehow an overvoltage occurs, so the direct current spark in the arresters is extinguished and a fire does not occur.
At the top of the cabinet is a strip for the ground cable leading from the roof.
Connection:
We connect the red plus cable to the red terminal
we connect the black negative cable to the blue terminal and the ground to the top of the terminal block.
We connect a new red wire to 1 fuse and connect it to any current converter to the plus contact, and of course we lead the minus from the second fuse to the converter to the minus and from the terminal block to the earthing point on the converter, it is marked
DC rozvaděč.
V levé části skříně jsou 2 pojistky pro plusový kabel a minusový kabel.
Vedle pojistek jsou takzvané SVODIČE . Ty jsou na to když uhodí blesk do panelů nebo nějak vznikne přepětí tak ve svodičích se jiskra stejnosměrného proudu uhasí a nedojde k požáru.
Nahoře ve skříni je lišta na zemnící kabel vedoucí ze střechy.
Zapojení:
Do červené svorky zapojíme červený plusový kabel
do modré svorky zapojíme černý mínusový kabel a nahoru na svorkovnici zemnění.
Do 1 pojistky napojíme nový červený drát a připojíme na jakýkoliv měnič proudu na plusový kontakt a samozdřejmně z druhé pojistky vedeme mínus zase na měnič na mínus a ze svorkovnice na zemnící bod na měniči , ten se označuje
To be continued next time 😁 be Hive
Pokračování příště 😁 budte Hive
Tyhle kutilské skills fakt obdivuju, mně se jich moc nedostalo :D
@tipu curate 2
Upvoted 👌 (Mana: 6/56) Liquid rewards.
Za nedlouho něco takovýho plánuju. Dík za návod!
Dneska po práci to dopišu