Elaboration of "scrunchie" headband
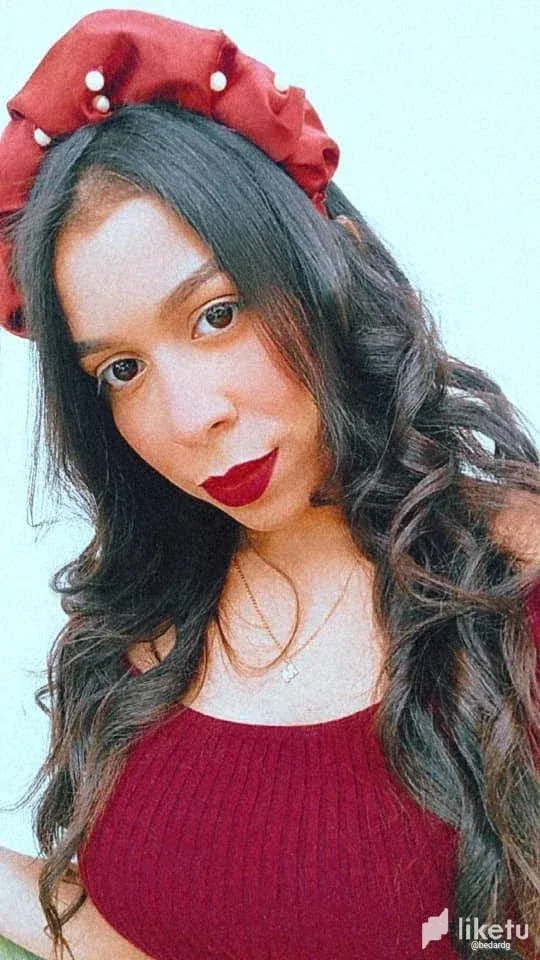
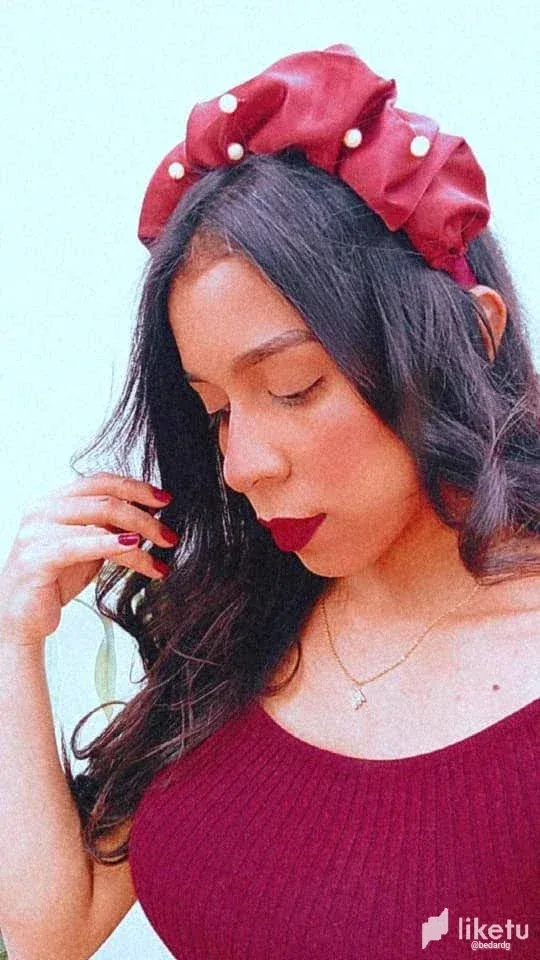
Final result
Making it
Good morning, today I bring you this proposal that is super fashionable: a "scrunchie" headband. But..."scruchie isn't the tails? Well my dears, in the middle of last year headbands with a similar technique became fashionable, in this link you can see how I made my "scrunchie" tails, today we are going to focus on the headband:
Materials
. Fabric trim of your preference (1.20 cm long) . ruler (optional) . Needle thread
. Scissors
. Ribbon (0.20 cm)
. silicone
. Pearls or rhinestones optional/
Elaboration
We take our piece of fabric and measure 10 cm wide. We cut. We are going to have a long strip sewn all over the wrong side and turn it over, we should have a kind of tube.
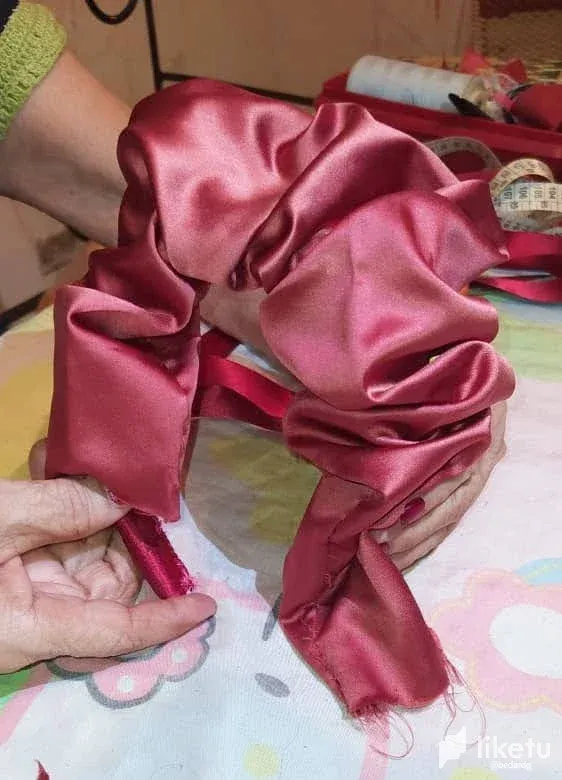
⚡ Tip: Depending on the width and how fluffy you want your headband, the length and width will depend, if you want it bigger or thinner you can add 2 cm or subtract 2 cm, in the same way with the length you can cut 5 cm. Once turned, we introduce it to the headband, making sure that the seam is always facing down. First we fold and glue one end of the headband very well, for this we help ourselves with silicone. Immediately we finish off with ribbon or with a piece with clean edges of the same fabric.
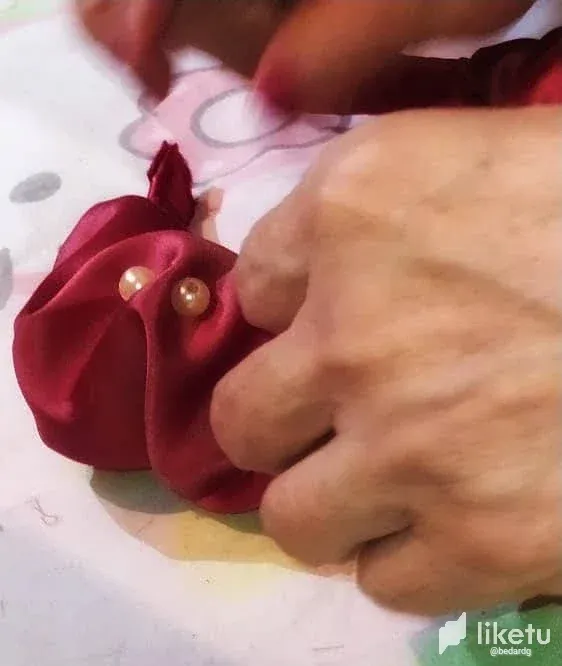
At the other end we wrinkle until we achieve the shape we want, we can glue the pearls or sew them on, I preferred to sew them on, since I don't like the messy effect of the glue. I was sewing them with an invisible stitch in the places that I liked. Now to finish our headband, once all the pieces are in place and always with the seam facing the inside of the headband, I repeated the process of the first end, securing my scrunchie with silicone and finishing off the work with a ribbon of the same color as the fabric. of the headband.
⚡ Tip: It is not necessary to run out to buy fabric, any will do and if we don't have it we can recycle from jean to cotton (for example sheets, a cover, preferably a cotton flannel), we can also go to the "patchwork" section of the fabric store and it's cojer since as you could see we spent very little fabric since this simple one has very little material.
I hope you liked this project and remember, if you do, share it with me in the comments!
ESPAÑOL:
Bueno día, hoy les traigo ésta propuesta que está súper de moda: un cintillo "scrunchie".
¿Pero.."scruchie no son las colas?
Bueno mis queridas, a mediados del año pasado se pusieron de moda los cintillos con una técnica similar, en este enlace podrán ver como realizó mis colas" scrunchie", hoy vamos a enfocarnos en el cintillo:
Materiales
. Recorte de tela de tu preferencia (1,20 cmts de largo)
. Regla (opcional)
. Aguja, hilo
. Tijera
. Listón (0,20 cmts)
. Silicón
. Perlitas o brillantitos opcional/
Elaboración
Tomamos nuestro retazo de tela y medimos 10 cmts de ancho. Cortamos. Nos va a quedar una tira larga cosemos por todo el revés y volteamos, nos debe quedar una especie de tubo.
⚡ Tip: Dependiendo del ancho y lo esponjosa que quieras tu cintillo, dependerá el largo y el ancho, si lo quieras mas grande o más fino puedes añadir 2 cmts o restar 2 cmts, de igual modo con el largo puedes cortar 5 cmts.
Una vez volteado, se lo introducimos al cintillo, procurando que la costura quede siempre hacia abajo.
Primero doblamos y pegamos muy bien un extremo del cintillo, para ésto nos ayudamos con silicón. Inmediatamente rematamos con listón o con un retazo con bordes limpios de la misma tela.
Del otro extremo arruchamos hasta lograr la forma que queremos, le podemos pegar las perlitas o cosérselas, yo preferí cosérselas, ya que no me gusta el efecto desprolijo del pegamento.
Yo las fuí cosiendo con puntada invisible en los lugares que me gustaron.
Ahora a terminar nuestro cintillo, una vez todas las piezas en su lugar y siempre con la costura viendo hacia dentro del cintillo, repetí el proceso del primer extremo, asegurando mi scrunchie con silicón y rematando el trabajo con un listón del mismo color de la tela del cintillo.
⚡ Tip: No es necesario salir corriendo a comprar tela, cualquiera sirve y de no tener podemos reciclar desde jean hasta algodón (ejemplo sábanas, una funda, una franela de algodón preferiblemente), también podemos ir a la sección de "retazos" de la tienda de telas y es cojer ya que como pudieron apreciar gastamos muy poca tela ya que éste sencillo lleva muy poco material.
Ojalá les haya gustado este proyecto y recuerden, si lo hacen, compártanlo conmigo en los comentarios!
For the best experience view this post on Liketu
Congratulations @bedardg! You have completed the following achievement on the Hive blockchain And have been rewarded with New badge(s)
Your next target is to reach 30 posts.
You can view your badges on your board and compare yourself to others in the Ranking
If you no longer want to receive notifications, reply to this comment with the word
STOPTo support your work, I also upvoted your post!
Check out our last posts:
Support the HiveBuzz project. Vote for our proposal!