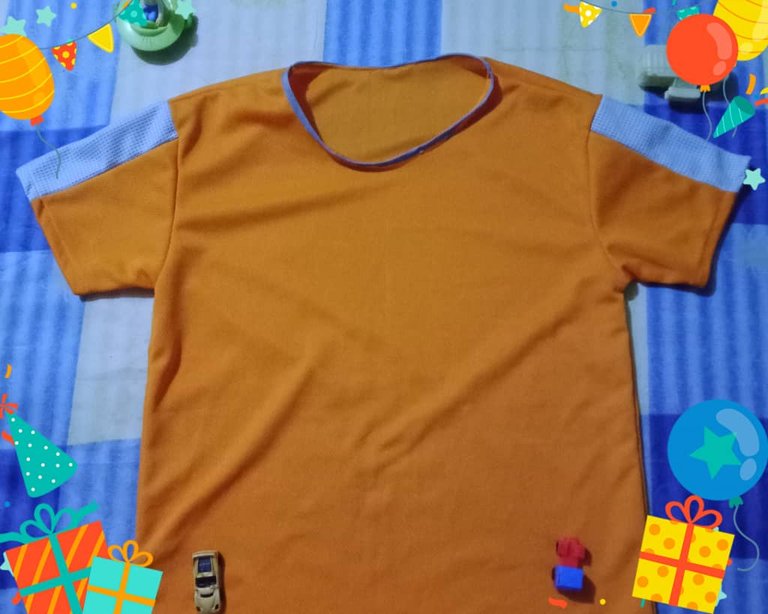
DIY: Flannel round neck with two-color sleeves // DIY: Franela cuello redondo con manga de dos colores (Eng - Esp)
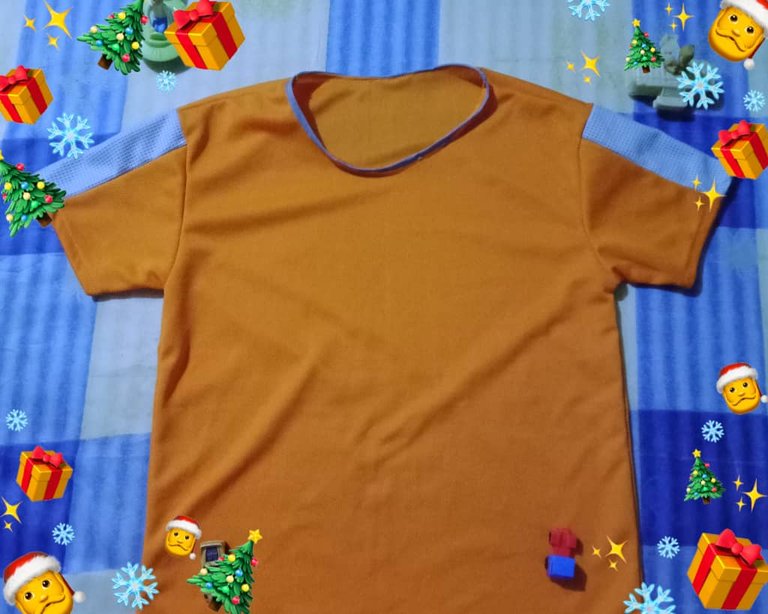
Hello creative friends around the world, I wish you are enjoying good health and have a blessed and 'prosperous week, taking advantage of the scraps of fabric that I found in my super bag where I keep the fabrics that are left over, I made a flannel for my son, the piece was 50 cm long by 75 cm wide; My idea when I saw the fabric was to make an outfit for my nephew, but the fabric was not enough, so I decided to make a flannel for my son combining orange with some gray fabric that was in the bag, I made a small adjustment in the sleeve and added a stripe in the center.
Hola amigos creativos en todo el mundo, deseo se encuentren disfrutando de buena salud y tengan una bendecida y ´prospera semana, aprovechando los retazos de tela que encontré en mi super bolsa donde guardo las telas que van sobrando, hice una franela para mi hijo, el retazo era de 50 cm de largo por 75 cm de ancho; mi idea al ver la tela fue hacer un conjunto para mi sobrino, pero la tela no era suficiente, entonces decidí hacer una franela para mi hijo combinando naranja con un poco de tela gris que había en la bolsa, hice un pequeño ajuste en la manga y agregué una franja en el centro.

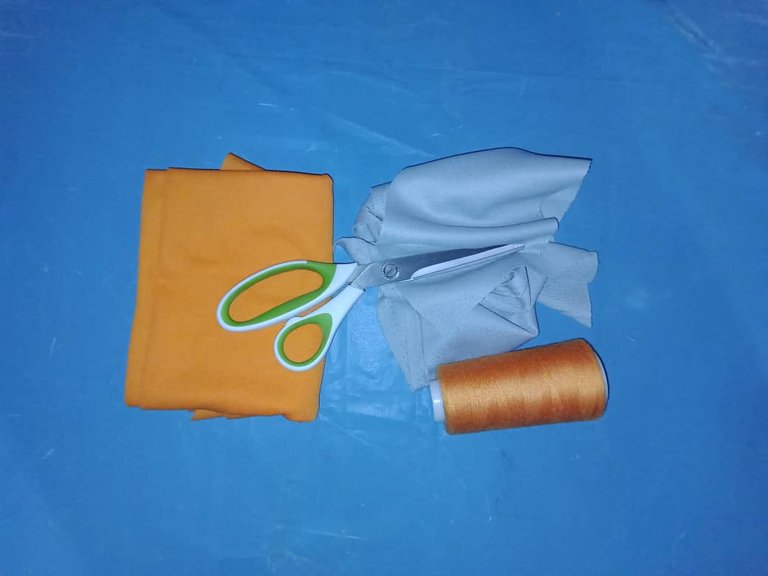
MATERIALS
Orange athletic fabric (50 cm)
Wafit polo fabric
Molds
Scissors
Thread
Sewing machine
Gray bias.
MATERIALES
Tela atlética color naranja (50 cm)
Tela polo wafit
Moldes
Tijera
Hilo
Máquina de coser
Sesgo gris.
PROCEDURE
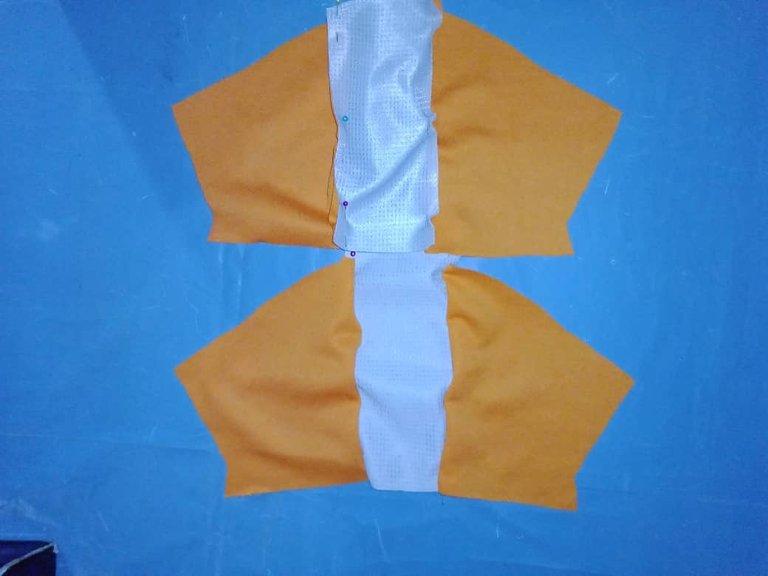
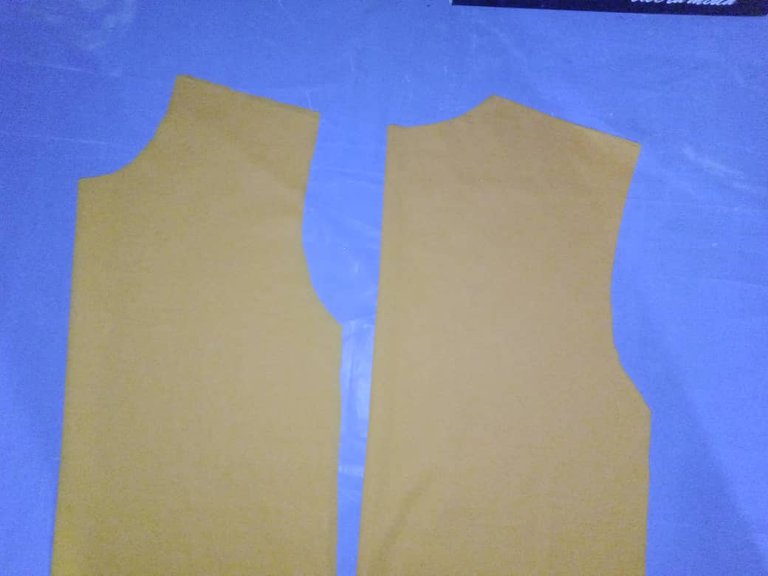
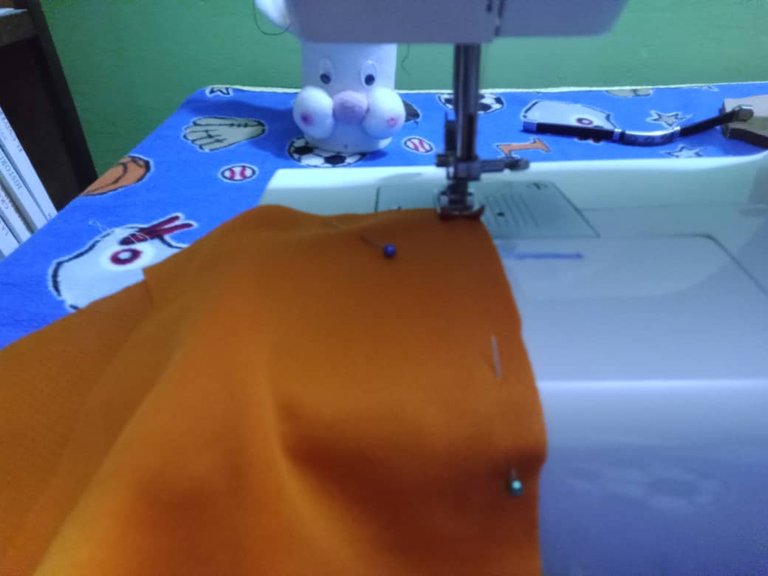
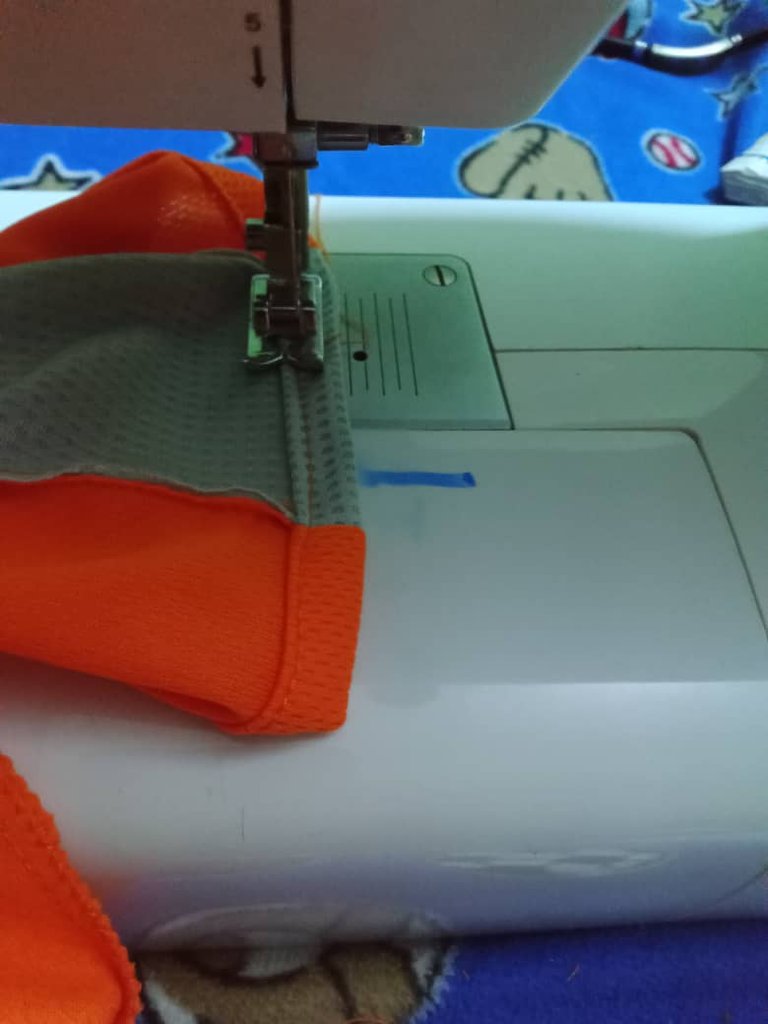
The first step is to mark the patterns, then cut the flannel pieces (front, back and sleeves), pin the sleeve stripes and sew with a straight stitch.
PROCEDIMIENTO
El primer paso es marcar los patrones luego cortar las piezas de la franela (delantero, trasero y mangas), sujeté con alfileres la franja de las mangas y cosí con puntada recta.

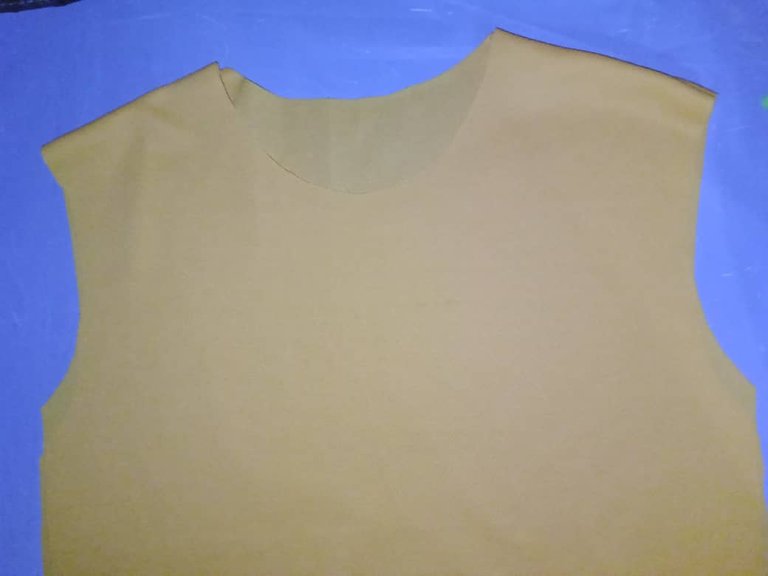
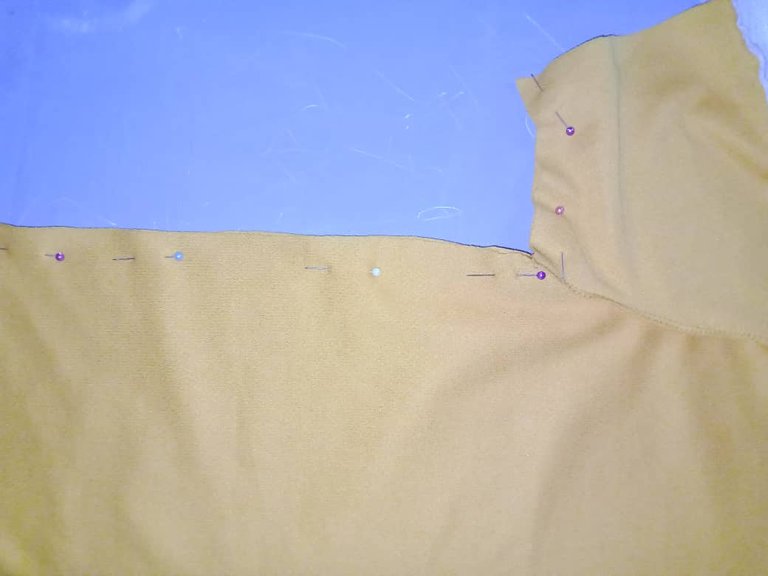
Then I faced right to right back and front, joined by the shoulders, in this step I like to use zig zag stitch to secure the seam and get a better finish.
Luego enfrenté derecho con derecho trasero y delantero, uní por los hombros, en este paso me gusta pasar puntada de zig zag para asegurar la costura y obtener un mejor acabado.
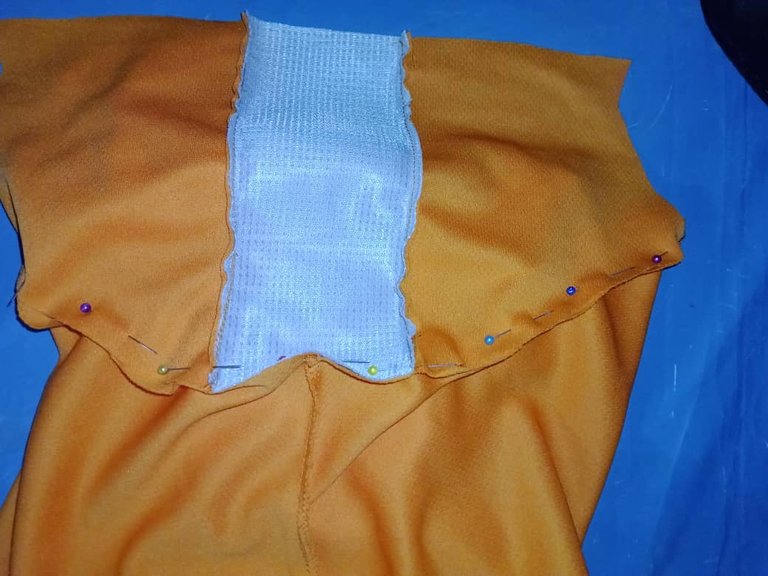
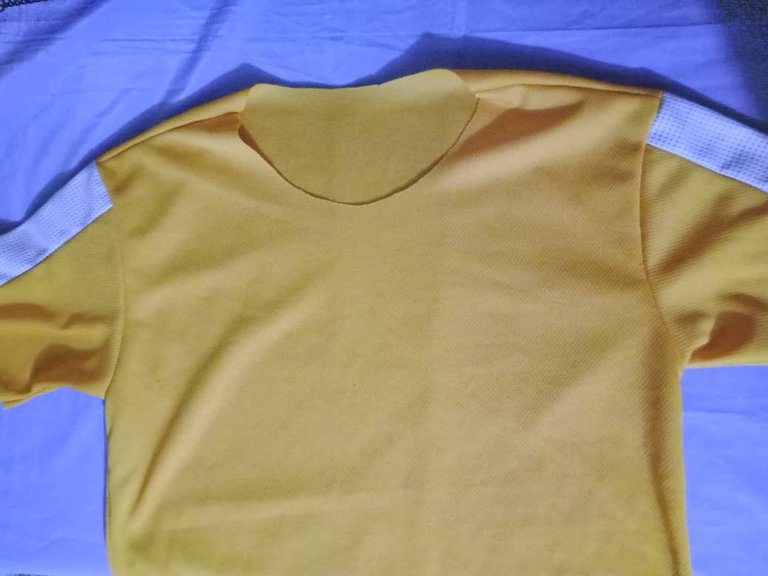
The next step is to glue the sleeves together, I pinned them right sides together, joined with a straight stitch and closed the sides. When gluing the sleeves it is important that the pieces match, because if one side is bigger or smaller than the other the armhole is reduced and it is uncomfortable to use a flannel that prevents us from moving our arms comfortably, the sleeve should be loose.
El siguiente paso es pegar las mangas, sujeté con alfileres enfrentando derecho con derecho, uní con puntada recta y cerré los laterales. Al pegar las mangas es importante que las piezas coincidan, porque si queda un lado más grande o pequeño que otro la sisa reduce y es incómodo usar una franela que nos impida mover los brazos cómodamente, la manga debe quedar holgada
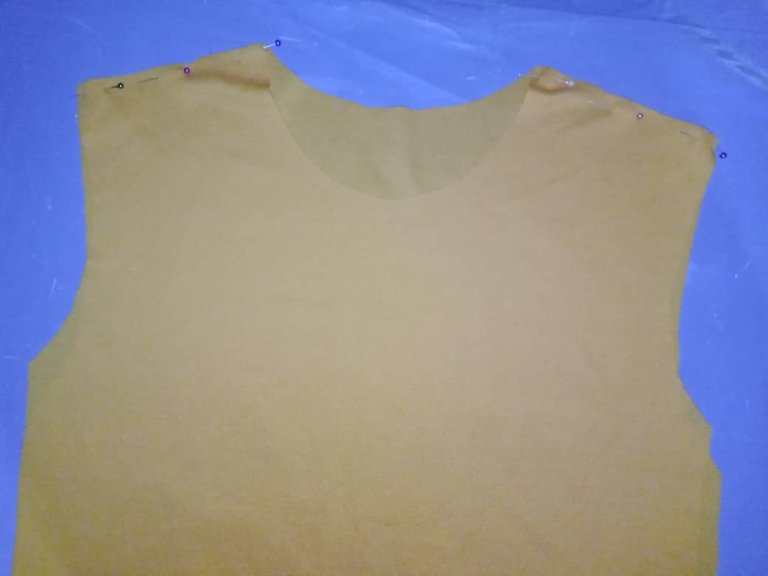
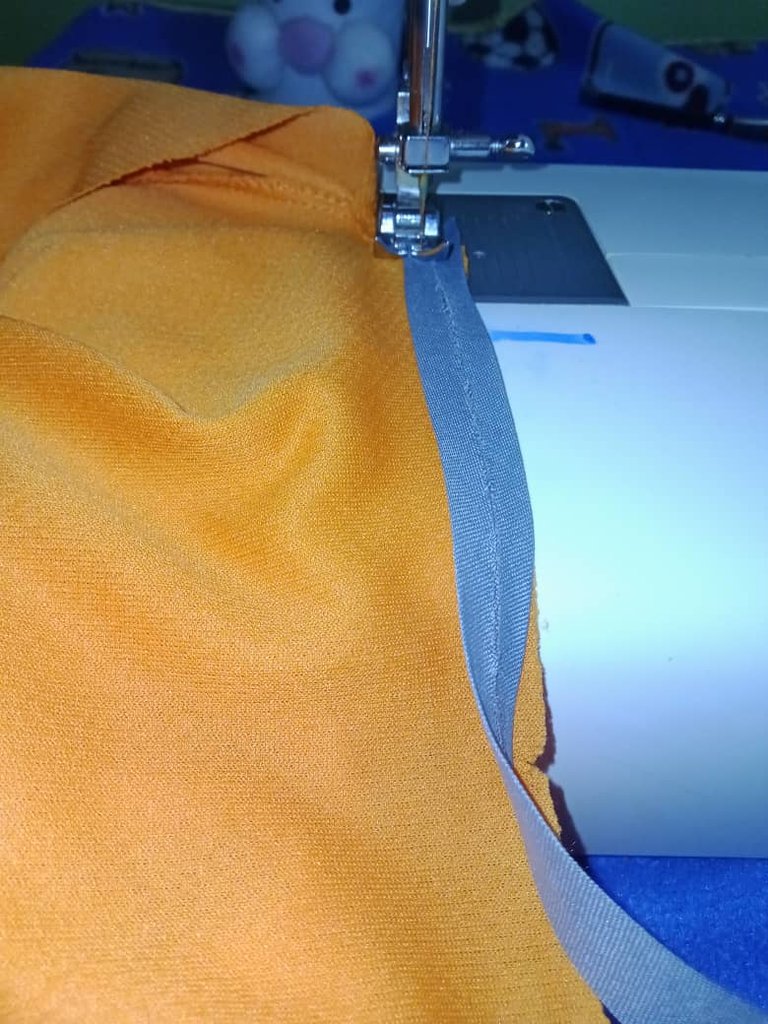
Once the sides were closed, I glued the collar facing right and left sides of the bias binding, then I turned the bias binding right side out and sewed the seam with a straight stitch.
Ya cerrados los laterales, pegué el cuello enfrentando derecho y revés del sesgo, luego volteé el sesgo por el derecho y pasé costura con puntada recta.
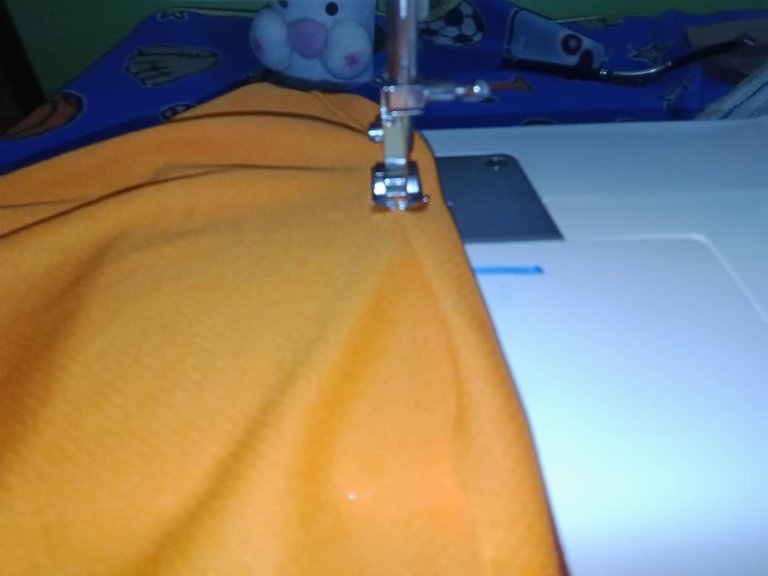
Finally, sew a hem of approximately one (1) cm wide, which will be the hem, also sew a hem on the sleeves and in a few steps we have a flannel ready.
Finalmente se cose un dobladillo de aproximadamente un (1) cm de ancho que será el ruedo, también se cose un dobladillo en las mangas y en pocos pasos tenemos lista una franela.
Hasta luego!
Translated with https://www.deepl.com/translator

              All images are my own, captured by a Síragon LC-3000 camera.


   Todas las imágenes son de mi autoría, capturadas por una cámara Síragon LC-3000
https://twitter.com/lileisabel/status/1708809304210325980?t=FB5va2kVfkSfBJ6Yj3-gPQ&s=19
Gracias por el apoyo querida @lileisabel.
Que tengas una excelente semana!
The flannel looks nicely made. Your son must have been excited.
Thanks for the support @diyhub, my son is very happy with his new flannel, taking advantage of fabric scraps is a way to save and create unique designs.
Cheers!
Yay! 🤗
Your content has been boosted with Ecency Points, by @belkyscabrera.
Use Ecency daily to boost your growth on platform!
Support Ecency
Vote for new Proposal
Delegate HP and earn more
Grateful for the support.
Greetings and blessings!
Pure this is pure masterpiece.
You are so talented and did a great job, the round neck skirt looks cool and custom made.
Hi @vickoly, it's a simple project to do and an idea to take advantage of scraps, my son is thrilled with his new flannel.
Have a great week!
@belkyscabrera
https://leofinance.io/threads/view/hive-130560/re-leothreads-epcsujbq
Gracias por el apoyo @hivediy.
Saludos!