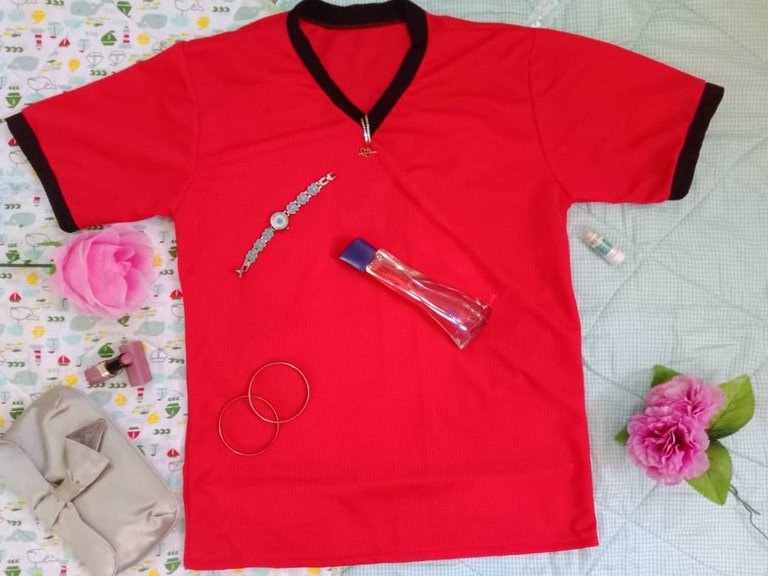
DIY: Make a V-neck flannel, in a few steps [Eng - Esp]
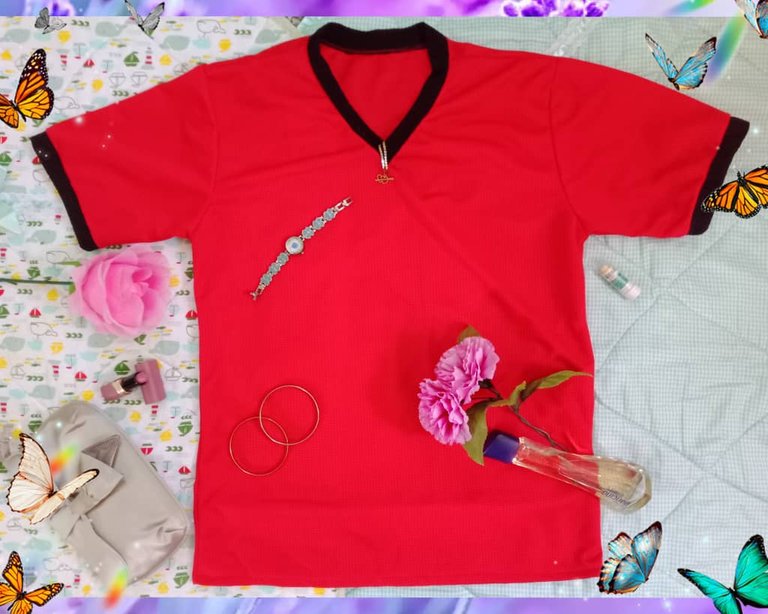
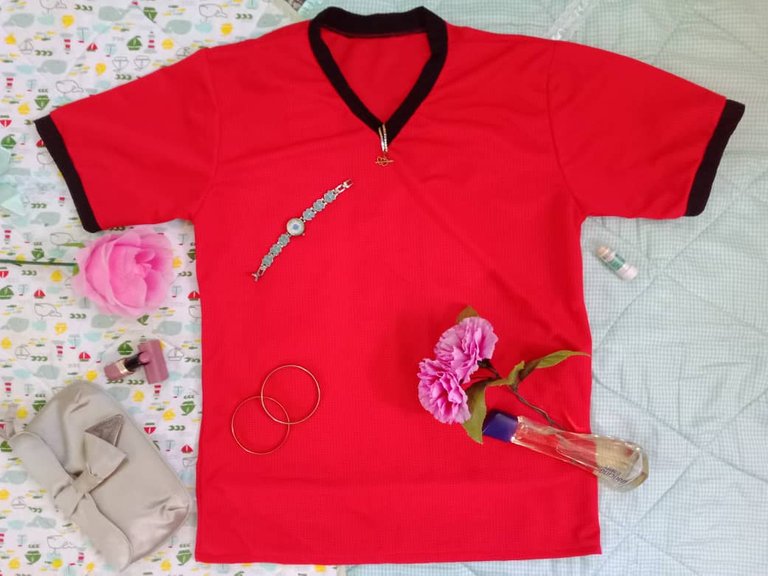
Greetings creative community #hivediy, I wish you a happy Thursday in family unity; we are almost halfway through the month of July, an active month in my country because the school year ends and grade promotions are also made; parents in errands to attend the graduation ceremonies of their children; among so many occupations this month due to my son's school activities I had to make a pause in my sewing projects to support him in the closing of the school year project that has been very fun and full of learning, among so many activities I could take a little time and finish a sewing work I had pending; it is a V-neck flannel, it is a type of flannel that I like very much for its casual and relaxed style, which is also being worn a lot nowadays.
Saludos comunidad creativa #hivediy, les deseo un feliz jueves en unión familiar; estamos casi a la mitad del mes de julio, un mes activo en mi país porque termina el año escolar y también se realizan las promociones de grado; los padres y madres en diligencias para asistir a los actos de grado de sus hijos; entre tantas ocupaciones de este mes por las actividades escolares de mi hijo he tenido que hacer una pausa en mis proyectos de costura para apoyarlo en el cierre de proyecto del año escolar que ha sido muy divertido y lleno de aprendizaje, entre tantas actividades pude sacar un pequeño tiempo y culminar un trabajo de costura que tenía pendiente; se trata de una Franela cuello en V, es un tipo de franela que me gusta mucho por su estilo casual y relajado, que además se está llevando mucho actualmente.


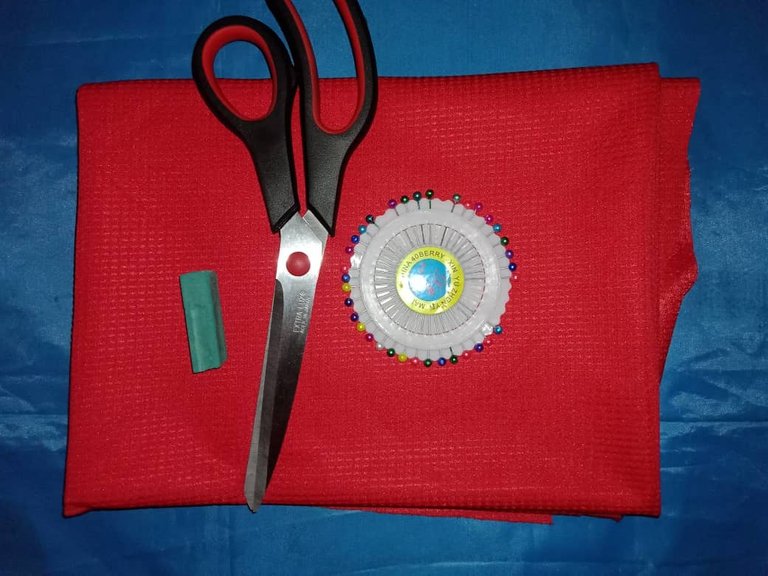
MATERIALS
Wafit polo fabric (75cm)
Rib fabric (20 cm)
Molds
Scissors
Thread
Sewing machine
MATERIALES
Tela polo wafit (75cm)
Tela rib (20 cm)
Moldes
Tijera
Hilo
Máquina de coser
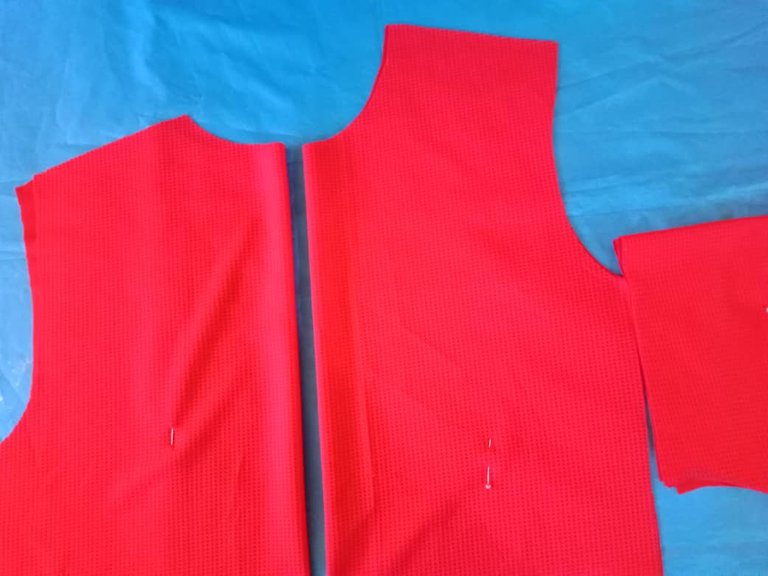
PROCEDURE
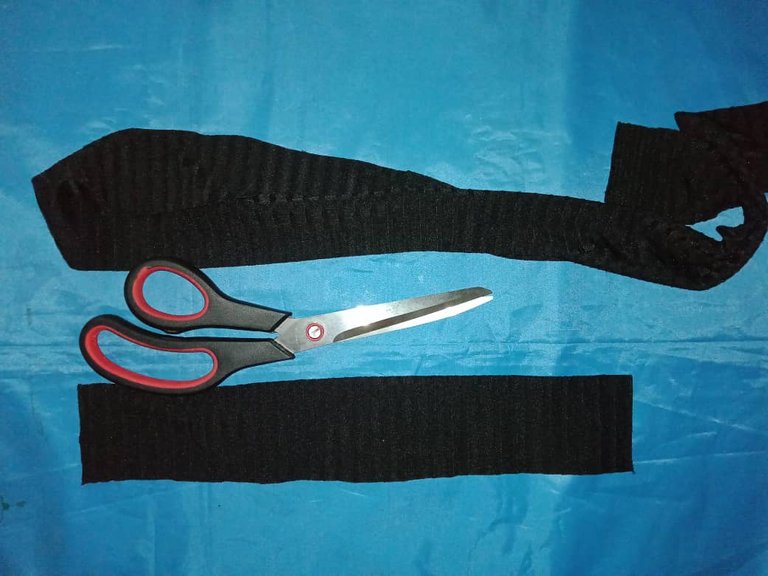
The elaboration of this flannel is simple and in a few steps; with the help of a chalk I marked the molds on the fabric, facing the right side and then I cut the pieces of the flannel; back, front and sleeves, plus two strips for the sleeve cuffs (3, 5 * 30 cm) and the collar (5 * 60 cm).
PROCEDIMIENTO
La elaboración de esta franela es sencilla y en pocos pasos; con ayuda de una tiza marqué los moldes en la tela, enfrentando el derecho y luego corté las piezas de la franela; trasero, delantero y mangas, además dos tiras de para los puños de la manga (3, 5 *30 cm ) y el cuello (5 *60 cm).
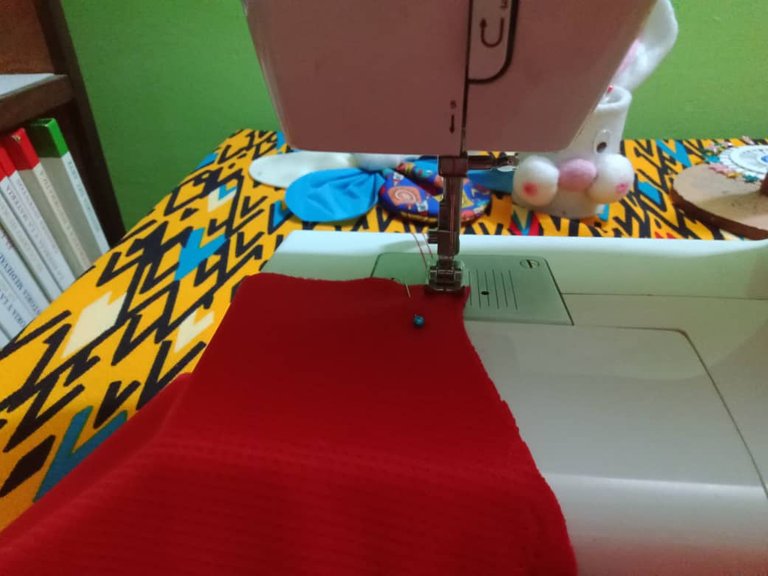
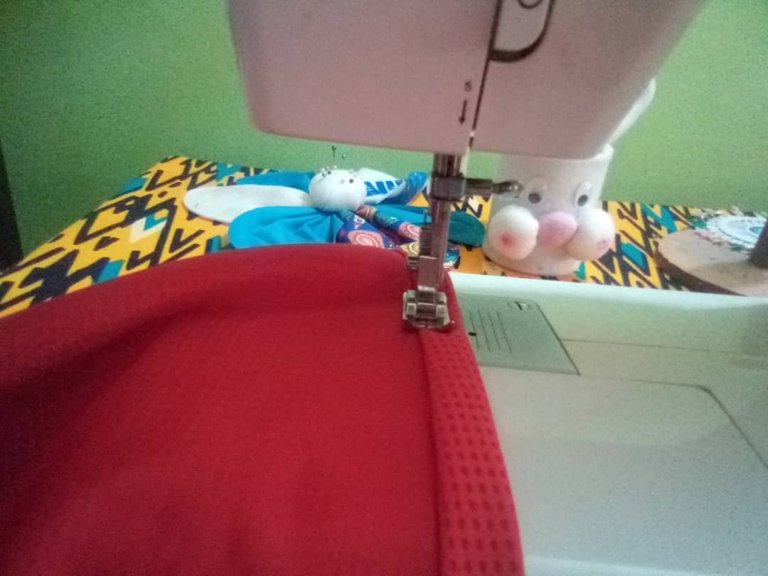
I faced front and back right sides together to join the shoulders, with a straight stitch, then pinned the sleeves right sides together and sewed with a straight stitch, at this point I like to use a zig zag stitch to secure the seam.
Enfrenté derecho con derecho la parte trasera y delantera para unir por los hombros, con puntada recta, seguidamente sujeté la mangas con alfileres enfrentando derecho con derecho y cosí con puntada recta, en este punto me gusta pasar puntada de zig zag para segurar la costura.

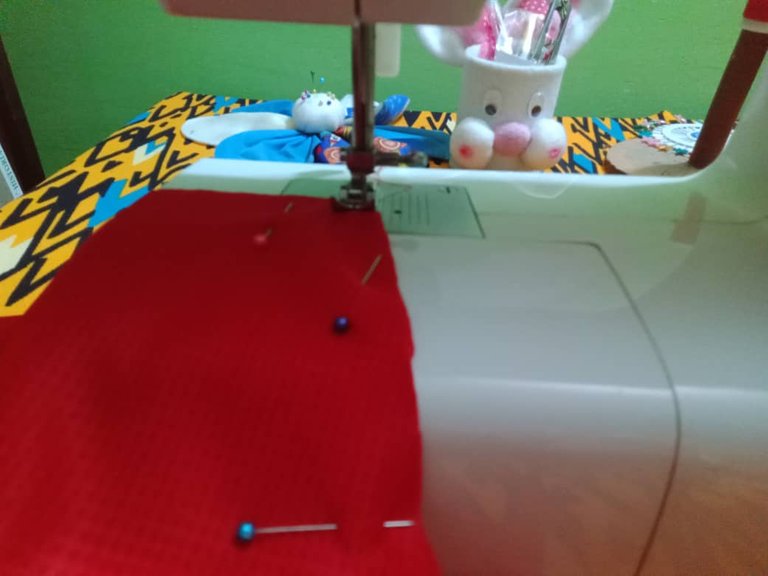
Glued the upper part of the sleeves, I fasten with pins and I close the sides and the sleeves also using straight stitch and reinforcing with zig zag, I also sew a 1 cm hem to make the hem.
Pegadas la parte superior de las mangas sujeto con alfileres y cierro los laterales y las mangas usando también puntada recta y reforzando con zig zag, coso además un dobladillo de 1 cm para hacer el ruedo.
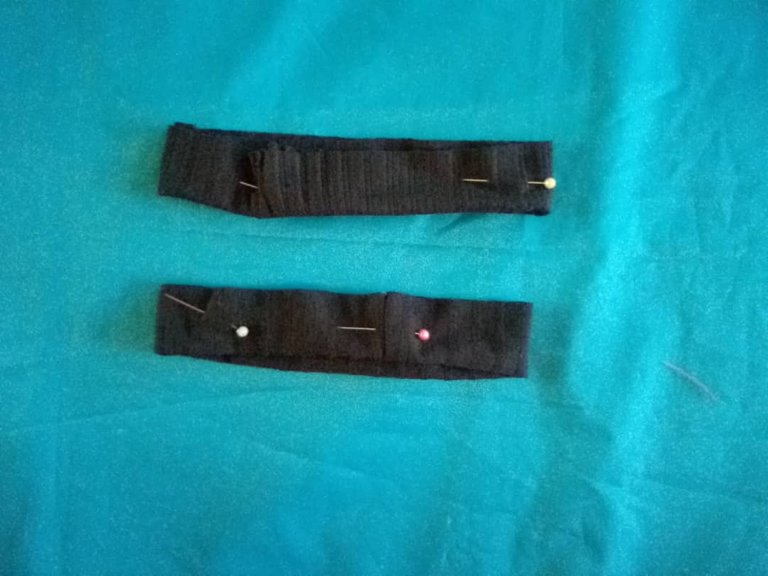
The cuff strips are sewn at the ends (each 14 cm long), then folded, pinned, faced with the right side of the sleeves and sewn on the back with a straight stitch, so that the sleeves can be sewn on the right side of the sleeves.
Las tiras de los puños las coso por los extremos (cada una de 14 cm de largo) luego doblo, sujeto con alfileres enfrento con el derecho de las mangas y coso por el revés con puntada recta, así están terminados los puños.
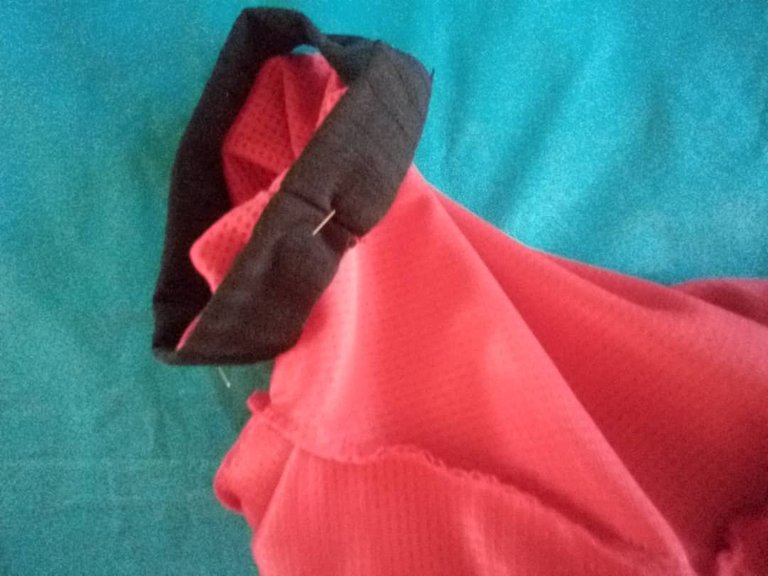
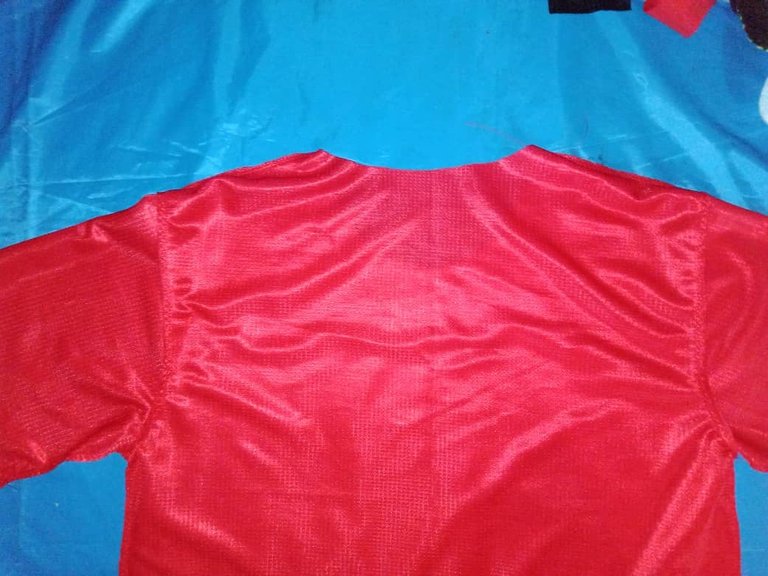
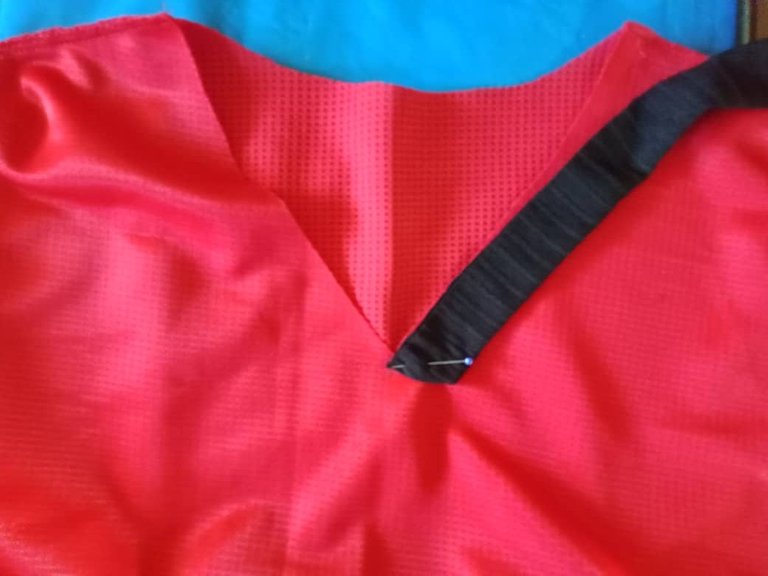
The last step is to glue the neck, the mold we use is round neck, therefore it requires a little modification; to get the V-neck I marked the center of the front neck and lowered 6 cm, then from the shoulders towards the point I marked in the middle I drew a straight line, cut very carefully and in this way I obtain the V-neck.
To glue the neck, I fold the strip, cut a beveled end and place the fold in the lower part of the neck, pin the end and sew stretching 1 cm, when I reach the next end I mount the bias in the front end in such a way that cover it and form the V, turn to the right and replenish, this is how the V-neck flannel is finished.
El último paso es pegar el cuello, el molde que usamos es de cuello redondo, por lo tanto requiere una pequeña modificación; para sacar el cuello en V marqué el centro del cuello delantero y bajé 6 cm, luego desde los hombros hacia el punto que marqué en el medio tracé una línea recta, corté con mucho cuidado y de esta forma obtengo el cuello en V.
Para pegar el cuello doblo la tira, corto un extremo bicelado y coloco el doblez en la parte inferior del cuello, sujeto con alfiler el extremo y coso estirando 1 cm, al llegar al siguiente extremo monto el sesgo en el extremo anterior de tal manera que lo cubra y forme la V, volteo por el derecho y repiso, así está terminada la franela cuello en V.
Finishing this project was very satisfying, it's the first time I've done a V-neck modification and I liked the result.
Terminar este proyecto fue muy satisfactorio, es la primera vez que hago una modificación para cuello en V y me gustó el resultado.

Hasta luego!
Translated with https://www.deepl.com/translator

              All images are my own, captured by a Síragon LC-3000 camera.


   Todas las imágenes son de mi autoría, capturadas por una cámara Síragon LC-3000
the dress looks beautiful, good work. Keep sharing great content 🙏🔥
Greetings @diyhub, I appreciate the support and appreciation, I like to combine the black and red color is very pretty.
Happy and blessed weekend!
This post has been manually curated by @bhattg from Indiaunited community. Join us on our Discord Server.
Do you know that you can earn a passive income by delegating to @indiaunited. We share more than 100 % of the curation rewards with the delegators in the form of IUC tokens. HP delegators and IUC token holders also get upto 20% additional vote weight.
Here are some handy links for delegations: 100HP, 250HP, 500HP, 1000HP.
100% of the rewards from this comment goes to the curator for their manual curation efforts. Please encourage the curator @bhattg by upvoting this comment and support the community by voting the posts made by @indiaunited.
Thanks for the support @indiaunited, it is greatly appreciated.
Grateful for the support @plantpoweronhive.
Happy and blessed weekend!
Hola, @belkyscabrera!
Te quedó perfecta esa franela, me encantó el color rojo de la tela y el paso a paso tam detallado! Te felicito!👏👏👏👏❤️
Sabes que me hiciste recordar que haces años y cuando era más joven 😅le decía a mi mamá que cuando yo usaba la máquina de coser no funcionaba conmigo! Jeje! Esto porque a ella le gustaba coser y a dos de mis hermanas también se le daba con facilidad este oficio, pero nunca, nunca pude coser en una máquina de coser. Así que de verdad que siento gran admiración hacia las personas que lo hacen.🥰💪
Que bueno que disfrutaste y aprendiste del cierre de proyecto de año escolar de tu niño.🤓📝✏️📐
Gracias por compartir!
Saludos!
Saludos @zupasteleria, gracias por tu hermoso comentario, te cuento que inicié la costura con la maternidad, de pequeña mi papá intentó motivar en mi el amor por la costura, pero no era lo mío en ese momento je, je.
Actualmente disfruto coser es mi momento de relax y ver la cara de mi hijo con las ropas que hago para el es mi mayor satisfacción.
Que tengas un feliz inicio de semana!