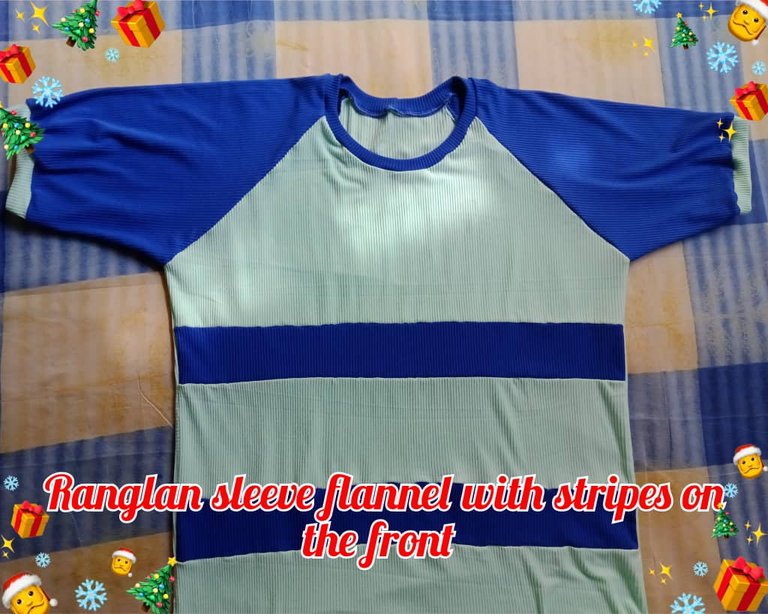
DIY: Raglan sleeve flannel with stripes on the front (Eng - Esp)
Greetings creative friends, I wish you a happy day together with your loved ones, December has already begun which reminds us that we must speed up the Christmas decorations at home, take out the boxes and bags where we keep the ornaments and family beautify, give a beautiful color and fill the house with joy, Christmas is my favorite time of year I like to decorate and make the ornaments, in previous months I was working on them but I still lack the small details like eyes, ribbons, mini stars and accessories that complement the ornaments.
Taking advantage of the small pause of the Christmas ornaments for lack of some materials, I made a ranglan sleeve flannel for my husband with a badass detail on the front, I like this type of sleeve, it is elegant and easy to make, also I learned a new technique to glue it, they are closed and then attached to the flannel, so it is easier and requires less time.
Saludos amigos creativos, les deseo un feliz día en unión de sus seres queridos, ya inició el mes de diciembre el cual nos recuerda que debemos acelerar las decoraciones navideñas en el hogar, sacar las cajas y bolsas donde guardamos los adornos y en familia embellecer, darle un hermoso color y llenar de alegría la casa, la Navidad es mi época favorita del año me gusta decorar y hacer los adornos, en meses anteriores estuve trabajando en ellos pero aún me faltan los pequeños detalles como ojos, cintas, mini estrellas y accesorios que complementan los adornos.
Aprovechando la pequeña pausa de los adornos navideños por falta de algunos materiales, elaboré una franela manga ranglan para mi esposo con detalle de bandas en la parte delantera, este tipo de manga me gusta, es elegante y sencilla de hacer, además aprendí una nueva técnica para pegarla, se cierran y luego se unen al la franela, así es más sencillo y requiere menos tiempo.

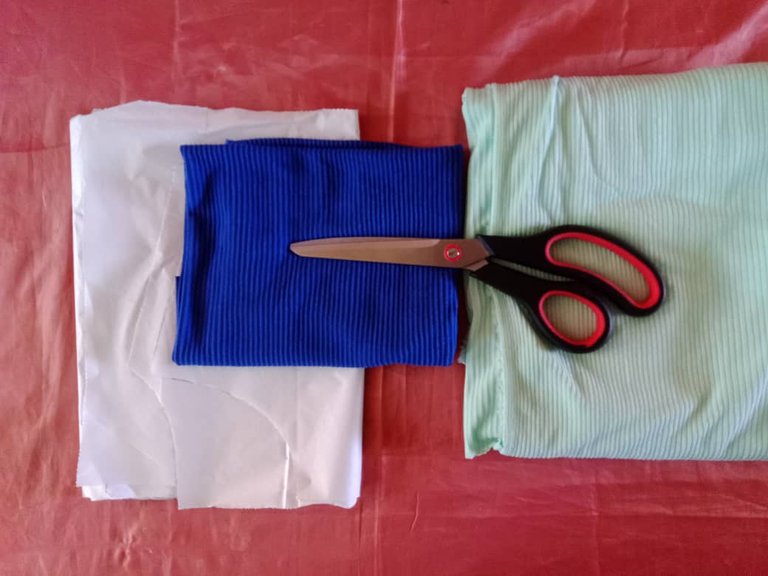
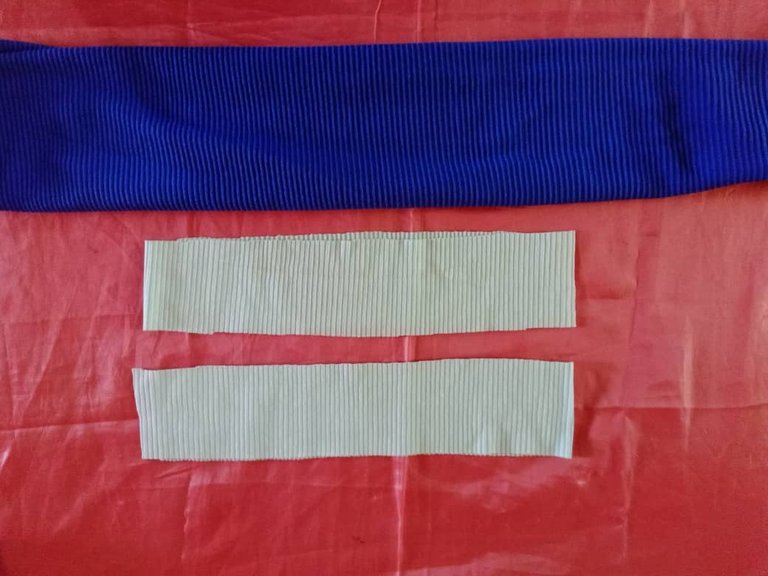
Materials:
*Rib fabric (1 meter light green and 50 cm royal blue).
*Molds
*Scissors
*Pins
*Thread
*Sewing machine
Chalk.
Materiales:
*Tela rib (1 metro vede claro y 50 cm azul rey)
*Moldes
*Tijera
*Alfileres
*Hilo
*Máquina de coser
Tiza.
Procedure
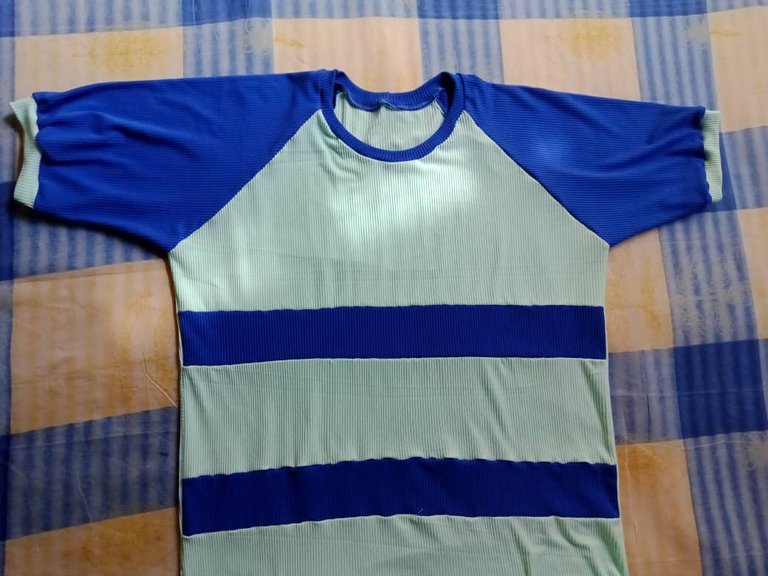
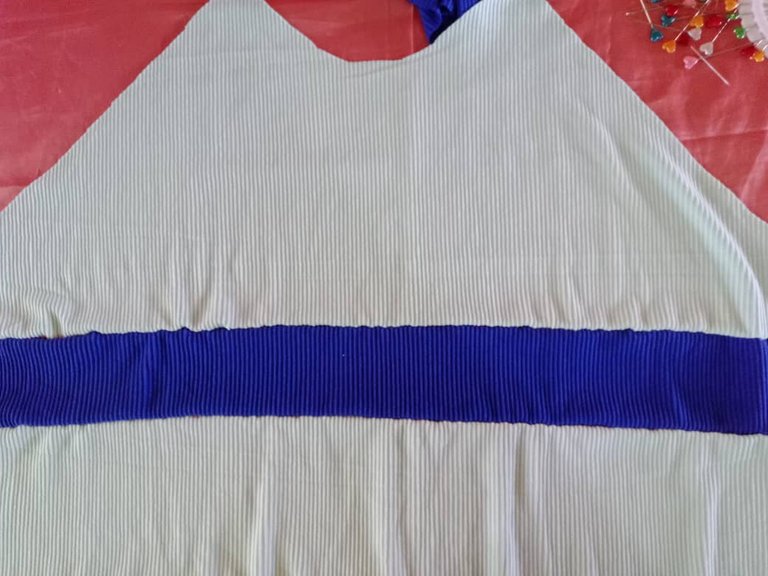
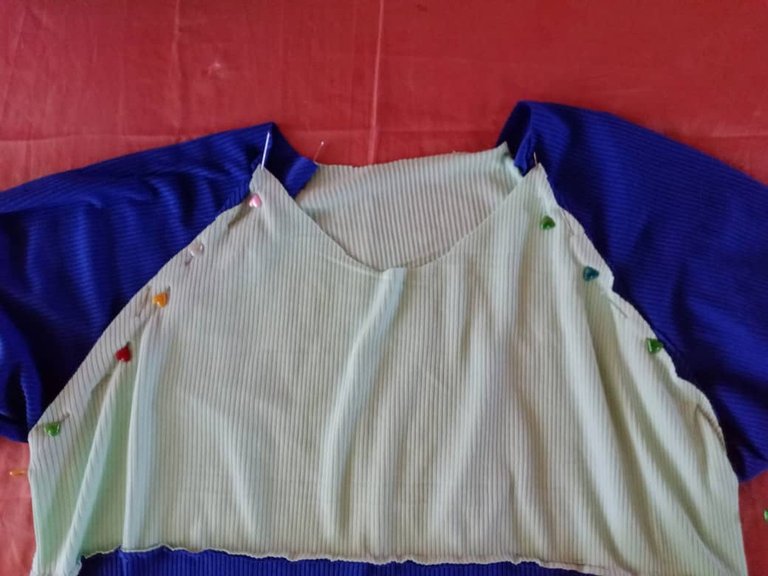
I started by marking the patterns, cut and then on the front I cut two eight (8) centimeter wide strips, in blue color I sewed them to the front; at this point when adding the strips it is important to leave one centimeter of seam at the top and bottom of the strip so as not to subtract from the length of the flannel.
Procedimiento
Inicié marcando los patrones, corté y luego en la parte delantera corté dos bandas o tiras de ocho (8)centímetros de ancho, en color azul las cosí a la parte delantera; en este punto al agregar las tiras es importante dejar un centímetro de costura en la parte superior e inferior de la tira para no restarle al largo de la franela.

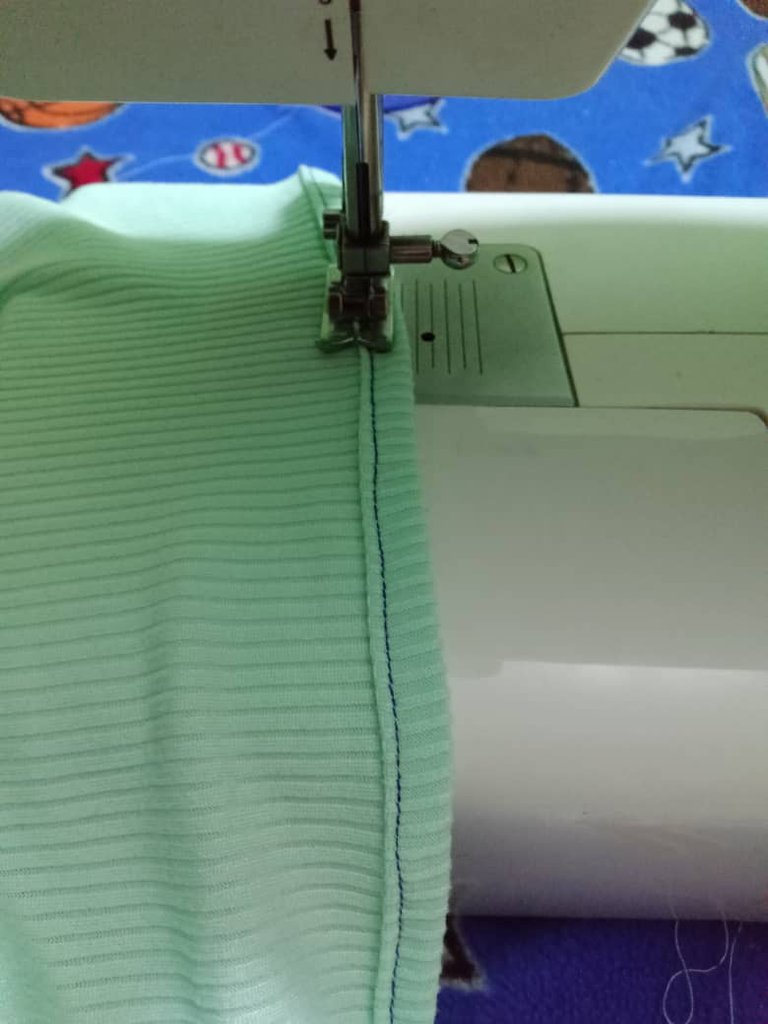
Next I faced the back and front, closed the sides with straight stitch and zig zag stitch, in sewing projects I usually use this stitch to secure the previous seam and get a good finish, especially with fabrics that "fray".
Seguidamente enfrenté la parte trasera y delantera, cerré los laterales con puntada recta y pasé puntada de zig zag, en los proyectos de costura acostumbro a usar esta puntada para asegurar la costura anterior y obtener un buen acabado, especialmente con las telas que "deshilachan"


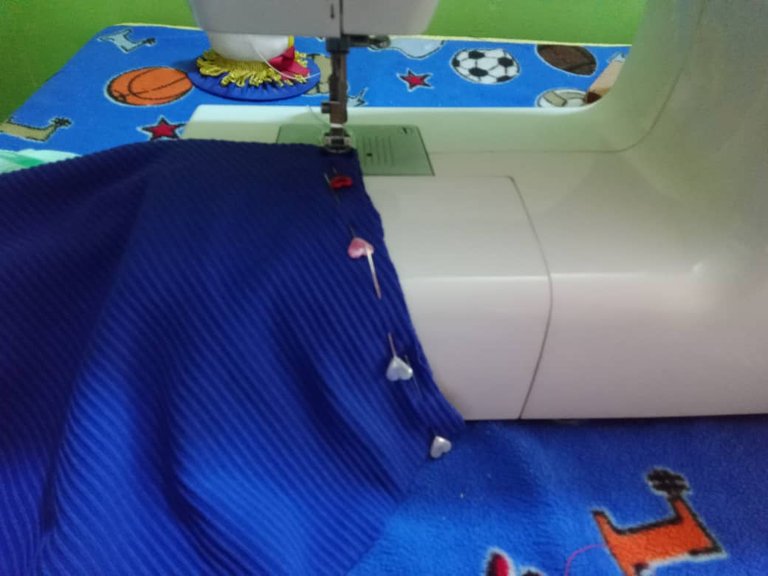
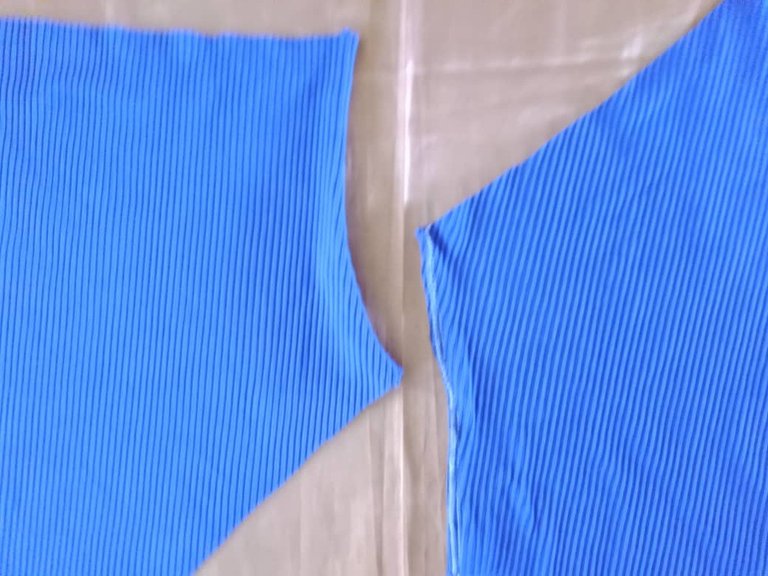
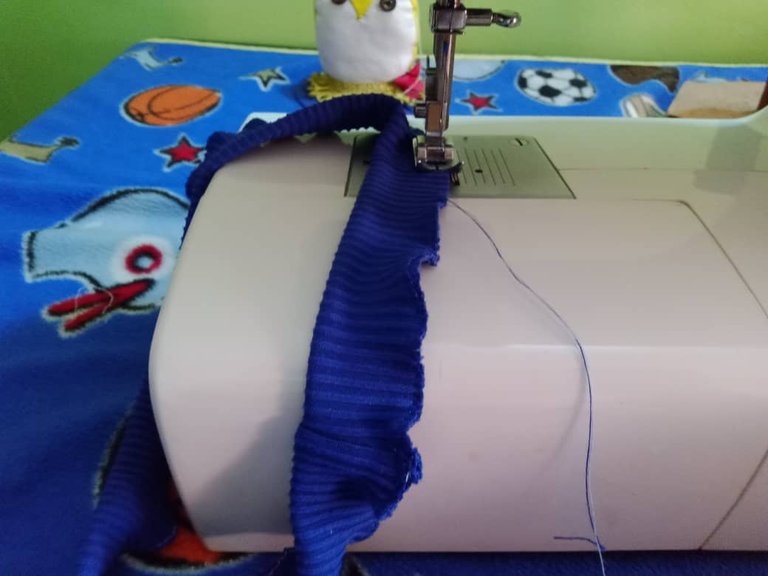
Once the sides were closed, I sewed the sleeves at the bottom, then I faced them with the flannel, pinned and sewed. When gluing the sleeves it is important to consider the longest side or peak, which corresponds to the back and serves as a guide to glue it where it belongs and work smoothly.
Cerrados los laterales, cosí las mangas por la parte inferior, luego enfrenté con la franela, sujeté con alfileres y cosí, al pegar las mangas es importante considerar el lado o pico más largo, que corresponde a la parte trasera y sirve de guía para pegarla donde corresponde y trabajar sin contratiempos.

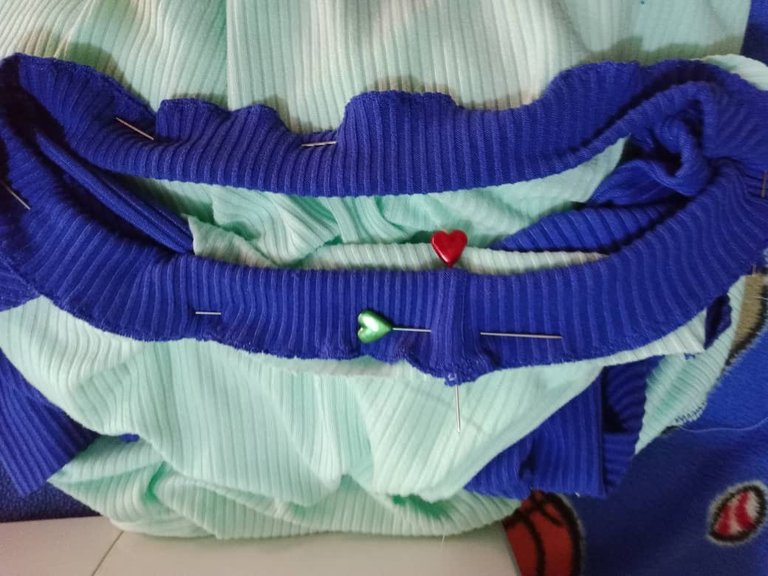
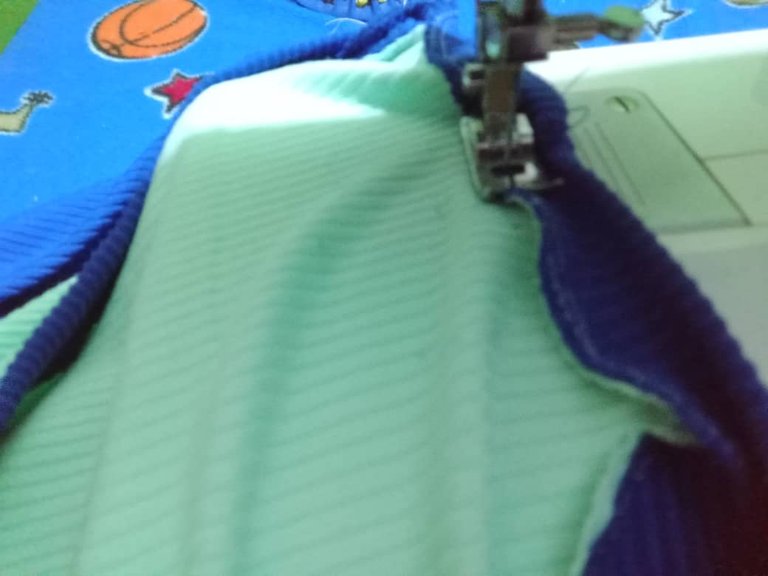
The fourth step is to glue the neck, to do it I cut a strip or bias of five (5) centimeters wide and fifty-nine (59) long which is the contour of the neck, I subtracted six (6) centimeters I closed the ends with straight stitch, folded and passed zig zag stitching for the lower part and thus the bias is ready, to glue it I divided it into four parts, I fixed it to the flannel and sewed with straight stitch stretching 0.5 centimeters.
El cuarto paso es pegar el cuello, para hacerlo corté una tira o sesgo de cinco (5) centímetros de ancho y cincuenta y nueve (59) de largo que es el contorno de cuello, le resté seis (6) centímetros cerré los extremos con puntada recta doblé y pasé costura de zig zag por la pare inferior y así está listo el sesgo, para pegarlo lo dividí en cuatro partes lo fijé a la franela y cosí con puntada recta estirando 0,5 centímetros.
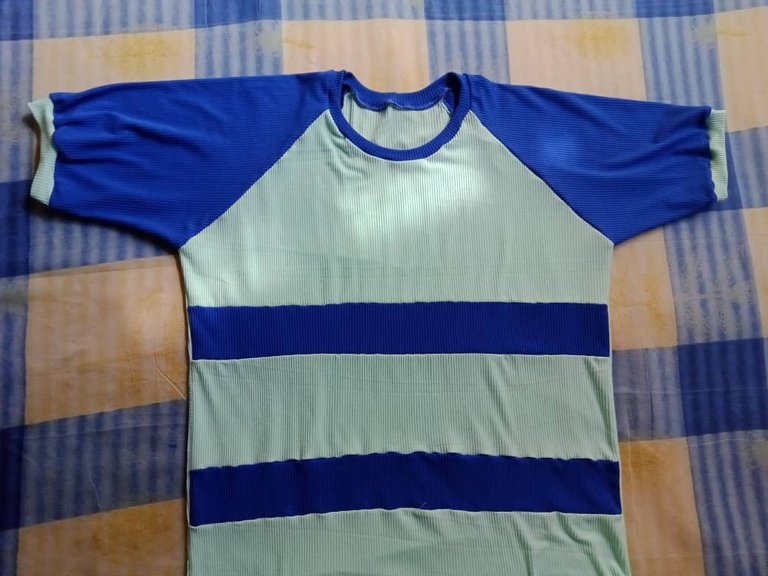
The last step is to sew the cuffs, the process is similar to the one used to glue the collar, as the sleeves are blue I made the cuffs in green to match the flannel and make them stand out, then I sewed a hem of one (1) centimeter to make the hem and finished the flannel.
El último paso es coser los puños, el proceso es similar al que se realiza para pegar el cuello, como la mangas son de color azul hice los puños de color verde para que combinen con la franela y resalten, luego cosí un dobladillo de un (1) centímetro para hacer el ruedo y terminada la franela.
This is the first time I sew a men's raglan sleeve flannel, also using the technique of gluing the sleeve closed, in my previous projects I sewed the sleeve open and then closed the sides, with this new process it was faster and I learned to use the longer peak as a guide for the back, I liked the result and I worked without difficulties.
Es la primera vez que coso una franela manga ranglan para caballero, además usando la técnica de pegar la manga cerrada, en mis proyectos anteriores cosía la manga abierta y luego cerraba los laterales, con este nuevo proceso fue más rápido y aprendí a usar el pico más largo como guía para la parte trasera, me gustó el resultado y trabajé sin dificultades.

Blessings!

¡Bendiciones!

Translated with https://www.deepl.com/translator
          All images are my own, captured by a Síragon LC-3000 camera.

   Todas las imágenes son de mi autoría, capturadas por una cámara Síragon LC-3000.
Has sido curado por @visualblock / You've been curated by @visualblock
Bienvenidas delegaciones / Delegations welcome
Trail de Curación / Curation Trail
Vota por nuestro Testigo aliado - @hispapro / Vote for our allied Witness - @hispapro
Más información sobre el testigo aquí / More information about the witness here
Hola @visualblock, agradecida por el apoyo brindado a mi contenido.
Saludos y feliz inicio de semana!
Haces una labor estupenda, siempre es un placer para nosotros apoyar tu talento. 🤗
I think that kind of sleeve adds style and jazzes up a plain t-shirt.
Nice job:)
Hi millycf1976, I love this sleeve model, it is simple but at the same time adds style and elegance, combining two colors highlights the sleeves and a nice contrast in the neckline.
Have a great week!
https://twitter.com/hivediy47901/status/1731664599533985889
Gracias por el apoyo @hive-130560
Saludos!
Quedo bonita y no tiene que gastar comprando ropa.
Hola @elmundodemiri, es una opción para ahorrar y crear los diseños al gusto de cada persona.
Saludos!
Hola amiga, te quedo muy bonita, bien terminada. Dios bendiga tus manos. Un abrazo.
Saludos amiga, me alegra que te haya gustado, este modelo de mangas me encanta y es sencillo de hacer.
Feliz y bendecida semana!