Needle Work your Bucket list #3: Flannel with raglan sleeve (Eng - Esp)
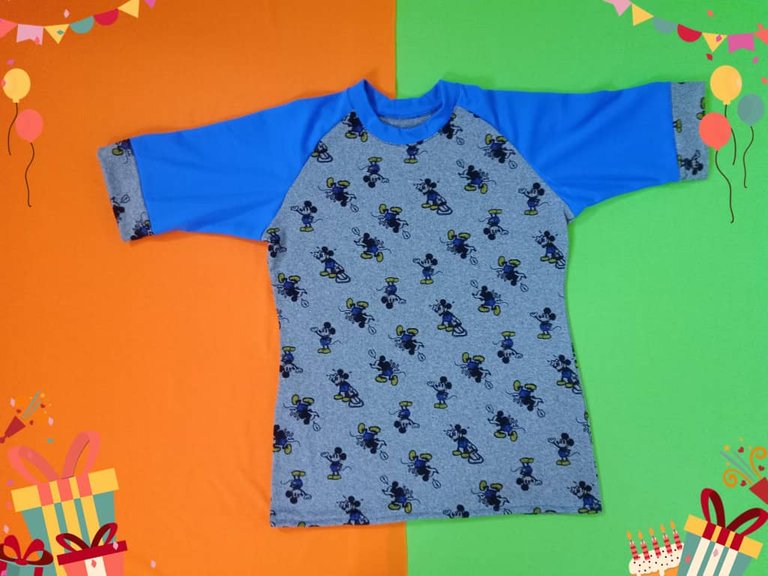

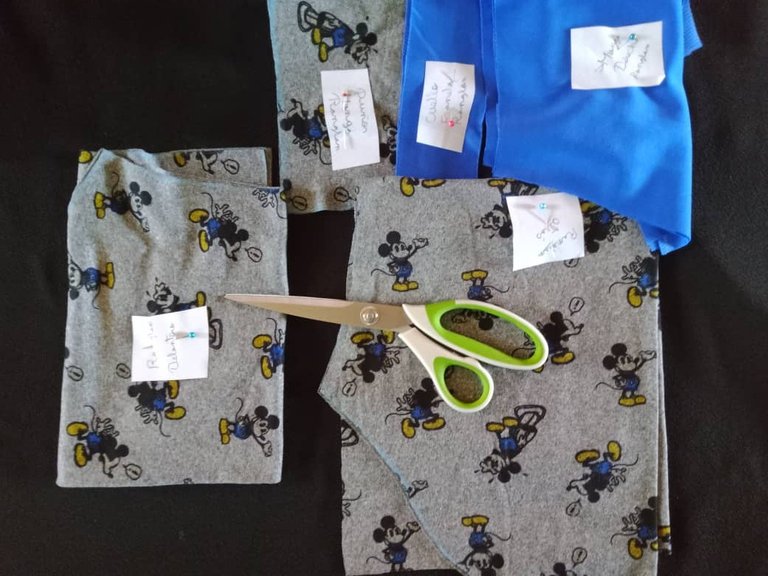
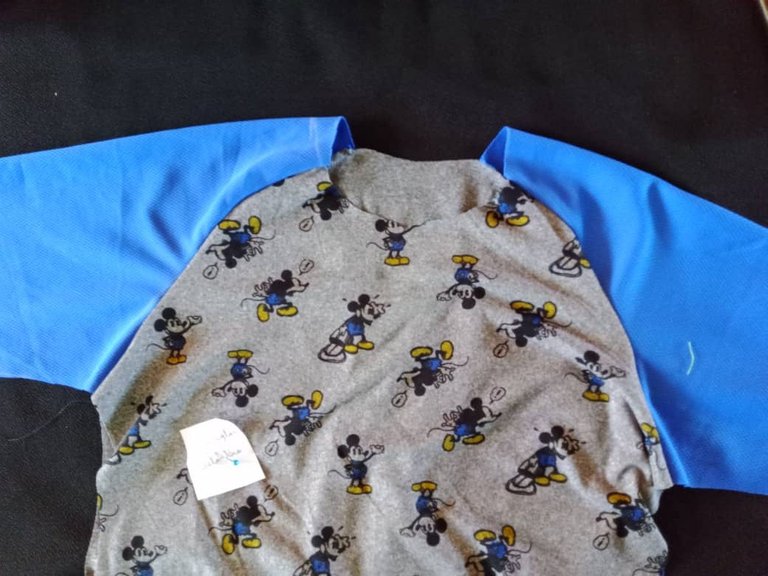
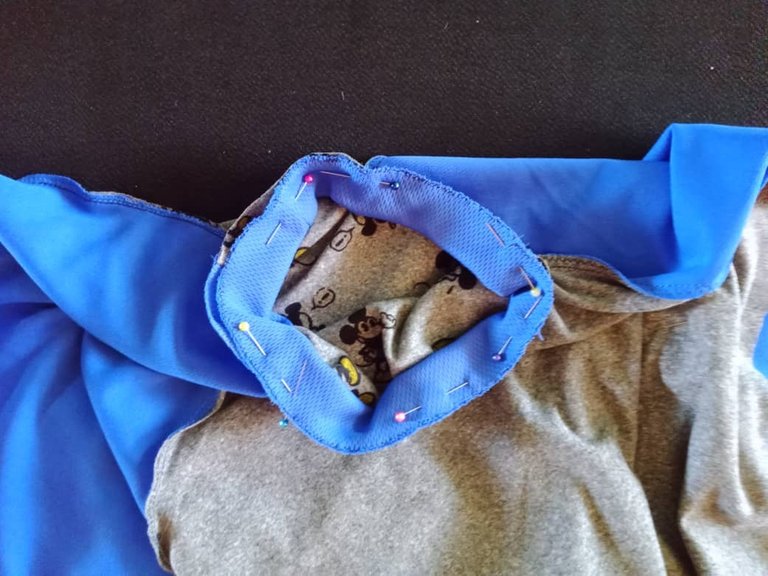
Greetings fellow yarn and needle lovers, happy and blessed Monday together with your loved ones, today ends the NeedleWork Your Bucket List brought by @crosheille, in which she encourages us to finish the pending sewing projects, I feel happy because I could finish 80% of my pending projects, most of them were flannel and overalls for my son, the sports overalls are just waiting for the elastic, the flannels were finished, I only have pending the weekly assignments for the sewing course and the tablecloth for my sewing table, today I share with you the culmination of a project that was a challenge for me: Flannel with raglan sleeve, since I saw this flannel model I liked it, I borrowed the patterns from a classmate, I copied them and taking advantage of the fabrics I had at home I cut the flannel, in my eagerness to finish this flannel as soon as possible I glued the sleeves as the others are regularly glued, everything was going well until there or at least I thought so, the problem arose at the time of gluing the neck, I divided the neck in 4 parts, I pinned and sewed, as I was sewing I realized that there was some fabric left over from the neck bias, I left the seam and I started to analyze what I had done wrong, I checked the pattern several times and realized that I had glued the sleeves in the wrong way, I took the seam ripper and to unpick the seams haha.

Saludos amigos amantes de los hilos y la agujas, feliz y bendecido lunes en unión de sus seres queridos, hoy finaliza el desafío NeedleWork Your Bucket List que ha traído @crosheille, en el cual nos anima a culminar los proyectos de costura pendientes, me siento feliz porque pude terminar el 80% de mis proyectos pendientes, en su mayoría eran franela y monos para mi hijo, los monos deportivos solo esperan por el elástico, las franelas fueron terminadas, solo me queda pendiente las asignaciones semanales del curso de costura y el mantel para mi mesa de costura, hoy comparto con ustedes la culminación de un proyecto que fue todo un reto para mi: Franela con manga ranglan, desde que vi este modelo de franela me gusto, le pedí los patrones prestados a una compañera del curso, los copié y aprovechando las telas que tenía en casa corté la franela, en mi afán por terminar esta franela lo más pronto posible pegué las mangas como regularmente se pegan las otras, todo iba bien hasta allí o al menos eso creía yo, el problema surgió al momento de pegar el cuello, dividí el cuelo en 4 partes sujeté con alfileres y pasé costura, a medida que cosía me di cuenta que sobraba tela del sesgo del cuello, dejé la costura y me puse a analizar que había hecho mal, revisé el patrón varias veces y caí en cuenta que había pegado las mangas de forma equivocada, tomé el saca costuras y a descoser se ha dicho jaja.


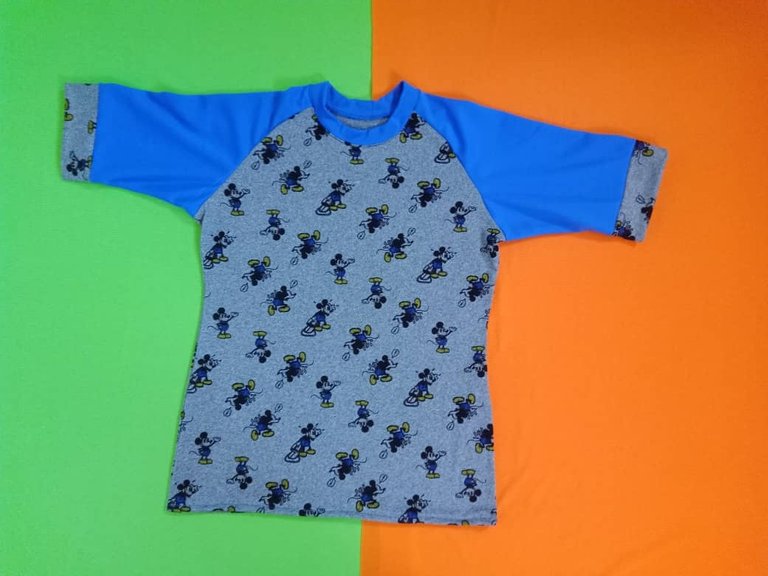
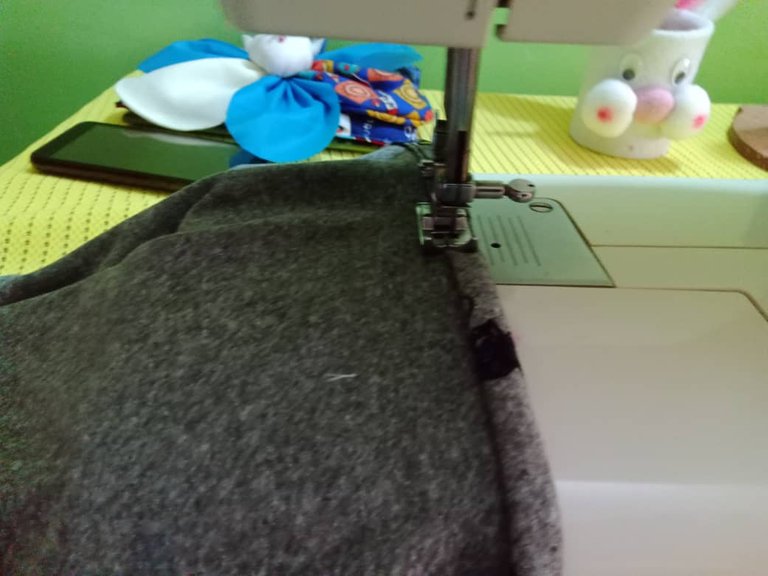
I finished unpicking and the fabric of the sleeves and the flannel were left with many holes. I always make my son's flannels one size bigger, this time was no exception and to cut the holes in the fabric I decided to adjust the flannel to his current size, cutting the part where I unpicked and remarking all the pieces, again I got down to work; this sleeve is glued open, sew the front armhole of the sleeve to the front armhole of the flannel, then the back armhole of the sleeve to the back armhole of the flannel, then the neck bias, then close the sides and sleeves and finally sew the cuffs of the sleeves and the bottom hem, very carefully I was sewing each piece and checking that it was well sewn, when I finished I was very happy with the result, this sleeve model is beautiful; the fabrics I used for this set were micro peach and athletic, the jumpsuit only lacks the elastic that with God's favor arrives between today and tomorrow, I hope it will be like that to definitely finish all the jumpsuits.
Terminé de descoser y la tela de las mangas y la franela quedaron con muchos orificios, siempre acostumbro hacer las franelas de mi hijo una tala más grande, esta vez no fue la excepción y para decidí ajustar la franela a su talla actual, cortando la parte donde descosí y remarcando todas las piezas, nuevamente me puse manos a la obra; esta manga se pega abierta, se cose la sisa delantera de la manga a la sisa delantera de la franela, luego la sisa trasera de la manga a la sisa trasera de la franela, seguidamente el sesgo del cuello, luego se cierran los laterales y las mangas por último se cosen los puños de las mangas y el dobladillo inferior, con mucho cuidado fui cosiendo cada pieza y verificando que estuviese bien cosida, al terminar me sentí muy feliz por el resultado, este modelo de manga es bonito; las telas que usé para este conjunto fueron micro durazno y atlética, al mono solo le falta el elástico que con el favor de Dios llega entre hoy y mañana, espero sea así para definitivamente terminar todos los monos.
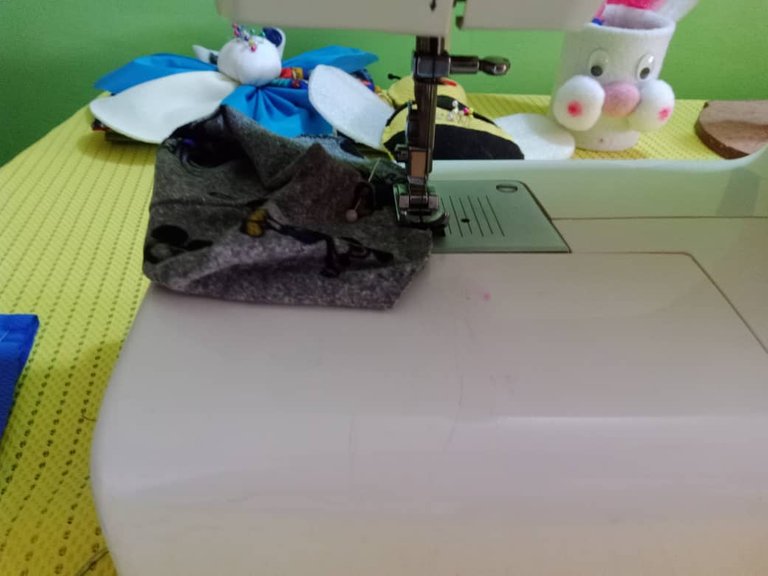
I marked the patterns and identified each piece, pinned and faced right sides together the front armhole of the flannel with the sleeve armhole, the same way I did with the back.
Marqué los patrones e identifiqué cada pieza, sujeté con alfileres y enfrenté derecho con derecho la sisa delantera de la franela con la sisa de la manga, de igual forma hice con la parte trasera.
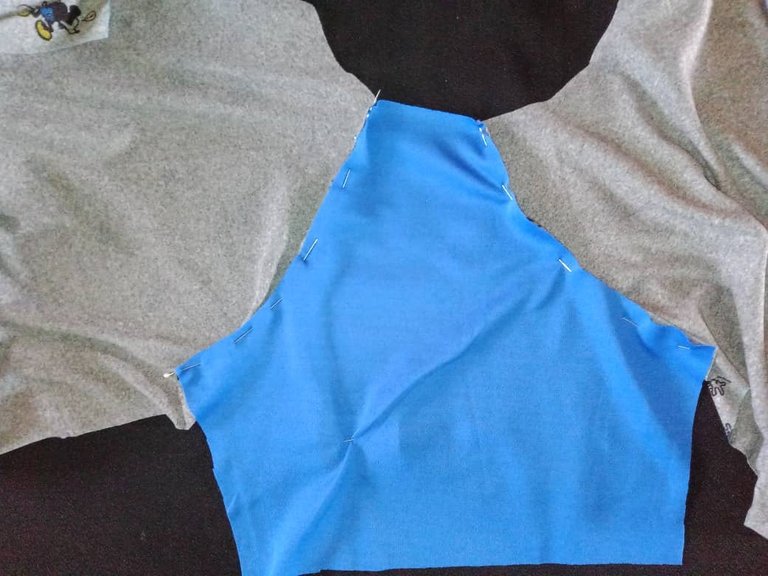
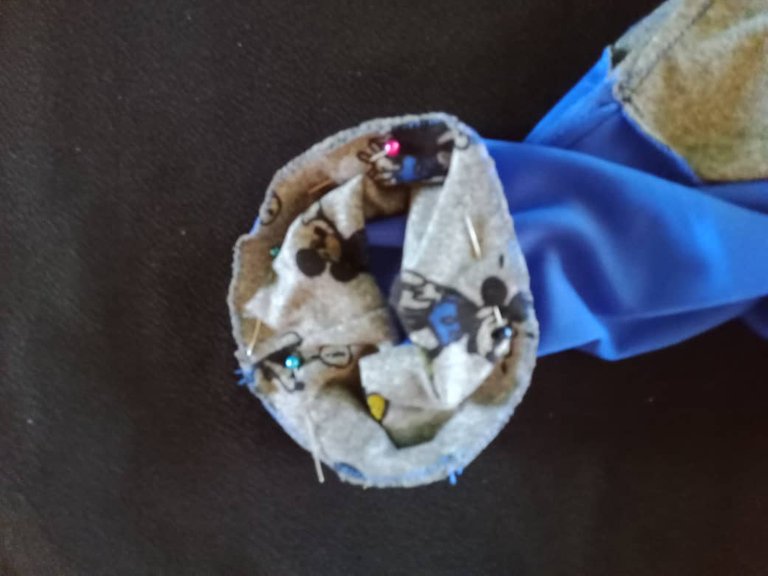
To make the collar, I sewed the bias binding right sides together, sewed the ends with a straight stitch, turned over, folded and zig zag stitched the edges to secure the seam, in the same way I sewed the sleeve cuffs; I pinned the collar right sides together, sewed with a straight stitch, then turned over and repeated.
Para hacer el cuello cosí el sesgo enfrentando derecho con derecho los extremos cosí con puntada recta, volteé doblé y pasé costura de zig zag por las orillas para asegurar la costura, de igual forma cosí los puños de las mangas; pegué el cuello enfrentando derecho con derecho, cosí con puntada recta luego volteé y repisé.
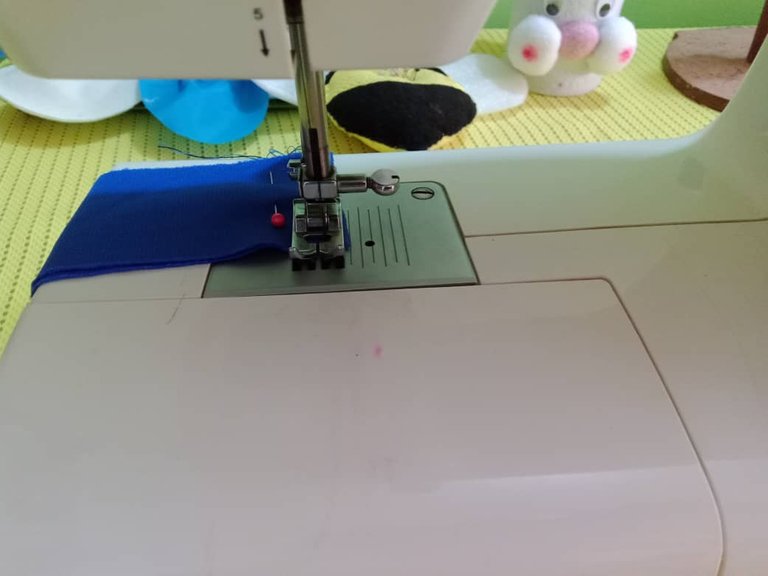
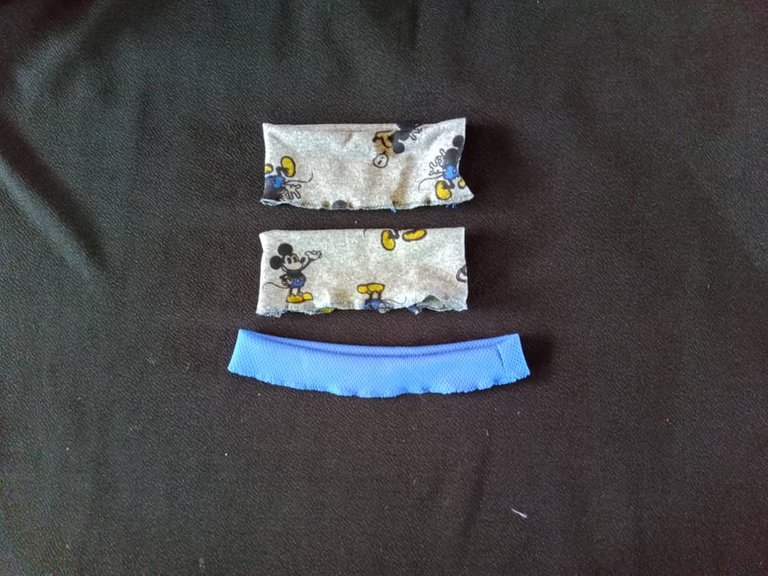
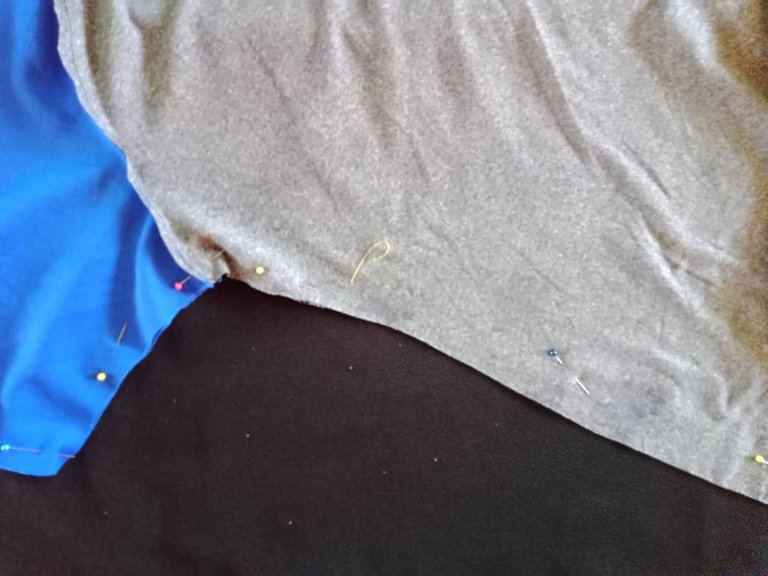
To close the sleeves and sides, I pinned, sewed with straight stitch, then glued the cuffs right sides together, joined with straight stitch, this process is very similar to gluing the collar, only it is not repeated.
Para cerrar las mangas y laterales, sujeté con alfileres, cosí con puntada recta, luego pegué los puños enfrentando derecho con derecho, uní con puntada recta, este proceso es muy similar al pegado del cuello, solo que no se repisa.
Finally I sewed a hem on the bottom and finished the flannel.
Finalmente cosí un dobladillo en la parte de abajo y terminada la franela.
Finishing this project was a challenge, I thought it was easier to glue the sleeves, although I had to unpick and had difficulty with the sleeves it was very satisfying to see the result, definitely these sleeves are now in my list of favorites, I like them very much for their sporty and relaxed style, ideal for everyday and casual flannel.
Terminar este proyecto fue todo un reto, pensé que era más sencillo pegar las mangas, aunque me tocó descoser y tuve dificultad con las mangas fue muy satisfactorio ver el resultado, definitivamente estas mangas están ahora en mi lista de favoritas, me gustan mucho por su estilo deportivo y relajado, ideales para las franela de diario y casuales.
Hasta luego!
Translated with https://www.deepl.com/translator
              All images are my own, captured by a Síragon LC-3000 camera. Dividers courtesy of @kattycrochet.


   Todas las imágenes son de mi autoría, capturadas por una cámara Síragon LC-3000. Divisores cortesía de @kattycrochet.
Que éxito amiga. Que hayas completado un 80% de tu bouquet listo es un avance titánico. Te felicito por tu constancia y esfuerzo.
Te quedó muy bonita la franela para tu hijo.
Bendiciones.
Saludos amiga @artsugar, gracias por pasar, han sido varios trasnochos jaja, pero gracias a Dios pude avanzar, solo me falta el elástico para terminar los monos, ya me quedarán pendientes las asignaciones del curso y mi mantel que le falta muy poco, él está muy feliz con su franela.
Bendiciones!
Awnnn, am so glad to hear that you were able to finish 80% of your project, you did meet up with the challenge and your son will be happy to have all of those new auditions.
Well done dear @belkyscabrera 💖💃💃💃🌹
Hi @monica-ene, I'm so happy because I was able to move forward, my son is more than happy with his flannels.
Happy and blessed start of the week!
Thanks dear.
May the new week bring us good tidings 💃❤
Congrats on finishing the 80% of your projects. You did a great job plus I like that shirt you make for your son. I'm sure your son will gonna love it too.🥰
Hi @jonalyn2020, my son is very happy with his new flannel, the fabric is soft and cool.
Blessings!
https://twitter.com/1567306537697251328/status/1635418228733382657
The rewards earned on this comment will go directly to the people( @evelin71 ) sharing the post on Twitter as long as they are registered with @poshtoken. Sign up at https://hiveposh.com.
Que bien te ha quedado esta franela. Que bueno que pudiste solucionar el detalle de las mangas y cuello, suele pasar cuando por primera vez realizamos un modelo nuevo, lo importante es el aprendizaje que nos queda. Que bueno que lograste terminar la mayoría de tus propósitos para este reto. Bien hecho. Saludos.
Saludos @mariela-b, me alegra que te haya gustado, sí, gracias a Dios pude resolver, es importante detallar primero el patrón y luego coser, de lo contrario toca descoser jaja; lección aprendida tomarlo con calma y sin prisa.
Feliz tarde!
Hola Belkys :) Me gusta esta combinación de telas, siempre pienso que la parte más difícil es la de coser los cuellos y puños, no sé por qué le tengo tanto miedo a eso jaja. Pero te quedó muy lindo este diseño y se ve prolijo, te felicito ❤️
Saludos @lauramica, para mi lo más difícil es el cuello, antes de pegarlo mido varias veces el sesgo, no para todas las telas es igual, pero con la micro durazno y atlética hay una diferencia de 3, 5 cm entre el cuello y el sesgo, solo se estira un poco el sesgo y queda a la perfección, hasta ahora me funcionado, igual siempre mido antes de cortar el sesgo del cuello.
Bendiciones!
Congratulations @belkyscabrera! You have completed the following achievement on the Hive blockchain And have been rewarded with New badge(s)
Your next target is to reach 4250 replies.
You can view your badges on your board and compare yourself to others in the Ranking
If you no longer want to receive notifications, reply to this comment with the word
STOPCheck out our last posts:
Cheers @hivebuzz, thanks for the support.
You've got this @belkyscabrera! Keep putting in the effort and you'll reach your target in no time.