[ESP-ENG] Cute culer holder - Tutorial | Lindo porta culer - Tutorial
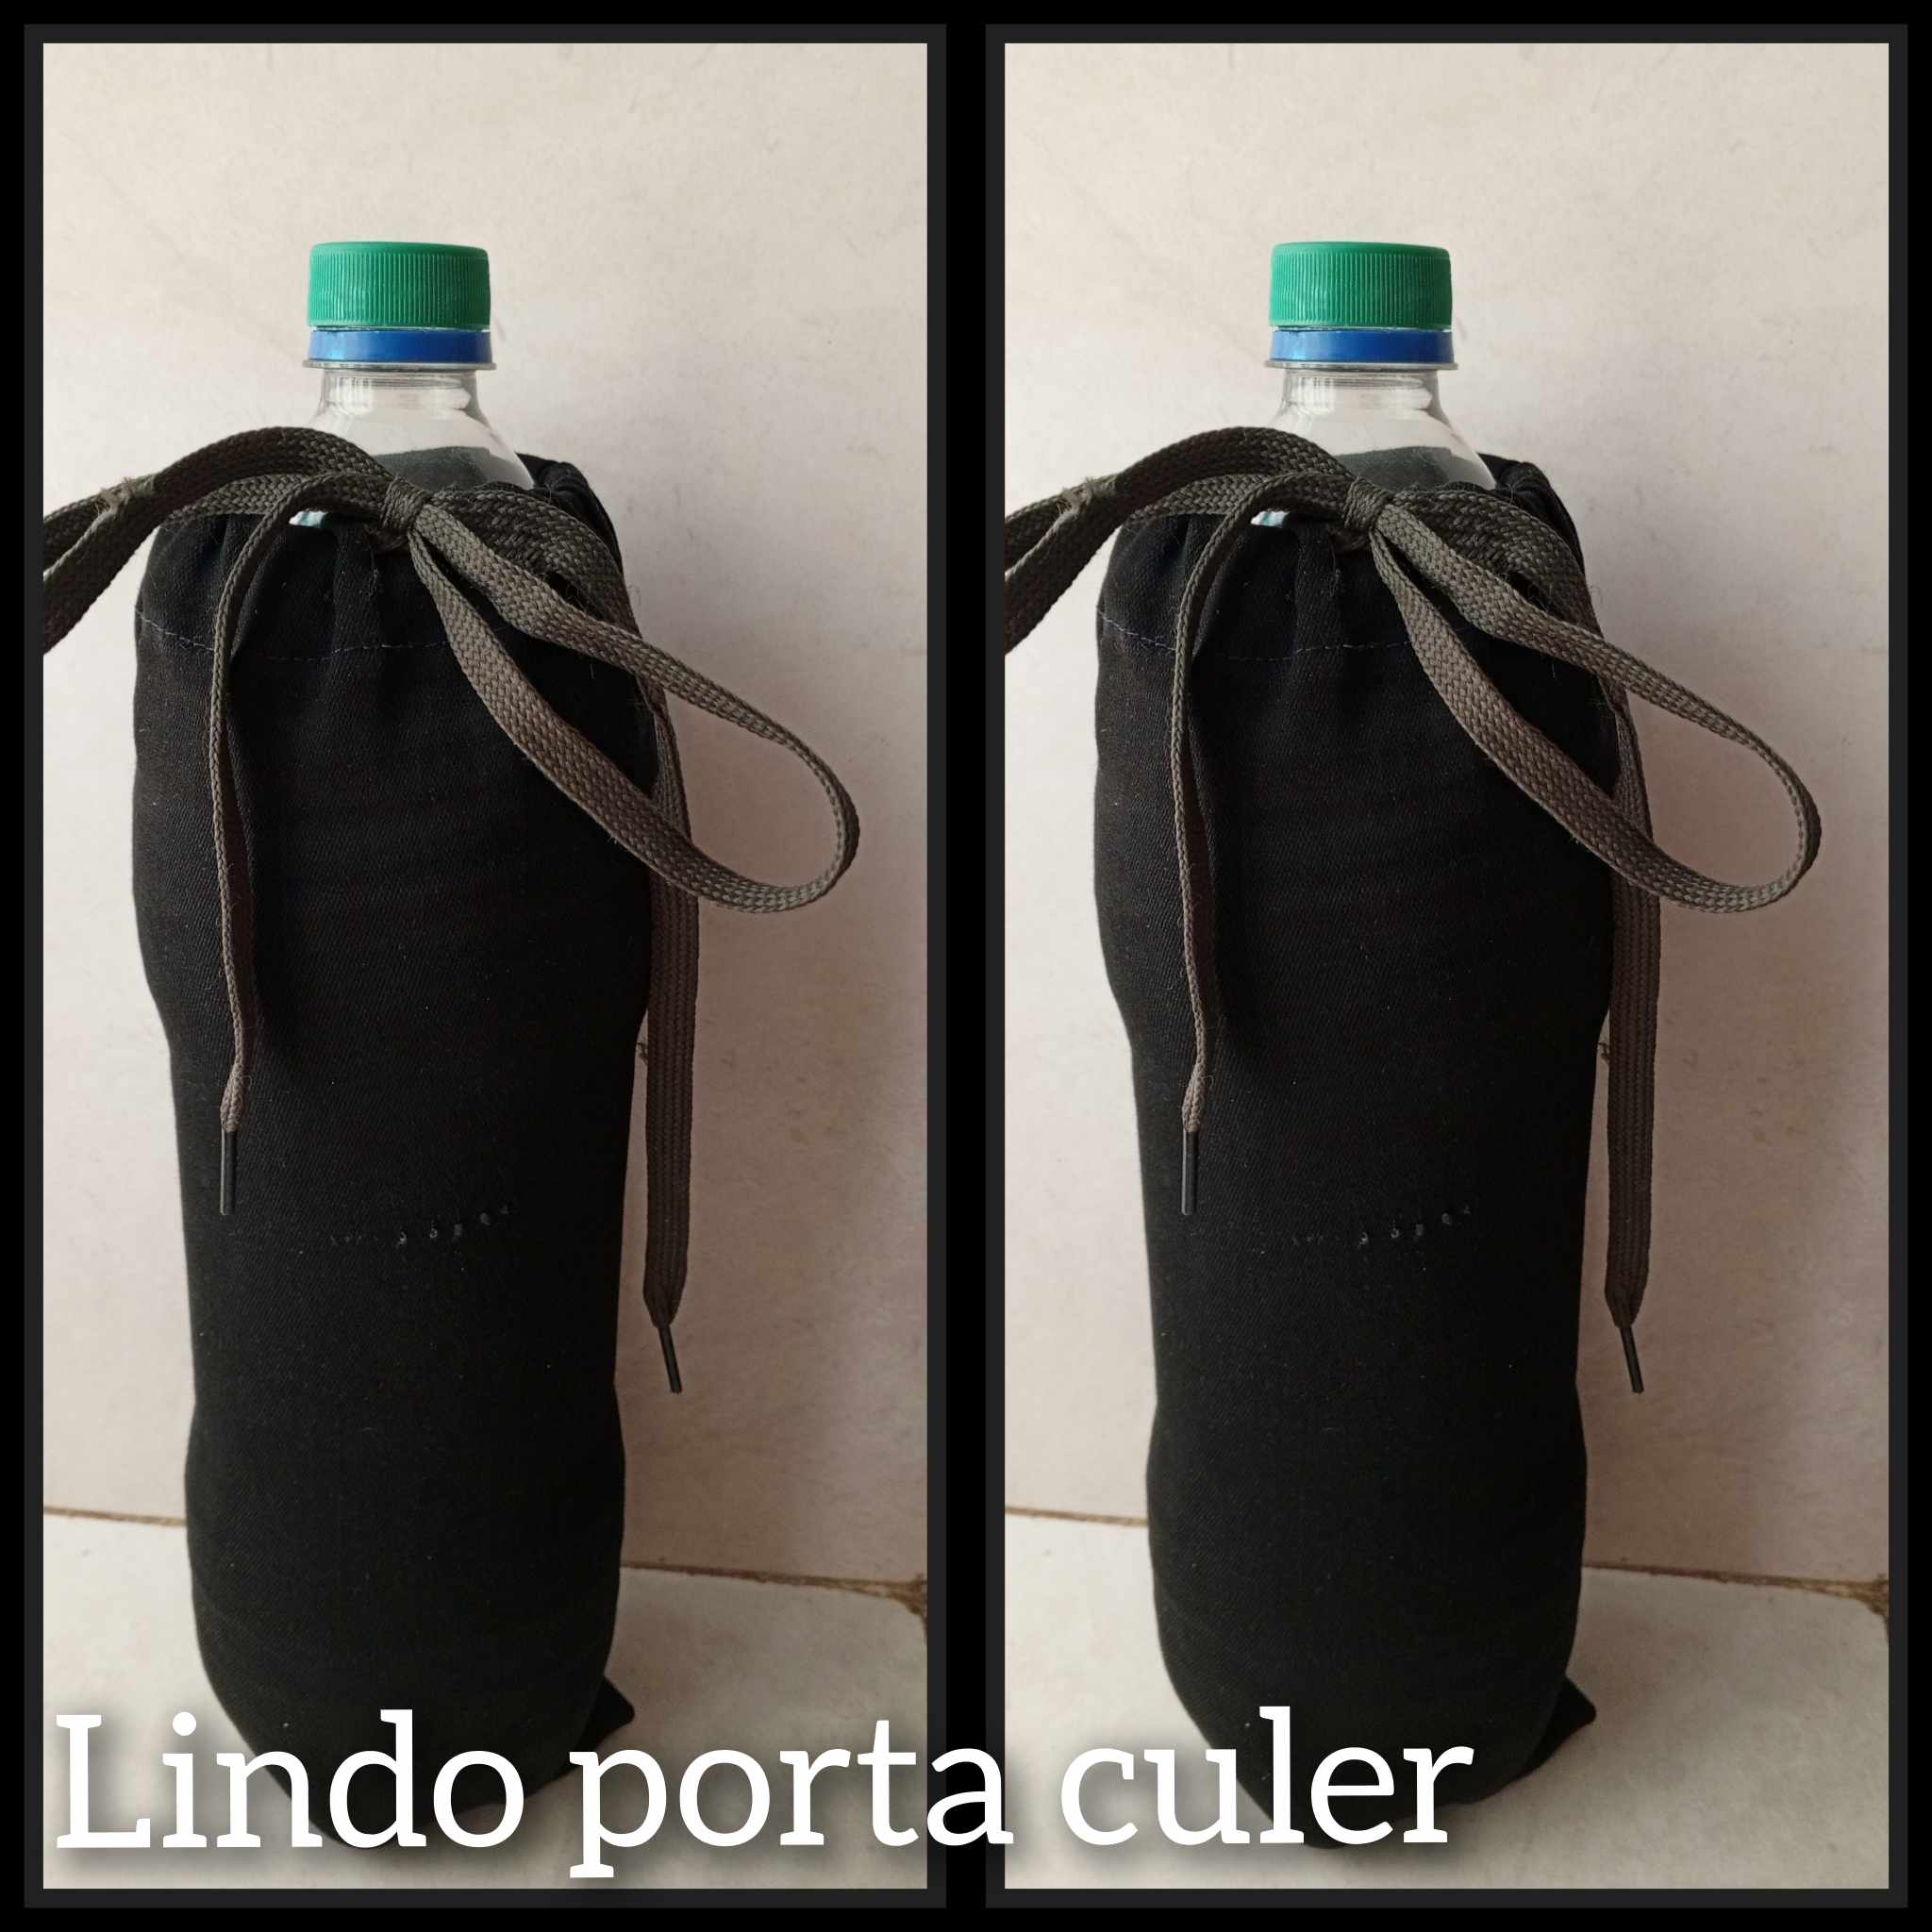
Amigos y amigas de hive, un placer estar acá nuevamente con todos ustedes compartiendo así un nuevo post donde les mostraré cómo hacer un porta culer para nuestros termos con agua, lo podemos usar al salir a correr, al parque, a la cancha, a jugar, al gym, a cualquier lugar donde vayamos y donde sepamos que tendremos la posibilidad de tener sed, esta innovación les servirá de mucha ayuda para todos nosotros asi que vamos a ver el paso a paso.
.jpg)
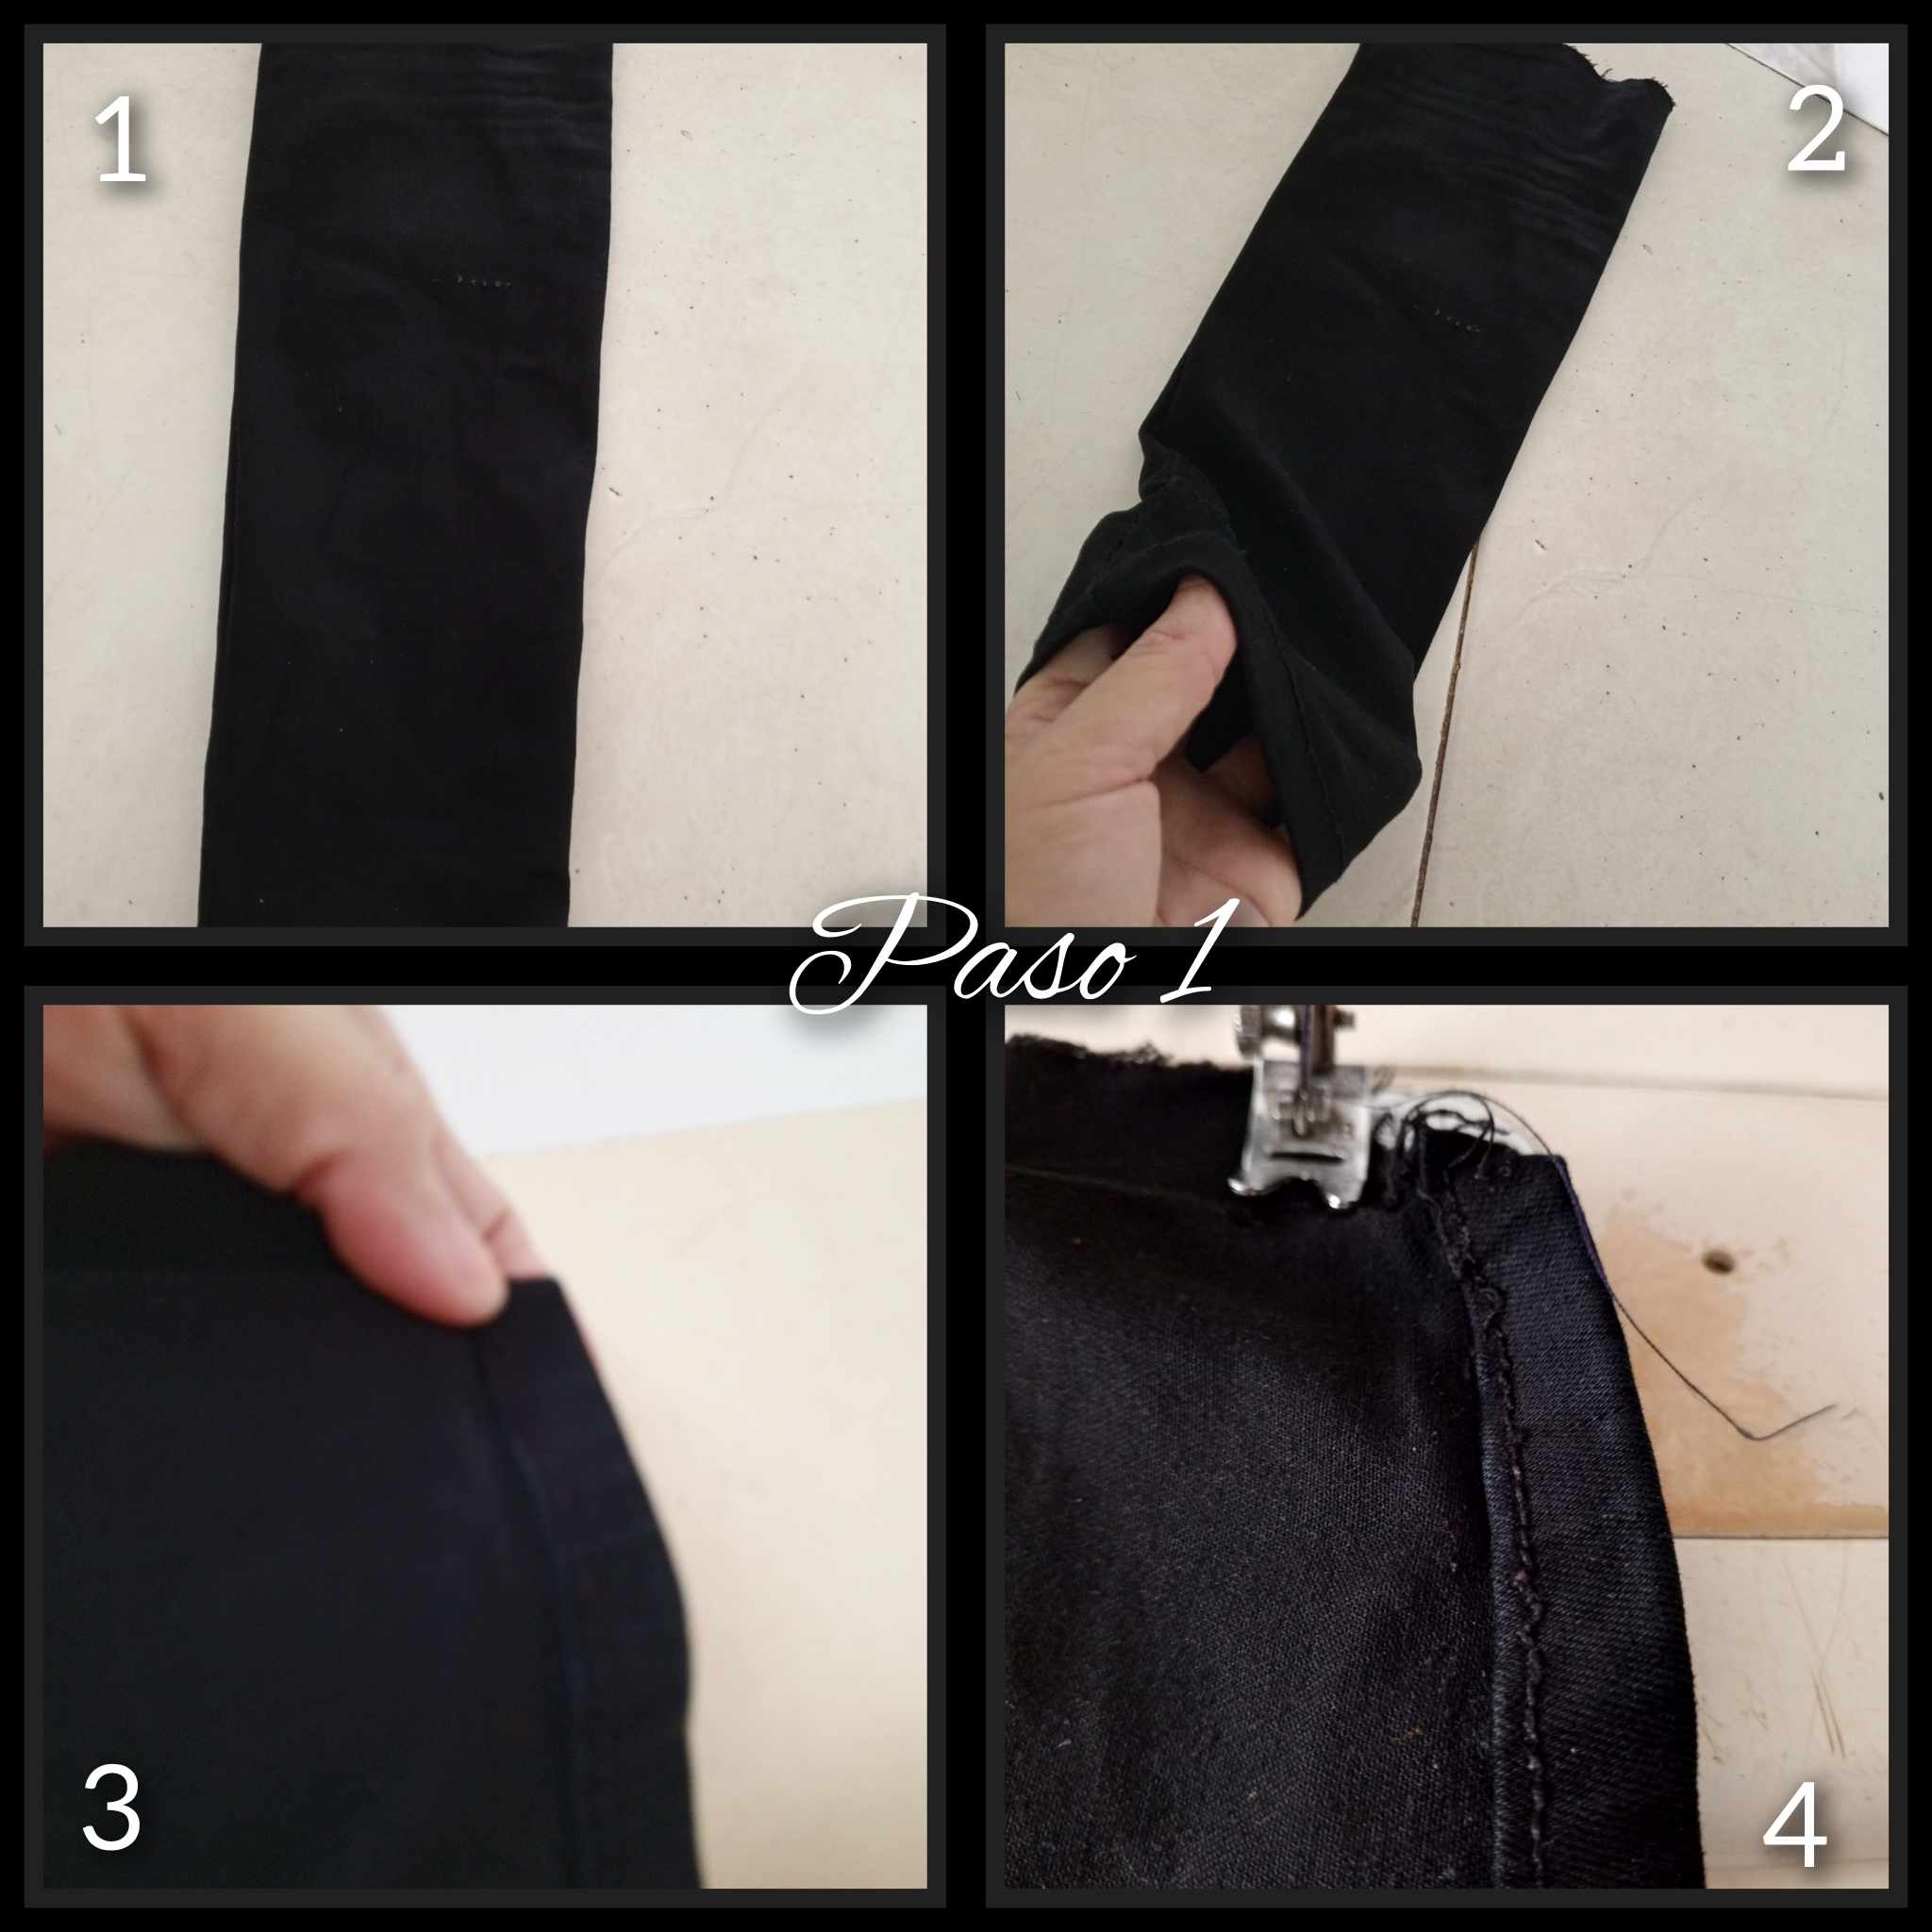
Paso 1: para que sepan este porta culer lo realicé con unos retazos de un jean la parte de abajo, realmente quedó justo a la medida del termo grande y de ahí tomé para realizar este lindo porta culer. Lo que procedí a hacer fué tomar el ruedo en la parte de abajo para cerrar y el termo no se salga.
Step 1: just so you know, I made this culer holder with some scraps of a jean, the bottom part was really just the size of the big thermos and from there I took it to make this nice culer holder. What I proceeded to do was to take the hem at the bottom and make the
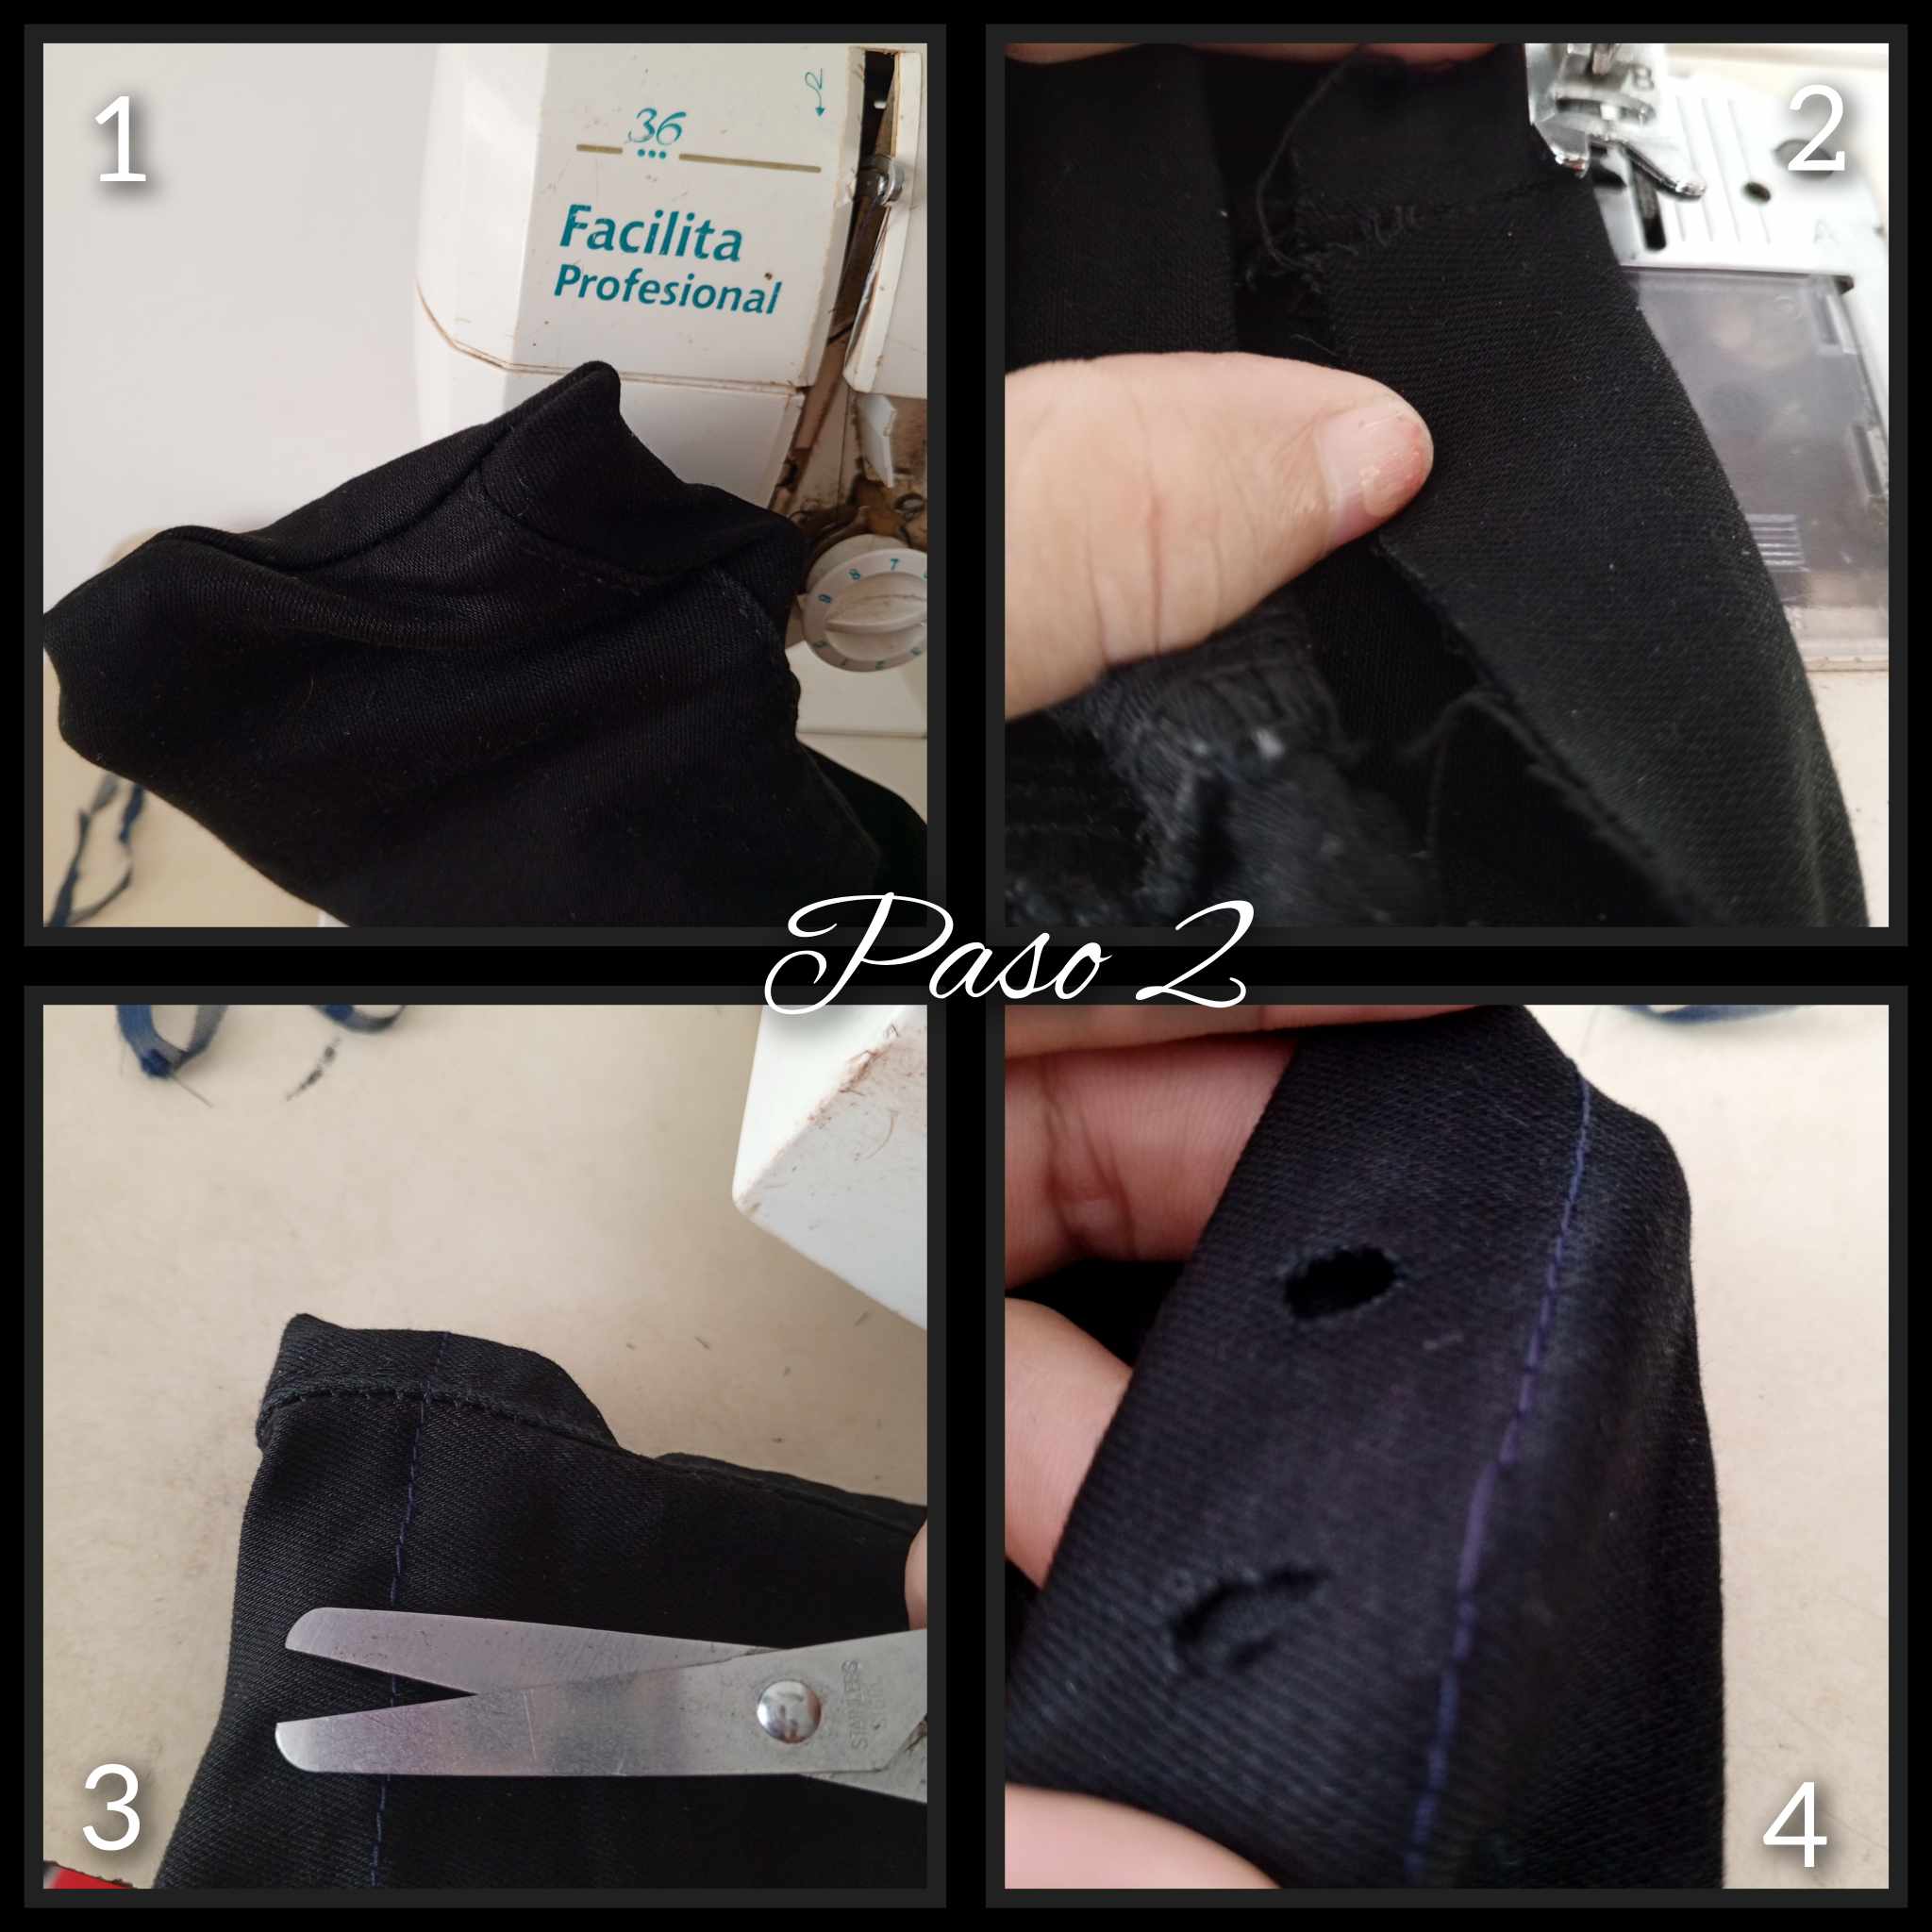
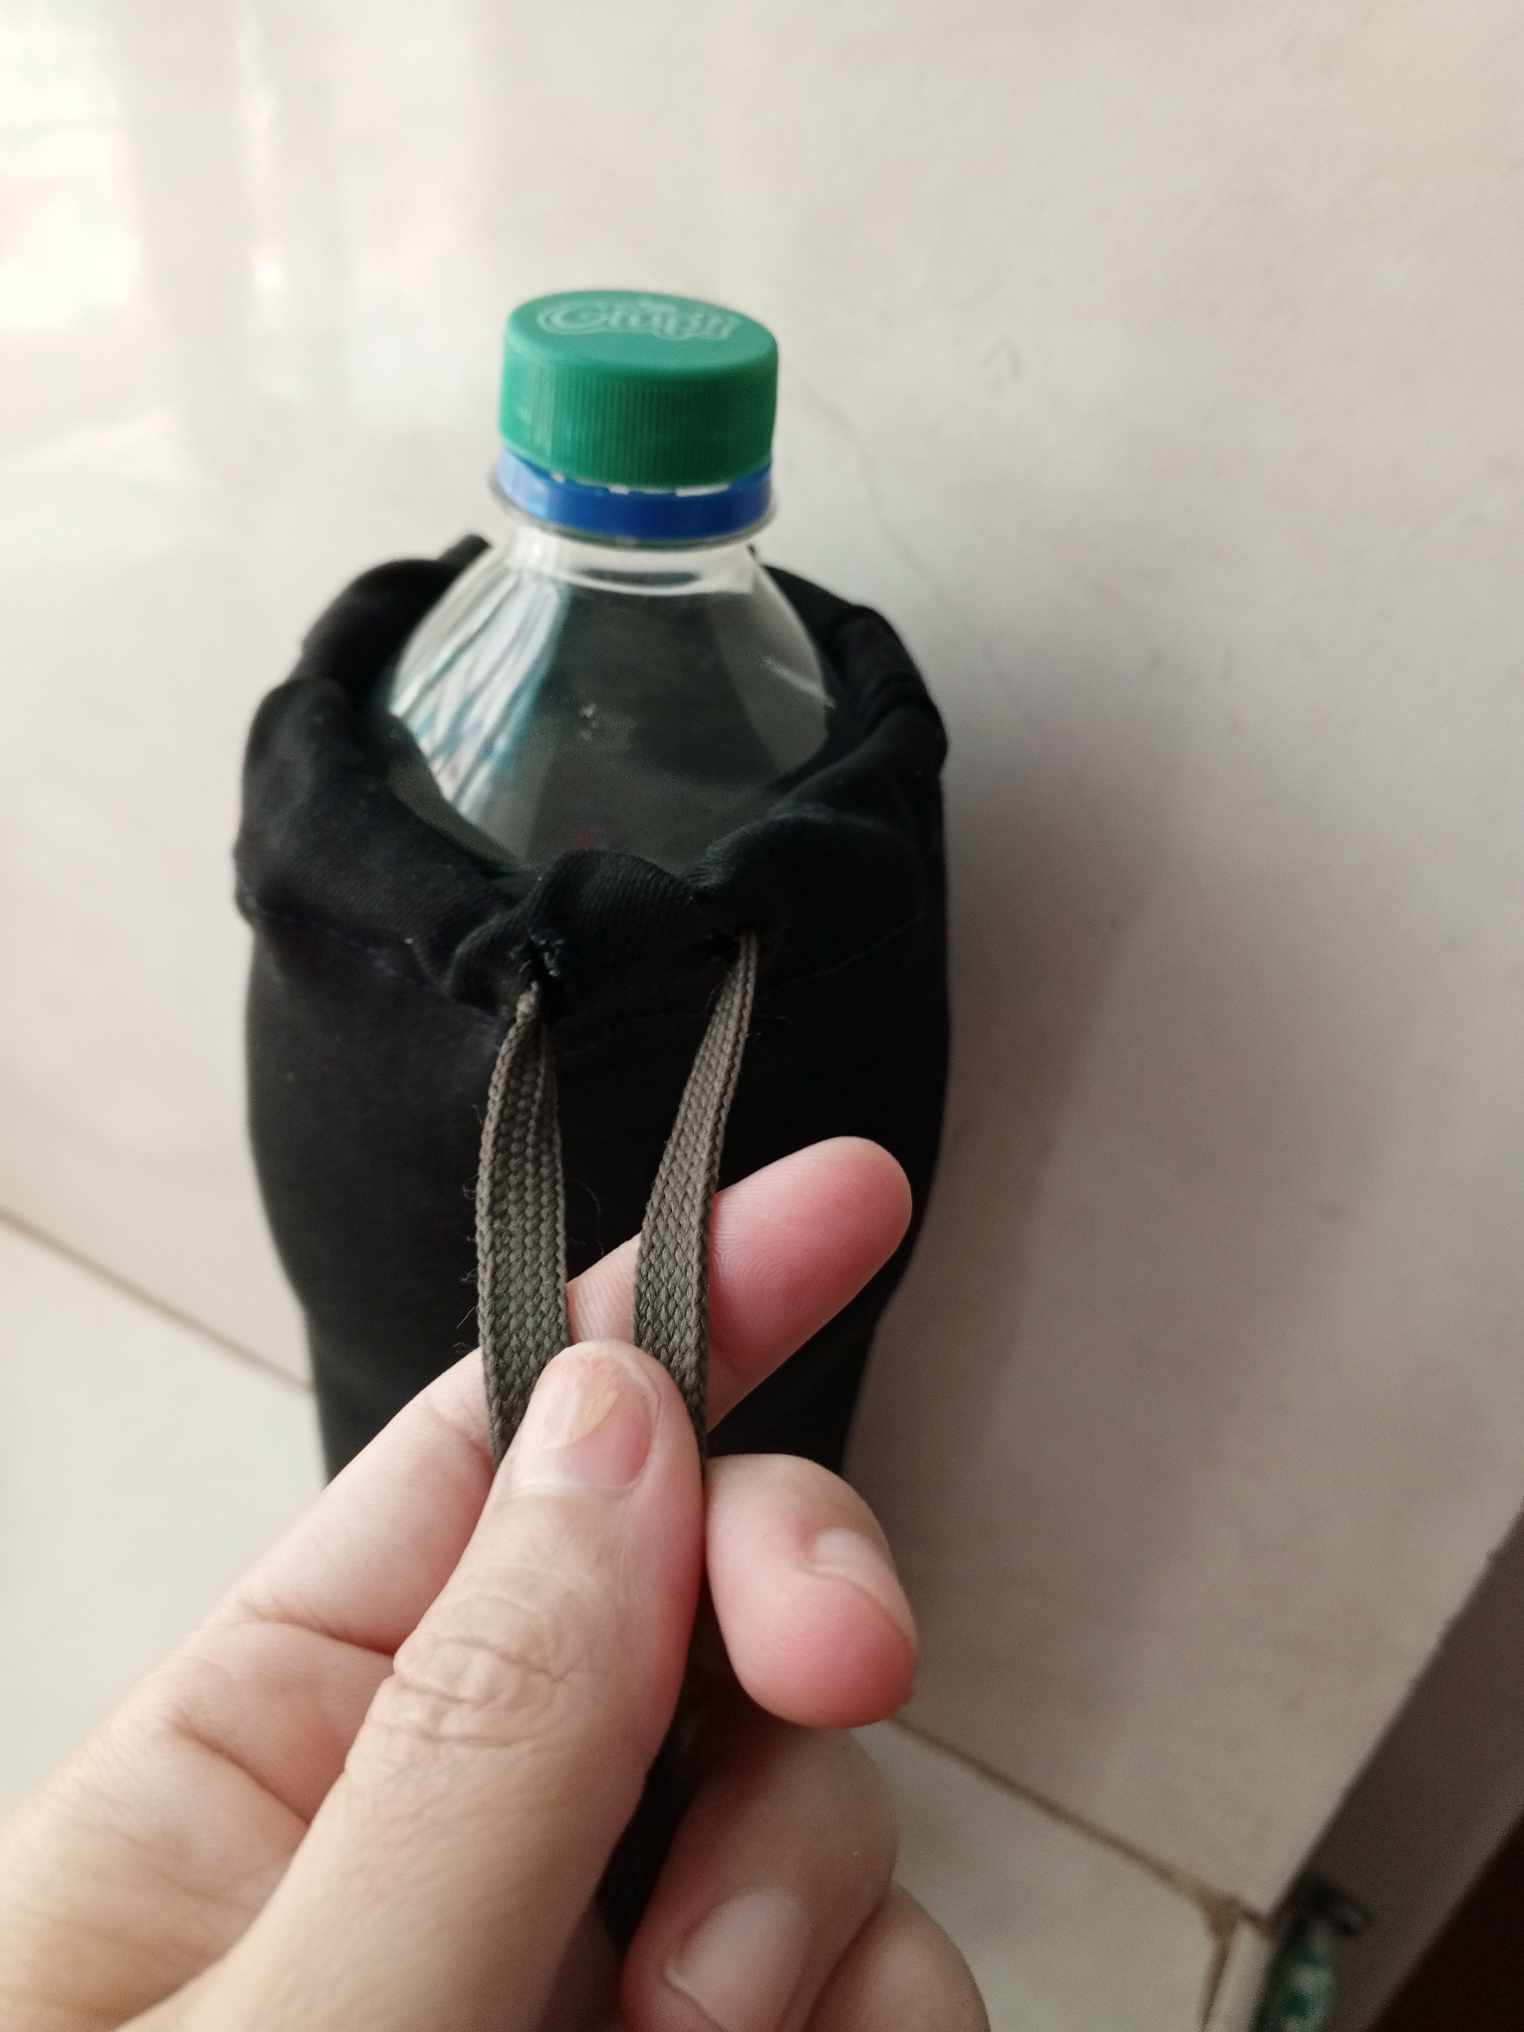
Paso 2. luego de haber cosido el ruedo en la parte de abajo de la funda o el porta culer procederemos a abrir internamemnte los huequitos por donde la trenza que usaremos para amarrar el porta culer y sostenerlo de ahí se abrirán.
Step 2. after having sewn the hem at the bottom of the culer holder, we will proceed to open internally the little holes where the braid that we will use to tie the culer holder and hold it will open.
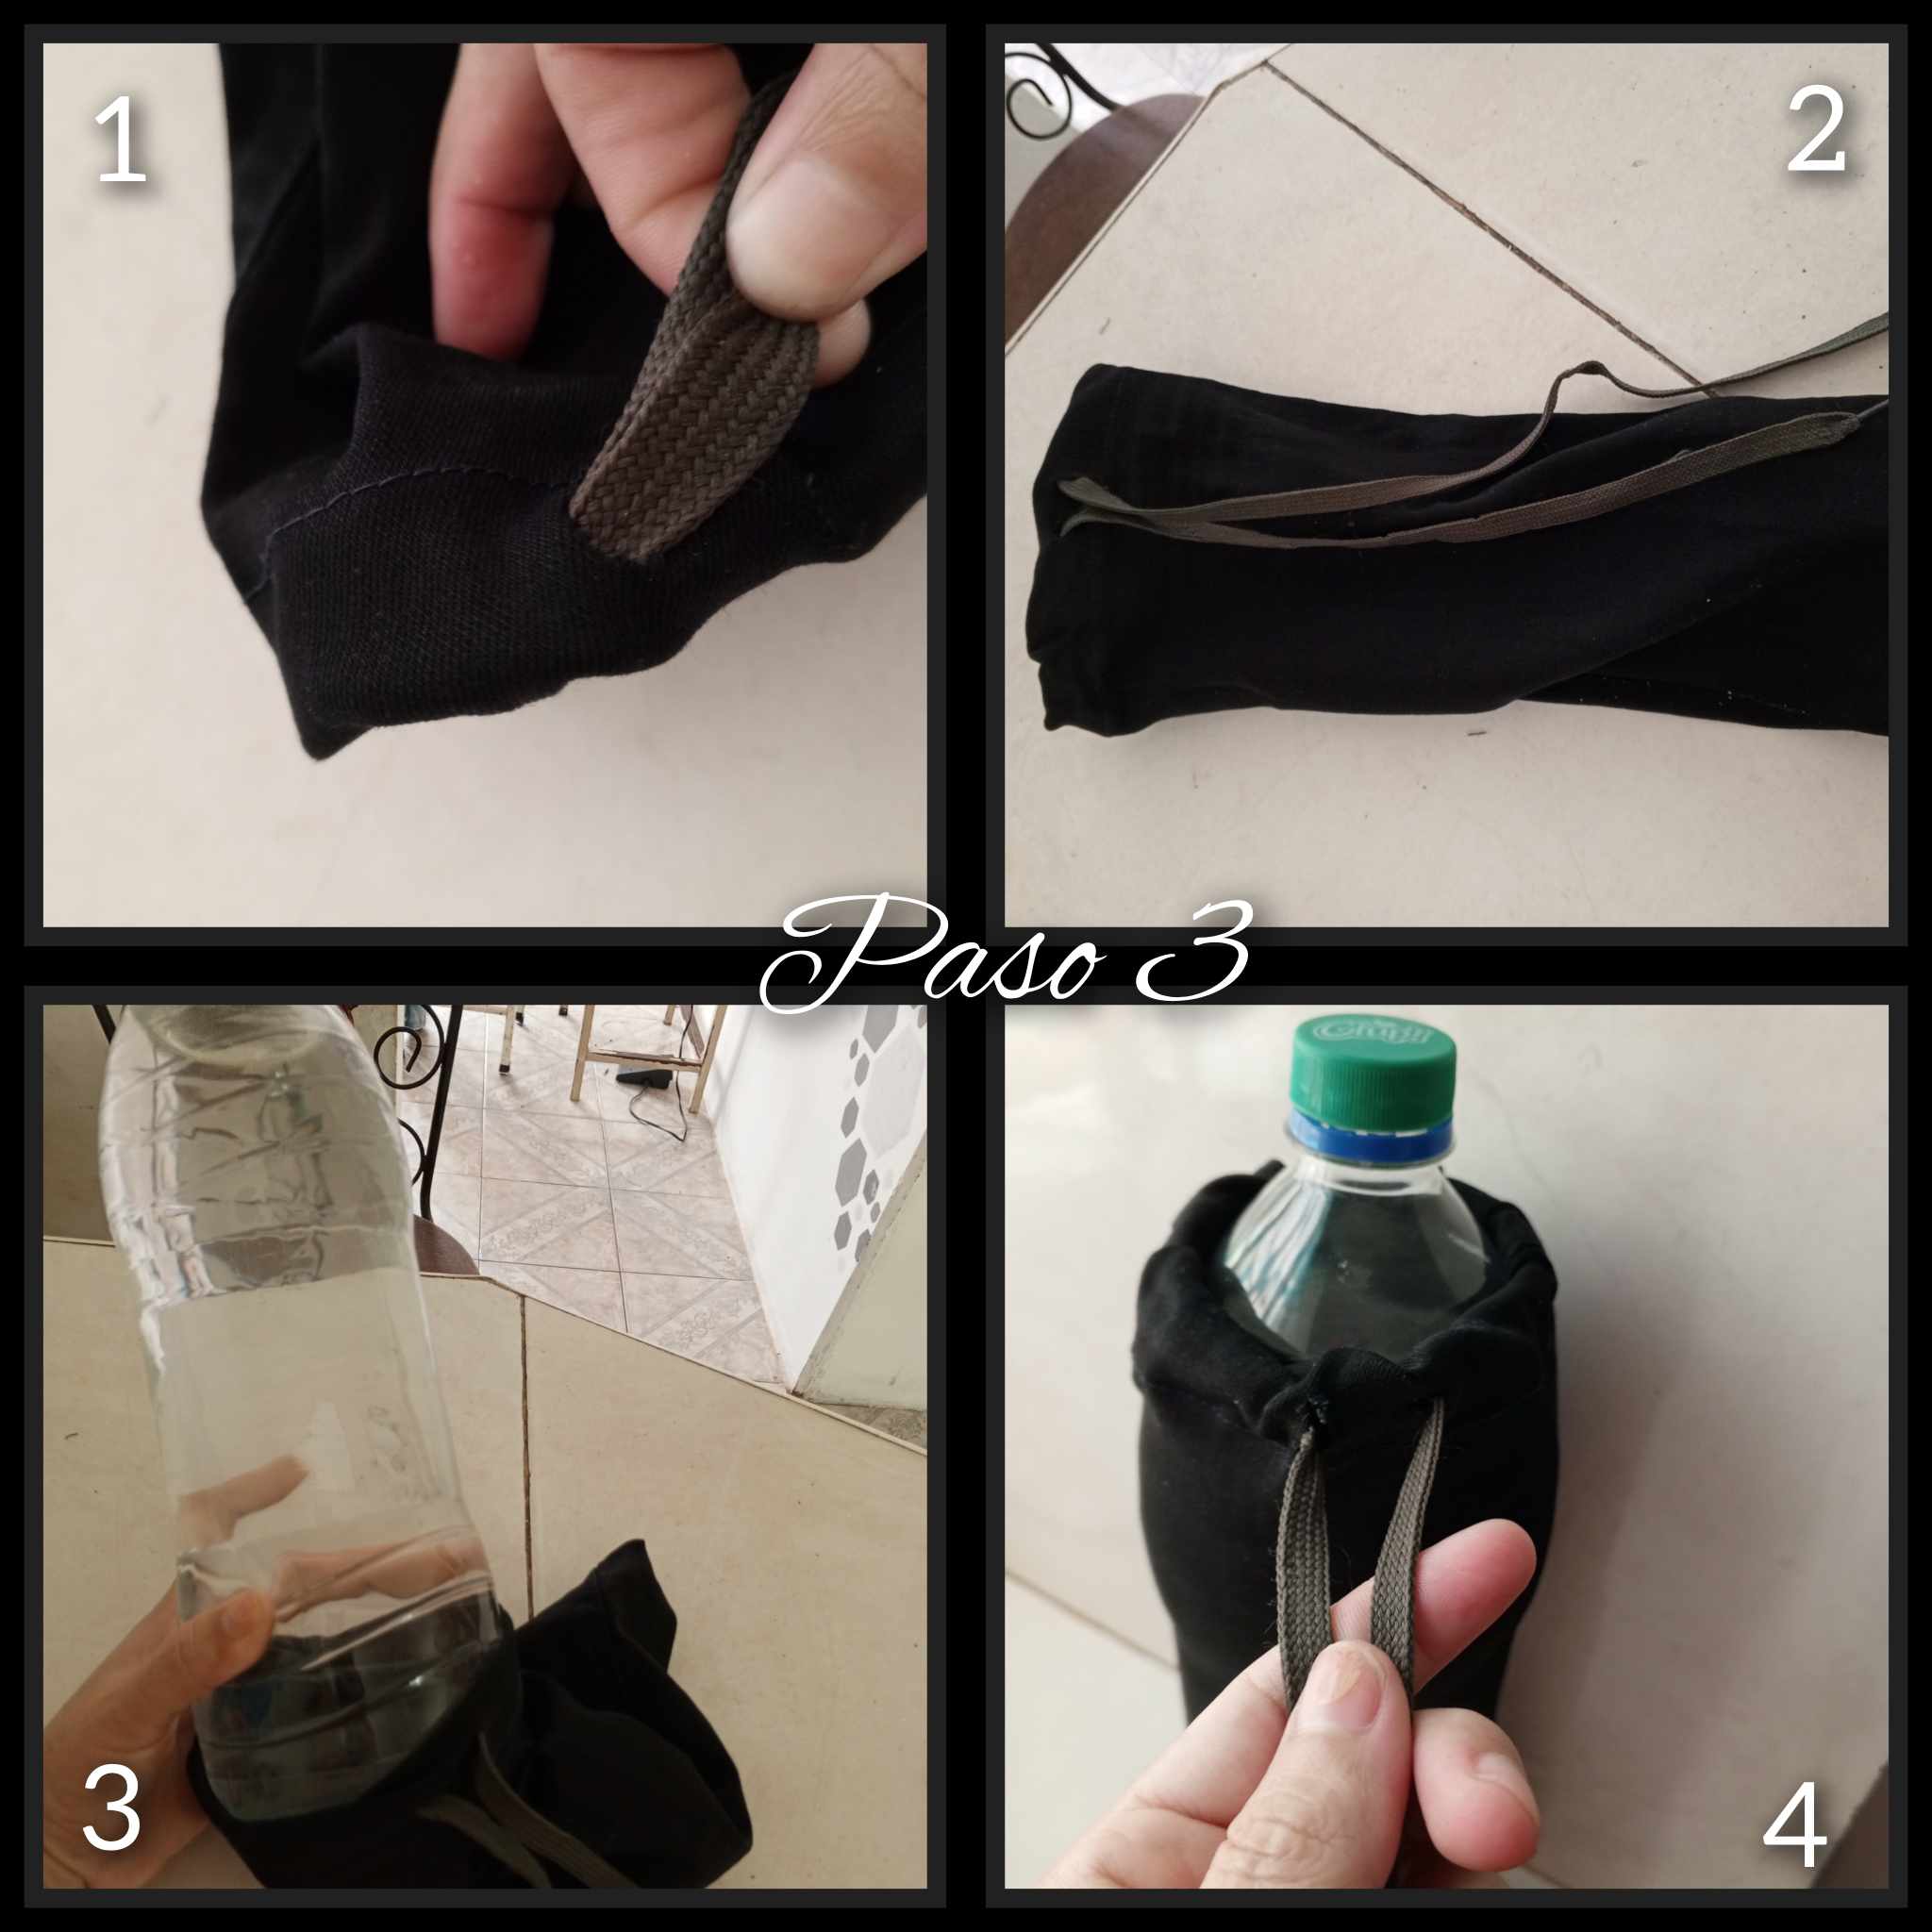
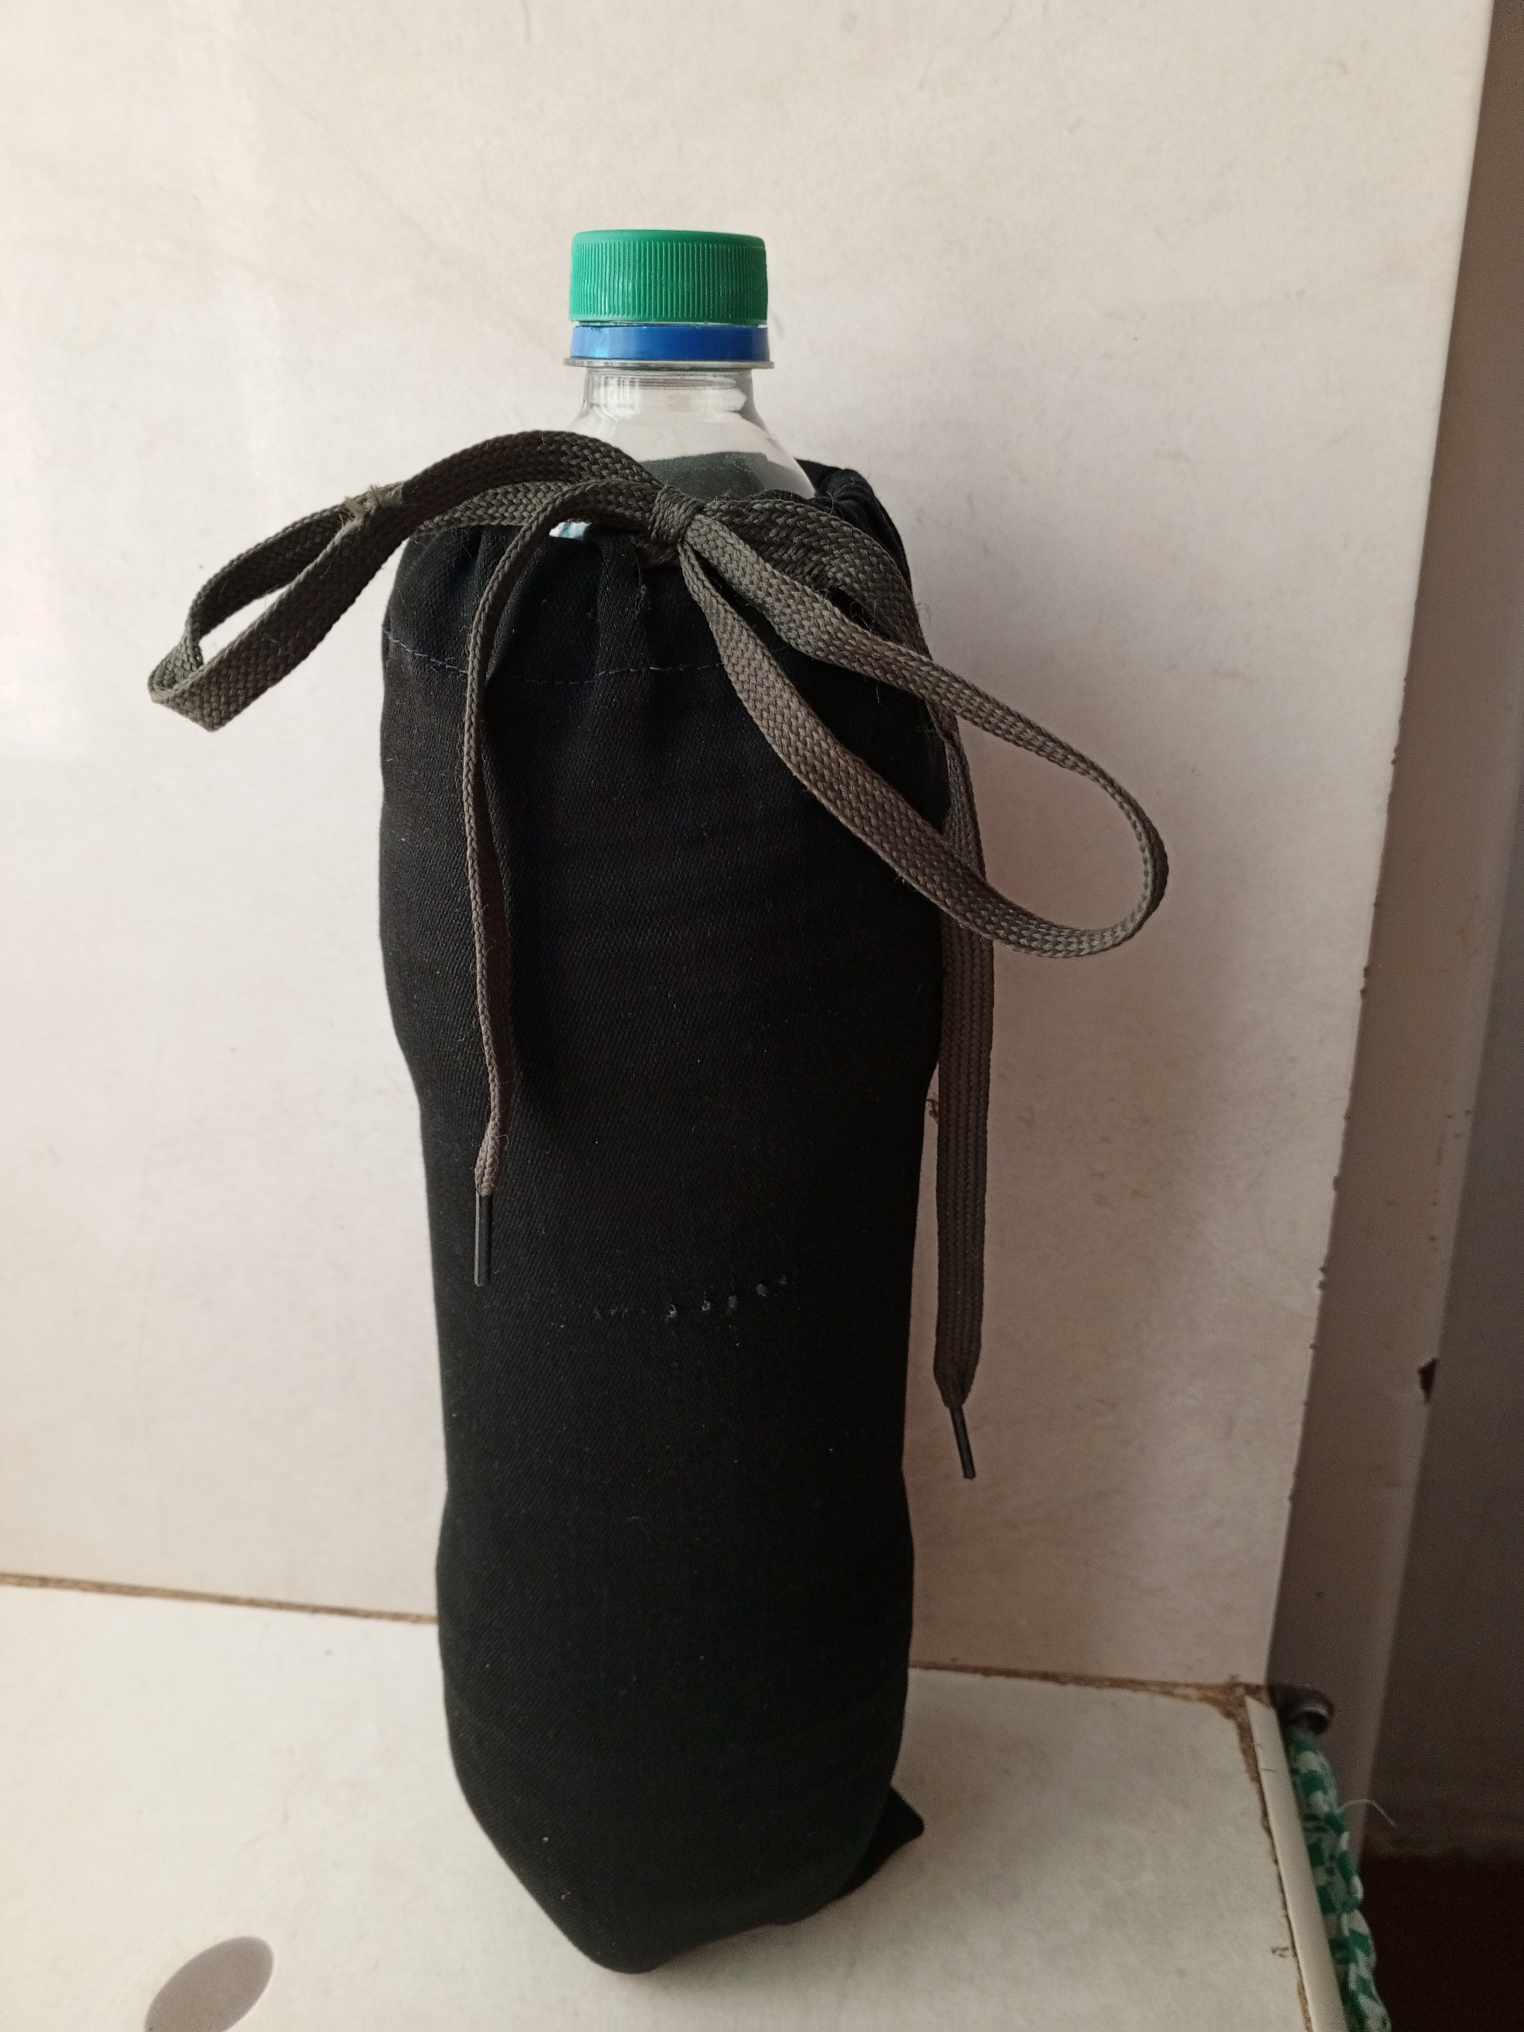
Paso 3: Luego de haber abierto los huequitos de nuestro porta culer, procederemos a introducir la trenza de zapato por los huequitos y así quedará como la imagen lo muestra, espero que también lo puedan hacer ustedes.
Step 3: After having opened the holes of our culer holder, we will proceed to introduce the shoe braid through the holes and it will look like the image shows it, I hope you can do it too.
.jpg)

Ay qué bonito te quedó tu Porta coler me gustaría hacerlo Yo también hago pórtate hermoso para mí y quedó muy bonito.