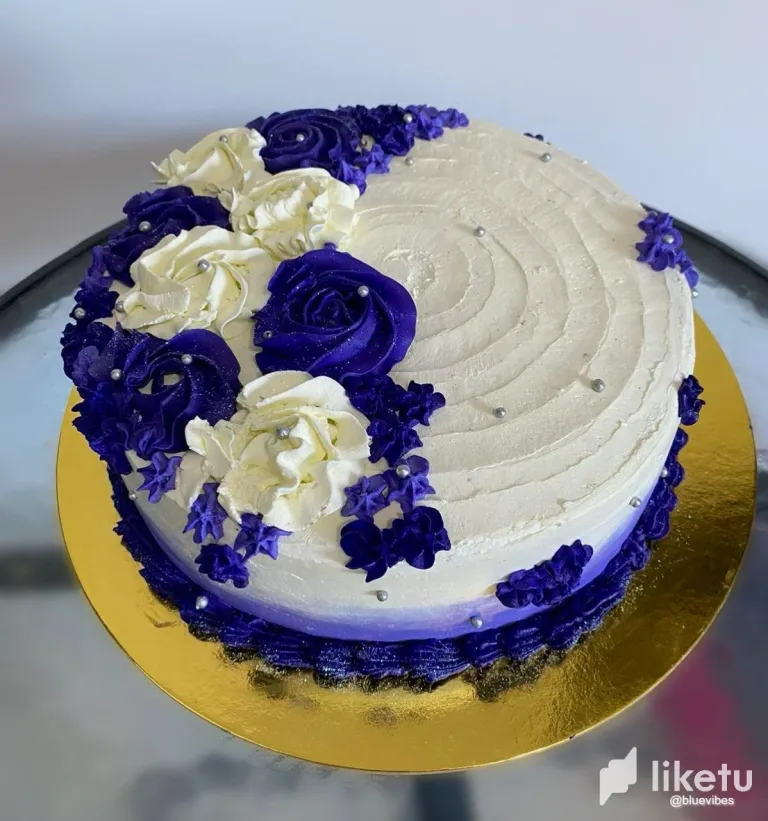
Torta decorada con degrade y rosetones en tono morado 👩🏼🍳💜 [ESP-ENG]

ENGLISH
Decorating cakes with cream has never seemed an easy task to me, in fact, I think it has its trick. However, I also think that practice makes perfect and failing a little is how you learn.
Today my mom asked me to help her decorate two cakes that she had been asked to decorate and that's how we have divided the work, she bakes the cake and I decorate. And although one was more complex than the other, besides the fact that I hadn't decorated a cake for months, I decided to take the risk and of course, I took some pictures of the process to share them with you. I hope you like it 🤗
Procedure
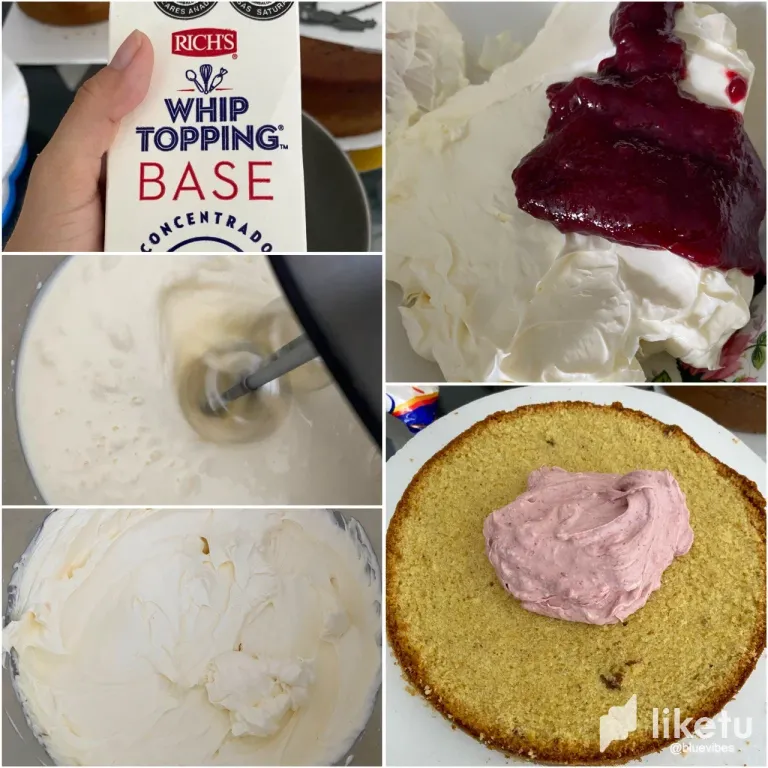
Step 1️⃣
The first thing I did was to beat the ''rich's'' cream very well and then add it to the mixer bowl where I mixed until it took creamy consistency, once ready I separated a little to make the filling which I achieved by joining some cream with blackberry jam that I had previously cooked.
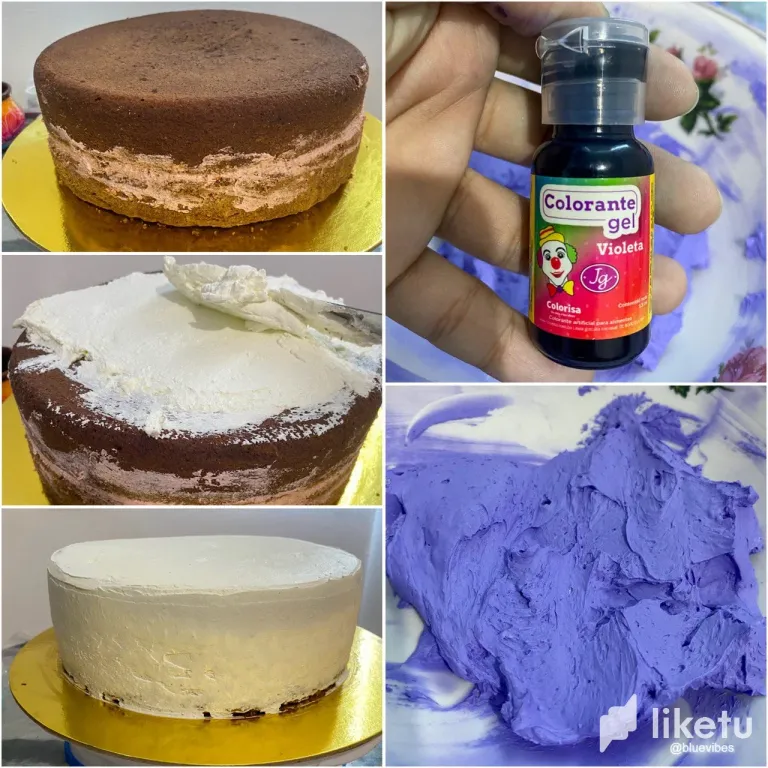
Step 2️⃣
Once I made the filling and covered each space very well I proceeded to cover the cake very well with white cream starting from the top and with the help of a spatula smooth well, after this I proceeded to create the cream for the gradient which I achieved with a little cream and purple gel dye.
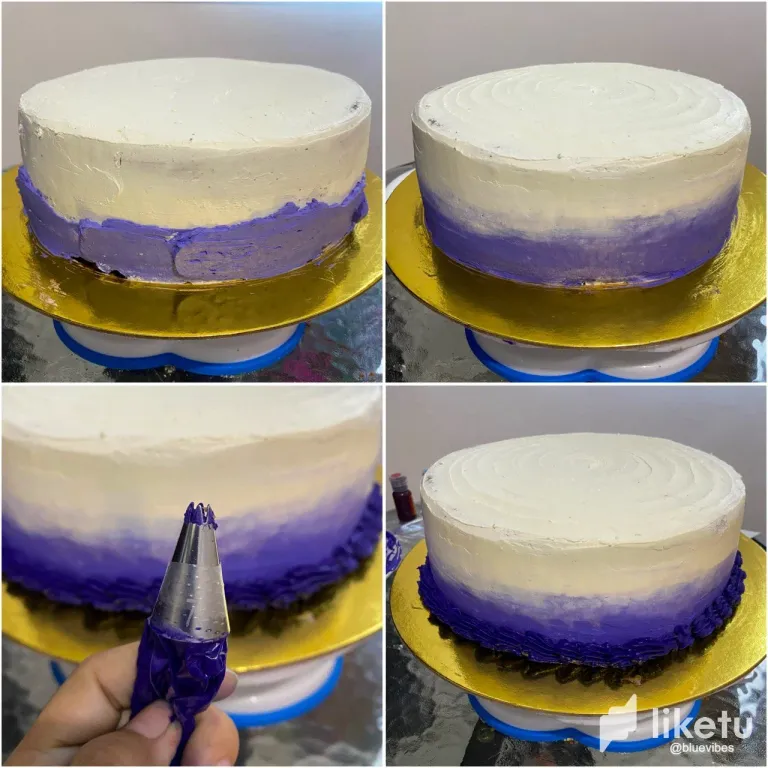
Step 3️⃣
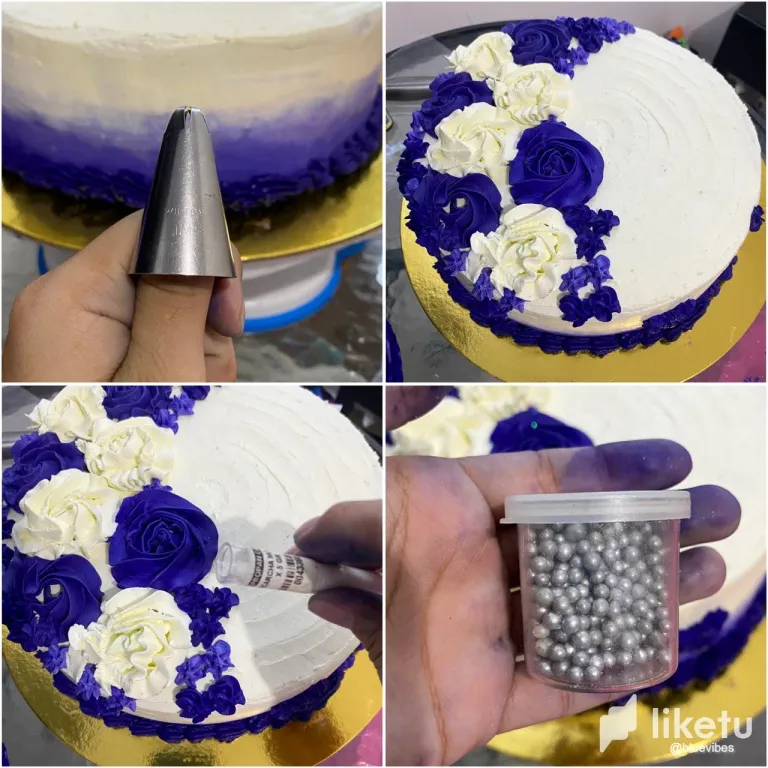
I added the purple cream with the help of a metallic spatula only in the bottom part and I smoothed with another smaller spatula until I got the gradient, so I didn't get such a marked line I added only a little white cream in all the division line and smoothed very well, to make the small waves in the bottom part I darkened a little more the purple cream adding a few more drops of dye and with a #7 nozzle I helped me.
Step 4️⃣
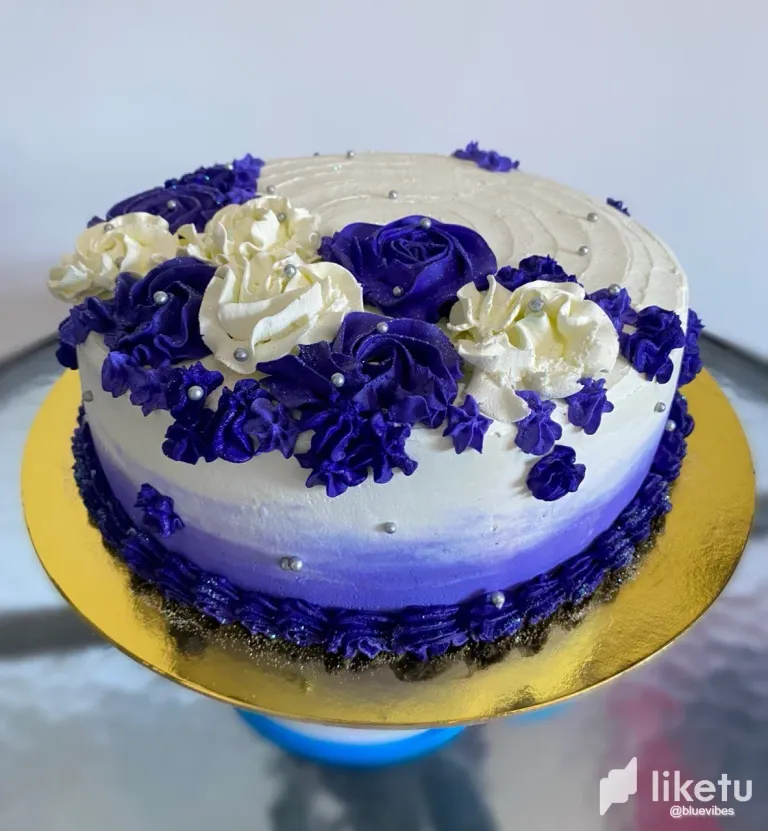
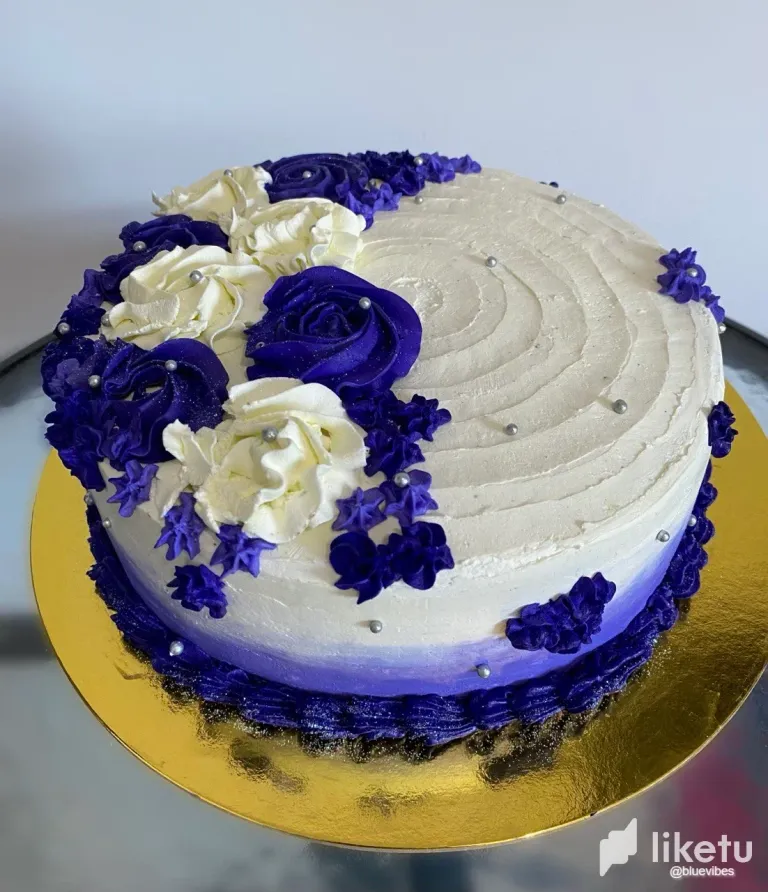
With the help of a Wilton 1M nozzle I made the rosettes in purple and white tones and with the nozzle used before (#7) I made the smaller ones, at the end I distributed a few small rosettes all over the cake, I added some edible glitter and silver pearls.
In the end this is how I got the cake decoration, although it seemed simple the truth is that it was a little difficult for me, not having a professional mixer and the right balloon I ran the risk that it was a little harder than normal so working it was more complicated, but I think it was totally worth it because it was very nice. By the way, an apology for my purple fingers, gel dye usually paints a lot 😅 Of course, practicing more with this type of base is within my tasks as I have to find the right spot for it.
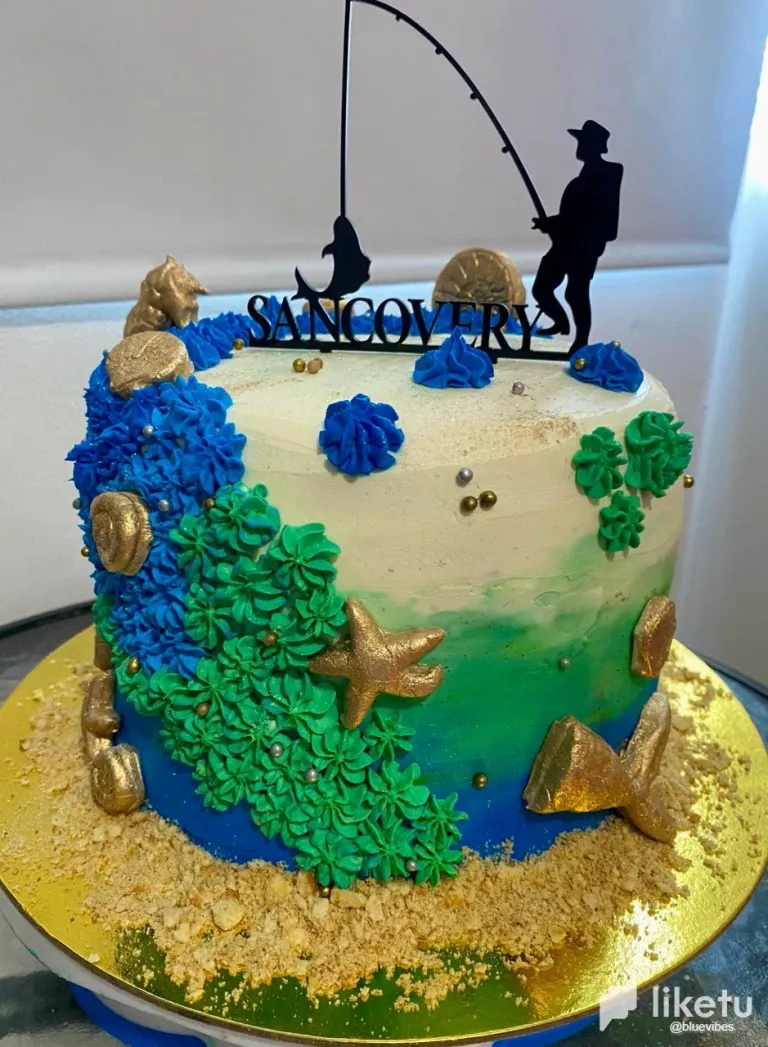
PS. I also share with you the other cake I made today with a fisherman theme 🥰.

ESPAÑOL
Decorar tortas con crema nunca me ha parecido tarea sencilla, de hecho, considero que tiene su truco. Sin embargo, también pienso que la práctica hace al maestro y fallando un poco es como se aprende.
El día de hoy mi mamá me pidió que la ayudara decorando dos tortas que le habían encargado y es que así es como nos hemos dividido el trabajo, ella cocina la torta y yo decoro. Y aunque una era más compleja que la otra, a demás de que tenía meses que no decoraba un torta pues, decidí arriesgarme y por supuesto, tomé algunas fotos del proceso para compartirlas con ustedes. Espero que les guste 🤗
Procedimiento
Paso 1️⃣
Lo primero que hice fue batir muy bien la crema rich's y luego añadirla al bol de la batidora donde mezcle hasta que tomara consistencia cremosa, una vez listo separé un poco para hacer el relleno el cual logré juntando un poco de crema con mermelada de mora que previamente había cocinado.
Paso 2️⃣
Una vez hice el relleno y cubrí muy bien cada espacio procedí a cubrir muy bien la torta con crema blanca empezando desde arriba y con ayuda de una espátula alise bien, luego de esto procedí a crear la crema para el degradado la cual logré con un poco de crema y tinte en gel morado.
Paso 3️⃣
Fui añadiendo la crema morada con ayuda de una espátula metálica solo en la parte de abajo y fui alisando con otra espátula más pequeña hasta lograr el degradado, para que no me quedara una linea tan marcada añadí solo un poco de crema blanca en toda la linea de división y alisé muy bien, para hacer las pequeñas olas en la parte de abajo oscurecí un poco más la crema morada añadiendo unas gotas más de tinte y con una boquilla #7 me ayudé.
Paso 4️⃣
Con ayuda de una boquilla Wilton 1M realicé los rosetones en tonos morados y blancos y con la boquilla antes usada (la #7) hice los más pequeños, al final repartí unos cuantos rosetones pequeños por todo el pastel, añadí un poco de escarcha comestible y perlas plateadas.
Al final así fue como me quedó la decoración de la torta, que aunque parecía sencilla la verdad es que se me dificultó un poco, al no tener una batidora profesional y el globo adecuado corrí el riesgo de que me quedó un poco más dura de lo normal por lo que trabajarla se me hizo más complicado, pero creo que valió totalmente la pena ya que quedó muy linda. Por cierto, una disculpa por mis dedos morados, el tinte en gel suele pintar muchísimo 😅 Por supuesto, practicar más con este tipo de base esta dentro de mis tareas ya que tengo que encontrarle el punto adecuado.
PD. Les comparto también la otra torta que hice el día de hoy con temática de pescador 🥰
Separador de texto creado por | Text separator
Texto traducido en | Text translated in: Deepl
Imagenes tomadas por mi | Images taken by me
For the best experience view this post on Liketu
This is a beautiful cake. You did it very well and carefully. Beautiful color combination. I really like it. Thank you for the tips and inspiration
Thank you very much, I'm still learning but I'm very happy to know that you liked the result. Thanks for stopping by, greetings 🤗
Una torta hermosa el color azul en degrade queda espectacular
Muchas gracias 💕
Pero qué belleza es esta mi Vane? Te quedó hermosa, mira todo lo que has avanzado con la decoración al punto de hacer esta belleza.
20 puntos ami bella ❤️
Siii Rosita, aún debo aprender a trabajar más con la crema jaja 😅 Pero ya poco a poco le he ido perdiendo el miedo. Me alegra mucho que te haya gustado 💕
¡Felicidades! Esta publicación obtuvo upvote y fue compartido por @la-colmena, un proyecto de Curación Manual para la comunidad hispana de Hive que cuenta con el respaldo de @curie.
Si te gusta el trabajo que hacemos, te invitamos a darle tu voto a este comentario y a votar como testigo por La Colmena.
Si quieres saber más sobre nuestro proyecto, te invitamos a acompañarnos en nuestro servidor de Discord.
Muchas gracias por el apoyo 💕
Que ternuras!! Me encanta como te quedaron Vane 💗 Esto me sirve de ayuda para yo intentarlo en algún momento 🤭. Que gran trabajo Ami💗✨
Muchas gracias mi Valen!!! Intentalooo, seguro que te queda hermoso porque tú tienes mucha creatividad 😍
Congratulations @bluevibes! You have completed the following achievement on the Hive blockchain And have been rewarded with New badge(s)
You can view your badges on your board and compare yourself to others in the Ranking
If you no longer want to receive notifications, reply to this comment with the word
STOPCheck out our last posts:
Hermosa !!
Te quedó muy bella la torta. No conocía esa crema Rich. Yo uso chantilly no se si es parecida.
Bello trabajo y el acabado se ve super delicado, la repostería es un trabajo muy minucioso, excelente trabajo con los materiales que tenias.
Te quedaron preciosas ambas decoraciones ami, ese tono de morado es hermoso y por lo que veo mancha bastante también jajaja. Necesito un cursito tuyo para decorar mis tortas también ❤️