Different make-up in shades of brown and pink| Step by Step [ESP/ING]
¡Hola, Comunidad de Hive!
Hello, Hive Commnunity!
Las mejores cosas pasan inesperadamente, cuando me senté a hacer este maquillaje tenía pensado hacer un social y no se en que momento se transformo en un maquillaje diferente, con un corte que no siempre sale bien, lo que si tenía claro era la combinación de colores, yo sabía que quería algo en marrón y rosado... Este maquillaje es mucho más fácil de lo que parece, y por ello quiero mostrarles el paso a paso.
The best things happen unexpectedly, when I sat down to do this makeup I had planned to do a social and I don't know at what point it became a different makeup, with a cut that does not always go well, what I did have clear was the color combination, I knew I wanted something in brown and pink... This makeup is much easier than it looks, and that's why I want to show you the step by step.
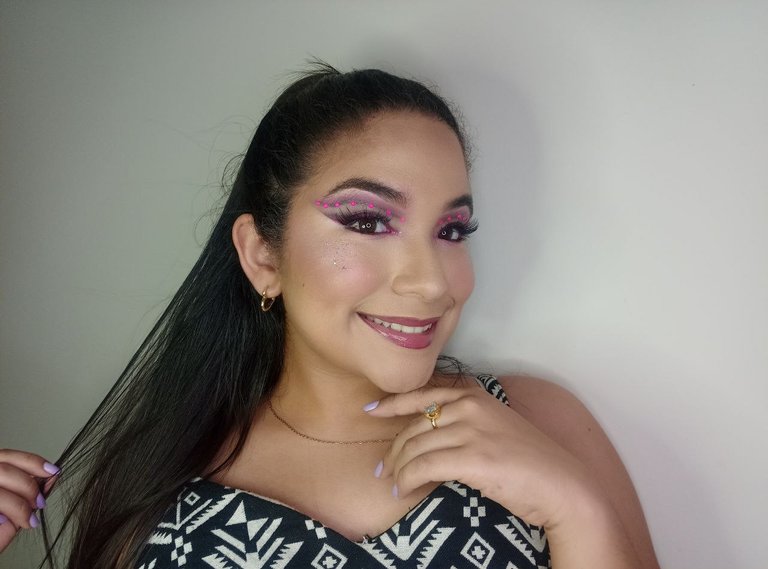
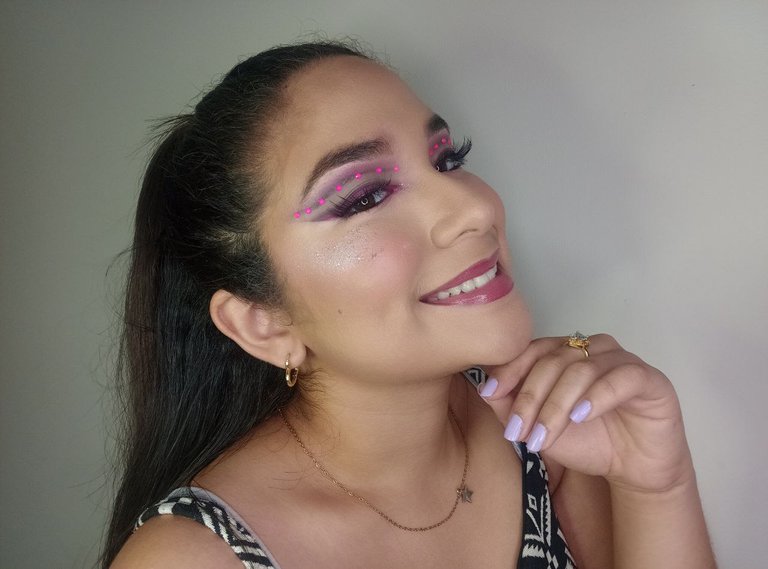
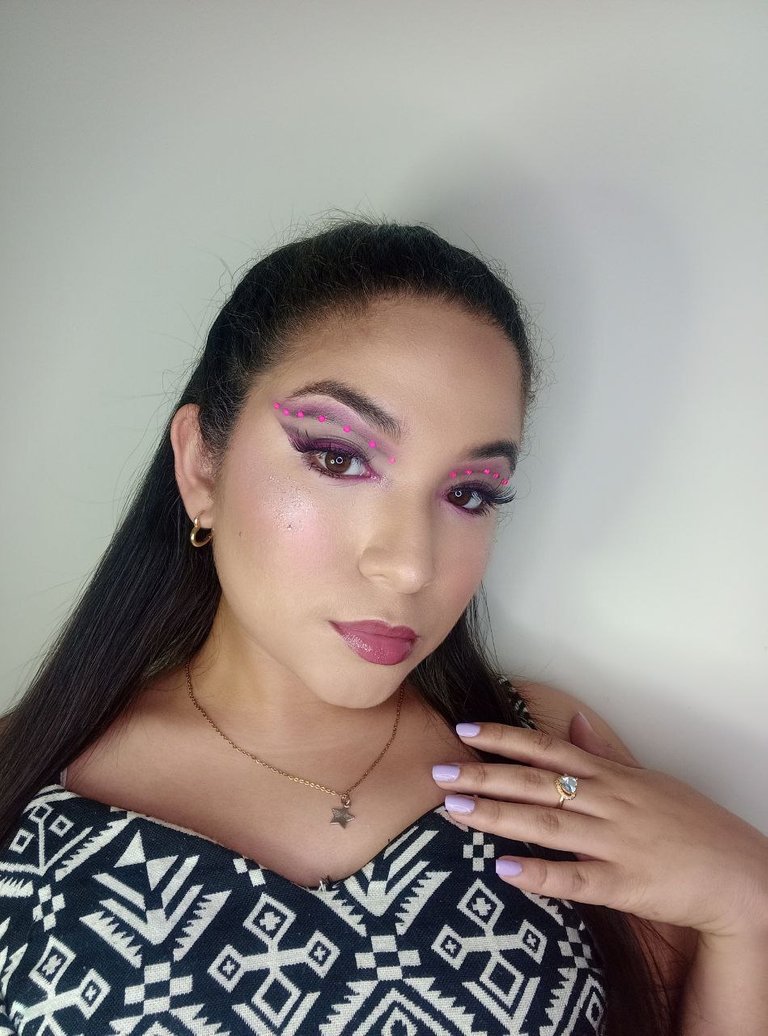
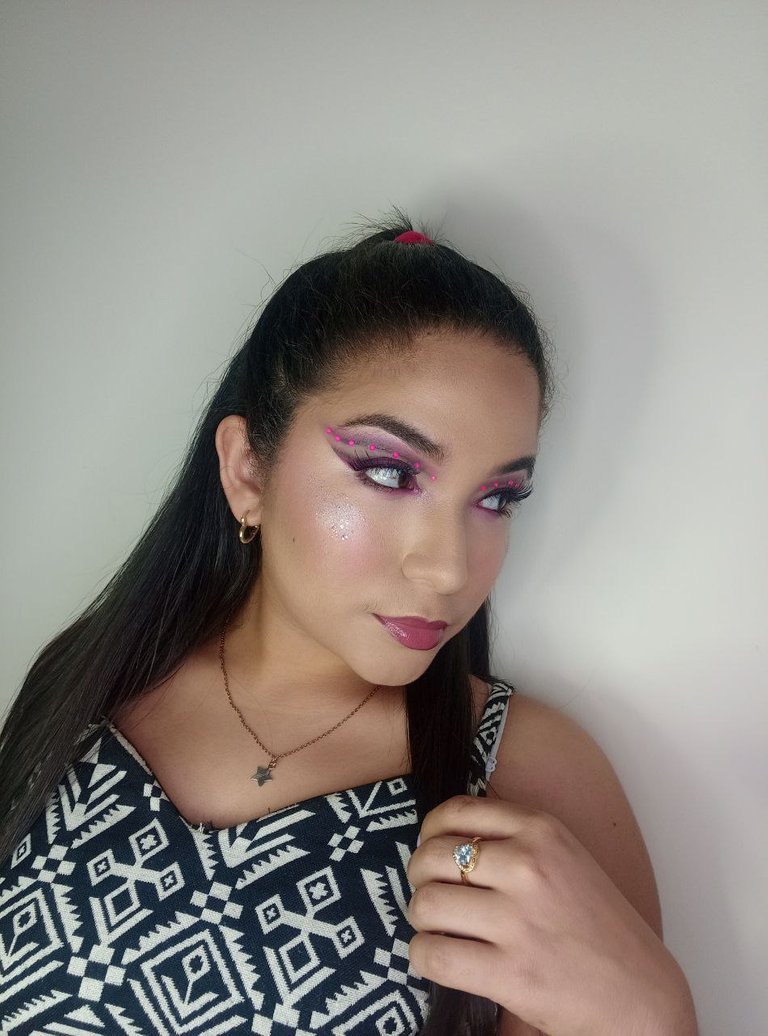
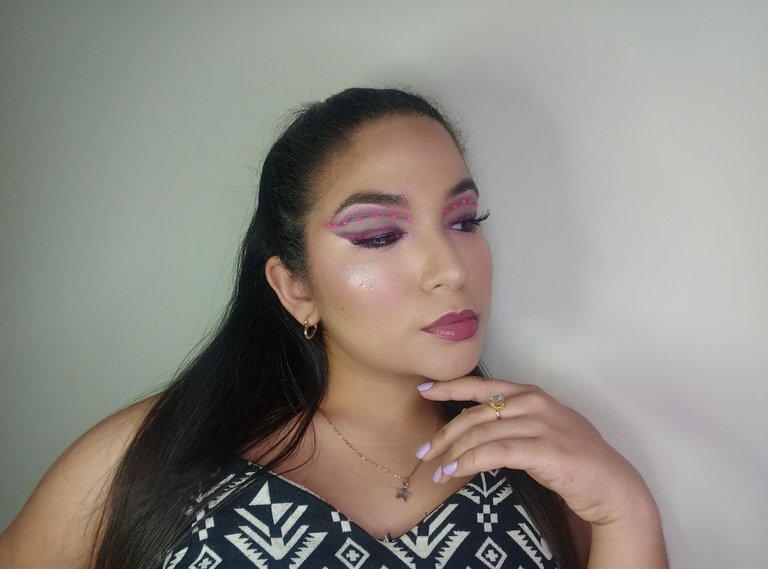
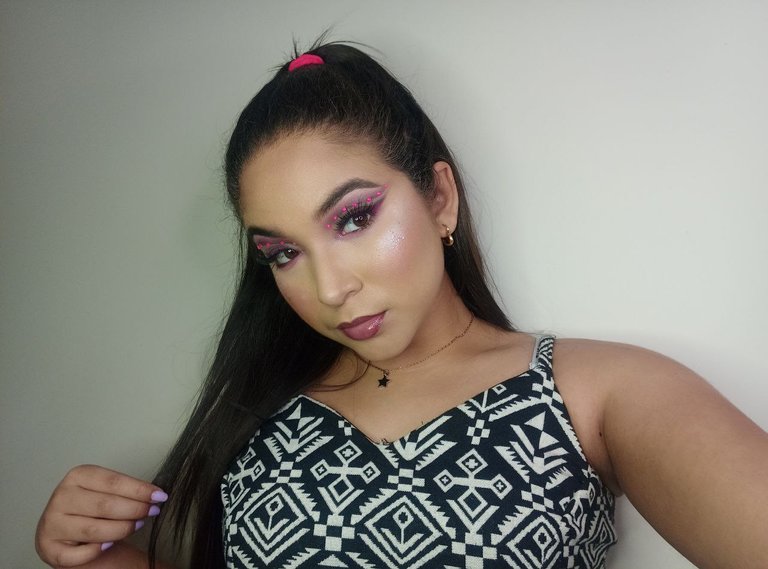
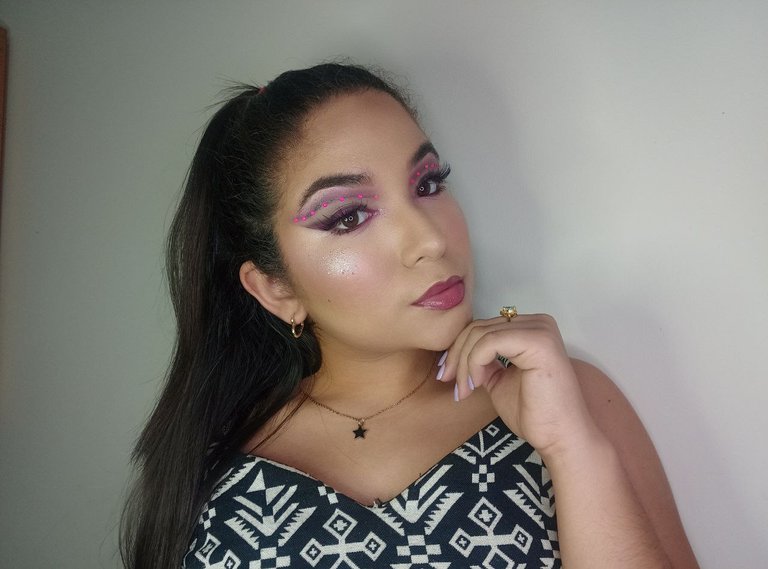
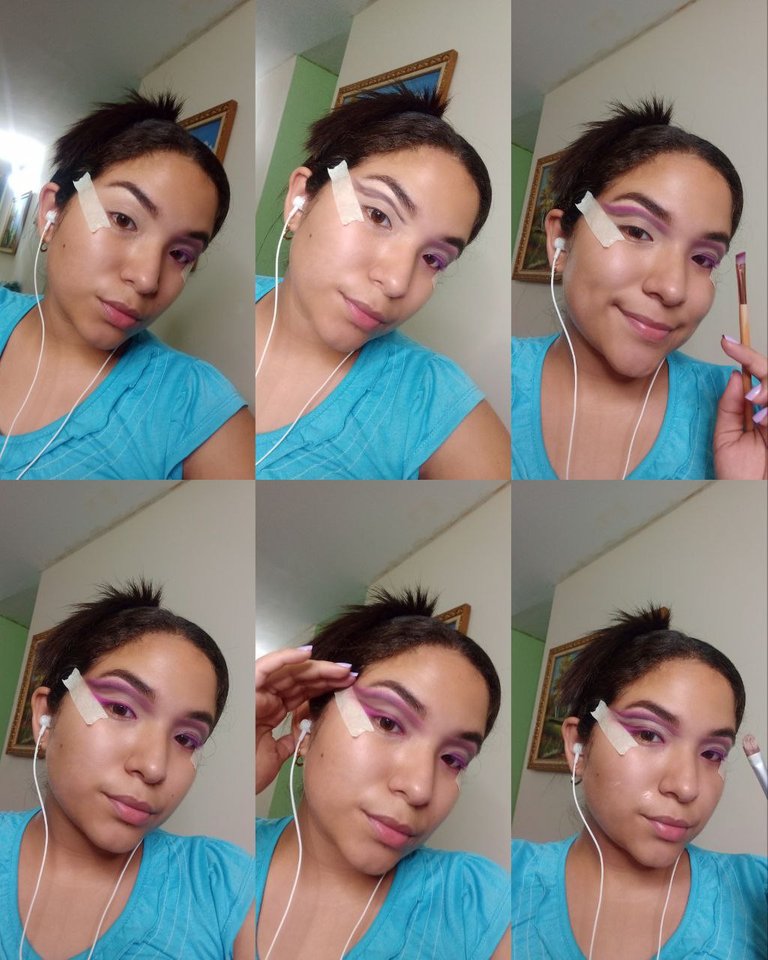
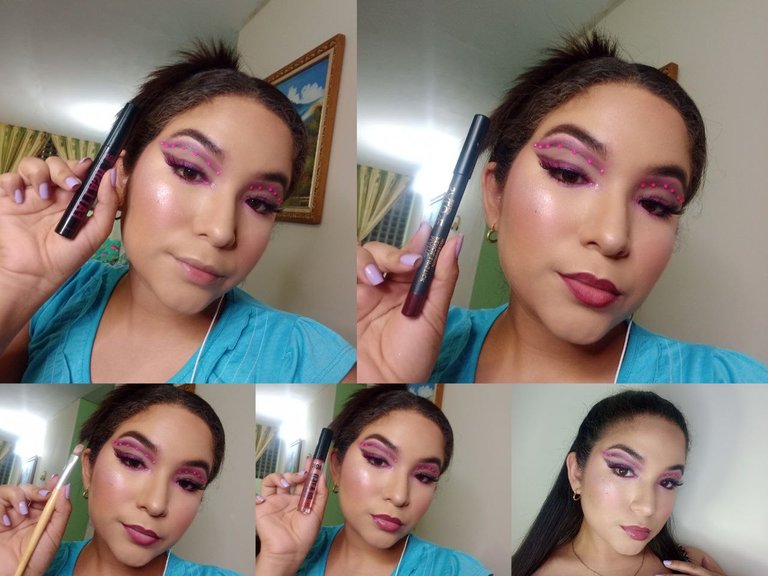
Inicie este maquillaje con las cejas listas y el parpado corregido, así que comencé colocando el marrón siguiendo la forma de mi ojo y resaltándola un poco más, como no tenía una brocha angular muy precisa, hice el trazo un poco grueso sabiendo que tendría que perfeccionar con corrector, luego de la misma manera coloque el color rosado y difumine. En la parte de abajo, primero coloque sombra rosada y en forma de delineado, arriba puse marrón e integre.
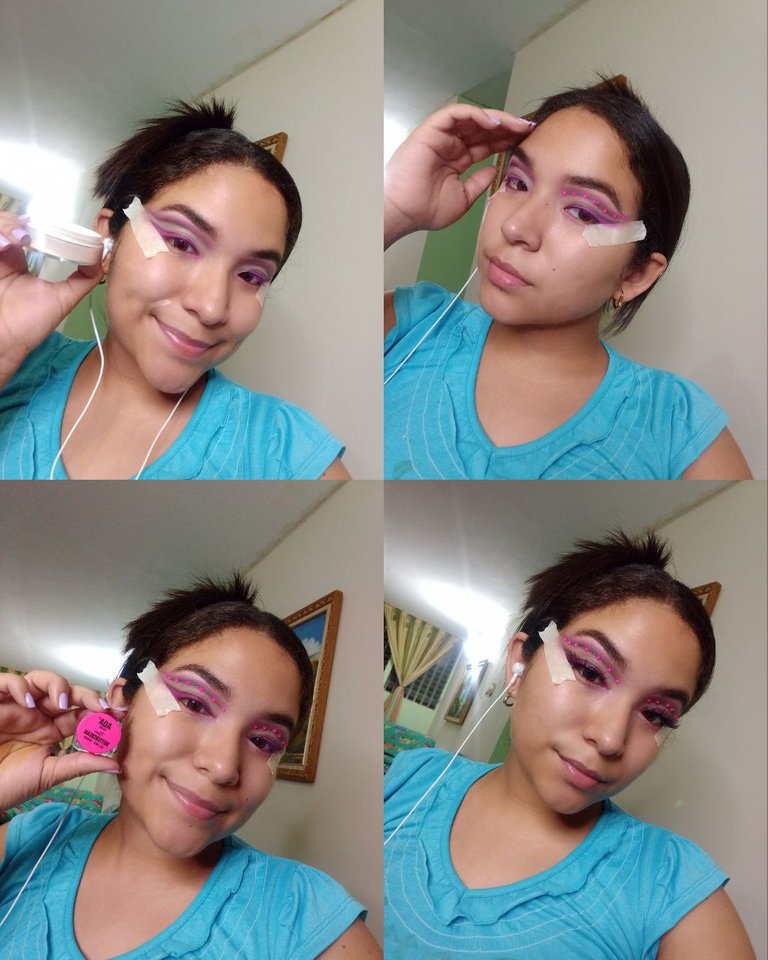
Hay que reforzar unas dos o tres veces los trazos para que se vea muy limpio el trabajo, pero el toque lo da corregir con corrector la forma adecuada, en el espacio libre donde no hemos colocado sombra vamos a sellar con polvo suelto. Quise darle un toque a este maquillaje, entonces tome pedrería rosada y la coloque la parte de arriba, siguiendo la forma antes marcada con la sombra, para resaltar el delineado de abajo, lo perfeccione con delineador en gel rosado y finalmente coloque pestañas postizas.
I started this makeup with the eyebrows ready and the eyelid corrected, so I started by placing the brown following the shape of my eye and highlighting it a little more, as I didn't have a very precise angular brush, I made the stroke a little thick knowing that I would have to perfect with concealer, then in the same way I placed the pink color and blurred. On the lower part, first I put pink shadow and in the form of an outline, on top I put brown and blend.
It is necessary to reinforce two or three times the strokes so that the work looks very clean, but the touch is given by correcting with concealer the right shape, in the free space where we have not placed shadow we will seal with loose powder. I wanted to give a touch to this makeup, so I took pink rhinestones and placed them on the top, following the shape previously marked with the shadow, to highlight the outline below, I perfected it with pink gel eyeliner and finally I placed false eyelashes.
Pasando al trabajo en la piel, coloque la base Velvet Touche de Dolce Bella y la difumine en todo mi rostro, para las ojeras estuve usando el corrector hidratante de salome, para seguir con los productos en crema hice los contornos en crema y aplique rubor también en crema, todo esto difuminándolo e integrándolo entre sí.
Moving on to the work on the skin, I applied Dolce Bella Velvet Touche foundation and blended it all over my face, for the dark circles I was using salome moisturizing concealer, to continue with the cream products I did the cream contours and applied blush also in cream, all this blending and integrating with each other.

Pasando al sellado del rostro, estuve utilizando polvo suelto para hacer una especie de baking pero no lo deje mucho rato cuando lo retire, los contornos decidí sellarlos con el bronzer de valmy, que es perfecto para este maquillaje porque da una apariencia muy fresca, para el rubor use el que trae el trio de salome y finalmente aplique un iluminador y encima de este, un poco de glitter para darle más personalidad.
Moving on to the sealing of the face, I was using loose powder to make a kind of baking but I didn't leave it too long when I removed it, the contours I decided to seal them with the bronzer of valmy, which is perfect for this makeup because it gives a very fresh look, for the blush I used the one that brings the trio of salome and finally I applied a highlighter and on top of this, a little glitter to give it more personality.
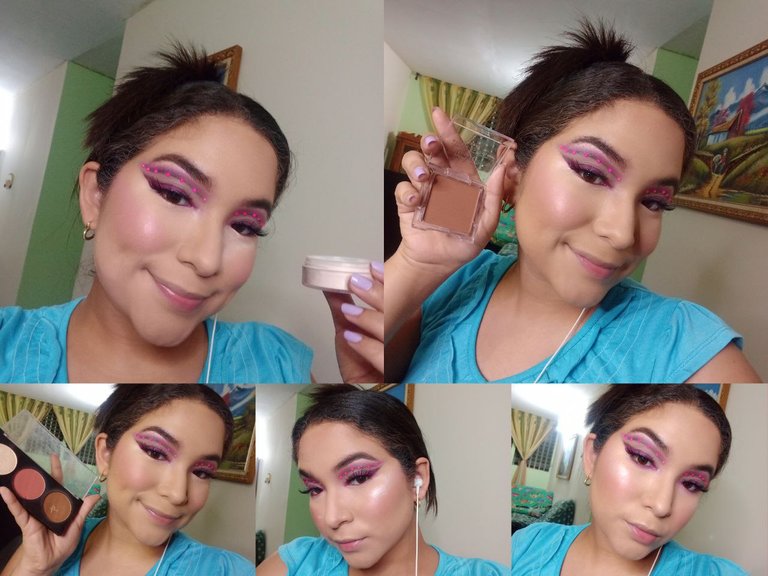
Para casi terminar, estuve haciendo un degrado en el parpado inferior, comenzando por el marrón y luego integrando el rosado, también resalte mis pestañas inferiores con la mascara para pestañas AOA. En los labios, tome el lapiz de salome en un color vinotinto oscuro e hice un efecto degradado hacia el centro que resalte con un poco de corrector y que para que se viera más glow, le puse un poco de gloss transparente.
To almost finish, I was doing a gradient on the lower eyelid, starting with brown and then integrating the pink, I also highlighted my lower lashes with AOA mascara. On the lips, I took the salome pencil in a dark vinotint color and made a gradient effect towards the center that I highlighted with a little concealer and to make it look more glow, I put a little clear gloss.
Este maquillaje fue una total sorpresa, hace un tiempo intente hacer esto y el resultado fue bueno, pero en definitiva hay una mejora, una mejora que me alegra poder tener, siento que este maquillaje resalta mucho por la pedrería, además de la piel tan glow y los labios fueron perfectos para este maquillaje tan lindo, me alegra de verdad haberme atrevido a hacerlo.
This makeup was a total surprise, a while ago I tried to do this and the result was good, but all in all there is an improvement, an improvement that I'm glad I can have, I feel that this makeup stands out a lot because of the rhinestones, plus the skin so glow and the lips were perfect for this makeup so cute, I'm really glad I dared to do it.