Halloween Special: Horror Makeup Inspired by A Religiosa| Step by Step [ESP/ING]
¡Hola, Comunidad de Hive!
Hello, Hive Commnunity!
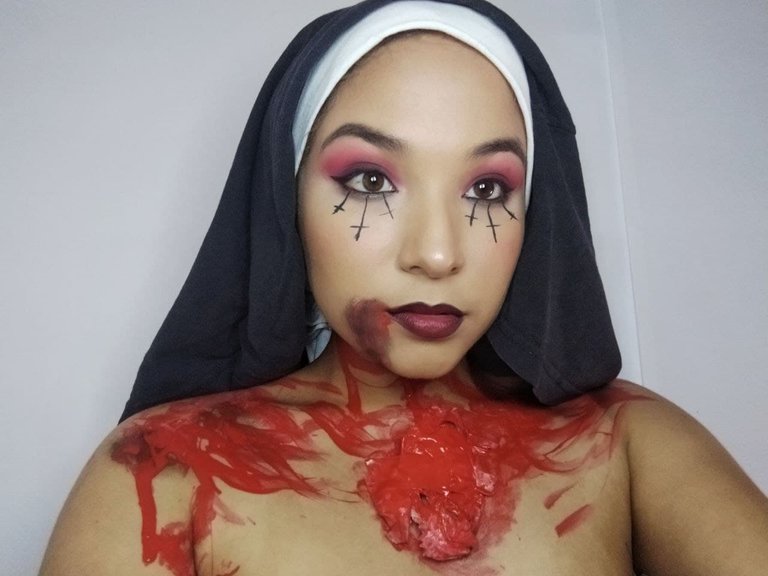
El día de hoy estoy un poco transformada, ya que, en esto días muy cercanos a Halloween he querido maquillarme de acuerdo a la temática pero la verdad es que algunas cosas me han detenido, pero aquí estoy hoy para traerles esta propuesta para el día de Halloween solo con maquillaje, la inspiración son las religiosas terroríficas.
Today I'm a bit transformed, because, in these days very close to Halloween I wanted to make up according to the theme but the truth is that some things have stopped me, but here I am today to bring you this proposal for Halloween with makeup only, the inspiration is the terrifying religious.
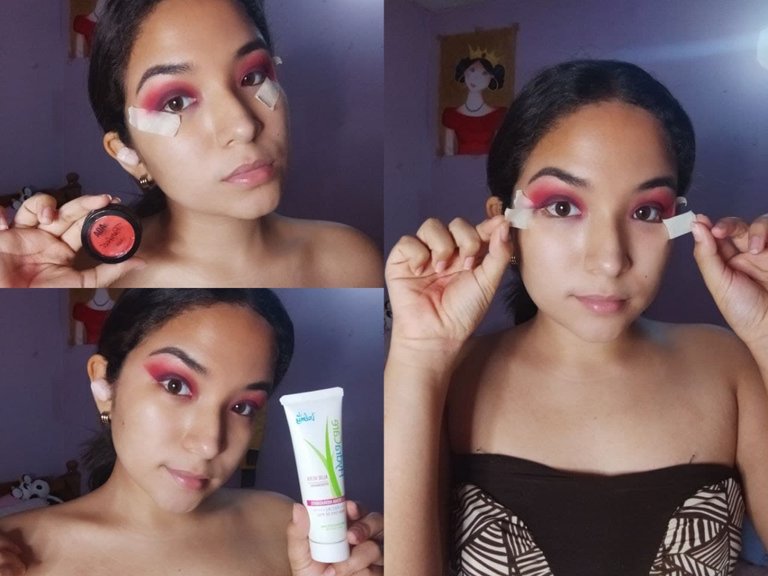
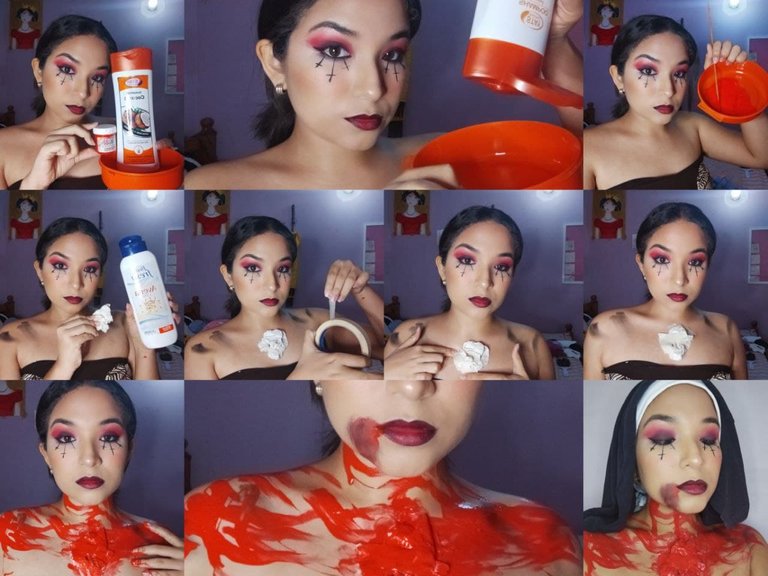
Para este maquillaje prepare mi rostro fuera de cámara para no hacer el proceso tan largo, las cejas las realice como de costumbre, con una técnica en bloque pero natural, que después corregí abajo con corrector y arriba con base. Para preparar el parpado coloque también corrector y difumine con mi esponja.
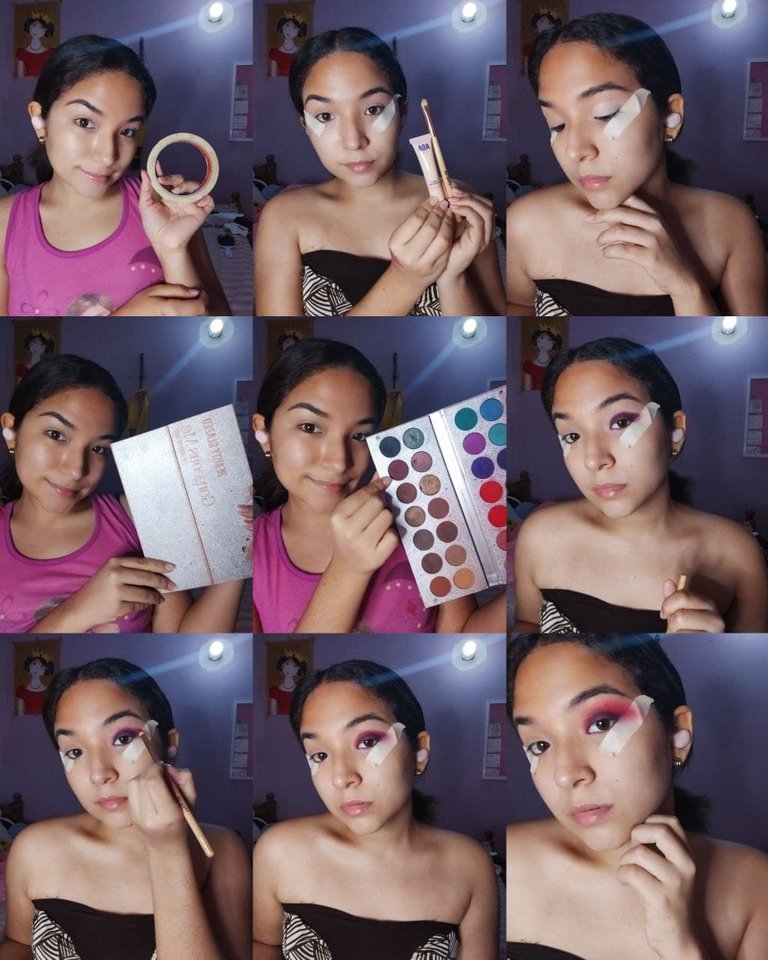
Para el trabajo de sombras estuve colocando un poco de teipe porque sabía que la naturalidad de los colores tan oscuros podía mancharme. Seguidamente tome el corrector Paw Paw de AOA y mi brocha lengua de gato para hacer un corte por toda la cuenca; luego con la paleta Gorgeous Me de Beatuy Glazed que me presto @lucianav, apoyandome con una brocha plana tome un vinotinto que posicione en todo el corte que realice y luego lo difumine un poco. Con una brocha tipo bala delinee por encima del corte en rojo, v un rojo que luego difumine con los mismos tonos de rojo.
En este punto me di cuenta que los colores se veían más hacia el rosado y el morado, así que tome un robor de AOA bien rojo y calido para repasar el trabajo de sombras. Luego removí los teipes y limpie los residuos de sombra que cayeron en mi ojera, como esto puede irritar un poco tome el gel hidratante de Valmy para hidratar la zona mientras me iba a comer, ya que aún no había empezado el maquillaje de piel.
For this makeup I prepared my face off camera so as not to make the process so long, I did the eyebrows as usual, with a block technique but natural, which I then corrected below with concealer and above with foundation. To prepare the eyelid I also applied concealer and blended with my sponge.
For the shadow work I applied a little bit of teipe because I knew that the naturalness of such dark colors could stain me. Next I took the Paw Paw concealer from AOA and my cat tongue brush to make a cut all over the socket; then with the Gorgeous Me palette from Beatuy Glazed that @lucianav lent me, supporting me with a flat brush I took a vinotint that I positioned all over the cut I made and then blurred it a little. With a bullet brush I outlined above the cut in red, v a red that I then blended with the same shades of red.
At this point I realized that the colors were looking more pink and purple, so I took a warm red AOA robor to go over the shadow work. I then removed the teipes and wiped off the shadow residue that fell on my under eye, as this can irritate a bit I took Valmy's moisturizing gel to hydrate the area while I went to lunch, as I hadn't started the skin makeup yet.
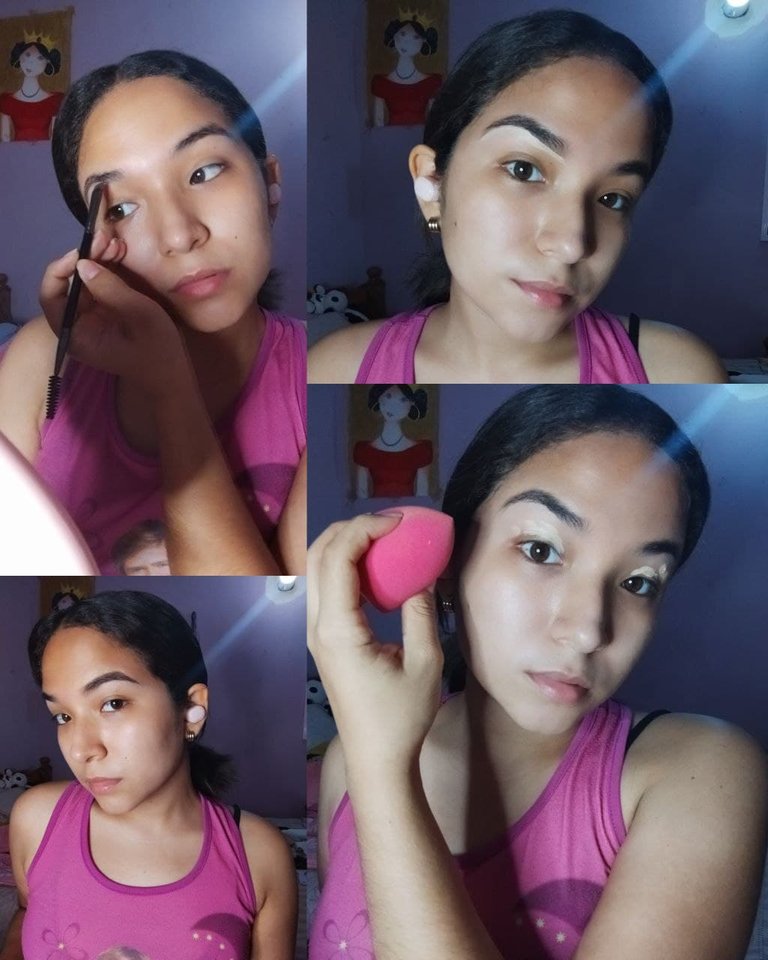
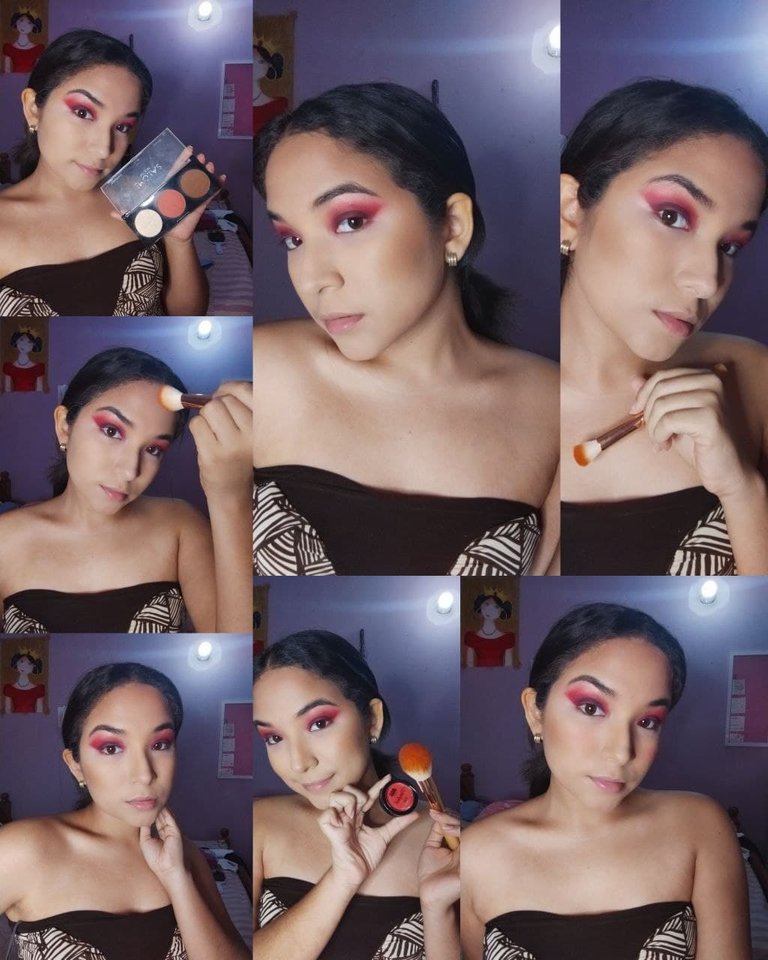
Después de ese mini receso, retome el maquillaje, comenzando por corregir ojeras mezclando mis dos correctores y difuminando con la esponja. Luego tome mi Base Salome y la Base A+ de AOA para mezclarlas y aplican con mi brocha. Luego selle todo este trabajo en crema con polvo suelto traslucido. Quite exceso con una brocha para polvos.
Pase con los contornos del rostro, comenzando con la frente, siguiendo a los pomulos y luego en la mandibula, la verdad es que los hice un poco más fuertes de lo que a mi me gusta pero en cámara se ve muy bien, aplique del mismo rubor que vimos en el trabajo de ojos.
After that mini break, I resumed my makeup, starting with correcting dark circles by blending my two concealers and blending with the sponge. I then took my Salome Foundation and AOA A+ Foundation to blend them together and applied with my brush. I then sealed all this cream work with translucent loose powder. Remove excess with a powder brush.
I did the contours of the face, starting with the forehead, moving to the cheekbones and then on to the jawline, I actually made them a little stronger than I like but on camera it looks great, I applied the same blush that we saw on the eye work.

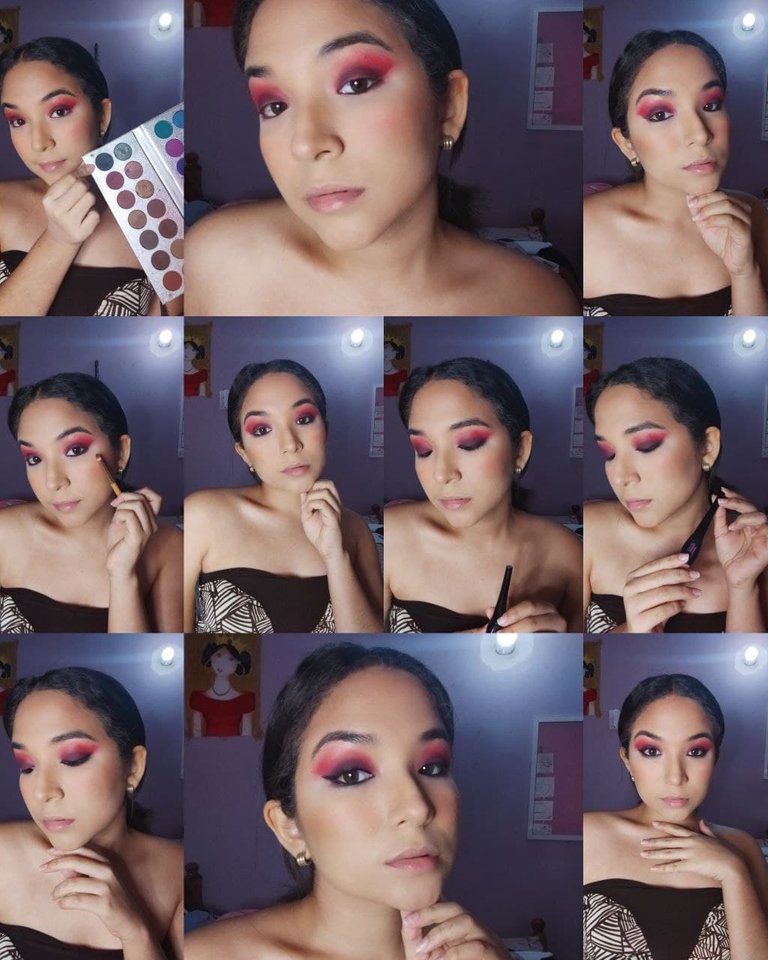
Después de terminar mi piel, deje el iluminador para lo último y pase a terminar el trabajo de ojos. Tome el negro de esta paleta, y delinee en el párpado inferior, ese delineado en sombra lo difumine con mi pincel de bala. Luego sabía que tocaba el delineado superior, y lo marque inicialmente con sombra por mi pulso y para hacerlo más intenso. Para dar el toque, retoque con delineador líquido.
After finishing my skin, I left the highlighter for last and moved on to finish the eye work. I took the black from this palette, and lined on the lower lid, that shadow liner I smudged with my bullet brush. Then I knew it was time for the upper eyeliner, and I marked it initially with shadow for my pulse and to make it more intense. For a touch up, I touched it up with liquid eyeliner.
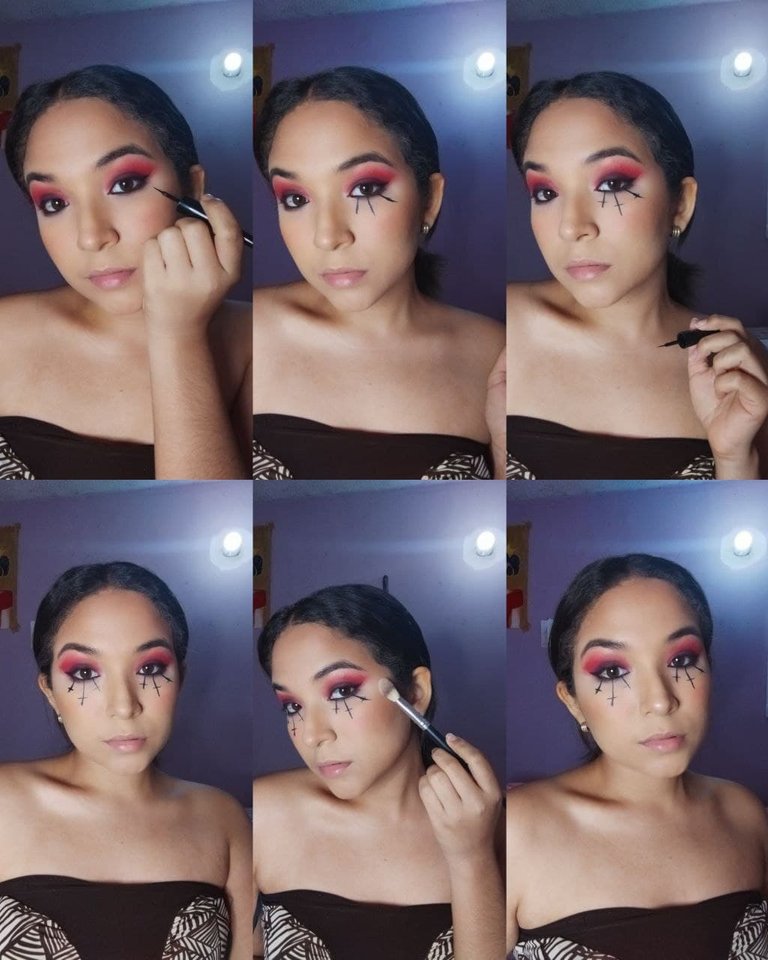
En este punto es que comencé a dar más forma a la idea, y con el delineador líquido hice 3 rayas que salían de mis ojos, la idea era hacer 3 cruces, así que esas rayas las complete con unas más pequeñas y salieron 3 perfectas cruces en cada ojo. Aquí aplique un poco de iluminador bien sutil. Pase a los labios, como no tengo lapiz negro tome mi brocha de labios y delinee con sombra y difumine, para repasar todo este trabajo con el labial rojo de Body. Aquí ya le veía mucho la forma, pude dejarlo así y seria más sencillo pero quería que fuera más escandaloso.
At this point I started to give more shape to the idea, and with the liquid eyeliner I made 3 stripes coming out of my eyes, the idea was to make 3 crosses, so I completed those stripes with smaller ones and I got 3 perfect crosses in each eye. Here I applied some subtle highlighter. I moved on to the lips, as I don't have a black pencil I took my lip brush and lined with shadow and smudged, to go over all this work with Body's red lipstick. I could have left it like this and it would have been simpler but I wanted it to be more outrageous.

Así que para hacerlo más escandaloso, necesitaba sangre, para hacerlo seguí el consejo de @lucianav, de tomar shampo, agregar pintura roja al frío y un poco de sombra negra. Tome una servilleta y mi crema de cuerpo para colocar realce en el centro, y lo pegue un poco con teipé, la sangre la coloque con las manos puestas quería que se viera desordenado. Al realizar esto termine todo el maquillaje.
So to make it more outrageous, I needed blood, to do it I followed @lucianav's advice, to take shampoo, add red paint to the cold and some black shadow. I took a napkin and my body cream to place highlight in the center, and stuck it a little with teipé, the blood I placed it with my hands on I wanted it to look messy. When I did this I finished all the makeup.
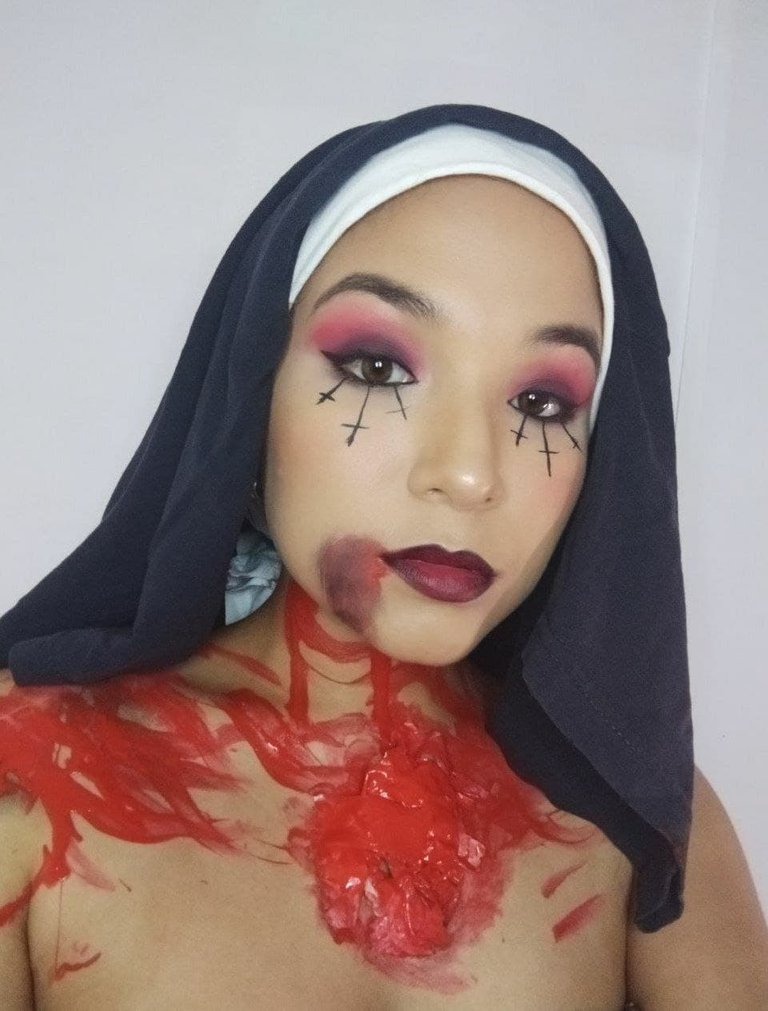
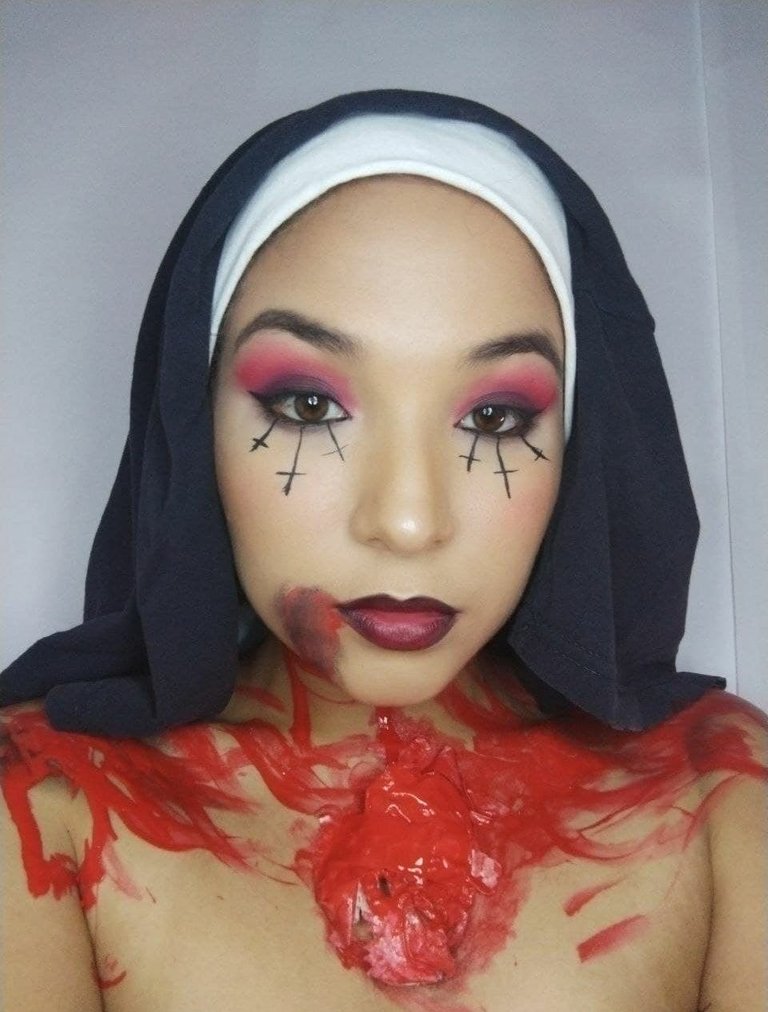
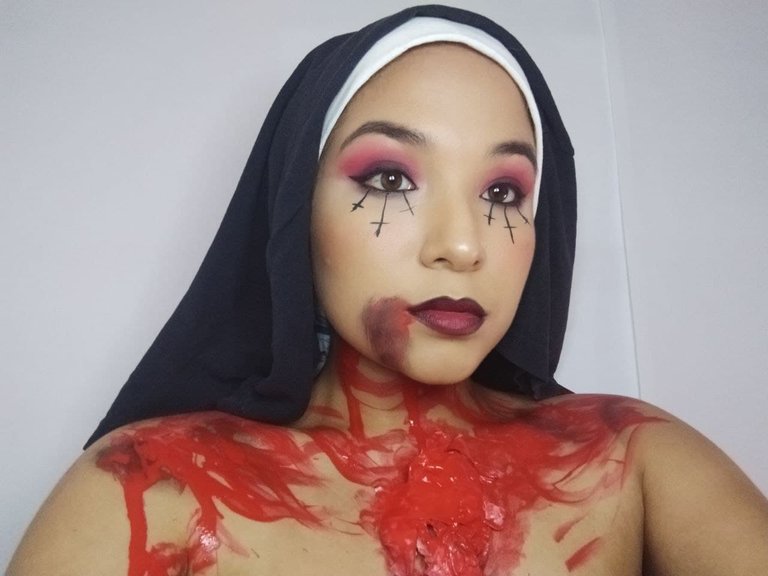
La verdad si tuviera un evento de Halloween, no colocaría la sangre, y me vistiera toda de negro; pero me encanto este maquillaje, los detalles definitivamente lo salvaron, me siento la verdad muy contenta con el resultado.
The truth is that if I had a Halloween event, I wouldn't put the blood, and I would dress all in black; but I loved this makeup, the details definitely saved it, I feel really happy with the result.

Congratulations @cami.rojas! You have completed the following achievement on the Hive blockchain and have been rewarded with new badge(s) :
Your next target is to reach 450 posts.
You can view your badges on your board and compare yourself to others in the Ranking
If you no longer want to receive notifications, reply to this comment with the word
STOPTo support your work, I also upvoted your post!
Check out the last post from @hivebuzz:
Support the HiveBuzz project. Vote for our proposal!
Quedó muy hermoso tu maquillaje, éxitos para ti 🌹
Muchas gracias bella ❤️
I really like this version you made of the scary nun.