Battle Mages Secrets: A combination of Blast & Slow Speed
I promised that I would share a couple of posts posts for this week's challenge and I'm glad I'm doing so right now (at the time of writing).
It's been quite hard to choose from a list of 5 battles which one I would share but went to choose the one with the best tactical aspect regarding this specific ruleset.
Explosive Weaponry

- All units gain the Blast ability.
- Additional damage is equivalent to main damage divided by 2.
The Martyr Play is one of the most interesting plays in the Explosive Weaponry Ruleset. Since the damage is dealt to adjacent units, it becomes easier to play the martyr monster next to the carry units without worrying too much about NOT being hit!

Without further ado, let's get right into the battle:


- High Mana Cap 39 Mana
- Water, Life, Death, Dragon Elements available
Reverse Speed+Explosive WeaponryRulesets
I have decided to go with this unusual team:
Summoner:
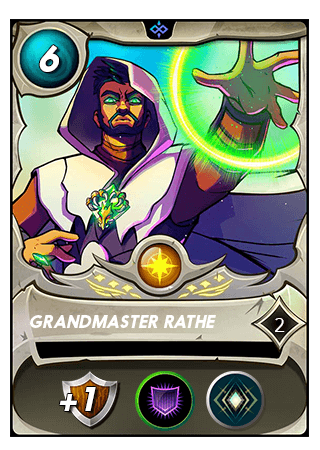
Abilities: Void Armor & +1 Armor + Amplify
If the memory serves me right, Life Team along with the fire team got one of the slowest monsters in terms of speed. Moreover, the +1 Armor & the Void Armor offers an extra protection to all my monsters especially with the fan favourite Magic Damage! Both in term of the main damage besides the blast damage.
Tank Position
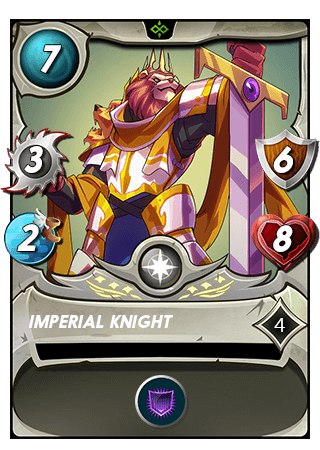
Ability: Void Armor
It's true that this monster doesn't have the best synergy with GrandMaster Rathe since it already have Void Armor, but still it got enough Tankiness (8 Health + 7 Armor + 1 Armor) in order to withstand lots of damage. Even better if coupled with the right support!
2nd Position
Ability: Reflection Shield + Reach
The right monster for this ruleset, first we got the Reflection Shield that blocks the damage from the Explosive Weaponry blast damage. In addition, to the decent agressive kit of this monsters considered in 4 Melee Damage + 3 Speed and the Reach ability allowing for a decent deal of damage from a safe position.
The Support
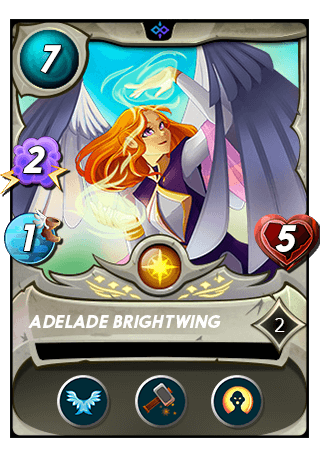
Ability: Flying + Repair + Ressurect
One of the best support cards in the game, the higher the level, the better the support is! besides the magic damage and the 1 Speed that synergize with both Rulesets, Repair will keep repairng the tank's Armor and keeps the monster as alive as possible, while the Ressurect that will most likely applied on the Imperial Knight, will bring it back to live with all its initial Armor.
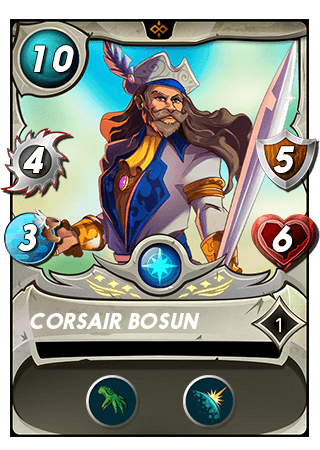
The Damage
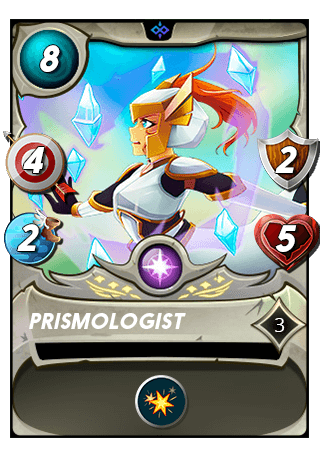
Ability: Blast
Again its ability overlaps with the Explosive Weaponry Ruleset, but the fact that it got a whopping 4 Ranged Damage (+2 Blast Damage) and the low speed (2 speed) would allow for a massive damage output in every round considering its put on a rather safe position.
Here's the Link to The Battle
Pre Round 1
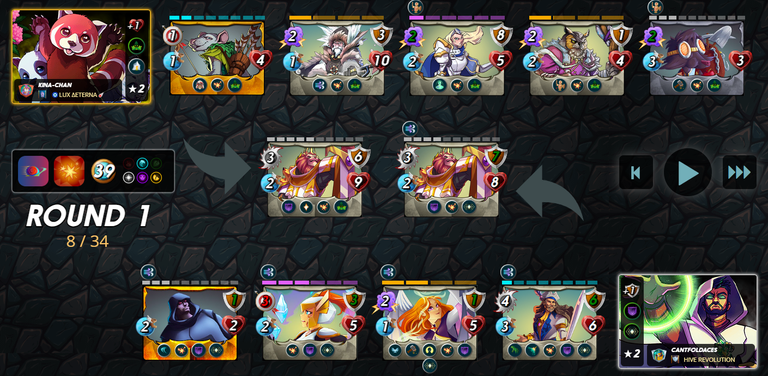
A rather interesting lineup I'm facing! The enemy adopted the martyr strategy to buff both his 1st & 3rd monster while its entire team is heavily focused of Magic Damage.
Round 1
- Ally Imperial Knight is holding on pretty well thanks to some help from Adelaide Repair.
- Prismologist secured the first takedown on Venari Marksrat leading to a martyr buff to both enemy Imperial Knight and Atuat
- Notice how the Reflection Shield keeps on absorbing tons of Blast Damage!
- Enemy Knight seems healthier that my Tank at the end of the round.
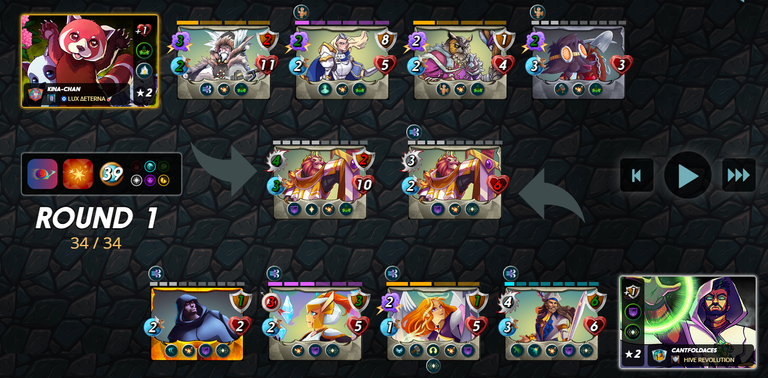
Round 2
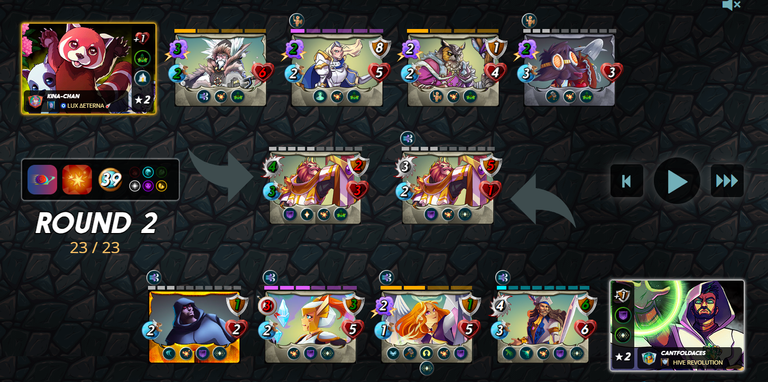
- Since my team got the lowest speed, enemy tank got left with little health only to get healed and armor repaired
- On the other side, successive magic attacks, with the finishing blow from Aves Sturgis, took down my imperial knight.
- Luckily, with the Ressurect from Adelaide Brightwing, it came back to life with all its initial Armor! 7 Armor
- Runemancer Atuat is tanking the blast damage pretty well especially with Lily's Triage
Round 3

- My Imperial knight took revenge by killing the enemy Tank and inflicting some blast damage to Atuat
- Right next, Corsair Bosun took down Runemancer Atuat, leaving just 3 units left!
- The trained Scavo Hierling baring his fangs and launching a magic bolt that took down for a second time my Imperial Knight
Round 4
- After losing the Reflection shield advantage, we can see how much the blast damage can hurt our team
- For this Round, No casuality, Grandmaster Rathe Void Armor was key for Corsair Bosun survival till now followed by the Reapir from Adelaide!
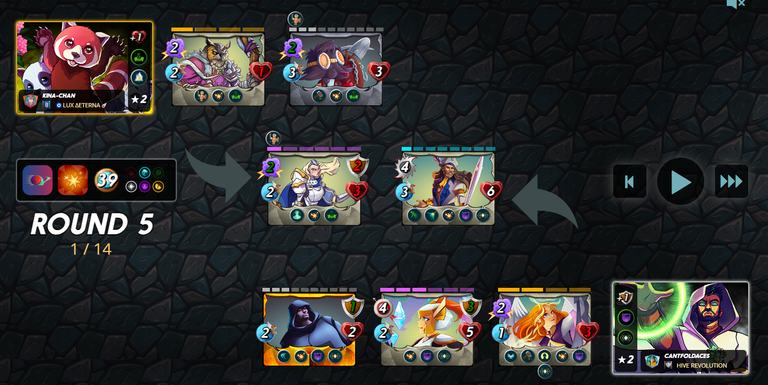
Round 5 & End
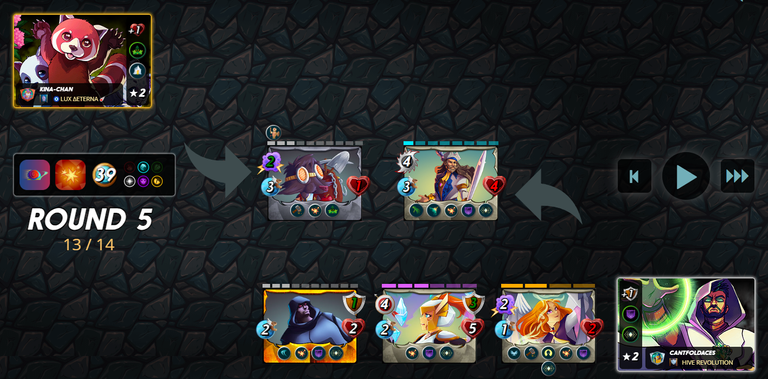
- The successive attacks from both Adelaide, Prismologist & Corsair Bosun were enough to put down both Evelyn and Aves the Trainer leaving a lonely trained Scavo hierling. Awaiting his destiny on the 6th Round
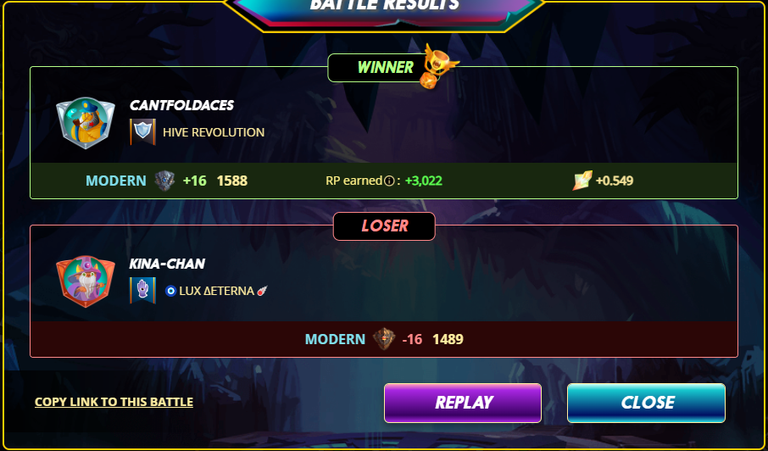
- With this, a great battle has ended and great rewards were gladly received +16 Trophies & 0.54 SPS
Here's the Link to The Battle
After Battle Commentary
- In my opinion, nothing much can be change regarding my team comp, maybe if the Mana allowed, putting up Uriel the Purifier as the Tank and the Self heal would be a great alternative, especially with a deadly recharge attack and its blast damage!
- Lily Shieldpaw can be considered in
Explosive Weaponrymatchups as it allows for some key heals against the Blast damage!
Thank you for reading till now and Good luck Have Fun on your Splinterlands Battles!
Make sure to take part in the Weekly battle Mage Secret here
Wanna take part in these exciting Splinterlands battles: Join me here
!hiqvote
!DHEDGE
@cantfoldaces, the HiQ Smart Bot has recognized your request (1/1) and will start the voting trail.
In addition, @cantfoldaces gets !PIZZA from @hiq.redaktion.
For further questions, check out https://hiq-hive.com or join our Discord. And don't forget to vote HiQs fucking Witness! 😻
Checkout our BDVoter Daily Hive Showcase & Participate into our Daily giveaway to win various prize.
Thanks for sharing! - @alokkumar121
