Battle Mages Secrets: Explosive and Trained Weaponry!
Ohh yeess! Finally a ruleset that I would have fun playing it and oh boy got many battles to share! Well I'm only limited to a couple of battles per week but wait! must importantly, I gotta POST about both of them of course and not getting lazy and push it to the weekend.
Anyways, I've got a pretty cool battle on the Silver League that I would like to share:
Explosive Weaponry

- All units gain the Blast ability.
- Additional damage is equivalent to main damage divided by 2.
The Agressive playstyle is the way to go around Explosive Weaponry! Which makes it talk about a couple of important aspect namely the Speed & Damage that's a given key in every matchup regardless the Rulesets!
On the other side, some abilities shines, or even a must have, in this kind Ruleset: Reflection Shield

it can make or break a battle as it halts the deadly blast damage over the course of the rounds in key placements:
Placing on the 2nd Position on the Reach Position to absorb the damage dealt to the Tank
Placing it next to a Taunt Monster (the latter placed generally on the last position) would absorb most of the damage!
Without further ado, let's get started:

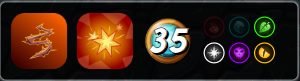
- Mid High Mana Cap 35 Mana
- Earth, Life, Death, Dragons Available
Briar Patch+Explosive WeaponryRulesets
I have decided to go with the particular following team:
Summoner
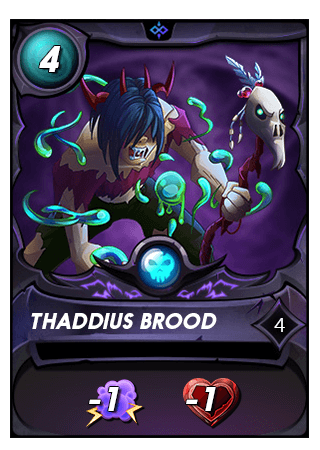
Ability: -1 Health & -1 Magic
The Debuff Death Summoner is put into action for this challenge. It's true that I didn't choose an agressive oriented summoner but hear me out, I've got a team for it in addition to that magic nerf that reduce the upcoming Magic Damage in case I end up facing Obsidian
Tank Position
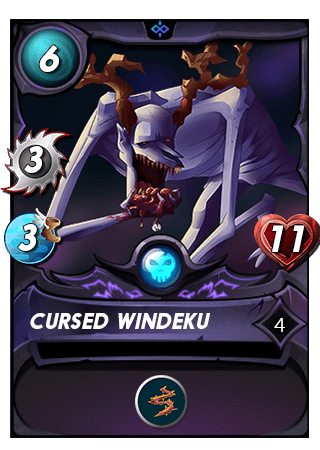
Ability: Thorns
A decent Tank that got lot's of hit points to sustain the damage in addition to a decent Damage 3 Melee & 3 Speed. Thorns is used to punish the opposing Melee Tank
At higher levels, it gets Heal making it even better in term of sustain!
2nd Position

Ability: Void Armor + Knock out + Giant Killer
Putting it at the 2nd Position to: First absorb the Blast Damage either its Melee or Magic, it should pass through the Armor thanks to the Void Armor Ability. Second, it can attack from the 2nd position since its a magic attack user!
Giant Killer will help if faced with a 10+ Mana Monster (Quora ?) while the Knock Out won't be too useful as I didn't bring a Stun monster
The Weapons Training Combo
| Front Trainee | The Trainer | Back Trainee |
|---|---|---|
 |  |  |
It's only right if I want to abuse the OP Weapons Training Ability:
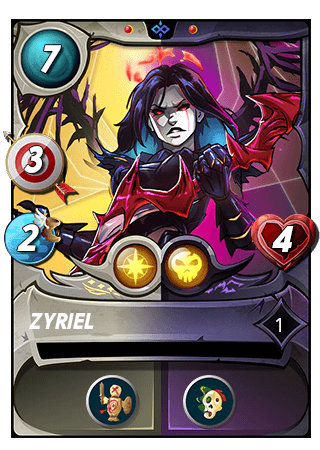
- The Trainer (Zyriel) will provide both Riftwing & Chaos Animator 3 Ranged Damage Totally a total of 9 Damage per Round. Morever, with the Life Leech, it keeps gaining Health the longer the battle goes on.
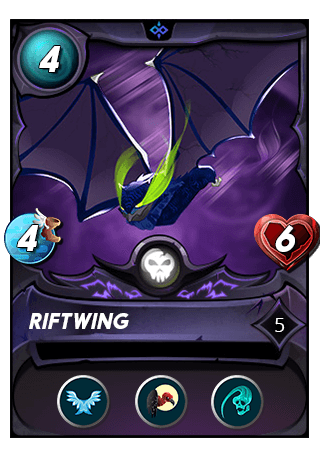
- Riftwing is put on the 3rd Position, in addition to its innate evasiveness Flying + Backfire + 4 Speed, gaining an additional heavy Ranged damage plus that decent speed and Flying will make it the first to act and less likely to miss its shots leading to a deadly Riftwing
- Chaos Animator is put on the back, using the Amplify to increase Windeku's Thorns damage to 3 and Void in case we are facing Magic Damage. It's low speed won't help much in his newly trained attack.
Last Position
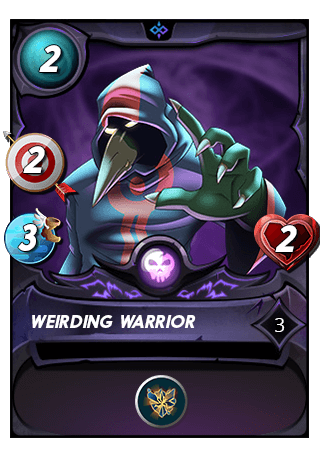
Ability: Shatter
A high utility 2 Mana card, first the shatter ability destroys the enemy's armor and my attacks won't be wasted on that given armor especially with this monster having a decent speed at 3!
Here's the Link to The Battle
Pre Round 1
Enemy opted for a rather interesting team, first having a reflection shield monster, in addition a Captain Katie as a carry with the snipe ability. Luckily its damage got reduced by Thaddius Brood.
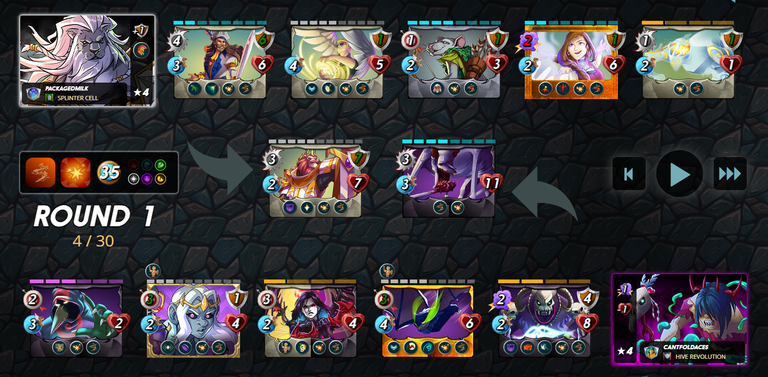
Round 1
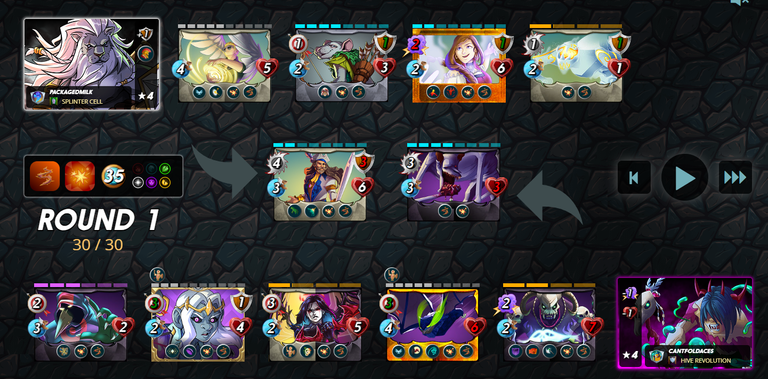
- Against a barrage of my attacks, and thanks to the shatter ability that took most of Imperial Knight plus the speed advantage my monsters are having: Zyriel was the one to take the First Blood!
- Corsair Bosun attack hurts while Katie is doing damage to 3 of my units!
Round 2
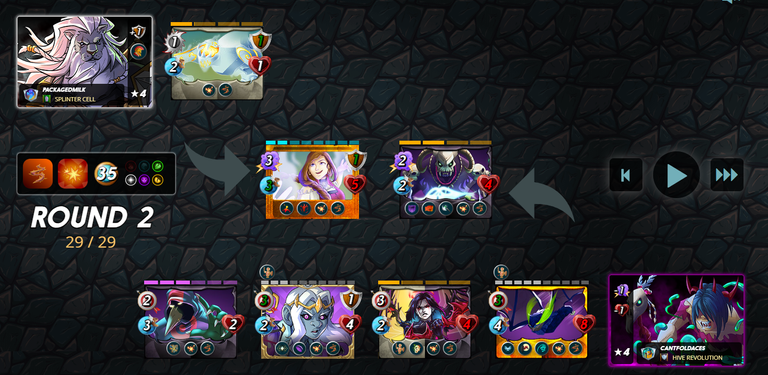
You should notice the importance of Speed! Riftwing doing 5 Damage and took down Corsair Armor, followed by Wierding Warrior and Cursed Windeku that took down Pelacor Conjurer with the Blast Damage
Corsair Bosun with the lone health took down Cursed Windeku
Djinn Muirat eliminated Corsair Bosun and left the Venari with little health, only to get eliminated after Zyriel & Chaos animator attacks!
Captain Katie Martyred to its initial 3 Magic Damage
Dayum with an action packed round !
Round 3
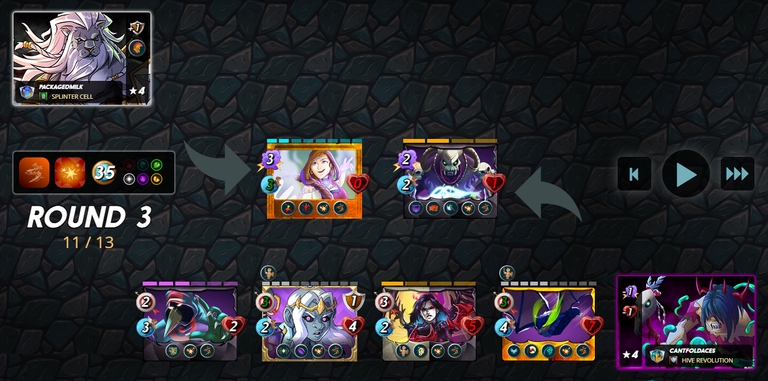
- Captain Katie, with the forgotten fiend can't take on the entire squad
- Wierding warrior eliminated the fiend with the blast ability
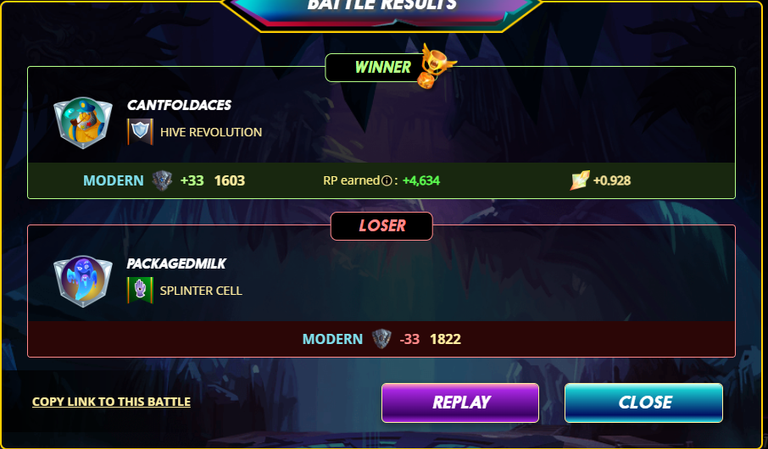
- Zyriel gave the final blow to the lonely Katie to Clinch the Victory for a sweet reward +33 Trophies & 0.92 SPS
Here's the Link to The Battle
After Battle Commentary
- A really satisfying battle! The Weapons Training always surprised me with the insane damage output! Statistically speaking, I'm firing double the damage the enemy team is sending while having the upper level in term of Speed!
- It would be great if I provided another high speed non attack monster if the Mana does allow to further dominate the battle.
Thank you for reading till now and Good luck Have Fun on your Splinterlands Battles!
Make sure to take part in the Weekly battle Mage Secret here
Wanna take part in these exciting Splinterlands battles: Join me here
!DHEDGE
!hiqvote
@cantfoldaces, the HiQ Smart Bot has recognized your request (1/1) and will start the voting trail.
In addition, @cantfoldaces gets !PIZZA from @hiq.redaktion.
For further questions, check out https://hiq-hive.com or join our Discord. And don't forget to vote HiQs fucking Witness! 😻
Checkout our BDVoter Daily Hive Showcase & Participate into our Daily giveaway to win various prize.
Thanks for sharing! - @marianaemilia

Nice battle! Good job!