Falda básica II Parte /// [ESP - ENG]

¡Florecido día queridos de NeedleWorkMonday! Quizás no sepan que hace un tiempo realicé un post sobre como elaborar el patrón para confeccionar una falda básica con vuelo en la parte baja aquí se los dejo, hoy les traigo el esperado (por mi) desenlace de la falda, ya que mi hija siempre me pregunta.
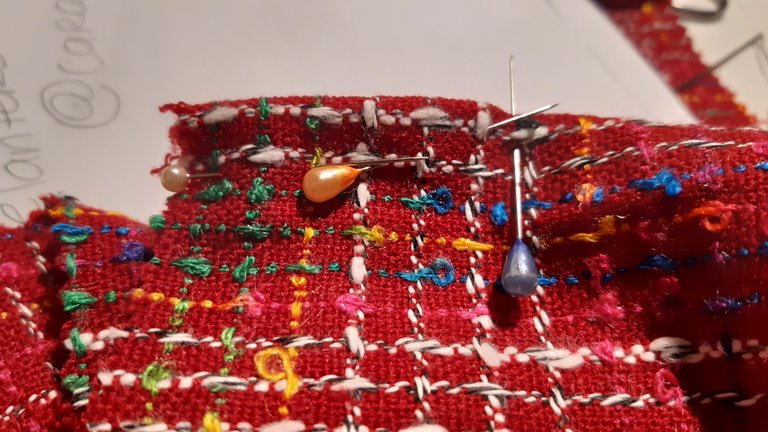
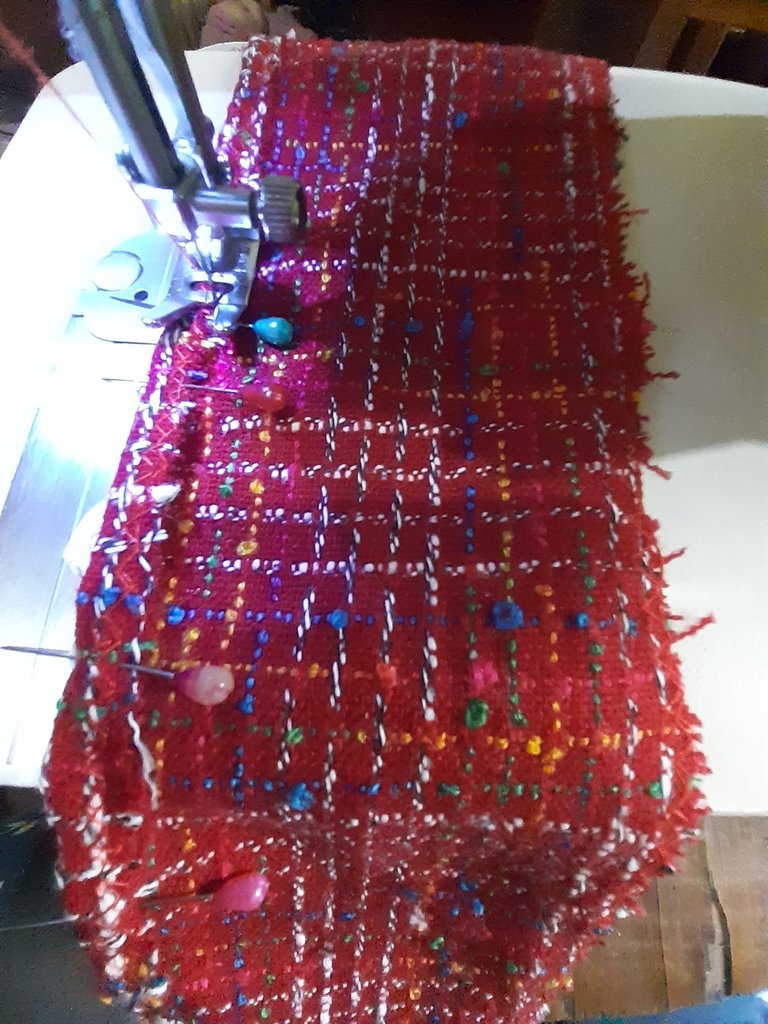
La verdad es que cometí un terrible error al colocar el cierre o cremallera, y debía descoser para colocarlo de nuevo, por eso así empieza este post, con la imagen del cierre mal puesto esperando su arreglo. Nunca falta un roto para un descosido.
Le estaba huyendo a este arreglo pues soy medio cegata y no quería dañar la tela Chanel con la que está confeccionada, así que esperé a que confluyeran los astros y entrara bastante sol por mi ventana, ya que es la mejor luz para trabajar. Así comenzamos esta tarea de ver la falda terminada.
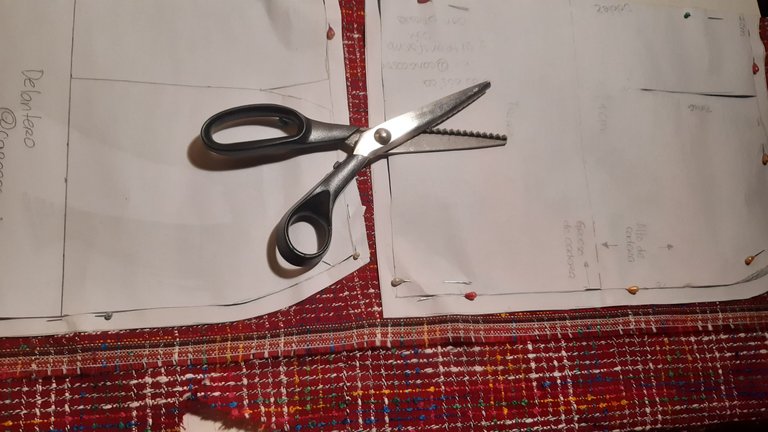
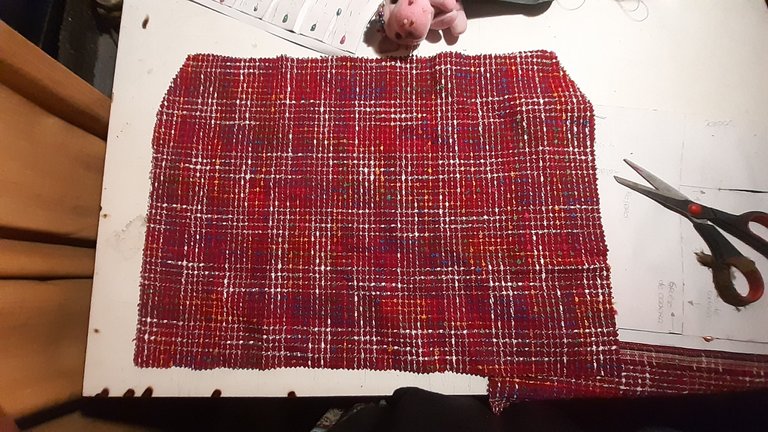
Así que lo primero que sigue después de haber realizado el patrón es colocarlo sobre la tela y proceder a cortarla. Teniendo en cuenta la dirección del hilo, como el patrón está hecho con el doblez en el medio, se debe doblar la tela para que al cortarla esta corresponda a alguna de las partes, sea la delantera o la trasera, estoy segura que muchas aquí conocen el procedimiento, pero igual lo explico para no dejar ninguna duda de como se corta la tela.
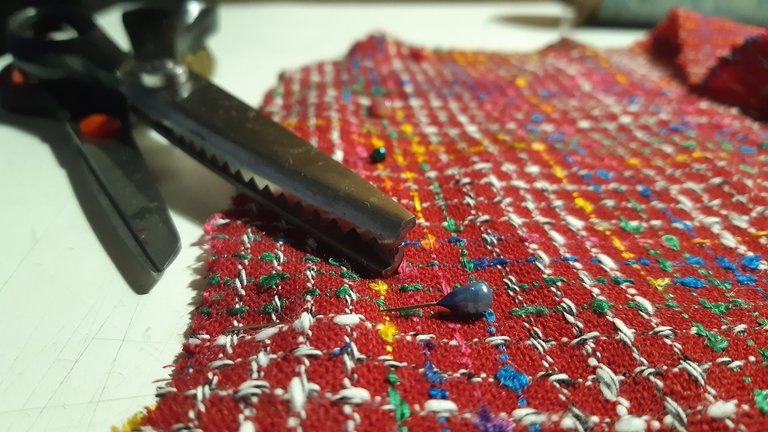
Como este tipo de tela se deshilacha la he cortado con una tijera de zig zag, o de pico como dicen en Venezuela, esto para evitar que se deshaga y termine toda deshilachada. Por supuesto, si contamos con la máquina Overlock hay que pasarle esta costura por todos los bordes, como yo no dispongo de una, simplemente cosí con la opción de zig zag de mi máquina recta, teniendo en cuenta que un punto de costura debe estar dentro de la tela y el otro afuera, aguantando las hilachas.
 |  |
|---|
Marcamos las pinzas con tiza de jabón y las cosemos, yo lo hice a mano para mayor precisión. Luego de esto enfrenté las dos partes (delantero y trasero) por el frente de la tela, en este caso, la tela al tener un lado frontal con un hermoso acabado y la parte de atrás con un aspecto un poco mas burdo, se hizo sencillo este paso, pero no todas las telas son así, así que hay que fijarse bien antes de cortar la tela, en muchos casos y sobre todo cuando los dos lados se parecen mucho, hay que hacer una marca con una tiza de jabón en el lado frontal.
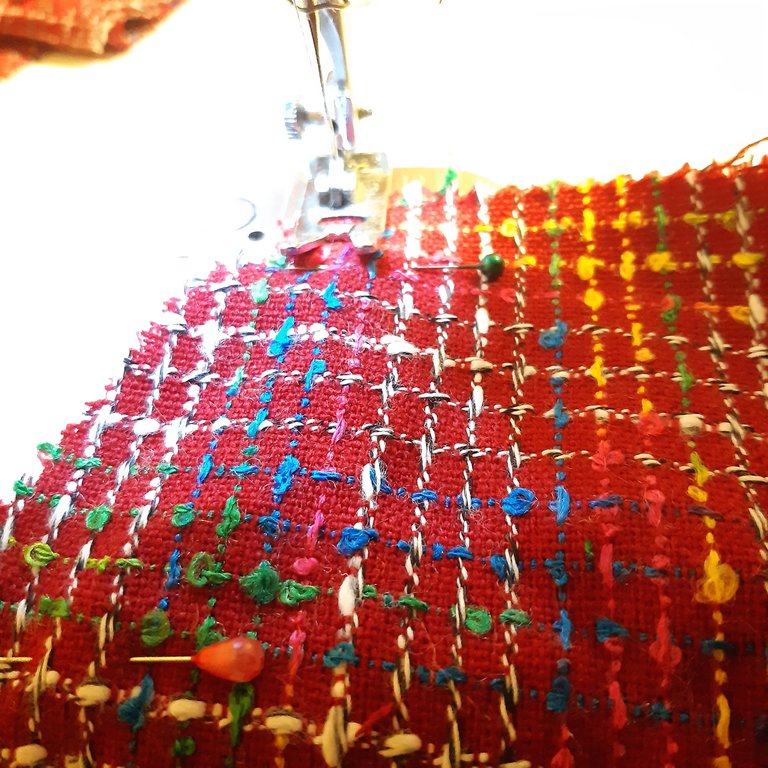
Luego cosí los extremos una vez fijados con alfileres, como coloqué un cierre a un lado de la falda, este lado lo cosí solo hasta la mitad. Aprendí un truco en internet y es colocar los alfileres no a lo largo sino a lo ancho, para que al pasar la máquina no se parta la aguja al caer sobre uno de estos alfileres.
 |  |
|---|
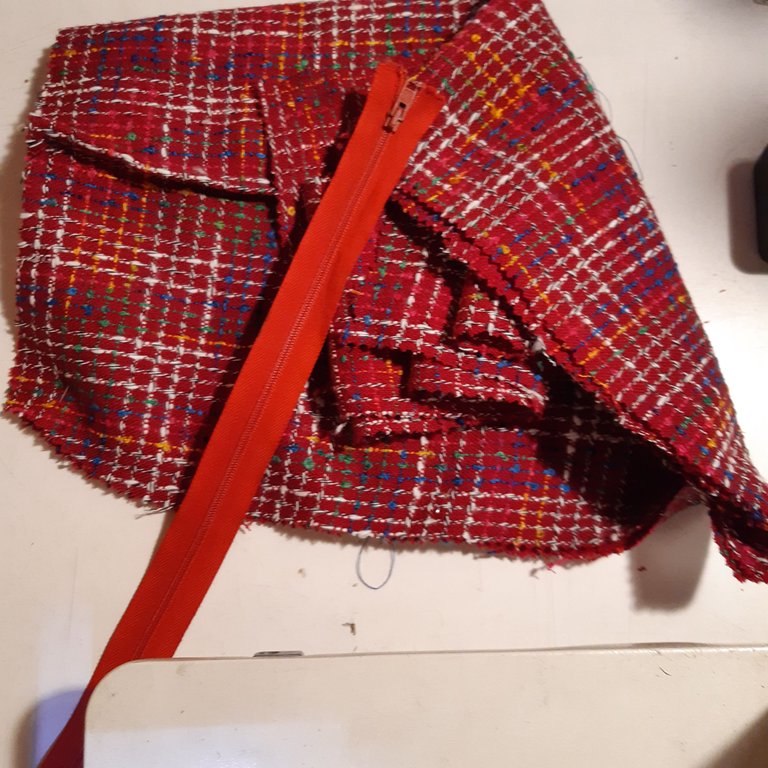
En otro post prometo explicar como se coloca el cierre a una prenda, por ahora solo comentaré que presenté el cierre y corté de él el extremo que sobra, para que no quede bailando dentro de la falda y represente una incomodidad al usarla. Este extremo lo reservé, porque seguramente puede servir para otro proyecto mas adelante.
 |  |  |
|---|
Una vez resuelto el error del cierre y terminado la costura de los dos lados, comienzo a colocar el vuelo de la falda, marco el centro del frente de la falda y comienzo a fijarla con alfileres desde esa marca para que los vuelos queden parejos. una vez fijados y cosidos a los lados, comienzo a coserlos por donde irían el ruedo. Anteriormente ya había cosido el ruedo de estos vuelos para facilitar el proceso.
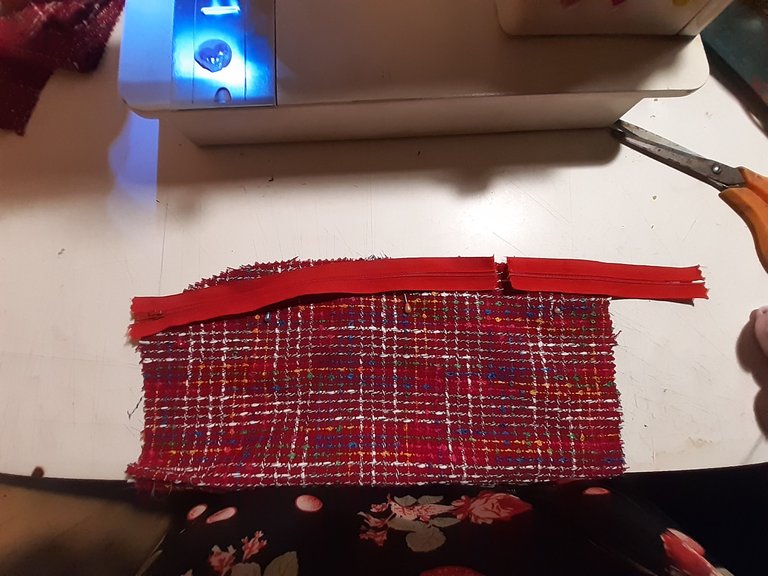
Luego de coser los vuelos tomé la medida del ancho de la cintura, dejando algunos centímetros para la colocación de un botón. y comencé a coserlo alrededor de la cintura, para esto lo fijé, nuevamente con alfileres, y cosí a un centímetro de distancia, enfrentando el delantero de la falda con el delantero de la tela para la pretina, olvidé mencionar que esta pretina midió 10cm de alto por 80 + 3 cm de ancho, los tres centímetros extras es para la costura y el botón.
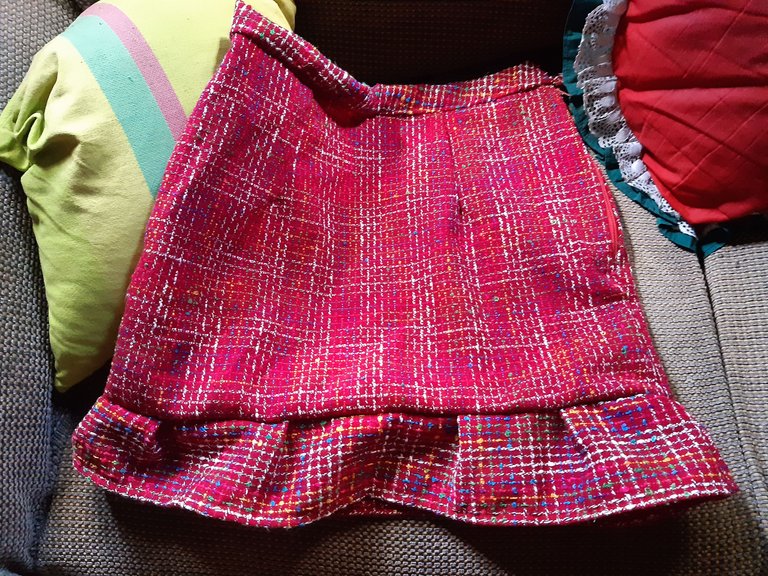
Luego hice un doblez hacia arriba , lo doblé por la mitad, doblé nuevamente 1 cm hacia adentro y fijé con alfileres, para cerrar y crear la pretina. Y así ya estuvo hecha la falda, solo queda plancharla.


Blossomed NeedleWorkMonday dears! Maybe You may not know that some time ago I made a post about how to make the pattern to make a basic skirt with a flounce at the bottom, here you have it, today I bring you the expected (by me) outcome of the skirt, since my daughter always asks me about it.
The truth is that I made a terrible mistake when placing the zipper, and I had to unpick it to place it again, that's why this post starts like this, with the image of the wrong zipper waiting to be fixed. There is never a broken zipper for a broken zipper.
I was running away from this repair because I am half blind and I did not want to damage the Chanel fabric with which it is made, so I waited for the stars to come together and for enough sun to enter through my window, as it is the best light to work with. So we began this task of seeing the finished skirt.
So the first thing that follows after having made the pattern is to place it on the fabric and proceed to cut it. Taking into account the direction of the thread, as the pattern is made with the fold in the middle, you must fold the fabric so that when you cut it this corresponds to one of the parts, either the front or the back, I'm sure many here know the procedure, but still I explain it so as not to leave any doubt about how to cut the fabric.
As this type of fabric frays I have cut it with a zig zag scissors, or beak scissors as they say in Venezuela, this to prevent it from unraveling and ending up all frayed. Of course, if you have an Overlock machine you have to sew this seam along all the edges, as I don't have one, I simply sewed with the zig zag option of my straight machine, taking into account that one stitch must be inside the fabric and the other outside, holding the threads.
| |
|---|
We marked the clips with soap chalk and sewed them together, I did this by hand for accuracy. After this I faced the two parts (front and back) on the front of the fabric, in this case, the fabric having a front side with a beautiful finish and the back side with a little coarser look, it made this step simple, but not all fabrics are like this, so you have to look carefully before cutting the fabric, in many cases and especially when the two sides look very similar, you have to make a mark with a soap chalk on the front side.
Then I sewed the ends together once pinned, as I placed a zipper on one side of the skirt, this side I sewed only half way up. I learned a trick on the internet and that is to place the pins not lengthwise but widthwise, so that the machine does not break the needle when it falls on one of these pins.
| |
|---|
In another post I promise to explain how to attach the zipper to a garment, for now I will only comment that I presented the zipper and cut off the end that is left over, so that it does not remain dancing inside the skirt and represent a discomfort when wearing it. I reserved this end, because it can surely be used for another project later on.
| | |
|---|
Once the error of the zipper is solved and the sewing of the two sides is finished, I begin to place the skirt's flounce, I mark the center of the front of the skirt and begin to fix it with pins from that mark so that the flounces are even. once fixed and sewn to the sides, I begin to sew them where the hem would go. Previously I had already sewn the hem of these flights to make the process easier.
After sewing the flights I took the measurement of the width of the waistband, leaving a few centimeters for the placement of a button, and began to sew it around the waist, for this I fixed it, again with pins, and sewed a centimeter apart, facing the front of the skirt with the front of the fabric for the waistband, I forgot to mention that this waistband measured 10cm high by 80 + 3 cm wide, the three extra centimeters is for the seam and the button.
Then I made a fold upwards, folded it in half, folded it again 1 cm inwards and pinned it, to close and create the waistband. And so the skirt is done, it only remains to iron it.

El contenido aquí presentado es de mi autoría.
Las fotografías fueron tomadas con mi teléfono.
La imagen de portada fue editada en Illustrator con una de mis fotos.
Los separadores y banner fueron hechos por mi en Illustrator
The content presented here is my own.
The photographs were taken with my phone.
The cover image was edited in Illustrator with one of my photos.
The separators and banner were made by me in Illustrator.

Tu lectura es un gran honor para mi
Your reading is a great honor for me
Follow me


Wow this look so beautiful, and I love the color of the material
That's right, it's a Chanel fabric that I bought years ago and is no longer available in my country, so I'm very excited to be able to use it, cheers!!!!
https://twitter.com/CaracasPrin/status/1567982545513357316
The rewards earned on this comment will go directly to the people( @caracasprin ) sharing the post on Twitter as long as they are registered with @poshtoken. Sign up at https://hiveposh.com.
Muchas gracias por el apoyo!
Yo estaba esperando este post. Me encantó la tela que escogieron es preciosa. La falda quedó sensacional.
Yay! 🤗
Your content has been boosted with Ecency Points, by @caracasprin.
Use Ecency daily to boost your growth on platform!
Support Ecency
Vote for new Proposal
Delegate HP and earn more
Thank you for sharing this amazing post on HIVE!
Your content got selected by our fellow curator @rezoanulvibes & you just received a little thank you via an upvote from our non-profit curation initiative!
You will be featured in one of our recurring curation compilations and on our pinterest boards! Both are aiming to offer you a stage to widen your audience within and outside of the DIY scene of hive.
Join the official DIYHub community on HIVE and show us more of your amazing work and feel free to connect with us and other DIYers via our discord server: https://discord.gg/mY5uCfQ !
If you want to support our goal to motivate other DIY/art/music/homesteading/... creators just delegate to us and earn 100% of your curation rewards!
Stay creative & hive on!
Thank you very much, it is an honor for me!