"Yo ando llenando de flores mi vida" Cintillo en crochet 🌺🌷 "I go around filling my life with flowers" Crochet headband.

Yo ando llenando de flores toda mi vida; este año he querido expresar lo que siento a través de ellas. Las flores tienen muchos significados, con ellas te puedes comunicar con alguien especial y decirle lo que sientes, ya sea amor, perdón, alegría, agradecimiento y hasta condolencias.
Desde el año pasado he tenido la dicha de enviarle varias veces flores a mi madre, yo sé cuánto le gustan y con ellas siempre quiero alegrarle sus días manifestándole el amor profundo que siento de tenerla como madre, como amiga.
Este año he decidido llenar mi blog de puras flores, muchas veces se me dificulta escoger cual tejer porque todas son bellas y con ellas se pueden hacer un montón de cosas.
La naturaleza nos regala flores de muchas clases, tamaños, colores y fragancias. Yo no sé si a ustedes les pasa lo mismo que a mí, pero cuando quiero regalar flores siempre me enredo toda al momento de comprar y siempre termino escogiendo las rosas porque son mis favoritas. A mí me emociona mucho cuando mis hijos o mi esposo me regalan ramos donde se combinan flores de todo tipo y genera una explosión de color que me alegra la vida.
Pero no hace falta que haya una fecha especial para regalar flores, así que siempre que puedas y se te antoje regala flores a tus seres amados.

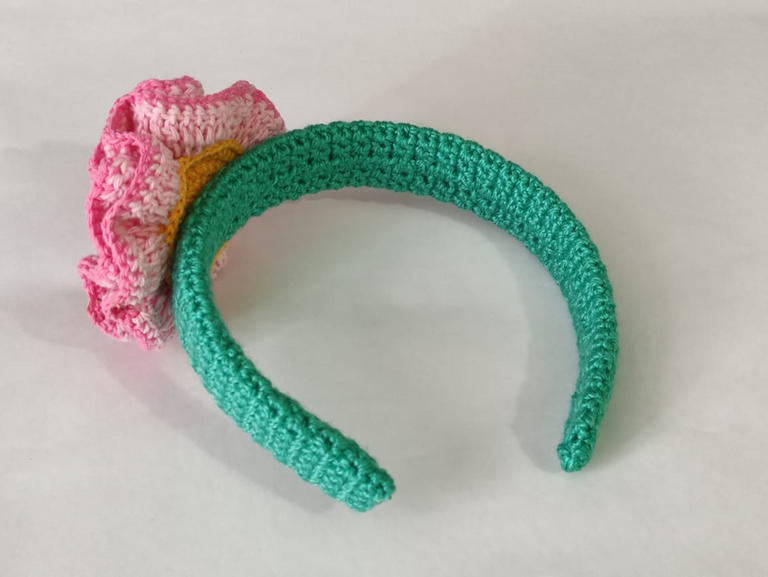
Hoy vamos a realizar un cintillo decorado con una flor grande que resalte. Este cintillo se lo vamos a regalar a las más pequeñas de la casa, en mi caso quiero guardarlo hasta que tenga la oportunidad de viajar a los andes y poder entregárselo personalmente a mi sobrina Gabriela.

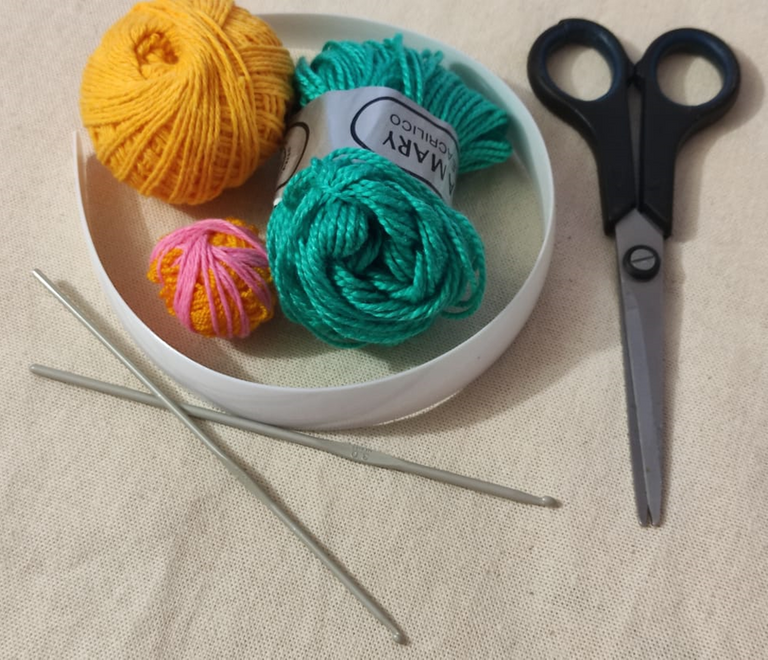
- hilos de tejer de varios colores
- aguja de tejer número 2 y 2,5 mm.
- tijeras
- cintillos plástico ancho.
- y muchas ganas de trabajar.

Antes de iniciar debo decir que este cintillo o diadema lo encontré gracias al concurso de joyería de la comunidad needleworkmonday, y es que resulta que gracias a mis investigaciones sobre el amigurumi pude darme cuenta que con esa técnica podemos realizar un montón de cosas hermosas. Hay cintillos tan lindos que se queda uno con la boca abierta viendo de un lado a otro y luego es más difícil escoger solo uno para realizar.

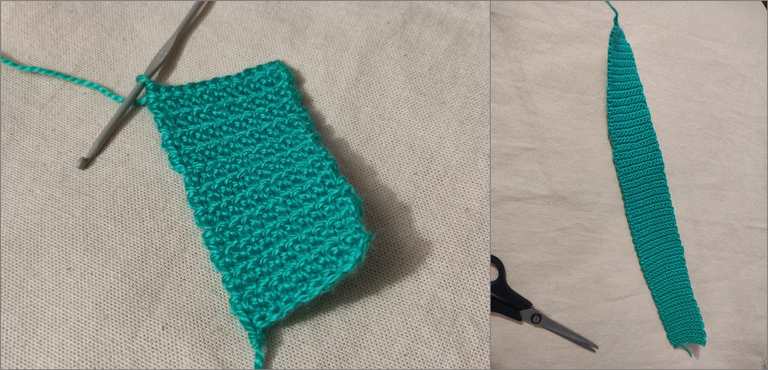
Iniciamos tejiendo 10 cadenetas y a partir de allí vamos a realizar 10 vueltas de puntos bajos. Luego tejemos una vuelta con un aumento de puntos bajos justo en la mitad. En total vamos a tejer 11 puntos bajos. Tejemos 5 vueltas de 11 puntos bajos cada una.
La idea es ir aumentando ya que nuestro cintillo tiene esa forma. En la vuelta 17 volvemos a tejer puntos bajos pero realizamos un aumento de puntos bajos justo en el medio, en total vamos a tejer 12 puntos bajos. Así seguimos tejiendo, en total vamos a tejer 50 vueltas, para luego volver a llegar al otro extremo donde vamos a realizar disminuciones.
Cuando terminamos la vuelta 50 de 12 puntos vamos a tener 5 puntos bajos, una disminución y nuevamente 5 puntos bajos. Repetimos 5 vueltas más de 11 puntos bajos, en la vuelta siguiente tejemos puntos bajos y una disminución justo en el medio, repetimos 9 vueltas más de 10 puntos bajos.
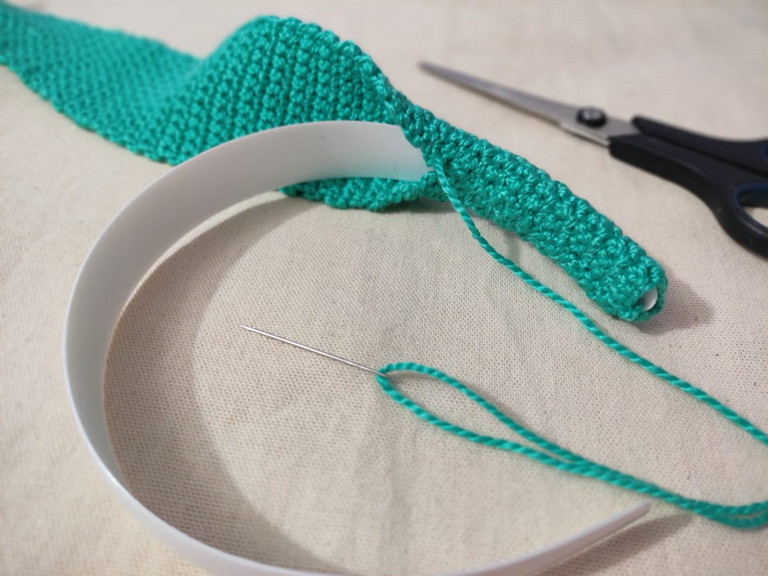
Ahora vamos a coser con una aguja lanera y una hebra de hilo larga, vamos uniendo de un extremo al otro y apretando con suavidad. Para rematar las puntas tomamos hebra y cerramos haciendo luego puntadas de seguridad para que no se suelte.

La flor puede ser cualquier modelo, ustedes escogen la de su preferencia porque estoy segura que a este cintillo todas le quedaran hermosas. También pueden colocar más de una flor o colocarle hojas verdes si deciden tejer el cintillo de otro color.
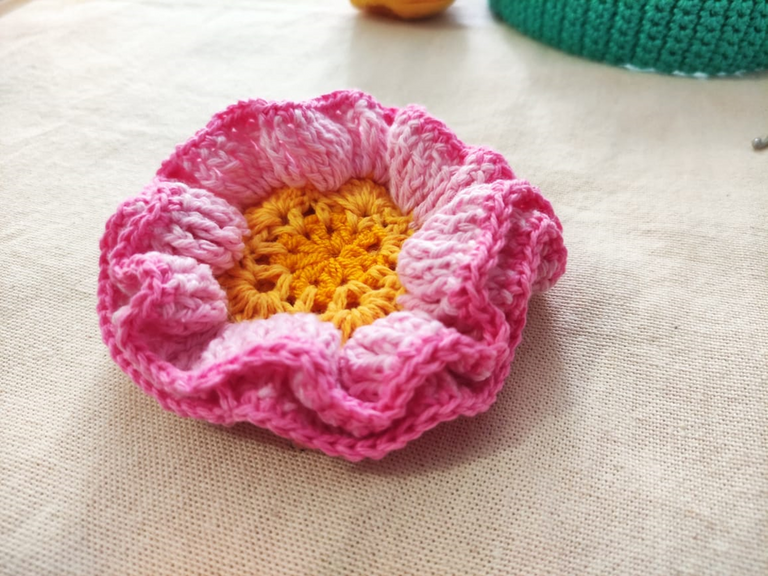
En este caso tuve que diseñar la flor a partir de patrón de la flor de áfrica de 5 pétalos (Color amarillo). Cuando la tuve lista cambié de hilo y realicé 3 puntos altos dobles en cada punto de base, esto es lo que permite que quede más arruchada la flor.
Un detalle importante es que la primera vuelta la hice tomando solo la primera hebra o hebra de adelante y luego la segunda hebra repetí el mismo proceso pero tomando la hebra de atrás. Por ultimo le hice un borde en tono rosado más fuerte.
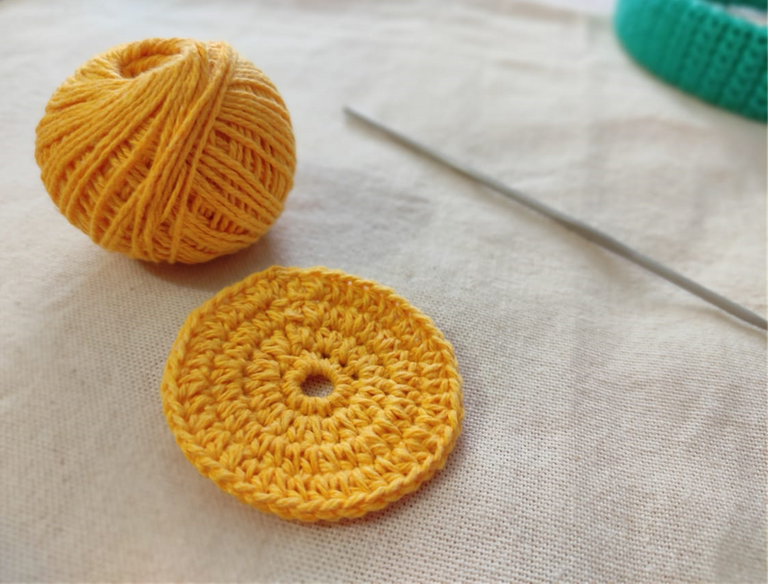
Para reforzar la flor hice un círculo amarillo con puntos medios altos. Pegamos este círculo en la parte posterior de la flor con silicón y colocamos una perla en el centro. ¡Si es tu gusto!
Debo confesar que escogí la forma más sencilla de realizar el cintillo, pero el resultado final es estupendo, no me arrepiento para nada al haberlo realizado.
Me encantó la combinación del cintillo, me gustó todo, espero que ustedes también se alegren conmigo y permitan que esta flor haga su trabajo y ponga una sonrisa en sus labios.

I fill my life with flowers; this year I wanted to express what I feel through them. Flowers have many meanings, with them you can communicate with someone special and tell them what you feel, whether it is love, forgiveness, joy, gratitude or even condolences.
Since last year I have had the joy of sending flowers to my mother several times, I know how much she likes them and with them I always want to brighten her days, showing her the deep love I feel for her as a mother, as a friend.
This year I have decided to fill my blog with pure flowers, many times it is difficult for me to choose which one to knit because they are all beautiful and with them you can make a lot of things.
Nature gives us flowers of many kinds, sizes, colors and fragrances. I don't know if the same thing happens to you, but when I want to give flowers as a gift I always get all tangled up when buying and I always end up choosing roses because they are my favorite. I get very excited when my children or my husband give me bouquets where flowers of all kinds are combined and it generates an explosion of color that makes my life happy.
But there doesn't need to be a special date to give flowers, so whenever you can and whenever you feel like it, give flowers to your loved ones.
Today we are going to make a headband decorated with a big flower that stands out. We are going to give this headband to the little ones of the house, in my case I want to keep it until I have the opportunity to travel to the Andes and give it personally to my niece Gabriela.

- knitting yarns of different colors
- knitting needle number 2 and 2.5 mm.
- scissors
- wide plastic bands.
- and a lot of desire to work.

Before I start I must say that I found this headband thanks to the jewelry contest of the #Needleworkmonday community, and it turns out that thanks to my research on amigurumi I could realize that with this technique we can make a lot of beautiful things. There are so cute little ribbons that you are left with your mouth open looking from one side to the other and then it is more difficult to choose just one to make.

We start by knitting 10 chains and from there we will knit 10 rows of single crochet stitches. Then we knit one row with an increase of single crochet right in the middle. In total we will knit 11 single crochet loops. We knit 5 rows of 11 single crochet stitches each.
The idea is to increase the number of rows as our headband has this shape. In the 17th row we knit again the single crochet but we make an increase of single crochet right in the middle, in total we are going to knit 12 single crochet stitches. This way we continue knitting, in total we are going to knit 50 rows, and then we come back to the other end where we are going to make decreases.
When we finish the 50th row of 12 stitches we will have 5 single crochets, a decrease and again 5 single crochets. We repeat 5 more rows of 11 single crochet stitches, in the next row we knit single crochet and a decrease right in the middle, we repeat 9 more rows of 10 single crochet stitches.
Now we are going to sew with a wool needle and a long strand of yarn, we are going to join from one end to the other and tighten gently. To finish off the ends we take the thread and close it, making safety stitches so that it doesn't come loose.

The flower can be any pattern, you choose the one of your preference because I am sure that this headband will look beautiful with all of them. You can also place more than one flower or add green leaves if you decide to knit the headband in a different color.
In this case I had to design the flower from the pattern of the 5 petals African flower (yellow color). When I had it ready, I changed the yarn and made 3 double double crochet stitches in each base stitch, this is what allows the flower to be more puckered.
An important detail is that I did the first round taking only the first strand or front strand and then the second strand I repeated the same process but taking the back strand. Finally I made a border in a stronger pink tone.
To reinforce the flower I made a yellow circle with medium high stitches. We glued this circle to the back of the flower with silicone and placed a pearl in the center, if you like!
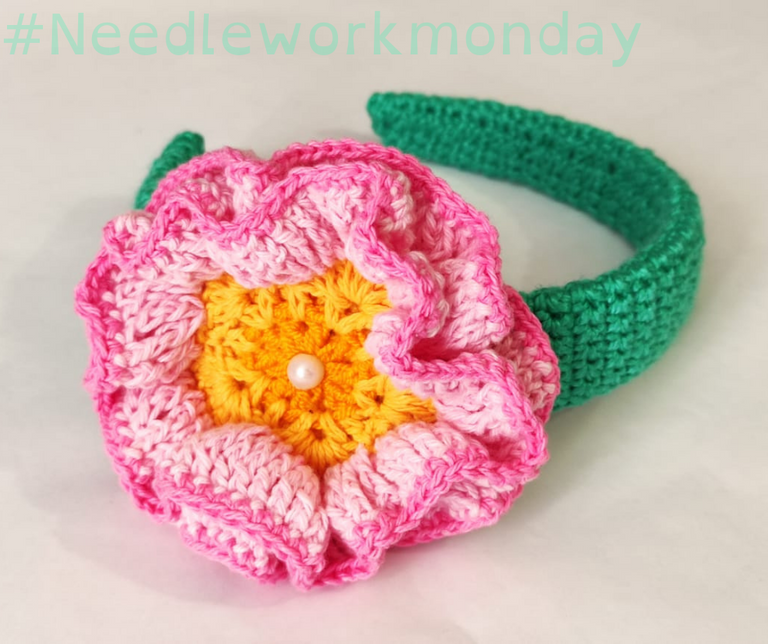
I must confess that I chose the simplest way to make the headband, but the final result is great, I don't regret making it at all.
I loved the combination of the headband, I liked everything, I hope you will also be happy with me and let this flower do its job and put a smile on your lips.
𝕋𝕠𝕕𝕠 𝕧𝕒𝕝𝕖 𝕝𝕒 𝕡𝕖𝕟𝕒 𝕤𝕚 𝕝𝕝𝕖𝕧𝕒, 𝕙𝕚𝕝𝕠𝕤, 𝕥𝕖𝕝𝕒𝕤 𝕪 𝕞𝕦𝕔𝕙𝕒𝕤 𝕡𝕦𝕟𝕥𝕒𝕕𝕒𝕤 𝕕𝕖 𝔸𝕄𝕆ℝ.
https://twitter.com/EvisCardoza/status/1524828365596901378
The rewards earned on this comment will go directly to the person sharing the post on Twitter as long as they are registered with @poshtoken. Sign up at https://hiveposh.com.
Me parece excelente amiga @carolinacardoza estar rodeada siempre de flores.
Tu cintillo quedó precioso. A las mamás les gusta mucho peinar y decorar la cabeza de sus hijas con este tipo de accesorios. Me encantó la flor.
Saludos.
Hola Hola Lelys, esa flor es fácil luego que ya consigues el patrón perfecto, al principio tejía y destejía, lo hice como tres veces pero quería conseguir la forma perfecta para mi. Estoy segura que mas de una mamá se animará a tejer, jejej.
Seguro que si. Se ven hermosos estos cintillos decorados con flores. 🌺☘️🌺
Muchas gracias
This is beautiful. I had lots of headband here that needs some decorating. I bought it months ago but never had the chance to decorate it. But thank you for this post, maybe I will try decorating them one at a time every other day. Thank you so much for sharing. God bless. 🥰
Thank you for sharing this amazing post on HIVE!
Your content got selected by our fellow curator @stevenson7 & you just received a little thank you via an upvote from our non-profit curation initiative!
You will be featured in one of our recurring curation compilations and on our pinterest boards! Both are aiming to offer you a stage to widen your audience within and outside of the DIY scene of hive.
Join the official DIYHub community on HIVE and show us more of your amazing work and feel free to connect with us and other DIYers via our discord server: https://discord.gg/mY5uCfQ !
If you want to support our goal to motivate other DIY/art/music/homesteading/... creators just delegate to us and earn 100% of your curation rewards!
Stay creative & hive on!
This is so beautiful @carolinacardoza thanks for sharing
Con el apoyo de la familia.
Trail de TopFiveFamily
Saludos. Te quedó genial ese cintillo y su flor. A mí me encanta las flores 🌹
Wonderful tutorial @carolinacardoza! Flowers are definitely a favorite of mine. Bravo!!
Una manera muy original y ecológica de llenarte de rosas, amiga @carolinacardoza