Making a Regency Style Skirt
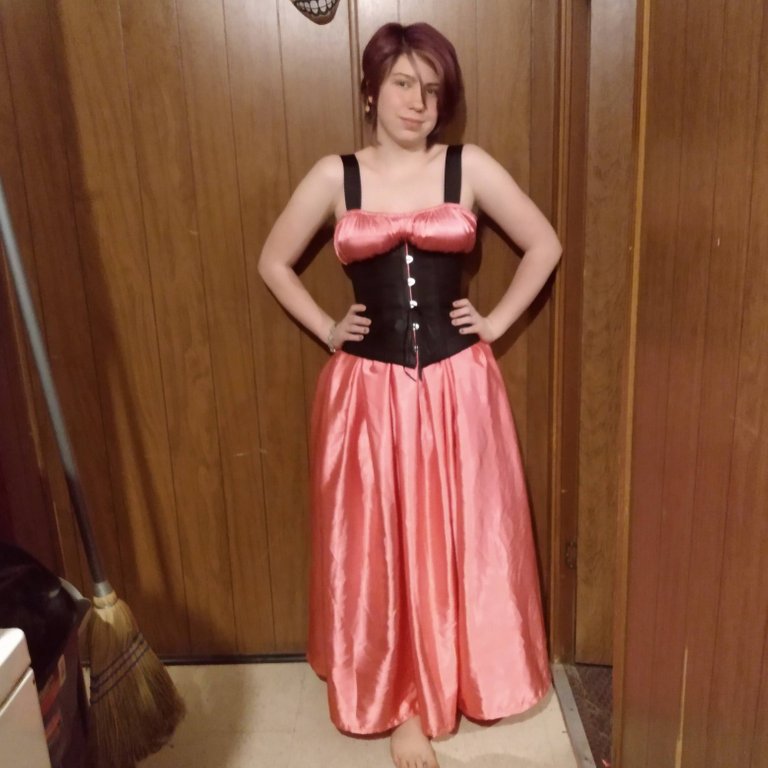
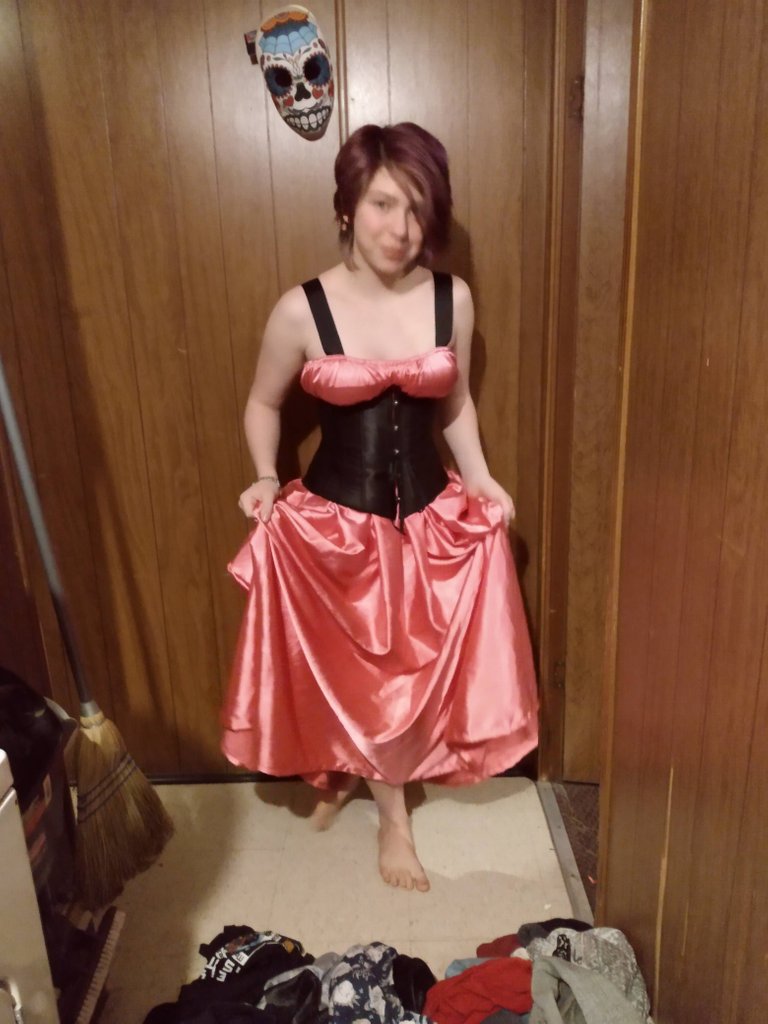
Hey guys! Today I am going to tell you guys about a regency skirt I made that is part of my “Fancy Pirate” costume that I made. It consists of this skirt and a top (I’m not sure what to call it), worn with a corset I have. I love this skirt so much, it is very simple to make, with super adjustable size, and it has the opportunity to have huge pockets. The shirt is very basic, just a rectangle gathered at the top with straps and part of a lining piece. I was going to write this about a week ago, but I’ve been low energy recently, so I haven’t been able to get myself to sit down and write.
So, for the skirt the first thing is to do is to measure the circumference of your waist. Cut this measurement in half. Take this number and multiply it by three. Add roughly 1.5 inches (5 centimeters). Use this number as one side of a rectangle, with the other side being the length you would like your skirt to be. Cut out two of these rectangles and they will be the front and back of your skirt. The skirt I made is 3 times the width I’m gathering it to, but you guys could do any amount of gathering you want.
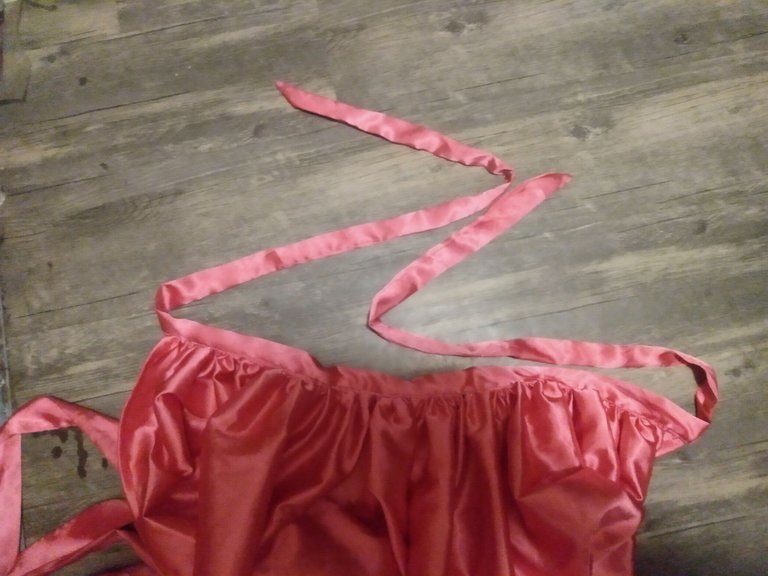
Now cut two ribbon shaped pieces that will comfortably tie around your waist, that are wide enough to fold over and you’re able to sew them into tubes.
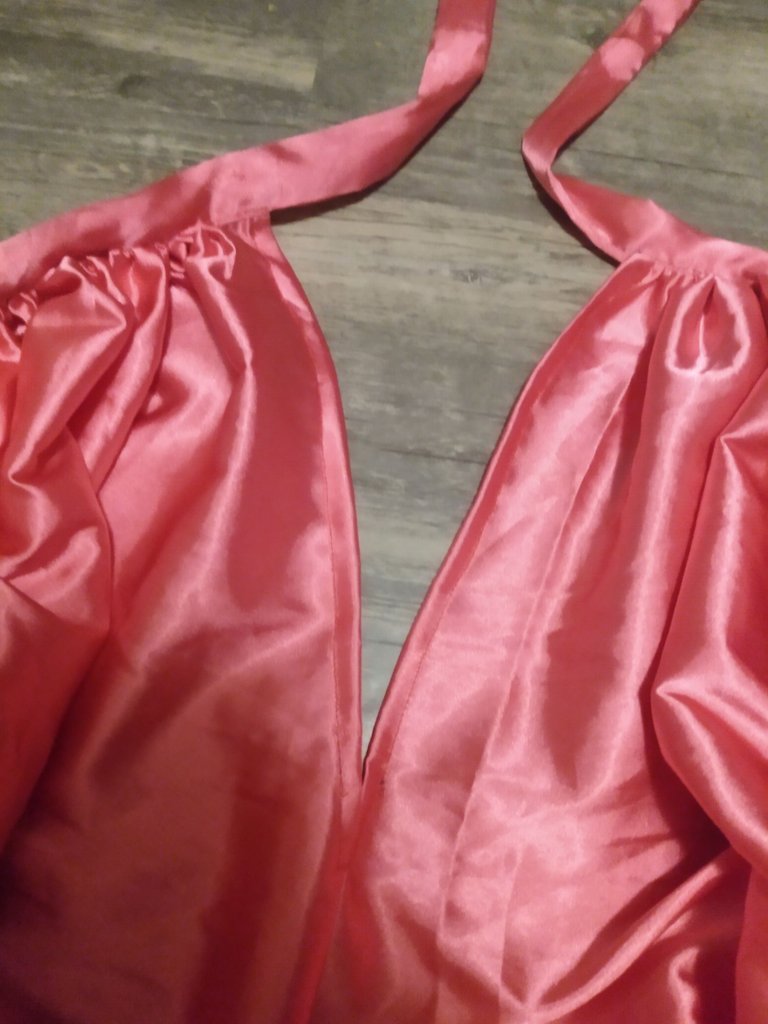
So after you cut your pieces, pick the top edge of each rectangle and hem about 10 inches down on each side of the front and back piece.
Run a gathering thread along the top edge of both skirt pieces. Some people will do this with just long machine stitches, but I prefer to gather things by hand. Use your original waist measurement to mark where you will be gathering the skirt pieces to on your ribbon pieces. It should be a length half your waist measurement with 1.5 inches added, right in the middle of your ribbon length-wise. Gather and sew each skirt piece to their respective ribbon within the marks you just set. I’m not sure if I should write about how I do my gathering on here so please comment if you would like me to write a tutorial on this.
Next fold your ribbon pieces over with the right sides facing each other. Sew the edges together from the end to right before where the skirt piece is on both sides of each ribbon. Clip your corners and turn your tube ribbons right side out. Now fold the top side of the ribbon over the raw edge of the top of the skirt piece with a ¼ inch seam allowance folded under. Pin and sew this on the front and back piece.
Now its time to sew the side seams! Match up the two pieces and sew from the bottom of the skirt all the way to where the hemmed part of the side is. Now hem the bottom edge of your skirt.
The last step is to try on your creation (if you don’t already try on everything you make throughout the whole process.) So, to put this skirt on, you use the ribbon on the back piece and tie it around your waist similar to an apron but in the back, and then you tie the front piece the same way. I like to make sure the knots are well hidden under the waistband, and this just requires a bit of tucking. I overlap the front over the back every time because it makes it more comfortable to access the pocket that is supposed to to be worn under this garment. I will probably go into more detail about this in a different post.
So, I am very happy that I have a gathered skirt to wear, because the comfort of these things is so underrated. If you guys would like to hear about making the top piece (Or anything else), leave a comment and I will write a post on that. I think that one of the best things about this style of skirt is how adjustable it is, because a lot of humans change sizes occasionally, and we make our clothes fit us, not the other way around. Also, I am excited to make and write about the pockets from this time period because they were epic!
I would like to note that while I am calling this a regency skirt, I would not like to imply that I have done loads of research or anything, because I haven't. I have done some research, but even then most of it has nothing to do with the history aspect. Just a disclaimer that this might not be exactly what a skirt was in the regency era, I'm just "pretty sure", and I like using the term, because at the very least, that was the inspiration for this.
If you are interested in seeing more of my creations, I post pictures of them semi-regularly on my Instagram, which is @cass_the_biblophile, so I totally recommend following me. Also, please leave a comment so that I know you read it. I hope you guys all enjoyed reading this, and maybe it inspired a few of you to start a new project. Peace, and I hope you are all doing well.