SEA GENIE🌊 Splinterlands Art Contest SPT W-264
Hola amigos de Hive! nuevamente les doy la bienvenida a una nueva presentación de la semana!😊👋❤️💕
Hello Hive friends! Once again I welcome you to a new presentation of the week!😊👋❤️💕
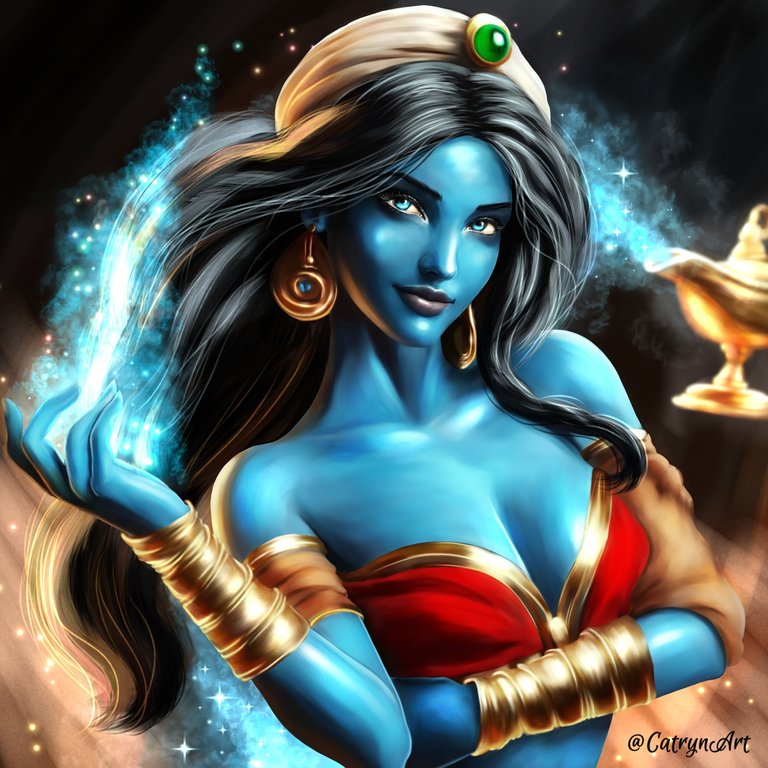

Feliz noche para todos, y un feliz fin de semana les deseo😊🌛🌟 en esta noche acabo de de terminar esta pieza que tenía todo el día haciendo. Pensé que no iba a poder participar por algunos contratiempos que tuve que atender, y bueno.. le puse empeño a esta linda genio que quise representar de forma femenina sobre la carta de SEA GENIE, me llevo un tiempo con la cantidad de accesorios que tuve que agregar así que fui trabajando por parte. Me gusto este resultado con esta nueva carta que quise representar para el concurso de la semana de Splinterlands. Espero la disfruten deseando que me acompañen en este paso a paso!🙂🌹🌷😚
Happy night to everyone, and I wish you a happy weekend😊🌛🌟 tonight I just finished this piece that I had been doing all day. I thought I wouldn't be able to participate due to some setbacks that I had to deal with, and well... I put effort into this beautiful genie that I wanted to represent in a feminine way on the SEA GENIE card, it took me a while with the amount of accessories I had to add so I was working on part. I liked this result with this new card that I wanted to represent for the Splinterlands week contest. I hope you enjoy it and I hope you join me in this step by step!🙂🌹🌷😚
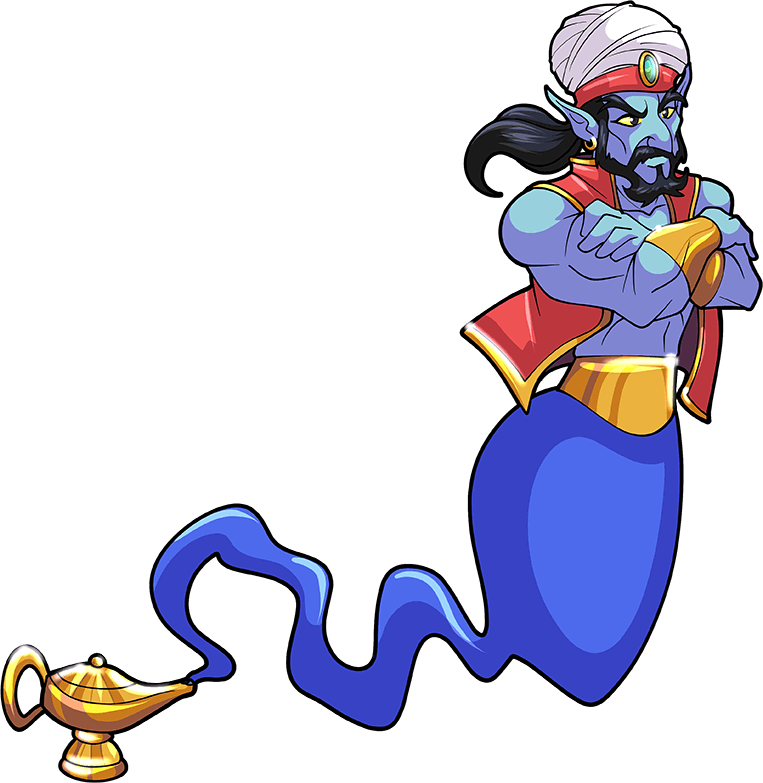
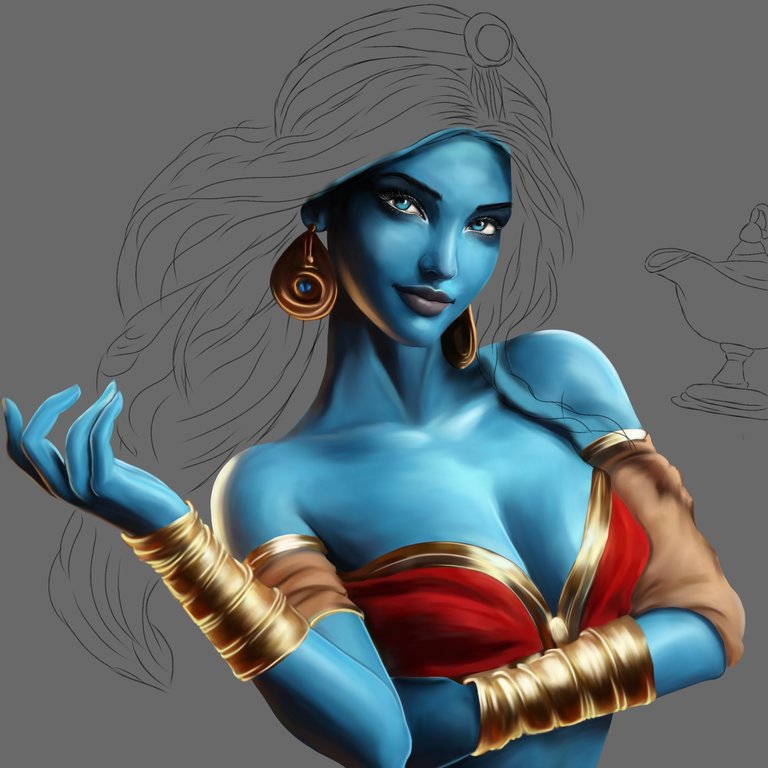
Link de la Imagen de Referencia/Reference Image Link
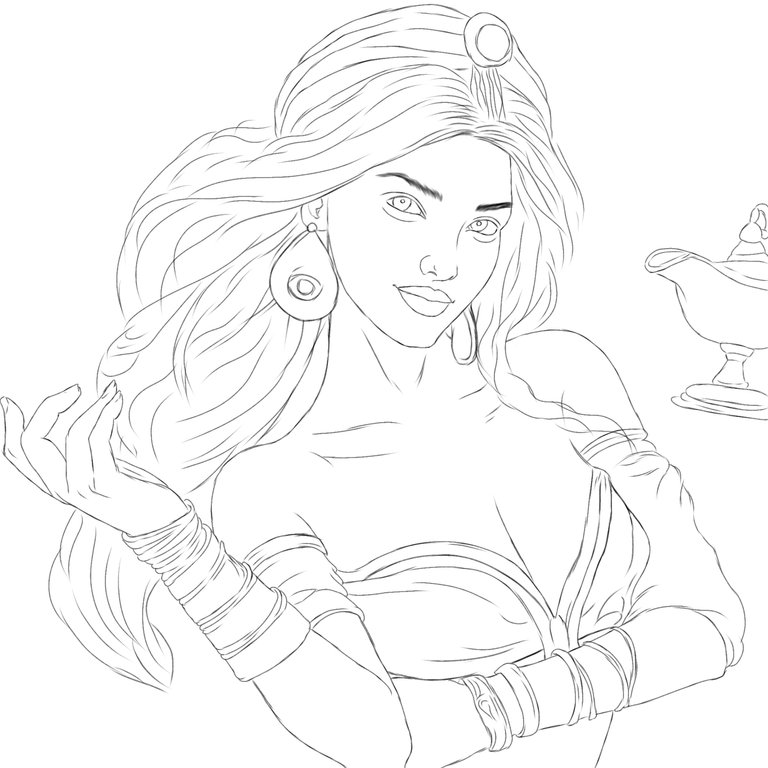
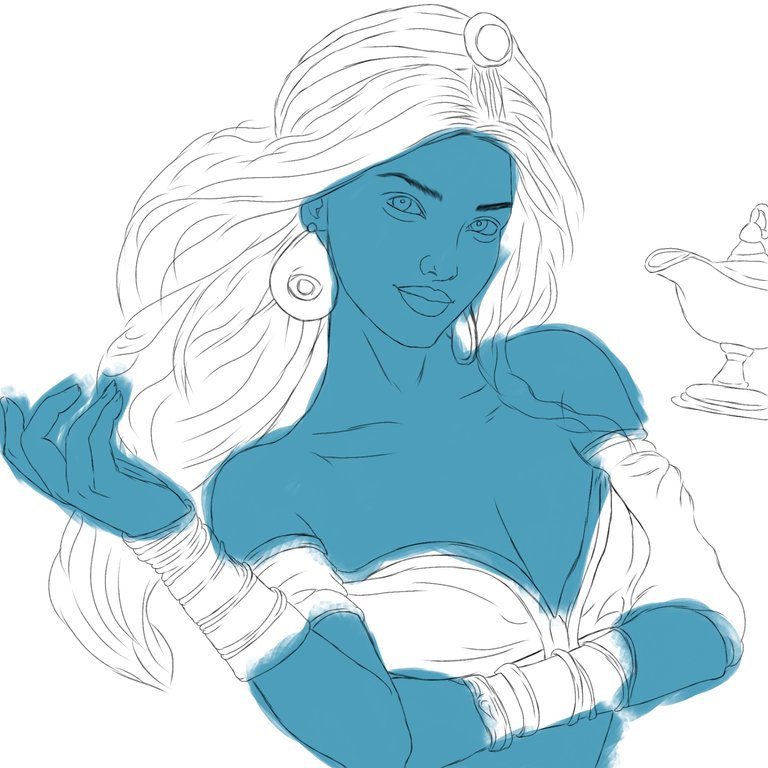
Etapas del Dibujo/Drawing Stages
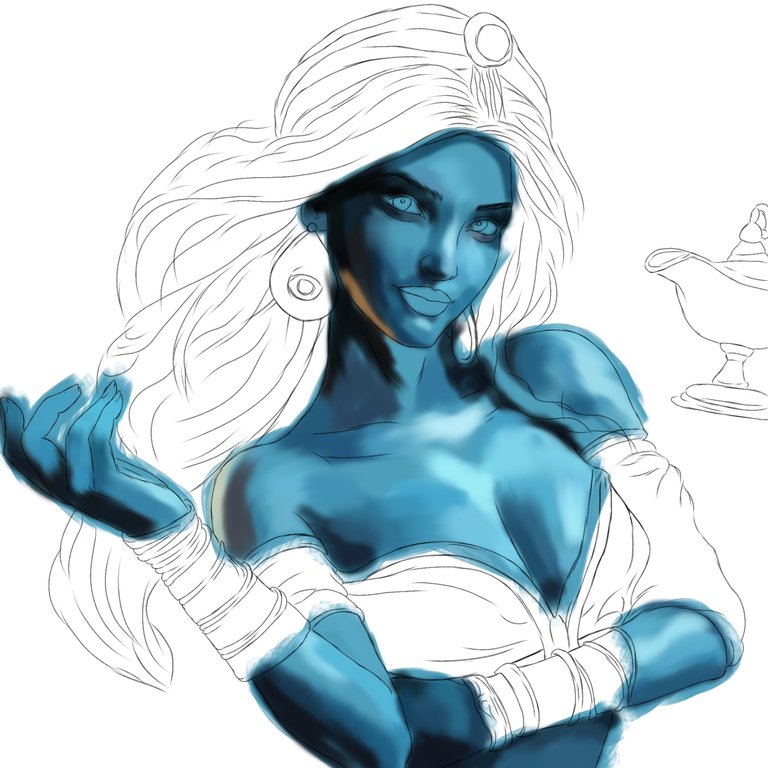
Tome para realizar el boceto la brocha tipo pelo por su fluidez en el trazo, luego en una nueva capa empecé a colocar el color base. Después empece a pincelar con la brocha tipo plano real usando método normal de mezcla, usando tonos fríos y en algunas secciones un poco de calidos para ubicar la iluminación que quería. Fui aplicando el difumino para mezclar y suavizar y luego fui definiendo un poco más algunas sombras y líneas, seguí trabajando con el difumino, después seguí en una nueva capa con la boca y los ojos usando el mismo tipo de pincel y el mismo método de mezcla normal aplicando el difumino en la herramienta filtro. Teniendo ya tonos más definidos con iluminación y sombras fui borrando lo sobresaliente y pase a borrar el delineado.
I took the hair-type brush to make the sketch because of its fluidity in the stroke, then in a new layer I began to place the base color. Then I started brushing with the real flat type brush using the normal mixing method, using cold tones and in some sections a little warm tones to locate the lighting I wanted. I applied the blend to mix and soften and then I defined some shadows and lines a little more, I continued working with the blend, then I continued on a new layer with the mouth and eyes using the same type of brush and the same mixing method normal by applying the blur in the filter tool. Having already more defined tones with lighting and shadows, I erased the highlights and went on to erase the outline.
 |  |
 |  |
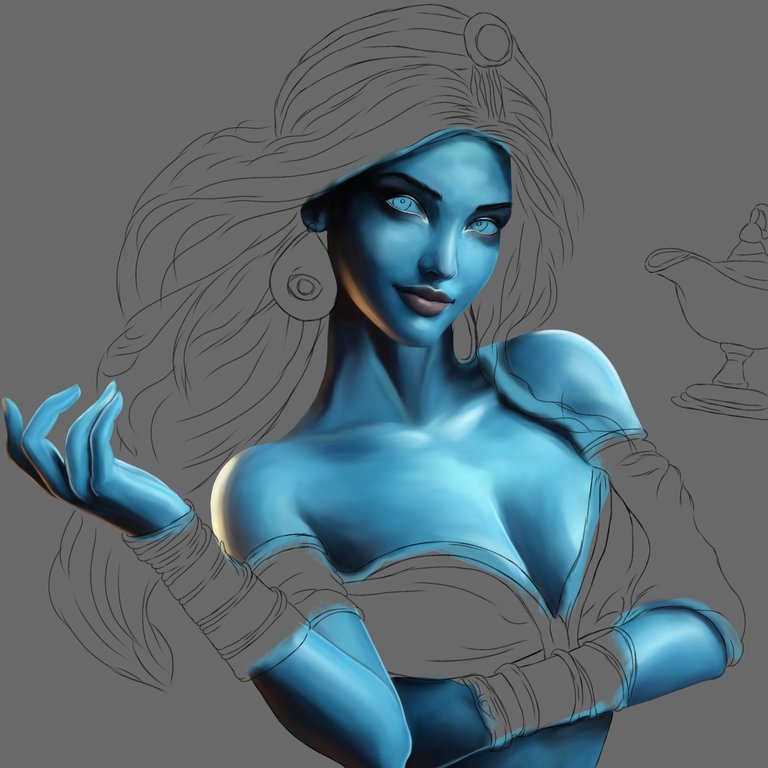 |  |
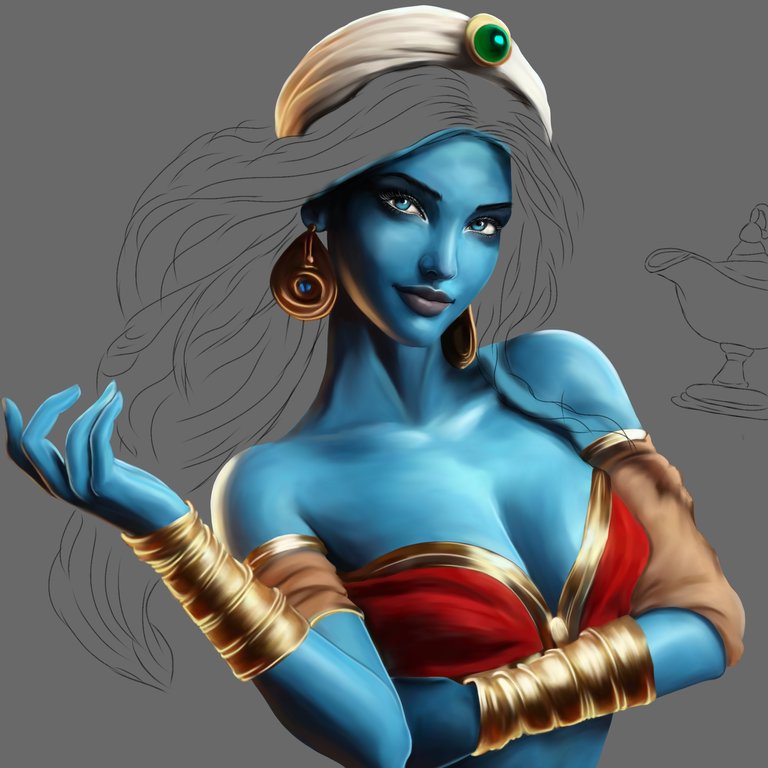
Pase a dibujar la vestimenta por sección usando varias capa para tener un mayor control a la hora de mezclar y poder borrar, usando el mismo método normal de mezcla. Fui definiendo un poco más y aplicando más iluminación para definir tambien, así hice con los accesorios trabajando los por capas y definiendo con sombras e iluminación para crear profundidad y volumen, luego seguí agregando algunos tonos más oscuros en una nueva capa al fondo usando la brocha tipo pastel suave y después seguí con el cabello usando un pincel plano real abanico y agregando mechones claros en una capa y en otra mechones las oscuros para crear la profundidad y el volumen. Trabaje en otra capa con el mismo pincel agregando un tono más oscuros para darle profundidad y seguí en una nueva capa agregando pinceladas con el pincel rendondo.
Go on to draw the clothing by section using several layers to have greater control when blending and to be able to erase, using the same normal blending method. I was defining a little more and applying more lighting to define as well, this is how I did with the accessories working in layers and defining with shadows and lighting to create depth and volume, then I continued adding some darker tones in a new layer in the background using the brush soft pastel type and then I continued with the hair using a real flat fan brush and adding light strands in one layer and dark strands in another to create depth and volume. I worked on another layer with the same brush adding a darker tone to give it depth and continued on a new layer adding brush strokes with the round brush.
 |  |
 |  |
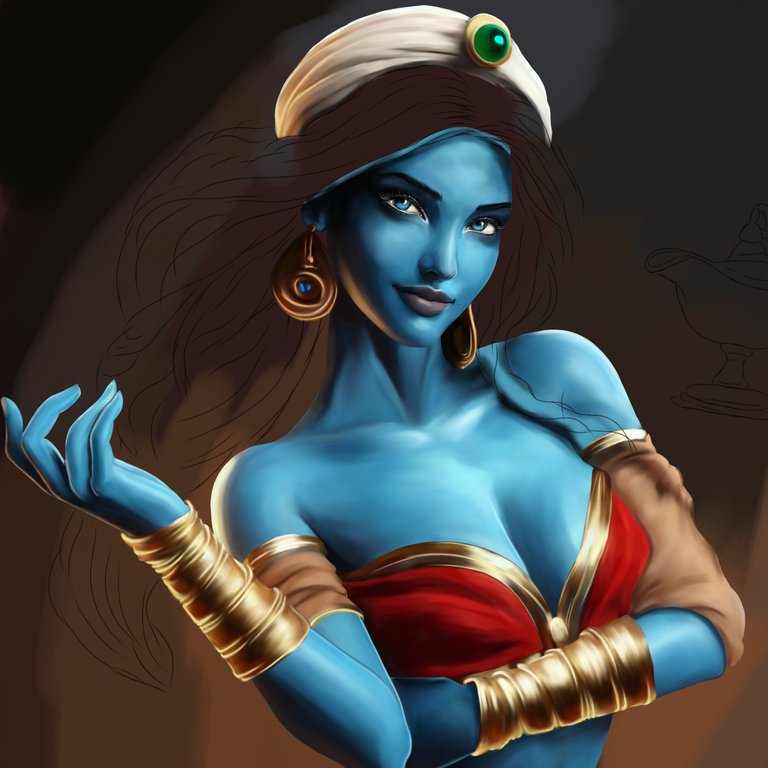 |  |
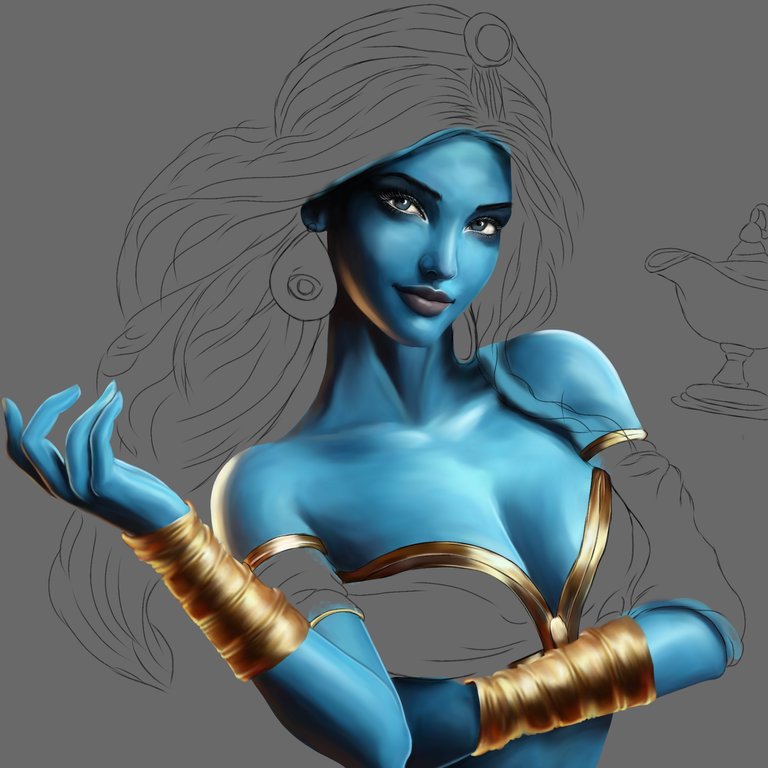
Seguí en una nueva capa agregando mechones con añadir para definir un poco más, y aplique una nueva capa de superposición para darle un poco de profundidad en las sombras y también reforzar un poco la iluminación. Así también resalte sus ojos usando una opacidad muy baja. Pase a cambiar el tono de fondo más oscuro y usando la brocha tipo pastel suave agregué los tonos de fondo, finalizando con el pincel tipo punto de brillo y luz usando una capa en añadir, para darle ese toque realista a este personaje que me encanto dibujar. Espero les haya gustado esta nueva presentación de esta semana!🙂👋💕🌹
I continued on a new layer adding strands with add to define a little more, and applied a new overlay layer to give it a little depth in the shadows and also boost the lighting a little. Also highlight your eyes using a very low opacity. I went on to change the darker background tone and using the soft pastel brush I added the background tones, finishing with the brightness and light point brush using a layer to add, to give that realistic touch to this character that I loved to draw . I hope you liked this new presentation this week!🙂👋💕🌹
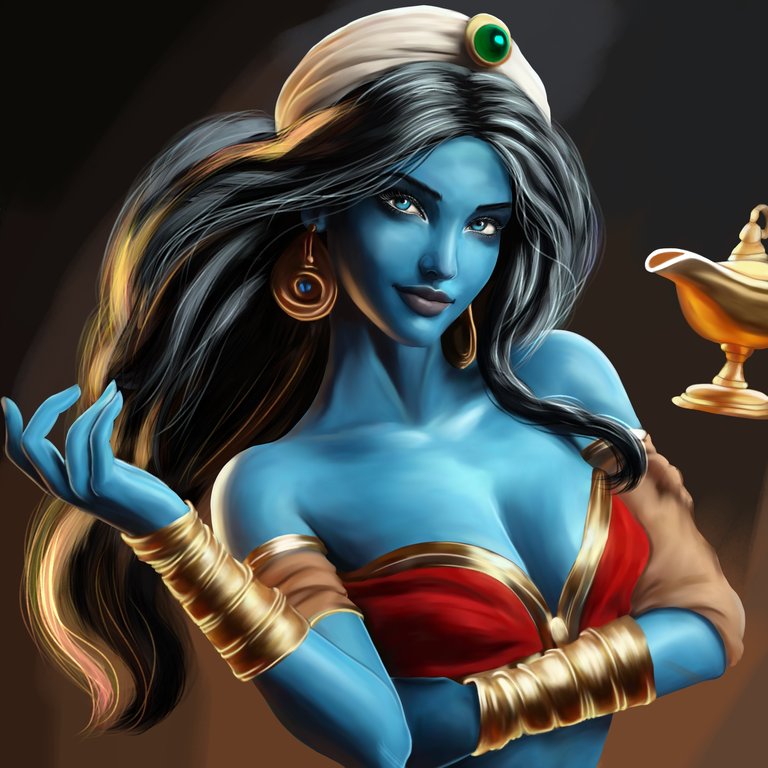 |  |
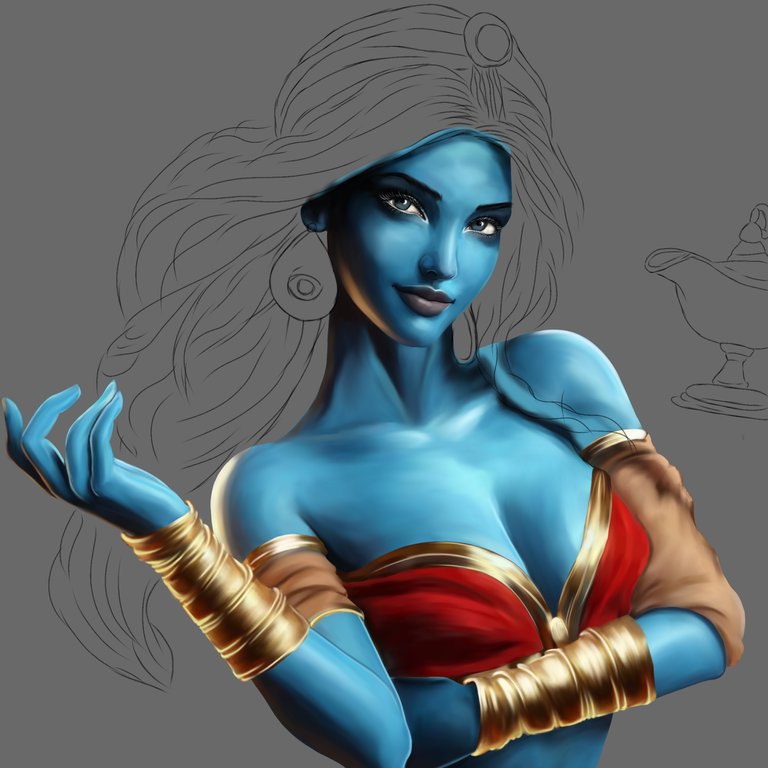
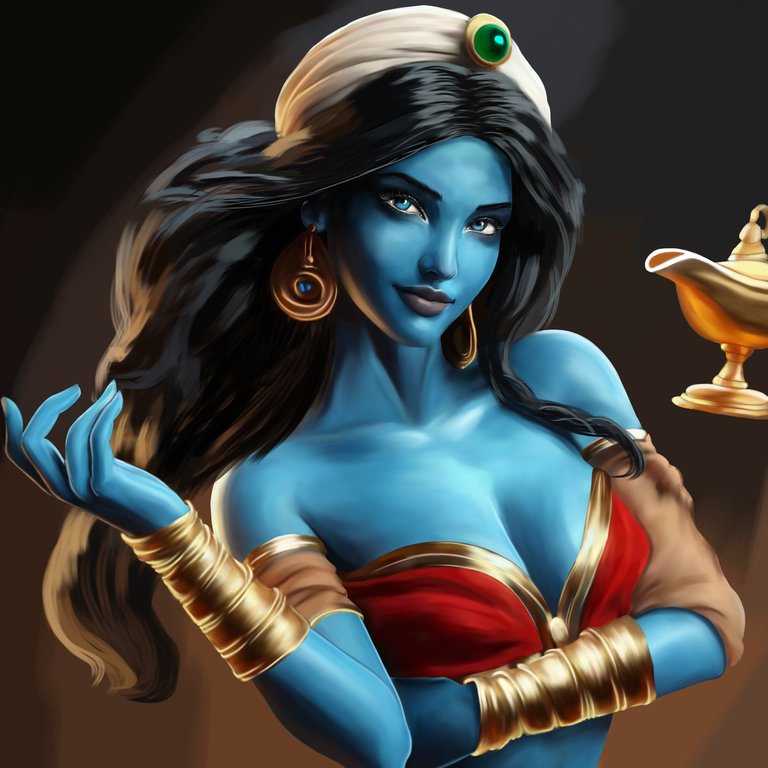
ILUSTRACIÓN FINAL/ End Illustration
Redes Sociales/ Social Networks
Sigueme en/ Follow me in:
👉Instagram: @catrynart
👉 Twitter: @catrynart
Herramientas Usadas/Used Tools
- Tablet Android/ Android Tablet
- Programa Ibis Paint X/ Ibis Paint X Program
- Traductor Deepl/ Deelp Translator
- Servidor de Imagenes Imgbb/ Imgbb Image Server
- Dactilopintura Digital/ Digital Fingerprint Painting
🌺¡HASTA UN PRÓXIMO POST!/ UNTIL A NEXT POST!🌺
Detenerse es Retroceder
To Stop is to go Backwards
Guao! Es maravillosamente perfecta! La amé
😶 🌹 graciaaasss!! Querida @equipodelta me encanto como resultó esta forma para esta carta❤️ un enorme saludo y una linda noche para ti 🌛🌟😚
wow..amazing art @catrynart! very beautiful with sparkle :)
Thank You friend ☺️
you are welcome good artist :)
Thanks so 🥰@appreciator and team @curangel @curie ❤️
Wow!! Increíble trabajo, me gustaron mucho los colores que utilizaste y la mezcla entre ellos. ¡Mucha suerte!
Gracias 😊🌹
random user after contemplating this work of art:
in my desires I can include doing something carnal with the genie
Genius Girl:
XD you are naughty.