Abstract Design of a Heart in Inkscape [ENG/ESP]

Abstract Design of a Heart in Inkscape:
Step 1:
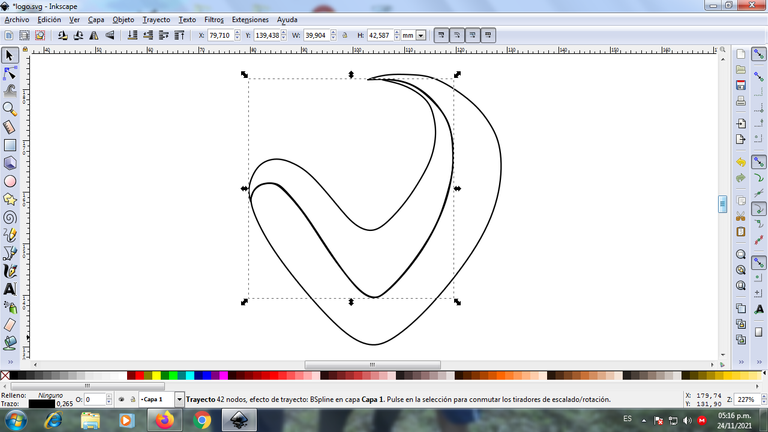
We open the Inkscape program, and click on the Bezier curves option on the toolbar and draw this figure.

Step 2:
Then we are drawing another figure to give it the shape of a heart using the same option.
Step 3:
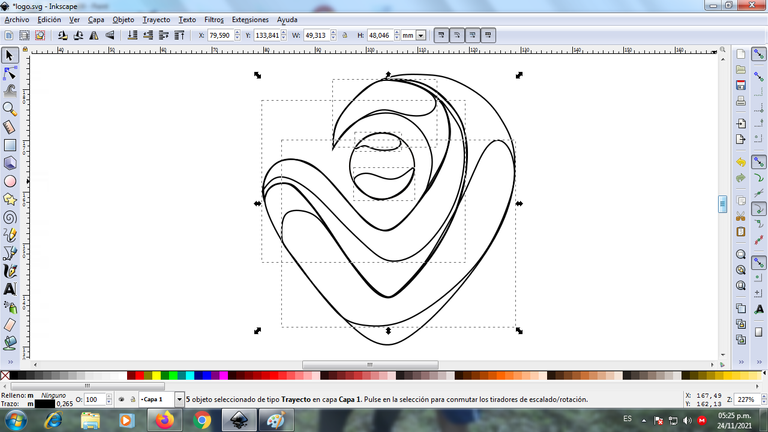
A crescent-shaped figure is drawn at the top with the option of Bézier curves.

Step 4:
Then we draw a circle with the option to create circles from the toolbar.

Step 5:
We continue drawing other figures within the previous ones to give it an abstract effect.
Step 6:
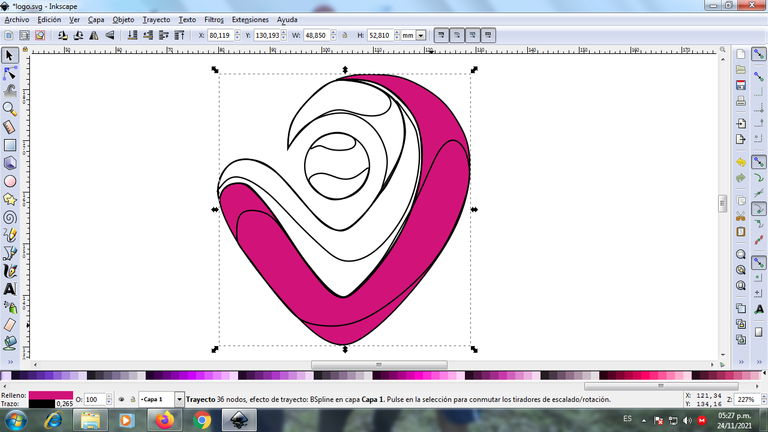
The color is applied to each of the parts of the heart, by pressing on the figure and clicking on the color palette to choose the color.
Step 7:
We apply step 6 in all the figures and this is the result.
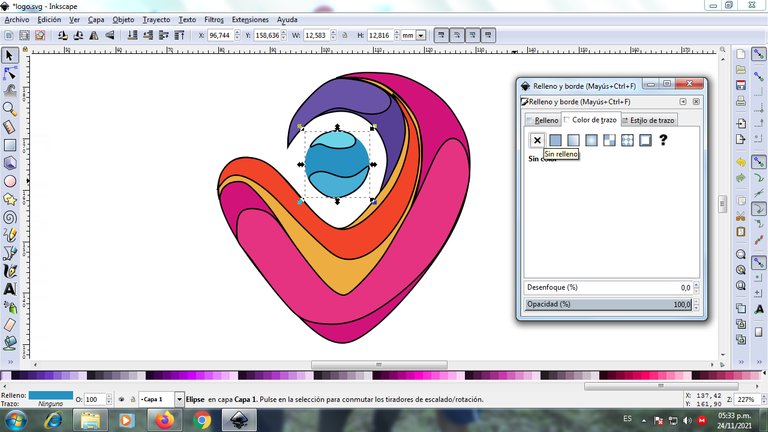
Step 8:
The borders are eliminated in each figure, for this it is selected and then in the menu bar Object - Fills and Borders.
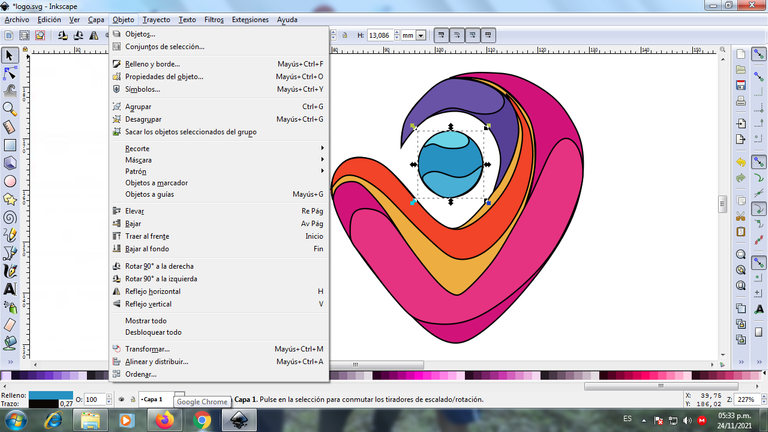
Click on the stroke color tab and the X to erase.
Step 9:
Now we continue erasing all the edges of the rest of the figure using step 9, it looks like this.

Step 10:
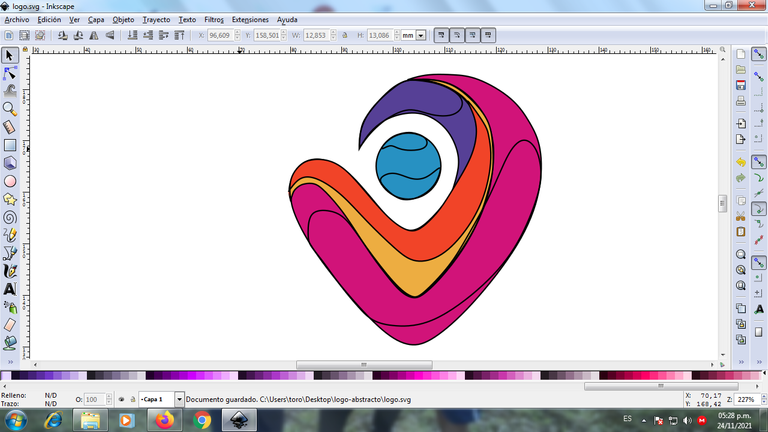
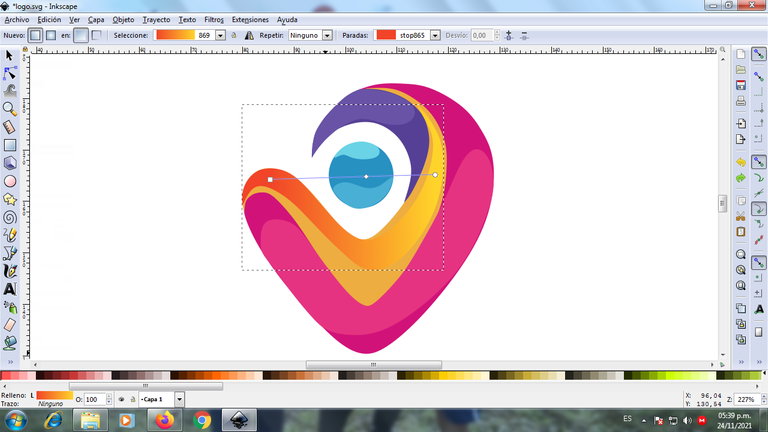
A gradient is applied to each of the figures, we click on gradient in the toolbar.

The second point is selected, we can have several points by clicking it, and we have another point to color it.
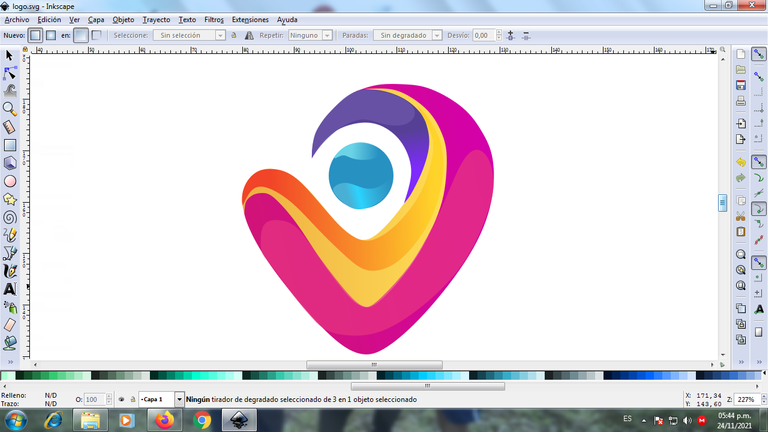
This is the final result:
Step 11:
A black background is inserted, the logo is duplicated, then the size is reduced and we apply a blur. A new gradient with stronger yellow was applied to give the heart more luminosity.
Reference Image source
I hope you liked my tutorial, see you in the next post.
Español
Saludos amigos de Hive, hoy les presento este diseño abstracto de un corazón realizado en el programa vectorial Inkscape. A continuación les presento los pasos:
Diseño Abstracto de un Corazón en Inkscape:
Paso 1:
Abrimos el programa Inkscape, y hacemos clic en la opción de curvas Bézier de la barra de herramientas y se trazamos esta figura.
Paso 2:
Luego vamos trazando otra figura para ir dándole la forma de corazón utilizando la misma opción.
Paso 3:
Se trazan en la parte de arriba una figura en forma de medialuna con la opción de curvas Bézier.
Paso 4:
Luego trazamos un círculo con la opción de crear círculos de la barra de herramienta.
Paso 5:
Seguimos dibujando otras figuras dentro de las anteriores para darle un efecto abstracto.
Paso 6:
Se aplica el color a cada una de las partes del corazón, presionando en la figura y hacemos clic en la paleta de colores para escoger el color.
Paso 7:
Aplicamos el paso 6 en todas las figuras y este es el resultado.
Paso 8:
Se eliminan los bordes en cada figura, para esto se selecciona y luego en la barra de menú Objeto - Rellenos y Bordes.
Clic en la pestaña de color de trazo y en la X para borrar.
Paso 9:
Ahora continuamos borrando todos los bordes del resto de la figura utilizando el paso 9, nos queda así.
Paso 10:
Se aplica un degradado en cada una de las figuras, le damos clic en degradado en la barra de herramientas.
Se selecciona el segundo punto, podemos tener varios puntos dándole clic, y tenemos otro punto para darle color.
Este es el resultado final:
Paso 11:
Se Inserta un fondo color negro, se duplica el logo, luego se reduce el tamaño y aplicamos un desenfoque. Se aplicó un nuevo degradado con amarillo más fuerte para darle más luminosidad al corazón.
Imagen de Referencia fuente
Espero les haya gustado mi tutorial, nos vemos en el próximo post.

https://twitter.com/cbit_roxana_mdh/status/1463679099419901959
The rewards earned on this comment will go directly to the person sharing the post on Twitter as long as they are registered with @poshtoken. Sign up at https://hiveposh.com.
I really like the colors. Thanks for sharing.
Hello how good, thank you very much for stopping by my blog.