Diseño de Dragón Ball en Inkscape [ESP/ENG]
Diseño de Dragón Ball en Inkscape:
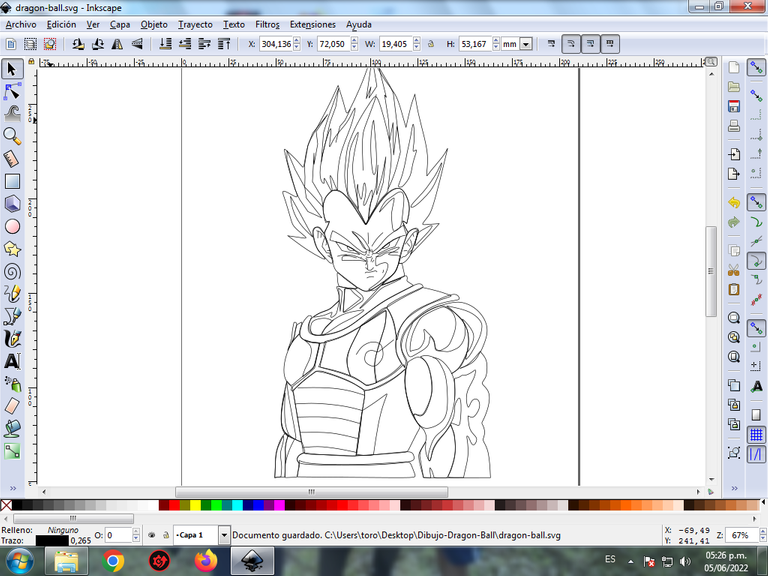
Paso 1:
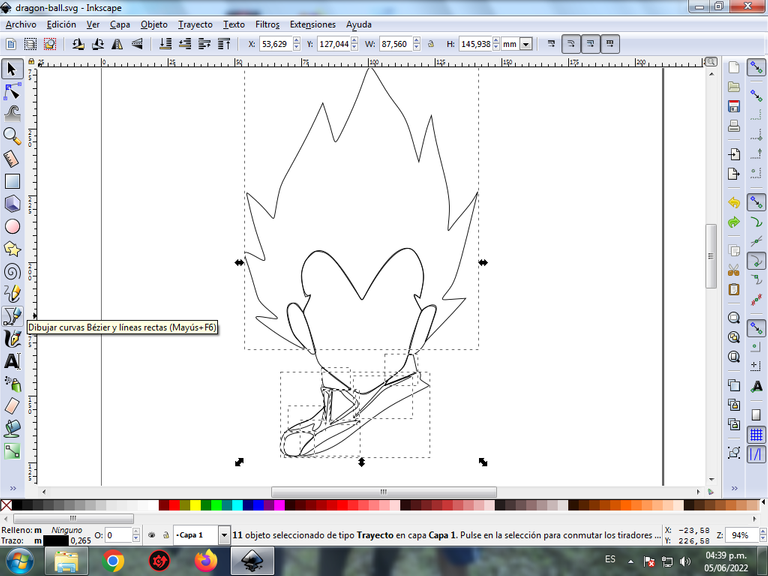
Se abre programa Inkscape, y desde la barra de herramienta que está en el lado izquierdo presionamos clic en la opción de dibujar curvas Bézier y se traza una figuras en forma de corazón que es la cabeza y dos figuras más que son las orejas del anime Dragón Ball.

En esta parte de curvas Bézier se selecciona la opción de Crear Trayecto Modo Trayecto BSpline, para que las forma queden de forma curvas.
Paso 2:
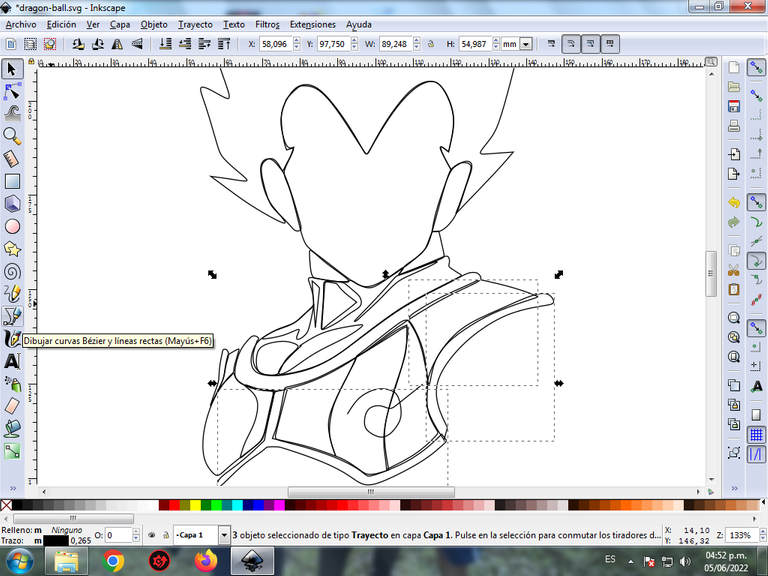
Se trazan alrededor de la cabeza una figura que es el cabello y luego comenzamos a realizar varios trazos que son parte del cuello y la ropa de Dragón Ball.
Paso 3:
Continuamos dibujando diferentes figuras que van en el traje del pecho, con la herramienta de curvas Bézier.
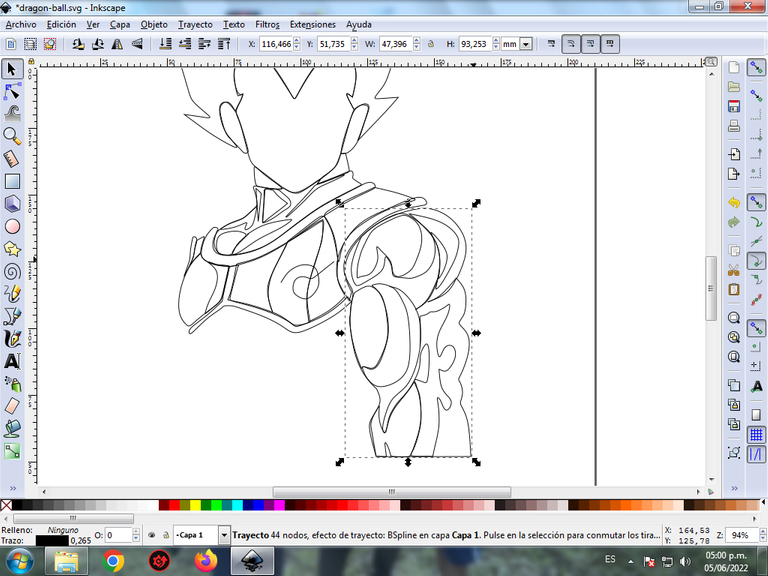
Paso 4:
Se traza el brazo derecho de Dragón Ball, cuya diseño presenta doce figuras para darle el efecto de los músculos con la misma herramienta.
Paso 5:
Ahora procedemos a dibujar varias formas que lleva el traje, así como también una parte del brazo izquierdo.

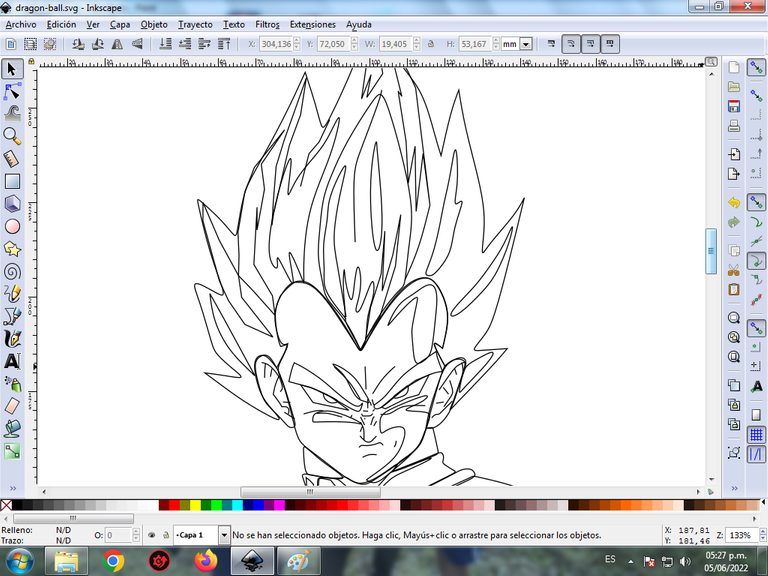
Paso 6:
Dibujamos los ojos, la cejas, la boca y la nariz de Dragón Ball, también se realizan diferentes trazos en la parte dentro del cabello y varias formas en la cara para darle diferentes contrastes.
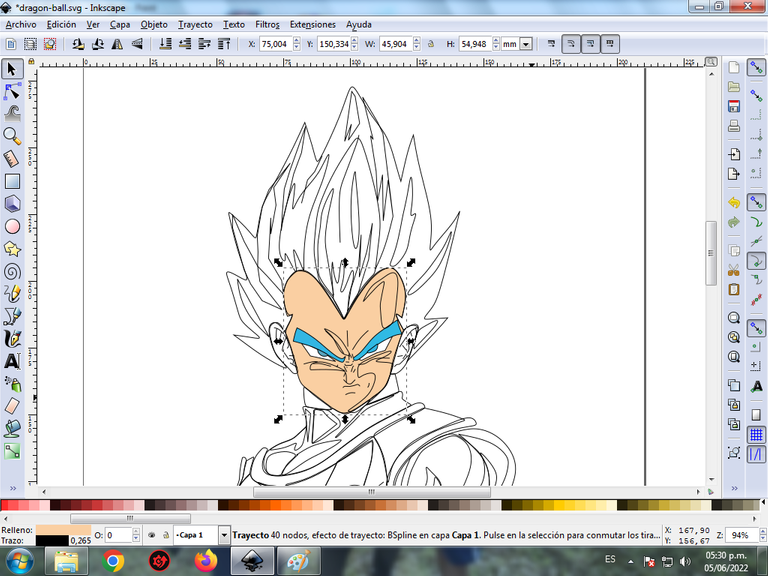
Paso 7:
Se selecciona el color comenzando por el rostro, para esto hacemos clic en la figura y luego el color naranja claro de la paleta de colores, que está en la parte inferior del programa. Luego continuamos con los ojos y las cejas
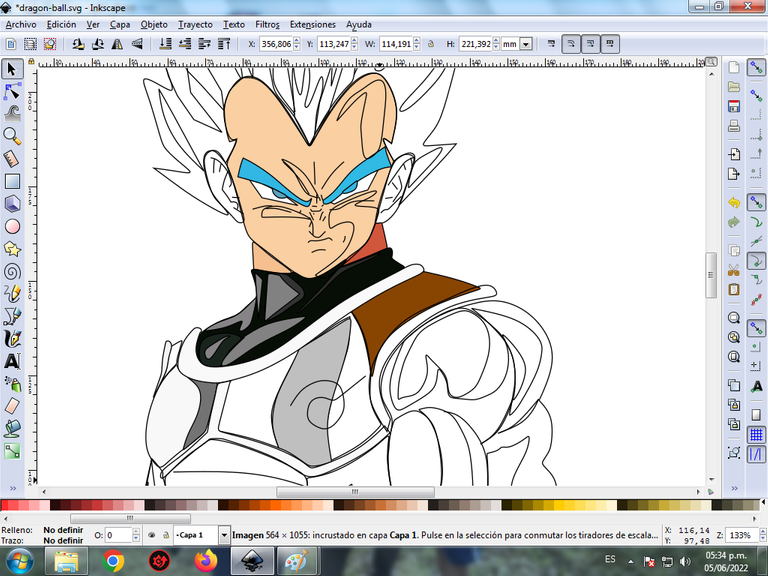
Paso 8:
Continuamos seleccionando los colores negro, blanco y gris en el las partes del traje del anime Dragón Ball.
Paso 9:
Se eliminan los bordes de algunas partes de las figuras, para esto se seleccionamos una y luego nos vamos a la barra de menú Objeto – Rellenos y Bordes.
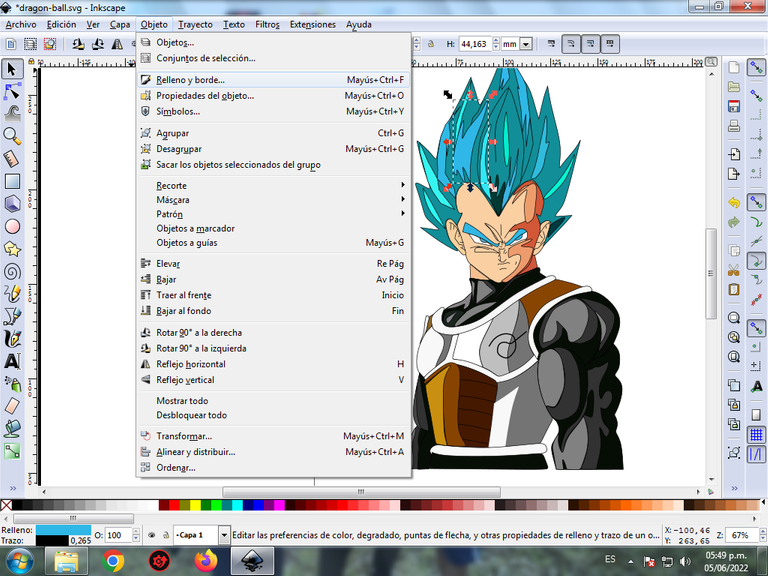
Se visualizará un recuadro, donde vamos a cliquear en la pestaña color de trazo y luego para poder borrar el borde le damos clic en la X para eliminarlo.
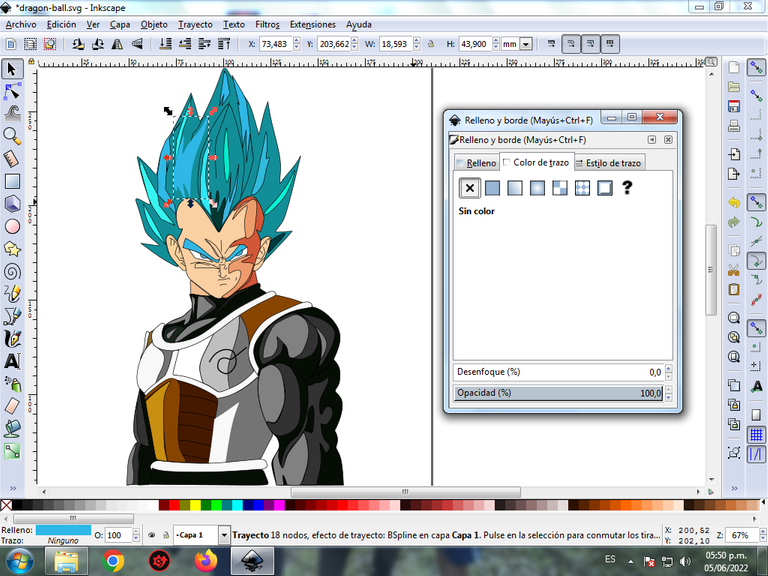
Este es el resultado final al borrar los bordes.
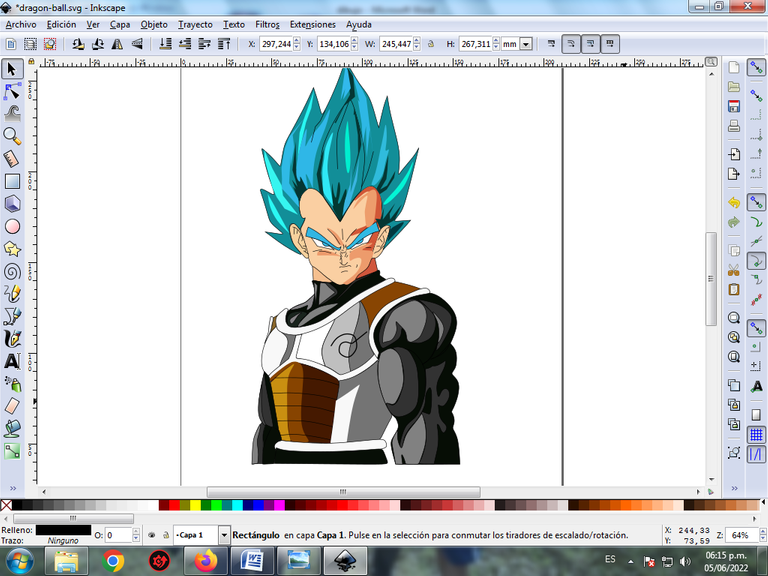
Paso 10:
Se agrupamos toda el diseño con las teclas Ctrl + G, la duplicamos con la combinación de teclas Control + D, le cambiamos al color azul claro y se la aplica un desenfoque desde la opción de la barra de menú Objeto – Rellenos y Bordes en desenfoque de 20% y lo enviamos al fondo, agrandándolo un poco para que se pueda ver el efecto.
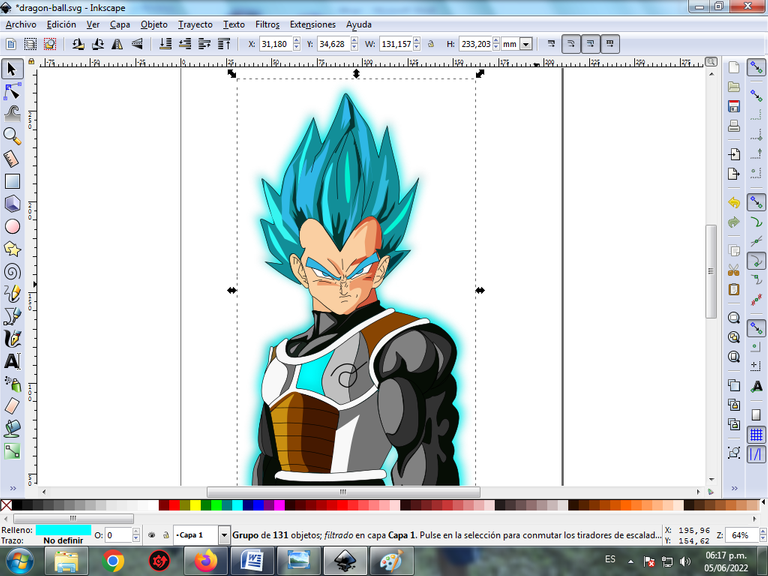
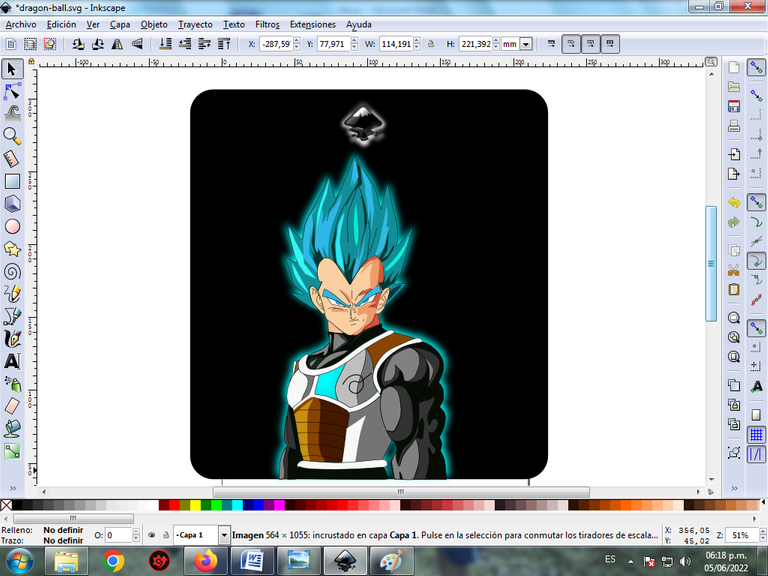
Paso 11:
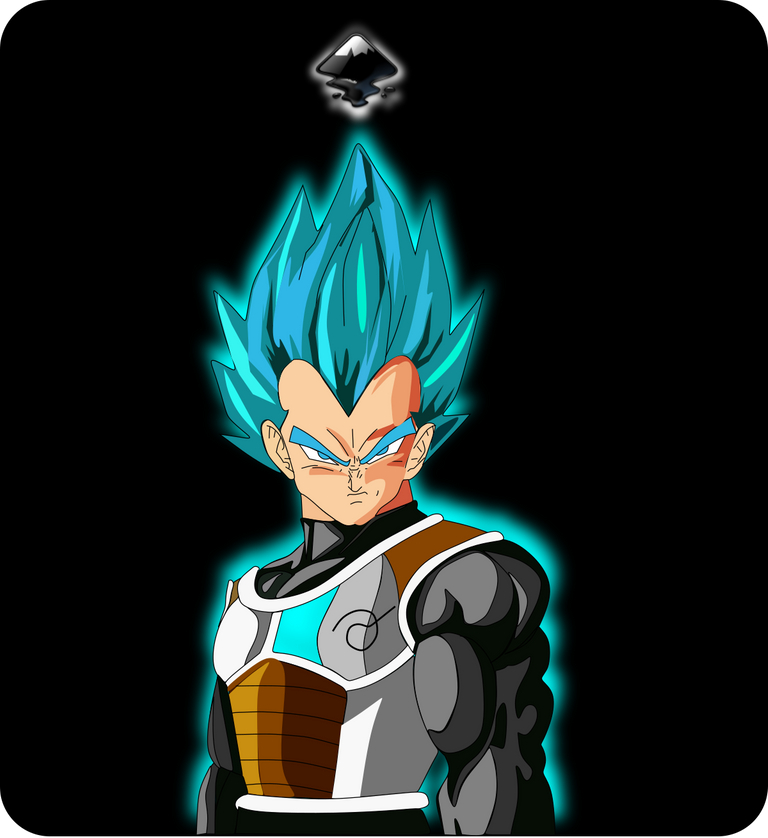
Luego insertamos un fondo color negro y tenemos listo nuestro diseño de Dragón Ball.
Imagen de Referencia Fuente
El programa Inkscape se puede descargar en esta dirección Fuente
Espero que les haya gustado mi tutorial, nos vemos en el próxima publicación.
English
Dragon Ball Design in Inkscape:
Step 1:
Inkscape program is opened, and from the toolbar that is on the left side we click on the option to draw Bézier curves and a heart-shaped figure is drawn that is the head and two more figures that are the ears of the Dragon anime Ball.
In this part of Bézier curves, the Create Path BSpline Path Mode option is selected, so that the shapes are curved.
Step 2:
A figure that is the hair is traced around the head and then we begin to make several strokes that are part of the neck and the Dragon Ball clothes.
Step 3:
We continue drawing different figures that go on the chest suit, with the Bézier curves tool.
Step 4:
The right arm of Dragon Ball is traced, whose design features twelve figures to give it the effect of muscles with the same tool.
Step 5:
Now we proceed to draw various shapes that the suit is wearing, as well as a part of the left arm.
Step 6:
We draw the eyes, eyebrows, mouth and nose of Dragon Ball, different strokes are also made on the inside of the hair and various shapes on the face to give it different contrasts.
Step 7:
The color is selected starting with the face, for this we click on the figure and then the light orange color from the color palette, which is at the bottom of the program. Then we continue with the eyes and eyebrows
Step 8:
We continue to select the colors black, white and gray in the Dragon Ball anime costume parts.
Step 9:
The borders of some parts of the figures are eliminated, for this we select one and then we go to the menu bar Object – Fills and Borders.
A box will be displayed, where we are going to click on the stroke color tab and then, in order to erase the border, we click on the X to eliminate it.
This is the final result when erasing the edges.
Step 10:
We group the entire design with the Ctrl + G keys, duplicate it with the Control + D key combination, change it to light blue and apply a blur from the Object menu bar option – Fills and Edges in blur 20% and send it to the bottom, enlarging it a bit so you can see the effect.
Step 11:
Then we insert a black background and we have our Dragon Ball design ready.
Reference Image Source
The Inkscape program can be downloaded at this address Source
I hope you liked my tutorial, see you in the next post.
Translated with Traductor de Google

This post has been manually curated by @steemflow from Indiaunited community. Join us on our Discord Server.
Do you know that you can earn a passive income by delegating to @indiaunited. We share 100 % of the curation rewards with the delegators.
Here are some handy links for delegations: 100HP, 250HP, 500HP, 1000HP.
Read our latest announcement post to get more information.
Please contribute to the community by upvoting this comment and posts made by @indiaunited.
Saludos amigos de @indiaunited muchas gracias por valorar mi publicación,
https://twitter.com/cbit_roxana_mdh/status/1533594441994444800
The rewards earned on this comment will go directly to the people(@cetb2008) sharing the post on Twitter as long as they are registered with @poshtoken. Sign up at https://hiveposh.com.
dibujaste eso sin calcar waoooo me impresiona mucho, mi nivel no llega hasta allí, yo dibujo sobre una figura de base... muy buen trabajo
Saludos amigo @m16uellop muchas gracias por visitar mi blog.
Bro quedo espectacular ese vegeta ,realmente me gusto demasiado
Saludos amigo que bien, muchas gracias por tu visita a mi blog.
My favorite character 😇
And very innovatively make it👌
¡Genial!
Yo hice el mismo personaje hace poco.
https://peakd.com/hive-174301/@joshtable/digital-drawing-veguetta-ultra-ego-fanart
Hola gracias, que casualidad coincidimos en el dibujo.
Waooo, increíble, casualmente yo hice un dibujo de Vegeta recientemente, tu dibujo está violento, gracias por compartirlo.
Saludos muchas gracias amigo.
Hola @cetb2008, de lujo te ha quedado impecable.

Hola muchas gracias.
Siempre he querido aprender a realizar este tipo de trabajos, quedo increíble y muy bien explicado, se ve que lo dominas.
Saludos @edfer18 muchas gracias, con la práctica a través de tutoriales puedes aprender a diseñar con Inkscape, muchas gracias por visitar mi blog.