Jclic Herramienta Educativa [ESP/ENG]
La aplicación de Jclic es un programa educativo baso en software libre, en la cual se pueden realizar contenidos educativos como rompecabezas, juegos de memorias, asociaciones, sopas de letras, crucigramas, respuestas escritas, etc, que se pueden adaptar a cualquier nivel educativo desde educación inicial, básica e incluso a nivel universitario.
Esta aplicación está compuesta de tres iconos que nos permite interactuar con el programa, una de estas es Jclic Author, que es donde podemos realizar las actividades, tomando en cuenta el nivel a la cual va dirigido y la cantidad de actividades en un contenido. Otra es Jclic Player que nos permite ejecutar la actividad una vez que está terminada y Jclic Reports, en esta se visualizan las actividades realizadas y el tiempo de ejecución, es un reporte para ver además el desempeño del estudiante en la actividad interactiva.
Jclic es una aplicación es interactiva, la cual funciona en diferentes sistemas operativos como Windows, Linux y Mac. Se puede descargar en la siguiente dirección.
Actualmente es importante utilizar las TICS para reforzar contenidos educativos a los estudiantes, por eso Jclic es una alternativa para despertar en el niño la creatividad en la resolución de problemas de forma interactiva y de esta forma el niño aprender el manejo del computador a través de esta aplicación y refuerza el contenido impartido por el maestro en el aula de clase.
A continuación les presento los pasos para realizar la actividad de rompecabeza en Jclic.
Paso 1:
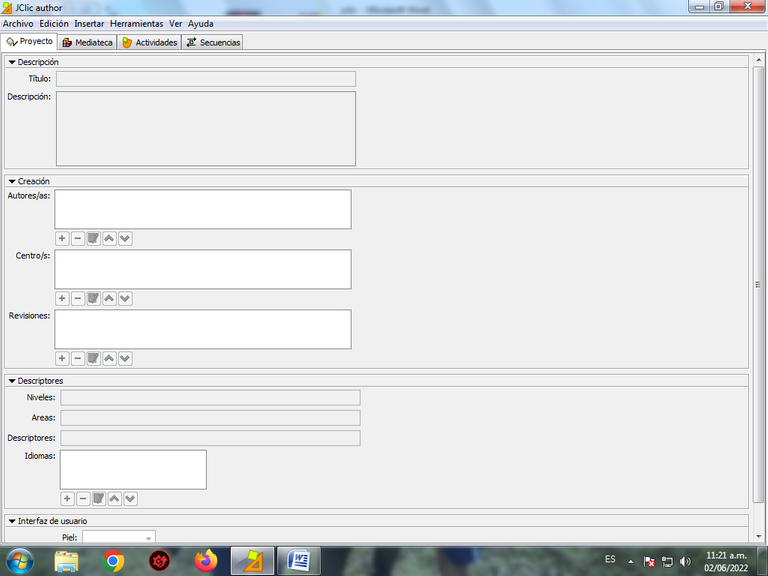
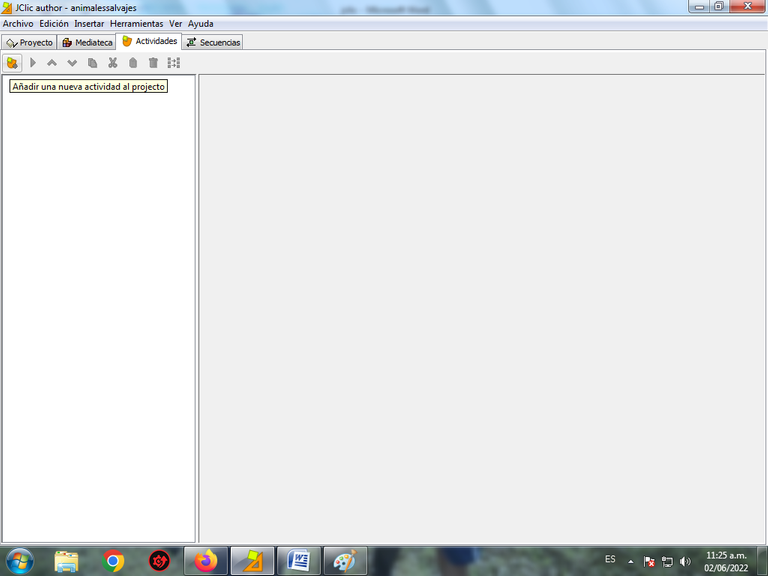
Abrimos el programa JclicAuthor, presionando doble clic. En esta primera pantalla tenemos varias pestañas: Proyecto, Mediateca, Actividades y Secuencias. En proyecto es la descripción del proyecto que vamos a crear, en mediateca en donde vamos a tener los archivos que se van a utilizar para la actividad como imágenes y sonidos, en actividades es donde se selecciona el tipo de actividad que se va a crear en este caso es rompecabeza y secuencia es donde se configura el orden de ejecución de la actividad.

Paso 2:
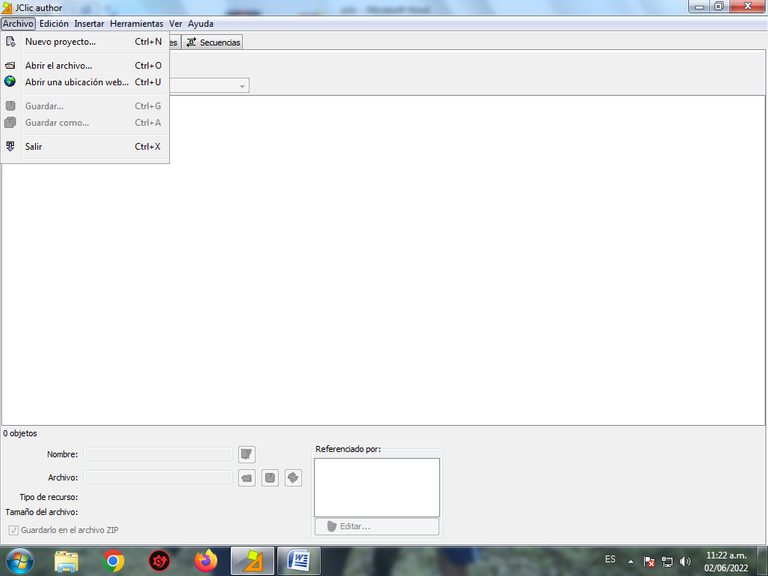
Le damos clic en Archivo – Nuevo Proyecto
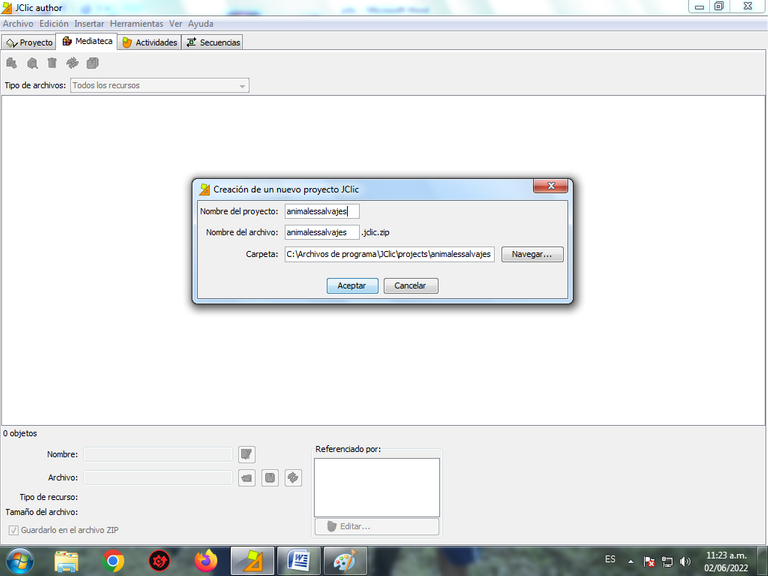
En la parte donde dice nombre del proyecto, escribimos animales salvajes y le damos clic en aceptar.
Paso 3:
Seleccionamos la pestaña Actividades y luego en Añadir actividad.
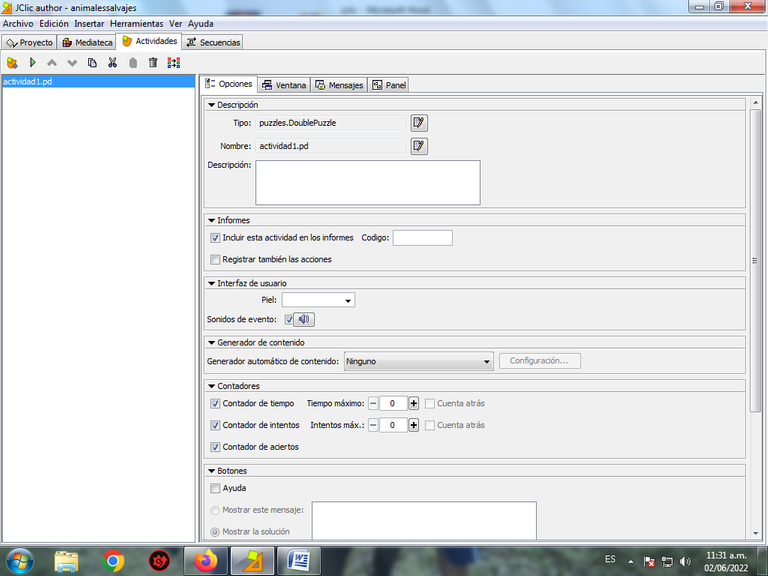
En el tipo de actividad escogemos Puzzle Doble y en nombre escribimos actividad1.pz, en importante que los nombres se escriban sin espacios y en minúscula, presionamos en aceptar.

Pasa 4:
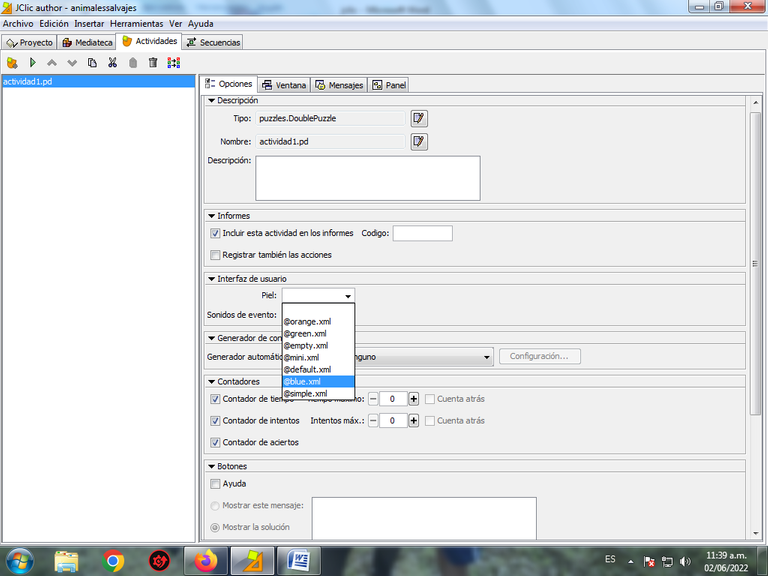
En la pestaña Opciones en Piel seleccionamos Blue.xml es decir va tener un color azul.
Paso 5:
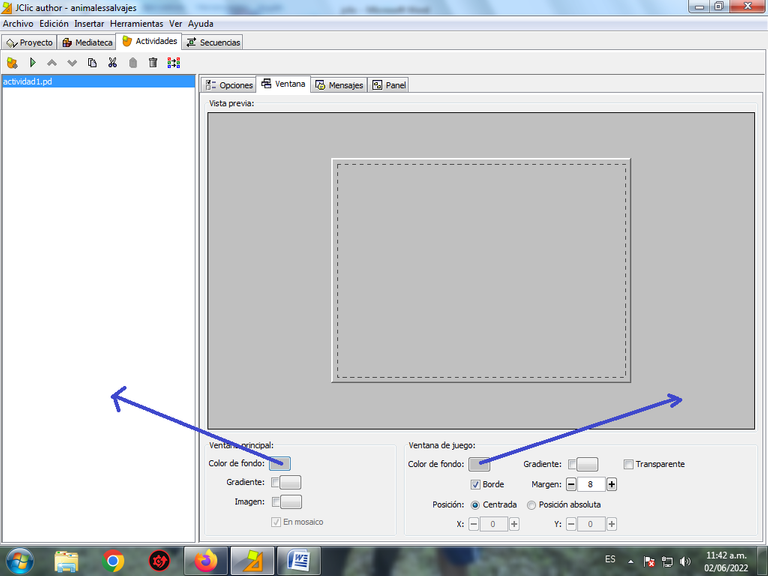
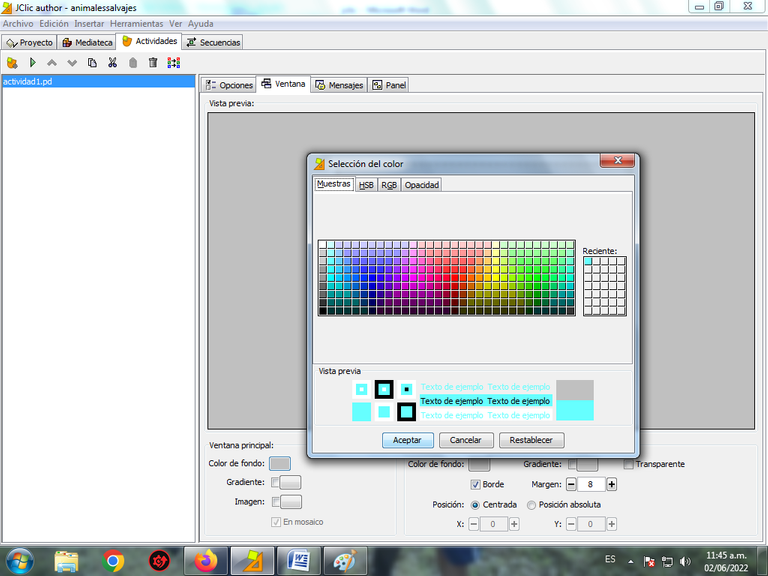
Nos vamos a la pestaña de Ventana donde vamos a seleccionar el color de fondo de la ventana principal y de la ventana de juego.
Se visualizarán cuatro nuevas pestañas que van a permitir la elaboración del la actividad, como son Opciones, ventana, mensajes y panel.
Paso 6:
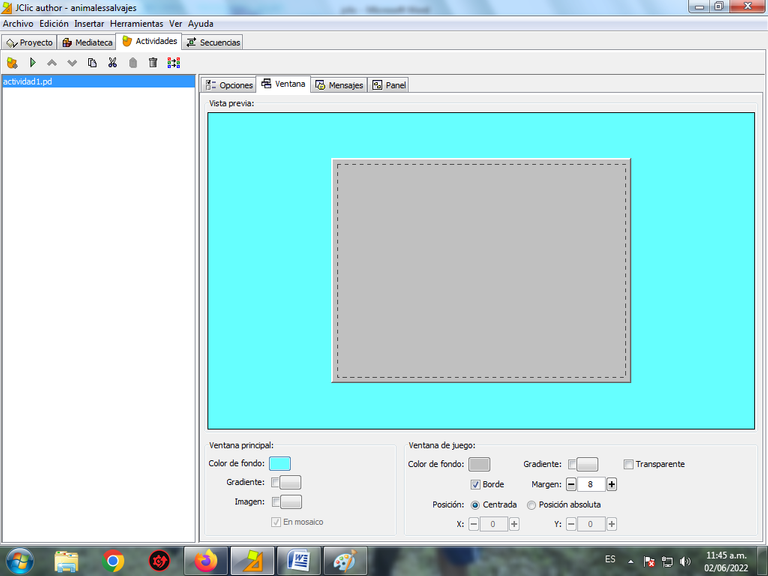
Le damos clic en color de fondo, y se selecciona el color que tendrá la ventana principal, escogemos un color azul claro.
Paso 7:
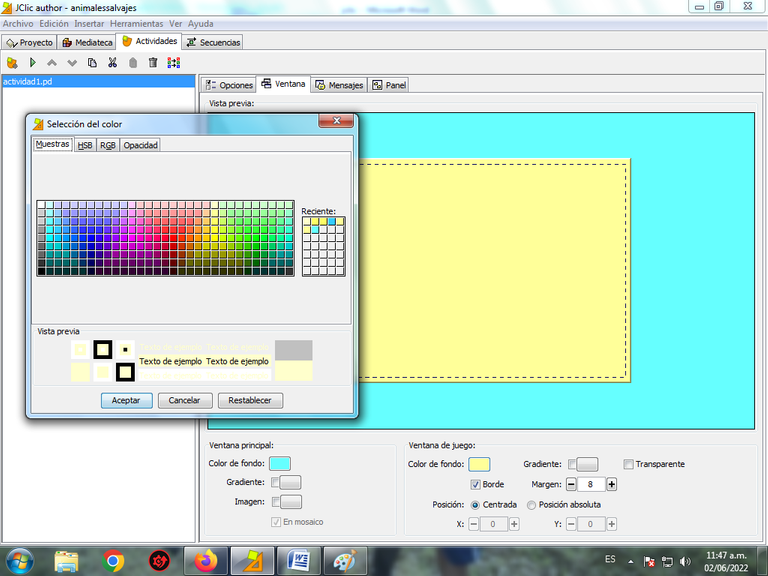
Procedemos a seleccionar el color de fondo de la ventana de Juego. Escogemos un color amarillo claro.
Paso 8:
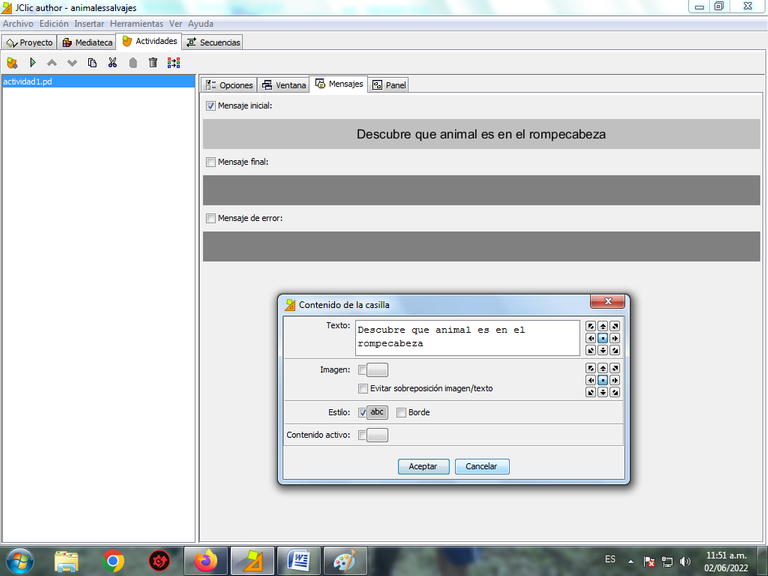
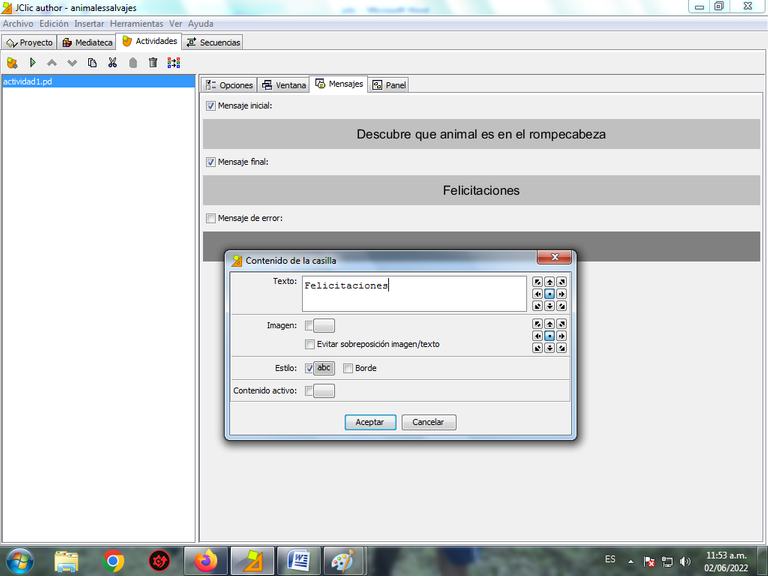
En la pestaña de mensaje, se escribe el mensaje inicial que servirá de guía para que el estudiante resuelva la actividad de rompecabeza, y el mensaje final se escribe palabras para motivar al estudiante como por ejemplo felicitaciones.
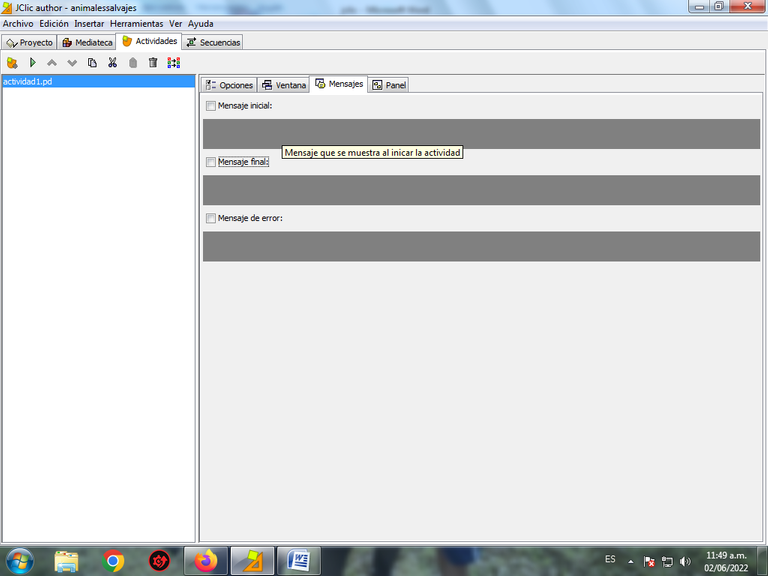
Le damos clic en mensaje Inicial y escribimos en donde dice Texto lo siguiente: “Descubre que animal es en el rompecabeza” y presionamos clic en aceptar.
Ahora en el mensaje final: “Felicitaciones”
Paso 9:
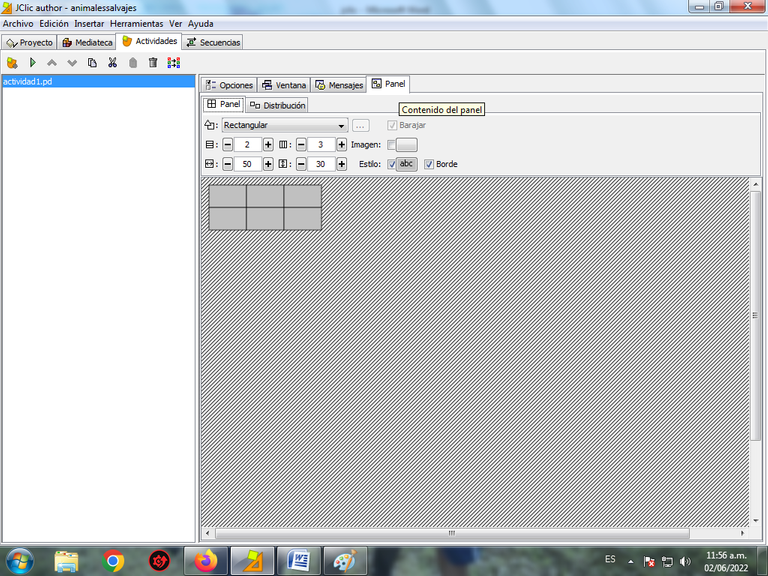
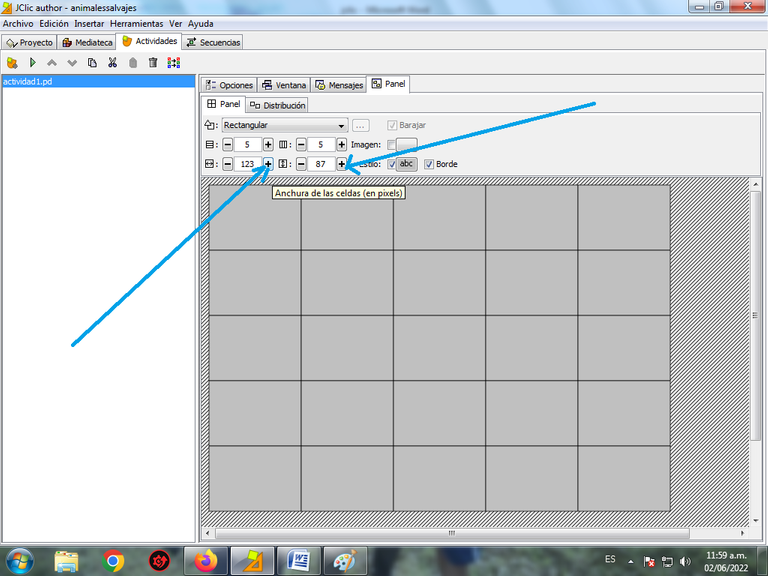
Luego se selecciona el Panel, que es donde se configura la cantidad de filas y columnas que tendrá nuestro rompecabeza, por defecto aparece de 2 x 3 es decir de 2 filas por dos columnas.
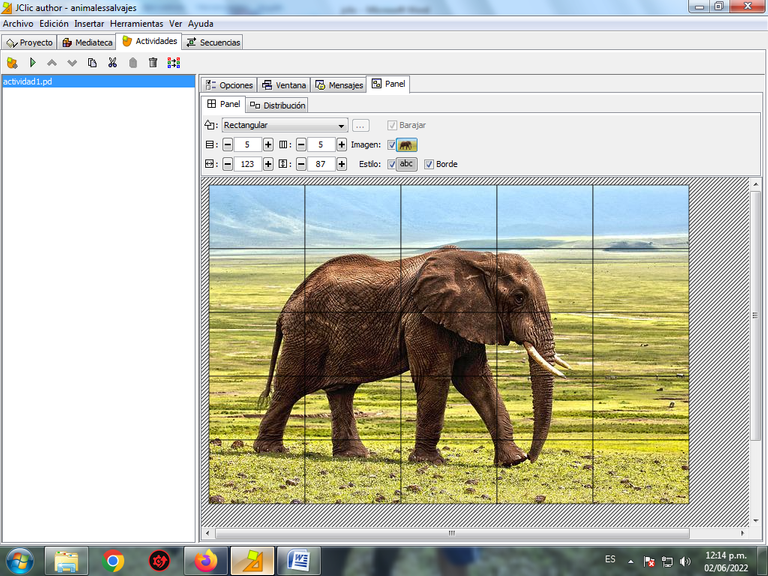
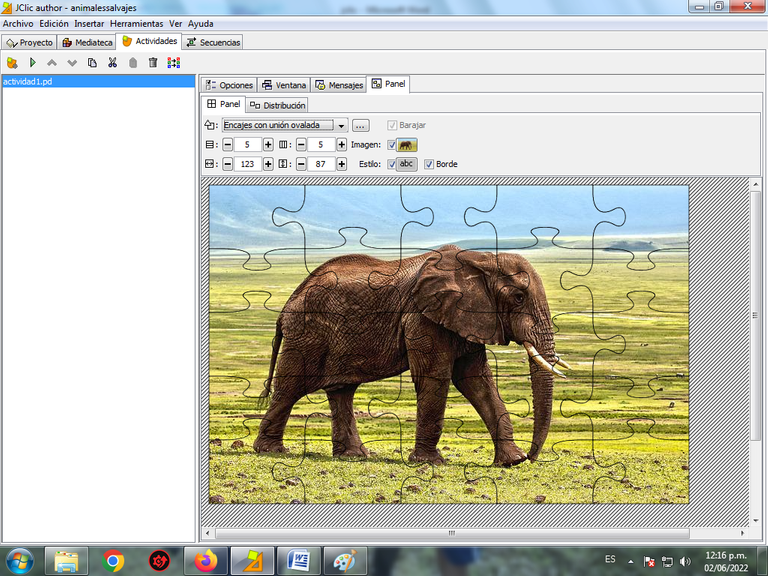
Aumentamos el número de filas y columnas en el símbolo donde aparece el más y de esta forma configuramos el rompecabeza de 5 x 5
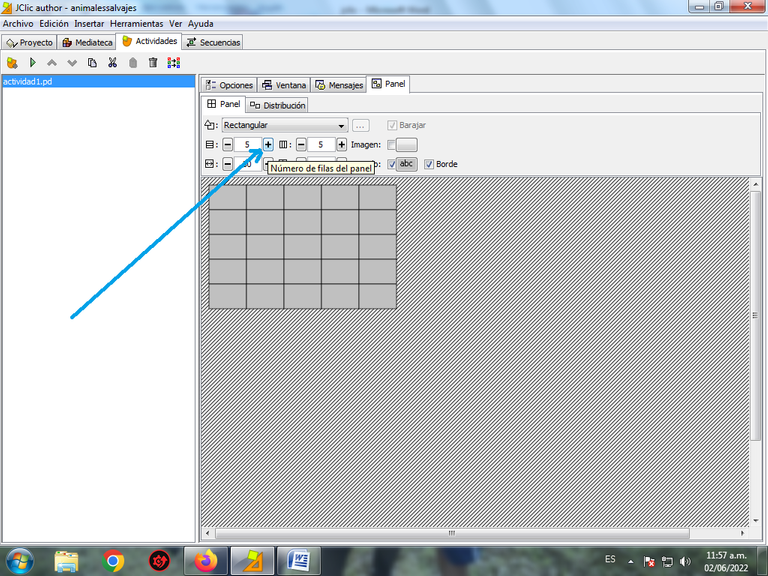
Configuramos también el ancho de la celda y la altura, para que se vea más grande la imagen.
Paso 10:
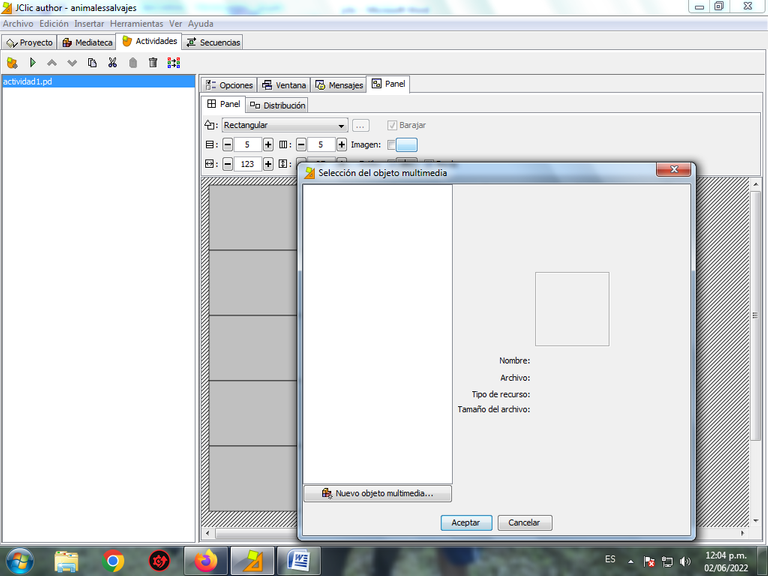
Se selecciona la imagen que vamos a tener dentro de esta figura rectangular de 5 x 5, presionamos clic.
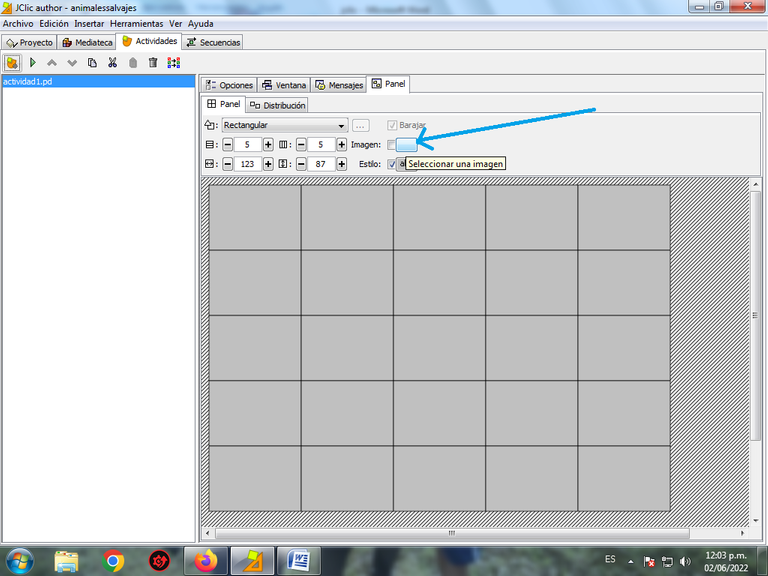
Pero no aparece ninguna imagen, ya que debemos primero insertarla para poder tenerla disponible.
Paso 11:
Le damos clic en la pestaña de Mediateca que está en la parte superior izquierda.
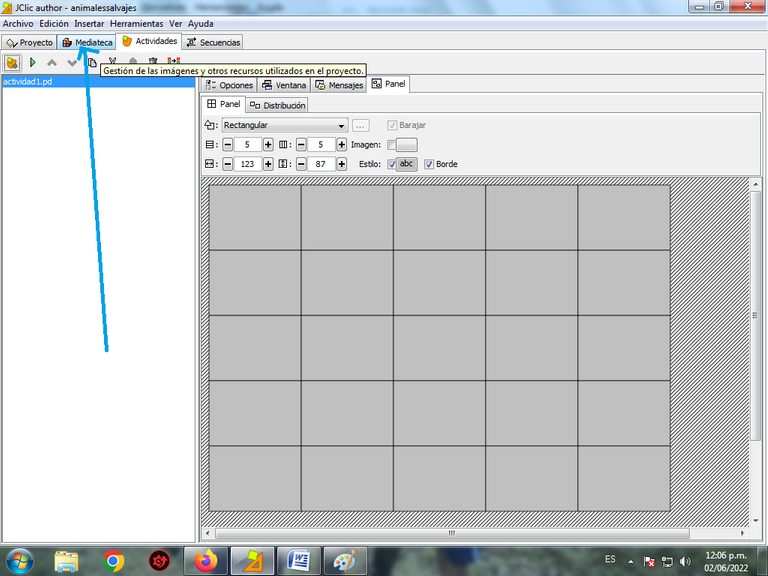
En añadir imagen, buscamos la ruta donde está descargada la imagen que vamos a usar para el rompecabeza.
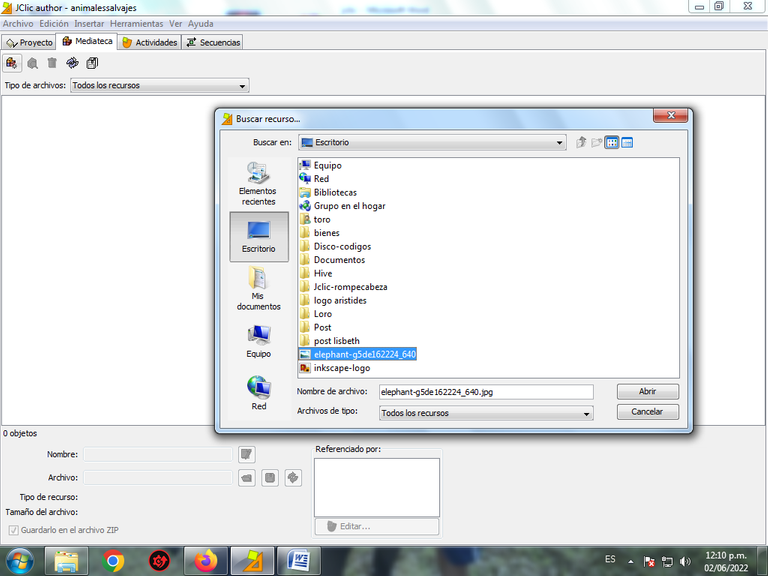
Escogemos la imagen
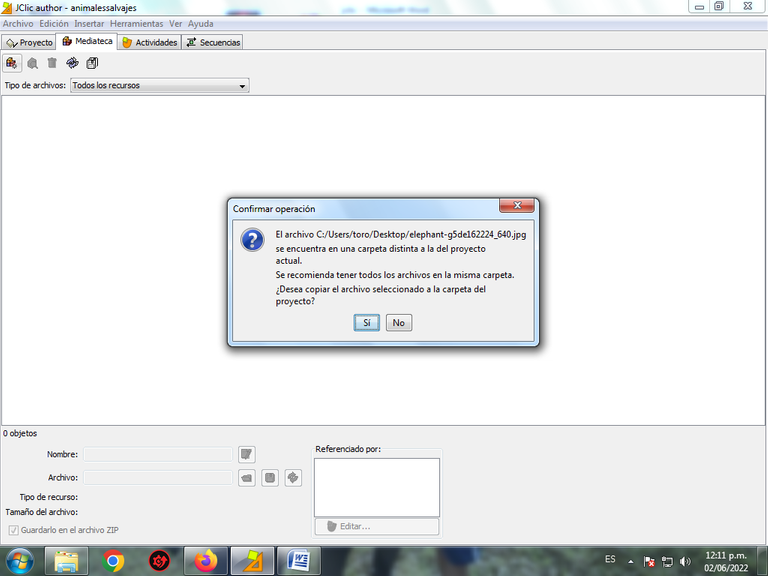
Es presionamos clic en la opción Si, para que la imagen se copien dentro del proyecto.
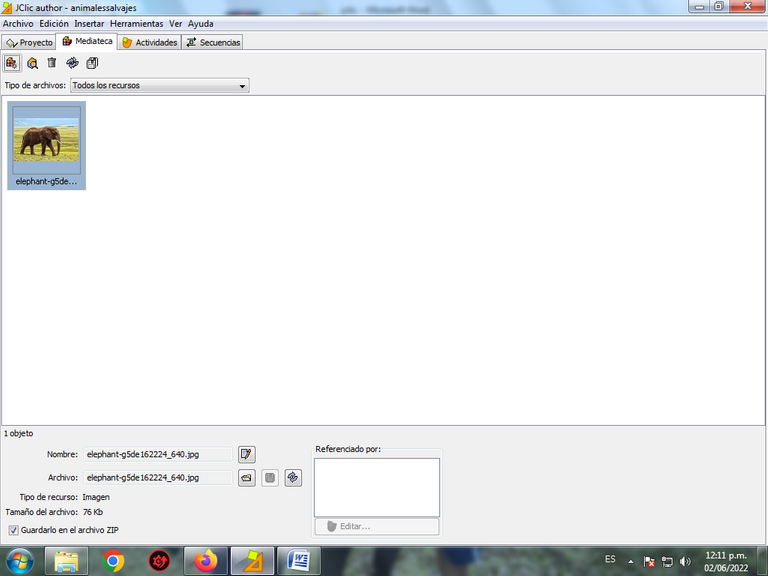
Ahora ya tenemos la imagen dentro del proyecto.
Paso 12:
Nos vamos a la pestaña de actividad, en Imagen, se inserta la imagen del elefante y le damos clic en aceptar.

Paso 13:
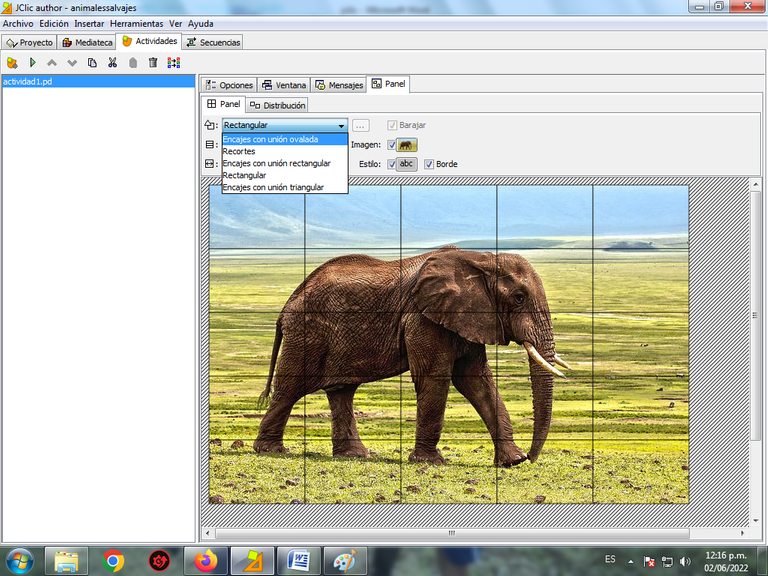
Cambiamos el generador de formas a encajes con unión ovaladas.
Paso 14:
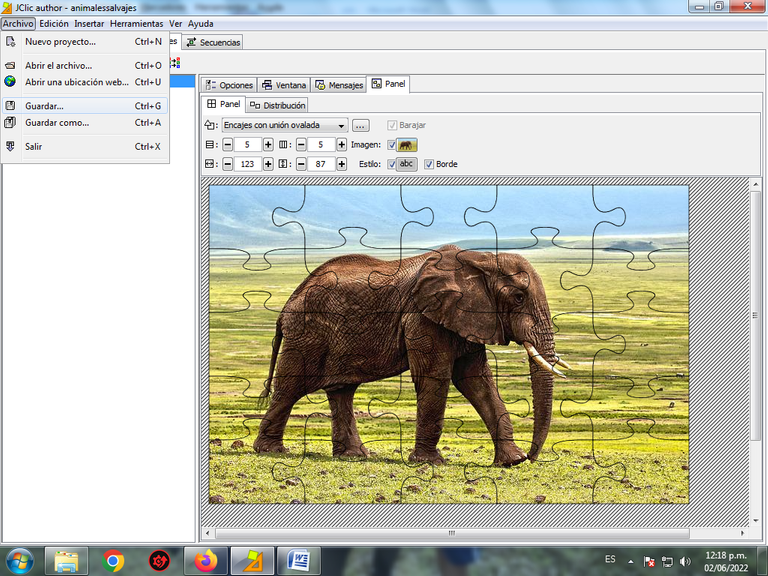
Ahora guardamos la actividad en la barra de menú Archivo – guardar.
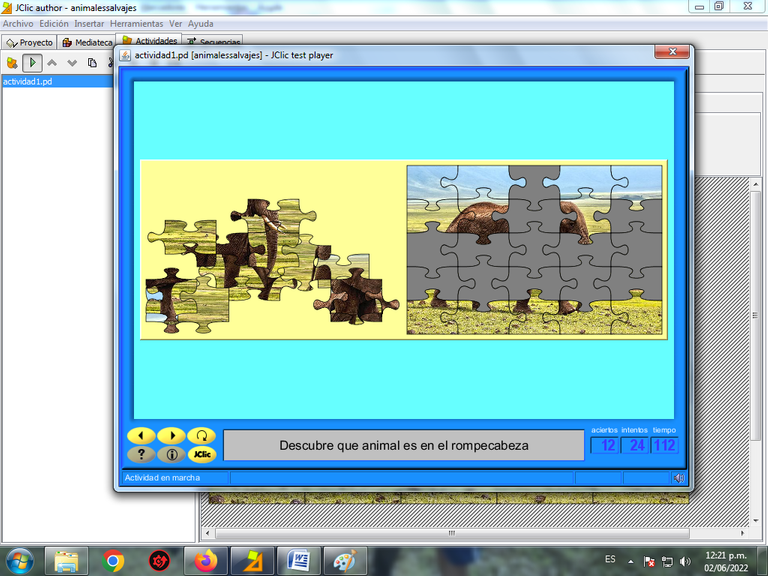
Se puede ejecutar la actividad en el botón verde para ir probando la actividad.
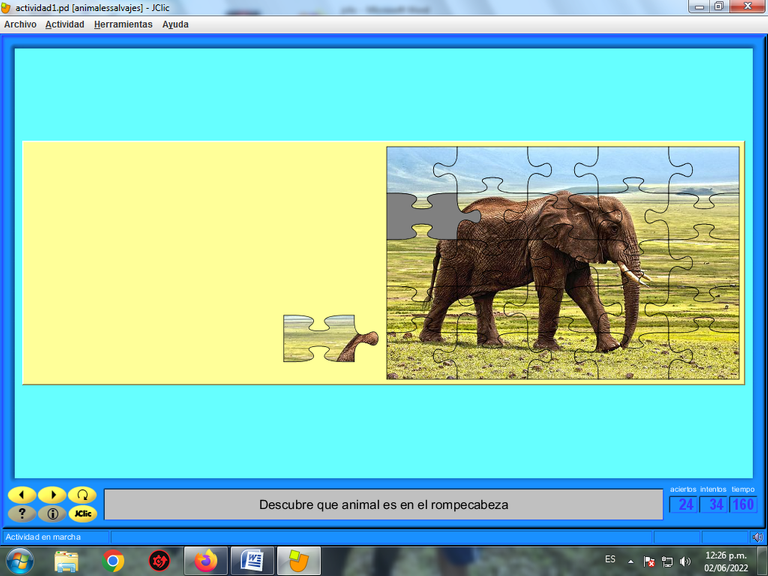
Una vez guardado ejecutamos Jclic Player para realizar nuestro rompecabeza ya listo.
Espero que les haya gustado, esta herramienta, nos vemos en una próxima publicación.
English
Greetings Hive friends, today I am going to present a tutorial to make a puzzle in Jclic, which is an educational tool that can be used as a didactic strategy to reinforce educational content taught to students in a classroom.
The Jclic application is an educational program based on free software, in which educational content such as puzzles, memory games, associations, word searches, crossword puzzles, written answers, etc. can be made, which can be adapted to any educational level from initial, basic education and even a university level.
This application is made up of three icons that allow us to interact with the program, one of these is Jclic Author, which is where we can carry out the activities, taking into account the level to which it is directed and the number of activities in a content. Another is Jclic Player that allows us to execute the activity once it is finished and Jclic Reports, in which the activities carried out and the execution time are displayed, it is a report to also see the student's performance in the interactive activity.
Jclic is an interactive application, which works on different operating systems such as Windows, Linux and Mac. It can be downloaded at the following address.
Currently it is important to use ICTs to reinforce educational content for students, that is why Jclic is an alternative to awaken creativity in the child in solving problems interactively and in this way the child learns to use the computer through this application and reinforcement of the content taught by the teacher in the classroom.
Below I present the steps to carry out the puzzle activity in Jclic.
Step 1:
We open the JclicAuthor program, pressing double click. In this first screen we have several tabs: Project, Media Library, Activities and Sequences. In project is the description of the project that we are going to create, in media library where we are going to have the files that are going to be used for the activity such as images and sounds, in activities is where the type of activity that is going to be created in this case is puzzle and sequence is where the execution order of the activity is configured.
Step 2:
We click on File – New Project
In the part where it says project name, we write wild animals and click accept.
Step 3:
We select the Activities tab and then Add activity.
In the type of activity we choose Double Puzzle and in the name we write activity1.pz, it is important that the names are written without spaces and in lower case, we press accept.
Pass 4:
In the Skin Options tab we select Blue.xml, that is, it will have a blue color.
Step 5:
We go to the Window tab where we are going to select the background color of the main window and the game window.
Four new tabs will be displayed that will allow the elaboration of the activity, such as Options, window, messages and panel.
Step 6:
We click on the background color, and the color that the main window will have is selected, we choose a light blue color.
Step 7:
We proceed to select the background color of the Game window. We choose a light yellow color.
Step 8:
In the message tab, the initial message is written that will serve as a guide for the student to solve the puzzle activity, and the final message is written words to motivate the student, such as congratulations.
We click on the Initial message and write where the Text says the following: "Discover which animal is in the puzzle" and click on accept.
Now onto the final message: “Congratulations”
Step 9:
Then the Panel is selected, which is where the number of rows and columns that our puzzle will have is configured, by default it appears 2 x 3, that is, 2 rows by two columns.
We increase the number of rows and columns in the symbol where the plus appears and in this way we configure the puzzle of 5 x 5
We also configure the width of the cell and the height, so that the image looks larger.
Step 10:
The image that we are going to have inside this rectangular figure of 5 x 5 is selected, we press click.
But no image appears, since we must first insert it to be able to have it available.
Step 11:
We click on the Media Library tab that is in the upper left.
In add image, we look for the path where the image that we are going to use for the puzzle is downloaded.
We choose the image
Is we click on the Yes option, so that the image is copied into the project.
Now we have the image inside the project.
Step 12:
We go to the activity tab, in Image, the image of the elephant is inserted and we click on accept.
Step 13:
We changed the shape generator to oval joint sockets.
Step 14:
Now we save the activity in the menu bar File – save.
You can run the activity on the green button to test the activity.
Once saved, we run Jclic Player to make our puzzle ready.
I hope you liked this tool, see you in a next publication.

Jclic es una gran herramienta educativa, que favorece a muchos docentes para realizar actividades lúdicas, que permitan a los estudiantes aprender de una manera diferente a través de las tecnologías. Gracias por compartir el paso a paso de como realizar un rompecabezas. Bien sencillo de realizar. Saludos
Hola @lisbethseijas si es una excelente herramienta para reforzar cualquier contenido de forma lúdica, gracias por visitar mi blog.
https://twitter.com/cbit_roxana_mdh/status/1532424152283549696
The rewards earned on this comment will go directly to the people(@cetb2008) sharing the post on Twitter as long as they are registered with @poshtoken. Sign up at https://hiveposh.com.
Gracias por compartir esta herramienta Jclic y el paso a paso bien detallado.
Saludos
Hola @mercmarg muchas gracias por comentar en mi publicación.
Your publication has been voted by Edu-venezuela. Your post will carry over to other curation projects for more voting support. Keep up the good work!
Saludos amigos @edu-venezuela agradecidos por su apoyo a mi publiación
Su post ha sido valorado por @goya
Saludos amigo @goya del proyecto @cervantes muchas gracias por valorar mi publicación
Has sido curado por @visualblock / You've been curated by @visualblock
Bienvenidas delegaciones / Delegations welcome
Encuentra nuestra comunidad aquí / Find our community here
Trail de Curación / Curation Trail
Saludos amigos de @visualblock muchas gracias por su apoyo