[ESP-ENG] Gorro de fin de año 🎄 New Year's Eve hat
Hello, friends of Hive! It's my pleasure to once again explain to you how to make these spectacular Christmas Hats to celebrate with your family this New Year's Eve.
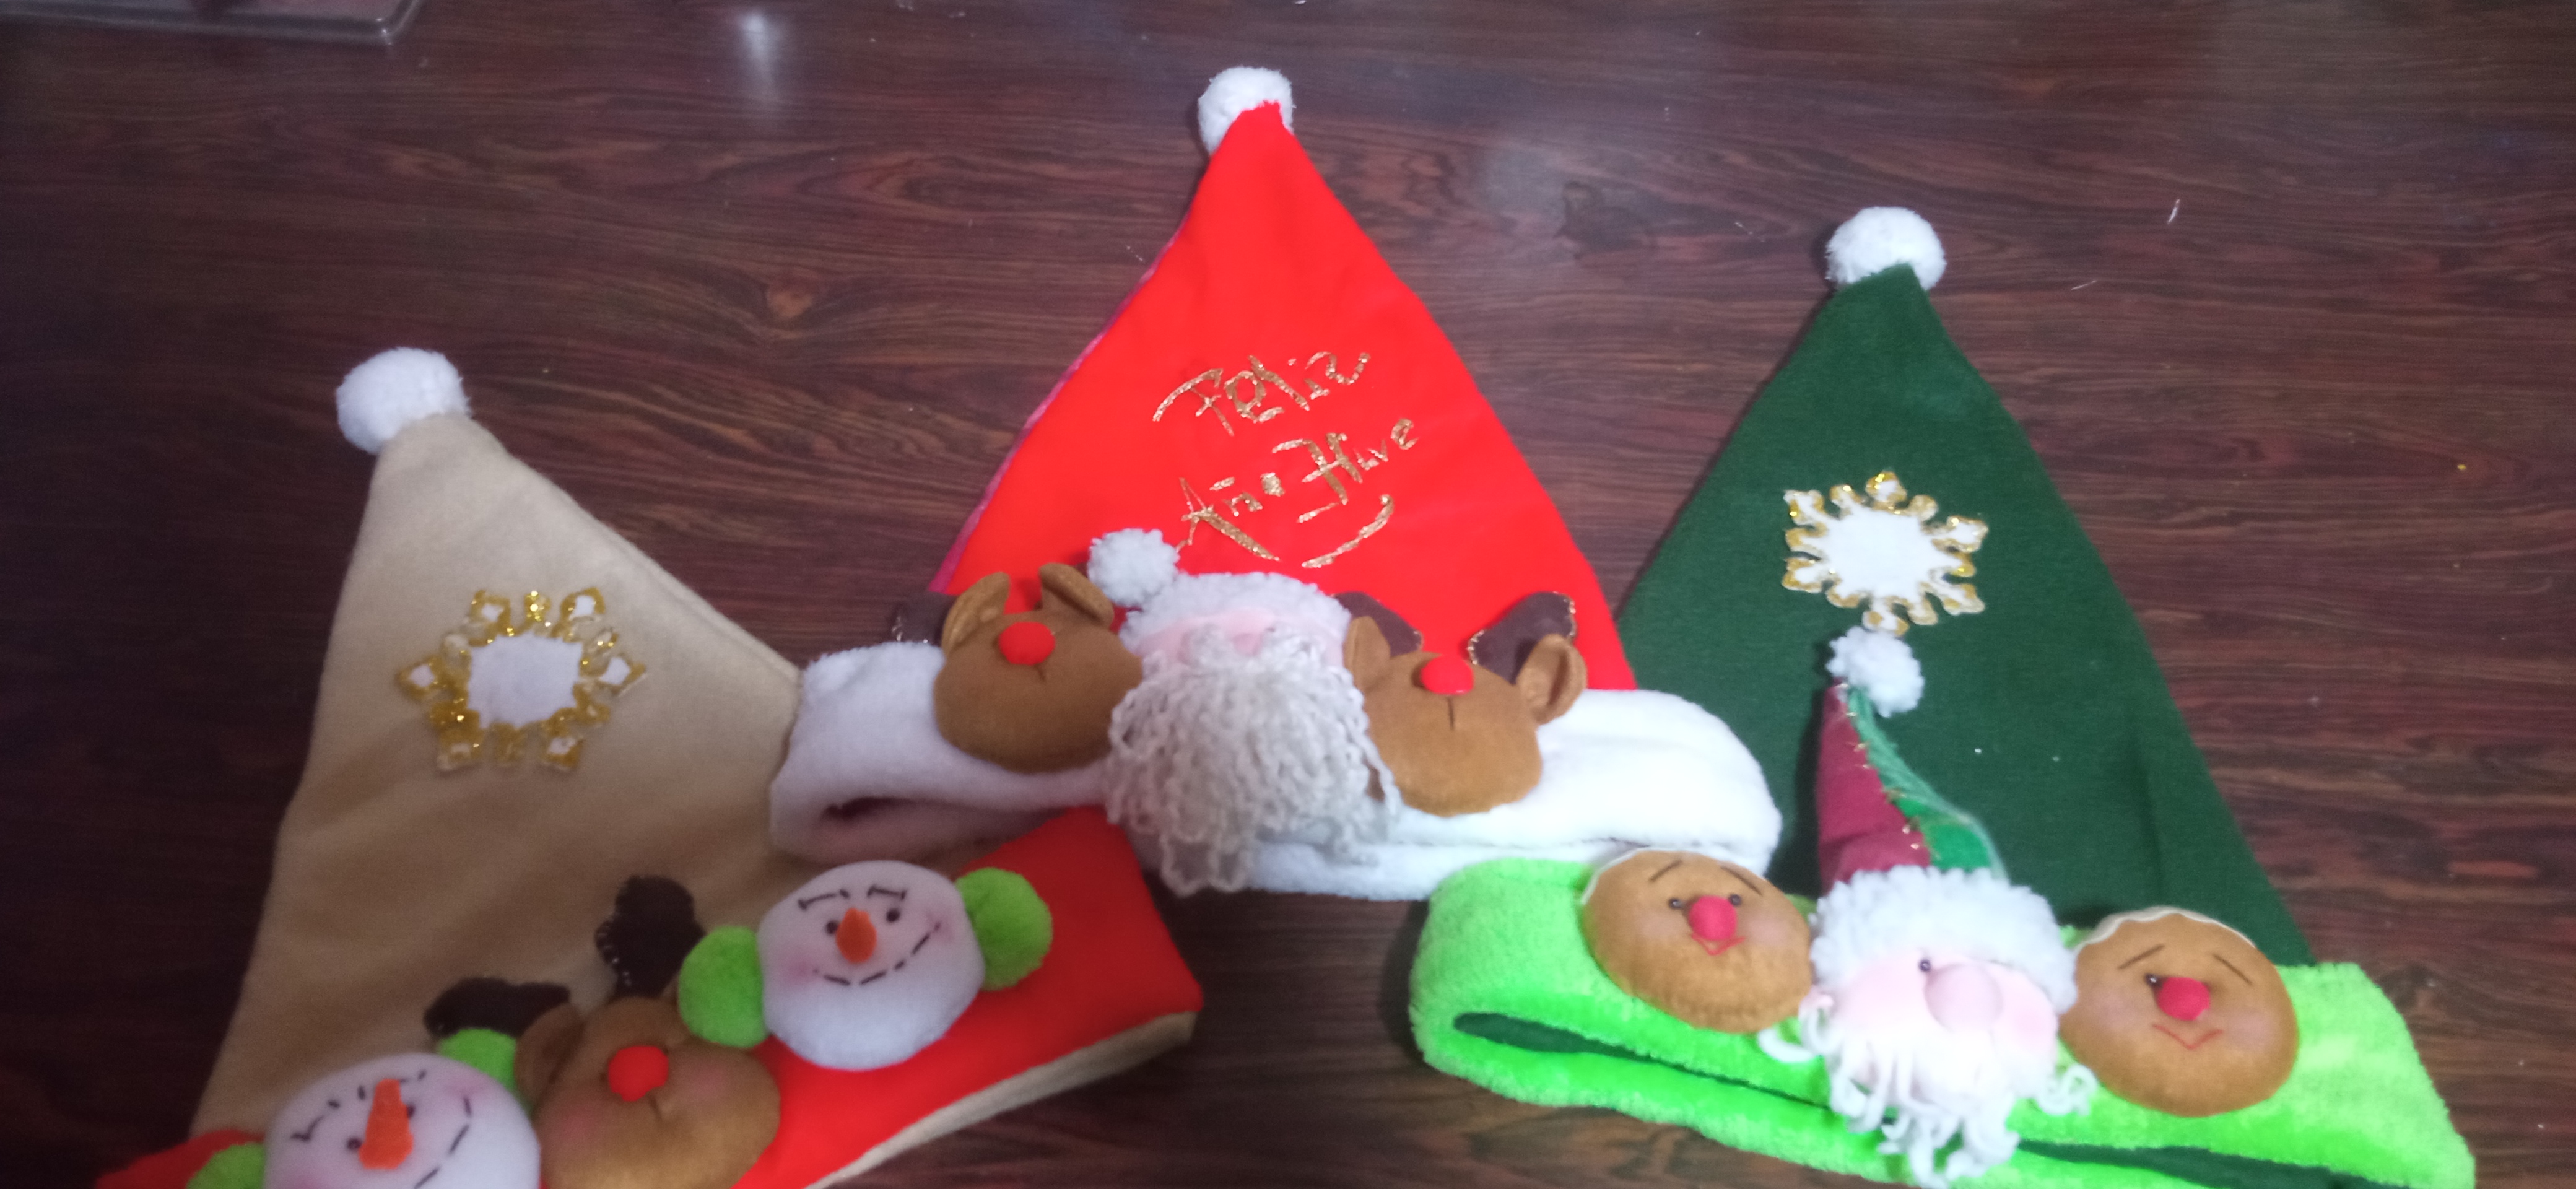
Mi familia y yo, acostumbramos a tomarnos fotos familiares con gorros navideños. Es por ello, que les traigo esta fabulosa propuesta para cerrar este Año y recibir el Año Nuevo.
My family and I are used to take family pictures with Christmas hats. That is why I bring you this fabulous proposal to close this year and welcome the New Year.
Sin mas que decir procedo a nombrar los materiales:
Without more to say I proceed to name the materials:
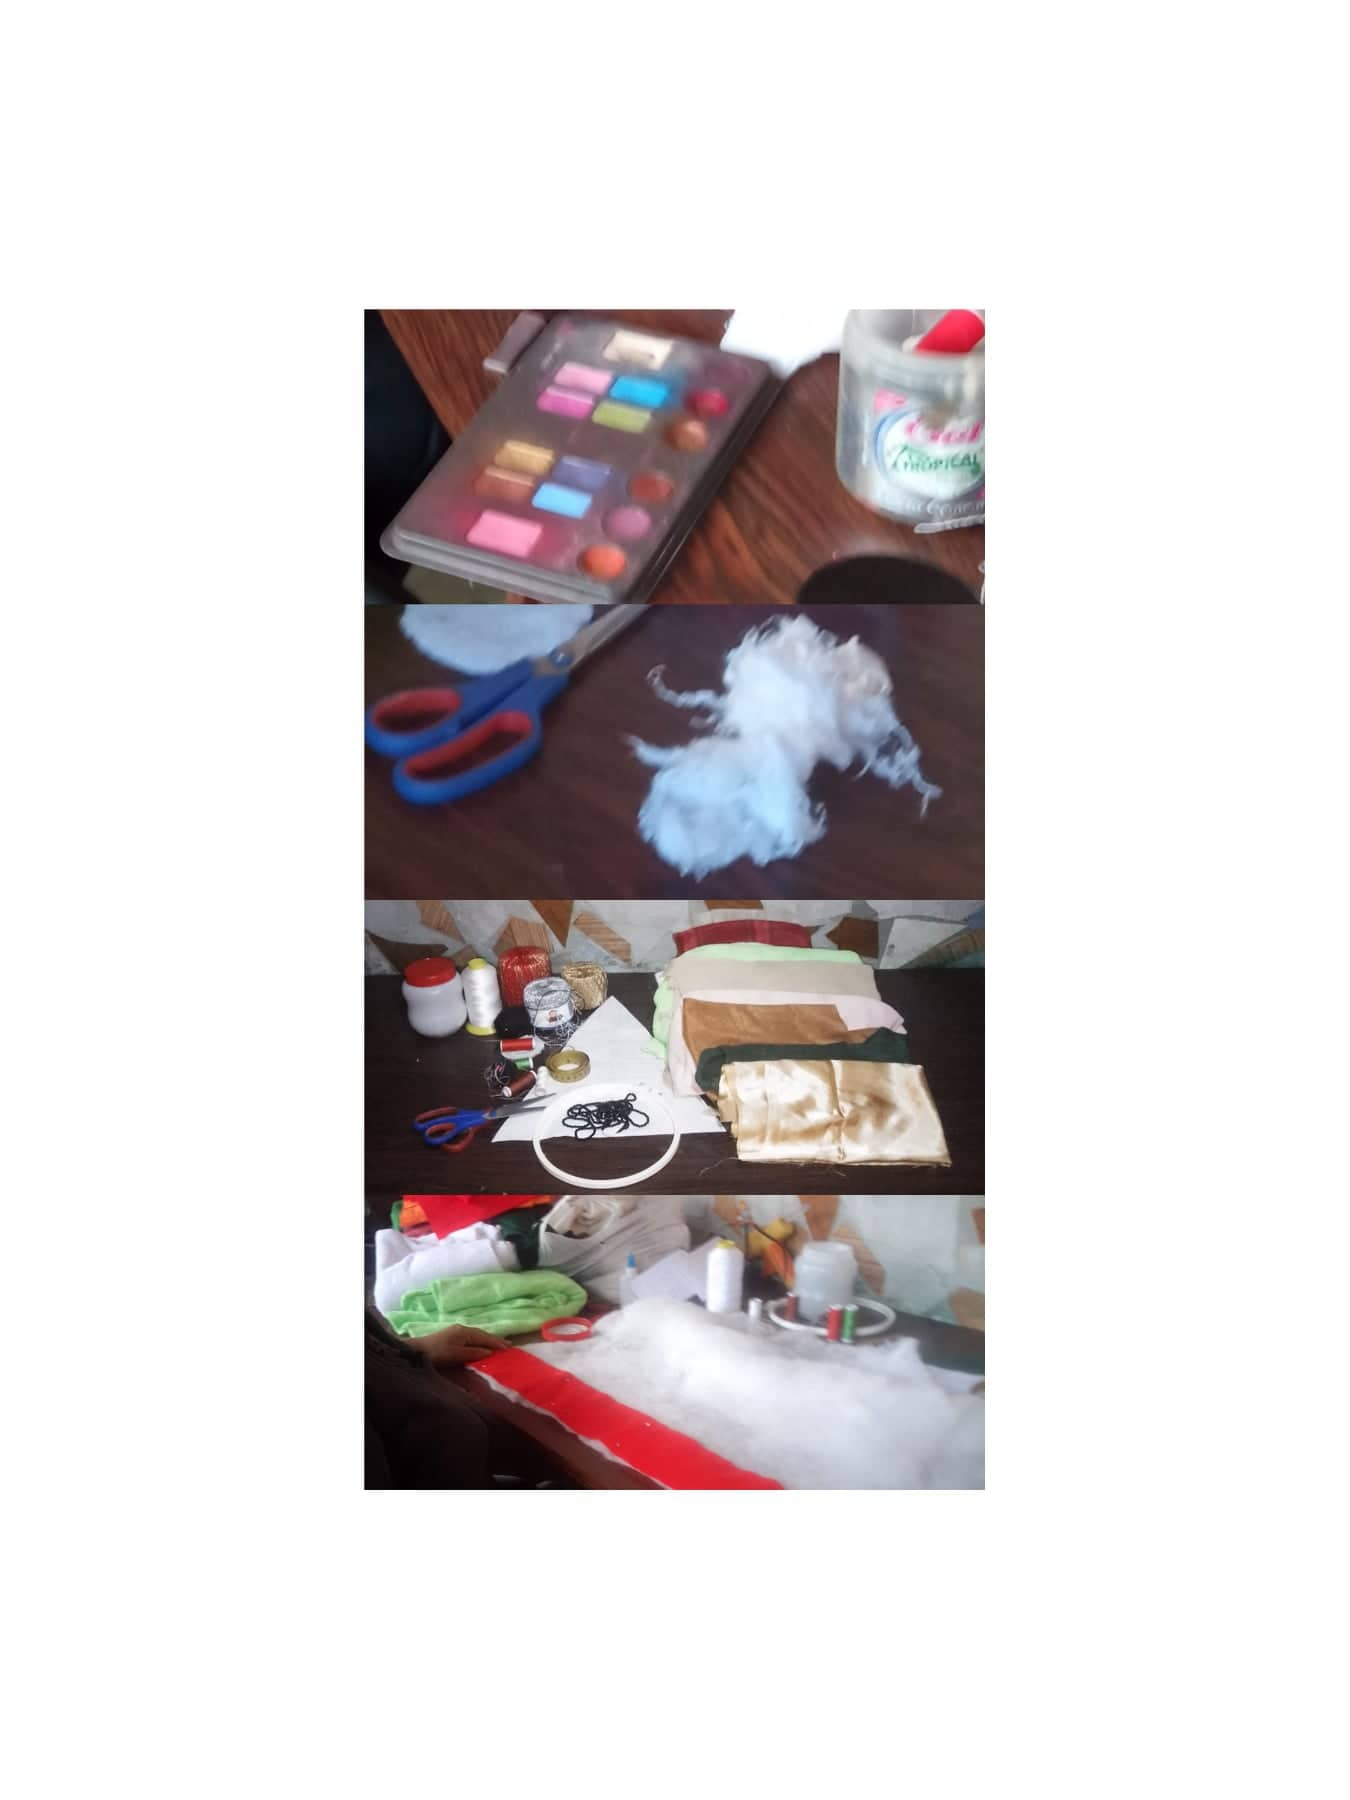
Materiales:
- 1/4 Metro de fieltro Rojo.
- 1/4 Metro de Manta Polar Verde y Beige.
- 1/4 Metro de ovejo verde claro y blanco.
- Retazos de Manta Polar color naranja,rojo,piel,marrón,blanco,estampada.
- Hilos para coser blanco,negro,marrón,verde,rojo.
- Hilos para bordar dorado y negro.
- Estambre blanco (para la barba del Santa).
- Cintas zig zag color crema.(para decorar la galleta de gengibre).
- Patrones.
- Cinta métrica.
- Canustillos negros (para los ojos de las caritas).
- Guata / relleno.
- Barra y pistola de silicón.
- Alfileres para sujetar.
- Rubor para maquillar.
- Apliques de copos de nieve para decorar.
Materials:
- 1/4 Meter of Red felt.
- 1/4 Meter of Green and Beige Fleece Blanket.
- 1/4 Meter of light green and white sheep.
- Patches of orange, red, brown, brown, white, printed polar fleece.
- White, black, brown, brown, green, red sewing thread.
- Gold and black embroidery thread.
- White yarn (for Santa's beard).
- Cream zig zag ribbons (to decorate the gingerbread cookie).
- Patterns.
- Measuring tape.
- Black canustillos (for the eyes of the little faces).
- Wadding / stuffing.
- Silicone stick and silicone gun.
- Pins for fastening.
- Make-up blusher.
- Snowflake appliqués for decorating.
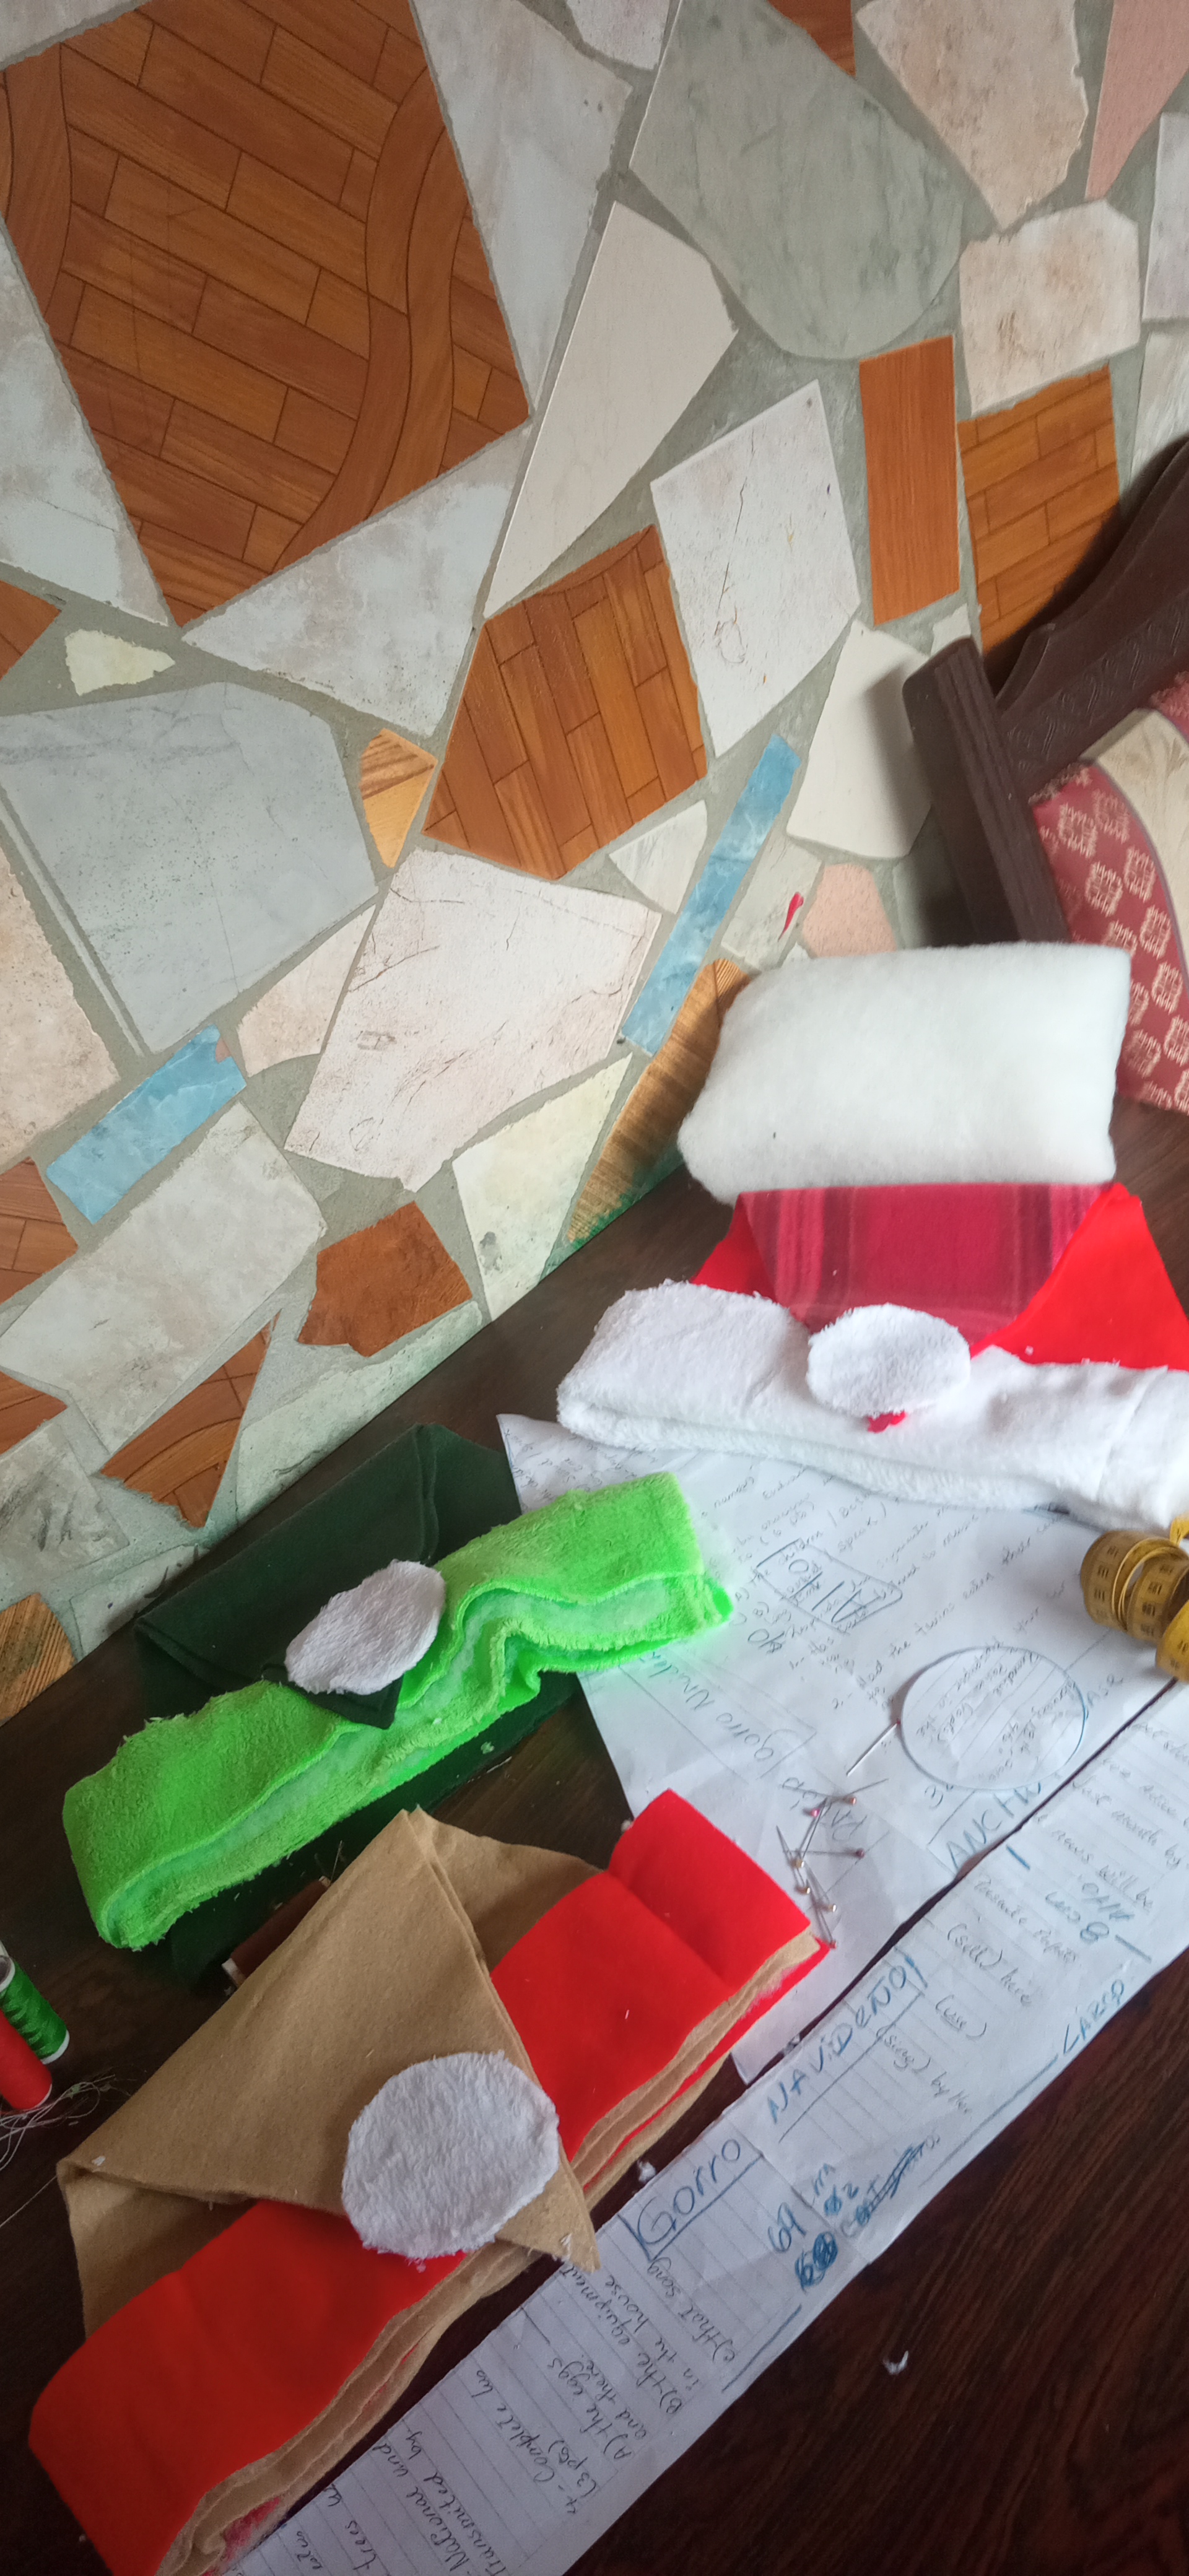
Medidas del Patrón:
Gorro forma triángular 32 Centímetros de ancho por 40 Cemtímetro de alto.
Tira rectángular 69 Centímetros de largo por 8 Centímetro de alto.
Para la bola del gorro un circulo de 12 Centímetros de diámetro.
Pattern Measurements:
Hat triangle shape 32 Centimeters wide by 40 Centimeter high.
Rectangular strip 69 centimeters long by 8 centimeters high.
For the ball of the cap a circle of 12 centimeters in diameter.
Paso 1:
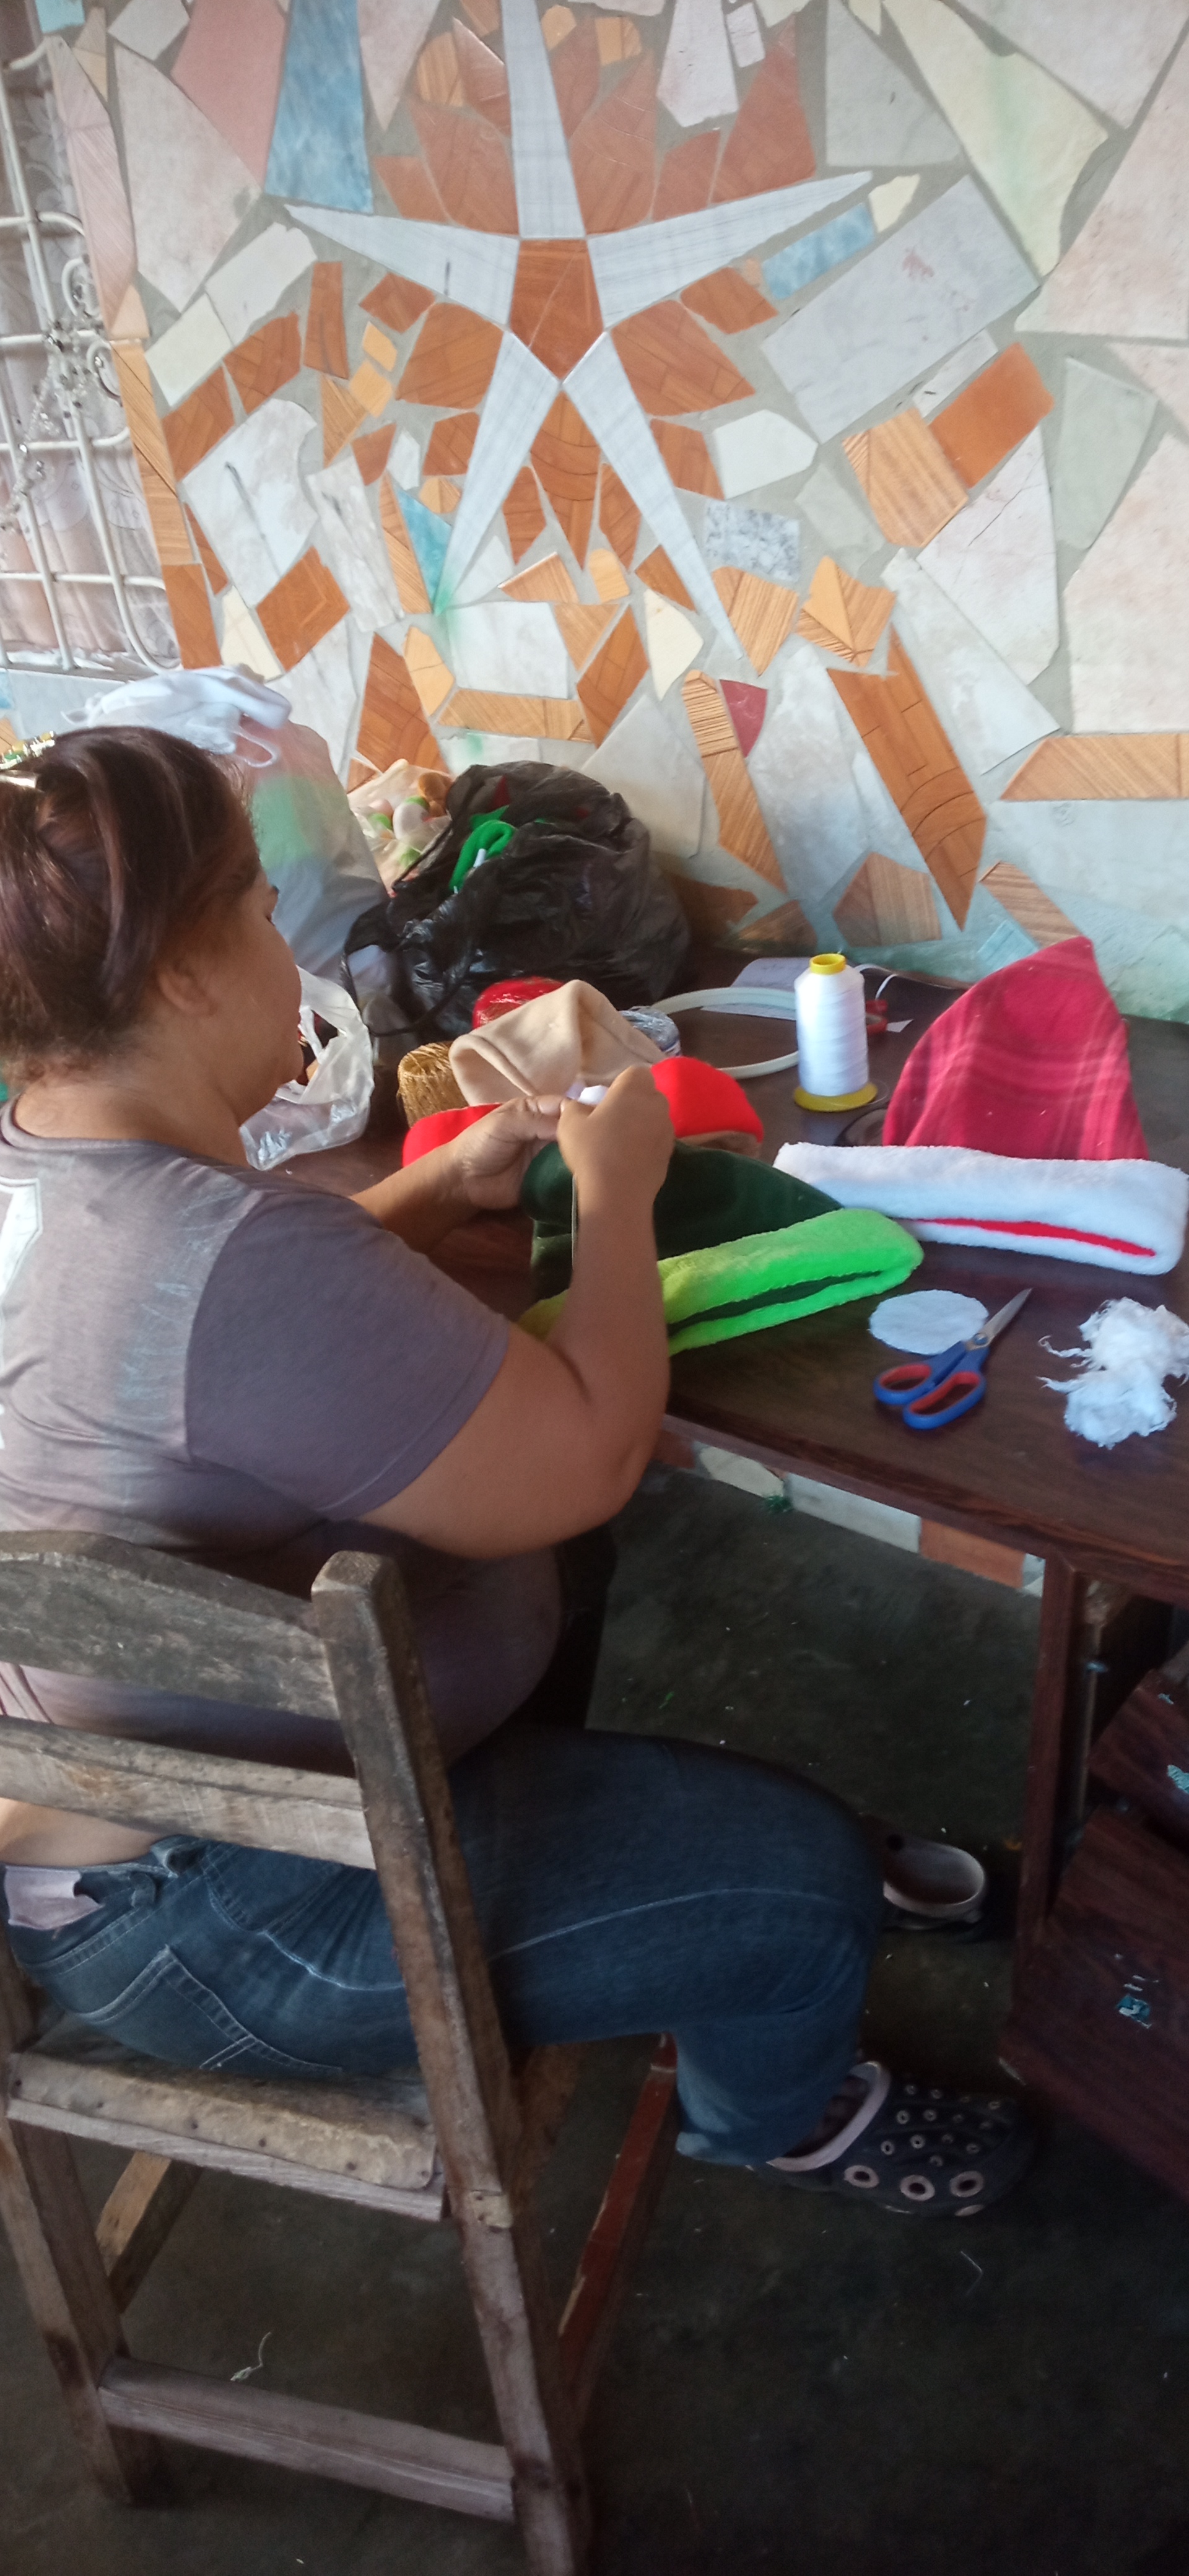
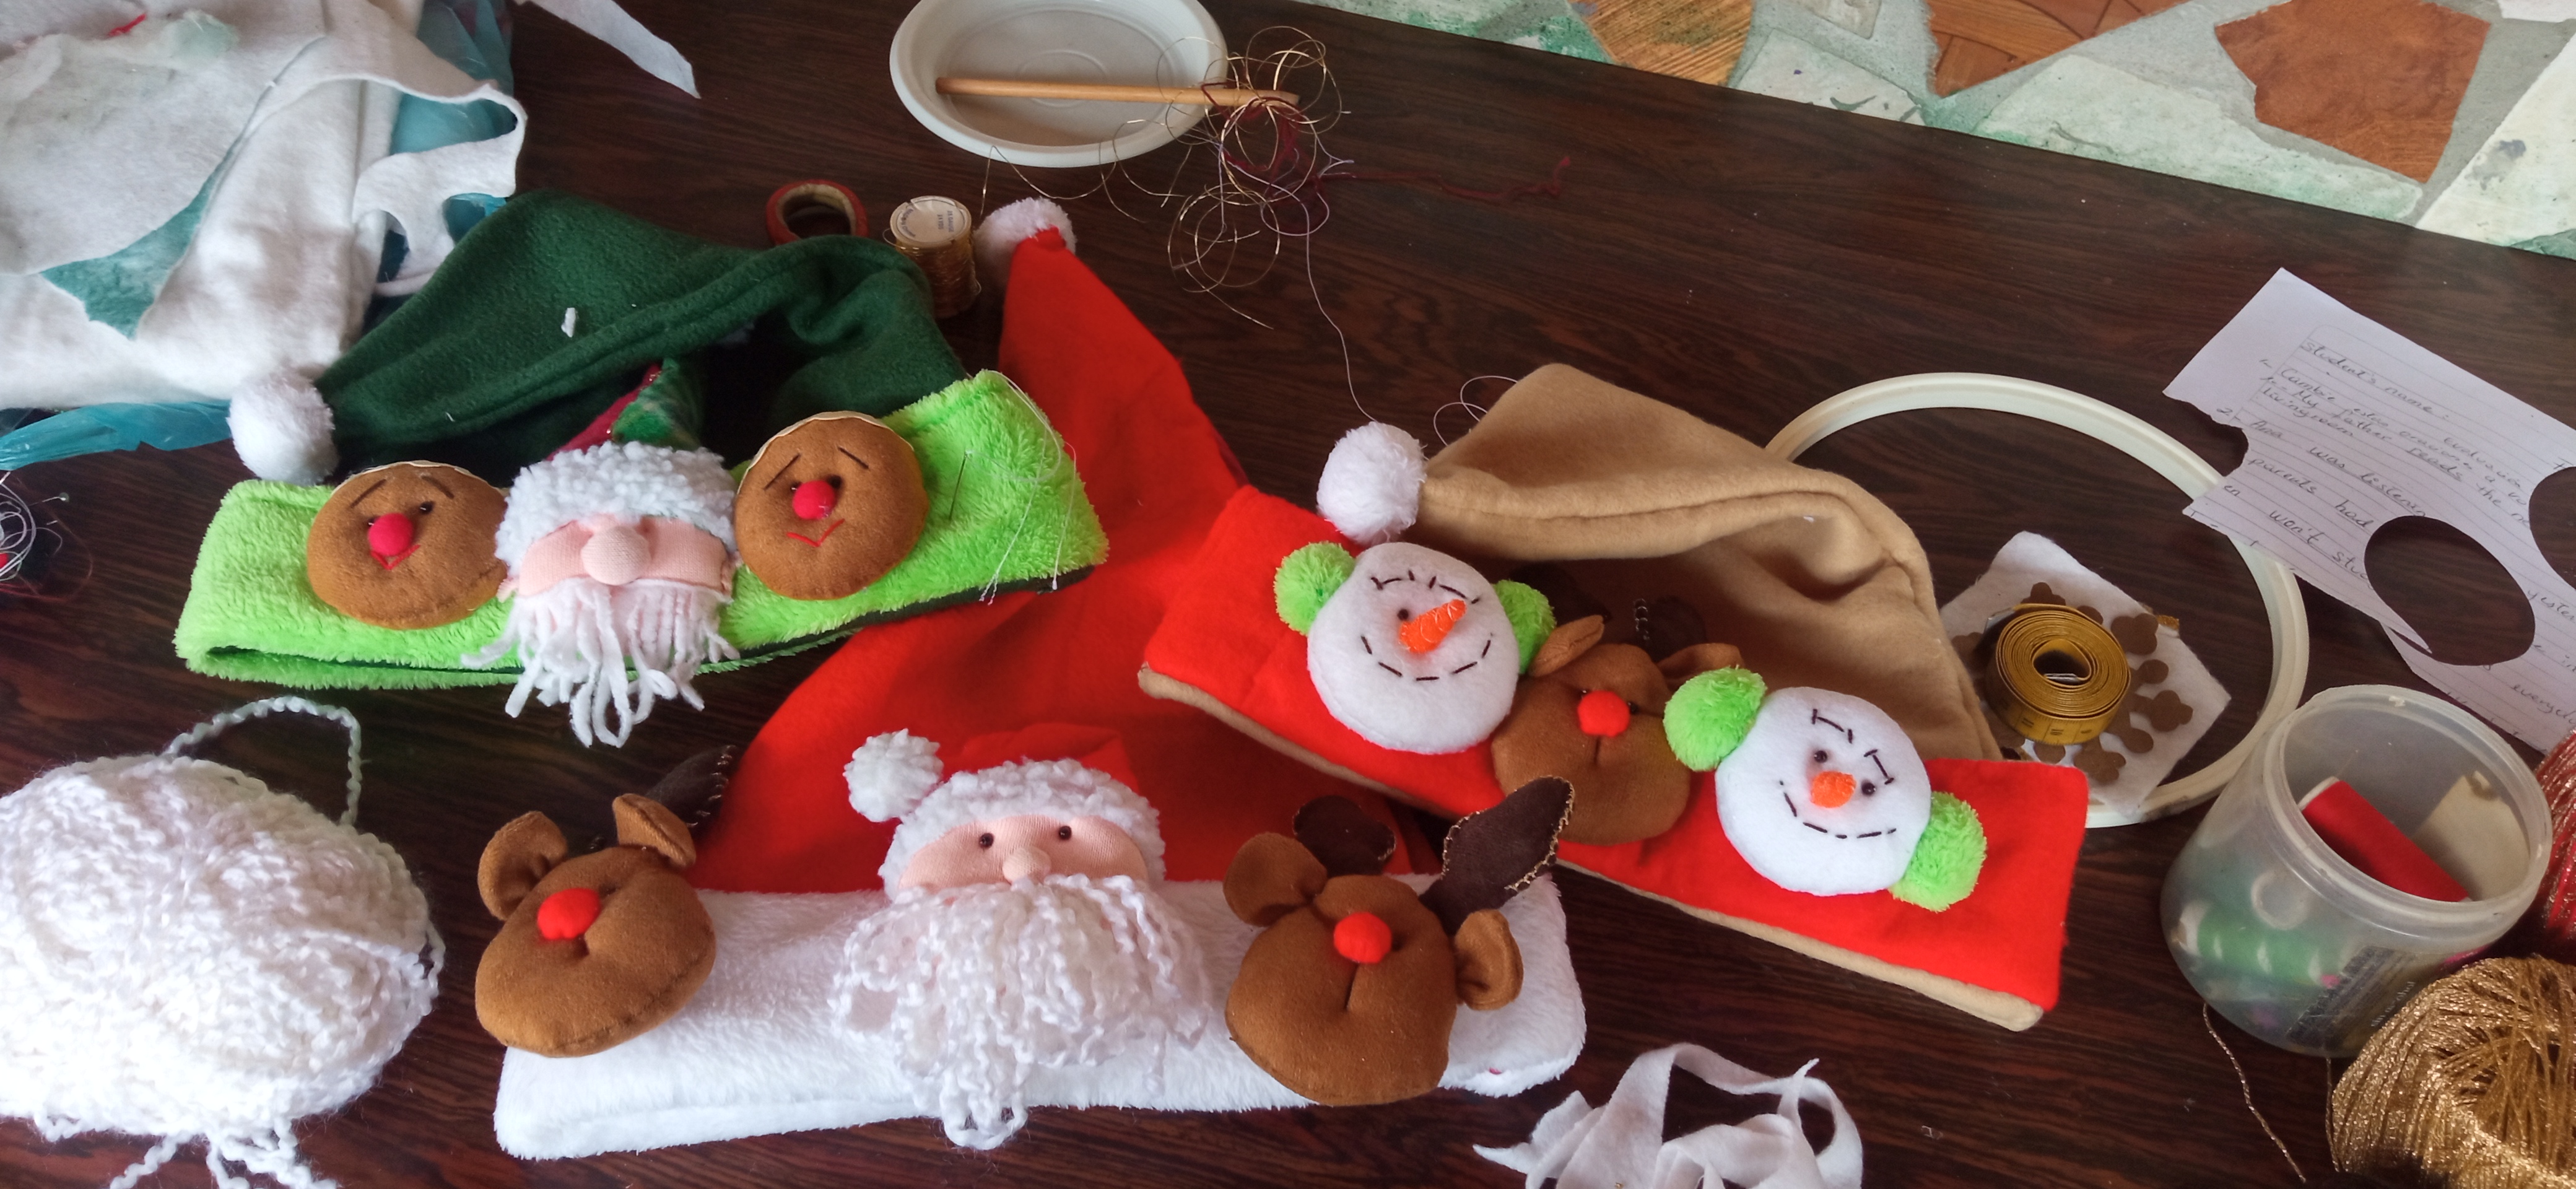
Para realizar los gorros corte las tres (3) piezas triángulares en colores beige, verde y rojo. Para la base del gorro corte tres tiras rectángulares en colores blanco, verde claro y rojo, Igualmente corte cuatro (4) círculos pequeños de 12 diámetro aproximadamente cada uno para realizar las caras de santa (color piel), las galletas de gengibre (color marrón),muñeco de nieve (blanco). Para la cara de los renos corte seis (6) óvalos en forma de pera,dos (2) los cuernos, dos (2)orejas en marrón,cuatro (4) circulos en verde claro para los audifonos de los muñecos de nieve, dos (2) triángulitos en color naranja para las narices de los muñecos de nieve, cuatro circulos rojos de 3 centímetros de diámetro aproximadamente para las narices de los renos y galletas de gengibre, dos (2) circulos de 3 centímetros de diámetro aproximadamente para las narices de santa y duende en color piel y dos (2) triángulos de 15 centímetro de largo por 10 centímetro de alto en colores rojo y tela estampada para los gorros. Por el lado al réves cosí a mano los gorros y los circulos para la caritas de duende, santa, muñecos de nieve, galletas y renos, cuernos y orejas.
Step 1:
To make the hats cut three (3) triangular pieces in beige, green and red. For the base of the hat, cut three rectangular strips in white, light green and red. Also cut four (4) small circles of approximately 12 diameters each to make the faces of Santa (skin color), the gingerbread cookies (brown) and the snowman (white). For the reindeer face cut six (6) pear-shaped ovals, two (2) for the antlers, two (2) brown ears, four (4) light green circles for the snowmen's headphones, two (2) orange triangles for the snowmen's noses, four (4) red circles of approximately 3 centimeters in diameter for the noses of the reindeer and gingerbread cookies, two (2) circles of approximately 3 centimeters in diameter for the noses of Santa and Elf in skin color and two (2) triangles of 15 centimeters long by 10 centimeters high in red and printed fabric for the hats.On the reverse side I hand sewed the hats and circles for the elf faces, Santa, snowmen, cookies and reindeer, antlers and ears.
Paso 2:
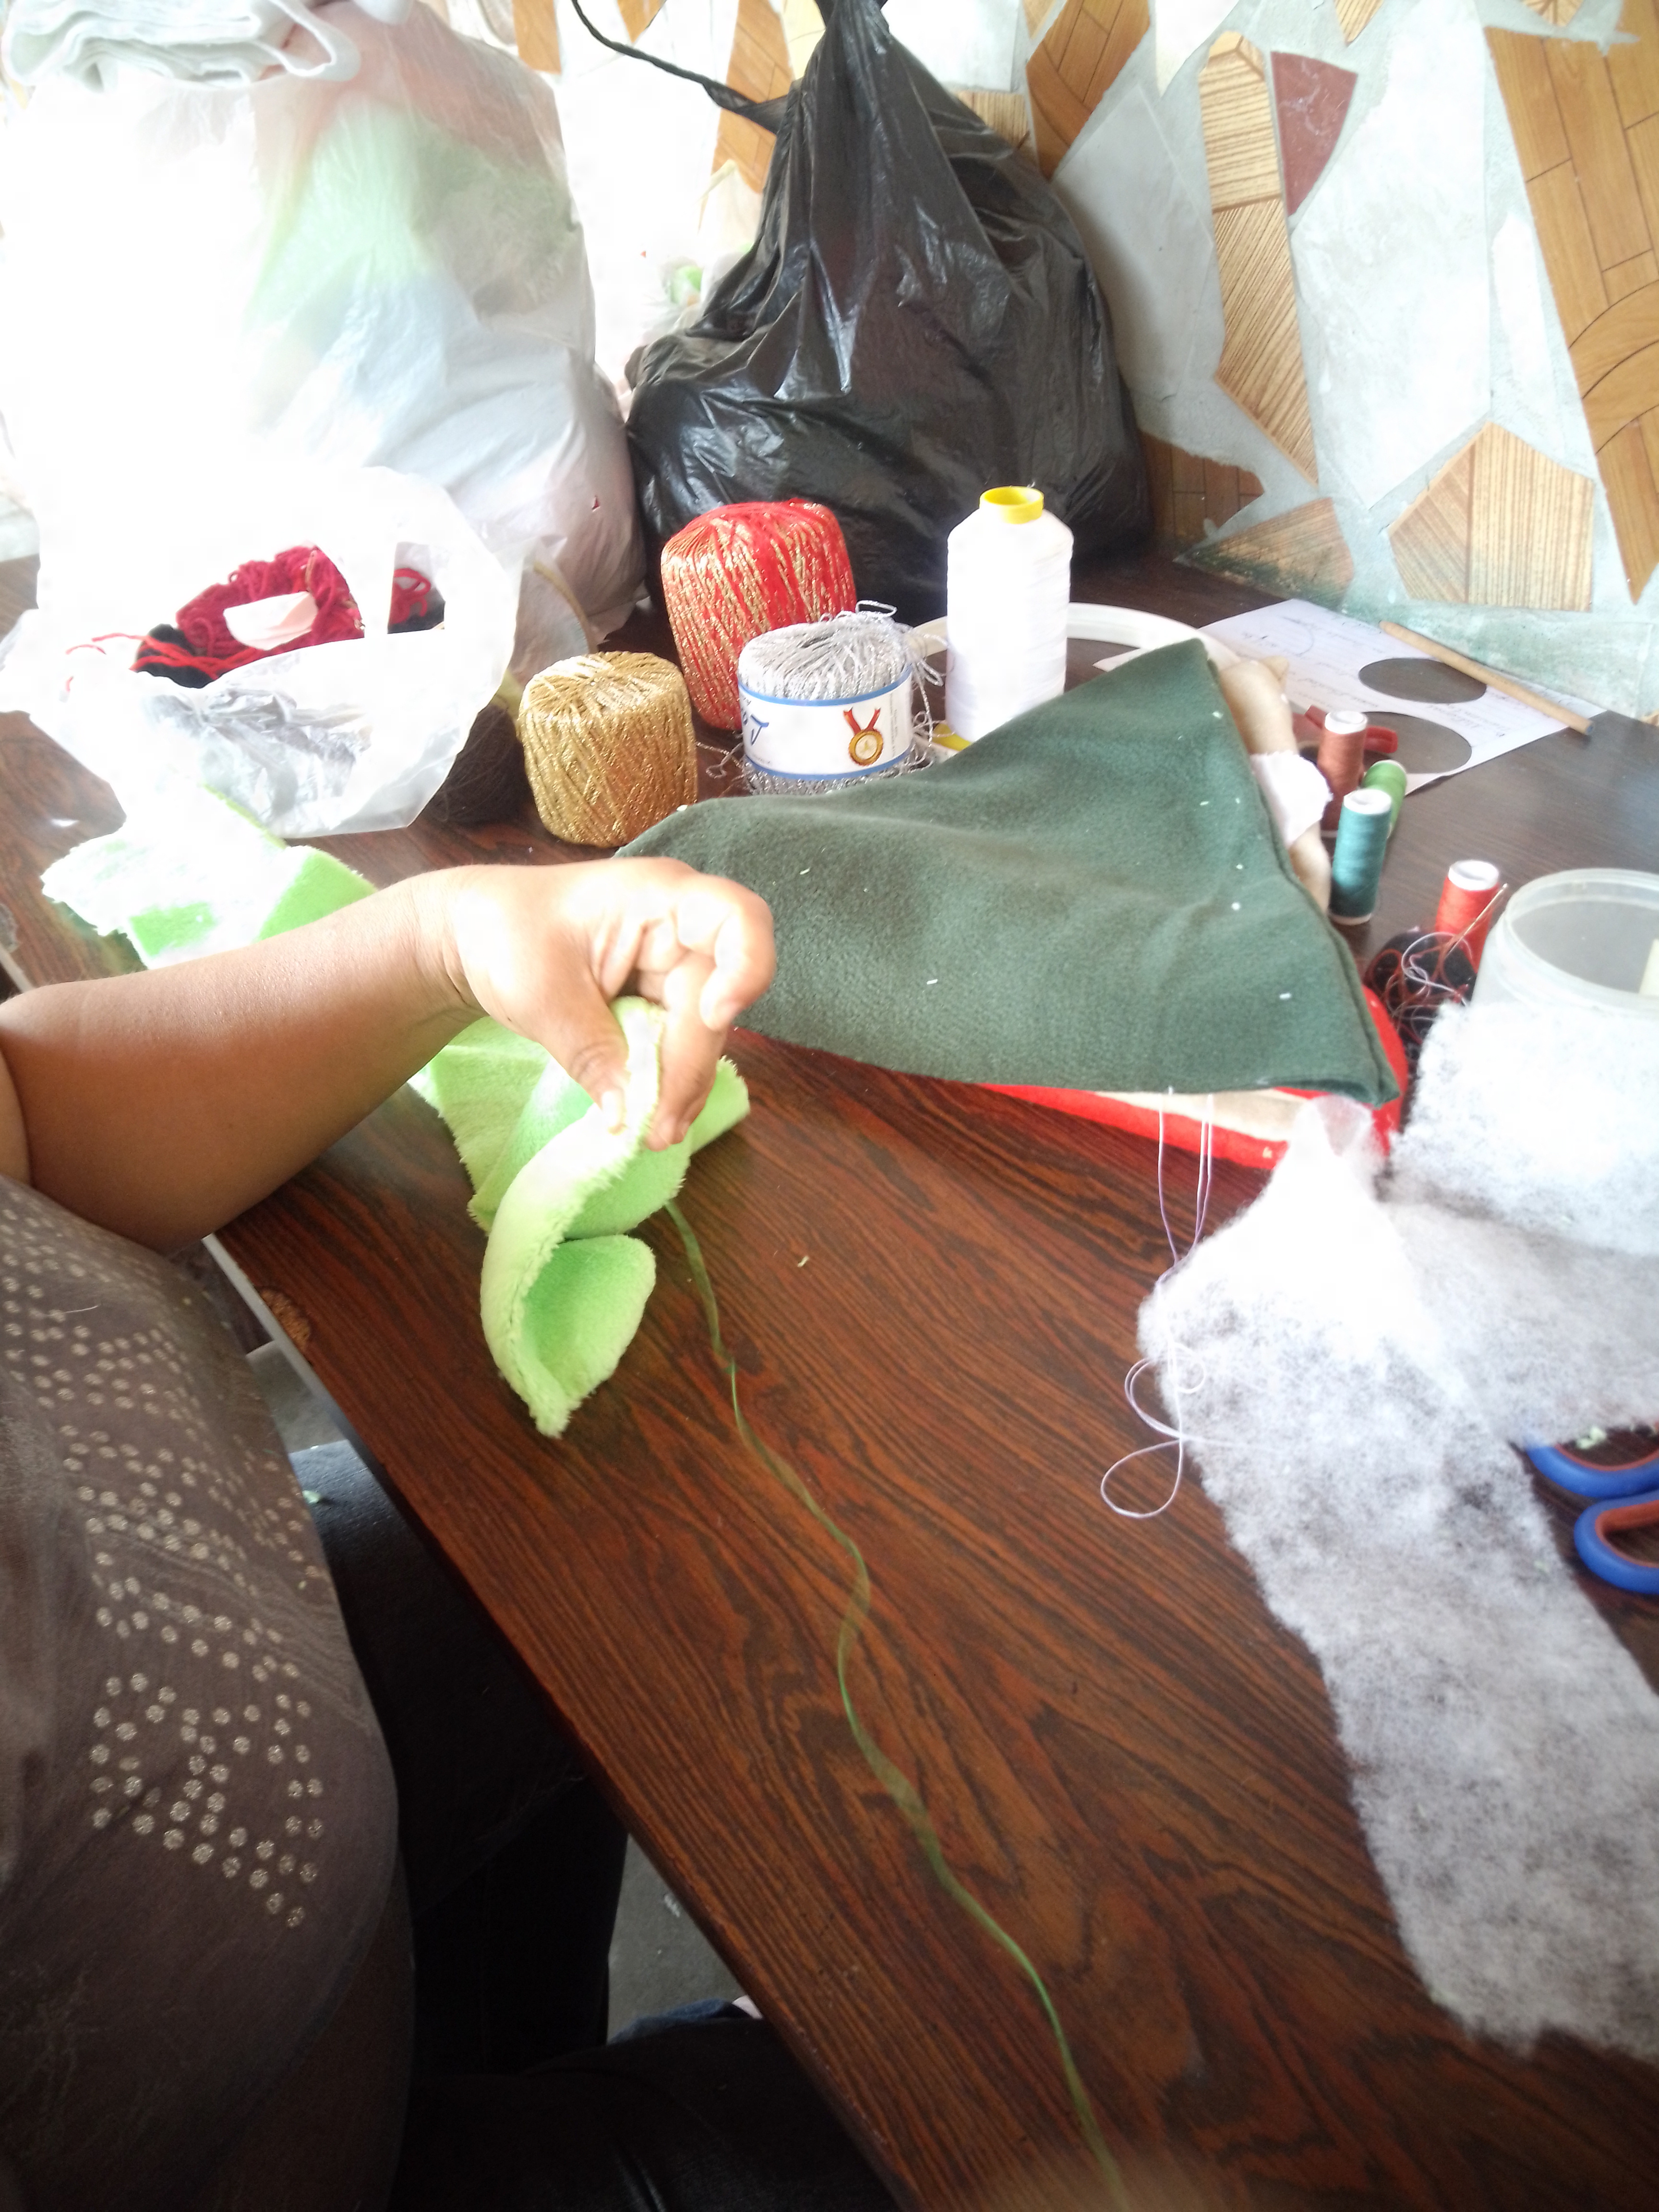
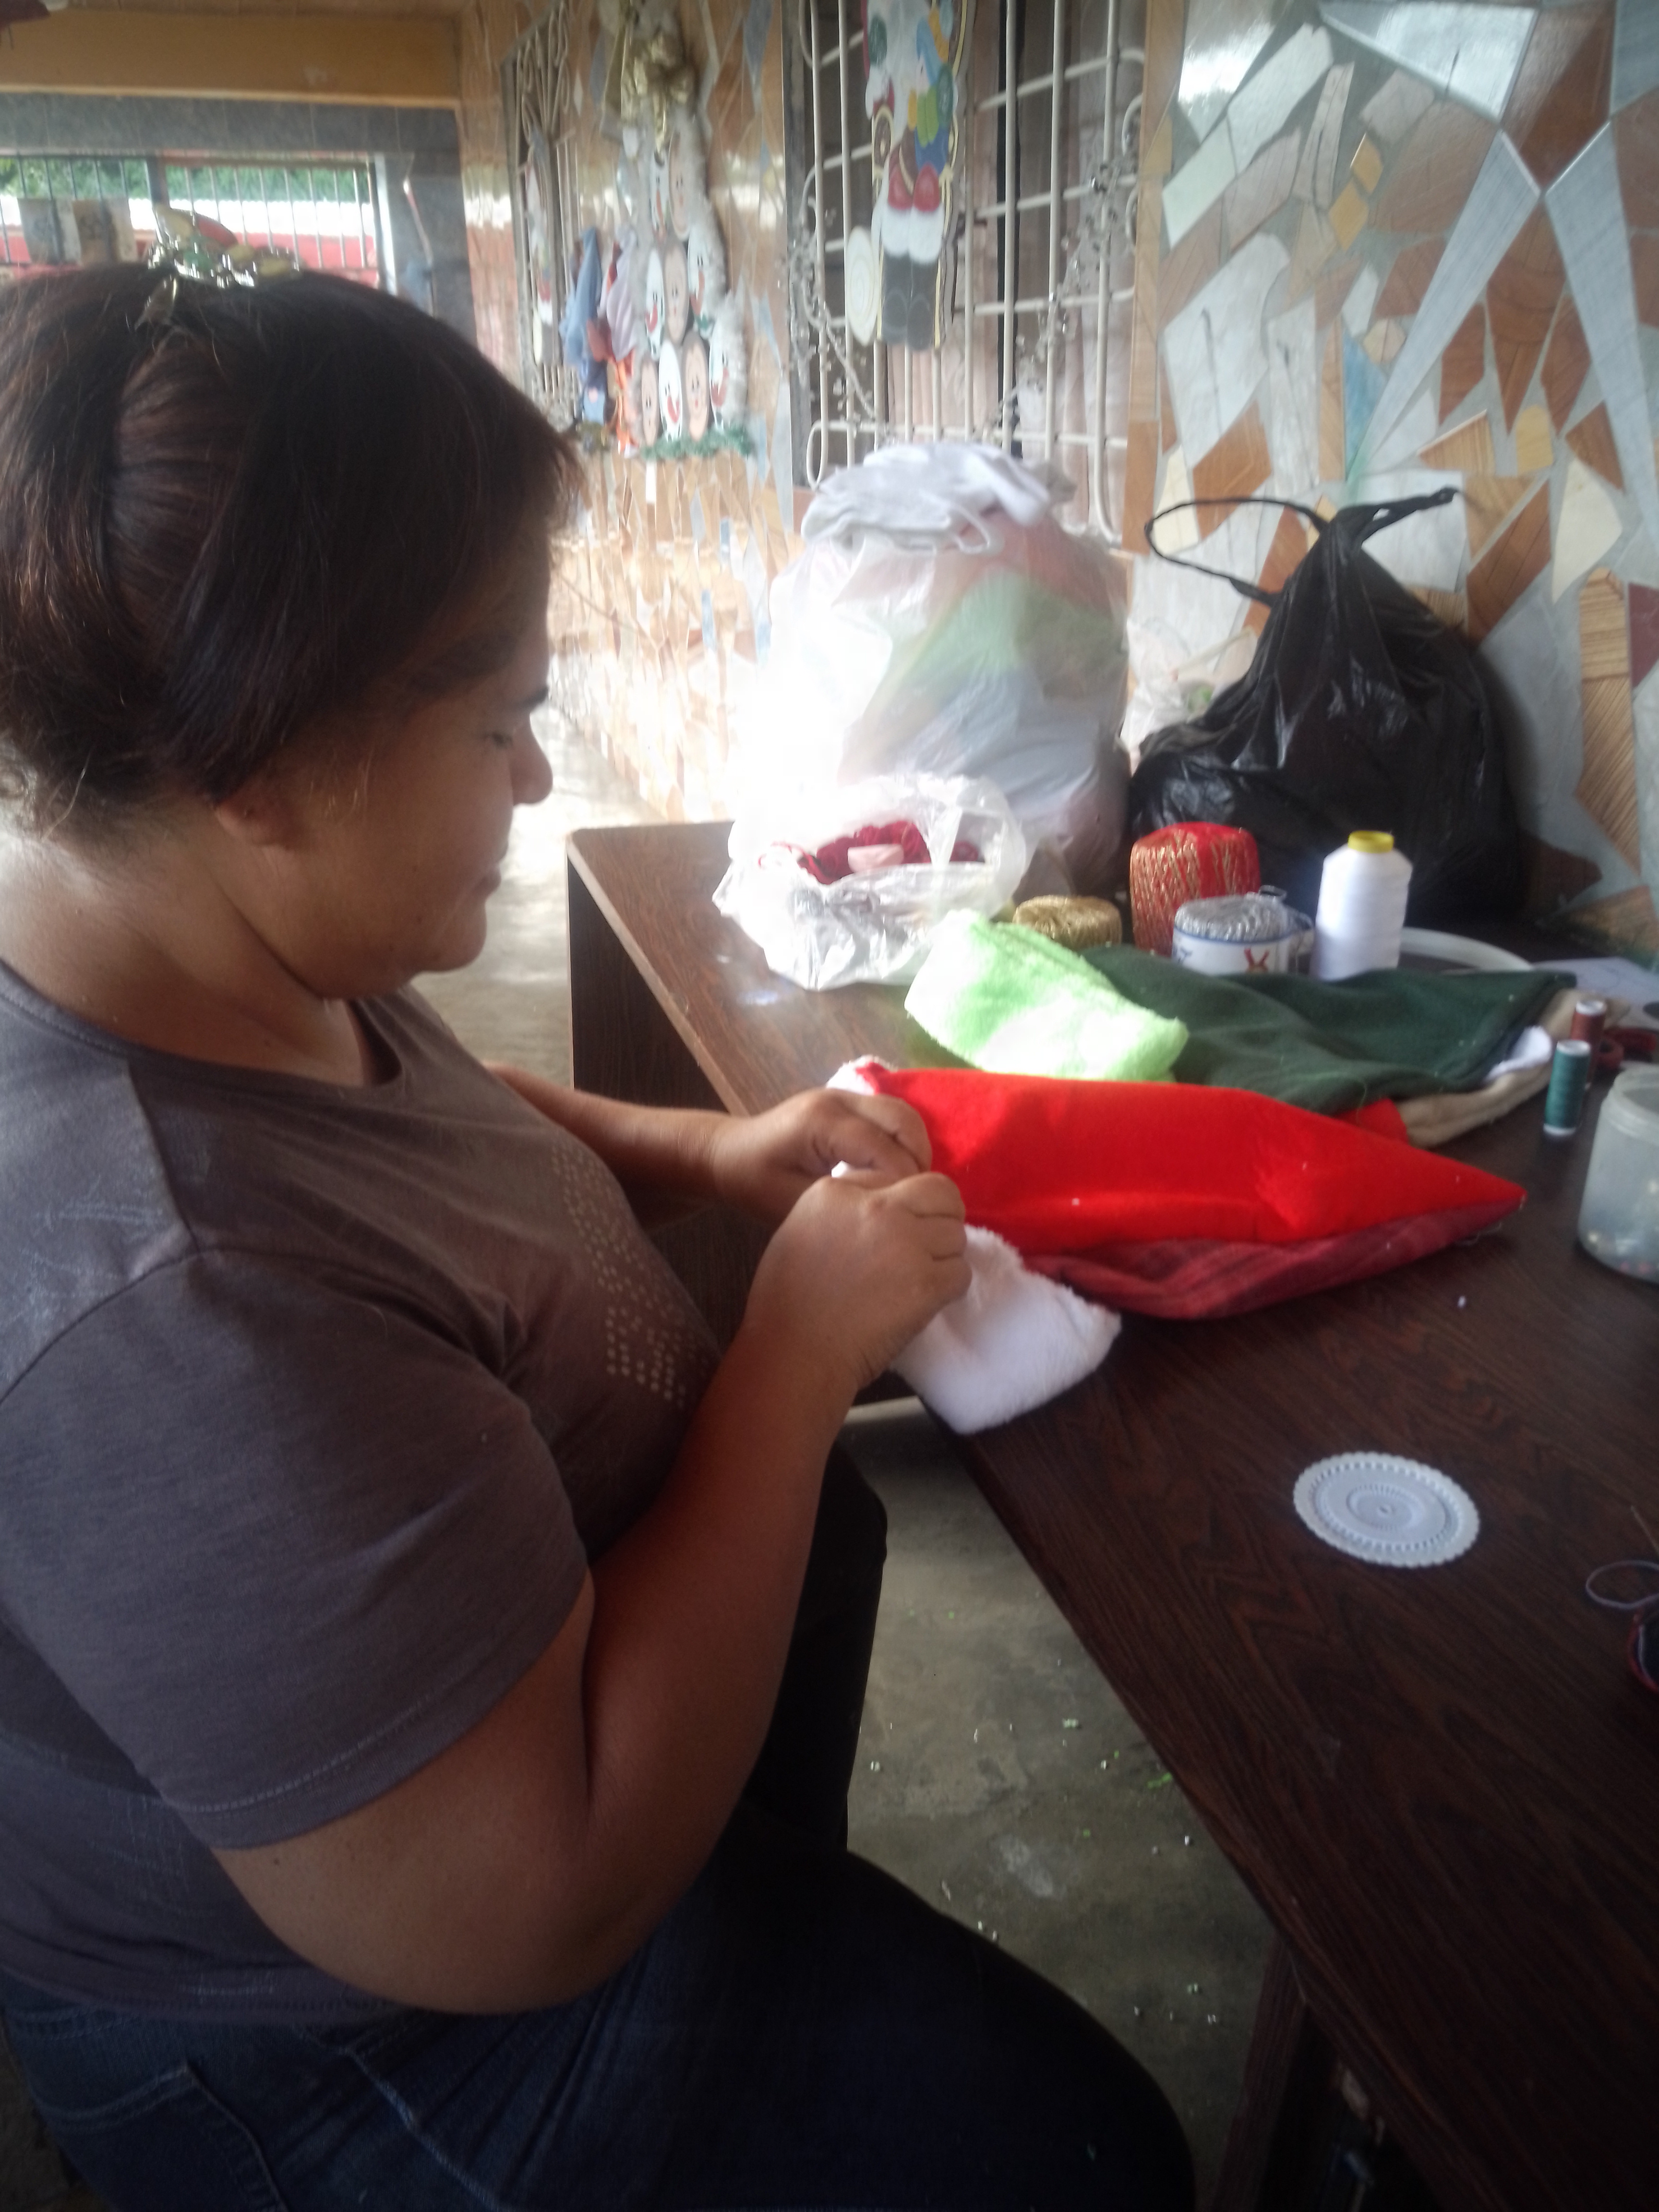
Las tres (3) tiras rectángulares que van en la base de los gorros las cosí por su lado derecho y las rellene con una tira de guata de la misma medida la cual dividí para que quedaran más delgadas.
Step 2:
The three (3) rectangular strips that go at the base of the hats I sewed them on the right side and filled them with a strip of wadding of the same size which I divided to make them thinner.
Paso 3:
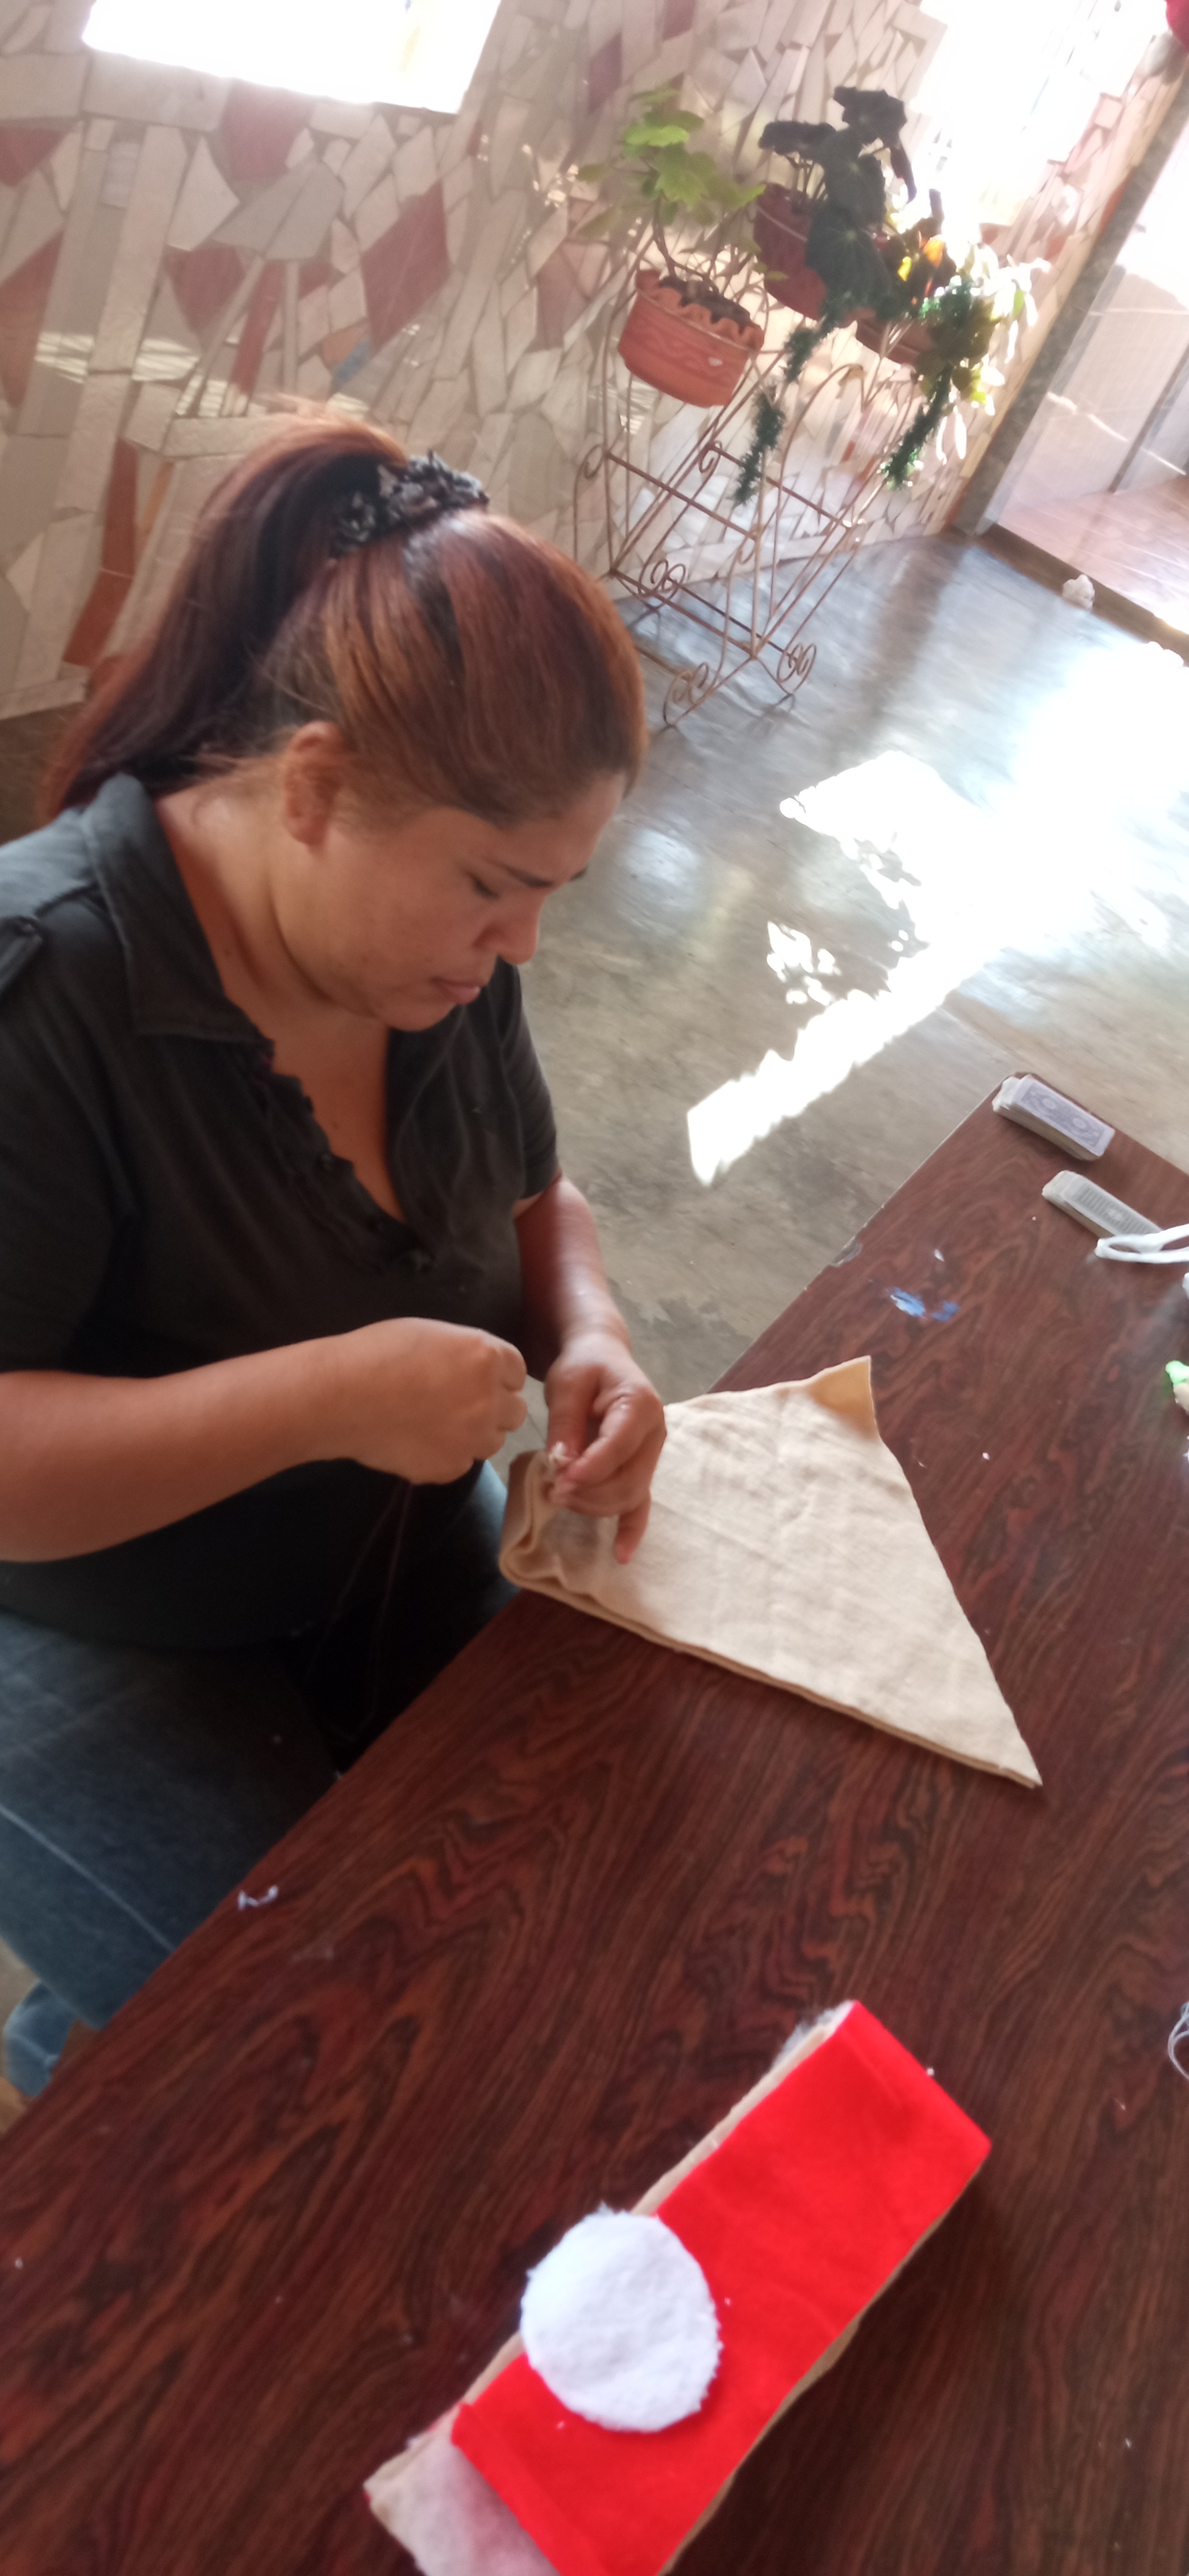
Despúes de tener ambas piezas listas del gorro las uní utilizando la ayuda de alfiletres para sujetarlas al mismo y las cosí al derecho a mano. Una vez lista, doble la tira rectángular hacia arriba para formar el borde del gorro.
Step 3:
After I had both pieces of the hat ready, I joined them together using the help of pincushions to attach them to the hat and sewed them right sides together by hand. Once ready, fold the rectangular strip up to form the brim of the hat.
Paso 4:
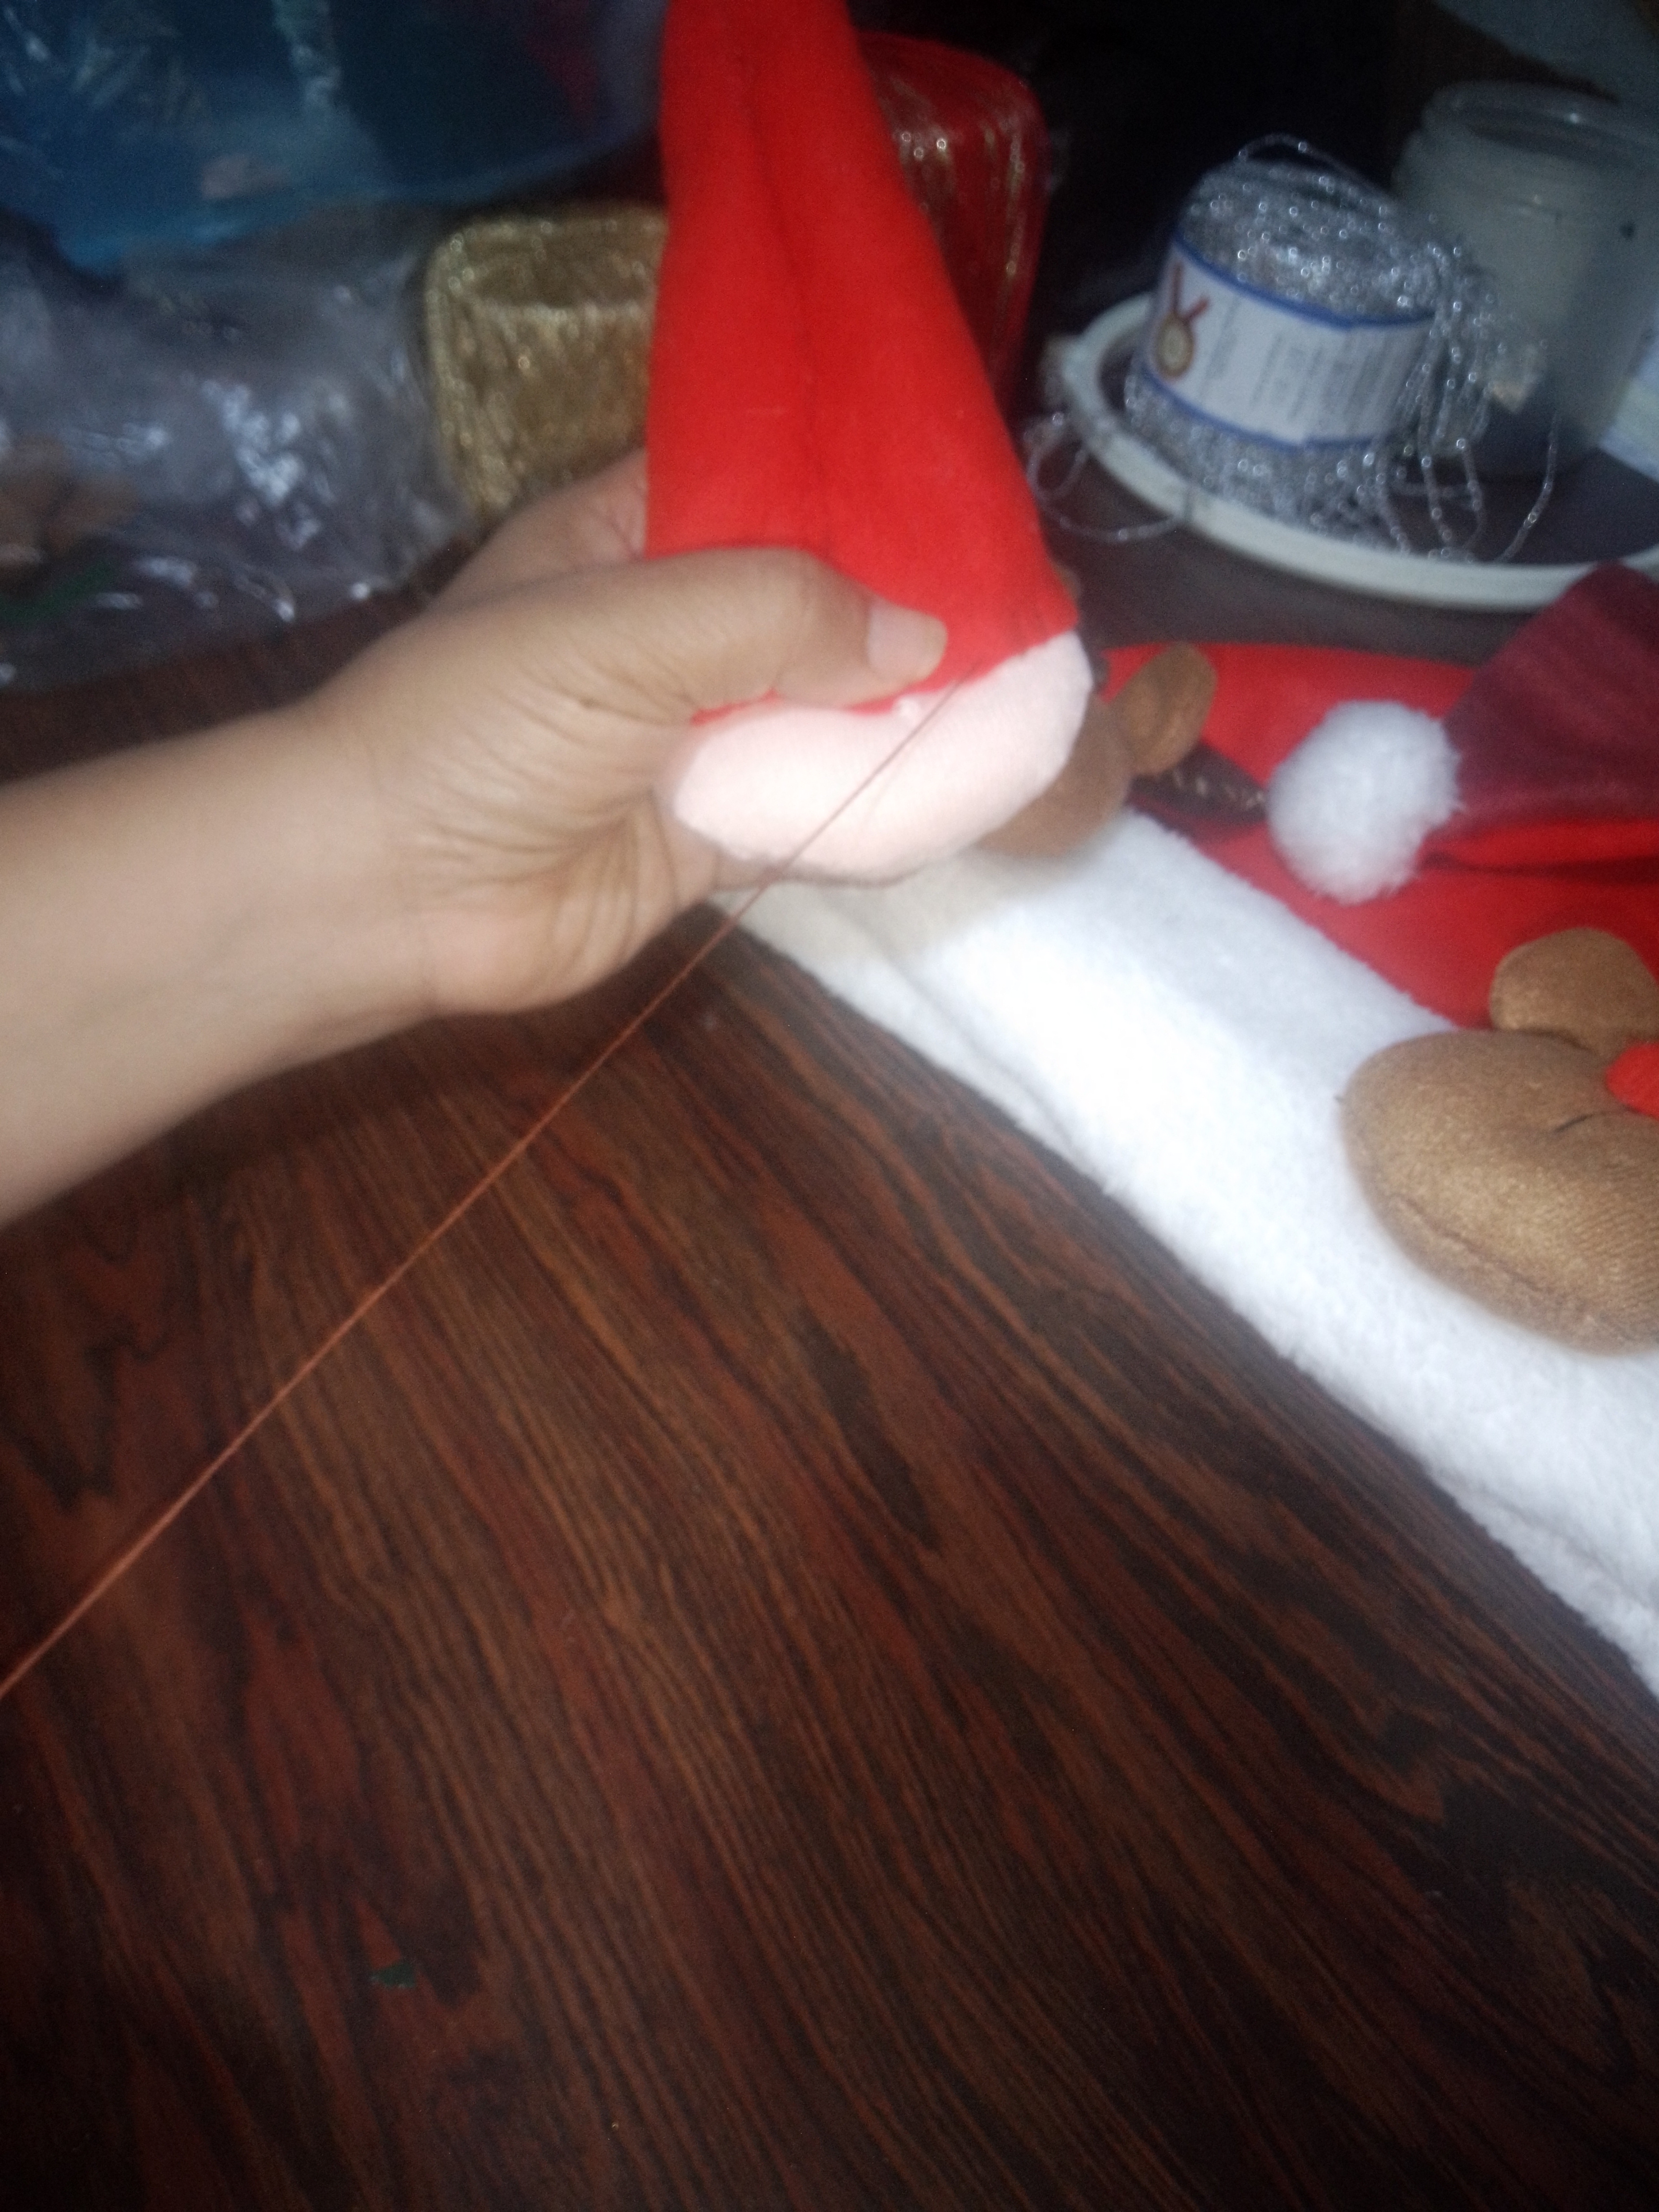
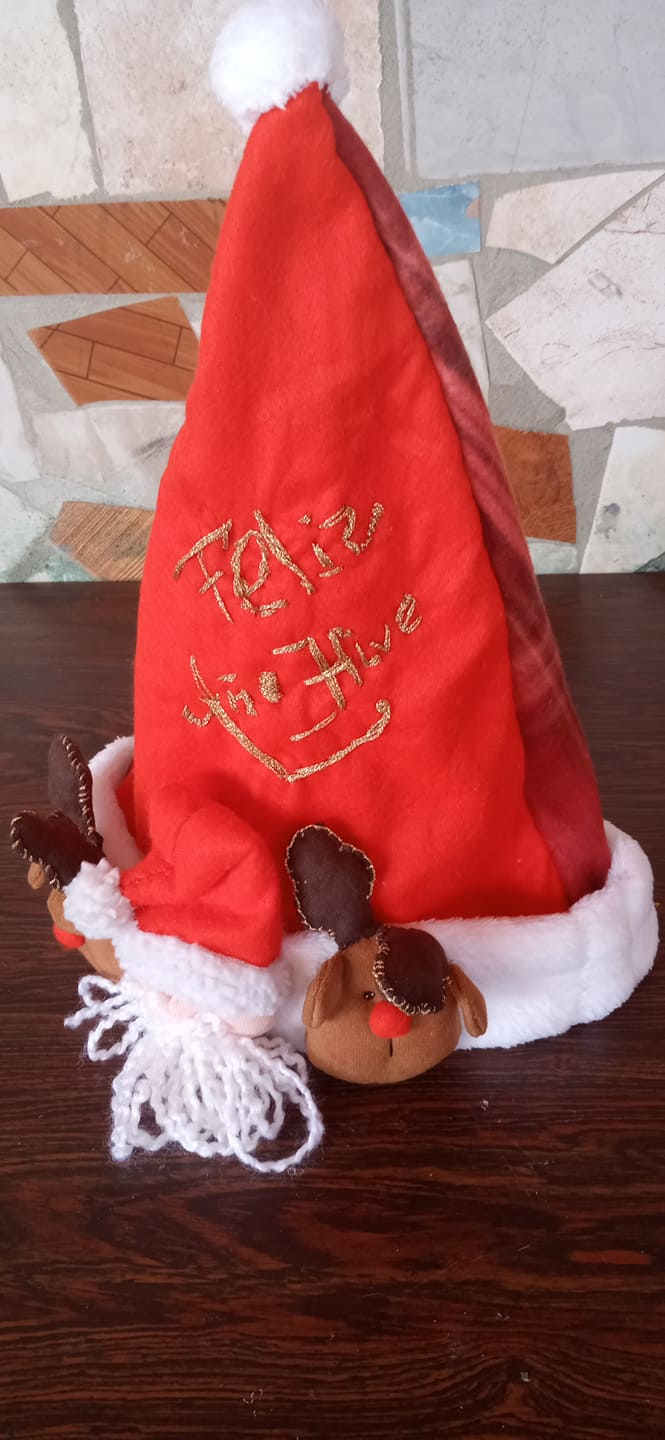
Corte tres (3) circulos en tela ovejo blanca de aproximadamente 8 centìmetro de diámetro los cuales così a mano de forma envolvente, los rellene y los fruncí para formar la bola blanca que pegue en la punta de los gorros. Esta misma técnica la utilizé para realizar las narices de las caritas y las bolas que asemejan los audifonos de los muñecos de nieve y los que pegue a los gorros de santa y duende.
Step 4:
I cut three (3) circles in white sheep fabric of approximately 8 centimeters in diameter which I sewed by hand in an enveloping way, filled them and gathered them to form the white ball that I glued on the tip of the hats. I used the same technique to make the noses of the little faces and the balls that resemble the snowmen's headphones and the ones I glued to the Santa and elf hats.

Paso 5:
Para realizar las caritas de santa, muñecos de nieves, galleta de gengibre,renos y duende despúes de coserlas por el lado al réves le hice un corte pequeño con ayuda de una tijera por uno de sus lados,los rellene y cosí nuevamente la abertura que hice.Una vez, rellenas las caritas pegue canustillos negros para los ojos,borde las cejas y bocas con hilo para bordar negro y rojo,pegue las narices con silicón caliente y con los dos (2) tirángulitos naranja forme las nerices de los muñecos de nieve que asemejan a una zanahoria.La barba de santa la hice formando cuatro(4) lazos con estambre blanco y un lazo pequeño para el bigote.Cosí los dos (2) gorros pequeños a las caras de santa y duende. La barba del duende conte un trozo de tela blanca de forma triángular y la pique con ayuda de una tijera en tiritas finitas las cuales estiré para alargarlas un poco y enroscaran por último las cosí para fijarlas. En las caras de las galletas de gengibre pegue con dos (2) cintas en forma de zig zag. Por último ruborice las caritas con rubor para darles un toque tierno.
Step 5:
To make the Santa, snowman, gingerbread, reindeer and elf faces, after sewing them on the side I made a small cut with the help of a scissors on one of their sides, stuffed them and sewed again the opening I made. Once the little faces were stuffed, I glued black canustillos for the eyes, bordered the eyebrows and mouths with black and red embroidery thread, glued the noses with hot silicone and with the two (2) orange tirángulitos I formed the nerices of the snowmen that resemble a carrot. I made Santa's beard by forming four (4) loops with white yarn and a small loop for the mustache and sewed the two (2) small hats to the faces of Santa and the elf. The elf's beard I counted a piece of white triangle-shaped fabric and cut it with a scissors into thin strips which I stretched to lengthen them a little and twist them and finally I sewed them to fix them on the faces of the gingerbread cookies with two (2) zig zag ribbons. Finally I blushed the faces with blush to give them a tender touch.
Paso 6:
Una vez, lista las caritas procedí a coserlas para pegarlas en el borde del los gorros. Por último, borde un pequeño mensaje para todos mis amigos de Hive deseándoles un Feliz Año en dorado en el gorro rojo.
Step 6:
Once the little faces were ready, I proceeded to sew them to glue them on the brim of the hats. Finally, I embroidered a little message to all my Hive friends wishing them a Happy New Year in gold on the red hat.
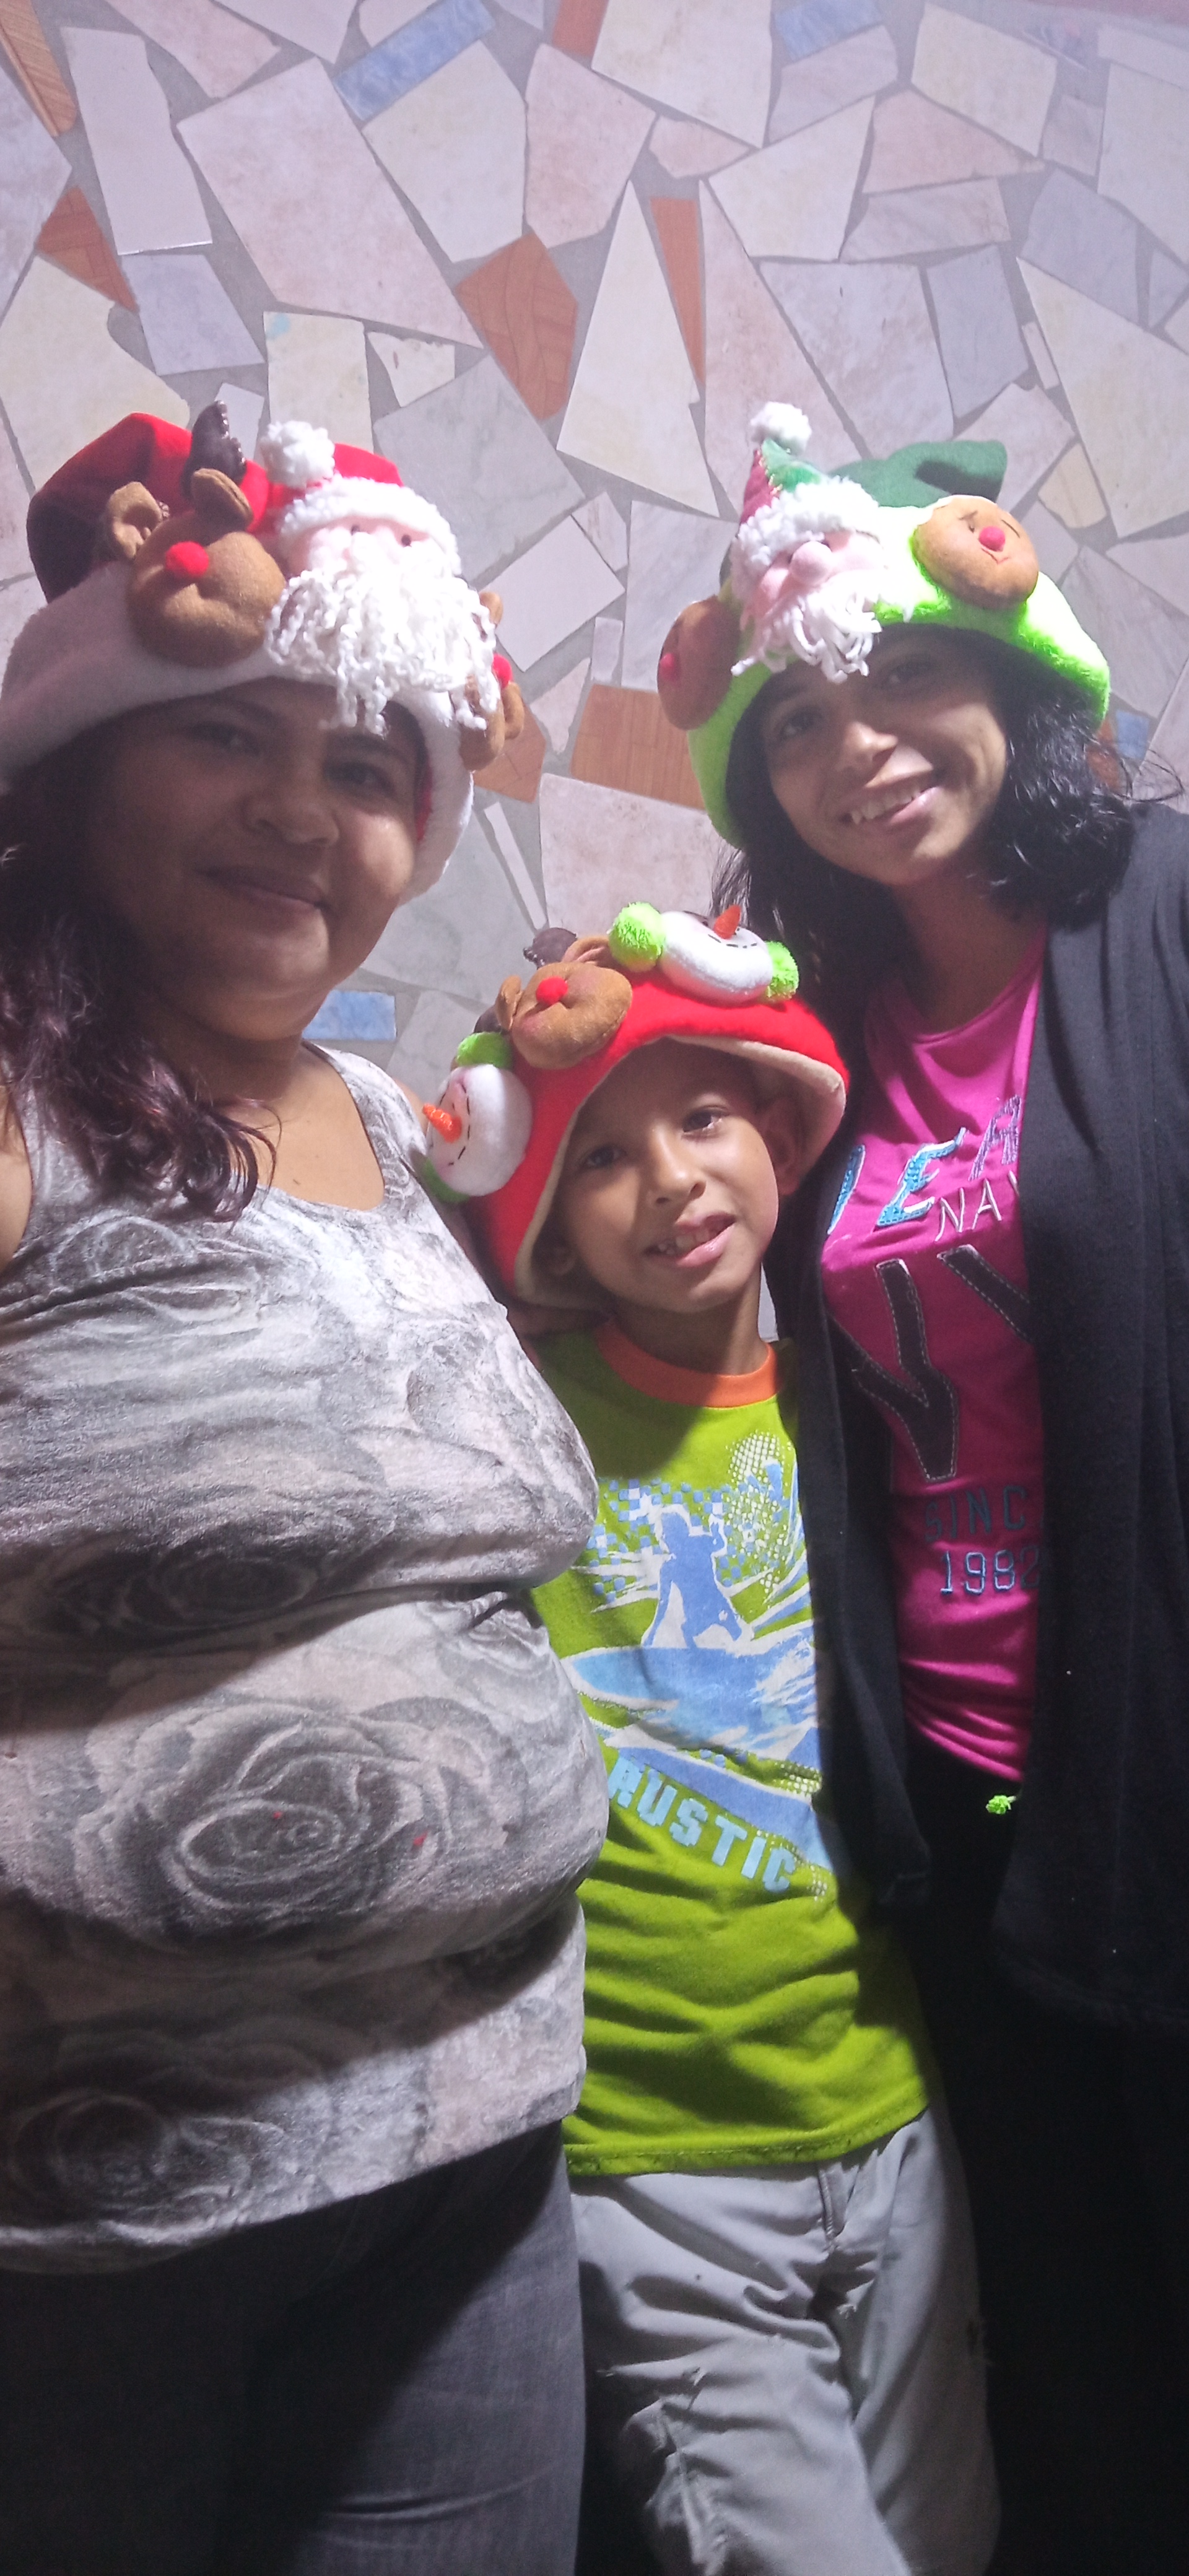
Espero que disfruten de esta propuesta y que este Año Nuevo este lleno de Bendiciones para todos. ¡Que Dios los Bendiga!
I hope you enjoy this proposal and that this New Year is full of blessings for all of you, God bless you.
Congratulations @claire23! You have completed the following achievement on the Hive blockchain and have been rewarded with new badge(s):
Your next target is to reach 500 upvotes.
You can view your badges on your board and compare yourself to others in the Ranking
If you no longer want to receive notifications, reply to this comment with the word
STOPCheck out the last post from @hivebuzz:
Support the HiveBuzz project. Vote for our proposal!
Hola, lindas ideas para tomar fotos en este año que se va. Lindas creaciones.