DIYIWD 🌹 ROSAS ROJAS EN MACETAS. // RED ROSES IN POTTS.
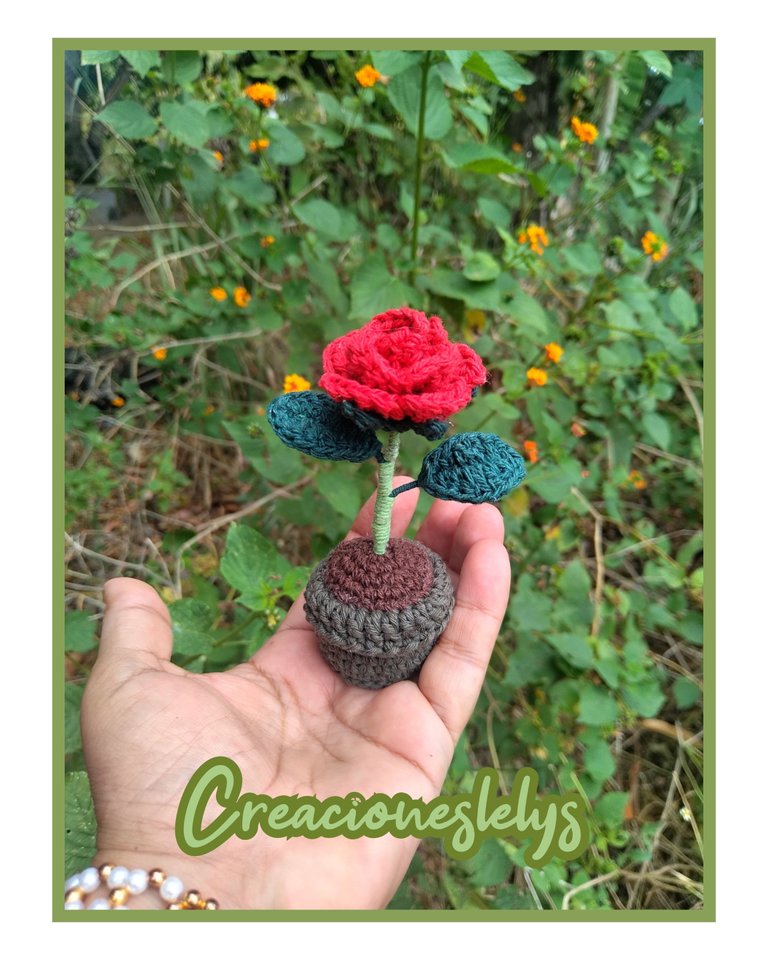
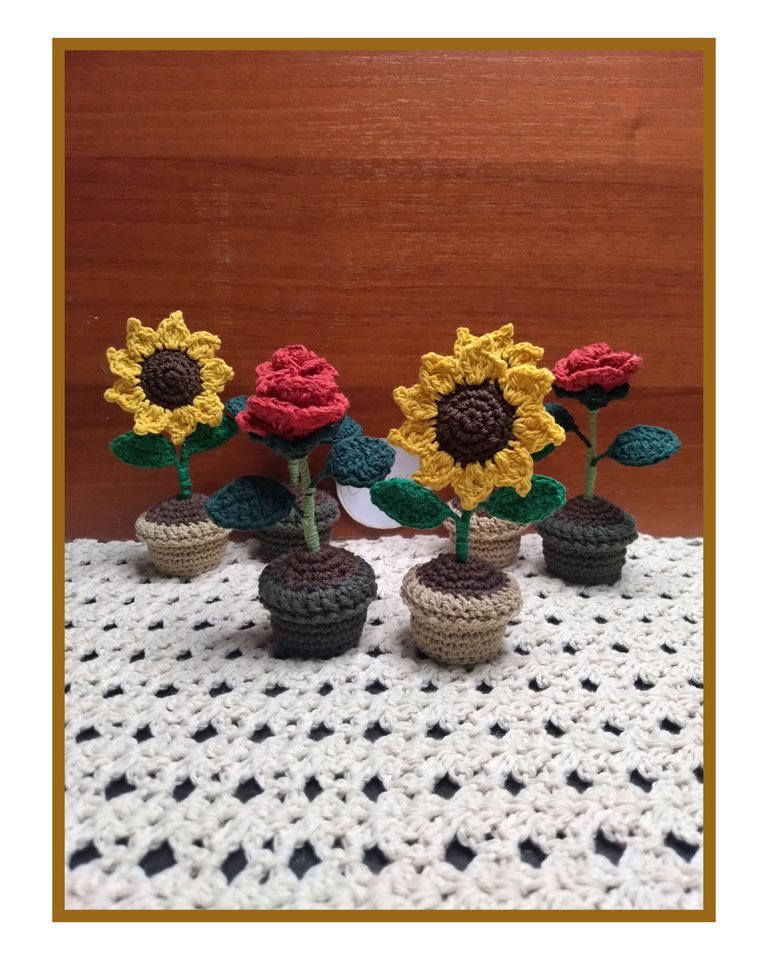
Hola amigos de esta linda comunidad. Siempre es un gusto pasar por aquí, leer sus publicaciones y comentarlas. Ustedes me animan a seguir creando y compartiendo parte de lo que hago. A veces en mi día a día me concentro solo en tejer. Tomo la aguja y los hilos y doy rienda suelta a la creatividad. En estos días he realizado algunos proyectos sencillos, pero que me encanta hacer porque son preciosos y porque se hacen relativamente rápido. Entre ellos están las macetas con flores. En la publicación pasada les mostré el resultado final de la maceta con girasoles 🌻 a ustedes les gustó mucho. Ahora quiero que vean como se ven las rosas en estas pequeñas macetas.
Hello friends of this nice community. It's always a pleasure to stop by, read your posts and comment on them. You encourage me to keep creating and sharing part of what I do. Sometimes in my day to day life I just concentrate on knitting. I take the needle and yarns and give free rein to creativity. These days I have made some simple projects, but that I love to do because they are beautiful and because they are relatively quick to make. Among them are the flower pots. In the last post I showed you the final result of the flower pot with sunflowers 🌻 you liked it a lot. Now I want you to see how the roses look in these little pots.

ROSAS ROJAS EN MACETAS.
RED ROSES IN POTTS.
En esta publicación me voy a concentrar en explicarles cómo tejí las rosas. La verdad es que se tejen súper rápido. Puedes elegir los colores que quieras, incluso azules y negras. Todo depende el gusto de cada quien. Los materiales que yo usé son:
🌹 Hilos pabilos.
🌹 Aguja de crochet de 2,25mm.
🌹 Alambre.
🌹 Pegamento.
🌹 Tijeras.
🌹 Aguja lanera.
In this post I'm going to concentrate on explaining how I knit the roses. The truth is that they are super fast to knit. You can choose the colors you want, even blue and black. It all depends on your taste. The materials I used are:
🌹 Threads pabilos.
🌹 Crochet needle of 2,25mm.
🌹 Wire.
🌹 Glue.
🌹 Scissors.
🌹 Wool needle.
Como les mencioné antes hacer estas flores es bastante sencillo. La rosa en sí consta de tres partes: la rosa, el cáliz y las hojas.
La rosa 🌹: elegimos el color de hilo que más nos guste para tejerla. Iniciamos tejiendo una cadena de 23 puntos. En la siguiente ronda vamos a tejer 21 puntos altos. cuando se teje de esta manera se gira el tejido antes de comenzar cada ronda o vuelta. Para la tercera vuelta levantamos 2 cadenas luego de girar el tejido. En el punto 3 contando desde el ganchillo vamos a tejer 3 puntos altos juntos (3paj), en el siguiente punto vamos a tejer todos estos puntos juntos: 1 punto bajo-2cad- 5 puntos altos- dejo uno sin trabajar y repito la secuencia. (1pb-2cad-5pa) Hasta terminar toda la vuelta.
El cáliz: este lo vamos a tejer en color verde. Iniciamos tejiendo 5 puntos bajos en un anillo mágico. En la siguiente vuelta vamos a tejer algo así como unos pétalos delgados. Levantamos 4 cadenas, nos devolvemos tejiendo en ellas 3 pb. Al llegar de nuevo al punto de inicio tejemos 1pb en el siguiente punto y repetimos (6cad-3pb en las cadenas) hasta tejer en todos los puntos.
Las hojas: estas las vamos a tejer en color verde. Empezamos tejiendo 8 cadenas. Luego sobre estas cadenas tejeremos la siguiente secuencia. Vamos a dar vuelta completa a las 8 cadenas. Además debemos incorporar el alambre. Lo tomamos en la mano como si fuera un hilo adicional y comenzamos a tejer envolviendo el alambre con el tejido. Esta es la secuencia: 1pb-1mpa-3pa-1mpa-1pb-1cad-1pb-1mpa-3pa-1mpa-1pb-1pd. Dejamos la hebra verde un poquito larga. También dejamos un poquito de alambre. Con el sobrante del hilo forramos el alambre. (Puedes ver el proceso en mi post anterior)
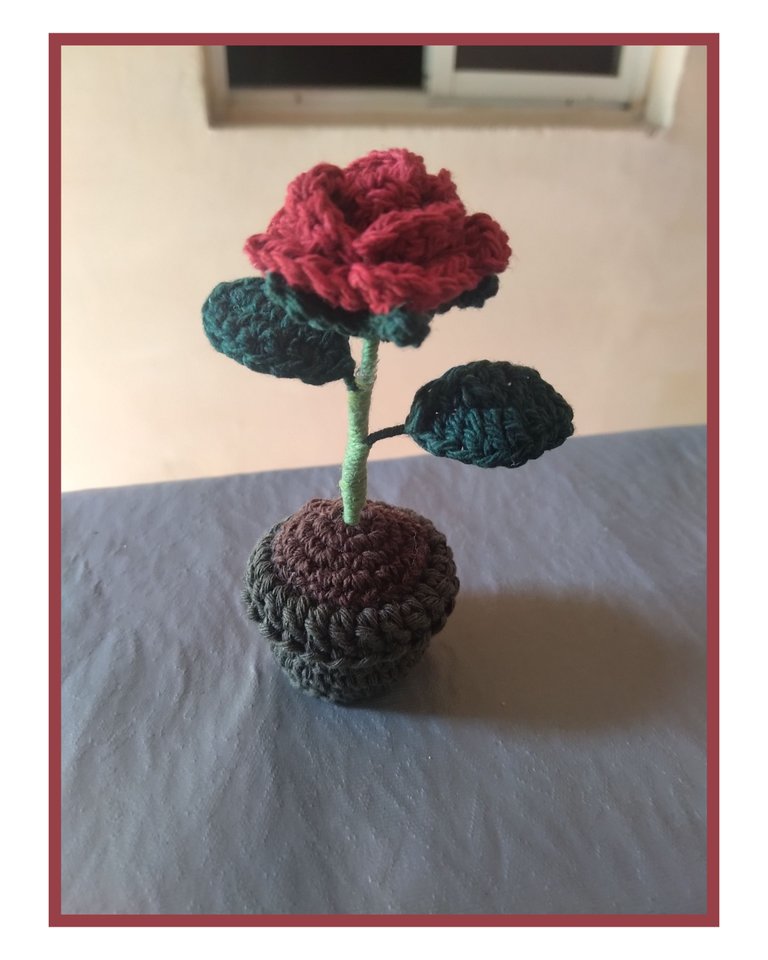
🌹 De esta manera ya tenemos terminadas las tres partes de la rosa.
As I mentioned before, making these flowers is quite simple. The rose itself consists of three parts: **the rose, the calyx and the leaves.
- The rose 🌹: we choose the color of yarn we like the most to knit it. We start by knitting a chain of 23 stitches. In the next round we are going to knit 21 high stitches. *When knitting in this way we turn the fabric before starting each round. For the third round we pick up 2 chains after turning the fabric. In stitch 3 counting from the crochet hook we are going to knit 3 double crochet stitches together (3paj), in the next stitch we are going to knit all these stitches together: 1 single crochet-2cad- 5 double crochet stitches- I leave one without working and repeat the sequence (1pb-2cad-5pa) until we finish the whole round.
- The chalice: we are going to knit this one in green. We start by knitting 5 single crochets in a magic ring. In the next row we are going to knit something like thin petals. We pick up 4 chains, we go back knitting in them 3 sts. When we get back to the starting stitch we knit 1 stitch in the next stitch and repeat (6cad-3 stitches in the chains) until we knit in all the stitches.
- The leaves: we are going to knit them in green color. We start by knitting 8 chains. Then over these chains we will weave the following sequence. *We are going to turn completely the 8 chains. We must also incorporate the wire * We take it in our hand as if it were an additional thread and we begin to weave wrapping the wire with the fabric. This is the sequence: 1pb-1mpa-3pa-1mpa-1mpa-1pb-1cad-1pb-1mpa-3pa-1mpa-1pb-1pb-1pd. We leave the green strand a little bit long. We also leave a little bit of wire. With the leftover yarn we line the wire (You can see the process in my previous post).
🌹 In this way we have finished the three parts of the rose.
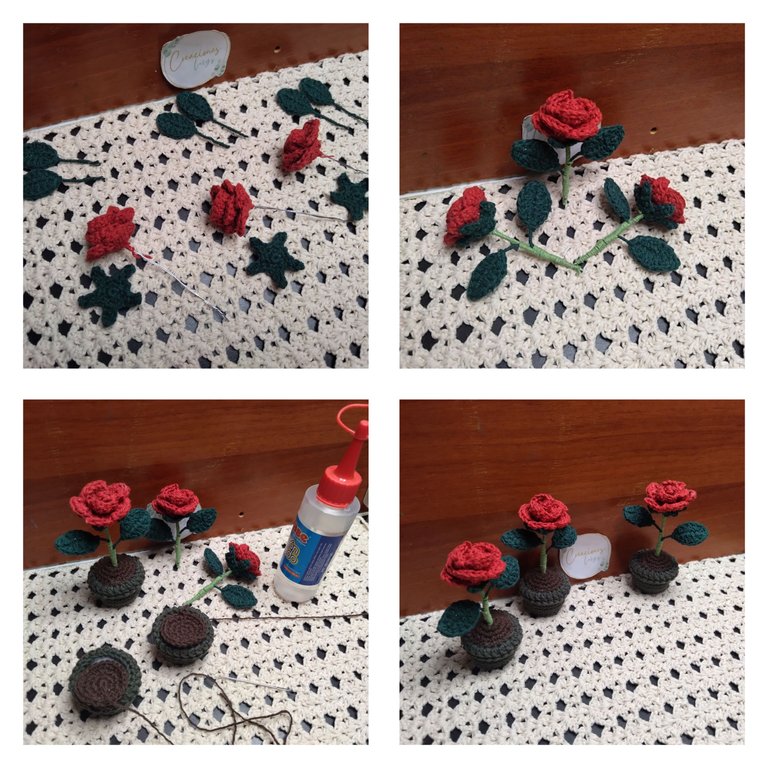
🌹 Ya solo se juntas las piezas igual como les mostré el armado del girasol. Estoy haciendo unas cuantas porque el día de la mujer regalé los girasoles y dos de estas rosas, ahora quiero tener otras disponibles para ofrecer en venta o regalar en otra ocasión. ¿Cómo las ven? ¿Les gustó?
The only thing left to do is to put the pieces together as I showed you how to assemble the sunflower. I'm making a few because I gave the sunflowers and two of these roses as gifts on Woman's Day, now I want to have others available to offer for sale or give as gifts on another occasion. How do you see them? Do you like them?
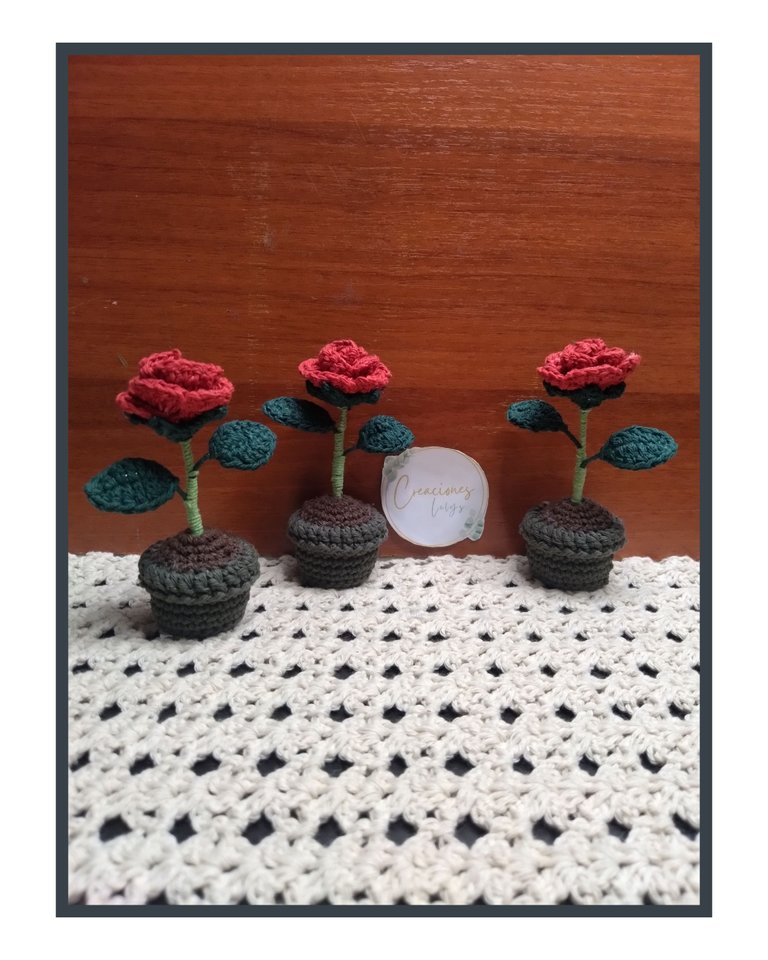
Son muy lindos estos pequeños detalles. Espero que se animen y hagan para ustedes.
These little details are very nice. I hope you are encouraged and do it for yourself.
Para más detalles del armado aquí te dejo el anterior post
For more details on the assembly here I leave you in the previous post
Gracias por el apoyo. Todas las fotos son de mi propiedad. Edité con Polish. Usé el traductor de Deelp. Bendiciones. Será hasta pronto.
Thanks for your support. All photos are my property. I edited with Polish. I used Deelp translator. Blessings. See you soon.
Congratulations, your post has been upvoted by @dsc-r2cornell, which is the curating account for @R2cornell's Discord Community.
Muchísimas gracias por el apoyo 😊
This would have to a lot of focus and attention. Thank you for entering the contest. Good luck
Thanks You 🫂
Wowww que hermosa flor, me encanta y como te quedó, cada vez más hermosos tus trabajo, más detalle. Está genial Lelys!😍
Muchas gracias 🫂 me alegra que te guste 🌹
Mucho! Buenas noches Lelys!😃
Que hermoso. Arte en tus manos ✋
Hola. Me alegra que te haya gustado. Muchas gracias.
De nada, saludos
Se ve realmente lindo la rosa en color rojo, me gusta mucho el resultado final 😊🌹 sin duda es un hermoso regalo
Hola 👋🏾 muchas gracias 🫂
Hermoso trabajo amiga, te quedaron muy lindas las rositas. Saludos
Hola. Me alegra mucho saber que te gustaron 🥳 muchas gracias ☺️